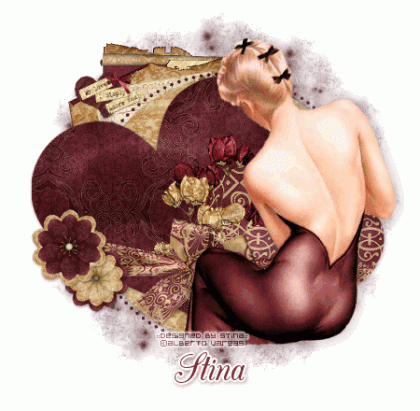
Supplies
Template #42 by Yvette of Essence of Creativity
Scrap kit of choice - I used "Vintage Valentine" by Designs by Ali
which can be purchased at Scraps With Attitude and Stargazer Scraps
Tube of choice - I used a pin up by Alberto Vargas
WSL_Mask75 by Chelle
Font of choice - I used CAC Champagne
Eye Candy 4 Gradient Glow (optional)
~ Step 1 ~
Open WSL_Mask75 and minimise (we will come back to that later)
Open Template and duplicate by pressing SHIFT + D. Close off original
Delete copyright layer
Image/Canvas Size and increase your working canvas to 600 x 550
Add new raster layer, move to bottom (Layers / Arrange / Send to bottom),
then flood fill with white
~ Step 2 ~
With your magic wand set to tolerance 0 and feather 1 click inside the circle layer
If using the same kit select paper 16, resize by 60% and paste as new layer
Position over the circle then invert selection (by going to Selections / Invert)
then press delete
Deselect
Repeat these steps for Heart1 using paper 2, and Heart2 using paper 18.
For the dotted circle repeat using paper 2.
Delete template layers.
~ Step 3 ~
Open Vintage Ribbon with Bow3 and resize by 45% (all layers UNchecked),
then paste as new layer
Rotate to the right by 10 (or to the left by 10 if you reversed the template as I did)
Position ribbon over the lower section of the hearts
Using your freehand tool with the following settings:
Selection type - Point to point
Mode - Add (shift)
Feather - 1
Smoothing - 0
Anti-alias - checked
Draw along the edge of the heart around the ribbon, the press delete
Repeat with the other side
Ribbon should look as though it is wrapped around the hearts and tucked behind them
~ Step 4 ~
Choose a couple of journaling elements
Resize them then position above the hearts
(where you do depends on the tube you use)
Move them down to below the dotted circle layer
so that they appeared tucked below the hearts
Open some flowers (I used Flowers 5 and 6, and place one on top of the other
then vice versa for the second flower) and resize as necessary
and position them to the edge of the ribbon on one side
Use some floral foilage and tuck them under the bow in the centre
~ Step 5 ~
Paste the paper 2 as new layer
Move to the bottom to the layer above your white background. Resize if necessary
Go to Layers / New Mask Layer / From Image and find WSL_Mask75
Source luminance checked;
Invert mask data unchecked
Merge group
Reduce opacity to around 50%
~ Step 6 ~
Paste your tube as new layer - resize if necessary - and position to your liking
Add drop shadows to each of the template layers and to your tube
**At this point I usually choose to crop the tag and then resize it before adding any text**
Add your name (I used Eye Candy Gradient Glow, which is optional)
Add your © copyright/licence number of artist used and your watermark
Save as GIF or JPG (me, I'm a GIF girl…*lol*) and you're done!
I hope you enjoyed my tutorial. *s*
::st!na::
©Tutorial written by Stina on 18th January 2009
All rights reserved

No comments:
Post a Comment