Please email me designed.by.stina@gmail.com with your creations. I'd love to see them.

Showing posts with label Marjolein Gulinski. Show all posts

Saturday, May 16, 2009

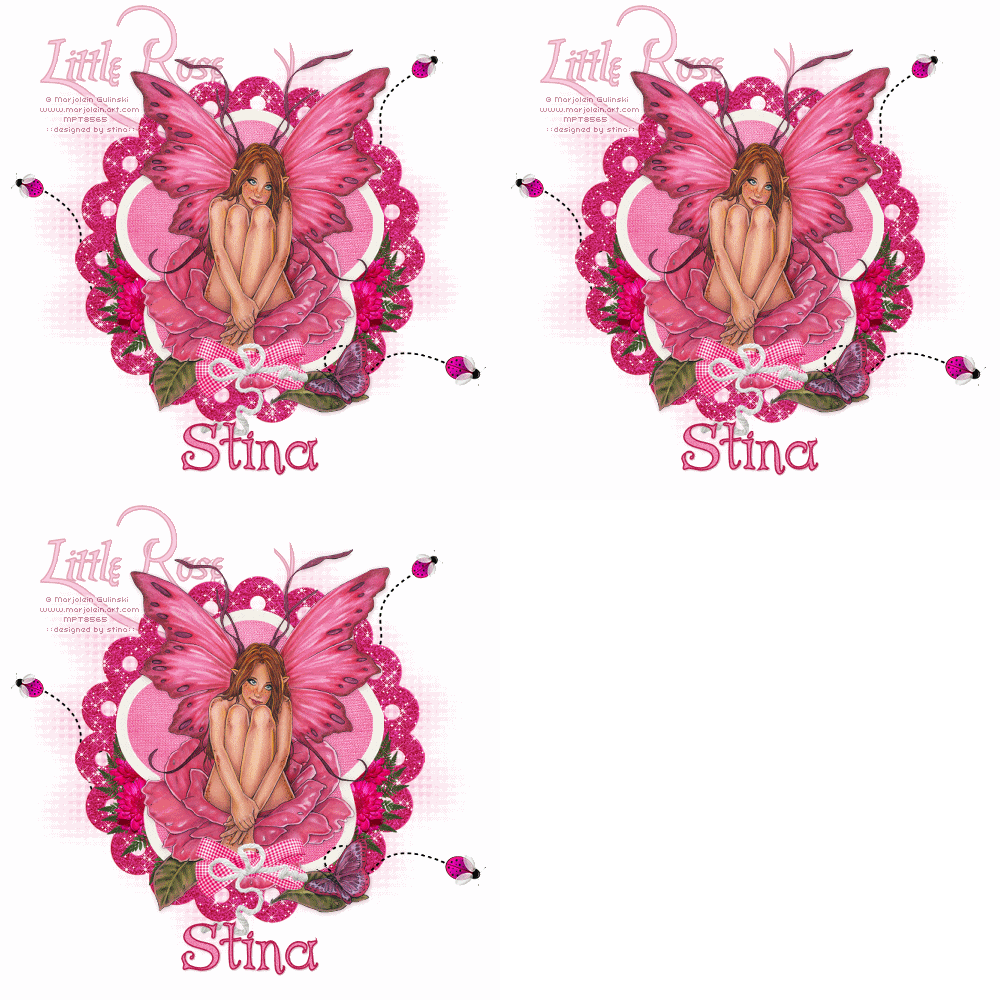
Little Rose

 
**Grand Opening of Twilight Scraps tut**
 
Supplies
 
Scrap kit of choice - I am using "Gingham Brights (Strawberry)" by Gemini Creationz available as part of the Grand Opening of Twilight Scraps
**Kit is a FREEBIE from 15th to 18th May then it goes on sale**
Tube of choice - I am using the lovely artwork of Marjolein Gulinski available from MyPSP Tubes
**PLEASE DO NOT USE HER ARTWORK WITHOUT THE APPROPRIATE LICENCE**
Fonts of choice - I am using Platthand and AL Age Old Love
Plugins: Alien Skin Xenofex 2 Constellation
 
 
Ready? Let's go...
 
 
Open a new 600 x 600 blank canvas flood-filled white
 
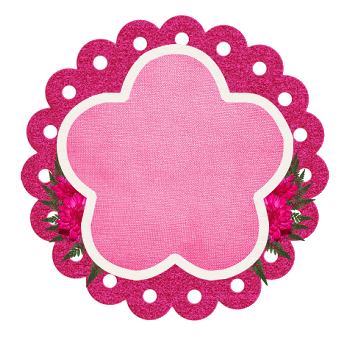
Paste ScallopMat as new layer
Resize by 70%
 
Paste ChipboardFrame as new layer
Resize by 65%
 
Select inside the Frame with your Magic Wand
Selections > Modify > Expand by 8
Add new raster layer
Layers > Arrange > Move Down
Paste a Paper of choice INTO selection
Deselect
 
Paste BFern02 as new layer
Image > Rotate by 70 to the right
Resize by 25%
Position to the lower right
Layers > Arrange > Move Down (to below the paper background)
 
Duplicate, then Image > Mirror
 
Paste BrightFlowers as new layer
Resize by 20%
Position in lower left (should also be below paper background)
Duplicate, then Image > Mirror
 
 
Paste Dash1 as new layer
Resize by 50%
Position from the bottom centre toward the right
 
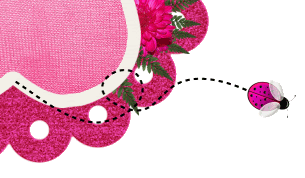
Paste Bug5 as new layer
Image > Rotate by 70 to the right
Image > Flip
Resize by 10%
Position at the end of the Dash
 
 
Paste GinghamBow1 as new layer
Resize by 30%
Position in the lower centre
 
Paste Rope as new layer
Resize by 40%
Position over centre of Gingham Bow
 
Paste Dash1 as new layer again
Image > Rotate by 50 to the left
Resize by 50%
Once you have it in position to your liking,
Layers > Arrange > Send to Bottom
 
Duplicate, then Image > Mirror
Position on opposite side to your liking
 
Duplicate the LadyBug we added a few steps back
Image > Mirror, then Image > Flip
Resize by 80%
Position on the end of the Dashed line
 
Duplicate, then Image > Mirror
Image > Rotate by 15 to the left
Position on the end of upper Dash
 
Paste Paper of choice as new layer
Layers > Arrange > Send to Bottom
Resize by 75%
 
Layers > New Mask Layer > From Image
Locate WSL_Mask7
OK
Layers > Merge > Merge Down
 
Crop and resize
 
Select Text Tool and font of choice
I am using Platthand
Set your Foreground nand Background to two colours from your tag
 
I am using:
Foreground - #b81f4f
Background - #f185b4
 
Stroke width - 1.5
 
Type out your text of choice
Convert to raster layer
Move it to the layer below the Scallop Mat
 
Activate your top layer again
Select another font of choice
I am using AL Age Old Love with the same colours
 
Type out your name
Objects > Align > Horizontal Centre in Canvas
Convert to raster layer
Apply a drop shadow of choice
 
Finally, add your © copyright, licence and watermark, then save as a GIF or JPG and you're done!
 
 
** IF YOU WISH TO ANIMATE PLEASE FOLLOW THESE NEXT STEPS **

Activate the Scallop Mat Layer
Duplicate twice and rename Sparkle1, Sparkle2 and Sparkle3
 
Hide Bling2 and Bling3 activating only Bling1
 
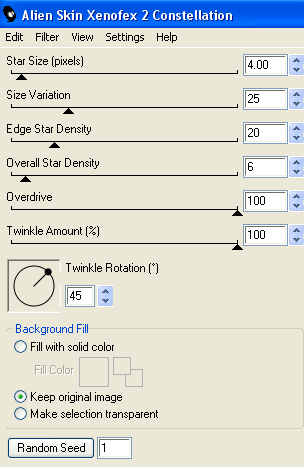
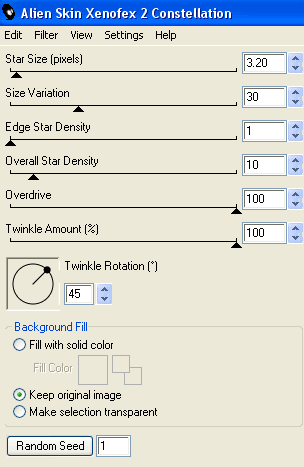
Effects > Plugins > Alien Skin Xenofex 2 > Constellation with the following settings:
 
 
Hide Sparkle1 and activate Sparkle2
Apply the Constellation effect, adjusting the Random Seed
 
Hide Sparkle2 and activate Sparkle3
Apply same again, adjusting the Random Seed
 
Hide Sparkle2 and Sparkle3 again with only Sparkle1 visible
Edit > Copy Merged
 
Open Animation Shop
Edit > Paste as New Animation
 
Back to PSP
Hide Sparkle1 and activate Sparkle2
Edit > Copy Merged
 
In Animation Shop
Edit > Paste AFTER Current Frame
 
Back to PSP
Hide Sparkle2 and activate Sparkle3
Edit > Copy Merged
 
In Animation Shop
Edit > Paste after Current Frame
 
Thanks for trying my tutorial!
 
::st!na::
 
 
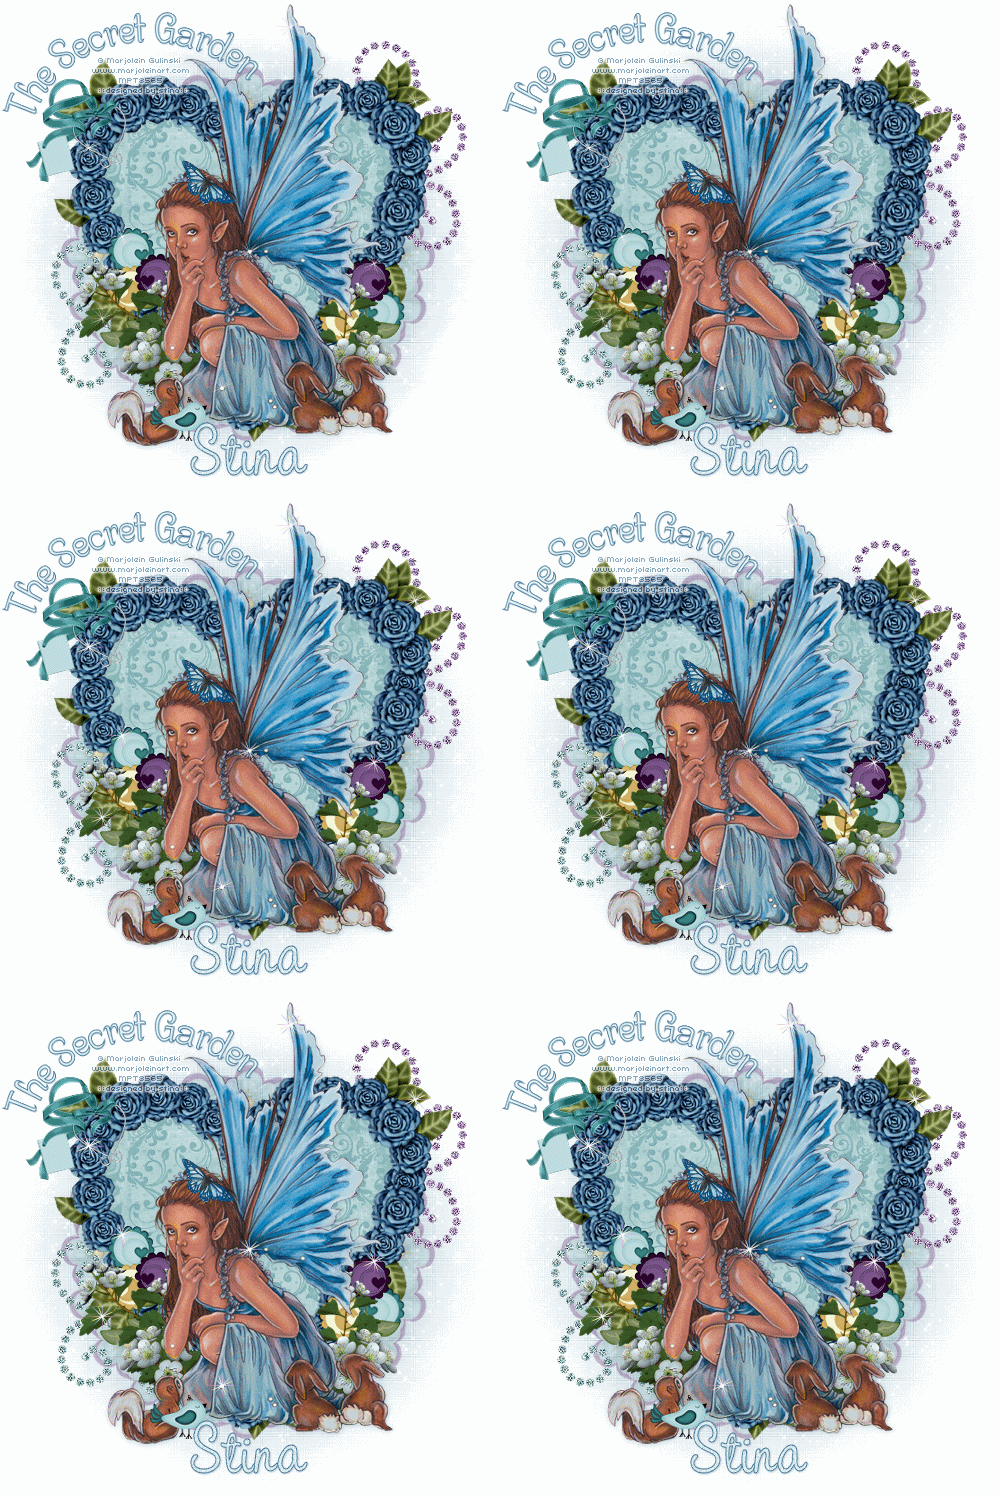
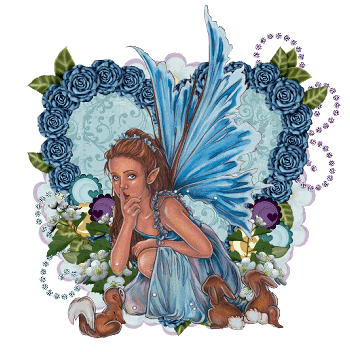
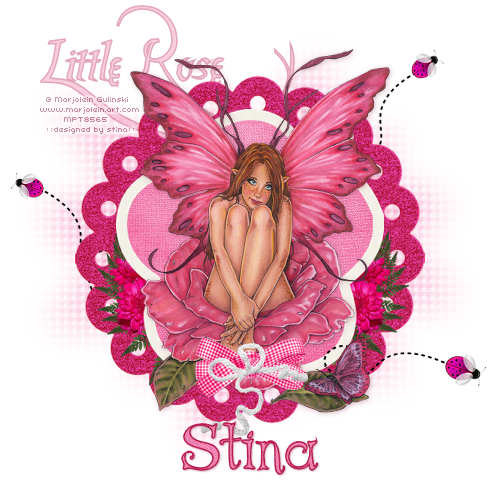
Here is a non-animated version:
 

© Tutorial written by Stina on 16th May 2009
All rights reserved

Friday, May 15, 2009

Secret Garden

 
**Grand Opening of Twilight Scraps tut**
 
Supplies
 
Scrap kit of choice - I am using "Motherly Love" by Nikki of Creative Intentionz available as part of the Grand Opening of Twilight Scraps
**Kit is a FREEBIE from 15th to 18th May then it goes on sale**
Tube of choice - I am using the lovely artwork of Marjolein Gulinski available from My PSP Tubes
WSL_Mask62 by Chelle available from her blog
Fonts of choice - I am using Centime and CAC Pinafore
Plugin: Alien Skin Xenofex 2 Constellation


Ready? Let's Go...
 
 
Open a new 600 x 600 blank canvas
 
flood-filled white
 
Paste FlowerHeartFrame3 as new layer
Resize by 60%
 
LEAVE IN POSITION
 
Paste FlowerHeartFrame1 as new layer
Resize by 60%
Frame should fall exactly over first Frame
Set blend mode to Soft Light
 
Layers > Merge > Merge Down
 
Select the inside of frame with Magic Wand
Selections > Modify > Expand by 10
Add new raster layer
Paste Paper of choice INTO selection
Deselect
 
Layers > Arrange > Move Down
 
 
Paste your tube as new layer
Resize as necessary
Position in centre of heart, or to your
liking
 
Paste FlowerBranch2 as new layer
Resize by 30%
Position to the left of your tube
Layers > Arrange > Move Down
 
Paste FlowerBranch1 as new layer
Resize by 30%
Position to the right protruding from behind
 
your tube
Duplicate, then Image > Mirror
Position both to your liking
Layers > Merge > Merge Down
 
Paste CherryBlossom1 as new layer
Resize by 25%
Position to the left
Move down below FlowerBranch layers
Duplicate, then Image > Mirror
Position to your liking behind branches
 
Paste CherryBlossom3 as new layer
Resize by 25%
Position to the right
Duplicate, then Image > Mirror
Position to your liking
 
Paste CherryBlossom2 as new layer
Resize by 25%
Position to the right
Duplicate, then Image > Mirror
Position to your liking
 
Paste GlitterDoodle2 as new layer
Resize by 50%
Layers > Arrange > Send to Bottom
Position in upper right
Adjust > Sharpness > Sharpen
 
 
Paste GlitterDoodle4 as new layer
Resize by 50%
Position in lower left
Adjust > Sharpness > Sharpen
 
Paste a light Flower as new layer
Resize by 30%
 
LEAVE IN POSITION
 
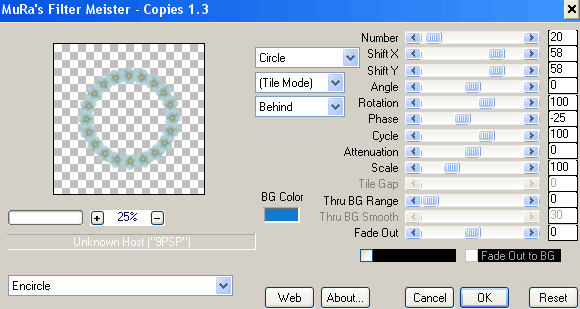
Effects > Plugins > Mura Meister > Copies with the following settings:
 
 
Layers > Arrange > Send to Bottom
 
Paste a darker Flower as new layer
Resize by 35%
 
LEAVE IN POSITION
 
Repeat the Mura Meister plugin above
 
Layers > Arrange > Move Dow
(Dark flower should be below lighter flower)
Position to your liking, then
Layers > Merge > Merge Down
Lower opacity to 50
 
 
Paste a WireRibbonHeart as new layer
Layers > Arrange > Bring to Top
Resize by 30%
Position upper right
Duplicate, then set blend mode to Soft Light
Layers > Merge > Merge Down
 
Paste a paper of choice as new layer
Layers > Arrange > Send to Bottom
 
Layers > New Mask Layer > From Image
Locate WSL_Mask62
OK
 
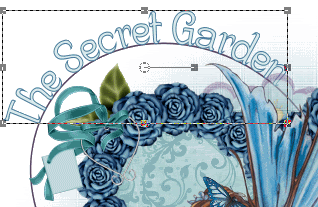
Select your Preset Shape Tool to Ellipse
Foreground on a dark colour and Background
null
Draw out a circle and position to liking
 
Select your Text Tool and font of choice
I am using Centime
Select two colours from your tag with a dark
 
colour as your foreground and a light as your background
I am  using the following:
Foreground - #507b9c
Background - #dbeeef
Stroke width - 1.0
 
 
On the curve type out your text of choice
Position to liking, then in your Layer
 
Palette opent he Vector Layer and turn off the Ellipse
Convert to raster layer
Add a drop shadow of choice
 
Select your Text Tool again and another font of choice
I am using CAC Pinafore
Type out your name
Objects > Align > Horizontal Centre in Canvas
Convert to raster layer
Add any effects and drop shadow of choice
 
Finally, add your © copyright, licence and watermark, then save as a GIF or JPG and you're done!
 
 
** IF YOU WISH TO ANIMATE PLEASE FOLLOW THESE NEXT STEPS **
 
There are two steps to this animation:
 
1. Activate your Background Mask Layer
Duplicate twice and rename to Sparkle1,
Sparkle2 and Sparkle3
 
Hide Sparkle2 and Sparkle3
Activate Sparkle1
Effects > Plugins > Alien Skin Xenofex 2 >
Constellation with the following settings:
 
 
Hide Sparkle1 and activate Sparkle2
Repeat Constellation, adjusting the Random
Seed
 
Hide Sparkle2 and activate Sparkle3
Repeat Constellation again, adjusting the
Random Seed
 
2. Now go back to your top layer
Add new raster layer and name it Stars
 
Use your Picture Tube Tool and select a Sparkle Star
Reduce to a scale of 10
Using your mouse click ONCE where you wish to
place your Stars
 
Then duplicate this layer TWICE
Rename each layer to Stars1, Stars2 and
Stars3
 
NOTE - if you don't have one in Picture Tubes, just find one in your files and resize as necessary
 
OK....ready to animate?
 
Hide Stars2 and Stars3 - leaving Stars1 visible
 
Activate Sparkle1, hiding Sparkle2 and Sparkle3
Edit > Copy Merged
 
Open Animation Shop
Edit > Paste as new animation
 
Back in PSP
Hide Sparkle1 and activate Sparkle2 ONLY
Edit > Copy Merged
 
In Animation Shop
Edit > Paste After Current Frame
 
Back in PSP
Hide Sparkle2 and activate Sparkle3 ONLY
Edit > Copy Merged
 
In Animation Shop
Edit > Paste After Current Frame
 
Back in PSP
Activate Stars2, while still leaving Stars1
 
visible
Hide Sparkle3 and activate Sparkle1
Edit > Copy Merged
 
In Animation Shop
Edit > Paste after Current Frame
 
Back in PSP
Hide Sparkle1 and activate Sparkle2 ONLY
Edit > Copy Merged
 
In Animation Shop
Edit > Paste After Current Frame
 
Back in PSP
Hide Sparkle2 and activate Sparkle3 ONLY
Edit > Copy Merged
 
In Animation Shop
Edit > Paste After Current Frame
 
Back in PSP
Activate Stars32, while still leaving Stars1
 
and Stars2 visible
Hide Sparkle3 and activate Sparkle1
Edit > Copy Merged
 
In Animation Shop
Edit > Paste after Current Frame
 
Back in PSP
Hide Sparkle1 and activate Sparkle2 ONLY
Edit > Copy Merged
 
In Animation Shop
Edit > Paste After Current Frame
 
Back in PSP
Hide Sparkle2 and activate Sparkle3 ONLY
Edit > Copy Merged
 
In Animation Shop
Edit > Paste After Current Frame
 
Whew! That's it!!
 
Now save as a GIF and you're done!
 
Thanks for trying my tutorial!
 
::st!na::
 
 
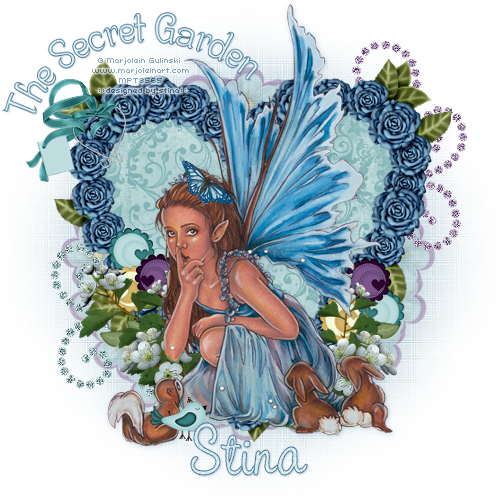
Here is a non-animated version:


© Tutorial written by Stina on 14th May 2009
All rights reserved
Sunday, April 19, 2009

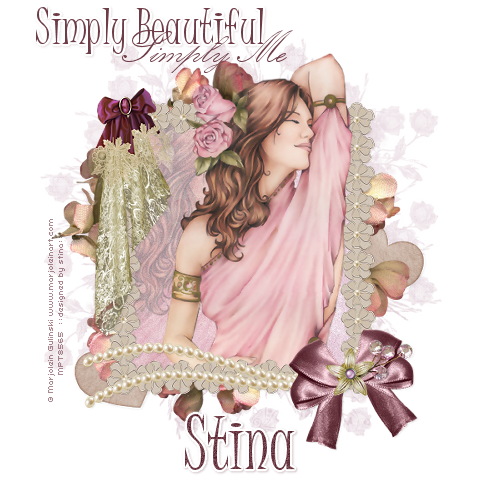
Simply Me

 
Supplies
 
Scrap kit of choice - I am using the gorgeous "Simply Me" kit by Chantal of ChaDesigns which is available from Cotton Candy Kreations
Tube of choice - I am using the lovely artwork of Marjolein Gulinski which can be purchased from My PSP Tubes
**PLEASE DO NOT USE HER ARTWORK WITHOUT THE APPROPRIATE LICENCE**
WSL_Mask226 by Chelle available from her blog
Plugins: Xero Improver and Xero Radiance
Plugin: Eye Candy 4000 Gradient Glow
Fonts of choice - I am using Juice ITC and Kunstler Script
 
 
Ready? Let's begin!
 
 
Open a new 700 x 700 blank canvas flood-filled white
 
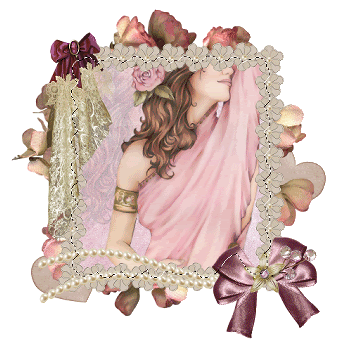
Paste Frame3 as new layer
Resize by 18%
 
Use your Magic Wand to select the inside of the frame
Selections > Modify > Expand by 10
Add a new raster layer
Layers > Arrange > Move Down
Paste Paper10 INTO selection
Deselect
 
Paste Flower7 as new layer
Layers > Arrange > Move Down (so it is below the paper just pasted)
Resize by 12%
 
Activate top layer
 
Paste Flower2 as new layer
Resize by 12%
Position in centre of bow
 
Paste Leaf as new layer
Image > Flip
Image > Rotate by 30 to the left
Resize by 5%
Position BENEATH flower
Then using your Eraser Tool erase the excess branch and leaves
 
 
Paste Lace Draperies as new layer
Resize by 9%
Position in upper left
 
Paste Bow2 as new layer
Resize by 5%
Position in upper left corner securing Draperies
 
 
Paste HeartTag as new layer
Image > Rotate by 30 to the right
Resize by 8%
Position to the right
Layers > Arrange > Send to Bottom
Place in position
Duplicate, then
 
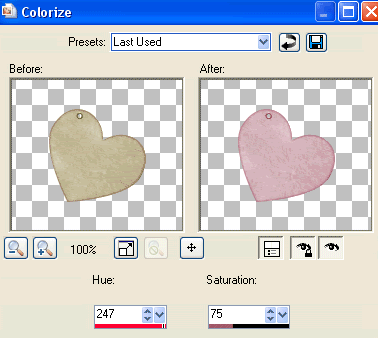
Adjust > Hue & Saturdation > Colourise with the following settings:
 
 
Lower opacity to 50
Layers > Merge > Merge Down
 
 
Duplicate again, then
Image > Mirror
Position in lower left corner
 
Activate Frame layer
With your Magic Wand select the inside of the Frame
Selections > Modify > Expand by 10
 
Paste your tube as new layer
Layers > Arrange > Move Down
Position off to the left
Selections > Invert
Delete
Lower opacity to around 40 or one to your liking
 
 
KEEP SELECTED!!
 
Paste your tube again
Resize as necessary
Position slightly to the right
 
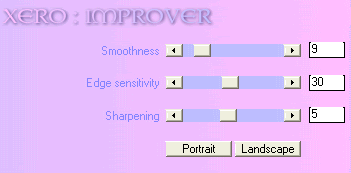
Effects > Plugins > Xero > Improver with the following settings:
 
 
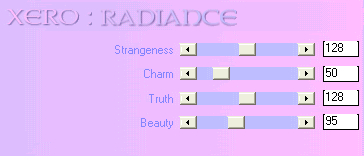
Effects > Plugins > Xero > Radiance with the following settings:
 
 
Duplicate layer
Layers > Arrange > Bring to Top
Turn off visibility of top layer

Go back to layer we were working on
Delete then deselect
 
 
Activate top layer
 
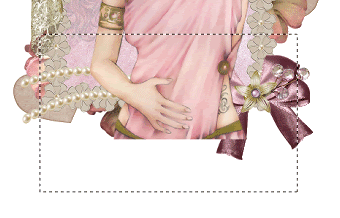
Use your Selection Tool to draw out a rectangle around the bottom half of the tube
 
 
Paste Paper12 as new layer
Resize by 17%
Layers > Arrange > Send to Bottom
 
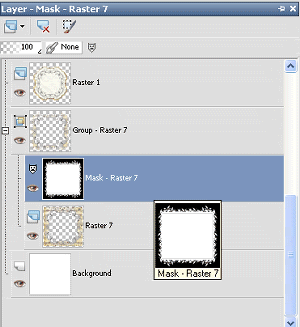
Layers > New Mask Layer > From Image
Locate WSL_Mask226
OK
Layers > Merge > Merge Group
Lower opacity to your liking
 
Activate top layer again
 
Select your Text Tool and font of choice
I am using Juice ITC
Choose a colour to complement your tag
 
Set your Material Palette:
Foreground - null
Background - colour of choice
 
Type out your text and place in position
Convert to raster layer
Apply a slight gradient glow and drop shadow
 
I then selected a script font to type out a complementary phrase then converted to raster layer
 
Select another font of choice (or use same)
Type out your name
Objects > Align > Horizontal Centre in Canvas
Convert to raster layer
Add some noise
Apply a gradient glow then the following drop shadow:
 
H & V - 1
Opacity - 30
Blur - 3.00
Colour - #6e3c46
 
Finally, add your © copyright, licence and watermark then save as a GIF or JPG and you're done!
 
Thank you for trying my tutorial!
 
::st!na::
 

© Tutorial written by Stina on 19th April 2009
All rights reserved
Thursday, April 9, 2009

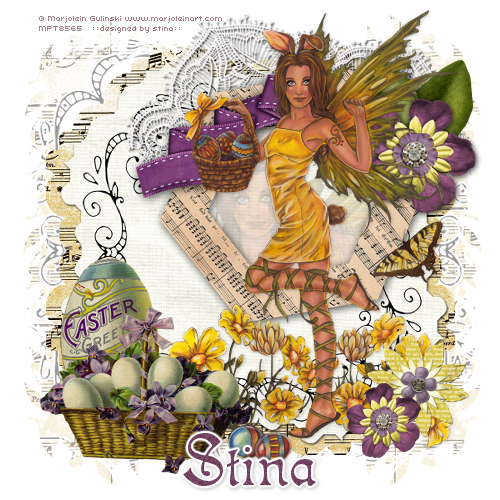
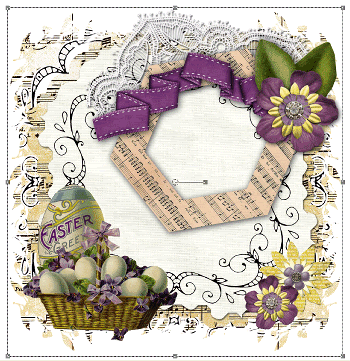
Vintage Easter

 
Supplies
 
"Vintage Easter" freebie scrap kit available from Pixel Music
Tube of choice - I am using the lovely artwork of Marjolein Gulinski which can be purchased from My PSP Tubes
**PLEASE DO NOT USE HER ARTWORK WITHOUT THE APPROPRIATE LICENCE**
WSL_Mask251 by Chelle available from her blog
Plugin: Eye Candy 4000 Gradient Glow
Font of choice - I am using Isabella
 
This is an easy tutorial ideal for Beginners
 
 
Let's begin!
 
Open a new 600 x 600 blank canvas flood-filled white
 
Paste Textbox3 as new layer
Resize by 35%
Leave in position
 
Paste ClusterFrame as new layer
Resize by 50%
Position up and slightly to the right
 
Paste Basket as new layer
Resize by 25%
Position in the lower left corner
 
Paste EasterEgg as new layer
Resize by 20%
Layers > Arrange > Move Down
Position behind the Basket and slightly up
 
Paste YellowFlower as new layer
Resize by 15%
Position in lower right
 
Paste PurpleFlower as new layer
Resize by 20%
Position in lower right overlapping the Yellow flower
 
Add a new raster layer
Selections > Select All
Paste SheetMusicBorder INTO selection
Deselect
Resize by 95%
Layers > Arrange > Send to Bottom
 
Layers > New Mask Layer > From Image
Locate WSL_Mask251
 
In your Layer Palette locate your Mask layer
 
 
With your Pick Tool use the nodes to pull the layer up at the top and down at the bottom
 
 
Layers > Merge > Merge Group
Lower opacity to around 40
 
Crop and Resize
 
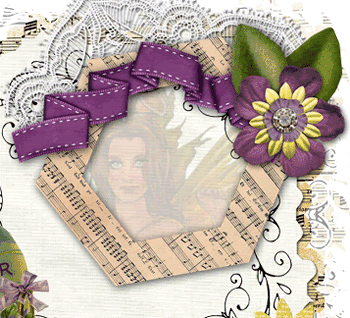
Paste your tube below cluster frame
Enlarge/resize to fit partially inside cluster frame
With your Magic Wand select inside the frame (be sure to select the shadow as well to include the entire inside)
Selections > Modify > Expand by 10
 
 
Selections > Invert
Delete and deselect
 
 
Paste your tube as new layer again
Layers > Arrange > Move Up (one layer above frame)
Resize as necessary and place in position
Apply drop shadow of choice
 
Select your Text Tool and font of choice
I am using Isabella
Choose a colour from your tube or scrap
Set your Material Properties:
Foreground - null
Background - #734360
 
Apply a Gradient Glow and drop shadow:
H & V - 1
Opacity - 30
Blur - 5.00
Colour - #301826
 
Finally, add your © copyright, licence and watermark then save as a GIF or JPG and you're done!
 
Thanks for trying my tutorial
 
::st!na::
 

© Tutorial written by Stina on 9th April 2009
All rights reserved