
Supplies
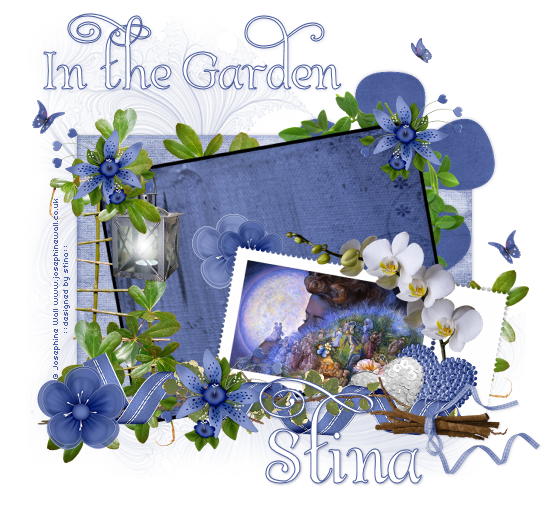
Scrap kit of choice - I am using the lovely "Oh So Blue" by Bea's Creations available from Stargazer Scraps
Image of choice - I am using the lovely artwork of Josephine Wall which is free to use along with proper credit on the tag
Masks - sg-fractural1111 and krd-mask25 here
Font of choice - I am using Albermarle Swash
No Plugins
Ready? Let's begin....
Open a new 700 x 600 blank canvas flood-filled white
Open a THREE Papers of choice and minimise
Select your Preset Shape Tool and set to Ellipse
Click your Background in your Materials Palette to open Material Properties to the Patterns tab
Select your FIRST Paper of choice with the Angle and Scale set to your liking - or leave as is
Click your Background in your Materials Palette to open Material Properties to the Patterns tab
Select your FIRST Paper of choice with the Angle and Scale set to your liking - or leave as is
Draw out a Rectangle with your Paper slightly below centre
Objects > Align > Horizontal Centre in Canvas
Convert to raster layer
Objects > Align > Horizontal Centre in Canvas
Convert to raster layer
Set your Preset Shape to a Flower shape
Change your Pattern in your Materials Palette to your SECOND Paper of choice
Change your Pattern in your Materials Palette to your SECOND Paper of choice
Hold your Shift key and draw out your Flower in the upper right
Convert to raster layer
Convert to raster layer
Set your Preset Shape back to Rectangle
Turn your Background off to Null and set your Foreground to #000000
Stroke width - 5.00
Turn your Background off to Null and set your Foreground to #000000
Stroke width - 5.00
Draw out a Rectangle not quite as large as the bottom one
Objects > Align > Horizontal Centre in Canvas
Convert to raster layer
Objects > Align > Horizontal Centre in Canvas
Convert to raster layer
Select inside the Rectangle with your Magic Wand
Selections > Modify > Expand by 3
Selections > Modify > Expand by 3
Add new raster layer
Paste your THIRD paper of choice INTO selection
Deselect
Paste your THIRD paper of choice INTO selection
Deselect
Now on both these layers Image > Rotate by 10 to the left
Paste Frame4 as new layer
Image > Mirror
Image > Rotate by 10 to the right
Resize by 70%
Position in lower right
Image > Mirror
Image > Rotate by 10 to the right
Resize by 70%
Position in lower right
Paste Ribbon6 as new layer
Position along bottom partially covering Frame
Position along bottom partially covering Frame
Paste Nature5 (Bamboo ladder) as new layer
Resize by 70%
Position to left
Resize by 70%
Position to left
Paste Leaves1 as new layer
Resize by 40%
Position over upper left corner of Ladder and frame
Resize by 40%
Position over upper left corner of Ladder and frame
Paste Flower3 as new layer
Image > Mirror
Resize by 50%
Position over centre of Leaves above Ladder
Image > Mirror
Resize by 50%
Position over centre of Leaves above Ladder
Duplicate, then Image > Mirror
Position in upper right corner of rotated rectangle
Position in upper right corner of rotated rectangle
Paste Lamp as new layer
Resize by 30%
Position beneath Leaves and Flowers as if hanging from Ladder
Position beneath Leaves and Flowers as if hanging from Ladder
Paste Flower12 as new layer
Resize by 60%
Position over and around right edge of Frame
Resize by 60%
Position over and around right edge of Frame
Paste Heart3 as new layer
Image > Rotate by 15 to the right
Resize by 35%
Image > Rotate by 15 to the right
Resize by 35%
Position over bottom of stem of Flower and behind Ribbon
Paste Heart6 as new layer
Resize by 55%
Position overlapping Heart3
Resize by 55%
Position overlapping Heart3
Activate top layer
Paste Flower3 again
Resize by 60%
Position lower left of stamp Frame between that and the ladder
Resize by 60%
Position lower left of stamp Frame between that and the ladder
Paste Flower8 as new layer
Resize by 50%
Position at base of ladder
Duplicate, then resize by 75%
Resize by 50%
Position at base of ladder
Duplicate, then resize by 75%
Move down layers below Stamp Frame
Position behind upper left corner
Position behind upper left corner
Paste Flower7 as new layer
Resize by 50%
Position behind flower behind corner of Frame
Resize by 50%
Position behind flower behind corner of Frame
Whilst on this layer paste your Image of choice as new layer
Image > Rotate by 10 to the right
Resize as necessary
Position within Frame to your liking
Image > Rotate by 10 to the right
Resize as necessary
Position within Frame to your liking
Activate the Frame and select inside it with your Magic Wand
Selections > Modify > Expand by 10
Selections > Invert
On Image layer, delete
Deselect
Selections > Modify > Expand by 10
Selections > Invert
On Image layer, delete
Deselect
Paste another image of choice as new layer
Image > Rotate by 10 to the left
Resize as necessary and position within Rectangle below the thin black frame we drew out
Lower opacity to your liking
You may even play with the blend modes for a desired effect
Image > Rotate by 10 to the left
Resize as necessary and position within Rectangle below the thin black frame we drew out
Lower opacity to your liking
You may even play with the blend modes for a desired effect
Paste Nature2 as new layer
Resize by 50%
Image > Flip
Position in upper right
Move down to between rotated rectangle and flower shape layers
Duplicate then set blend mode to Multiply
Lower opacity to 50
Layers > Merge > Merge Down
Lower opacity to 50
Layers > Merge > Merge Down
Paste any extra greenery and elements you wish to your liking
Resize canvas to 500 wide
Paste Paper of choice as new layer
Layers > Arrange > Send to Bottom
Layers > Arrange > Send to Bottom
Layers > New Mask Layer > From Image
Apply sg_Fractual1111
OK
Layers > Merge > Merge Group
Apply sg_Fractual1111
OK
Layers > Merge > Merge Group
Image > Canvas Resize to 550 x 500
On same layer,
Layers > New Mask Layer > From Image
Apply krd-mask25
Layers > New Mask Layer > From Image
Apply krd-mask25
DO NOT MERGE
Activate Mask layer and resize by 95%
Layers > Merge > Merge Group
Lower opacity to 55
Layers > Merge > Merge Group
Lower opacity to 55
Activate top layer
Select your Text Tool and font of choice
I am using Albrmarle Swash
Foreground - #4d5f9c
Background - #FFFFFF
Stroke width - 1.0
I am using Albrmarle Swash
Foreground - #4d5f9c
Background - #FFFFFF
Stroke width - 1.0
Type out your text and position to liking
Convert to raster layer
Apply a drop shadow of choice
Convert to raster layer
Apply a drop shadow of choice
Select another font of choice or use the same
Type out your name and position to liking
Apply a drop shadow of choice
Apply a drop shadow of choice
Finally, add your © copyright, licence and watermark, then save as GIF or JPG and you're done!
** IF YOU WISH TO ANIMATE PLEASE FOLLOW THESE NEXT STEPS **
Activate your Lamp/Lantern layer
Duplicate once and rename Light1 and Light2
Activate Light1 and hide Light2
Effects > Illumination Effects > Sunburst with the following settings:
Hide Light1 and activate Lightr2
Repeat Sunburst again adjusting the following:
Light Spot Brightness - 15
Rays Brightness - 30
Repeat Sunburst again adjusting the following:
Light Spot Brightness - 15
Rays Brightness - 30
Activate Light1 and hide Light2
Edit > Copy Merged
Edit > Copy Merged
Open Animation Shop
Edit > Paste as New Animation
Edit > Paste as New Animation
Back to PSP
Hide Light1 and activate Light2
Edit > Copy Merged
Hide Light1 and activate Light2
Edit > Copy Merged
In Animation Shop
Edit > Paste after Current Frame
Edit > Paste after Current Frame
Select All and change the Frame Properties to 50
Now save as a GIF and you're done!
Now save as a GIF and you're done!
Thanks for trying my tutorial!
::st!na::
Here is a non-animated version:
© Tutorial written by Stina on 18th June 2009
All rights reserved


