Please email me designed.by.stina@gmail.com with your creations. I'd love to see them.

Showing posts with label Lix. Show all posts

Saturday, July 4, 2009

Lazing on a Sunny Afternoon


Supplies

Scrap kit of choice - I am using "Fun and Fancy Free" by Lynn Earwicker available from The Scrapping Divaz Designz
Tube of choice - I am using the delightful artwork of Lix available with a licence through CILM
**PLEASE DO NOT USE THIS ARTWORK WITHOUT THE APPROPRIATE LICENCE**
UFMask19 here
Fonts of choice - SandyTextHmkBold and SBC Sandy Beach
Plugins: Filters Unlimited Blue Sky, Mura Meister Copies and Penta.com Colour Dot


Let's begin....


Open a new 700 x 550 canvas flood-filled white

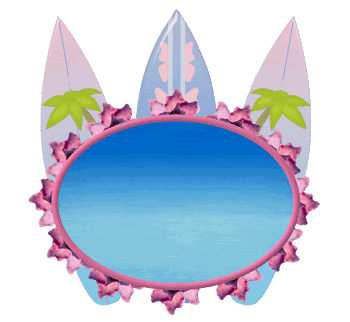
Paste a Surfboard as new layer
Image > Rotate by 10 to the left
Resize by 70%
Position slightly to the left
Duplicate, then Image > Mirror

Paste another Surfboard as new layer
Resize by 70%
Position in centre

Select your Preset Shape Tool and set to Ellipse
Foreground - colour to match tag
Background - null
Stroke width - 10.00

Draw out Ellipse towards centre
Objects > Align > Horizontal Centre in Canvas
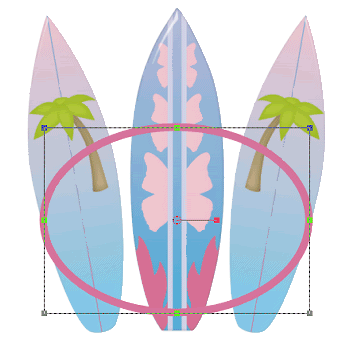

Convert to raster layer

Apply the following Inner Bevel:
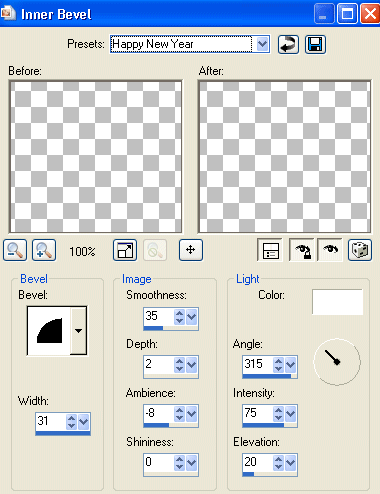

Select inside with your Magic Wand
Selections > Modify > Expand by 5
Add new raster layer
Paste Paper of choice INTO selection

KEEP SELECTED!!

Effects > Plugins > IC Net Software > Filters Unlimited > Color Filters > Blue Sky
Default settings
Deselect
Layers > Arrange > Move Down

Activate top layer

Paste Flower as new layer
Resize by 15%

Effects > Plugins > Mura Meister > Copies with the following settings:
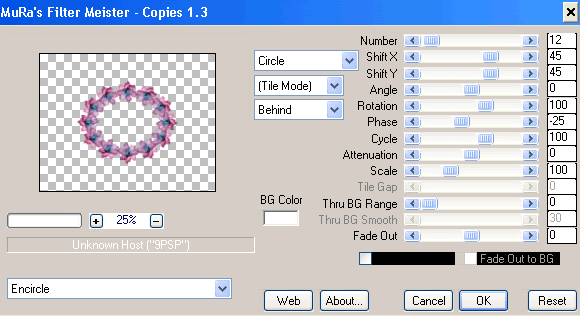

Position in line with Frame
Place over or behind Frame - it's up to you
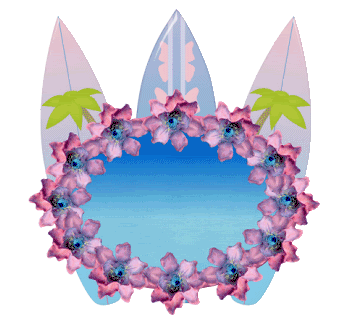

Paste Tube of choice as new layer
Resize as necessary
Position along bottom of Ellipse Frame to your liking

Paste BeachBall as new layer
Resize by 20% and position

Paste Sandcastle as new layer
Resize by 40% and position

Paste Umbrella as new layer
Resize by 45% and position behind your Tube

Paste PalmTree as new layer
Resize by 40% and position behind Tube and Umbrella

Paste Sun as new layer
Resize by 25% and position to liking

Add any other elements to your liking

Paste Paper of choice a new layer
Layers > Arrange > Send to Bottom

Layers > New Mask Layer > From Image
Apply UFMask19
OK
Layers > Merge > Merge Group

Crop and resize

Still on Mask layer
Effects > Plugins > Penta.com > Colour Dot
Default settings
Lower opacity to 55

Select Text Tool and font of choice
I am using SandyTextHmkBold
Text colour of choice - I am using #0e74c7

Type out text of choice and position
Convert to raster layer
Apply a slight Gradient Glow and/or drop shadow of choice

Select another font of choice
I am using SBC Sandy Beach
Same Text colour
Type out your name and position
Convert to raster layer
Apply any effect or drop shadows as necessary to your liking

Finally, add your © copyright, licence and watermark, then save as a GIF or JPG and you're done!


** IF YOU WISH TO ANIMATE PLEASE FOLLOW THESE NEXT STEPS **

Activate your Frame Background layer
Duplicate once and rename Sunburst1 and Sunburst2

Activate Sunburst1

Effects > Illumination Effects > Sunburst with the following settings:
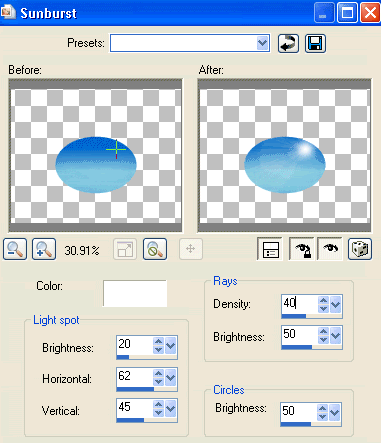

Hide Sunburst1 and activate Sunburst2
Apply Sunburst effect again with the following changes:
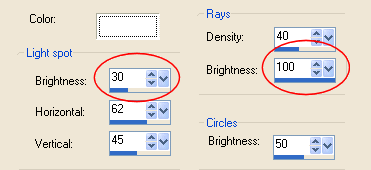

Now for the animation!

Activate Sunburst1 and hide Sunburst2
Edit > Copy Merged

Open Animation Shop
Edit > Paste as New Animation

Back to PSP
Hide Sunburst1 and activate Sunburst2
Edit > Copy Merged

In Animation Shop
Edit > Paste AFTER Current Frame

Select All and set your Frame Properties to 50
Save as a GIF and you're done!

Thanks for trying my tutorial!

::st!na::


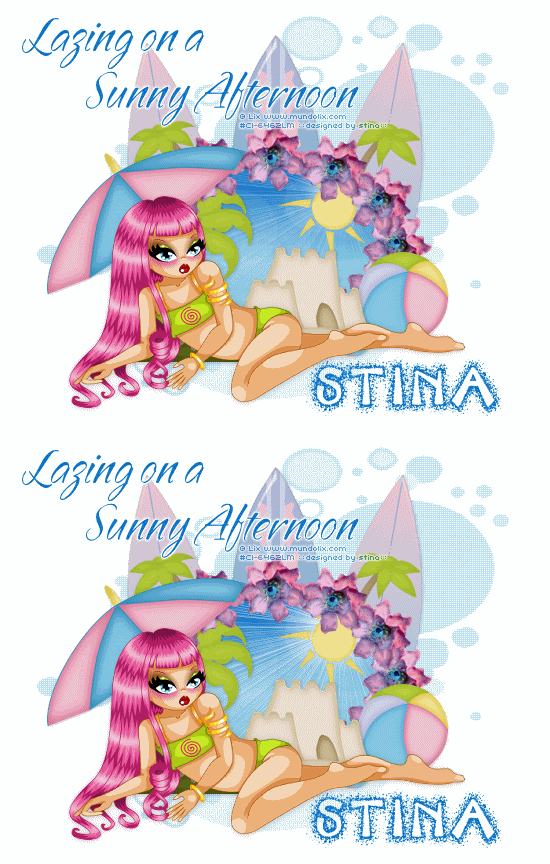
Here is a non-animated version:
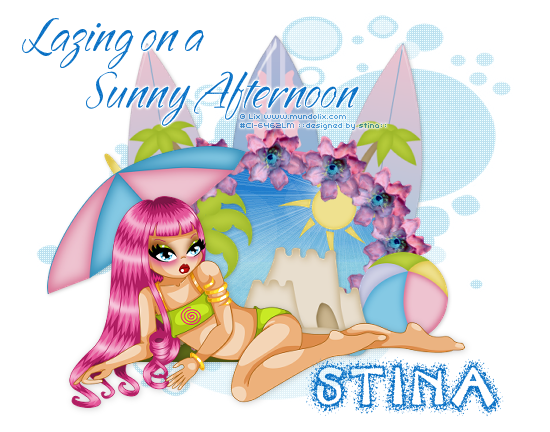


© Tutorial written by Stina on 4thJuly 2009
All rights reserved

Sunday, May 24, 2009

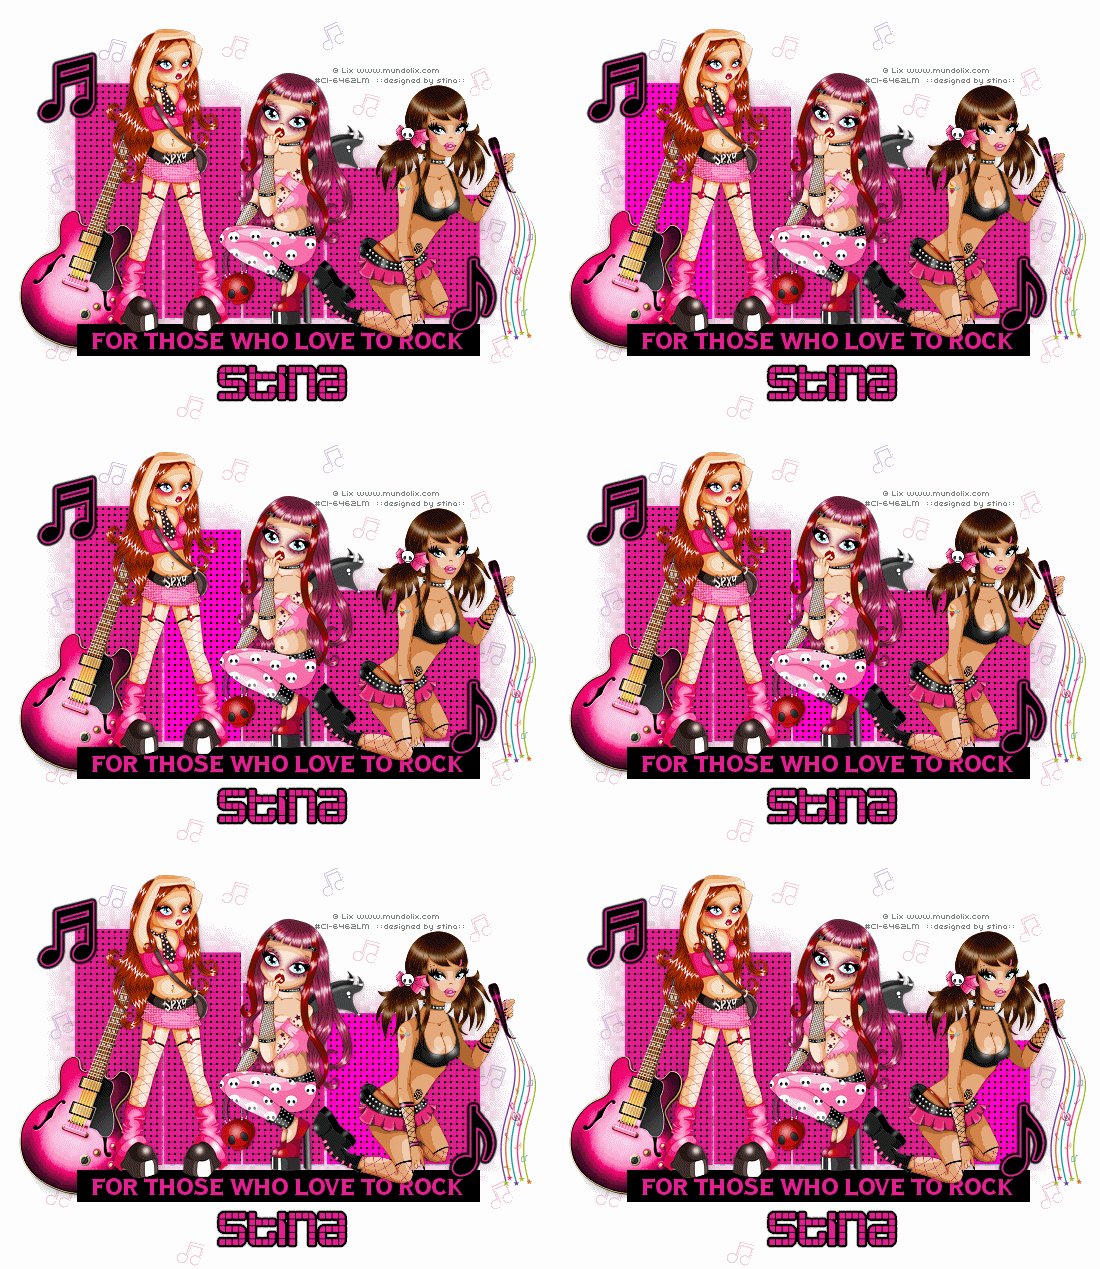
Love to Rock

 
Supplies
 
Scrap kit of choice - I am using "Rockin' Attitude" Re Grand Opening kit from Scraps with Attitude
Tubes of choice - I am using the artwork of Lix which is available with a licence from CILM
**PLEASE DO NOT USE THIS ARTWORK WITHOUT THE APPROPRIATE LICENCE**
MPD_Template 1 from MomParadiseDesigns available from Creative Misfits
Plugin: Eye Candy 4000 Gradient Glow
Fonts of choice - I am using CopperplateTBoldCon and Astronaut
 
 
Ready? Let's begin....
 
 
Open MPD_Template 1 and duplicate (Shift D)
Delete copyright layer
 
Image > Canvas Resize 650 x 500 centred (for more working space)
Flood-fill excess Background layer white
Then resize to your liking (because some of the effects we will be using don't resize very well - so we are going to resize first)
 
Select the BlueBars with your Magic Wand
Press delete a few times to remove the blue background
Flood-fill each rectangle bar with your colour of choice
Deselect
Rename this layer BARS
 
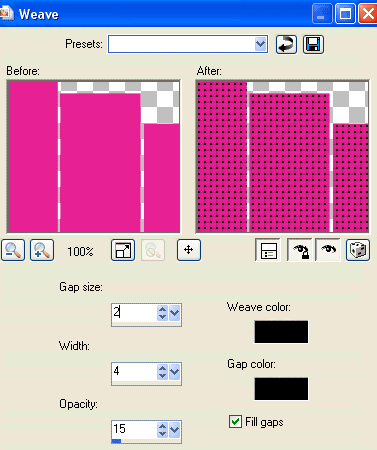
Effects > Texture Effects > Weave with the following settings:
 
 
Select the Guitar layer with your Magic Wand
Flood-fill with another colour of choice
Then deselect
I pasted a Guitar from the scrap kit
 
Activate MusicNote1
Add new raster layer
Flood-fill with a colour of choice
Activate your MusicNote1 again
Selections > Select All, then Float, then Defloat, then Invert
Activate flood-filled layer
Delete then deselect
**This gives a smoother outline finish**
 
Repeat with MusicNote2 layer
Then Merge both MusicNote layers together
 
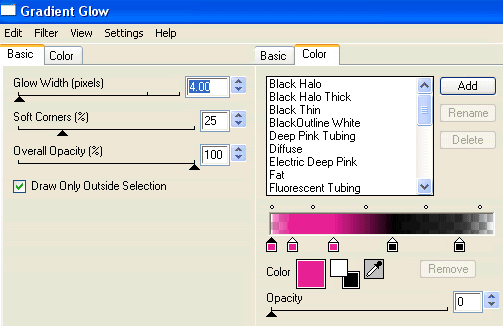
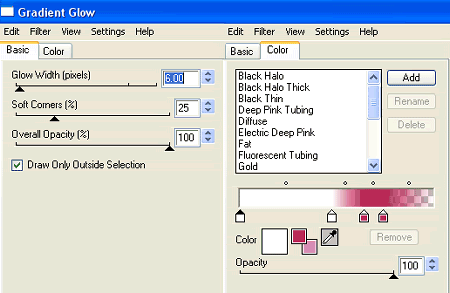
Effects > Plugins > Eye Candy 4000 > Gradient Glow with the following settings:
 
 
Select the SmallRectangle with your Magic Wand
Flood-fill with a colour of your choice
Deselect
 
It is up to you if you want to keep the Word Art - I wrote my own
 
Select Text Tool and font of choice
I used CopperplateTBoldCon
Type out Text and position
Convert to raster layer
 
Paste Tubes of choice as new layers
Resize each as necessary
Position to liking
 
Add any extra elements you wish
 
Now activate your BARS layer and duplicate it
Layers > Arrange > Send to Bottom
Rename BARS BKG
 
Adjust > Blur > Gaussian Blur with a Radius of 20.00
 
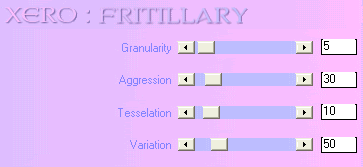
Effects > Plugins > Xero > Fritillary with the following settings:
 
 
Repeat Fritillary
Lower opacity to 55
 
Select Text Tool and font of choice
I am using Astronaut
Type out your name
Objects > Align > Horiztonal Centre in Canvas
Convert to raster layer
Apply a drop shadow of choice
 
Finally, add your © copyright, licence and watermark, then save as a GIF or JPG and you're done!
 

** IF YOU WISH TO ANIMATE PLEASE FOLLOW THESE NEXT STEPS **
 
Activate the BARS Layer
Duplicate FIVE times so you have a total of six layers
Rename Bright1, Bright2, Bright3, Bright4, Bright5 and Bright6
 
Leave Bright1 as is and activate Bright2
 
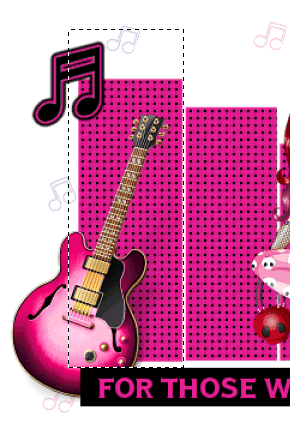
With your Selection Tool draw a rectangle around the first BAR


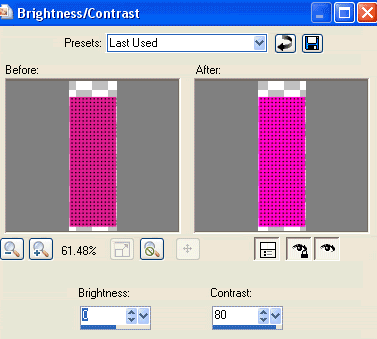
Adjust > Brightness & Contrast > Brightness/Contrast with the following settings:


Hide Bright2 and activate Bright3
Draw a rectangle around the second bar
Apply the Brightness & Contrast
 
Repeat with the remaining Bars up to Bright6 layer, then
 
Hide Bright2 to 6 leaving Bright1 visible
Edit > Copy Merged
 
Open Animation Shop
Edit > Paste as New Animation
 
Back to PSP
Hide Bright1 and activate Bright2
Edit > Copy Merged
 
In Animation Shop
Edit > Paste AFTER Current Frame
 
Again, repeat with the other layers until you have SIX frames in Animation Shop
 
Go to Frame Properties and change to 20, then save as a GIF and you're done!
 
Thanks for trying my tutorial!
 
::st!na::
 
 
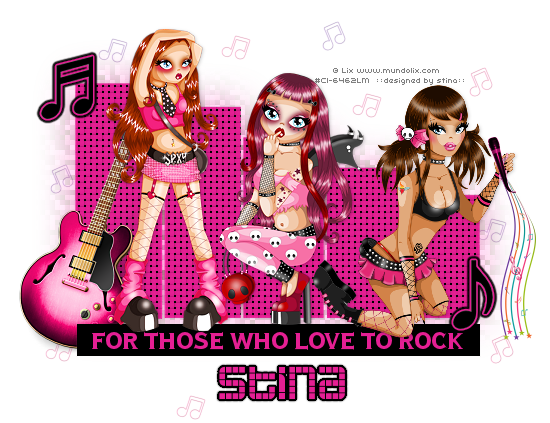
Here is a non-animated version:


© Tutorial written by Stina on 24th May 2009
All rights reserved
Thursday, May 21, 2009

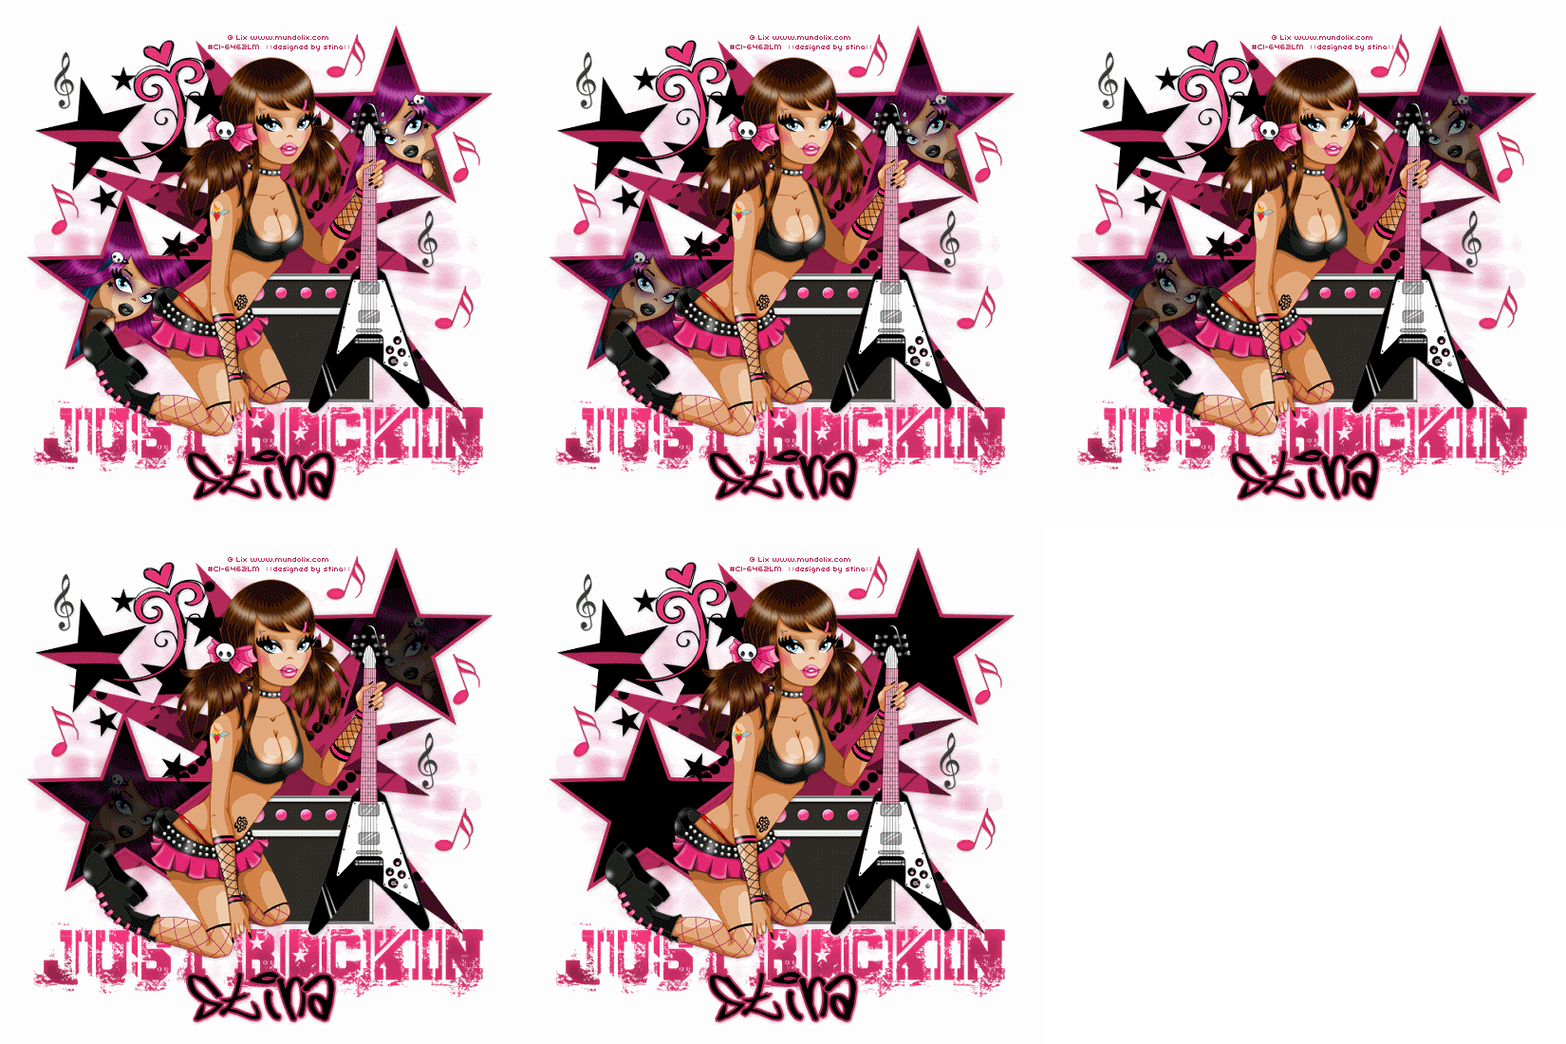
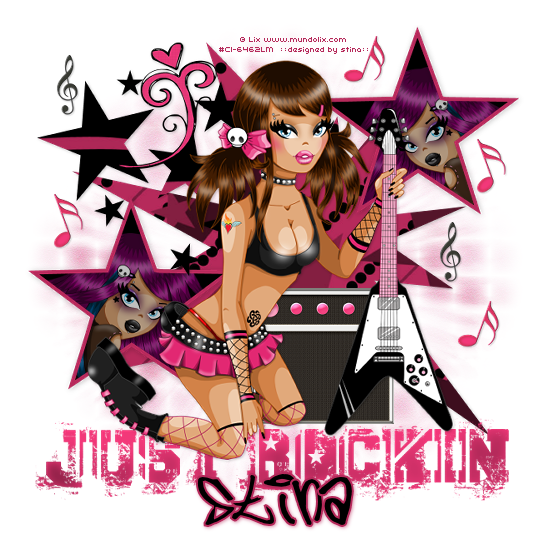
Just Rockin

 
Supplies
 
Scrap kit of choice - I am using the Re Grand Opening Collab kit "Rockin with Attitude" available from Scraps with Attitude
Tubes of choice - I am using the artwork of Lix available from CILM
**PLEASE DO NOT USE THIS ARTWORK WITHOUT THE APPROPRIATE LICENCE**
WSL_Mask89 by Chelle available from her blog
Preset Shapes here
Font of choice - I am using 5 Cent
 
 
Ready? Let's begin....
 
 
Open a new 600 x 600 blank canvas flood-filled white
 
Open two papers of choice and minimise both
 
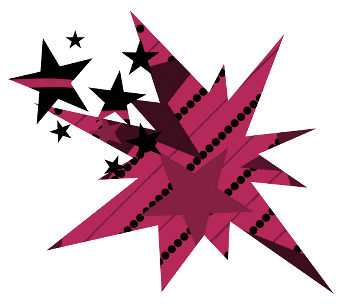
Select your Preset Shape Tool and set to an Explosie shape
In your Materials Palette, set your Background to one of your papers of choice
Set the scale to your liking (depending on the size of the paper)
 
Hold Shift key down and draw out your shape
Convert to raster layer
 
Set your Preset Shape to "dbmmisc05" or another of choice
 
In your Materials Palette set your Background to your other paper of choice
 
Hold Shift key and draw out shape
Position to liking then convert to raster layer
 
 
Set your Preset Shape to a star
Select a colour fron your tag and set to Foreground
Stroke width - 5.00
 
Hold Shift key and draw out star
Position to liking then convert to raster layer
 
Draw out another star and position to liking
Convert to raster layer
 
Layers > Merge > Merge Down
 
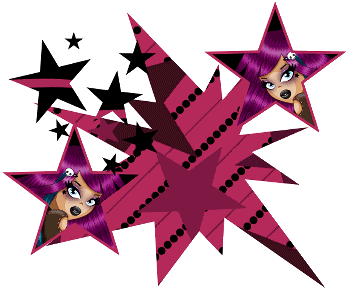
Using your Magic Wand select the inside of each Star
Selections > Modify > Expand by 3
Add a new raster layer
Flood fill with #000000
Layers > Arrange > Move Down
 
KEEP SELECTED
 
Paste a tube of choice as new layer
Resize as necessary and position to liking
Selections > Invert
Delete
 
STILL SELECTED
 
Paste another tube (or use the same Mirrored) as new layer
Reszie and position to liking
Delete and deselect
 
Layers > Merge > Merge Down
Rename StarTube
 
 
Paste Amp as new layer
Resize by 10%
Position towards bottom of main shape and slightly off centre
 
Paste Tube of choice as new layer
Resize as necessary and position to liking
 
Paste MusicNotes of choice as new layer
Image > Rotate by 20 to the right
Resize by 5%
Position around tag to your liking
 
Paste same again as new layer
Image > Rotate  by 20 to the left
Resize by 5%
Position to liking
 
Paste WordArt of choice as new layer
Resize by 65% (depending on size)
Position along the bottom
Layers > Arrange > Move Down (below tube layer)
 
Resize tag
 
Paste Paper of choice as new layer
Layers > Arrange > Send to Bottom
Resize as necessary
 
Layers > New Mask Layer > From Image
Locate WSL_Mask89
OK
Layers > Merge > Merge Group
 
Activate top layer
 
Select Text Tool and font of choice
I am using 5 Cent
Set your Foreground and Background to two colours from your tag
Stroke width - 2.0
 
Type out your name
Objects > Align > Horizontal Centre in Canvas
Convert to raster layer
Apply a drop shadow of choice
 
Finally, add your © copyright, licence and watermark, then save as a GIF or JPG and you're done!


** IF YOU WISH TO ANIMATE PLEASE FOLLOW THESE NEXT STEPS **
 
Activate the StarTube Layer
Duplicate three times and rename Fade1, Fade2, Fade3 and Fade4
 
Leave Fade1 as normal
 
Hide Fade1, Fade3, and Fade4 activating only Fade2
Lower opacity of this layer to 75


Hide Fade2 and activate Fade3
Lower opacity of this layer to 50
 
Hide Fade3 and activate Fade4
Lower opacity of this layer to 25
 
Hide Fade2, Fade3 and Fade4 again with only Fade1 visible
Edit > Copy Merged
 
Open Animation Shop
Edit > Paste as New Animation
 
Back to PSP
Hide Fade1 and activate Fade2
Edit > Copy Merged
 
In Animation Shop
Edit > Paste AFTER Current Frame
 
Repeat for the following two layers
For the last layer Hide All Fade1, Fade2, Fade3 and Fade4
Edit > Copy Merged, then
Paste After Current Frame in Animation Shop
 
You should now have all 5 Frames
Adjust Frame Properties to 30
Save as a GIF and you're done!
 
Thanks for trying my tutorial!
 
::st!na::
 
 
Here is a non-animated version:
 

© Tutorial written by Stina on 21st May 2009
All rights reserved
Saturday, March 14, 2009

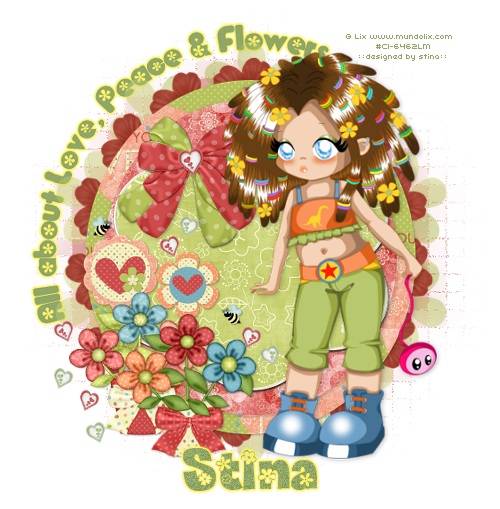
All about Love Peace & Flowers

 
Supplies
 
Scrap kit of choice - I am using "All About the Flowers" by Swheat Creations which is available at Exquisite Scraps and Paradise 4 Scrappers
Tube of choice - I am using the delightful work of Lix which can be purchased from CILM
**PLEASE DO NOT USE THIS ARTWORK WITHOUT THE APPROPRIATE LICENCE**
Vix_Mask172
WSL_Mask133 by Chelle
Fleur Rouge (red flower)
Fonts of choice - I am using Flower and Daffodil
Plugin: Mura Meister Copies
Plugin: Eye Candy 4000 Gradient Glow
 
My Supplies here
 
 
~ Step 1 ~
 
Open a new 600 x 600 blank canvas flood-filled white
 
Open Paper1 and Paper9
Resize both to 400 x 400
And then minimise
 
Select your Preset Shapes Tool to Ellipse and click on your Background in the Materials Palette
In Material Properties, select Patterns and choose Paper1
 
Draw out a circle
 
Objects / Align / Centre in Canvas
Convert to raster layer
 
In Material Properties change your pattern to Paper9
 
Draw out another circle over the first one
Use the nodes to align circle to the exact size
Resize by 90%
 
Paste ScallopBack4 as new layer
Resize by 50%
Leave in position
 
Paste FleurRouge (supplied) as new layer
Resize by 10%
 
LEAVE IN POSITION
 
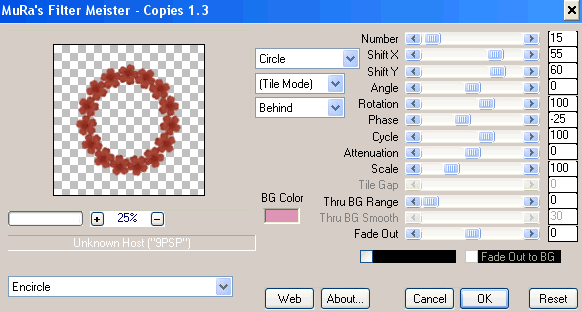
Effects / Plugins / Mura Meister / Copies with the following settings:
 
 
Layers / Arrange / Send to Bottom
 
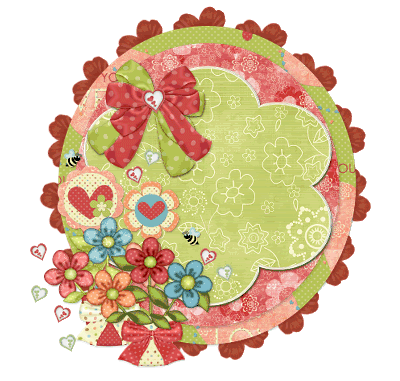
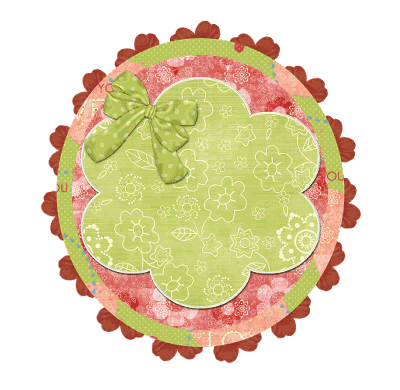
Your canvas should now look like this:


~ Step 2 ~
 
Paste PotOfFlowers as new layer
Resize by 30%
Position to the left
 
Paste FlowerPot as new layer
Resize by 30%
Position to the left
 
Paste Flower1 as new layer
Resize by 30%
Position behind Flower Pots
 
Paste Flower4 as new layer
Resize by 25%
Position behind Flower Pots also
 
Paste LilBee as new layer
Resize by 5%
Duplicate
Image / Mirror
Position Bees around flowers
 
Paste Bow9 as new layer
Image / Mirror
Resize by 25%
Position over existing green bow
 
Paste Heart1 as new layer
Image / Rotate by 10 to the left
Resize by 7%
Position over the centre of the bow
 
Paste Heart1 again as new layer
Image / Rotate by 20 to the left
Resize by 5%
Position around the flowers or to your liking
 
Paste Heart4 as new layer
Image / Rotate by 20 to the right
Resize by 5%
Position around the flowers or to your liking
 
Duplicate then Image / Mirror
Place around tag to your liking
 
 
Paste your tube of choice
Resize as necessary
Position to the right
 
Apply slight drop shadows to each layer:
H & V - 1
Opacity - 30
Blur - 3.00
Colour - #000000
 

~ Step 3 ~
 
Activate Background layer
Paste Paper4 as new layer
 
Adjust / Blur / Gaussian Blur
Radius - 20.00
 
Layers / New mask Layer / From Image
Locate Vix_Mask172
OK
 
Layers / Merge / Merge Group
Lower opacity to 45
 
Paste Paper5 as new layer
Layers / Arrange / Move Down
 
Layers / New Mask Layer / From Image
Locate WSL_Mask133
OK
Layers / Merge / Merge Group
 
Resize by 80%
 
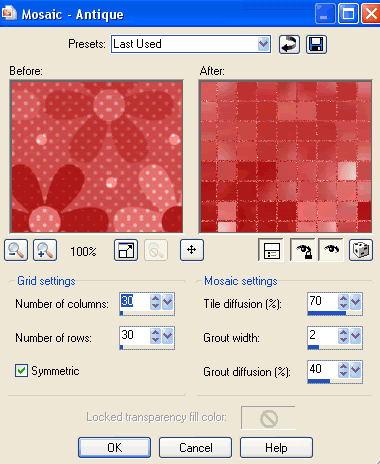
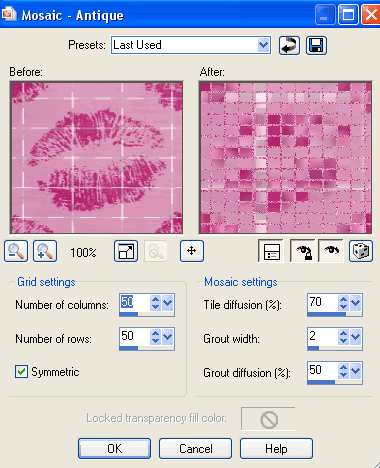
Effects / Texture Effects / Mosaic - Antique with the following settings:
 

Lower opacity to 50
 
Select your Preset Shape Tool to Ellipse
Foreground - #000000
Background - null
 
Draw out a circle around the outside
 
Objects / Align / Centre in Canvas
 
Select your Text Tool and font - I am using Flower
Foreground - null
Background - #91a767 (or one to match your tube)
 
Type out the words "All about Love, Peace & Flowers" or words of your choice
 
In Layer Palette turn off visibility of Ellipse
Convert to raster layer
 
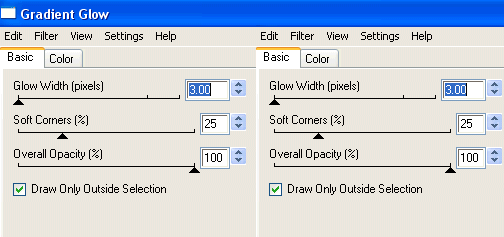
Effects / Plugins / Eye Candy 4000 / Gradient Glow with the following settings:
 
 
Select another font if you wish or use the same - I am using Daffodil
 
Type out your name
Objects / Align / Horizontal Centre in Canvas
Convert to raster layer
Apply same Gradient Glow as above
 
Finally, add your © copyright, licence and watermark
 
Save as a GIF and you're done!
 
Thank you for trying my tutorial
 
::st!na::
 

© Tutorial written by Stina on 14th March 2009
All rights reserved
Wednesday, March 11, 2009

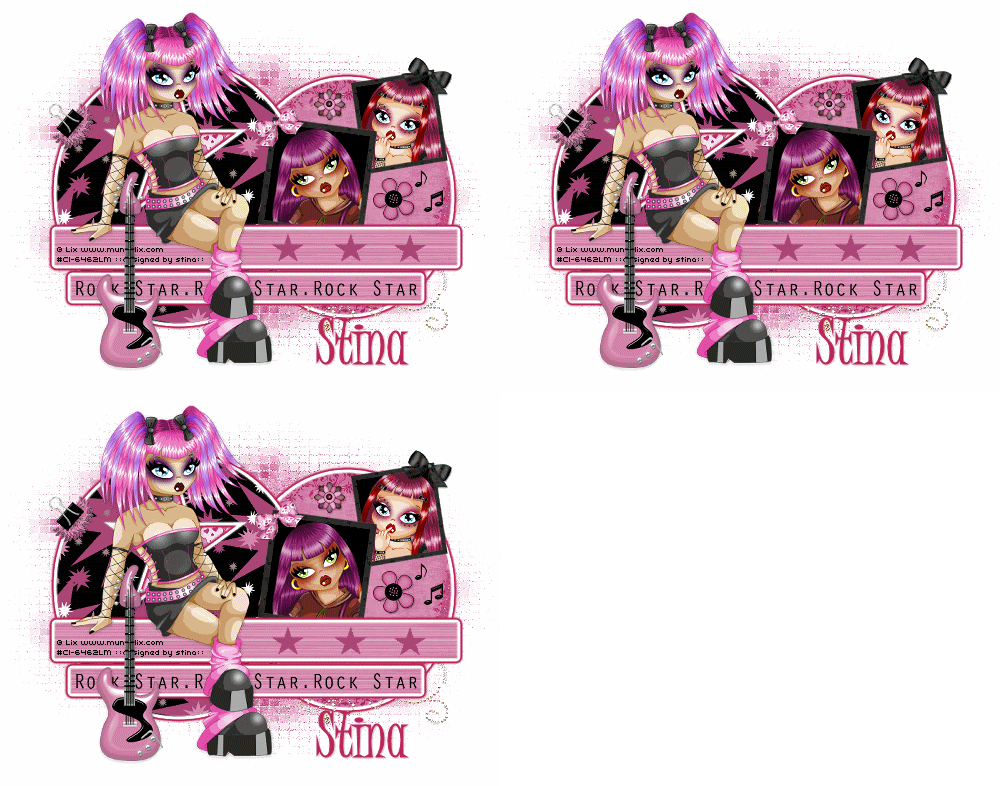
Rock Star

 
Supplies
 
Scrap kit of choice - I am using the lovely "Glam Rock" kit by Candy Kisses Designz which is available at Paradise 4 Scrappers
Tubes of choice - I am using the delightful artwork of Lix which can be purchased from CILM
**PLEASE DO NOT USE THIS ARTWORK WITHOUT THE APPROPRIATE LICENCE**
WSL_Mask84 by Chelle available from her blog
Teresa's Template #6 available from her blog
Plugin: Eye Candy 4000 Gradient Glow
Font of choice - I am using Juice
 
 
~ Step 1 ~
 
Open Teresa_Template6
Shift D to duplicate then close off original
Resize to 600 x 600, then
Image / Canvas Resize to 700 x 550
 
Activate Circle1 layer
Selections / Select All
Selections / Float then Selections / Defloat
Hit delete then
Selections / Modify / Feather by 2
Paste Paper10 into selection
Deselect
 
Use your Magic wand to select the star in Circle1
Selections / Modify / Expand by 10
Add a new raster layer
Layers / Arrange / Move Down
Paste Paper15 into selection
Deselect
 
Activate Frame1
Selections / Select All
Selections / Float then Selections / Defloat
Hit delete
Paste Paper4 into selection
Deselect
 
Repeat same with Frame2
Then on Frame2 Layers / Arrange / Move Down
 
Activate Circle2
Selections / Select All
Selections / Float then Selections / Defloat
Hit Delete
Selections / Modify / Feather by 2
Paste Paper11 into selection
Deselect
 
Activate Strip1
Selections / Select All
Selections / Float then Selections / Defloat
Hit Delete
Selections / Modify / Feather by 2
Paste Paper8 into selection
Deselect
 
Repeat the same with Strip2
 
With your Eye Dropper Tool choose a dark colour from one of the papers - I am using #a94577
 
Activate Stars layer
Selections / Select All
Selections / Float then Selections / Defloat
 
NOW DELETE STARS LAYER
THEN
ADD A NEW RASTER LAYER AND CALL IT STARS
 
Selections / Modify / Feather by 2
Flood fill your colour into selection
Deselect
 
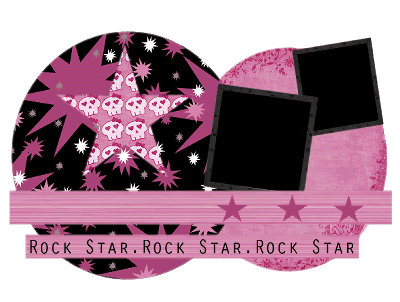
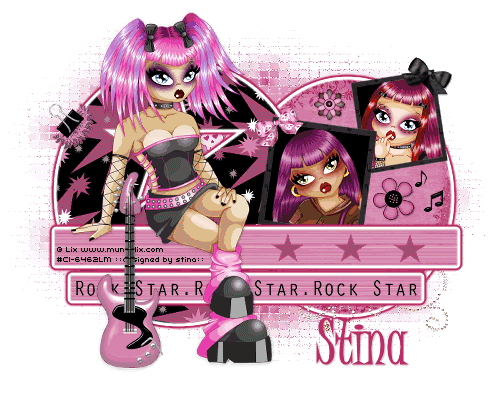
You should now have something like this:
 
 
~ Step 2 ~
 
Activate Photomat1
Click the area with your magic wand
You can paste a paper here if you wish or leave it as I have
 
Paste your tube or image as new layer
Position under the Frame to your liking
Selections / Invert
Delete
Deselect
 
Activate Photomat2 and repeat with 2nd tube or image of choice
 
Paste main tube as new layer
Resize as necessary
 
Add drop shadows of choice to each tube
 
Paste Flower01 as new layer
Resize by 20%
Position beside Frame 1 and beneath Frame2
 
Paste Musicnotes3 as new layer
Resize by 20%
Position beside Flower
 
Paste Musicnotes9 as new layer
Resize by 20%
Position with flower and musicnote
 
Paste Flower2 as new layer
Resize by 12%
Position above Frame1
 
Paste Bling2 as new layer
Resuze by 50%
Position beneath Strip1


Paste BinderFlowerClip as new layer
Image / Rotate by 50 to the left
Resize by 25%
Position to the edge of the circle on the left
 
Paste Bow as new layer
Image / Rotate by 20 to the left
Resize by 20%
Position on the upper left corner of Frame1
 
Paste Bow2 as new layer
Image / Rotate by 30 to the right
Resize by 20%
Position in the upper right corner of Frame2
 
Paste Guitar as new layer
Resize by 22%
Position near your main tube
 
Activate your Background layer
Paste Paper13 as new layer
Layers / New Mask Layer / From Image
Locate WSL_Mask84
OK
 
In your Layer Palette activate the Mask layer
 
Select your Pick Tool (or deformation tool in some versions) and use the top and bottom nodes to make the layer more rectangular
 
 
Effects / Texture Effects / Mosaic - Antique with the following settings:
 
 
Crop and resize your tag
 

~ Step 3 ~
 
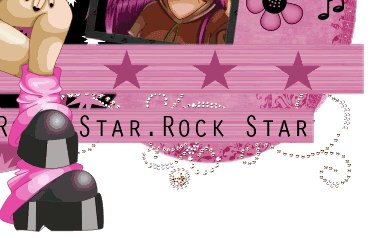
Now that we have resized let's add a Gradient Glow (yes, I admit I love Gradient Glow *g*)
 
Activate your Circle1 layer
Effects / Plugins / Eye Candy 4000 / Gradient Glow with the following settings:
Deep Pink Colour used is #bd2556


Repeat this Gradient Glow on Circle2, Strip1 and Strip2
 
Ensure you are back on the top layer
 
Select your Text Tool and choose your font - I am using Juice
Set your background to a colour that matches your tube - I am using #bd2556
 
Type out your name
Add a drop shadow:
H & V - 1
Opacity - 30
Blur - 2.00
Colour - #68142f
 
Add your © copyright, licence and watermark

IF YOU WISH TO ANIMATE PLEASE READ ON
 
Activate your Mask layer
Duplicate twice so you should now have three layers
Rename them to Ani1, Ani2 and Ani3
 
Hide Ani2 and 3
 
On Ani1 apply some noise at 15
Edit / Copy Merged
 
Open Animation Shop
Edit / Paste as new animation
 
Back in PSP
Hide Ani1 and activate Ani2
Apply noise at 20
Edit / Copy Merged
 
In Animation Shop
Edit / Paste after current frame
 
Back in PSP
Hide Ani2 and activate Ani3
Apply noise at 25
Edit / Copy Merged
 
In Animation Shop
Edit / Paste after current Frame
 
Then save as a GIF or JPG and you're done!
 
Thank you for trying my tutorial
 
::st!na::
 
 
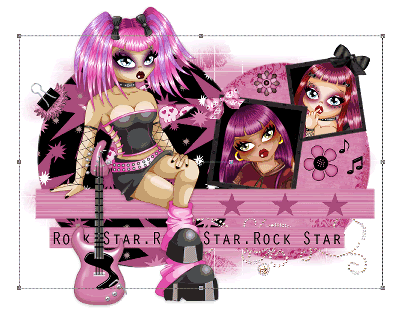
A non-animated version:
 
© Tutorial written by 11th March 2009
All rights reserved