Please email me designed.by.stina@gmail.com with your creations. I'd love to see them.

Friday, November 9, 2012

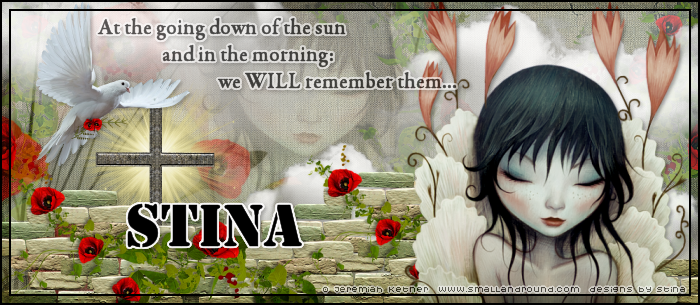
We Will Remember Them

Supplies

Scrap kit - "Poppy Fields" by Tootypup Scraps available from the stores listed on her blog
Tube of choice - I am using an FTU one by Jeremiah Ketner
Don't forget when using a tube to make sure it is SAFE to use AND give proper credit to the artist
Fonts of choice - I am using Garamond Premr Pro Smbd and Stencil
Mask of choice - I am using WSL_Mask362 by Weescotslass
Eye Candy 5 Impact Gradient Glow

Download Supplies here


Open a new 700 x 600 transparent canvas
Flood fill white


Paste TP_ScrollFrame_01 as a new layer
Leave in position, or position to your liking


Paste TP_StoneWall_01 as new layer
Resize by 55% and position towards lower half of canvas


Paste one of the TP_LestWeForget elements (I used 01)
Resize by around 70% and position to the right without covering the poppies and in line with the stone wall at the bottom


Paste TP_Cross_03 as new layer
Resize by around 25% and position BEHIND the last element of the solider's gun and boots etc.


Paste TP_PeaceDove_02 as new layer
Resize by 20%, then Image / Mirror and position to the upper left of the frame


Activate bottom layer

Paste a paper of choice as a new layer
Resize by 70%
Layers / Load Mask / Load Mask from Disk
Choose a mask of your choice
I am using WSL_Mask362

Layers / Merge / Merge Group

Now activate the Frame layer

Paste TP_Cloud_02 as new layer
Position behind the stone wall to your liking
I used the Eraser tool to erase the excess on the bottom left

Now activate your Frame layer again
Paste a tube of your choice as a new layer
I am using one by Jeremiah Ketner
Resize to your liking - I resized by 70%
Position to your liking


To make the tube "blend" more with the colours of the tag, I then did the following:
Duplicate tube layer
Adjust / Hue and Saturation / Colorise
With settings set to ZERO
Then, Adjust / Color / Manual Color Correction with the following settings:


** If you do not have Manual Color Correction in your menu, you need to go to View / Customise / Unused Commands
Then locate Manual Colour Correction in the right window and DRAG it to the menu you want it in
I placed it under Adjust / Color


Now lower the opactity of the colourised layer to around 50%
Apply a drop shadow of choice to your layers
Select a font of your choice and type a phrase or text of choice
I used the closing lines of the "Ode of Remembrance"
Apply a gradient glow if you wish, followed by a slight drop shadow

Add your name and your credits

Merge Visible then Crop to Selection and you're done!

Thank you for trying my tutorial!


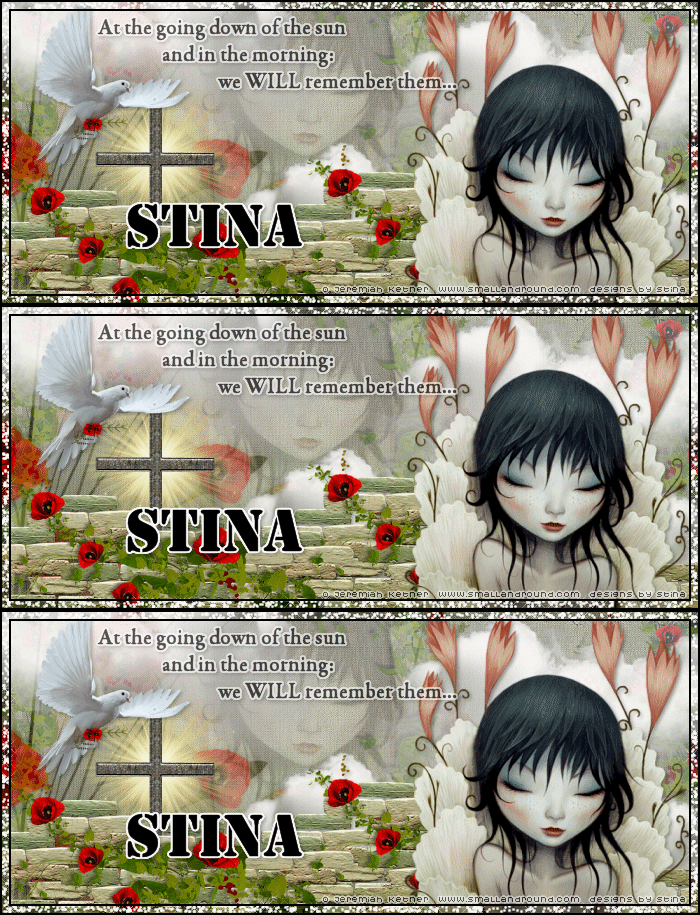
Here is a forum style tag I made using the same elements and style from this tutorial. Both animated and non-animated.
RemembranceFT

RemembranceFT ani


© Tutorial written by Stina on 9th November 2012

Wednesday, July 25, 2012

Go Purple for Animals


I've had some positive feedback and a few comments on my Facebook timeline cover which I then converted into a sig-tag, so I decided to write a tutorial. *s*


Supplies

Tube of choice - I am using two tubed images of my own dogs, Ciara and Dexter
Fonts of choice - I am using Copperplate TMed and BickhamFancy Script
Pawprint made by me, available here
Plugins: Penta.com / Jeans
Xero / Soft Mood (optional)
Eye Candy 5 Impact / Gradient Glow (optional, for text)


Open a transparent canvas 850 x 315
(this is the size of a timeline cover)

In your materials palette choose a colour (I'm using #4e2b69) for the foreground and a darker colour like black for your background

Click on the Foreground to open the Material Properties
Select the Gradient tab

Choose the Foreground-Background which should be preset in your gradients
Angle - 45
Repeats - 4
Style - Linear

Flood fill canvas
Then Adjust / Blur / Gaussian Blur with a Radius of 30.00

With your Selection Tool set to Rectangle and Feather to 0, draw out a long narrow rectangle toward the bottom of your canvas from end to end (left to right)
Don't worry about the position - we can reposition it later

Add a new raster layer
Flood fill white
Selections / Modify / Contract by 1
Then flood fill with black
Deselect

Now select the entire canvas
Selections / Select All
Add a new raster layer
Flood fill black
Selections / Modify / Contract by 9
Fllood fill white
Selections / Modify / Contract by 1
Delete the deselect

You should now have something like this:


Now activate the background layer again
Paste a pawprint as a new layer
Image / rotate by 15.00 to the right
Resize by 45%
Position to the left just above the rectangle

Duplicate then Image / Mirror
Position just to the right of the first pawprint
Layers / Merge / Merge Down

Duplicate four times and position each set evenly spaced along the canvas
Turn visibility off all layers but these five sets of pawprints
Layers / Merge / Merge Visible
Turn visibility back on again

Open your Pawprint and paste as new layer
Image / Rotate by 15.00 to the left
Resize by 45% and position to the left above the first set

Adjust / Brightness and Contrast / Brightness/Contrast with the following settings:
Brightness - 50
Contrast - 11

Duplicate then Image / Mirror and position almost between first two sets of pawprints
Layers / Merge / Merge Down
Duplicate four times and position along the top

The last set does not fit so only the left pawprint will be positioned


Turn off all layers but ALL the pawprints
Layers / Merge / Merge Visible
Lower opacity to 50%
Turn visibility back on again
Still on the pawprint layer,
Layers / Merge / Merge Down

Now apply your Jeans filter
Effects / Plugins / Penta.com / Jeans with the following settings:
Amount - 15
Border Width - 4

Open your tube(s) and paste as a new layer
Resize as needed to your liking and position to the far right
I also applied an optional filter to my tubes as follows:

Duplicate tube and apply Xero / Soft Mood with default settings
Lower opacity to around 55 to 65% - depending on your tube and to your liking
Layers / Merge Down
Repeat for second tube, if using one

Now activate the Rectangle layer

Open your Pawprints and resize by around 35%
Position to the right on the narrow rectangle we drew out
Duplicate, then Image / Mirror
Layers / Merge Down

Now with your block print font (I used Copperplate TMed), type out a few words of your choice
Make sure you type the word as a Vector layer
Position the text to the right then grab the middle left node of the Vector layer and drag in a little to narrow the text slightly
Layers / Convert to Raster Layer

Place your credit in the lower right in a small pixel font
I used a black gradient glow to make it stand out

If you are using this as a Timeline cover, you may save it and you're done!

For a signature tag you may want to resize it down before adding your credits

Choose a nice font for your name
I also added a black gradient glow to mine for effect

Now save as a PNG (better quality), and you're done!

Thank you for trying my tutorial!


© Tutorial written by Stina on 25th July 2012

Friday, March 16, 2012

Spring Dreams

Supplies

Scrap kit of choice - I am using "Beautiful Day" by Seachell Scrapz which is FTU
Tube of choice - I am using Josephine Wall who is FTU
Plugins:
Xero / Porcelain
Gradient Glow (optional)


Open BD_Element25 and duplicate it
Close off your original

Image / Canvas Resize
Placement:
Top - 150
Bottom - 0
Left and Right - 50

Canvas should now be 600 x 650

Paste a paper of your choice as new layer
Resize by 50%
Move to layer beneath Frame

Open your tube of choice
Resize as necessary
(Tube is STILL below the Frame)

Effects / Plugins / Xero / Porcelain with default settings

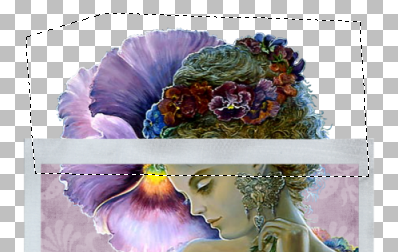
With your Selection Tool set to Point to Point
Make a selection of your Tube around the top of the Frame:

Selections / Promote Selection to Layer
Deselect
Move Selection to layer ABOVE Frame

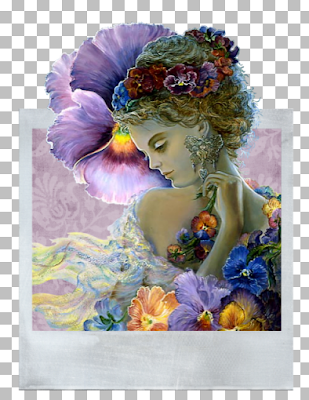
It should now look something like this:

Paste one of Ribbons (Element31 - 34) as new layer
Resize by 65% (you may need to widen your canvas to 550)
Duplicate layer
Set Blend Mode to Soft Light and duplicate again

Choose three flowers and paste them as new layers
Resize first one by 25%
Resize second one by 30%
Resize third one by 35%
Position them to your liking

Paste Elements 22 and 23 as new layers
On first one, Image / Free Rotate to the right
Resize by 15% and position
On second one, Image / Free Rotate to the left
Resize by 15% and position

Now add a new raster layer and move to the bottom
Flood fill with black (for now)

Paste BD_Element27 as new layer
Position behind tag toward the top (or to your liking)
Duplicate, then Image / Flip, then Image / Mirror
Move the duplicate to the layer below

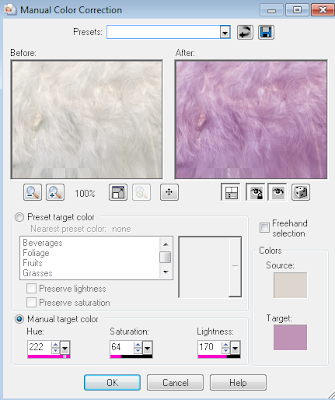
On the first layer, choose your Manual Colour Correction
(you may have to go into View / Customise / Unused Commands, locate Manual Colour Correction and drag it to somewhere on your Toolbar or menu)
Use similar settings to this:
(I used my dropper tool to select the colours - left click for Source and right click for Target)

Apply Manual Colour Correction again WITH SAME SETTINGS!

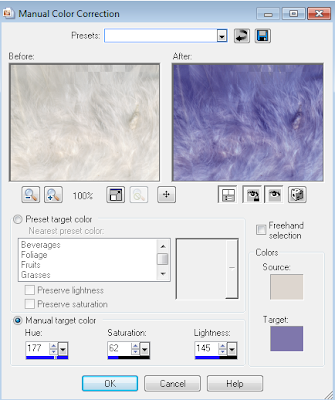
Now on the second (bottom) layer, apply Manual Colour Correction with these or similar settings:

Using your Eraser tool erase any excess protruding at the top

Delete your background layer as you no longer need it

Activate top layer and add your credits and your name
Save as a PNG and you're done!

Thank you for trying my tutorial!

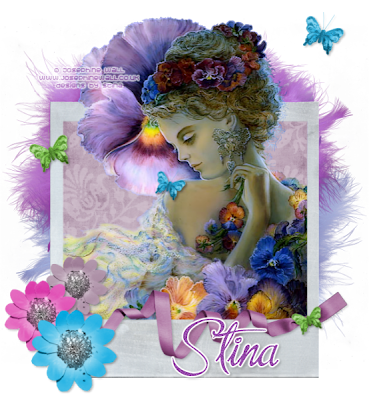
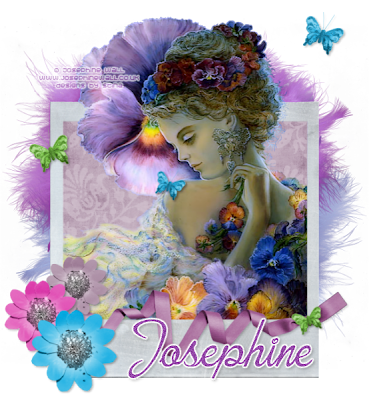
Tag for Josephine Wall:

© Tutorial written by Stina on 16th March 2012

Tuesday, March 6, 2012

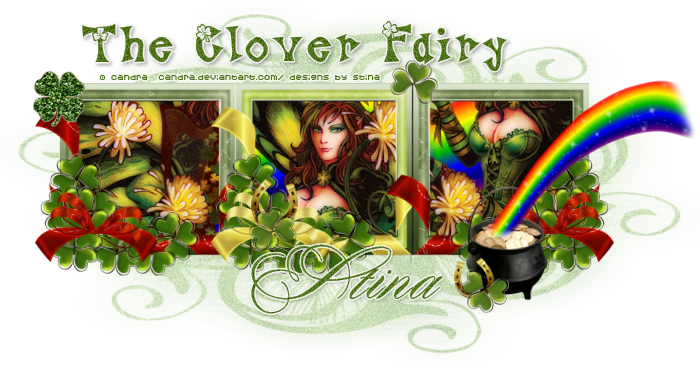
The Clover Fairy

Clover Fairy
Supplies

Scrap kit of choice - I am using my own "The Clover Fairy" available from all my stores listed on my blog
Tube of choice - I am using the FTU artwork of Candra
Fonts of choice - I am using LD Clover and Portfolio
Mask of Choice - I am using WSL_Mask327
Plugins:
Xero Porcelain
Xero Radiance
Alien Skin Eye Candy Impact Gradient Glow


Open a blank transparent canvas
900 x 400

Paste DBS_Frame03 as new layer
Resize by 50%
Leave in centre

Paste DBS_Frame04 as new layer
Resize by 50%
Position to the left of the middle frame
Layers / Arrange / Move Down

Duplicate layer
Then Image / Mirror
Layers / Arrange / Move Up

You should now have something like this:


Activate bottom layer
Paste a Paper of your choice as a new layer

With your Selection Tool set to Rectangle
Draw out a rectangle in the frames

Now Paste your tube of choice in various positions in the three frames to your liking

Merge tube layers into one

Effects / Plugins / Xero / Porcelain
Default Settings

Duplicate layer
Effects / Plugins / Xero / Radiance
Default Settings
Lower opacity to around 40

Image / Canvas Resize
950 x 500
Placement:
Top - 50
Bottom - 50
Left - 0
Right - 50

Activate top layer

Paste DBS_PotOGold as new layer
Resize by 50%
Position to the right

Paste DBS_GlitterClover as new layer
Resize by 30%
Position in upper left or to your liking

Paste DBS_Clover02 as new layer
Resize by 10%
Position to your liking
Duplicate, Mirror and Flip to your liking

Paste DBS_Horseshoe as new layer
Resize and position to your liking

Activate bottom layer
Paste a paper of choice as new layer
Resize by 120%

Load a Mask of your choice
I am using WSL_Mask327
Layers / Merge / Merge Group
Lower opacity to around 35

Resize tag to around 600 pixels

Select a font and colour of your choice
Type out any text and your name
Apply a small Gradient Glow in white and a drop shadow

Add your credits and you're done!

Thanks for trying my tutorial!

© Tutorial written by Stina on 6th March 2012