Supplies
Scrap kit of choice - I am using "Victorian Goth" by Melisa's Scraps which can be purchased from Creative Scraps and Cotton Candy Kreations
Tube of choice - I am using the artwork of Jasmine Becket Griffith which can be purchased from CILM
**PLEASE DO NOT USE HER ARTWORK WITHOUT THE APPROPRIATE LICENCE**
WSL_Mask214 by Chelle available from her blog
Fonts of choice - I am using Blackletter686 BT, LiorahBT and Be Safe
~ Step 1 ~
Open a new 600 x 600 blank canvas flood-filled white
Paste Camo_1 as new layer
Resize by 70%
Resize by 70%
LEAVE IN POSITION
Duplicate
Image / Rotate by 15 to the left
Position to the left
Duplicate
Image / Mirror
Image / Rotate by 15 to the left
Position to the left
Duplicate
Image / Mirror
Layers / Merge / Merge Down
Rename this layer to Small Cameos and the other layer to Cameo
Rename this layer to Small Cameos and the other layer to Cameo
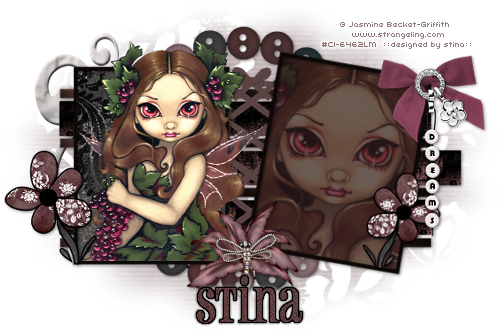
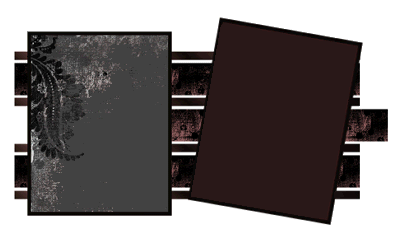
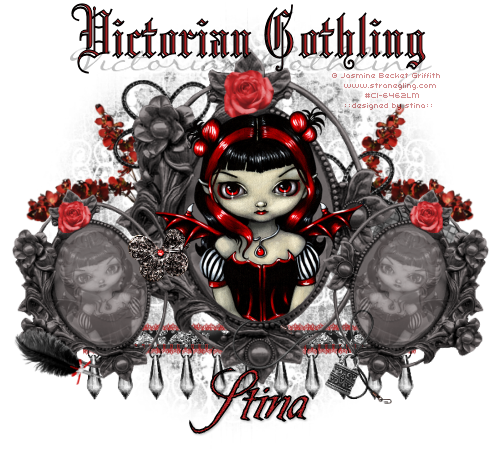
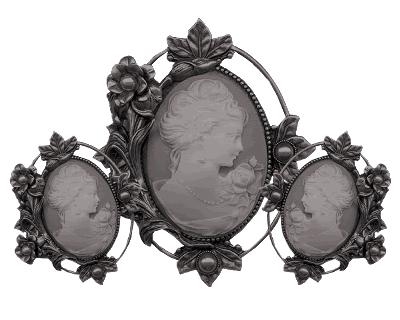
You should now have something like this:
~ Step 2 ~
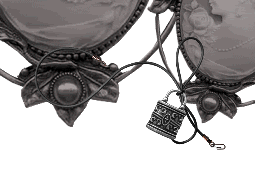
Paste Necklace as new layer
Resize by 40%
Position as if it secured to one of the Cameos
Resize by 40%
Position as if it secured to one of the Cameos
Paste Butterfly as new layer
Resize by 15%
Position between the left and centre Cameos
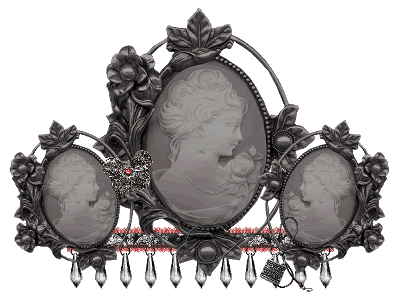
Paste RibbonWCharms as new layer
Resize by 50%
Position along the bottom
Layers / Arrange / Send to Bottom
Resize by 50%
Position along the bottom
Layers / Arrange / Send to Bottom
Paste LaceRibbon as new layer
Resize by 50%
Position along length of the ribbon
Layers / Arrange / Send to Bottom
Resize by 50%
Position along length of the ribbon
Layers / Arrange / Send to Bottom
Paste Pen as new layer
Image / Rotate by 25 to the left
Resize by 20%
Position along the bottom of left Cameo
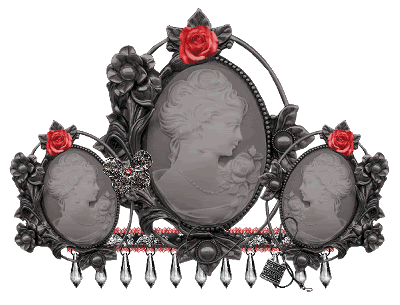
Paste Rose as new layer
Resize by 8%
Position in top centre of small Cameo to the left
Resize by 8%
Position in top centre of small Cameo to the left
Duplicate
Image / Mirror
Layers / Merge / Merge Down
Image / Mirror
Layers / Merge / Merge Down
Paste Rose as new layer again
Resize by 12%
Position in top centre cameo
Resize by 12%
Position in top centre cameo
Paste MetalFlower as new layer
Resize by 30%
Position where you want it to go
Layers / Arrange / Send to Bottom
Resize by 30%
Position where you want it to go
Layers / Arrange / Send to Bottom
Duplicate
Image / Mirror
Place in position on opposite side
Image / Mirror
Place in position on opposite side
Paste Flower as new layer
Resize by 40%
Position to the left between the left and centre Cameos
Layers / Arrange / Send to Bottom
Duplicate
Image / Mirror
Layers / Merge / Merge Down
Resize by 40%
Position to the left between the left and centre Cameos
Layers / Arrange / Send to Bottom
Duplicate
Image / Mirror
Layers / Merge / Merge Down
Activate Background layer
Paste Paper7 as new layer
Resize by 70%
Paste Paper7 as new layer
Resize by 70%
Layers / Load/Save Mask / Load mask from Disk
WSL_Mask214
Fit to Layer CHECKED
OK
Layers / Merge / Merge Group
WSL_Mask214
Fit to Layer CHECKED
OK
Layers / Merge / Merge Group
Crop and resize
~ Step 3 ~
Paste tube as new layer
Resize as necessary
Position in the centre cameo
Resize as necessary
Position in the centre cameo
With your Selection Tool set to Ellipse
From the centre of the Cameo draw out an oval along the edge of inner frame
Activate your tube
With your Eraser Tool the excess from the bottom
Deselect
From the centre of the Cameo draw out an oval along the edge of inner frame
Activate your tube
With your Eraser Tool the excess from the bottom
Deselect
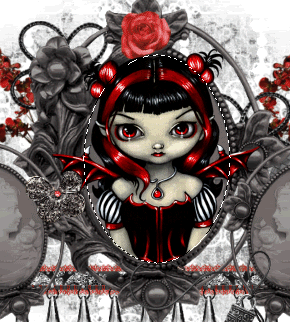
Duplicate
Image / Rotate by 15 to the left
Resize by 55%
Position within the left cameo frame
Set blend mode to Luminance (Legacy)
Duplicate again
Image / Mirror
Image / Rotate by 15 to the left
Resize by 55%
Position within the left cameo frame
Set blend mode to Luminance (Legacy)
Duplicate again
Image / Mirror
Back to your Top Layer
Select your Text Tool
Choose two colours from your tube
Foreground - #000000
Background - #a92124
Choose two colours from your tube
Foreground - #000000
Background - #a92124
Stroke width - 1.0
Select your font of choice - I am using Blackletter686 BT
Type out "Victorian Gothling"
Objects / Align / Horizontal Centre in Canvas
Convert to raster layer
Type out "Victorian Gothling"
Objects / Align / Horizontal Centre in Canvas
Convert to raster layer
Toggle the colours in your Materials Palette and turn the visiblity off the Foreground so that you now have the following:
Foreground - null
Background - #000000
Foreground - null
Background - #000000
Select a script font - I am using LiorahBT
Add the same text as previous
Position slightly lower
Objects / Align / Horizontal Centre in Canvas
Convert to raster layer
Add the same text as previous
Position slightly lower
Objects / Align / Horizontal Centre in Canvas
Convert to raster layer
Layers / Arrange / Move Down
Lower the opacity to 25
Lower the opacity to 25
Select another font of choice - I am using Be Safe
Toggle the colours back to those we used first
Foreground - #000000
Background - #a92124
Toggle the colours back to those we used first
Foreground - #000000
Background - #a92124
Stroke width - 1.5
Type out your name
Objects / Align / Horizontal Centre in Canvas
Convert to raster layer
Add some noise of 15
Apply a drop shadow:
H & V - 1
Opacity - 30
Blur - 3.00
Colour - #000000
Objects / Align / Horizontal Centre in Canvas
Convert to raster layer
Add some noise of 15
Apply a drop shadow:
H & V - 1
Opacity - 30
Blur - 3.00
Colour - #000000
Finally, add your © copyright, licence and watermark
Then save as a GIF or JPG and you're done!
Thank you for trying my tutorial!
::st!na::
© Tutorial written by Stina on 21st March 2009
All rights reserved