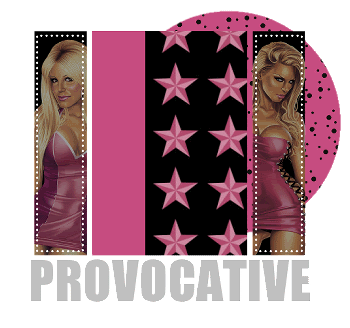
Please email me designed.by.stina@gmail.com with your creations. I'd love to see them.

Showing posts with label Elias Chatzoudis. Show all posts

Wednesday, September 16, 2009

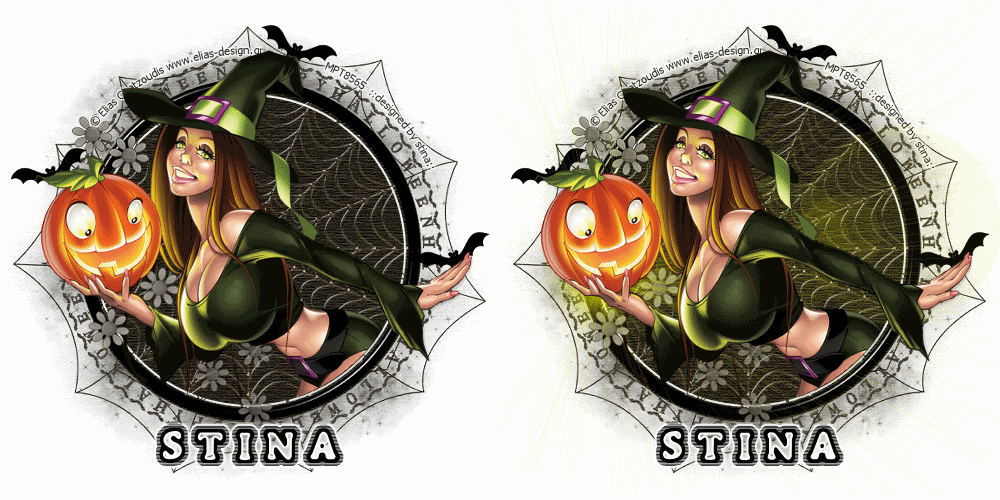
Spooktacular


Supplies

Scrap kit of choice - I am using "Spookylicious" by Tootypup Scraps available from Twilight Scraps
Tube of choice - I am using the artwork of Elias Chatzoudis which is available with a licence from My PSP Tubes
**PLEASE DO NOT USE HIS ARTWORK WITHOUT THE APPROPRIATE LICENCE**
WSL_Mask318 by Chelle available from her blog
vaybs_mask_hw_03 by Vayb available here
Fonts of choice - I am using BoneHymie
Plugins: Eye Candy 4000 > Glass


Let's begin...


Open a new 600 x 600 blank canvas flood-filled white

Paste Paper6 (or one of choice) as new layer
Resize by 75%
Duplicate and hide layer

Activate original paper layer (on the bottom)
Layers > New Mask Layer > From Image
Apply WSL_Mask318
OK
Layers > Merge > Merge Group

Activate top paper layer
Layers > New Mask Layer > From Image
Apply vaybs_mask_hw_03
Invert Mask Data CHECKED
OK
Layers > Merge > Merge Group
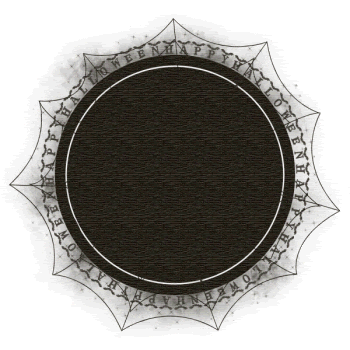


Paste one of the Webs of choice as new layer
Resize by 50%

LEAVE IN POSITION!

Set blend mode to Screen

Select Preset Shape Tool and set to Ellipse
Foreground - #000000
Background - null
Width - 15.00

Hold shift key down and draw out circle the same size as the circle of your Mask
Objects > Align > Centre in Canvas
Convert to raster layer

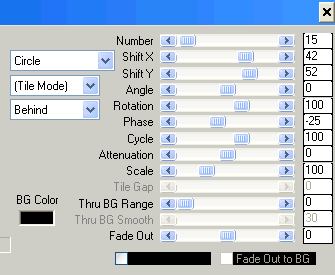
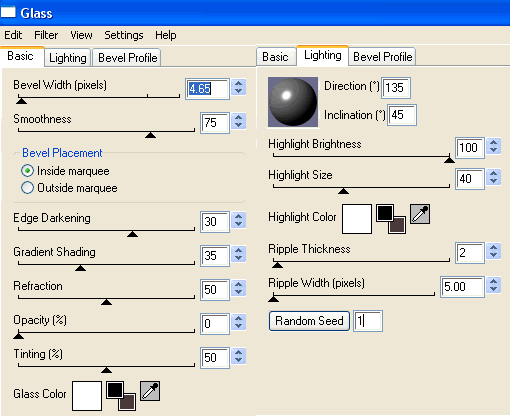
Effects > Plugins > Eye Candy 4000 > Glass with the following settings:


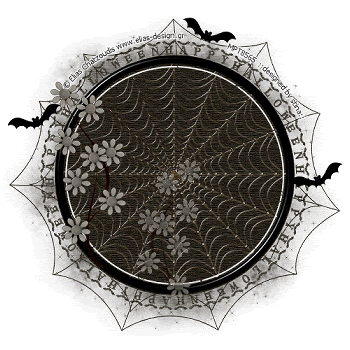
Paste Flowers of various colours as new layers
Resize by 30%
(Rotate one or two by 25 to the left)
Position to liking
It may look hap-hazard now but once you add your Tube it will blend in
Alternatively you can add your Tube first and then paste the flowers, positioning them behind your tube
Erase any excess you wish to your liking

Paste Tube of choice as new layer
Use your Freehand Tool to draw along the inside of your Frame around the bottom excess of Tube
Selections > Invert
Selections > Modify > Feather by
Carefully erase the excess
Deselect

Reposition flowers to fit around Tube then merge Flowers into one layer

Paste Bat as new layer
Image > Rotate by 20 to right
Resize by 10 - 15%%
Duplicate then Image > Mirror
Position to your liking

Crop and resize to liking

Select Text Tool and font of choice
I am using BoneHymie
Text colour black
Objects > Align > Horizontal Centre in Canvas
Convert to raster layer
Apply Gradient Glow and drop shadow of choice

Finally, add your © copyright, licence and watermark, then save as a GIF or JPG and you're done!


** IF YOU WISH TO ANIMATE PLEASE FOLLOW THESE NEXT STEPS **

Turn off the Visiblity of your Tube and name layers


Layers > Merge > Merge Visible
Duplicate
Rename duplicate GLOW

Re-activate layers again

Acticate GLOW layer

Effects > Illumination Effects > Sunburst with the following settings:
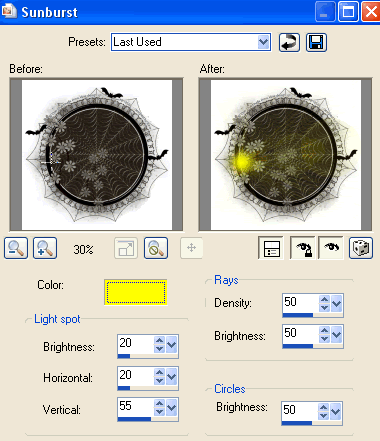


This will depend on your Tube and positioning how you wish your Illumination effect to be

Now to animate - this animation is an easy one

Turn off GLOW layer
Edit > Copy Merged

Open Animation Shop
Edit > Paste as New Animation

Now activate GLOW layer
Edit > Copy Merged

Open Animation Shop
Edit > Paste as New Animation

Select all and change Frame Properties to 50
Now save as a GIF and you're done!

Thanks for trying my tutorial!

::st!na::


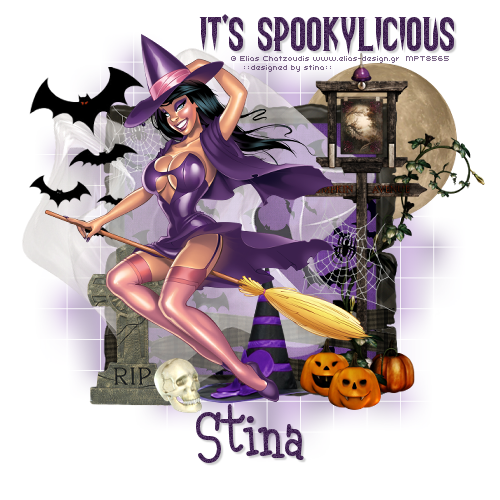
Here is a non-animated version:
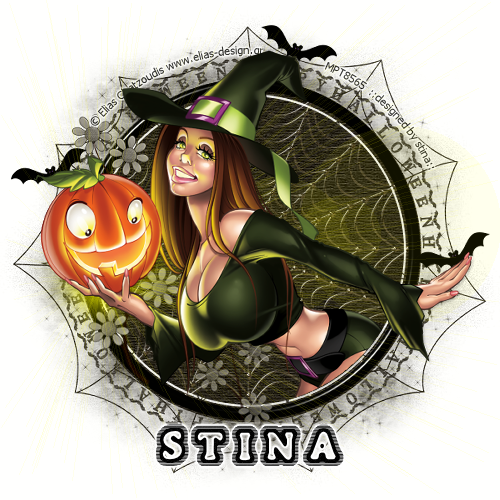


© Tutorial written by Stina on 16th September 2009
All rights reserved

Saturday, September 12, 2009

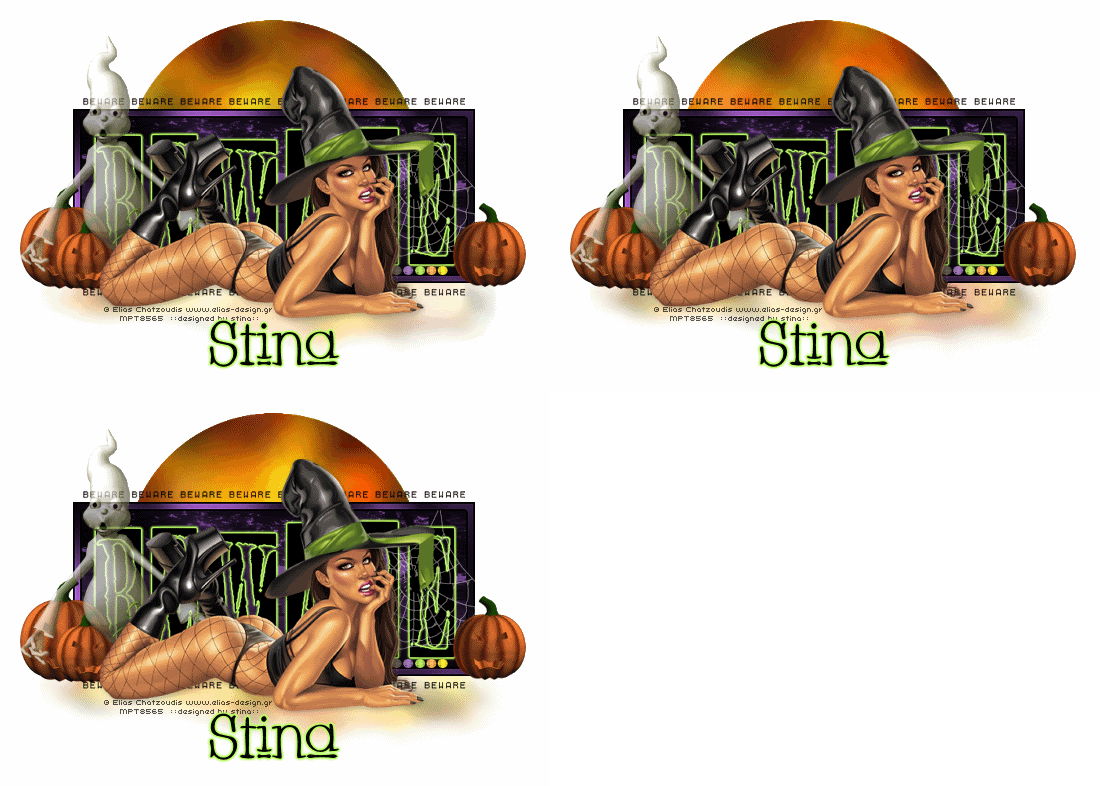
Beware!


Supplies

Scrap kit of choice - I am using "Spookylicious" by Dana's Creative Studio available from Twilight Scraps
Tube of choice - I am using the artwork of Elias Chatzoudis available with a licence from My PSP Tubes
**PLEASE DO NOT USE HIS ARTWORK WITHOUT THE APPROPRIATE LICENCE**
Template 104 by Beth available from her blog
Fonts of choice - I am using Whackadoo Upper
Plugins: Greg's Factory Output II > Pool Shadow
Eye Candy 4000 > Gradient Glow (optional) and HSB Noise


Let's begin...


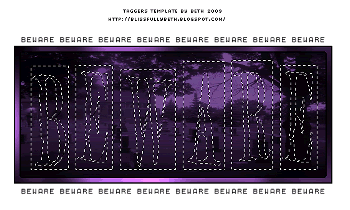
Open Template 104 by Beth
Shift D to duplicate and close off original

Image > Canvas Resize 700 x 500 (centred)
Flood fill excess background white

Activate LG BLACK RECT and select with Magic Wand
Paste Paper of choice INTO selection
Deselect

Select LG ORANGE RECT FRAME
Selections > Modify > Expand by 1
Flood fill with Black

Selections > Modify > Contract by 3
Flood fill with #462856

KEEP SELECTED!!

Effects > Plugins > Greg's Factory Output II > Pool Shadow with default settings

STILL SELECTED!!

Image > Flip
Repeat the Pool Shadow twice
Deselect

Activate LG BEWARE WORD ART
Select entire area with Magic Wand
Press delete
Selections > Modify > Inside/Outside Feather with the following settingss:
Inside - checked
Feather - 1.00


Flood fill entire area Black
Deselect

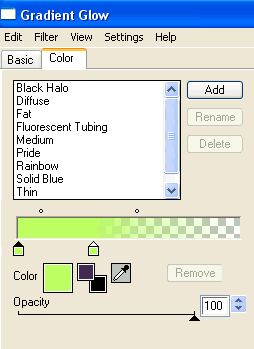
Effects > Plugins > Eye Candy 4000 > Gradient Glow with the following settings:


Glow width - 4.00
Colour - #b9ff63

Paste BeadRibbon as new layer
Resize by 55%
Position directly below the word BEWARE but above Frame

Paste SpiderWeb as new layer
Resize by 30%
Position over word art to liking

Set blend mode to Screen and lower opacity to 55

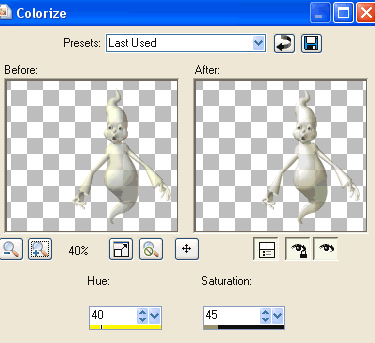
Paste Ghost as new layer
Resize by 60%
Position to your liking

Adjust > Hue & Saturation > Colourise with the following settings:


Paste Pumpkin as new layer
Resize by 45%
Position to the lower left
Duplicate, then resize by 70%
Position alongside first pumpkin

Duplicate Pumpkin1 again
Resize by 80%
Position to the lower right below Ghost

Paste Moon01 as new layer
Layers > Arrange > Send to Bottom

LEAVE IN POSITION!!

Paste Moon02 as new layer
It should fall directly on top of Moon01

Set blend mode to Soft Light
Layers > Merge > Merge Down

Set your Eraser Tool to:
Size - 100
Hardness - 10

Erase the bottom of cloud where it darkened when merging the two layers

Paste Tube of choice as new layer
Resize as necessary and position to liking

Crop and resize tag

Select your Text Tool and font of choice
I am using Whackadoo Upper
Text colour is Black

Type out your name
Objects > Align > Horizontal Centre in Canvas
Convert to raster layer
Add the same Gradient Glow as above and drop shadow of choice

Finally, add your © copyright, licence and watermark, then save as a GIF or JPG and you're done!


** IF YOU WISH TO ANIMATE PLEASE FOLLOW THESE NEXT STEPS **

Activate your Moon layer
Duplicate twice and rename Moon1, Moon2 and Moon3

Activate Moon1
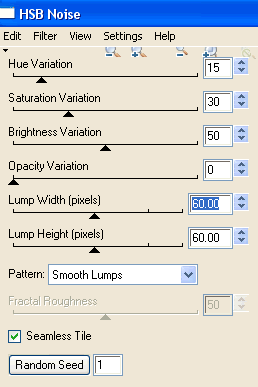
Effects > Plugins > Eye Candy 4000 > HSB Noise with the following settings:


Hide Moon1 and activate Moon2
Repeat Noise, adjusting Random Seed

Hide Moon2 and activate Moon3
Repeat Noise once again, adjusting the Random Seed

Now to animate!

Activate Moon1 and hide Moon2 and Moon3
Edit > Copy Merged

Open Animation Shop
Edit > Paste as New Animation

Back to PSP
Hide Moon1 and activate Moon2
Edit > Copy Merged

In Animation Shop
Edit > Paste After Current Frame

Back to PSP
Hide Moon2 and activate Moon3
Edit > Copy Merged

In Animation Shop
Edit > Paste After Current Frame

Select all and change Frame Properties to 15
Now save as a GIF and you're done!

Thanks for trying my tutorial!

::st!na::


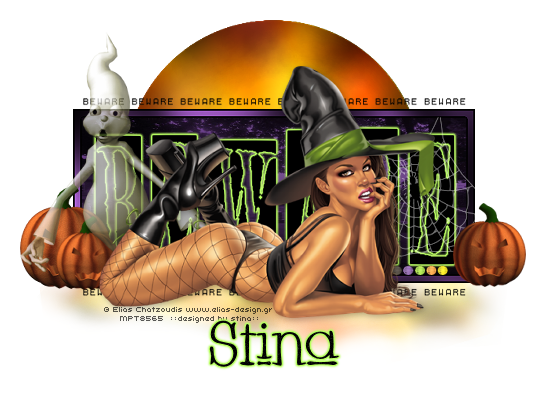
Here is a non-animated version:


© Tutorial written by Stina on 12th September 2009
All rights reserved
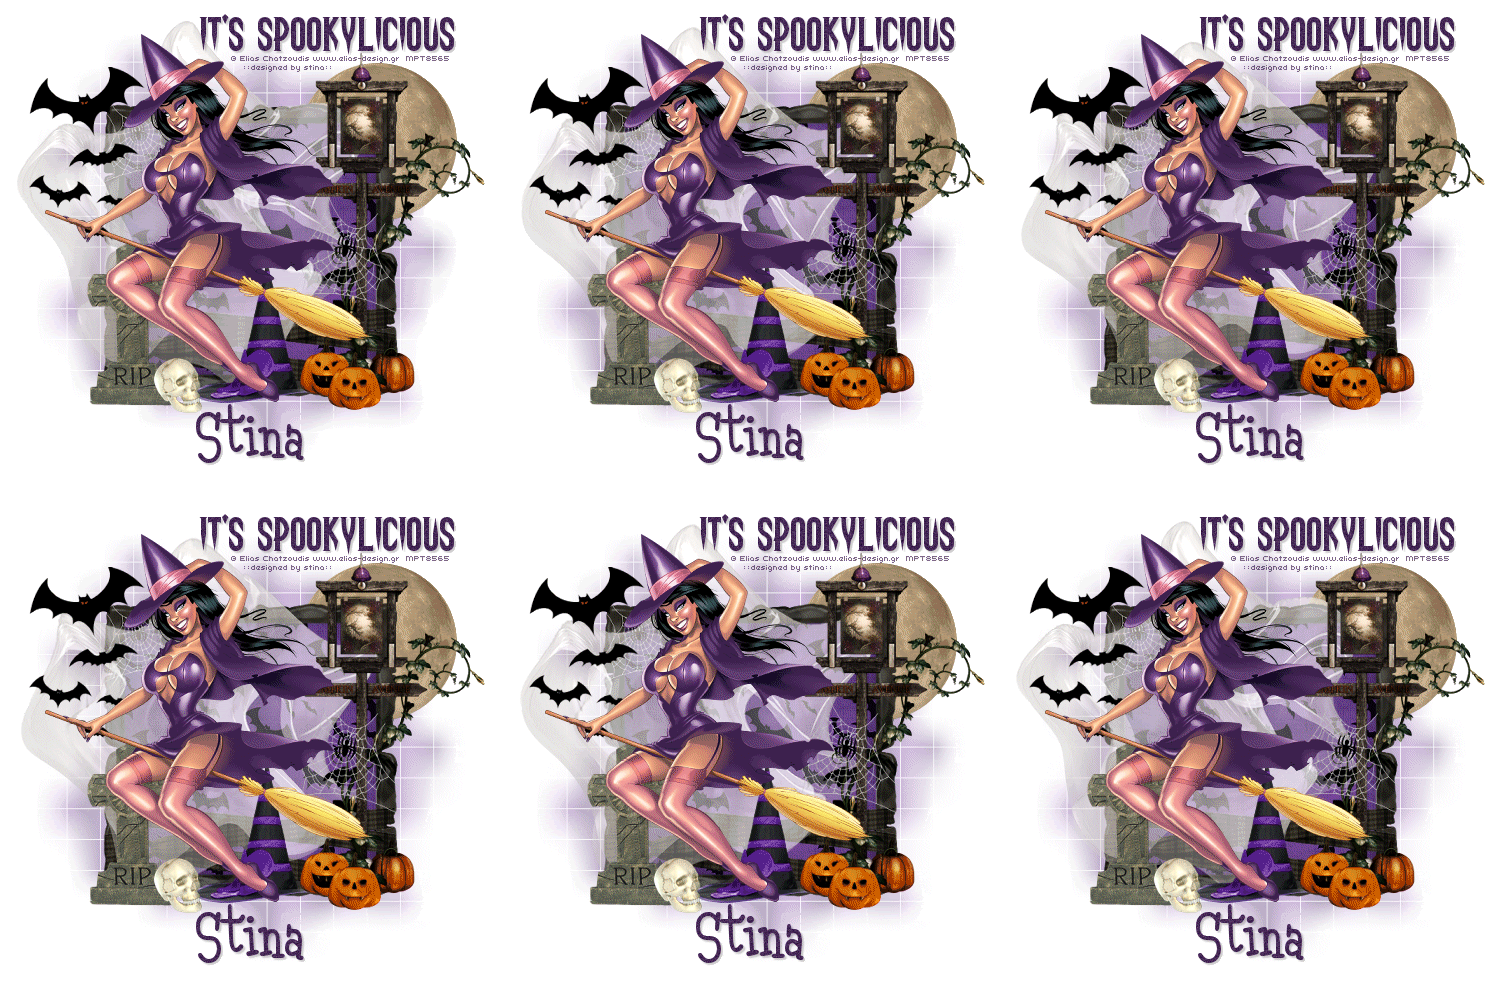
It's Spookylicious!


Supplies

Scrap kit of choice - I am using "Spookylicious" by Creative Intentionz' available from Twilight Scraps
Tube of choice - I am using the artwork of Elias Chatzoudis available with a licence from My PSP Tubes
**PLEASE DO NOT USE HIS ARTWORK WITHOUT THE APPROPRIATE LICENCE**
WSL_Mask84 by Chelle available from her blog
Fonts of choice - I am using Haunting Attraction and Malihini Tahitian BTN Cond
Plugins: Adjust > Variations


Let's begin...


Open a new 600 x 600 blank transparent canvas

Paste Frame of choice as new layer
Resize by 80%

Using your Selection Tool carefully make a selection around the inside of your Frame


Add a new raster layer
Layers > Arrange > Move Down
Paste Paper of choice INTO selection
Deselect

Activate top layer

Paste Sign as new layer
Resize by 55%
Position to the left

Paste SpiderWeb as new layer
Image > Mirror
Resize by 30%
Position over sign to liking

Paste Pumpkin1 and Pumpkin2 as new layers
Resize each by 15%
Position at the base of Sign

Paste a GraveStone as new layer
Resize by 35%
Position to the lower left

Paste Skull as new layer
Resize by 25%
Position at the base of GraveStone

Paste WitchesHat1 as new layer
Resize by 40%
Position BEHIND Skull and Pumpkin layers but ABOVE the SpiderWeb layer

Duplicate
Then select the Purple areas of the hat with your Magic Wand


Effects > Plugins > Adjust > Variations
Click on "More Magenta" (if using the Purple Hat)
OK

Lower opacity of layer to 70
Layers > Merge > Merge Down

Paste Bats as new layer
Resize by 70%
Position to upper left

Paste FullMoon as new layer
Resize by 50%
Position in upper right
Layers > Arrange > Send to Bottom


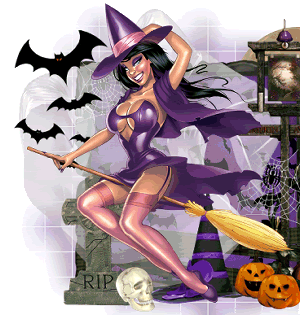
Paste Tube as new layer
Resize as necessary
Position to liking

Paste Ghost as new layer
Resize by 60%
Position to the upper left BEHIND Tube, Bats and GraveStone

Adjust > Brightness & Contrast > Brightness/Contrast with the following:
Brightness - 50
Contrast - 0


Paste Paper of choice as new layer
Layers > Arrange > send to Bottom

Adjust > Blur > Gaussian Blur with a radius of 10.00

Layers > New Mask Layer > From Image
Apply WSL_Mask84
OK
Layers > Merge > Merge Group
Lower opacity to 40

Crop and resize to liking

Select your Text Tool and font of choice
I am using Haunting Attraction
Text colour is #462856
Type out your text of choice position to liking
Convert to raster layer
Apply any effect and drop shadow of choice

Select another font of choice
I am using Malihini Tahitian BTN Cond
Same text colour

Type out your name
Objects > Align > Horizontal Centre in Canvas
Convert to raster layer
Add some noise and drop shadow of choice

Finally, add your © copyright, licence and watermark, then save as a GIF or JPG and you're done!


** IF YOU WISH TO ANIMATE PLEASE FOLLOW THESE NEXT STEPS **

Activate your Ghost layer
Duplicate five times and rename Ghost1 through to Ghost6

Activate Ghost1
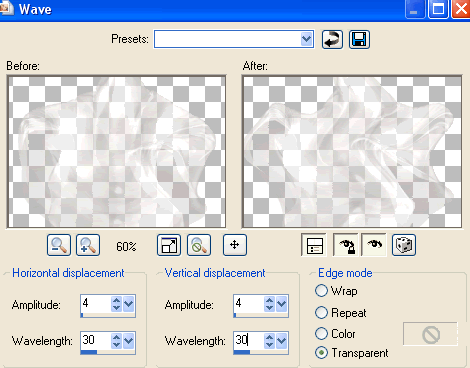
Effects > Distortion Effects > Wave with the following settings:


Hide Ghost1 and activate Ghost2
Repeat Wave, adjusting the Wavelength to 32

Hide Ghost2 and activate Ghost3
Repeat Wave once again, adjusting the Wavelength to 34

Repeat Wave effect up to Ghost6 adjust wavelength by 2 each time

Now to animate!

Activate Ghost1 and hide Ghost2 and Ghost3
Edit > Copy Merged

Open Animation Shop
Edit > Paste as New Animation

Back to PSP
Hide Ghost1 and activate Ghost2
Edit > Copy Merged

In Animation Shop
Edit > Paste After Current Frame

Back to PSP
Hide Ghost2 and activate Ghost3
Edit > Copy Merged

In Animation Shop
Edit > Paste After Current Frame

Back to PSP
Hide Ghost3 and activate Ghost4
Edit > Copy Merged

In Animation Shop
Edit > Paste After Current Frame

Back to PSP
Hide Ghost4 and activate Ghost5
Edit > Copy Merged

In Animation Shop
Edit > Paste After Current Frame

Back to PSP
Hide Ghost5 and activate Ghost6
Edit > Copy Merged

In Animation Shop
Edit > Paste After Current Frame

Select all and paste Frames as new animation
Select all again, then Animation > Reverse Frames
Select all, copy, then activate last Frame on original animation and paste AFTER current frame

You should now have 12 Frames

Select all and change Frame Properties to 20
Now save as a GIF and you're done!

Thanks for trying my tutorial!

::st!na::


Here is a non-animated version:


© Tutorial written by Stina on 12th September 2009
All rights reserved
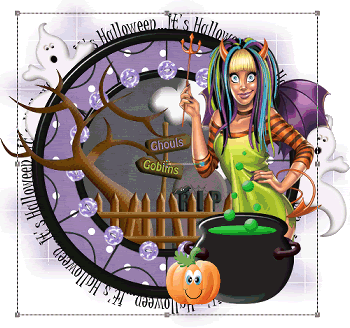
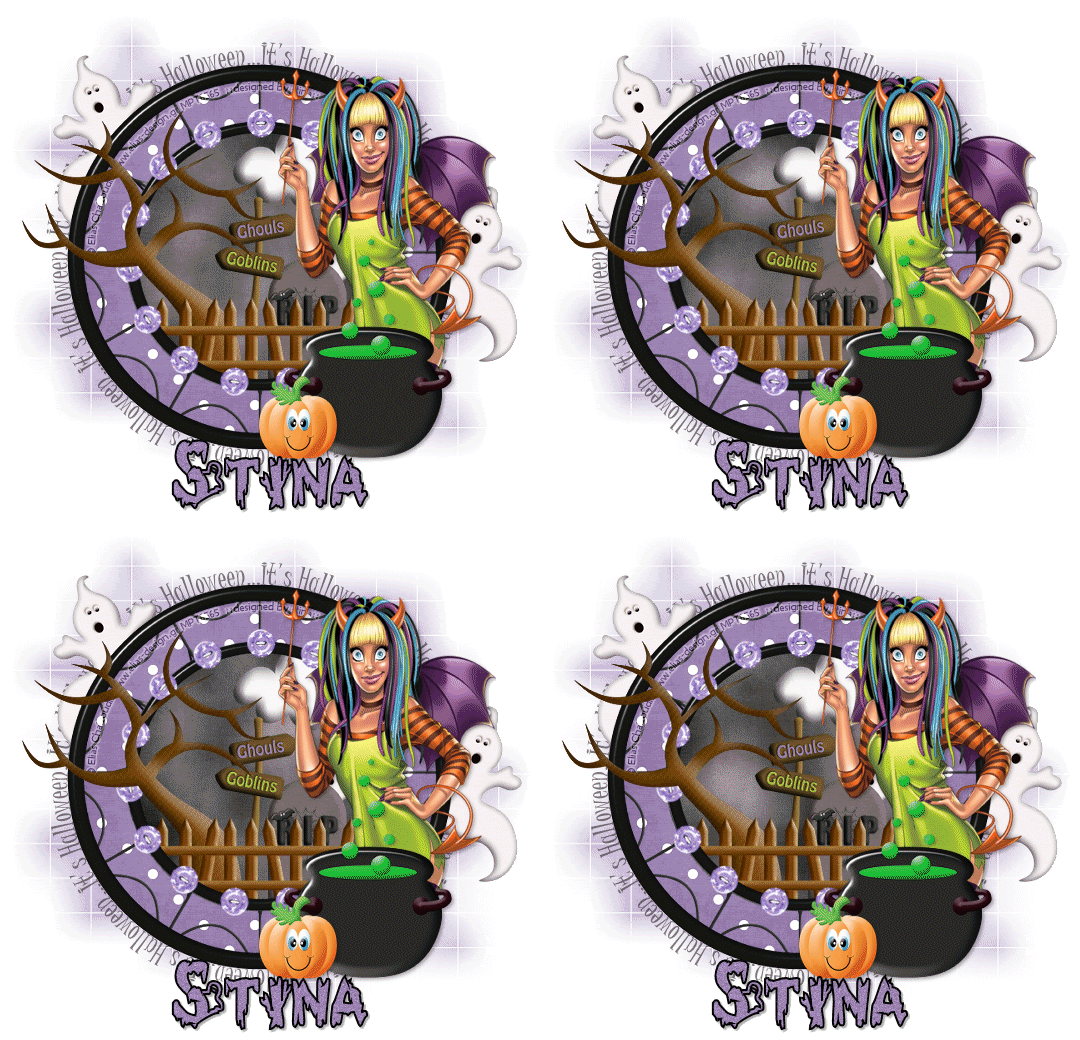
It's Halloween


Supplies

Scrap kit of choice - I am using "Eek" by Kristi Westling available from The Scrapping Divaz Designz and Sunshine Studio Scraps
Tube of choice - I am using the artwork of Elias Chatzoudis available with a licence from My PSP Tubes
**PLEASE DO NOT USE HIS ARTWORK WITHOUT THE APPROPRIATE LICENCE**
WSL_Mask84 by Chelle available from her blog
Fonts of choice - I am using Juice ITC and AnnieSpooked
Plugins: Eye Candy 4000 > Glass and HSB Noise
Mura Meister > Copies


Let's begin...


Open a new 750 x 600 blank transparent canvas

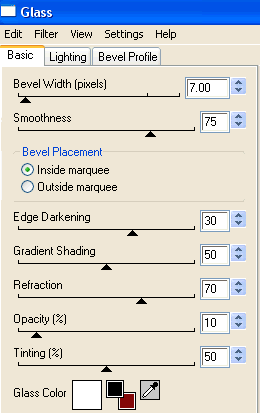
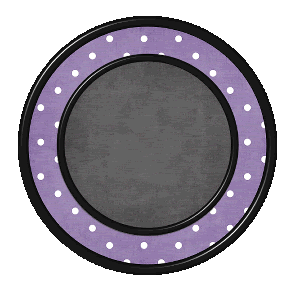
Select your Preset Shape Tool and set to Ellipse
Foreground - #000000
Background - null
Width - 20.00

Hold your shift key and draw out a circle
Objects > Align > Centre in Canvas
Convert to raster layer

Effects > Plugins > Eye Candy 4000 > Glass with the following settings:


Select inside Frame with Magic Wand
Selections > Modify > Expand by 10
Add new raster layer
Paste Paper of choice INTO selection
Layers > Arrange > Move Down

KEEP SELECTED!!

Selections > Modify > Contract by 60
Selections > Modify > Feather by 2
Add a new raster layer
Paste another Paper of choice INTO selections
Deselect

Duplicate Frame and resize by 70%
It should now frame inner layer


Paste a Button of choice as new layer
Resize by 70%

LEAVE IN POSITION!!

Effects > Plugins > Mura Meister > Copies with the following settings:


Paste Fence as new layer
Resize by 50%
Place below small Frame layer
Select outside Frame with Magic Wand
Selections > Modify > Expand by 10
Activate Fence then delete

KEEP SELECTED!!

Paste Cloud as new layer
Resize by 40%
Position in the upper area to liking
With the outside still selected, press delete
Deselect

Paste Tree as new layer
Resize by 50%
Position to the left
Duplicate then
Layers > Arrange > Bring to Top

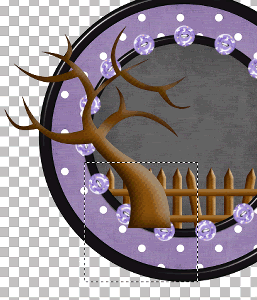
Make a selection around the bottom half of Tree
Delete, then deselect


Paste a Tombstone as new layer
Resize by 30% and position behind fence
Erase any excess at the bottom

Paste Sign as new layer
Resize by 25%
Position between Tree and Tombstone behind fence

Paste Cauldron as new layer
Resize by 50%
Position to the lower left or right (to your liking)

Paste Pumpkin as new layer
Resize by 30%
Position beside Cauldron

Paste Tube of choice as new layer
Resize as necessary and position to liking

Paste Ghost as new layer
Image > Rotate by 20 to the left
Resize by 30%
Layers > Arrange > Send to Bottom
Position in upper left protruding from behind Frame
Duplicate, then Image > Mirror
Position on opposite side to liking

Crop and resize to liking

Paste Paper as new layer
Layers > Arrange > send to Bottom

Layers > New Mask Layer > From Image
Apply WSL_Mask84
OK
Layers > Merge > Merge Group
Lower opacity to 50

Select your Preset Shape Tool and set to Ellipse
Foreground - #000000
Background - nulle
Width - 2.00

Hold down shift key and draw out circle around your Frame
Objects > Align > Centre in Canvas
Use nodes to make an even symmetrical circle around Frame

Select your Text Tool and font of choice
I am using JuiceITC
Text colour is Black
Type out your text of choice on the curve
Position to liking


Open Layer Palette and Vector Layer
Close off ellipse, then convert to raster layer
Apply any effect and drop shadow of choice
Lower opacity to 55

Select another font of choice
I am using AnnieSpooked
Foreground - #000000
Background - #9d86b4
Stroke width - 2.00

Type out your name
Objects > Align > Horizontal Centre in Canvas
Convert to raster layer
Add some noise and drop shadow of choice

Finally, add your © copyright, licence and watermark, then save as a GIF or JPG and you're done!


** IF YOU WISH TO ANIMATE PLEASE FOLLOW THESE NEXT STEPS **

Activate your Paper Background layer of your small Frame
Duplicate four times and rename Fog Background, Fog1, Fog2 and Fog3

Activate Light1
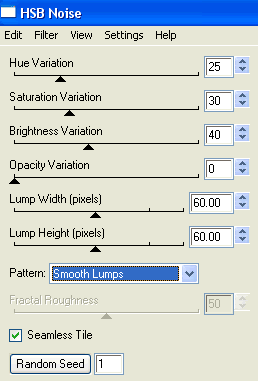
Effects > Plugins > Eye Candy 4000 > HSB Noise with the following settings:


Hide Fog1 and activate Fog2
Repeat Noise, adjusting the Random Seed

Hide Fog2 and activate Fog3
Repeat Noise once again, adjusting the Random Seed

Lower the opacity of Fog1, Fog2 and Fog3 to around 75

Now to animate!

Activate Fog1 and hide Fog2 and Fog3
Edit > Copy Merged

Open Animation Shop
Edit > Paste as New Animation

Back to PSP
Hide Fog1 and activate Fog2
Edit > Copy Merged

In Animation Shop
Edit > Paste After Current Frame

Back to PSP
Hide Fog2 and activate Fog3
Edit > Copy Merged

In Animation Shop
Edit > Paste After Current Frame

Select all and change Frame Properties to 30
Now save as a GIF and you're done!

Thanks for trying my tutorial!

::st!na::


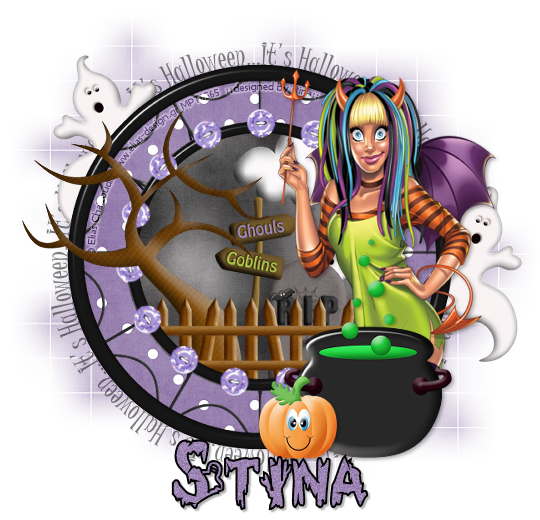
Here is a non-animated version:


© Tutorial written by Stina on 11th September 2009
All rights reserved
Saturday, August 29, 2009

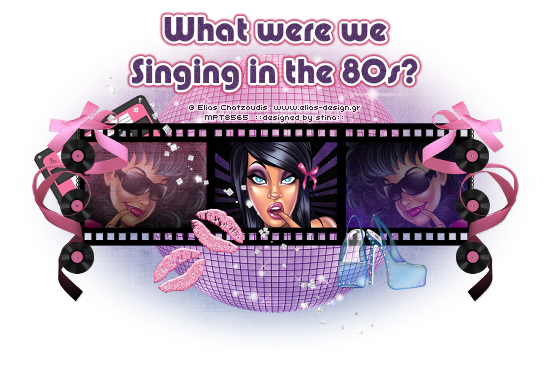
Singing in the 80s


Supplies

Scrap kit of choice - I am using "80's Glam Rock" by Kristi Westling available from The Scrapping Divaz Designz and Sunshine Studio Scraps
Tubes of choice - I am using the lovely artwork of Elias Chatzoudis available with a licence from My PSP Tubes
**PLEASE DO NOT USE HIS ARTWORK WITHOUT THE APPROPRIATE LICENCE**
WSL_Mask41 by Chelle available from her blog
Chain made my Tootypup available here (supplied with permission)
Fonts of choice - I am using Pump Demi Bold LET and Quark Neon
Plugins: Eye Candy 4000 > Gradient Glow
Xenofex 2 > Constellation


Let's begin...


Open a new 750 x 500 blank canvas flood-filled white

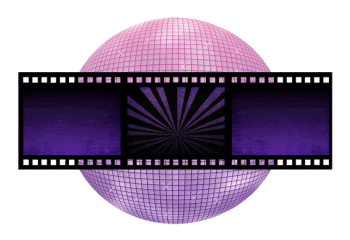
Paste Disco Ball as new layer
Resize by 60%

LEAVE IN POSITION!!

Paste FilmStrip Frame as new layer
Resize by 80%
Select inside first Frame
Selections > Modify > Expand by 5
Add new raster layer
Paste paper of choice INTO selection
Layers > Arrange > Move Down
Deselect

Select middle Frame
Selections > Modify > Expand by 5
Activate layer you pasted your paper on
Paste another paper of choice into selection
Deselect

Select third Frame
Repeat above step with another paper of choice


Select first Frame again
Selections > Modify > Expand by 5
Paste Tube of choice as new layer
Resize to liking
Selections > Invert
Delete then deselect
Duplicate then Image > Mirror

Select middle Frame again
Selections > Modify > Expand by 5
Paste another Tube of choice as new layer
Resize to liking
Selections > Invert
Delete then deselect

Paste Chain as new layer
Image > Rotate by 90
Resize by 25%
Duplicate and position to make one long chain
Layers > Merge > Merge Down
Positon to the right of Frame so the chain protrudes slightly
Duplicate, then Image > Mirror

Paste Record as new layer
Resize by 8%
Position on the end of the chain
Duplicate twice and space them evenly along chain
Layers > Merge > Merge Down twice
Duplicate, then Image > Mirror

Paste Ribbon2 as new layer
Image > Flip
Resize by 25%
Position to the right
Duplicate, then Image Mirror


On the Records layer select around them with your Magic Wand
Selections > Invert
Selections > Modify > Inside/Outside Feather
Inside by 5.00
Erase the ribbon from the inside of the top and bottom records
Deselect

Paste Lips as new layer
Image > Rotate by 30 to the right
Resize by 15%
Position to the left of the center on Film Strip
Duplicate and Image > Mirror
Position slightly down from the first

Paste Shoes as new layer
Resize by 25%
Position to liking
Duplicate and lower opacity to 50
Layers > Merge > Merge Down

Paste Sparkles as new layer
Resize by 30%
Position to liking

Paste Cassette as new layer
Image > Rotate by 30 to the left
Resize by 15%
Position behind FilmStrip to the upper left

Paste Paper of choice as new layer
Layers > Arrange > Send to Bottom

Layers > New Mask Layer > From Image
Apply WSL_Mask41
OK
Layers > Merge > Merg Group

Crop and resize tag

Select your Text Tool and font of choice
I am using Pump Demi Bold LET
Colour is #58386a or to match your tag

Type out text of choice
Objects > Align > Horiztonal Centre in Canvas
Convert to raster layer

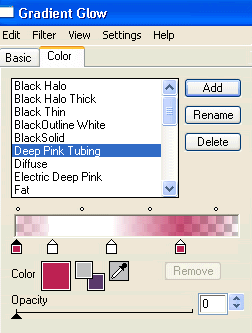
Effects > Plugins > Eye Candy > Gradient Glow with Deep Pink Tubing


Select another font of choice
I am using Quark Neon
Same text colour

Type out your name
Objects > Align > Horiztonal Centre in Canvas
Convert to raster layer
Apply any same Gradient Glow as above but increasing the Glow Width slightly

Finally, add your © copyright, licence and watermark, then save as a GIF or JPG and you're done!


** IF YOU WISH TO ANIMATE PLEASE FOLLOW THESE NEXT STEPS **

Firstly, lower the opacity of each of your Tube layers to 40
Rename them Left, Middle and Right

Activate your Disco Ball layer
Duplicate five times and rename Sparkle1 through to Sparkle6

Activate Sparkle1 and hide the rest
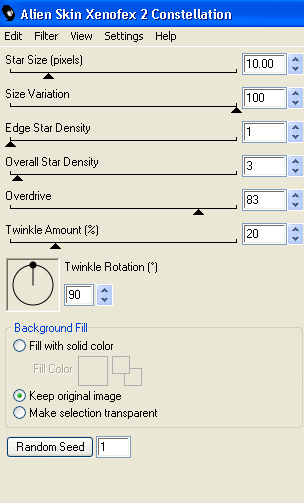
Effects > Plugins > Xenofex 2 > Constellation with the following settings:


Hide Sparkle1 and activate Sparkle2
Repeat Constellation again adjusting the Random Seed

Hide Sparkle2 and activate Sparkle3
Repeat Constellation again, adjusting the Random Seed

Repeat steps through to Sparkle6

Now to animate!

Activate Sparkle1
Activate Left Tube and raise opacity to 100
Edit > Copy Merged

Open Animation Shop
Edit > Paste as New Animation

Back to PSP
Hide Sparkle1 and activate Sparkle2
DO NOt ADJUST TUBE YET!
Edit > Copy Merged

In Animation Shop
Edit > Paste after Current Frame

Back to PSP
Hide Sparkle2 and activate Sparkle3
Edit > Copy Merged

In Animation Shop
Edit > Paste after Current Frame

Back to PSP
Activate Sparkle4
Reduce Left Tube back to 40 and raise the opacity of the Middle Tube to 100
Edit > Copy Merged

In Animation Shop
Edit > Paste after Current Frame

Back to PSP
Hide Sparkle4 and activate Sparkle5
Edit > Copy Merged

In Animation Shop
Edit > Paste after Current Frame

Back to PSP
Hide Sparkle5 and activate Sparkle6
Edit > Copy Merged

In Animation Shop
Edit > Paste after Current Frame

Back to PSP and Sparkle1
Reduce Middle Tube Tube back to 40 and raise the opacity of the Right Tube to 100
Edit > Copy Merged

In Animation Shop
Edit > Paste after Current Frame

Back to PSP
Hide Sparkle1 and activate Sparkle2
Edit > Copy Merged

In Animation Shop
Edit > Paste after Current Frame

Back to PSP
Hide Sparkle2 and activate Sparkle3
Edit > Copy Merged

Back to PSP
Activate Sparkle4
Reduce Left Tube back to 40 and raise the opacity of the Middle Tube to 100
Edit > Copy Merged

In Animation Shop
Edit > Paste after Current Frame

Back to PSP
Hide Sparkle4 and activate Sparkle5
Edit > Copy Merged

In Animation Shop
Edit > Paste after Current Frame

Back to PSP
Hide Sparkle5 and activate Sparkle6
Edit > Copy Merged

In Animation Shop
Edit > Paste after Current Frame

You should now have 12 Frames
Select All and change Frame Properties t0 15
Now save as a GIF and you're done!

Thanks for trying my tutorial!

::st!na::


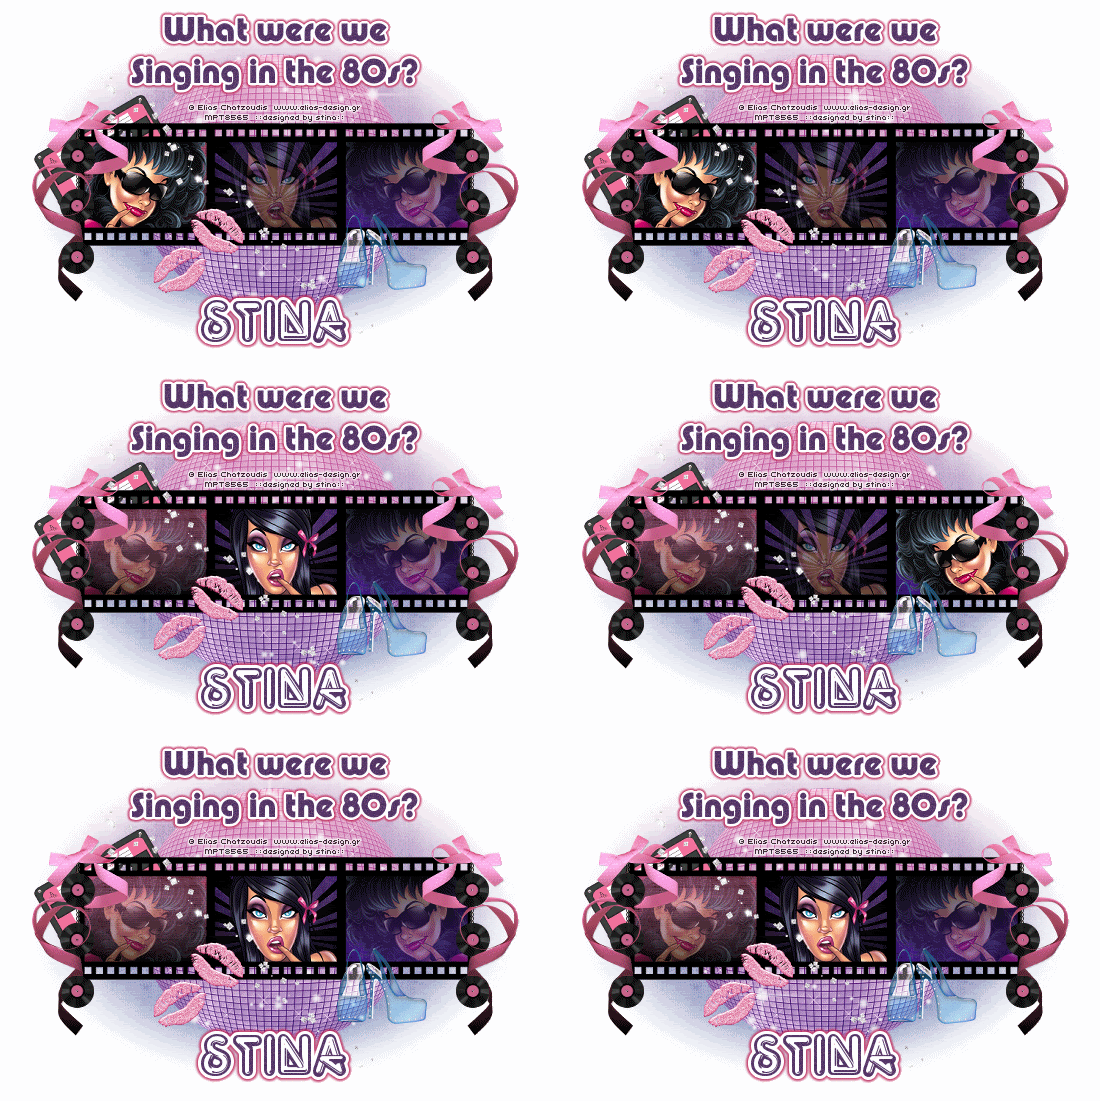
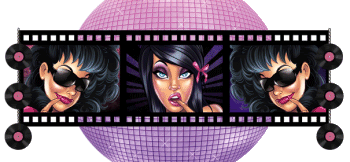
Here is a non-animated version:


© Tutorial written by Stina on 29th August 2009
All rights reserved
Wednesday, August 5, 2009

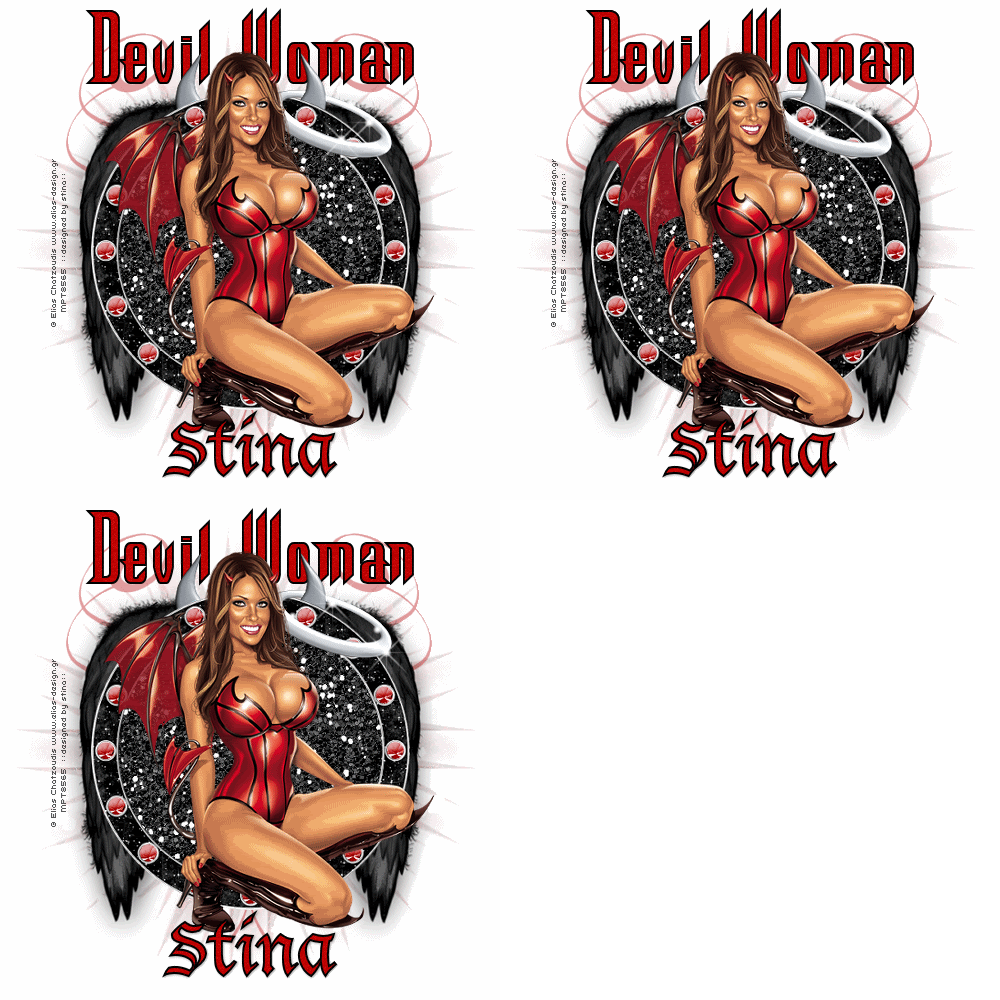
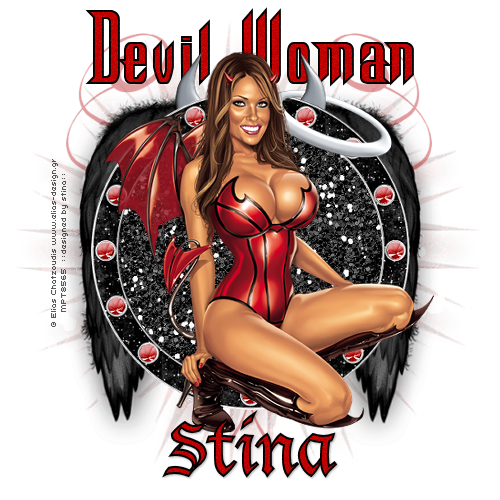
Devil Woman


Supplies

Scrap kit of choice - I am using "Good vs Evil" by Alyssa's Scraps & Such available from Paradise 4 Scrappers, Twilight Scraps and Dazzling Scraps
Tube of choice - I am using the lovely artwork of Elias Chatzoudis available with a licence from My PSP Tubes
WSL_Mask26 by Chelle available from her blog
Fonts of choice - I am using Warlock and Lucida Blackletter
Plugin: Xenofex 2 Constellation


Let's begin...

Open a new 600 x 600 blank canvas flood-filled white

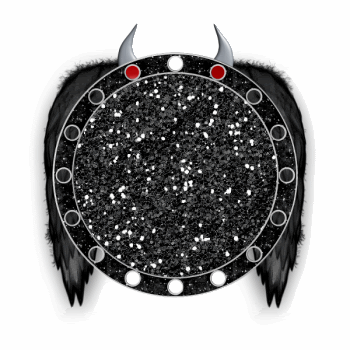
Paste Frame1 as new layer
Resize by 60%

Select inside frame with Magic Wand
Selections > Modify > Expand by 5
Add new raster layer
Layers > Arrange > Move Down
Paste Glitter4 INTO selection
Deselect

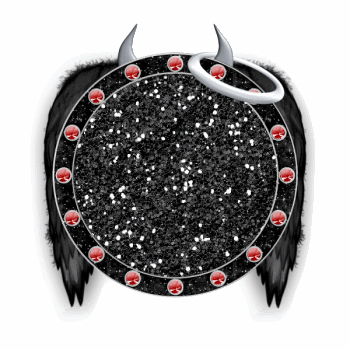
Paste BlackWings as new layer
Layers > Arrange > Move Down


Paste Halo as new layer
Image > Rotate by 20 to the right
Resize by 25%
Position over one of the "horns"

Use your Freehand Tool to draw around the portion of the Halo overlapping the horn
Delete then deselect

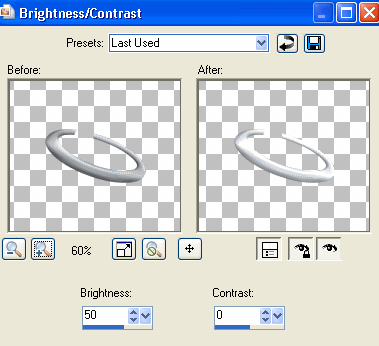
Adjust > Brightness & Contrast > Brightness/Contrast with the following settings:


Paste Red Diamond as new layer
Resize by 16%
Duplicate and paste around Frame till they cover each hole

Hide all layers then,
Layers > Merge > Merge Visible
Unhide layers and move Red Diamonds to layer below Frame
Adjust > Sharpness > Sharpen


Paste Doodle1 as new layer
Resize by 75%
Layers > Arrange > Send to Bottom
Position to the left
Duplicate, then Image > Mirror
Layers > Merge > Merge Down
Lower opacity to 40

Paste Tube of choice as new layer
Resize as necessary and position

Paste Paper of choice as new layer
Layers > Arrange > Send to Bottom

Layers > New Mask Layer > From Image
Apply WSL_Mask26
OK
Layers > Merge > Merge Group

Crop and resize to liking

Select your Text Tool and font of choice
I am using I am using Warlock
Foreground - #000000
Background - #c00000
Stroke width - 2.0

Type out text of choice
Objects > Align > Horiztonal Centre in Canvas
Convert to raster layer
Apply some slight noise
Place below Black Wings layer

Select another font of choice
I am using Lucida Blackletter
Same colours

Type out your name
Objects > Align > Horizontal Centre in Canvas
Convert to raster layer
Apply some noise and drop shadow of choice

Finally, add your © copyright, licence and watermark, then save as a GIF or JPG and you're done!


** IF YOU WISH TO ANIMATE PLEASE FOLLOW THESE NEXT STEPS **

Activate your Halow layer
Duplicate twice and rename Halo1, Halo2 and Halo3

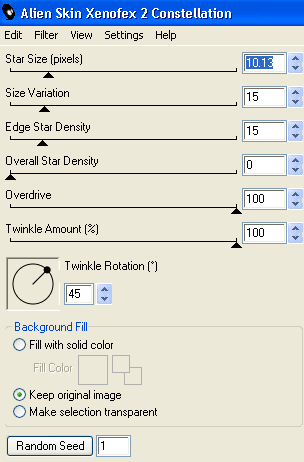
Effects > Plugins > Xenofex 2 > Constellation with the following settings:


Hide Halo1 and activate Halo2
Apply the Constellation effect again, adjusting the Random Seed

Hide Halo2 and activate Halo3
Apply the Constellation effect once more, adjusting the Random Seed

Now to animate!

Hide Halo1 and activate Halo2
Edit > Copy Merged

Open Animation Shop
Edit > Paste as New Animation

Back to PSP
Hide Halo2 and activate Halo3
Edit > Copy Merged

In Animation Shop
Edit > Paste after Current Frame

Select All, and change Frame Properties to 20
Now save as a GIF and you're done!

Thanks for trying my tutorial!

::st!na::


Here is a non-animated version:


© Tutorial written by Stina on 5th August 2009
All rights reserved
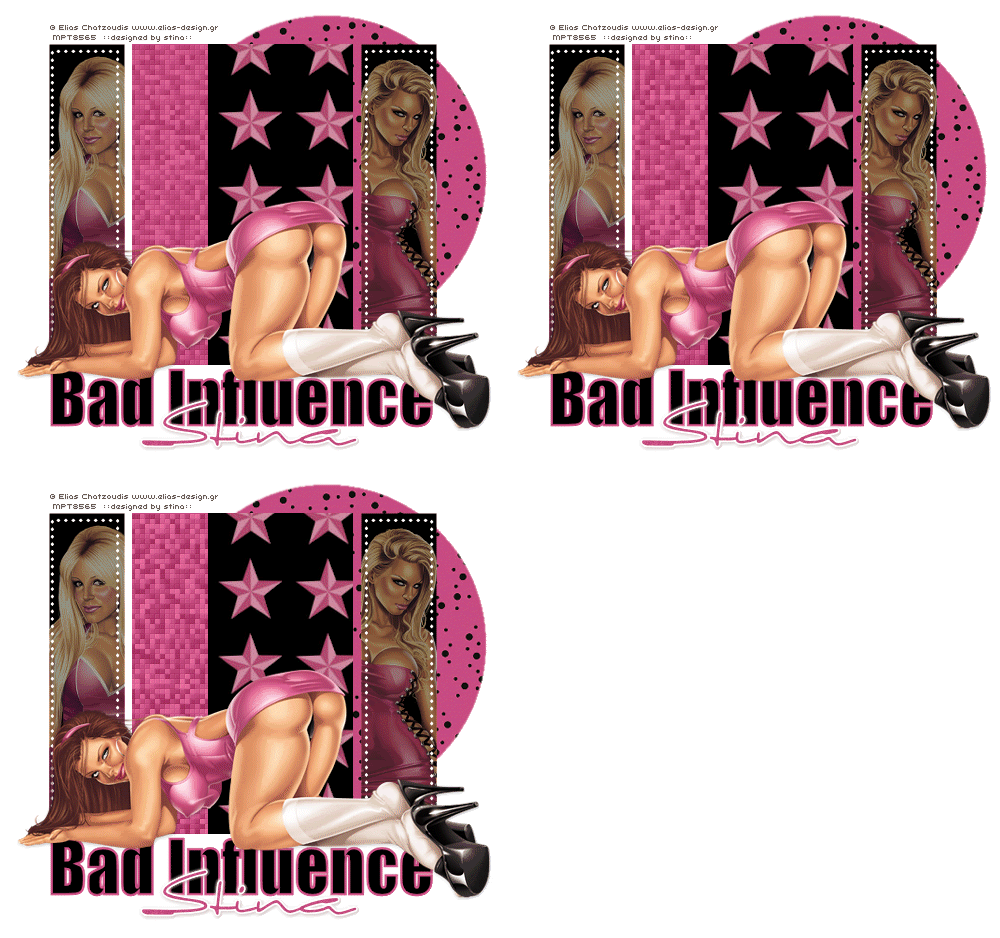
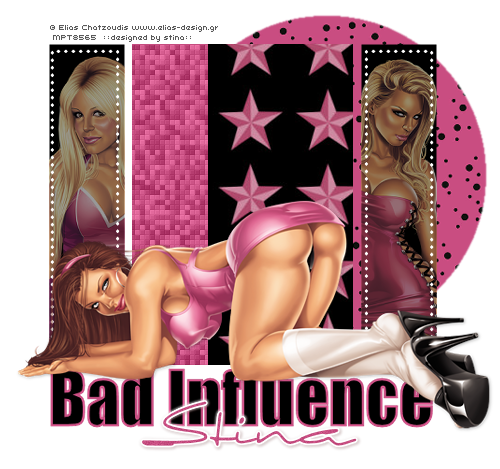
Bad Influence


Supplies

Scrap kit of choice - I am using "Flirting with Elias" by Kissed by Pix available from Scraps with Attitude, TKO Scraps and The Creativity Box
Tubes of choice - I am using the gorgeous artwork of Elias Chatzoudis available with a licence from My PSP Tubes
Template #192 by Missy available from her blog
Fonts of choice - I am using Impact and Sincerely
Plugins: Xero > Fritillary
Eye Candy 4000 > Gradient Glow

**This is similar to the other tut using this same kit - just simpler as it uses a template**


Let's begin....


Open Missy's Template #192 and duplicate
Close off original
Delete copyright layer

Select CIRCLE layer (raster 1) with your Magic Wand
Selections > Modify > Feather by 2
Press delete a couple of times to remove colour
Paste Paper of choice INTO selection
Deselect

Activate Rectangle layer and select with Magic Wand'
Paste Paper of choice as new layer
Selections > Invert
Delete then deselect
Layers > Merge > Merge Down

Select Thin Rectangle2
Flood-fill with a colour matching your tube
Deselect

Select Thin Rectangle1
Paste a Tube of choice as new layer
Resize as necessary and position within selection
Selections > Invert
Delete then deselect
Lower opacity of Tube to 60

Select Thin Rectangle3
Repeat above step with another Tube of choice


Select your WordArt and flood-fill with a colour of your choice
OR
Select Text Tool (I used Impact)
Type out some Text of your choice and position
Convert to raster layer


Paste your main Tube of choice as new layer
Resize as necessary and position over text
Add drop shadow of choice

Crop and resize

Activate top layer

Select your Text Tool again and another font of choice
I am using Sincerly
Colour - #c64d80 (or colour of choice)

Type out your name
Objects > Align > Horizontal Centre in Canvas
Convert to raster layer
Apply a Gradient Glow in white and drop shadow of choice

Finally, add your © copyright, licence and watermark, then save as a GIF or JPG and you're done!


** IF YOU WISH TO ANIMATE PLEASE FOLLOW THESE NEXT STEPS **

Activate your ThinRectangle2 layer (flood-filled rectangle)
Select with your Magic Wand
Duplicate twice and rename Fritillary1, Fritillary2 and Fritillary3

Activate Fritillary1
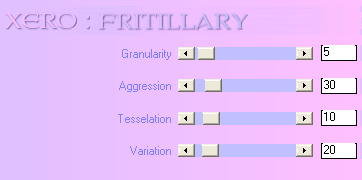
Effects > Plugins > Xero > Fritillary with the following settings:


Hide Fritillary1 and activate Fritillary2
Apply the Fritillary adjusting only the Variation

Hide Fritillary2 and activate Fritillary3
Apply the Fritillary once again and adjust the Variation once more

Now to animate!

Activate Fritillary1 and hide Fritillary2 and Fritillary3
Edit > Copy Merged

Open Animation Shop
Edit > Paste as New Animation

Back to PSP
Hide Fritillary1 and activate Fritillary2
Edit > Copy Merged

In Animation Shop
Edit > Paste After Current Frame

Back to PSP
Hide Fritillary2 and activate Fritillary3
Edit > Copy Merged

In Animation Shop
Edit > Paste After Current Frame

Select All and change Frame Properties to 20
Now save as a GIF and you're done!

Thanks for trying my tutorial!

::st!na::


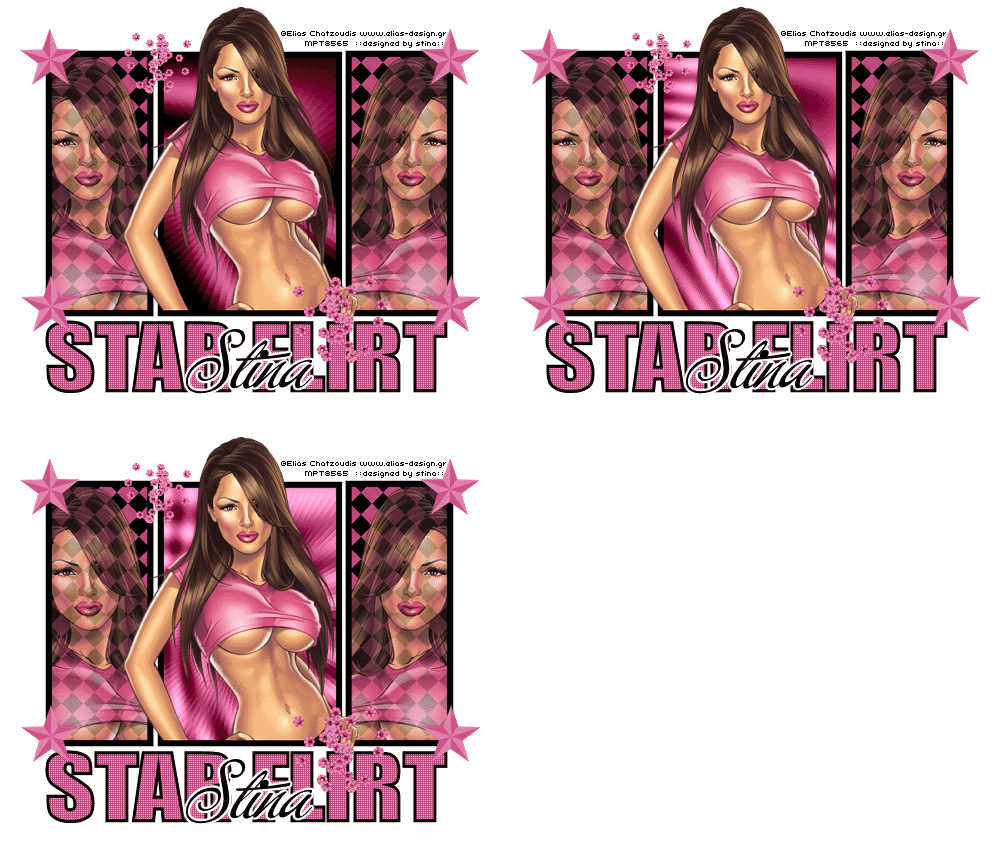
Here is a non-animated version:


© Tutorial written by Stina on 4th August 2009
All rights reserved
Tuesday, August 4, 2009

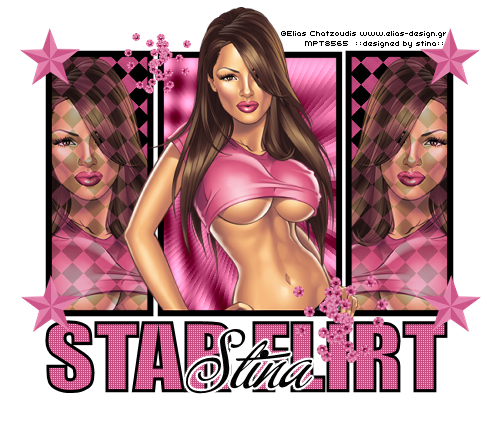
Star Flirt


Supplies

Scrap kit of choice - I am using "Flirting with Elias" by Kissed by Pix available from Scraps with Attitude, TKO Scraps and The Creativity Box
Tubes of choice - I am using the gorgeous artwork of Elias Chatzoudis available with a licence from My PSP Tubes
Fonts of choice - I am using Impact and Buffet Script
Plugins: Penta.com > Colour Dot
Tramages > Moving Screen
Eye Candy 4000 > Gradient Glow


Let's begin...


Open a new 600 x 550 blank canvas flood-filled white

Select your Preset Shape Tool to Rectangle
Foreground - #000000
Background - null
Width - 8.00
Create as Vector

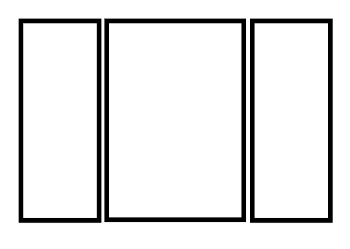
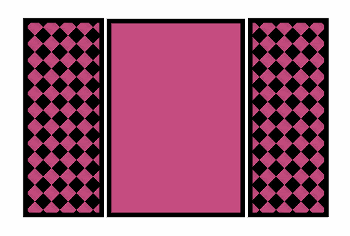
Draw out a rectangle in the centre of canvas
Objects > Align > Centre in Canvas
Convert to raster layer

Using the same settings draw out another rectangle slightly thinner to the left and position
Use the nodes to size the correct height with the middle Rectangle
Convert to raster layer
Duplicate, then Image > Mirror
Layers > Merge > Merge Down
Repeat
Rename RECTANGLES


Select the inside of the two outer rectangles with your Magic Wand
Selections > Modify > Expand by 5
Paste Paper of choice as new layer
Layers > Arrange > Move Down
Resize by 65% (or as necessary)
Selections > Invert
Delete, then deselect

Select the middle Rectangle with your Magic Wand
Selections > Modify > Expand by 5
Activate Paper layer and flood fill selection with a colour from your Tube
Delete, then deselect


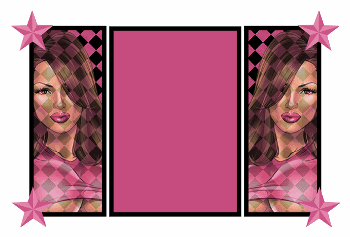
Paste your Tube of choice in your left rectangle
Position to your liking
Select the inside of rectangle with Magic Wand again
Selections > Modify > Expand by 5
Selections > Invert
Delete, then deselect

Duplicate then Image > Mirror
Lower opacity to around 80

Activate top layer

Paste a Star of choice as new layer
Resize by 20%
Position in upper left
Duplicate, the Image > Mirror
Layers > Merge > Merge Down
Duplicate, then Move down to bottom of Rectangles


Paste Tube and resize as necessary
Use your Selection Tool to select the bottom of your Tube and delete

Paste a Sequin Cluster as new layer
Resize by 15%
Position to your liking
Duplicate, then Image > Mirror
Resize by 70%
Position to your liking

Crop and resize

Select your Text Tool and a nice block font
I am using Impact
Foreground - #000000
Background - #c64d80
Stroke width - 3.00

Type out text of choice and position squarely beneath Rectangles
Use nodes to compress height from bottom
Position below Stars layer
Convert to raster layer


Select the inside of each letter with your Magic wand
Effects > Plugins > Penta.com > Colour Dot with default settings
Deselect

Activate top layer

Select your Text Tool again and another font of choice
I am using Buffet Script
Colour - #000000

Type out your name
Objects > Align > Horizontal Centre in Canvas
Convert to raster layer
Apply a Gradient Glow in white

Finally, add your © copyright, licence and watermark, then save as a GIF or JPG and you're done!


** IF YOU WISH TO ANIMATE PLEASE FOLLOW THESE NEXT STEPS **

Activate your RECTANGLES layer
Select inside the middle rectangle
Selections > Modify > Expand by 5

Activate the paper background
Layers > Promote Selection to Layer
Duplicate twice and rename Swirl1, Swirl2 and Swirl3

KEEP SELECTED!!

Activate Swirl1
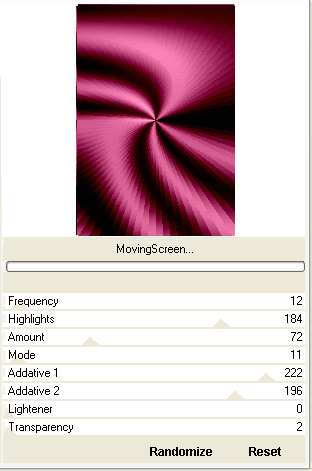
Effects > Plugins > Tramages > Moving Screen with the following settings: (or any that you wish)


(you may have to import the filters into Filters Unlimited if they do not show in your normal Plugin list)

KEEP SELECTED!!

Hide Swirl1 and activate Swirl2
Apply the Moving Screen again and Randomise settings to your liking
Keep the Lightener and Transparency set to 0
(you may have to manually move them to 0 when you Randomise)

STILL SELECTED!!

Hide Swirl2 and activate Swirl3
Apply the Moving Screen once more and Randomise to your liking (see above)
Deselect

Now to animate!

Activate Swirl1 and hide Swirl2 and Swirl3
Edit > Copy Merged

Open Animation Shop
Edit > Paste as New Animation

Back to PSP
Hide Swirl1 and activate Swirl2
Edit > Copy Merged

In Animation Shop
Edit > Paste After Current Frame

Back to PSP
Hide Swirl2 and activate Swirl3
Edit > Copy Merged

In Animation Shop
Edit > Paste After Current Frame

Select All and change Frame Properties to 25
Now save as a GIF and you're done!

Thanks for trying my tutorial!

::st!na::


Here is a non-animated version:


© Tutorial written by Stina on 4th August 2009
All rights reserved