
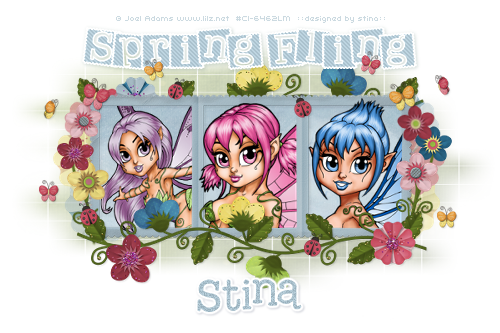
Supplies
Scrap kit of choice - I am using "Spring Fling Bling" by LLIELLA which is available from Funky Playground Designs
Tubes of choice - I am using the delightful artwork of Joel Adams which can be purchased from CILM
**PLEASE DO NOT USE HIS ARTWORK WITHOUT THE APPROPRIATE LICENCE**
WSL_Mask84 by Chelle which is available from her blog
Fonts of choice - I am using 2Peas Gone Postal and 2Peas High Tide (both pay fonts)
Plugin: Penta.com / Jeans
Plugin: Eye Candy 4000 Gradient Glow (optional)
~ Step 1 ~
Open a new 600 x 600 blank canvas flood-filled white
Paste Frame1 as new layer
Resize by 20%
Resize by 20%
Grab your Selection Tool and draw out a rectangle around the frame
Paste Paper20 as a new layer
Resize by 12%
Selections / Invert
Delete
Deselect
Paste Paper20 as a new layer
Resize by 12%
Selections / Invert
Delete
Deselect
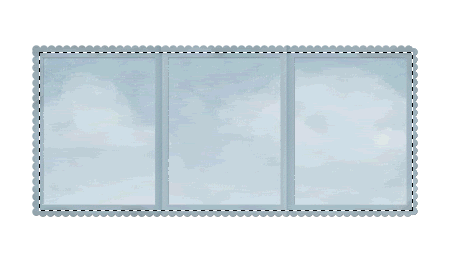
With your Magic Wand select the inside of the first frame
Selections / Modify / Expand by 2
Selections / Modify / Feather by 2
Selections / Modify / Expand by 2
Selections / Modify / Feather by 2
Paste your tube as new layer
Resize as necessary
Resize as necessary
Selections / Invert
Use your Eraser Tool to erase the excess
**NOTE - I DIDN'T SIMPLY DELETE AT THIS POINT BECAUSE I KEPT SOME PARTS OF EACH TUBE OVERHANGING**
Deselect
Use your Eraser Tool to erase the excess
**NOTE - I DIDN'T SIMPLY DELETE AT THIS POINT BECAUSE I KEPT SOME PARTS OF EACH TUBE OVERHANGING**
Deselect
Repeat with two more tubes
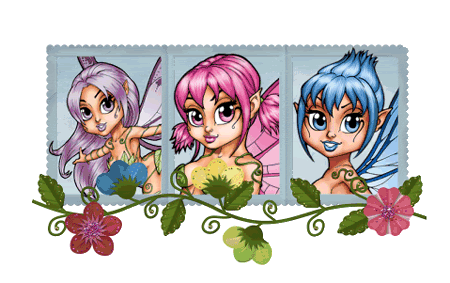
Paste FlowerCluster-noshadow as new layer
Resize by 12%
Position along the bottom of Frame
Resize by 12%
Position along the bottom of Frame
~ Step 2 ~
Paste Ladybug1 as new layer
Image / Rotate by 20 to the right
Duplicate and Image / Mirror
Image / Rotate by 20 to the right
Duplicate and Image / Mirror
Paste Stem1 as new layer
Resize by 10%
Position to the right below the flower cluster
Resize by 10%
Position to the right below the flower cluster
Paste PaperFlower6 as new layer
Resize by 9%
Place on Stem to the right
Layers / Merge / Merge Down
Resize by 9%
Place on Stem to the right
Layers / Merge / Merge Down
Paste Stem1 again
Resize by 10%
Position behind first flower
Resize by 10%
Position behind first flower
Paste two more Flowers of choice
Resize by 8% each
Position to the right above the stem
Resize by 8% each
Position to the right above the stem
Duplicate Stem1 and position to the left
Paste three Flowers of choice
Resize first one by 9% and the next two by 8%
Position above stem
Resize first one by 9% and the next two by 8%
Position above stem
Paste PaperFlowers12, 13 and 14 as new layers
Resize each by 20%
Position each behind Frame on either side
Resize each by 20%
Position each behind Frame on either side
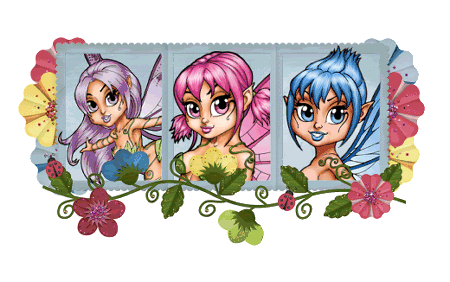
Hide all layers except these six flowers
Layers / Merge / Merge Visible
Lower opacity to about 45
Unhide layers
Layers / Merge / Merge Visible
Lower opacity to about 45
Unhide layers
Paste Butterfly5 as new layer
Resize by 3%
Image / Mirror
Position to the left
Resize by 3%
Image / Mirror
Position to the left
Paste Butterfly6 as new layer
Resize by 3%
Position to the right
Resize by 3%
Position to the right
Paste Butterfly1 as new layer
Image / Rotate by 20 to the right
Resize by 4%
Position in upper left corner
Image / Rotate by 20 to the right
Resize by 4%
Position in upper left corner
Paste Butterfly2 as new layer
Image / Rotate by 20 to the left
Resize by 4%
Position in upper right corner
Image / Rotate by 20 to the left
Resize by 4%
Position in upper right corner
Activate FlowerCluster layer
Duplicate then Image / Mirror
Place at the top of the frame
Layers / Arrange / Send to Bottom
Duplicate then Image / Mirror
Place at the top of the frame
Layers / Arrange / Send to Bottom
Add some more Ladybugs and Butterflies
Crop and resize
~ Step 3 ~
Paste Paper14 as new layer
Resize by 18%
Resize by 18%
Layers / Arrange / Send to Bottom
Layers / New Mask Layer / From Image
Locate WSL_Mask84
OK
Locate WSL_Mask84
OK
Layers / Merge / Merge Group
Select your Pick Tool (Deformation Tool in some versions) and use the nodes to stretch and resize Mask layer
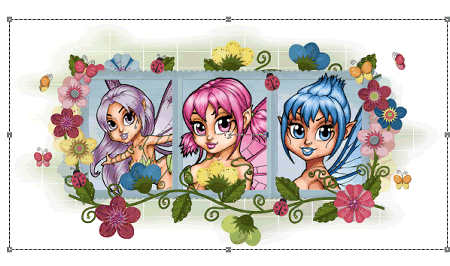
Pick a colour from your Scrap - I used #aac1cd
Select your Text Tool and font
Set your Material Palette to:
Foreground - #FFFFFF
Background - ##aac1cd (or colour of choice)
Select your Text Tool and font
Set your Material Palette to:
Foreground - #FFFFFF
Background - ##aac1cd (or colour of choice)
Type the words "Spring Fling"
Objects / Align / Horizontal Centre in Canvas
Convert to raster layer
Objects / Align / Horizontal Centre in Canvas
Convert to raster layer
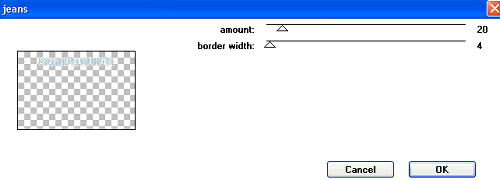
Effects / Plugins / Penta.com / Jeans with the following settings:
Apply a drop shadow:
H & V - 1
Opacity - 20
Blur - 5.00
Colour - #194a38
H & V - 1
Opacity - 20
Blur - 5.00
Colour - #194a38
Keep the same colours in your Material Palette and select another font
Type out your name
Objects / Align / Horizontal Centre in Canvas
Convert to raster layer
Apply any effects you like
Add a drop shadow
Type out your name
Objects / Align / Horizontal Centre in Canvas
Convert to raster layer
Apply any effects you like
Add a drop shadow
Finally, add your © copyright, licence and watermark
Save as a GIF and you're done!
Thank you for trying my tutorial
::st!na::
© Tutorial written by Stina on 15th March 2009
All rights reserved
