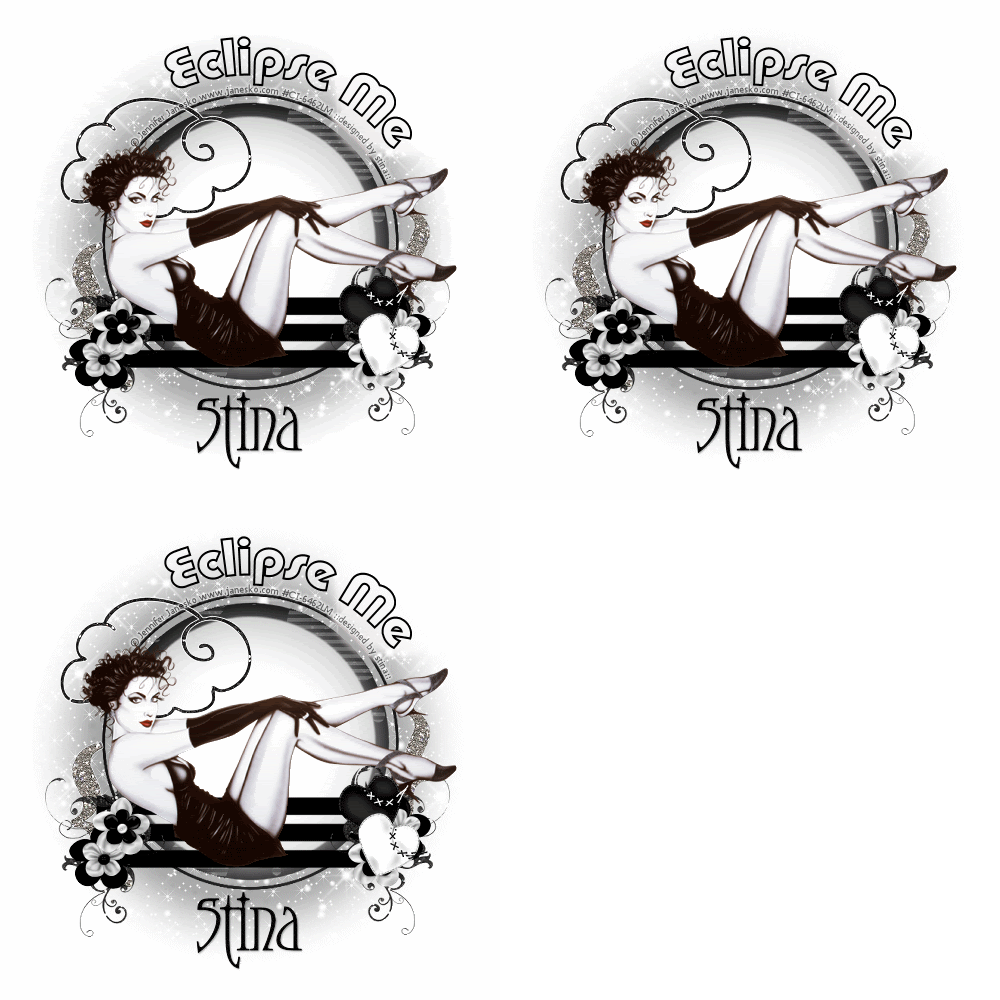
Supplies
Scrap kit of choice - I am using "New Moon" by Vassia Designs available from Stargazer Scraps and Twilight Scraps
Tube of choice - I am using the lovely artwork of Jennifer Janesko available with a licence through CILM
**PLEASE DO NOT USE HER ARTWORK WITHOUT THE APPROPRIATE LICENCE**
WSL_Mask54 and WSL_Mask41 by Chelle available from her blog
Fonts of choice - I am using Pump Demi Bold and Moonstone
Plugin: Xenofex 2 Constellation
Ready? Let's begin....
Open a new 700 x 500 blank canvas flood-filled white
Select your Preset Shape Tool and set to Ellipse
In your Materials Palette set your background colour to #c0c0c0
Hold your Shift key and draw out a circle
Objects > Align > Centre in Canvas
Convert to raster later
Objects > Align > Centre in Canvas
Convert to raster later
LEAVE IN POSITION!!
Change the background colour in your palette to #FFFFFF
Hold your Shift key again and draw out another circle slightly smaller than the Grey one
Objects > Align > Centre in Canvas
Convert to raster later
Hold your Shift key again and draw out another circle slightly smaller than the Grey one
Objects > Align > Centre in Canvas
Convert to raster later

With your White circle activated, go to
Adjust > Blur > Gaussian Blur with a radius of 30.00
Adjust > Blur > Gaussian Blur with a radius of 30.00
Now on your Grey layer,
Adjust > Blur > Gaussian Blur with a radius of 1.00
Adjust > Blur > Gaussian Blur with a radius of 1.00
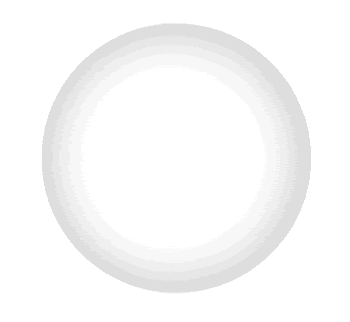
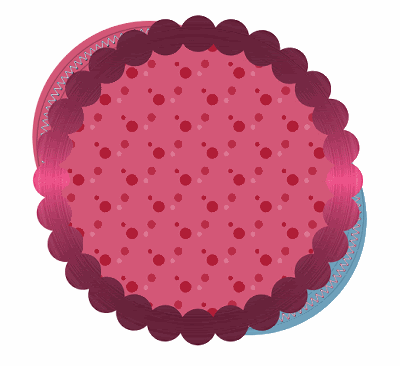
Merge the two circle layers together and rename MOON
Open a paper of choice and minimise
Select your Preset Shape Tool again and set to Rectangle
Open your Materials Palette properites and select the Pattern tab
Find your paper in the thumbnails and select
Open your Materials Palette properites and select the Pattern tab
Find your paper in the thumbnails and select
Draw out a thin rectangle to the bottom of the Moon
Objects > Align > Horizontal Centre in Canvas
Convert to raster layer
Objects > Align > Horizontal Centre in Canvas
Convert to raster layer
Duplicate and move up slightly
Duplicate again and move up slightly again
Duplicate again and move up slightly again
Hide Background and Moon, then
Layers > Merge > Merge Visible
Layers > Merge > Merge Visible
Paste GlitterDoodle2 as new layer
Resize by 50%
Position to the right of rectangles
Resize by 50%
Position to the right of rectangles
Duplicate, then Image > Mirror
Paste Flower1 as new layer
Resize by 40%
Position to the lower left
Resize by 40%
Position to the lower left
Paste Flower2 as new layer
Resiz eby 35%
Position slightly above Flower1
Resiz eby 35%
Position slightly above Flower1
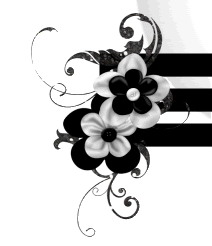
Paste Heart1 as new layer
Image > Rotate by 20 to the left
Resize by 30%
Image > Rotate by 20 to the left
Resize by 30%
Position to the right
Paste Heart2 as new layer
Image > Rotate by 20 to the right
Resize by 30%
Image > Rotate by 20 to the right
Resize by 30%
Position slightly below Heart1
Place a couple of flowers behind them

Paste Cloud as new layer
Resize by 50%
Position to the left
Resize by 50%
Position to the left
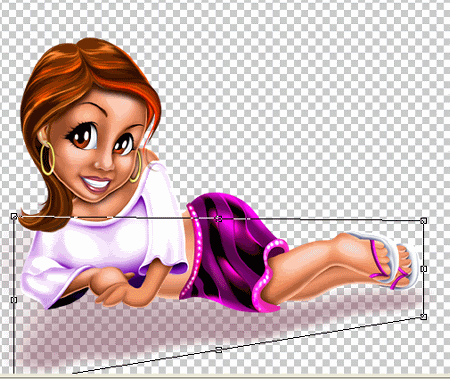
Paste Tube of choice as new layer
Resize as necessary
Position to your liking
Resize as necessary
Position to your liking
Paste Bracket2 as new layer
Image > Rotate by 20 to the left
Resize by 40%
Position to the left
Resize by 40%
Position to the left
Duplicate, then Image > Mirror and position
Resize by 85%
Layers > Merge > Merge Down, then
Adjust > Sharpness, Sharpen
Paste Paper of choice as new layer
Layers > Arrange > Send to Bottom
Duplicate and hide bottom copy
Layers > Arrange > Send to Bottom
Duplicate and hide bottom copy
Activate dupliate layer
Layers > New Mask Layer > From Image
Apply WSL_Mask54
OK
Layers > Merge > Merge Group
Resize by 80%
Position directly behind Moon
Rename Mask2
Layers > New Mask Layer > From Image
Apply WSL_Mask54
OK
Layers > Merge > Merge Group
Resize by 80%
Position directly behind Moon
Rename Mask2
Unhide original paper layer
Layers > New Mask Layer > From Image
Apply WSL_Mask41
OK
Layers > Merge > Merge Group
Resize by 90%
Lower opacity to around 50
Rename Mask1
Layers > New Mask Layer > From Image
Apply WSL_Mask41
OK
Layers > Merge > Merge Group
Resize by 90%
Lower opacity to around 50
Rename Mask1
Crop and resize
Still on Mask1 Layer
Effects > Plugins > Xenofex 2 > Constellation withthe following settings:
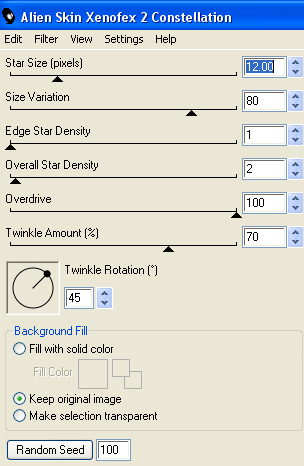
Or play with the settings to your liking
Select your Preset Shape Tool and set to Ellipse
With your Foreground on #000000 Hold your Shift key and draw out a circle
Objects > Align > Centre in Canvas
With your Foreground on #000000 Hold your Shift key and draw out a circle
Objects > Align > Centre in Canvas
Select your Text Tool and font of choice
I am using Pump Demi Bold
Foreground - #000000
Background - (colour to match tag - I'm using #FFFFFF faded)
Stroke width - 2.0
I am using Pump Demi Bold
Foreground - #000000
Background - (colour to match tag - I'm using #FFFFFF faded)
Stroke width - 2.0
Type out your Text and position to liking
Convert to raster layer
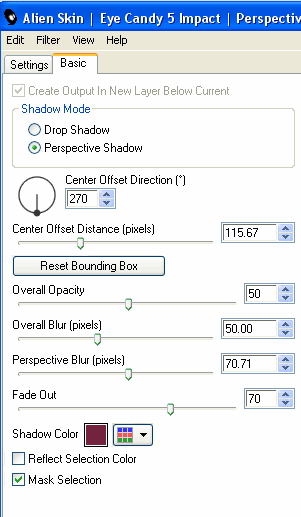
Add some noise and a drop shadow of choice
Convert to raster layer
Add some noise and a drop shadow of choice
Select another font of choice
I used Moonstone
Text colour black
I used Moonstone
Text colour black
Type out your name
Objects > Align > Horizontal Centre in Canvas
Convert to raster layer
Add some noise and a drop shadow of choice
Objects > Align > Horizontal Centre in Canvas
Convert to raster layer
Add some noise and a drop shadow of choice
Finally, add your © copyright, licence and watermark, then save as GIF or JPG and you're done!
** IF YOU WISH TO ANIMATE PLEASE FOLLOW THESE NEXT STEPS **
Activate your Mask1 layer which we've already applied the Constellation effect on once
(yes we are going to again, but with different settings)
(yes we are going to again, but with different settings)
Duplicate twice and rename Sparkle1, Sparkle2 and Sparkle3
Hide Sparkle2 and Sparkle3 and activate Sparkle1
Effects > Plugins > Xenofex 2 > Constellation with the following settings:
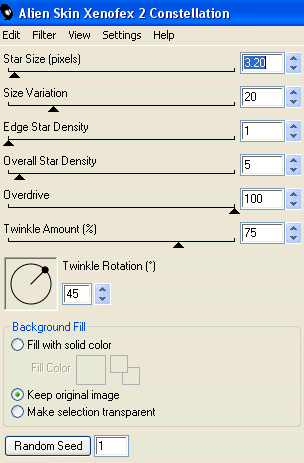
Hide Sparkle1 and activate Sparkle2
Apply the Constellation effect again, adjusting the Random Seed
Apply the Constellation effect again, adjusting the Random Seed
Hide Sparkle2 and activate Sparkle3
Apply the Constellation effect again, adjusting the Random Seed
Apply the Constellation effect again, adjusting the Random Seed
Now for the animation!
Activate Sparkle1 and hide Sparkle2 and Sparkle3
Edit > Copy Merged
Edit > Copy Merged
Open Animation Shop
Edit > Paste as New Animation
Edit > Paste as New Animation
Back to PSP
Hide Sparkle1 and activate Sparkle2
Edit > Copy Merged
Hide Sparkle1 and activate Sparkle2
Edit > Copy Merged
In Animation Shop
Edit > Paste AFTER Current Frame
Edit > Paste AFTER Current Frame
Back to PSP
Hide Sparkle1 and activate Sparkle2
Edit > Copy Merged
Hide Sparkle1 and activate Sparkle2
Edit > Copy Merged
In Animation Shop
Edit > Paste AFTER Current Frame
Edit > Paste AFTER Current Frame
Save as a GIF and you're done!
Thanks for trying my tutorial!
::st!na::
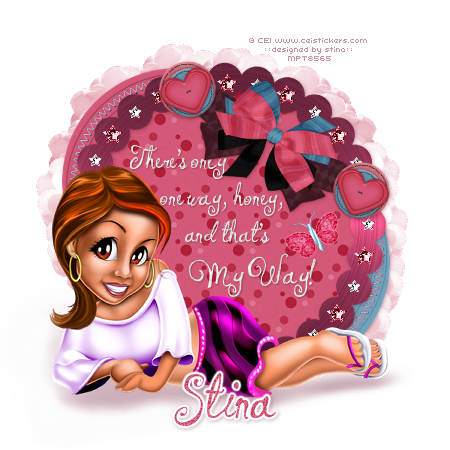
Here is a non-animated version:
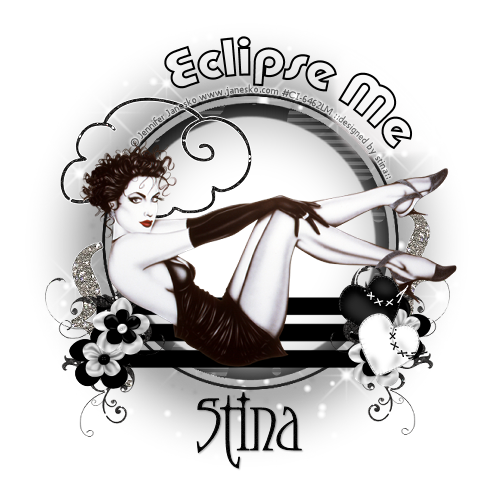
© Tutorial written by Stina on 8th June 2009
All rights reserved