Please email me designed.by.stina@gmail.com with your creations. I'd love to see them.

Showing posts with label Valentines. Show all posts

Monday, February 16, 2009

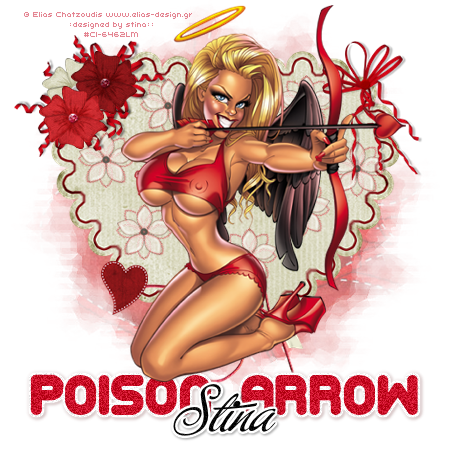
Poison Arrow

poisonarrow-stina_stina0209

Supplies

Elements from the following scrap kits:
"Valentine" scrap kit by Szunyo (freebie) which can be found on her blog
"Valentine Hearts" scrap kit by Monti (freebie) found on his site
"Poison Rock Girl" scrap kit by Bel Vidotti (freebie) which can be found on her blog
Tube of choice - I am using the artwork of Elias Chatzoudis which can be purchased from My PSP Tubes
**PLEASE DO NOT USE HIS ARTWORK WITHOUT THE APPROPRIATE LICENCE**
WSL_Mask161 by Chelle which can be found on her blog
Fonts of choice - Corpulent Caps and Buffet Script (pay font)
Eye Candy 4000 Gradient Glow

~ Step 1 ~

Open Mask and fonts and minimise for later

Open new blank canvas 600 x 600 flood-filled white

Let's start with the Szunyo_Valentine kit

Paste Szunyo_V_komm4 as new layer
Resize by 25%
Leave in place

Paste Szunyo_V_flower1g as new layer
Resize by 7%
Position in top left corner

Paste Szunyo_V_flower2 as new layer
Resize by 7%
Position in top left corner with first flower
Duplicate this layer and move slightly across
Duplicate again then change blend mode to Screen
Layers / Merge / Merge Down

Position Flowers to your liking

Paste Szunyo_V_rope as new layer
Resize by 15%
Position at the bottom of the heart

Paste Szunyo_V_emb8 (red heart) as new layer
Resize by 5% then Image / Mirror
Position at the bottom on the end of the string rope

~ Step 2 ~

Go to Bel Vidotti's "Poison Rock Girl" kit

Paste Flower05 as new layer
Adjust / Hue & Saturation / Colourise
Hue - 255
Saturation - 255
Resize by 15%

Paste Flower02 as new layer
With your FReehand Tool draw around the Black Gem in the centre of the flower
Adjust / Hue & Saturation / Colourise
Hue - 255
Saturation - 255

Then adjust the Hue & Saturation again this time changing the Saturation to 100

Resize by 20%
Position over first flower
Layers / Merge / Merge Down

Lower opacity to 60
Duplicate this flower several times and place around the heart
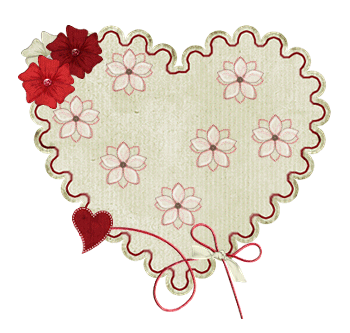
pa-01

~ Step 3 ~

Go to Monti's Valentine Hearts kit

Paste Bow1 as new layer
Resize by 35%
Position BEHIND the flowers on the left
Duplicate layer then Image / Flip
Move next to first bow beneath the flowers
pa-02

Paste Bow as new layer
Image / Rotate by 20 to the left
Resize by 40% and position to the upper right

Paste Paper01 as new layer
Layers / Arrange / Send to Bottom
Resize by 90%
Layers / New Mask Layer / From Image
Locate WSL_Mask161 in menu
Source Luminance
OK

Layers / Merge / Merge Group

Lower opacity of this layer to 60

~ Step 4 ~

Foreground: #FFFFFF
Background: #c90d27

Font: Corpulent Caps
Size: 60
Stroke width: 2.00
Kerning: -50

Type out the words POISON ARROW
Objects / Align / Horizontal Centre in Canvas
Convert to Raster Layer

Adjust / Add/Remove Noise / Add Noise
Gaussian
Noise: 25
Monochrome

Effects / Plugins / Eye Candy 4000 / Gradient Glow
Glow width: 3.00
Soft Corners: 25
Opacity: 100
Setting: Fat
Colour: White

Apply a drop Shadow:
H & V: 1.00
Opacity: 40
Blur: 3.00
Colour: #5a1415

Now let's add our name

Turn the foreground off to null
Change Background to #000000

Font: Buffet Script
Size: 40
Kerning: 0

Type your name
Objects / Align / Horizontal Centre in Canvas
Convert to Raster layer

Effects / Plugins / Eye Candy 4000 / Gradient Glow
Glow width: 3.00
Soft Corners: 25
Opacity: 100
Setting: Fat
Colour: White

Apply a drop Shadow:
H & V: 1.00
Opacity: 40
Blur: 3.00
Colour: #000000

Add your © copyright, licence and watermark and you're done!

Thanks for trying my tutorial

::st!na::


©Tutorial written by Stina on 14th February 2009
All rights reserved


Sunday, February 15, 2009

Cupid's Kiss

cupidskiss-stina_stina0209

Supplies

I used two scrap kits - both are freebies
"All You Need is Love" by Sara's Scraps and "Sweet Valentine" by Missy of Misfits Scrapz,
and you can find both kits on each designers' blog
Tube of choice - I use the lovely artwork of Suzanne Richards
which can be purchased from CILM
**PLEASE DO NOT USE HER ARTWORK WITHOUT THE APPROPRIATE LICENCE**
WSL_Mask214 by Chelle
Heartland Regular font
Eye Candy 4000 Gradient Glow

Font and Mask here

~ Step 1 ~

Open font and Mask and minimise for later

Open a new blank canvas 650 x 600 flood-filled white

Paste Frame1 as new layer
Move slightly to the left
Duplicate then Image / Mirror
Position frames to your liking

With your magic wand click inside first frame
Selections / Modify / Expand by 10
Activate your background layer and then
Selections / Promote Selection to Layer

KEEP SELECTED!!

Add new raster layer
Copy Paper1 and paste INTO Selection
Deselect
Lower opacity of this layer to 50

Layers / Merge / Merge Down
Then on the frame layer again
Layers / Merge / Merge Down

With your magic wand click inside the second frame
Selections / Modify / Expand by 10
Activate background layer again
Selections / Promote selection to Layer
Move this layer ABOVE first frame but still beneath second frame

KEEP SELECTED!!

Add new raster layer
Copy Paper1 again and paste into selection
Deselect

NOW go to Adjust / Hue & Saturation / Colourise with the following settings:

ss_ck-01

Lower opacity of this layer to 40

Layers / Merge / Merge Down
Then on the frame layer again
Layers / Merge / Merge Down

You should now have two hearts on two layers
DO NOT MERGE THESE TWO HEARTS!!

~ Step 2 ~

Paste HeartRibbon as new layer
Resize by 70% and position to the left

Paste Love WardArt as new layer
Resize by 70% and position in first heart

Paste I Love U Buttons as new layer
Resuze by 70% and position in the lower right of second heart

Paste Double Heart as new layer
Resize by 70% and position on the frame to the lower right

ss_ck-02
Paste Bow Eyelet 1 as new layer
Image / Rotate by 20 to the right
Resize by 60%
Position towards the top between the two hearts

Paste Bow Eyelet 2 as new layer
Resize by 60% and position toward the bottom of the hearts

Paste the Missy_sv_Flower2 as new layer from Missy's kit
Resize by 20% and duplicate
Position them together on the upper right of the frame

Name them Flower1 and Flower2

ss_ck-03

Duplicate Flower1 and set the blend mode to Multiply
Layers / Merge / Merge Down

Duplicate Flower2 and set the blend mode to Hard Light
Layers / Merge / Merge Down

Tuck Flower2 behind Flower1 so that the darker one is the top layer

Paste Missy_sv-Bling Doodle 1 as new layer
Resize by 50%
Position in the lower left between the two hearts
Duplicate layer
Image / Mirror then Image / Flip
Position top bling in the upper right
ss_ck-04
Add any other elements you wish

Crop and resize your tag (I resized mine to 500 x 400)

~ Step 3 ~

Paste your tube and resize as necessary
(My lil cupid I resized by 65%)
Duplicate layer

On original tube layer:

Effects / Plugins / Eye Candy 4000 / Gradient Glow with the following settings:
Glow width - 8.00
Soft Corners - 25
Opacity - 100
Setting - MEDUIM
Colour - White

The lower opacity of Gradient Glow layer to your liking
This will give the effect of a soft glow around the tube

Paste Paper7 (from Sara's Scrap kit) as new layer and move to bottom layer
Resise by 75%

Layers / New Mask Layer / From Image
Locate WSL_Mask214 in drop down
Source Luminance checked
OK

Layers / Merge / Merge Group

Lower opacity to 40

Choose a colour to match your tag with your eye dropper tool and select it as your background

Select your Text Tool and font
Type out your name
Add a Gradient Glow
I used the following settings:

Glow width - 3.00
Soft corners - 25
Opacity - 100
Setting - Fat
Colour - White

Apply a drop shadow:
H & V - 1
Opacity - 40
Blur - 5.00
Colour - #ee7cbd

Add your © copyright, licence and watermark and you're done!

Thanks for trying my tutorial

::st!na::

©Tutorial written by Stina on 11th February 2009
All rights reserved

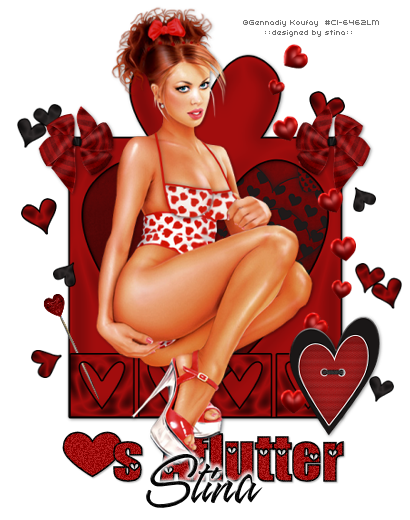
Hearts Aflutter

heartsaflutter-stina_stina0209

Supplies

Scrap kit of choice - I am using "I Heart You" by Captivated Visions which can be purchased at Exquisite Scraps or Paradise4Scrappers
Thank you Rachel for this gorgeous kit!
Tube of choice - I am using the lovely work of Gennadiy Koufay which can be purchased from CILM with the proper licence
**PLEASE DO NOT USE HIS WORK WITHOUT THE APPROPRIATE LICENCE**
Fonts of choice - I used Love Letters and A&S Speedway
Download them here

~ Step 1 ~

Open a new blank canvas 600 x 600 flood-filled white

Paste Frame 01 as new layer and resize by 60%

With your magic wand click inside the heart in the centre of the frame
Selections / Modify / Expand by 10
Paste Paper 19 as new layer and resize by 60%
Move the paper to where you want the hearts showing (keeping in mind your tube will partially cover them)
cv_ha-01

**Hint - paste your tube but keep it hidden till we need it but you can unhide it to help you position the paper or elements**

~ Step 2 ~

Paste Border 01 as new layer and resize by 55%
Position it along the bottom of the frame (see below)
cv_ha-02

Using your Selection Tool draw out a rectangle around the heart overlapping the frame
Delete

Paste Bow 10 as new layer and resize by 20%
Place on the top right corner of frame
Duplicate then Image / Mirror

Paste FallingHearts as new layer and resize by 70%
Position on the right to your liking

Paste Heart 22 as new layer and resize by 25%
Position to the lower left

Paste Pin 01 as new layer and resize by 30%
Image / Rotate by 25 to the left
Resize again by 45%
Position to the lower left and drop below the border hearts along the bottom of frame

~ Step 3 ~

Open Heart Confetti 03 and 04
Draw out selections around various hearts and paste them as new layers around your tag
Alternate resizing them by 35%, 40% and 50%
Position them to your liking

Paste your tube as new layer and resize if necessary
If you have already have your tube pasted you can unhide it now (we have finished pasting elements *s*)

Add drop shadows to your layers

Crop and resize tag

~ Step 4 ~

Foreground - #000000
Background - #a10d0d

Select your Preset Shape tool and find Heart 1 with the following settings:

cv_ha-03

Draw out a heart almost the width of the first heart square in the border (use as a guide)
cv_ha-04

Adjust / Add/Remove Noise / Add Noise
Uniform
20%
Monochrome
OK

Select your Text Tool - colours remain the same in your Material Palette
Create as Vector - checked
Anti-alias - checked
Stroke width - 1.5
Text size - 60
Font - Love Letters

Now type out "s Aflutter"

Overlap the "S" slightly with the heart
Adjust / Add/Remove Noise / Add Noise
Uniform
20%
Monochrome
OK

Still on this layer
Layers / Merge / Merge Down
Add a slight drop shadow

In a font and colour of your choice type out your name
Add any extra effects, such as Noise, Glass or Gradient Glow (optional)

Add your ©copyright, licence and watermark and you're done!

Thanks for trying my tutorial

::st!na::

©Tutorial written by Stina on 7th February 2009
All rights reserved


I Heart You

Supplies

Scrap kit of choice - I am using the lovely "I Heart You" by Captivated Visions
which can be purchased from Exquisite Scraps or Paradise4Scrappers
Thank you Rachel for this gorgeous kit! I truly enjoy working with it!
Tube of choice - I am using the gorgeous work of Joel Adams
which can be purchased from CILM with the proper licence
**PLEASE DO NOT HIS WORK WITHOUT THE APPROPRIATE LICENCE**
WSL_Mask 131 and 133 by Chelle which can be found on her blog
Font of choice - I am using A&S Snapper Script
Eye Candy 4000 Glass

~ Step 1 ~

Open Masks and font and minimise for later

Open a new blank canvas 600 x 600 flood-filled white
Paste Frame 6 as a new layer
LEAVE IN POSITION

Paste Paper 20 as new layer and move below frame layer
Position the paper slightly down ensuring one of the large hearts is somewhere
within the frame near the centre (see below)
cv_ihy-01
Once happy with the position activate your frame layer
Click inside the frame
Selections / Modify / Expand by 10
Back on the paper layer
Selections / Invert
Delete

KEEP SELECTED!!

Hide your paper layer

Paste Paper 07 as new layer and move below first paper layer
Position with hearts surrounding the frame (see below)
cv_ihy-02
Once happy with the position activate your frame layer
Click inside the frame
Selections / Modify / Expand by 10
Back on the paper layer
Selections / Invert
Delete
Deselect

Paste Falling Hearts as new layer
Image / Mirror then position so the curve of the hearts lines up with the curve of the frame
With your Eraser Tool erase the remaining hearts

Add a drop shadow:
H & V - 2
Opacity - 60
Blur - 8.00
Colour - #000000

~ Step 2 ~

Resize your tag to 400 x 400
Image / Canvas Resize and enlarge working space to 500 x 500

Paste Flowers as new layer and resize by 20%
Image / Mirror then position to the lower right of the frame

Paste Pin 02 as new layer and resize by 12%
Image / Rotate by 20 the right
Position in the top right

Paste Bow 05 as new layer
Resize by 50% and position at the bottom of frame in the centre
Duplicate then change blend mode to Screen
Reduce the opacity of this layer to 50

Paste Bow 01 as new layer
Resize by 30% then position over the bow at the bottom of the frame

~ Step 3 ~

Paste your tube as new layer and resize if necessary
Position to the left to your liking
You may need to adjust the position of some of your elements

Activate your background layer

Paste Paper 09 as new layer (no need to resize it unless you wish to)
Duplicate and hide original layer

On duplicate layer go to
Layers / New Mask Layer / From Image
Locate WSL_Mask131 in the list
Source Luminance checked
Invert Mask Data UNchecked
OK
Layers / Merge / Merge Group

Unhide original paper layer
Layers / New Mask Layer / From Image
Locate WSL_Mask133 in the list
Source Luminance checked
Invert Mask Data UNchecked
OK
Layers / Merge / Merge Group

~ Step 4 ~

Paste WordArt 01 as new layer and resize by 35%
Position in the frame beside your tube
With your freehand tool draw around the word LOVE and hit delete, then deselect

Activiate the paper layer with the hearts and using your magic wand click inside the large heart
Selections / Promote Selection to Layer

KEEP SELECTED!!

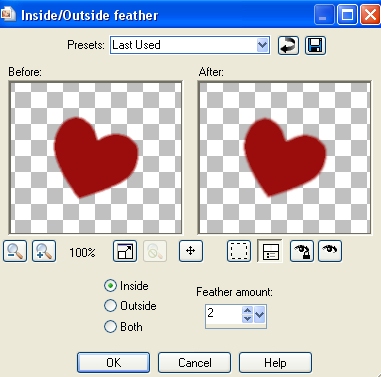
Selections / Modify / Inside/Outside Feather with the following settings:

cv_ihy-03

STILL SELECTED

Selections / Invert
Delete
Deselect

Still on this layer
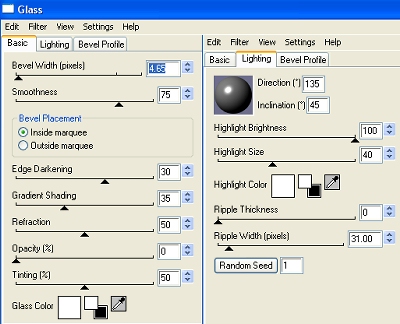
Effects / Plugins / Eye Candy 4000 / Glass with the following settings:

cv_ihy-04

Go to your paper layers and reduce the opacity of the top one to about 50

You will see the hearts from the second papyer layer we did below show through

Add a drop shadow to the WordArt layer:
H & V - 1
Opacity - 100
Blur - 10.00
Colour - #000000

Add any other elements or embellishments you wish

Type your name in a font of your choice using a colour which matches your tube

Add your © copyright, licence and watermark and you're done!

Thank you for trying my tutorial

::st!na::

©Tutorial written by Stina on 6th February 2009
All rights reserved
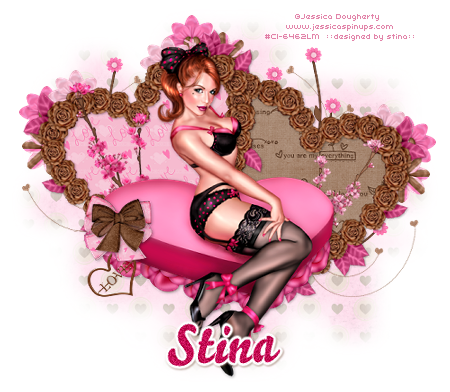
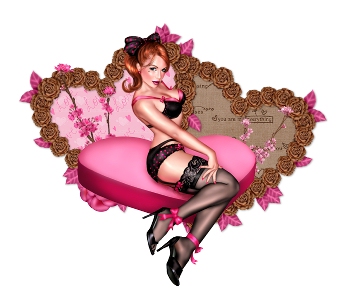
Pink Sweets


pinksweets-stina_stina0209

Supplies

Scrap kit of choice - I am using the delectable delicious kit "Pink Chocolate Sweets"
by Miss Foxy's Designs which can be purchased from Paradise4Scrappers
Thank you Miss Foxy for this delicious kit! Mmmm…makes me wanna eat more chokky! *g*
Tube of choice - I am using the lovely artwork of Jessica Doughtery which can be purchased from CILM with the proper licence
**PLEASE DO NOT USE HER ARTWORK WITHOUT THE APPROPROATE LICENCE**
WSL_Mask230 by Chelle which can be found on her blog
Font of choice - I am using Bello Script
Eye Candy 4000 Gradient Glow (optional)

~ Step 1 ~

Open Mask and minimise for later

Open a new blank canvas 700 x 600 flood filled white

Open HeartFrame_2 and resize by 15%
Paste as new layer
Image / Rotate 20 to the left
Duplicate then Image / Mirror
Position to your liking

With your magic wand click inside first heart
Selections / Modify / Expand by 10
Open Paper_11 and resize by 14%
Paste as new layer and position beneath frame
Selections / Invert
Delete
Deselect

Click inside the second heart
Selections / Modify / Expand by 10
Open Paper_3 and resize by 14%
Paste as new layer and position beneath frame
Selections / Invert
Delete
Deselect

Apply drop shadow to both frames
V & H - 1
Opacity - 40
Blur - 5.00
Colour - #000000

On the first frame layer
Layers / Merge / Merge Down
Then repeat on the second frame layer

~ Step 2 ~

Open Cherry_Blossom_1 and resize by 12%
Paste as new layer
Image / Rotate by 10 to left and position it to the left
Open Cherry_Blossom_2 and resize by 12%
Paste as new layer then Image / Mirror
Position to the right
Image / Rotate by 20 to the right
Adjust / Sharpen / Unsharpen Mask
Radius - 1.00
Strength - 100
Clipping - 4

~ Step 3 ~

Paste your tube as a new layer and resize if necessary
Position it to your liking

Open Rose_1 and resize by 12%
Paste as new layer and place beneath the chocolate heart box (see below)
fd_ps01

Duplicate and move slightly across
Continue this step until the box has roses along the bottom (see below)
fd_ps02

Open Bow_4 and resize by 5%
Paste as new layer and position to the edge of the box

Open Bow_3 and rezize by 5%
Paste as new layer then Image / Mirror
Position over Bow_4 then resize again by 85%

Open Heart Embellishment_3 and resize by 12%
Paste as new layer and position beneath the bows
Erase any excess from this embellishment's bow

Open Flowers 1, 2 & 4
Resize each of them by 6%
Paste each as new layer and position to the left behind heart frame, overlapping one another
Duplicate each flower twice and place them at the top of the frame, and at the far right

Open Hearts and Flowers_1 and resize by 10%
Paste as new layer and position at the top to your liking then move this layer to the bottom

Duplicate then Image / Mirror and place to the left
Duplicate again and place to the far right, using the Pick Tool (Deformation Tool) to rotate it slightly to the right

Crop and resize

~ Step 4 ~

Open Paper_4 and resize to the width of your tag (mine was 500px)
Paste as new layer and move to bottom
Layers / New Mask Layer / From Image
Locate WSL_Mask230 in drop down list
Source Luminance checked
Invert Mask Data UNchecked
OK

Layers / Merge / Merge Group
Reduce the opacity of this layer to about 30

Add your name in font of your choice, add a gradient glow if you wish and apply a drop shadow

Add your ©copyright, licence and watermark and you're done!

Thanks for trying my tutorial

::st!na::

©Tutorial written by Stina on 6th February 2009
All rights reserved

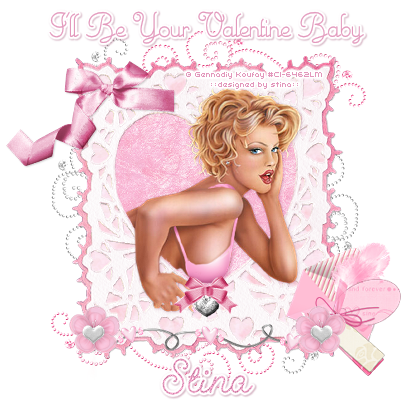
Valentine Baby

Supplies

Scrap kit of choice - I am using Missy's "Sweet Valentine"
which can be downloaded from her blog Mistfits Scrapz
Tube of choice - I am using the lovely artwork of Gennadiy Koufay
which can be purchased from CILM
PLEASE DO NOT USE HIS ARTWORK WITHOUT THE APPROPRIATE LICENCE
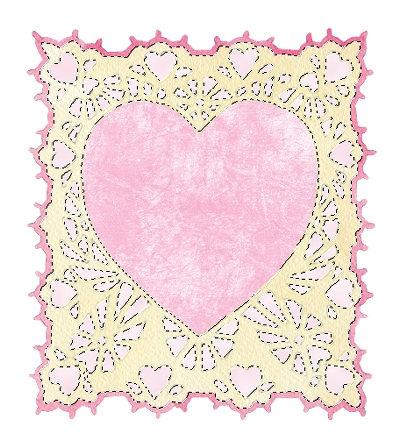
Lacey Valentine Frame (supplied)
Heart_Charm (supplied)
Fonts of choice - I used Monte Carlo Script NF (which is a pay font)
and Geeoh-Hmk (supplied)

My Supplies here

~ Step 1 ~

Open Lacey Valentine Frame and duplicate then close off original
Image / Canvas Resize then resize area to 600 x 600 centre
Add new raster layer and flood fill with white

Paste paper of your choice - I used Paper 1 from the "All You Need is Love" kit by Sara's Scraps
Resize by 50%
Activate lacey frame layer
With your magic wand click the inside of the heart
Selections / Modify / Expand by 5
Selections / Invert
Delete
Deselect
Lower opacity to 35

Open Paper 7 from Missy's Sweet Valentine kit and paste as new layer
Resize by 60% and move it to the bottom layer

Activate the Frame layer
With your magic wand click the outside of your frame
Selections / Modify / Expand by 5
Delete

KEEP SELECTED

Duplicate this layer
Selections / Invert
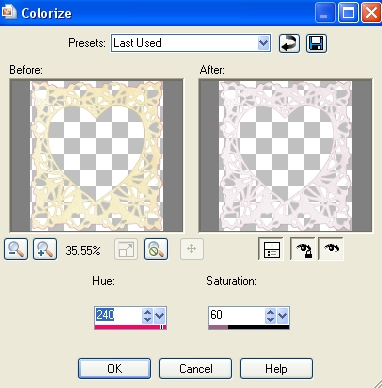
Adjust / Hue & Saturation / Colourise with the following settings:

vb-01

Selections / Invert
Adjust / Blur / Gaussian Blur
Radius - 5.00
Deselect

~ Step 2 ~

With your magic wand on the following setting:

vb-02

Selections / Modify / Expand by 1
Selections / Promote Selection to Layer
vb-04
Adjust / Hue & Saturation / Colourise with the same settings but adjusting the Saturation to 60

vb-03
Duplicate layer and change blend mode to Screen and lower opacity to 60
Deselect
vb-05
On original frame layer apply drop shadow:
V & H: 1
Opacity: 20
Blur: 2.00

~ Step 3 ~

Paste your tube as a new layer and resize as necessary
Position to your liking
Activating one of the duplicate frame layer (without the drop shadow) click inside the heart with your magic wand
Selections / Modify / Feather by 2
Now with your eraser tool on a small brush size setting (but not too small) and the Hardness set to around 50 carefully erase part of your tube overlapping the bottom of the heart
Remember you want to keep some overlapping though!
When you are satisfied Deselect
Apply a slight drop shadow of choice

~ Step 4 ~

Now to add your elements!

Paste a bow of your choice and resize as necessary (I used one from a PTU kit which I cannot share)
Position at the base of the heart near your tube to your liking
Paste the heart_charm as a new layer
Resize by 20% Smart Size then again by 60% Bicubic Resample
Position below the bow

Paste Flower_2 from the kit as a new layer
Resize by 20%
Position to the bottom left of the frame
Duplicate then Image / Mirror

Paste Puffyheart3 as new layer
Resize by 8%
Position over the centre of the flower
Duplicate then Image / Mirror

Paste heart_doodle2 as new layer
Resize by 50% and position along the bottom of frame beneath the flowers

Paste envelope as new layer
Resize by 20%
Image / Rotate by 20 to the right
Position behind the flower to the right

Paste feather1 as new layer
Resize by 20%
Position over the envelope

Paste tags as new layer
Resize by 20%
Position over the envelope, with the feather beneath it

Paste Bow1 as new layer
Resize by 40%
Position in top left corner
Duplicate
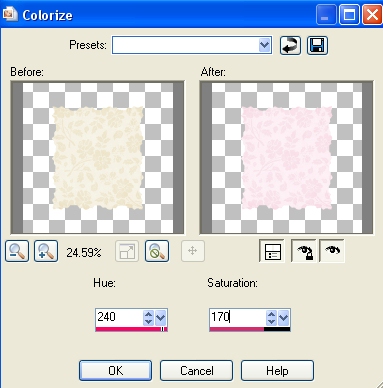
Adjust / Hue & Saturation with
Hue: 240
Saturation: 170
On duplicate layer set blend mode to Soft Light

~ Step 5 ~

Paste Bling Doodle1 as new layer
Resize by 50%
Position in lower left corner then move to bottom layer
Duplicate
Image / Mirror then Image / Flip

Paste Bling Doodle2 as new layer
Resize by 50%
Image / Rotate by 90 to the right
Duplicate
Image / Mirror then Image / Flip

You should now have something like this

vb-06

Add any other elements you wish then apply a drop shadow of your choice to each of the elements
Crop and Resize your tag

In a nice font with Create as Vector checked in yout tool options,
type out "I'll Be Your Valentine" at the top of your tag
Objects / Align / Horizontal Centre in Canvas
Convert to raster layer

Effects / Plugins / Eye Candy 4000 / Gradient Glow
Glow width: 3.00
Soft corners:
Opacity: 100
Solid White

Apply a drop shadow

Type your name in another nice font (I used GeeoOhmk)
and use the same Gradient Glow settings as above
Apply a drop shadow

Add your © copyright, licence and watermark and you're done!

Thank you for trying my tutorial.

::st!na::

©Tutorial written by Stina on 3rd February 2009
All rights reserved
Kiss Me Quick

Supplies

Scrap kit of choice - I am using "Love N Kisses" by Babycakes Scraps which can be purchased from her blog
Tube of choice - I am using the artwork of Barbara Jensen which can be purchased with licence from her website
Missy's Template #160 which can be downloaded from her blog Divine Intentionz
Mask sg_heart_burst (I'm not sure where I came about this mask - if it yours please let me know so I can give you proper credit)
Font of choice - I am using BattleLines

Mask and Font here

~ Step 1 ~

Open WSL_Mask and minimise for later

Open Missy's Template #160
Duplicate and close off original
Delete credit layer and lips layer as we won't be needing those
Image / Canvas Resize and resize your canvas to 650 x 600
Flood fill excess background layer in white

~ Step 2 ~

With your magic wand click inside your Square layer
Selections / Modify / Feather by 2
Open BCS Rose Paper 4 and paste as new layer
Resize by 65%
Selections / Invert
Hit delete
Deselect

Click inside the Rectangle layer
Selections / Modify / Feather by 2
Open BCS Rose Paper 1 and paste as new layer
Resize by 65%
Selections / Invert
Hit delete
Deselect

Activate the Thin Rectangle1 Layer and click in it (this is the one below the Square layer)
Open the BCS Embroidered Ribbon and paste as new layer
Resize by 60% and position so the top and bottom of ribbon neatly fits within the marchin ants
Selections / Invert
Hit delete
Deselect

Repeat this step for the other Thin Rectangle later

~ Step 3 ~

Activate the Kiss Me WordArt layer
Selections / Float
Selections / Defloat
Selections / Modify / Feather by 2
Using your BCS Rose Paper 4 once again paste as new layer and resize by 65%
Selections / Invert
Hit Delete

Open the BCS Glass Kiss 6 and paste as new layer
Resize by 85% and position in centre
Open your tube and position that above the glass kiss/lips and below the Kiss Me WordArt
Use your eraser tool to erase any excess overhanging the rectangle
Add a slight drop shadow to your tube

~ Step 4 ~

Now for your elements!
Open the BCS String Bow and paste as new layer
Resize by 60% and position over the words Kiss Me with the eyelets on opposing sides as if joining the layers
Now activate the ORIGINAL WordArt layer (you should not have deleted it yet) and click inside the K-I-S-S
Activate the string bow and hit delete
Deslect
See how it looks as though it weaves below the word?

Now activate the WordArt later again and click inside the M-E
Then activate the string bow and using your eraser tool erase one leg of the M and corner of the E where the eyelet is

Open BCS Beaded Wire and paste as new layer below your tube
Resize by 62% and position at the top of the rectangle layers

Activate your white backgrund layer and paste the BCS Glitter Doodle as new layer
With your magic wand ensure you have the following settings:
Mode: Add (shift)
Match: RVG Value
Tolerance: 65
Contiguous checked
Feather: 0
Anti-alias checked
Inside checked

Now click inside the glitter doodle layer where it protrudes out to the left

bcs_kmq01

**You should now see marching ants around the shape of the doodle layer**
Selections / Invert
Hit delete
Deselect

bcs_kmq02

The drop shadow from the doodle layer should now have disappeared

Resize this layer by 95% and move slightly to the left
Duplicate layer and mirror
Layers / Merge / Merge Down
Lower opacity to 30
Image / Flip
With your selection tool draw out a rectangle around the protuding bit at the bottom
Hit delete
Deselect

bcs_kmq03

Remaining on this layer paste BCS Rose Paper 1 as a new layer again
Resize by 85%
Layers / New Mask Layer / From Image
Locate sg_heart burst in your drop down menu
Source Luminance checked
Invert Mask Data CHECKED
OK

Layers / Merge / Merge Group

Resize this layer by 90% and lower opacity to 65

Add any other elements to your creation as you like

~ Step 5 ~

Add your name using your font and colour of choice
I used:
Font: BattleLines
Size: 48
Colour: #76093b

Adjust / Add/Remove Noise / Add Noise
Uniform
25%

Plugins / Effefft/ Eye Candy 4000 / Gradient Glow
Using a white setting with a Glow width on 4.00

Add a drop shadow:
Horizontal and Vertical: 1
Opacity: 40
Blur: 2.00
Colour: #76093b

Add your ©copyright, licence and watermark and you're done!

Thanks for trying my tutorial!

::st!na::

©Tutorial written by Stina on 28th January 2009
All rights reserved