Please email me designed.by.stina@gmail.com with your creations. I'd love to see them.

Showing posts with label Jasmine Becket-Griffth. Show all posts

Sunday, September 13, 2009

Witches Brew


Supplies

Scrap kit of choice - I am using "Spookylicious" by JosDZigns available from Twilight Scraps
Tube of choice - I am using the lovely artwork of Jasmine Becket Griffith available with a licence from CILM
**PLEASE DO NOT USE HER ARTWORK WITHOUT THE PROPER LICENCE**
DBV_Mask02 by Vaby available here
Fonts of choice - I am using BoneHymie, Carpenter Script and Centime
Plugins: dbs Flux > Linear Transmission
Alien Skin Eye Candy 5: Nature > Smoke


Let's begin...


Open a new 750 x 600 blank canvas flood-filled white

Paste Frame01 as new layer
Resize by 60%

LEAVE IN POSITION!!

Paste Frame02 as new layer
Resize by 50%
Move to the left directly beside Frame01
Duplicate, then Image > Mirror
Layers > Merge > Merge Down, then
Layers > Arrange > Move Down

Frame01 should be on top with the broom over the bottom corner of right Frame
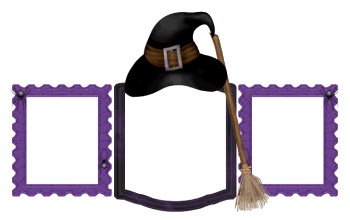


Select inside the two outer Frames with your Magic Wand
Selections > Modify > Expand by 10
Paste Paper of choice as new layer
Resize by 75%
Selections > Invert
Delete then deselect
Layers > Arrange > Move Down

Select inside the middle Frame with Magic Wand
Selections > Modify > Expand by 10
Activate Paper layer
Paste same paper or other paper of choice INTO selection
Deselect

Paste Black Cat as new layer
Position in left Frame to liking

With your Selection Tool make a selection around the bottom half of the cat overhanging Frame
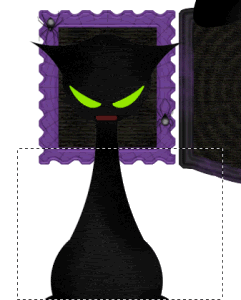


Delete then deselect
Duplicate, then Image > Mirror

Paste Cauldron as new layer
Resize by 25%
Position between left and middle Frames

Paste Kooky Spider as new layer
Resize by 30%
Position to liking

Paste Tube of choice as new layer
Resize as necessary and position to your liking

Paste Paper of choice as new layer
Layers > Arrange > Send to Bottom

Layers > New Mask Layer > From Image
Apply DBV_Mask02
OK
Layers > Merge > Merge Group
Lower opacity to 60

Crop and resize

Still on Mask Layer
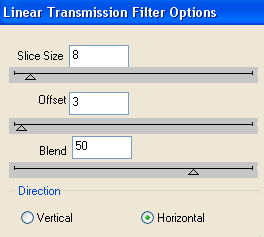
Effects > dsb Flux > Linear Transmission with the following settings:


Select Text Tool and fonts of choice
I am using BoneHymie and CarpenterScript
Text colour is Black

Type out your text of choice and position to liking
Best to type each "line" as separate vectors and then convert each layer to raster - that way you can move them around and position to liking
Apply any effects and drop shadow of choice

Select another font of choice
I am using Centime
Objects > Align > Horizontal Centre in Canvas
Convert to raster layer
Apply any effect and drop shadow of choice

Finally, add your © copyright, licence and watermark, then save as a GIF or JPG and you're done!


** IF YOU WISH TO ANIMATE PLEASE FOLLOW THESE NEXT STEPS **

Activate your Cauldron layer
Add three new raster layers and rename them Cauldron1, Cauldron2 and Cauldron3

With your Freehand Tool draw out a selection where you want the pot to bubble
Selections > Invert (YOU MUST INVERT!!)
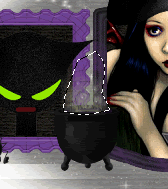


Effects > Plugins > Alien Skin Eye Candy 5: Nature > Smoke with the following settings:
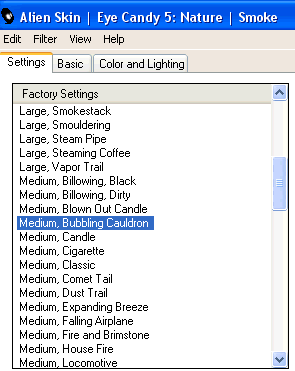


Hide Cauldron1 and activate Cauldron2
Repeat Smoke effect, adjusting the Random Seed

Hide Cauldron2 and activate Cauldron3
Repeat Smoke Effect again, adjusting the Random Seed once more

Deselect

Now activate your Black Cat layers
Select the green eyes with your Magic Wand (Tolerance around 40)
Selections > Modify > Expand by 2
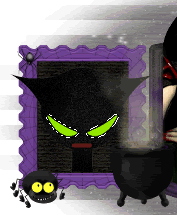


Add a new raster layer and name it CatsEyes
Flood fill with #0e0e0e and deselect

Now to animate!

Turn off the CatsEyes and activate Cauldron1
Edit > Copy Merged

Open Animation Shop
Edit > Paste as New Animation

Hide Cauldron1 and activate Cauldron2
Edit > Copy Merged

Open Animation Shop
Edit > Paste as New Animation

Hide Cauldron2 and activate Cauldron3
Edit > Copy Merged

Open Animation Shop
Edit > Paste as New Animation

Activate CatsEyes and Cauldron1 again
Edit > Copy Merged

Open Animation Shop
Edit > Paste as New Animation

Hide Cauldron1 and activate Cauldron2
Edit > Copy Merged

Open Animation Shop
Edit > Paste as New Animation

Hide Cauldron2 and activate Cauldron3
Edit > Copy Merged

You should now have 6 Frames

Select all and change Frame Properties to 20
Now save as a GIF and you're done!

Thanks for trying my tutorial!

::st!na::


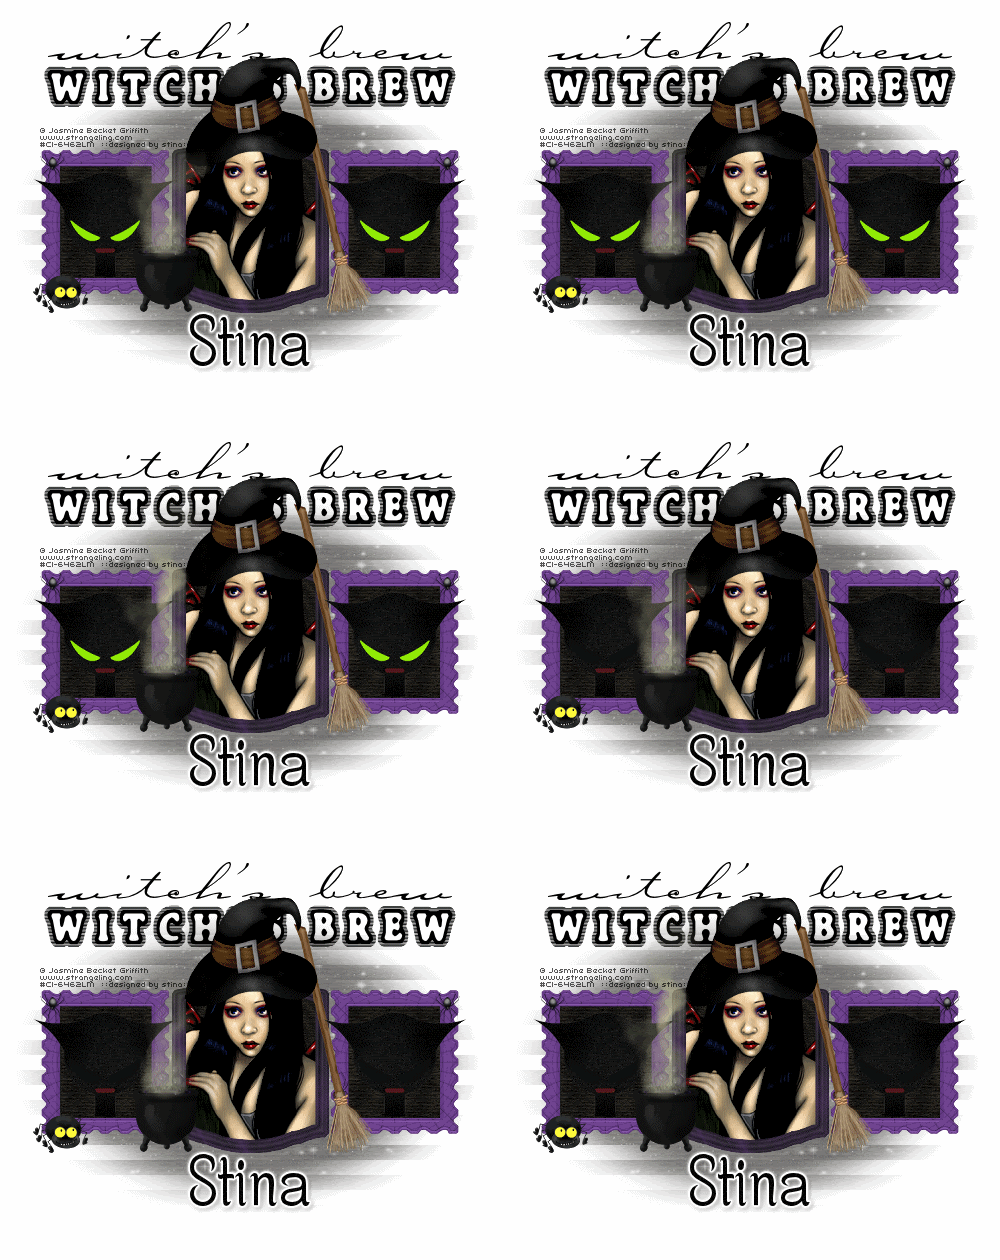
Here is a non-animated version:
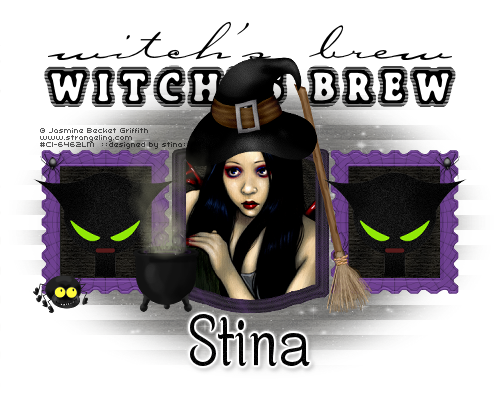


© Tutorial written by Stina on 13th September 2009
All rights reserved

Thursday, August 20, 2009

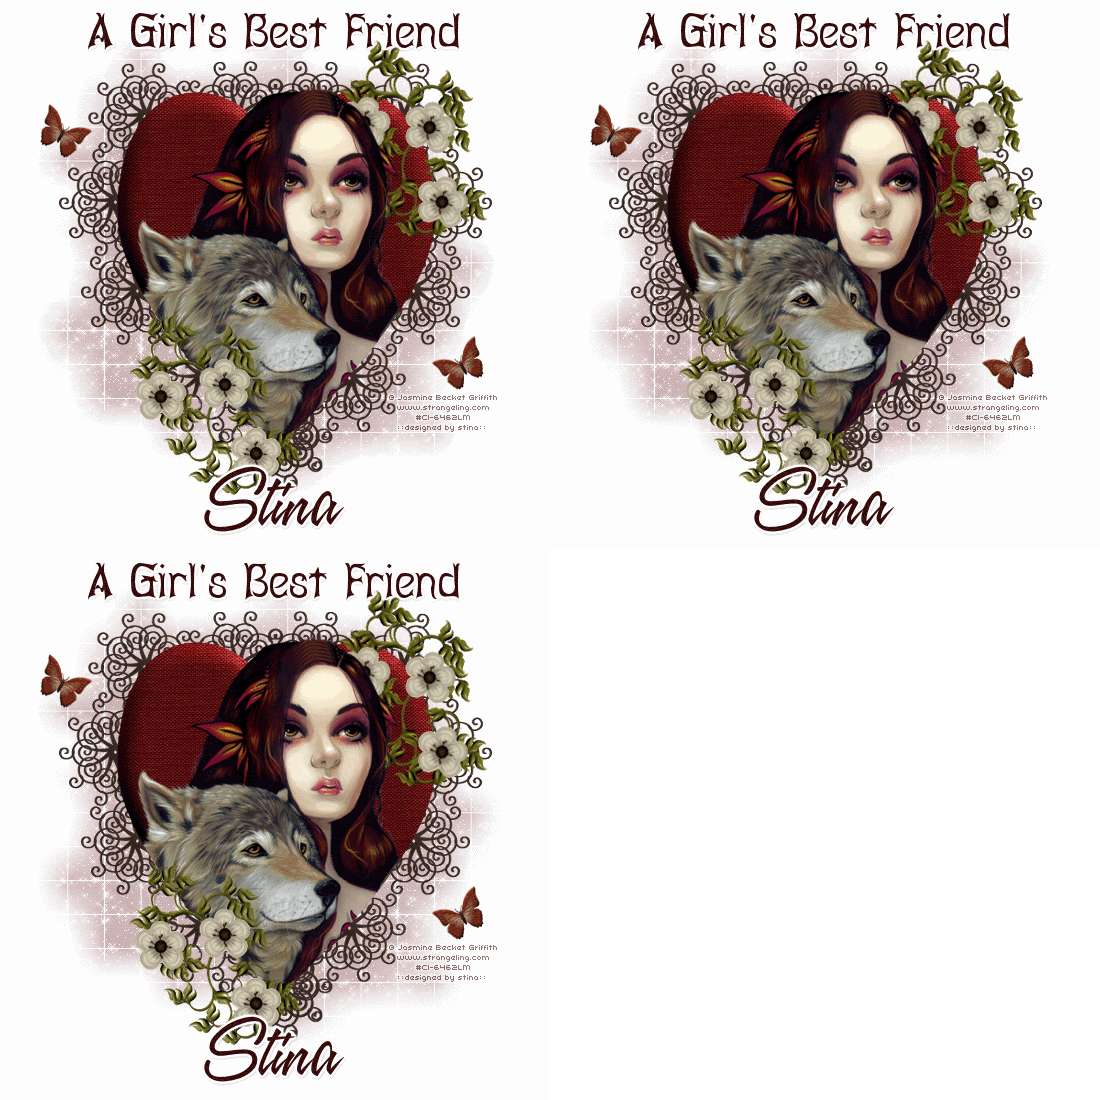
A Girl's Best Friend


Supplies

Scrap kit of choice - I am using Tootypup Scraps' part of "An Autumn Romance" collab available from Twilight Scraps
Tubes of choice - I am using the artwork of Jasmine Becket Griffith which is avialable with a licence from CILM
**PLEASE DO NOT USE HER ARTWORK WITHOUT THE APPROPRIATE LICENCE**
WSL_Mask84 by Chelle available from her blog
Fonts of choice - I am using Abagail and A&S Speedway
Plugins: Xenofex 2 > Constellation
Eye Candy 4000 > Gradient Glow (optional)


Let's begin....


Open a 600 x 600 blank canvas flood-filled white

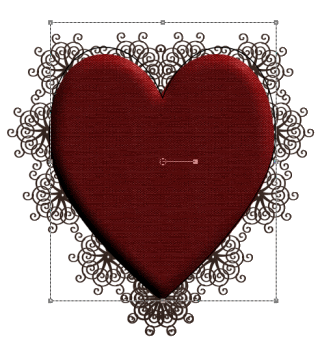
Paste Heart5b as new layer
Resize if necessary (I kept it the same size)

Paste your Tube of choice as new layer
Resize as necessary and position

Select your Preset Shape Tool to Heart
Foreground - #000000
Background - null

Draw out a heart to the same size as the one we pasted
(You might want to hide your Tube layer for this step so you can see the edge of the heart)


Once happy with your sizing,
Convert to raster layer

Select outside the Heart you just drew with your Magic Wand
Selections > Modify > Feather by 3

Activate and unhide Tube layer
Erase the any excess you wish to your liking
You can delete your heart shape now

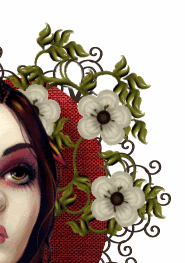
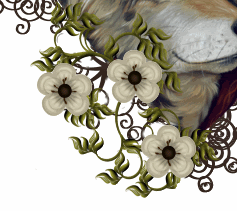
Paste Doodle4 as new layer
Image > Rotate by 20 to the right
Resize by 30%
Position to the lower left

Paste a Flower of choice as new layer
Resize by around 15%
Duplicate twice and place each flower on the greenery
Layers > Merge > Merge Down
Repeat so each flower is one layer
Duplicate then set blend mode to Multiply
Lower opacity to 75, then
Layers > Merge > Merge Down

Layers > Merge > Merge Down
(Flowers and Doodle as one layer)

Duplicate then move to the upper right corner
Image > Rotate by 15 to the right
Place this layer BEHIND your Tube layer

Activate Background Heart layer
Use your Eraser Tool to erase some of the "wrought iron" so that the Doodle greenery blends with it


Paste a Butterfly as new layer
Resize by 20%
Position in upper left
Duplicate, then Image > Mirror
Position in lower right

Crop and resize

Paste Paper of choice as new layer
Layers > Arrange > Send to Bottom

Layers > New Mask Layer > From Image
Apply WSL_Mask84
OK
Layers > Merge > Merge Group
Lower opacity to 35

Select Text Tool and font of choice
I am using Abagail
Text colour to match tag - I am using #380b0c

Type out text of choice
Objects > Align > Horizontal Centre in Canvas
Convert to raster layer
Add any effects you wish and drop shadow of choice

Select another font of choice
I am using A&S Speedway
Same text colour

Type out your name
Objects > Align > Horizontal Centre in Canvas
Convert to raster layer
Add any effects you wish and drop shadow of choice

Finally, add your © copyright, licence and watermark, then save as GIF or JPG and you're done!


** IF YOU WISH TO ANIMATE PLEASE FOLLOW THESE NEXT STEPS **

Activate the Mask Layer
Duplicate twice and rename Sparkle1, Sparkle2 and Sparkle3

Hide Sparkle2 and Sparkle3 activating only Sparkle1

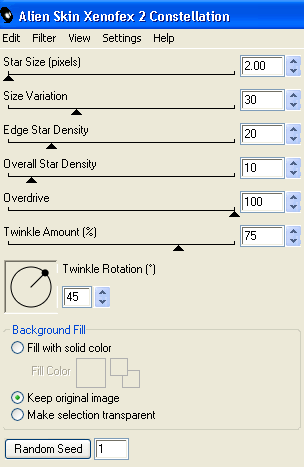
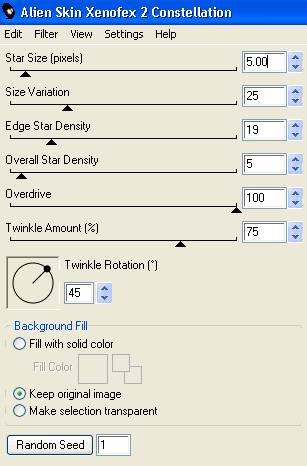
Effects > Plugins > Xenofex 2 > Constellation with the following settings:


Hide Sparkle1 and activate Sparkle2
Apply the Constellation effect, adjusting the Random Seed

Hide Sparkle2 and activate Sparkle3
Apply the Constellation effect again, adjusting the Random Seed once more

Hide Sparkle2 and Sparkle3 with only Sparkle1 visible
Edit > Copy Merged

Open Animation Shop
Edit > Paste as New Animation

Back to PSP
Hide Sparkle1 and activate Sparkle2
Edit > Copy Merged

In Animation Shop
Edit > Paste AFTER Current Frame

Back to PSP
Hide Sparkle2 and activate Sparkle3
Edit > Copy Merged

In Animation Shop
Edit > Paste AFTER Current Frame
Save as a GIF and you're done!

Thanks for trying my tutorial!

::st!na::


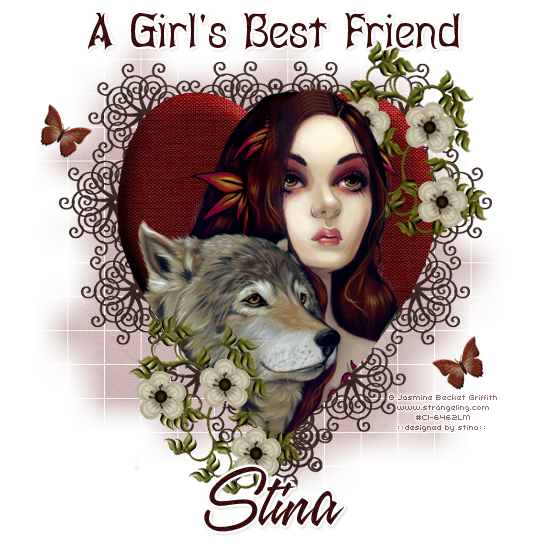
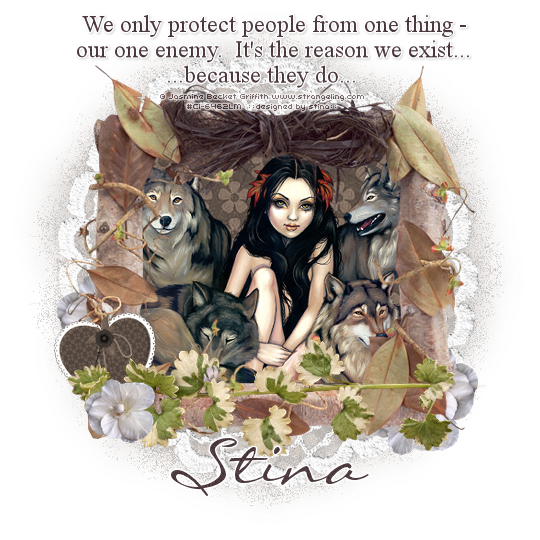
Here is a non-animated version:


© Tutorial written by Stina on 19th August 2009
All rights reserved

Monday, August 10, 2009

Protector


Supplies

Scrap kit of choice - I am using Heartbeatz Creationz' part of "An Autumn Romance" collab available from Twilight Scraps
Tubes of choice - I am using the lovely artwork of Jasmine Becket-Griffith available with a licence from CILM
**PLEASE DO NOT USE HER ARTWORK WITHOUT THE PROPER LICENCE**
WSL_Mask119 by Chelle available from her blog
Fonts of choice - I am using Misfortune and LiorahBT
Plugins: Eye Candy 4000 > Gradient Glow
Xenofex 2 > Constellation


Let's begin...


Open a new 600 x 600 blank canvas flood-filled white

Paste Element27 (Lace) as new layer
Resize by 85%

Paste Element22 (Leafy Frame) as new layer
No need to resize

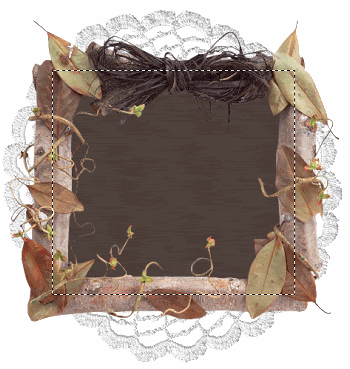
With your Selection Tool draw a rectangle around the Frame
Add a new raster layer
Layers > Arrange > Move Down

Paste Paper of choice INTO selection


KEEP SELECTED!!

Paste Tube of choice as new layer
Resize as necessary
Position inside Frame
Selections > Invert
Delete then deselect

Paste Element25 (Leafy Branch) as new layer
Resize by 52%
Position along bottom of Frame
Erase the stem protruding to the right

Paste Element1 (Heart with Key) as new layer
Image > Rotate by 10 to the left
Resize by 20%
Position to the lower left BEHIND leafy branch


Paste Element26 (white flower) as new layer
Resize by 15%
Position to the lower left over leafy branch and heart
Duplicate a few times and position behind Frame on either side to your liking

Paste Paper of choice as new layer
Layers > Arrange > Send to Bottom

Layers > New Mask Layer > From Image
Apply WSL_Mask119
OK
Layers > Merge > Merge Group
Lower opacity to 50

Crop and resize to liking

Select Text Tool and font of choice
I am using Times New Roman
Text colour - #4d3a3f

Type out a quote or text of choice
Objects > Align > Horiztonal Centre in Canvas
Convert to raster layer
Apply a slight Gradient Glow

Select another font of choice
I am using LiorahBT
Type out your name
Objects > Align > Horizontal Centre in Canvas
Convert to raster layer
Apply a slight Gradient Glow and drop shadow of choice

Finally, add your © copyright, licence and watermark, then save as a GIF or JPG and you're done!


** IF YOU WISH TO ANIMATE PLEASE FOLLOW THESE NEXT STEPS **

Activate your Mask layer
Duplicate twice and rename Sparkle1, Sparkle2 and Sparkle3

Activate Sparkle1
Effects > Plugins > Xenofex 2 > Constellation with the following settings:


Hide Sparkle1 and activate Sparkle2
Repeat Constellation adjusting the Random Seed

Hide Sparkle2 and activate Sparkle3
Repeat Constellation again adjusting the Random Seed once more

Now to animate!

Activate Sparkle1 and hide Sparkle2 and Sparkle3
Edit > Copy Merged

Open Animation Shop
Edit > Paste as New Animation

Back to PSP
Hide Sparkle1 and activate Sparkle2
Edit > Copy Merged

In Animation Shop
Edit > Paste After Current Frame

Back to PSP
Hide Sparkle2 and activate Sparkle3
Edit > Copy Merged

In Animation Shop
Edit > Paste After Current Frame

Now save as a GIF and you're done!

Thanks for trying my turorial!

::st!na::


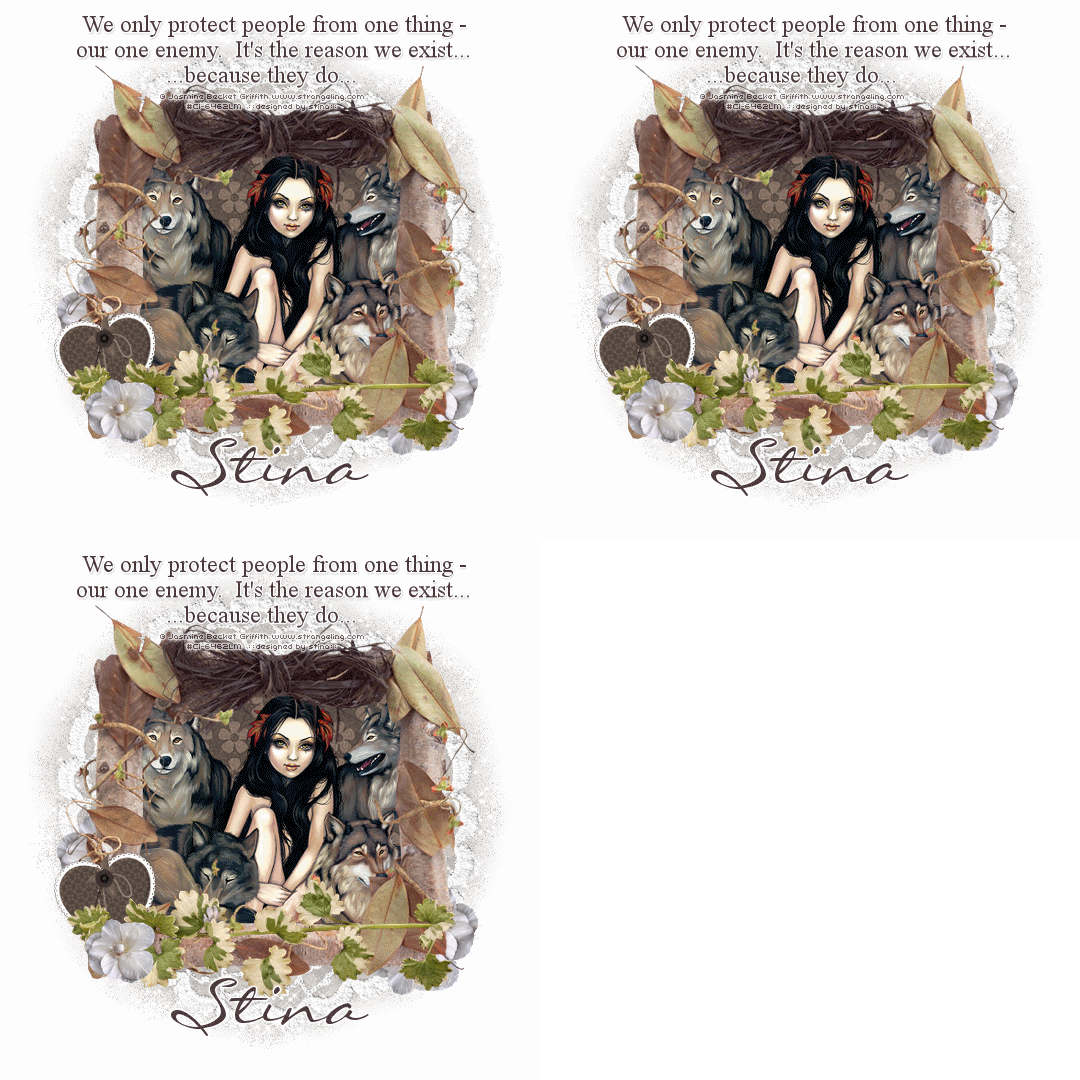
Here is a non-animated version:


© Tutorial written by Stina on 9th August, 2009
All rights reserved
Sunday, April 5, 2009

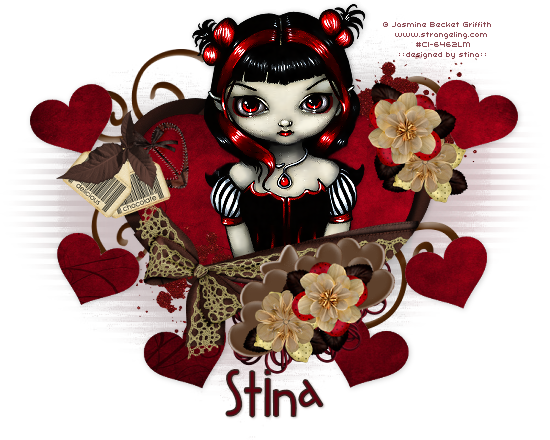
Chocolate Fairy

 
Supplies
 
"Chocolate" freebie kit by Bel Vidotti which is available from her blog
Tube of choice - I am using the artwork of Jasmine Becket Griffith which can be purchased from CILM
**PLEASE DO NOT USE HER ARTWORK WITHOUT THE APPROPRIATE LICENCE**
WSL_Mask10 by Chelle available from her blog
Template #43 by Ali available from her blog
Font of choice - I am using 2 Peas Fat Frog
 
Let's begin
 
 
Open Template 43 by Ali
Shift D to duplicate and close the original
Delete the copyright layer
 
Image > Canvas Resize 750 x 600 centred
 
Add a new raster layer and flood fill white
 
Layers > Arrange > Send to Bottom
 
Activate MAIN BACK HEART layer
Selections > All
Selections > Float
Selections > Defloat
Paste Paper01 into Selection
Deselect
 
Activate SMALLER HEARTS layer
Selections > All
Selections > Float
Selections > Defloat
Paste Paper01 into Selection (it should still be in your clipboard memory)
Deselect
 
Activate MAIN HEART FRAME
Selections > All
Selections > Float
Selections > Defloat
Paste Paper06 into Selection
Deselect
 
Duplicate then set blend mode to Multiply
Lower opacity to 50
Layers > Merge > Merge Down
 
Now Activate MAIN BACK HEART again
Resize by 90%
Activate MAIN HEART FRAME and do the same
 
Paste Doodle02 as new layer
Resize by 50%
Layers > Arrange > Move Down
Position to the right
Duplicate
Image > Mirror then Image > Flip
Resize by 85%
Position in the upper right
 
 
Paste Tag01 as new layer
Image > Rotate by 20 to the left
Resize by 30
Position to the left
 
paste Tag02 as new layer
Image > Rotate by 40 to the right
Resize by 30
Position over first tag
 
 
Paste Leaves as new layer
Resize by 30%
Place over tags
 
Paste Flower07 as new layer
Resize by 35%
Place in upper right
 
Paste Flower06 as new layer
Image > Rotate by 40 to the left
Resize by 40%
Place alongside other flower04
 
Paste Flowers01 and 03 as new layers
Resize each by around 35%
Place one each in the centre of the first two flowers
Layers > Merge > Merge Down on each Flower
 
 
Duplicate each Flower
Position both flowers at the bottom of the heart
 
Now paste various chocolates of choice as new layers
Resize each by 30%
Image > Rotate by 30 to the left or right
Repeat if necessary
 
Paste Wrape03 as new layer
Resize by 55%
Position BEHIND chocolates and flowers
 
Activating your MAIN HEART FRAME AGAIN
Select the area outside of the frame with your Magic Wand
 
 
Selections > Modify > Feather by 3
Use your Eraser Tool to erase the excess overhanging the right
Deselect
 
Paste any other embellishments or elements you wish
 
Crop and resize
 
Activate your background layer
 
Paste Paper04 as new layer
Layers > New Mask Layer > From Image
Locate WSL_Mask10
OK
Layers > Merge > Merge Group
Lower opacity to around 35
 
Paste your tube as new layer
Resize as necessary
Place where desired
 
Select your Text Tool and font of choice
Choose a colour from your tube or scrap
Set it as your background in your Materials Palette
 
Type out your name
Objects > Align > Horizontal Centre in Canvas
Convert to raster layer
Apply any effects you wish and add a drop shadow
 
Finally add your © copyright, licence and watermark, then save as a GIF or JPG and you're done!
 
Thank you for trying my tutorial!
 
::st!na::
 
 
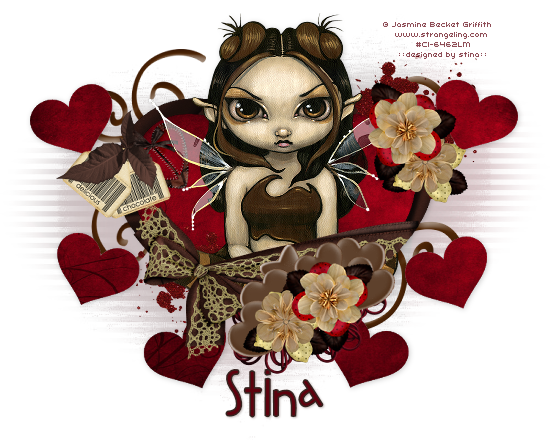
Here is another example:
 

© Tutorial written by Stina on 5th April 2009
All rights reserved
Saturday, March 21, 2009

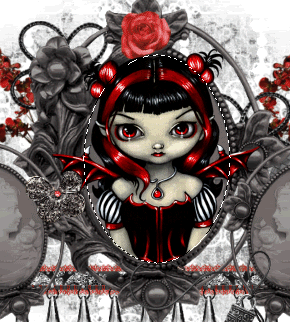
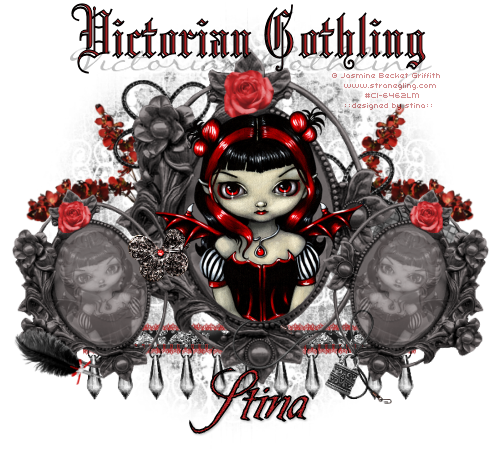
Victorian Gothling

 
Supplies
 
Scrap kit of choice - I am using "Victorian Goth" by Melisa's Scraps which can be purchased from Creative Scraps and Cotton Candy Kreations
Tube of choice - I am using the artwork of Jasmine Becket Griffith which can be purchased from CILM
**PLEASE DO NOT USE HER ARTWORK WITHOUT THE APPROPRIATE LICENCE**
WSL_Mask214 by Chelle available from her blog
Fonts of choice - I am using Blackletter686 BT, LiorahBT and Be Safe
 
 
~ Step 1 ~
 
Open a new 600 x 600 blank canvas flood-filled white
 
Paste Camo_1 as new layer
Resize by 70%
 
LEAVE IN POSITION
 
Duplicate
Image / Rotate by 15 to the left
Position to the left
Duplicate
Image / Mirror
 
Layers / Merge / Merge Down
Rename this layer to Small Cameos and the other layer to Cameo
 
You should now have something like this:


~ Step 2 ~
 
Paste Necklace as new layer
Resize by 40%
Position as if it secured to one of the Cameos
 

Paste Butterfly as new layer
Resize by 15%
Position between the left and centre Cameos
 
Paste RibbonWCharms as new layer
Resize by 50%
Position along the bottom
Layers / Arrange / Send to Bottom
 
Paste LaceRibbon as new layer
Resize by 50%
Position along length of the ribbon
Layers / Arrange / Send to Bottom
 

Paste Pen as new layer
Image / Rotate by 25 to the left
Resize by 20%
Position along the bottom of left Cameo
 
Paste Rose as new layer
Resize by 8%
Position in top centre of small Cameo to the left
 
 
Duplicate
Image / Mirror
Layers / Merge / Merge Down
 
Paste Rose as new layer again
Resize by 12%
Position in top centre cameo
 
Paste MetalFlower as new layer
Resize by 30%
Position where you want it to go
Layers / Arrange / Send to Bottom
 
Duplicate
Image / Mirror
Place in position on opposite side
 
Paste Flower as new layer
Resize by 40%
Position to the left between the left and centre Cameos
Layers / Arrange / Send to Bottom
Duplicate
Image / Mirror
Layers / Merge / Merge Down
 
Activate Background layer
Paste Paper7 as new layer
Resize by 70%
 
Layers / Load/Save Mask / Load mask from Disk
WSL_Mask214
Fit to Layer CHECKED
OK
Layers / Merge / Merge Group
 
Crop and resize
 

~ Step 3 ~
 
Paste tube as new layer
Resize as necessary
Position in the centre cameo
 
With your Selection Tool set to Ellipse
From the centre of the Cameo draw out an oval along the edge of inner frame
Activate your tube
With your Eraser Tool the excess from the bottom
Deselect
 
 
Duplicate
Image / Rotate by 15 to the left
Resize by 55%
Position within the left cameo frame
Set blend mode to Luminance (Legacy)
Duplicate again
Image / Mirror
 
Back to your Top Layer
 
Select your Text Tool
Choose two colours from your tube
Foreground - #000000
Background - #a92124
 
Stroke width - 1.0
 
Select your font of choice - I am using Blackletter686 BT
Type out "Victorian Gothling"
Objects / Align / Horizontal Centre in Canvas
Convert to raster layer
 
Toggle the colours in your Materials Palette and turn the visiblity off the Foreground so that you now have the following:
Foreground - null
Background - #000000
 
Select a script font - I am using LiorahBT
Add the same text as previous
Position slightly lower
Objects / Align / Horizontal Centre in Canvas
Convert to raster layer
 
Layers / Arrange / Move Down
Lower the opacity to 25
 
Select another font of choice - I am using Be Safe
Toggle the colours back to those we used first
Foreground - #000000
Background - #a92124
 
Stroke width - 1.5
 
Type out your name
Objects / Align / Horizontal Centre in Canvas
Convert to raster layer
Add some noise of 15
Apply a drop shadow:
H & V - 1
Opacity - 30
Blur - 3.00
Colour - #000000
 
Finally, add your © copyright, licence and watermark
 
Then save as a GIF or JPG and you're done!
 
Thank you for trying my tutorial!
 
::st!na::
 

© Tutorial written by Stina on 21st March 2009
All rights reserved
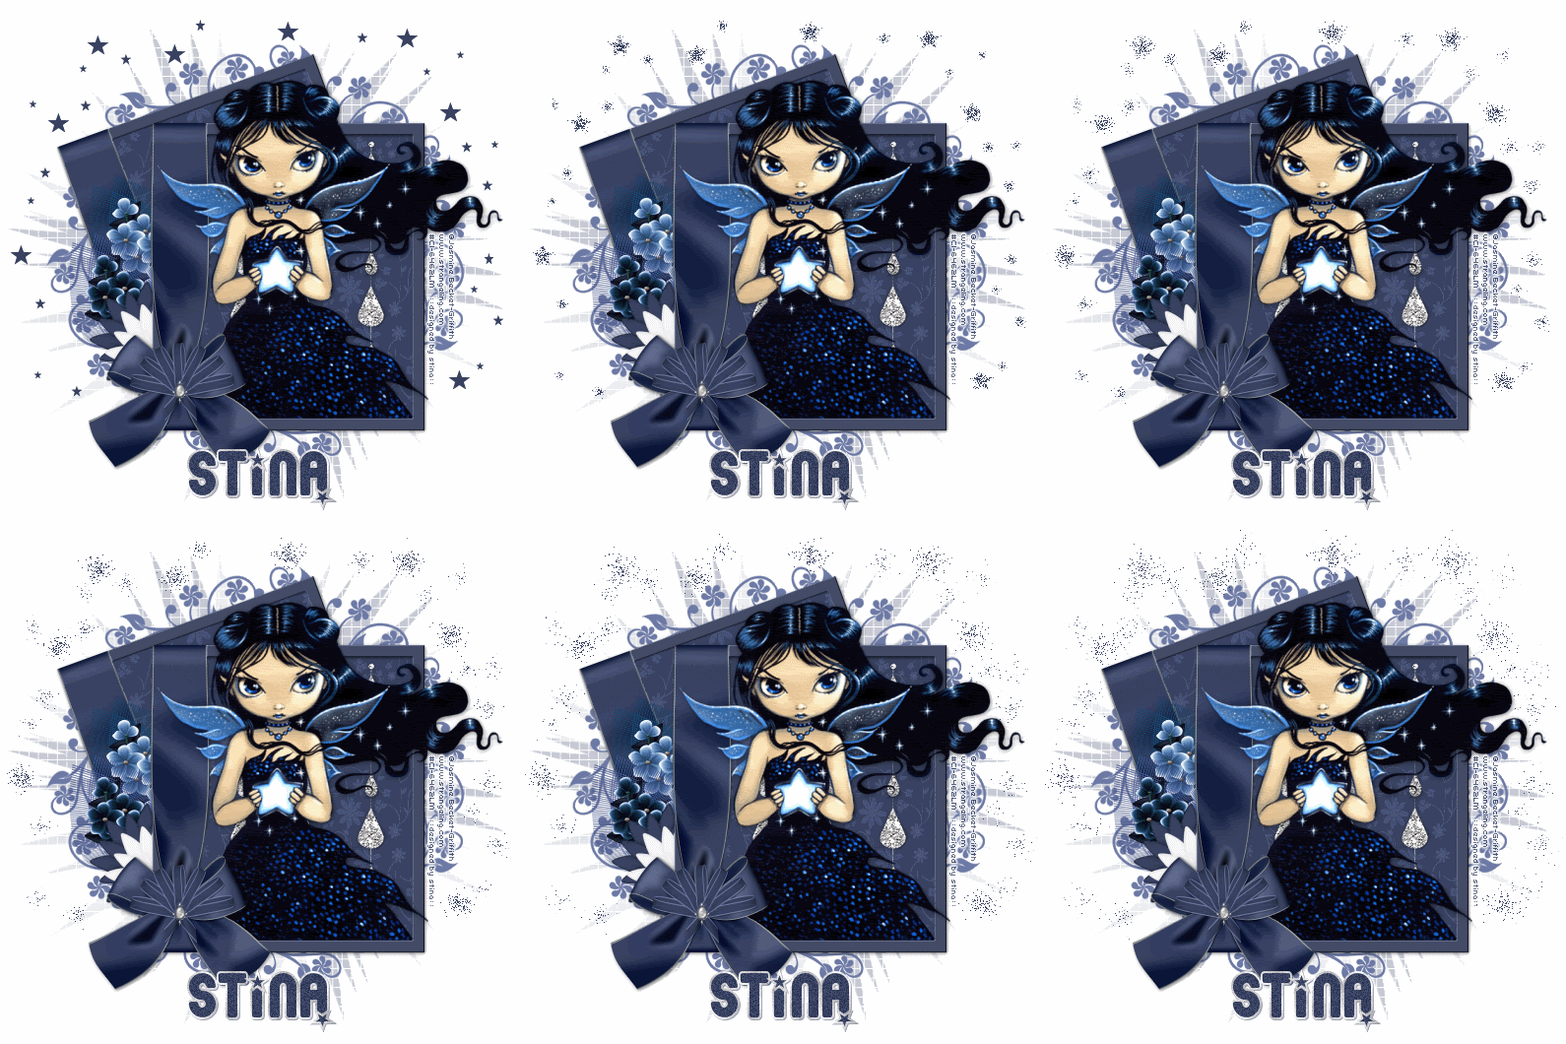
Saturday, March 14, 2009

Starchild

 
Supplies
 
Scrap kit of choice - I am using "Moment in Time" by Annie's Designs which can be purchased from Paradise 4 Scrappers and Creative Scraps
Tube of choice - I am using the lovely work of Jasmine Becket-Griffith which can be purchased from CILM
**PLEASE DO NOT USER HER ARTWORK WITHOUT THE APPROPRIATE LICENCE**
Vix_Mask143 (supplied)
Star Preset Shape (supplied)
Font of choice - Pornstar (supplied)
 
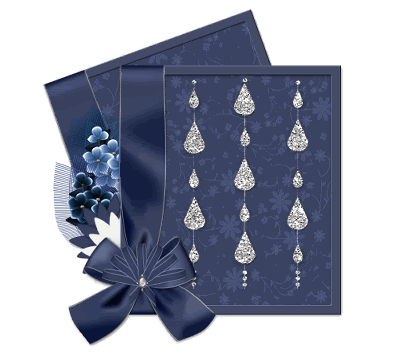
My Supplies here
 
 
~ Step 1 ~
 
Open a new 600 x 600 blank canvas flood-filled white
 
Paste Frame6 as new layer
Resize by 35%
Duplicate
Image / Rotate by 20 to the left
Layers / Arrange / Move Down
 
Rename them Frame1 (bottom) and Frame2 (top)
 
Activate Frame1 and using your Magic Wand select the inside of them frame
Selections / Modify / Expand by 10
Add new raster layer
Paste Paper7 into Selection
Deselect
 
Activate Frame2 and repeat step
 
On Frame1 Layers / Merge / Merge Down
DO NOT DO THIS STEP FOR FRAME2
 
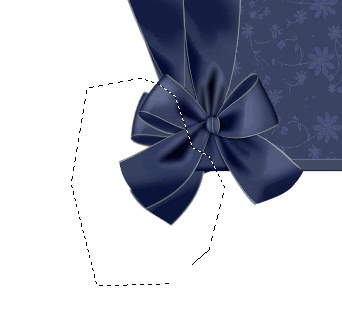
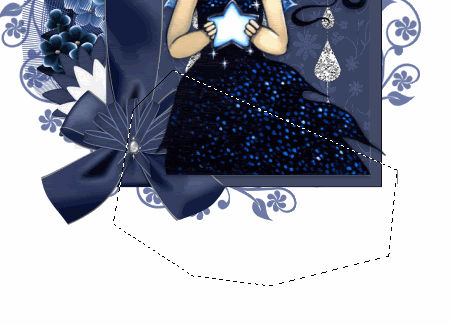
With your Freehand Tool make a small selection around the excess bow from the borrom frame
 
 
Delete
 
Paste Bow9 as new layer
Resize by 15%
Position over centre of bow on frame
 

~ Step 2 ~
 
Paste Flower6 as new layer
Resize by 25%
Position between Frame1 and Frame2
 
Paste Flower5
Resize by 25%
Position between Frame1 and Frame2
 
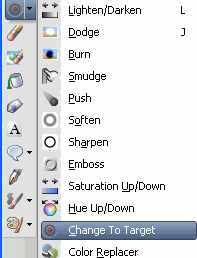
Set your Foreground to a colour matching your frames - I chose #1a2448
 
Now select your Change to Target Tool with the following settings:
 
 
Dust your brush over both your Flower layers to change their colour
 
Paste Flower as new layer
Resize by 40%
Position behind bow
 
Paste Flower4 as new layer
Resize by 40%
Position behind Flower behind bow
 
Activate paper layer of Frame1
Paste DustOfPearl as new layer
Resize by 80% Bicububic
Position in the centre of the frame
 

Paste Frame as new layer
Resize by 45%
Layers / Arrange / Send to Bottom
Position centrally behind frames to look like a circle of "doodles"
 
Paste tube as new layer
Resize as necessary
Position in Frame1 on top layer
Duplicate and move below Frame1
 
Add a drop shadow to the top Tube layer:
H & V - 1
Opacity - 50
Blur - 8.00
Colour - #000000
 
With your Freehand Tool draw around the excess over the bow then Delete
Deselect
 
 
Crop and resize
 

~ Step 3 ~
 
Activate your Background layer
 
Paste Paper4 as new layer
Adjust / Blur / Gaussian Blur
Radius - 20.00
 
Layers / New Mask Layer / From Image
Locate Vix_Mask143
OK
 
Layers / Merge / Merge Group
Lower opacity to 30
 
Activate your top layer
 
Select your Preset Shapes Tool to Seeing_Stars_W
Set your Background colour to one matching your tube and frame - I am using #384160
 
Draw out 4 stars of varying sizes
Rename them Star1 - 4
Duplicate and position to your liking
 
Once you have positioned your stars hide all layers EXCEPT the Stars, then
Layers/ Merge / Merge Visible
 
Unhide layers
 
Select your Text Tool and font (I used Pornstar)
Foreground - Silver colour
Background - #384161
 
Type out your name
Add some noise and a drop shadow:
H & V - 1
Opacity - 50
Blur - 1.00
Colour - #384161
 
Finally, add your © copyright, licence and watermark
 

~ Step 4 ~
 
**This next step is for animation**
 
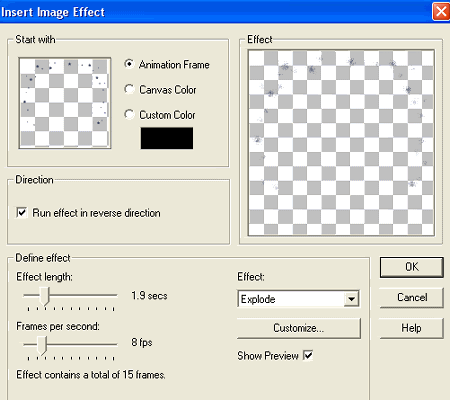
Copy your Stars layer and paste into Animation Shop
 
Effects / Insert Image Effect with the following settings:
 
 
You should now have 16 frames
 
Back in PSP turn off the visibility of your Stars layer
Edit / Copy Merged
 
In Animation Shop
Edit / Paste as New Animation
Then Paste After Current Frame until you have 16 Frames of your tag
 
Now back to your Star animation we have just created
Edit / Select All
Animation / Reverse Frames
Edit / Copy
 
Activate the tag you just pasted
Edit / Propogate Paste (MUST BE SELECTED)
Edit / Paste
 
DO NOT CLICK YOUR MOUSE BUTTON UNTIL YOU ARE SATISFIED WITH THE POSITION
 
Animation / Frame Properties
Change to 15
 
Save as a GIF and you're done!
 
Thank you for trying my tutorial
 
::st!na::
 
 
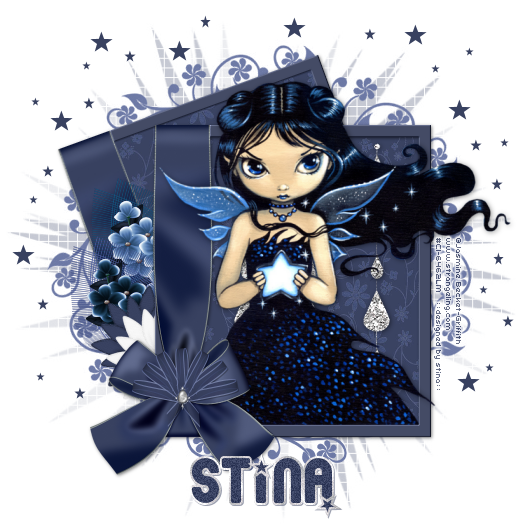
A non-animated version:
 

© Tutorial written by Stina on 14th March 2009
All rights reserved
Thursday, February 26, 2009

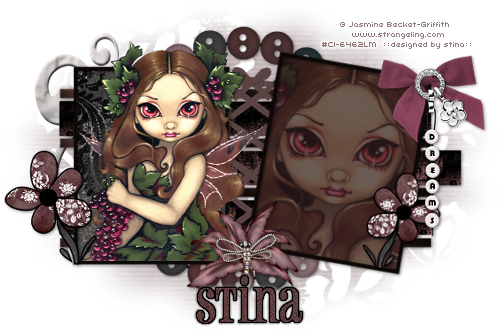
Fairy Dreams

 
Supplies
 
Scrap kit of choice - I am using the lovely "Fairy Dreams" kit by Melisa's Scraps which you can purchase from Cotton Candy Kreations and Creative Scraps
Tube of choice - I am using the delightful artwork of Jasmine Becket-Griffith which can be purchased from CILM
WSL_Mask33 by Chelle
Font of choice - I am using Pharmacy
Plugin: Eye Candy 4000 Gradient Glow
 
 
~ Step 1 ~
 
Open a new blank canvas 600 x 400 flood filled white
 
Open Paper1 and resize 200 x 200
Minimise it and select your Preset Shapes Tool
Set it to Rectangle
 
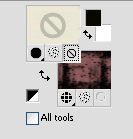
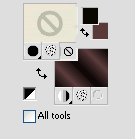
In your Materials Palette set your Foreground to null and your background to the Paper you just resized
 
 
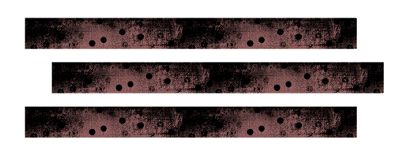
Draw out a long rectangle about 400 pixels long and 50 high
Objects / Align / Centre in Canvas
Convert to raster layer
 
Duplicate and position slightly down and across
 
Duplicate again and position down and in line with the top rectangle
 

Now with your Dropper Tool select two colours from the paper pattern you just drew out
Set them to your Foreground and Background
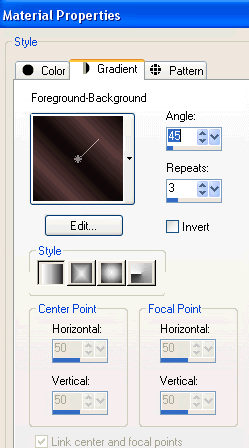
Select your background to Foreground/Background Gradient with the following settings:
 

Make sure your Foreground is set to Null
 
 
Draw out a rectangle the length of the first one but much thinner
Position directly above the top rectangle
Convert to raster layer
 
Image / Rotate by 90 degrees (either way)
 
**IMPORTANT** DO NOT MOVE - LEAVE IN PLACE
 
Effects / Plugins / Graphics Plus / Cross Shadow
Default settings
Repeat
 
Image / Rotate  by 90 degrees back again
 
Duplicate and move between next rectangles
Duplicate again and repeat step
Duplicate again and place last one at the bottom


~ Step 2 ~
 
Select your Preset Shape Tool again on Rectangle
Set your Foreground to black and your Background to null
Stroke width - 5.00
 
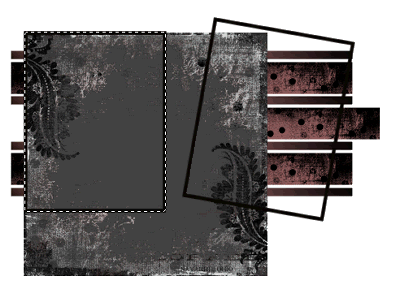
Draw out a rectangle which will be our frame
Use the nodes to size it up or down
Convert to raster layer
 
Duplicate then Image / Rotate by 10 to the right
Position first frame to the left and the second to the right

With your magic wand click inside the first frame
Selections / Modify / Expland by 3
 
Now open Paper6 and resize to 300 x 300
Paste as new layer on your canvas and position along the left edge of your frame
 
 
Selections / Invert
Delete
 
Add a new raster layer
 
Using your magic wand click inside your second frame
Selections / Modify / Expand by 3
Flood fill new layer with a colour from the either from your tube or the kit
Deselect
 
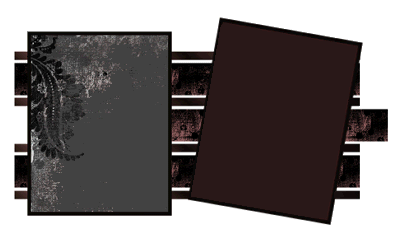
Your canvas should now look something like this:


~ Step 3 ~
 
You've made your template and frames - now let's decorate!! *s*
First let's add our tubes!
 
Paste your tube of choice as new layer
Resize as necessary
Position along the bottom edge of frame but so top and side overhangs
 
Paste your tube again
Image / Rotate by 10 to the right
Position under second frame to your liking
Use your magic wand to click inside frame
Selections / Modify / Expand by 3
Selections / Invert
Activtate tube layer
Delete
Deselect
 
 
Paste Frame1 as new layer
Resize by 50%
Layers / Arrange / Send to Bottom and place behind template and frames in the centre
 
Paste FlowerPatch1 as new layer
Resize by 30% and place along the edge of left frame
Duplicate then Image / Mirror
 
Paste Bow1 as new layer
Resize by 50% then Image / Mirror
Place in the upper right frame
Duplicate then set blend mode to Soft Light
 
Paste DreamsText1 as new layer
Resize by 20%
Adjust / Sharpness / Unsharpen Mask
Radius - 1.00
Strength - 100
Clipping - 4
OK
 
Position over the centre of the bow
 
Paste Flower5 as new layer
Resize by 35% and place in centre between the two frames
 
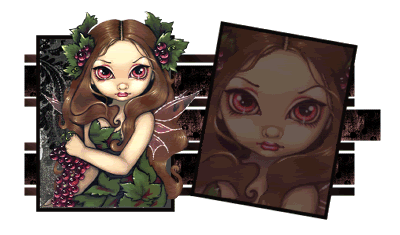
Add any other elements you wish to personalise your creation
 
Apply some drop shadows to your elements
 

~ Step 4 ~
 
Paste Paper3 as new layer
Layers / Arrange / Send to Bottom
 
Layers / New Mask Layer / From Image
Locate WSL_Mask33
Source luminance
OK
 
Layers / Merge / Merge Group
 
Choose a nice font to type out your name
Apply a Gradient Glow in Black
and a drop shadow in white
 
Add your © copyright, licence and watermark
Save as a GIF or JPG and you're done!
 
Thanks for trying my tutorial
 
::st!na::
 

© Tutorial written by Stina on 25th February 2009
All rights reserved