Please email me designed.by.stina@gmail.com with your creations. I'd love to see them.

Showing posts with label Jamie Kidd. Show all posts

Sunday, September 6, 2009

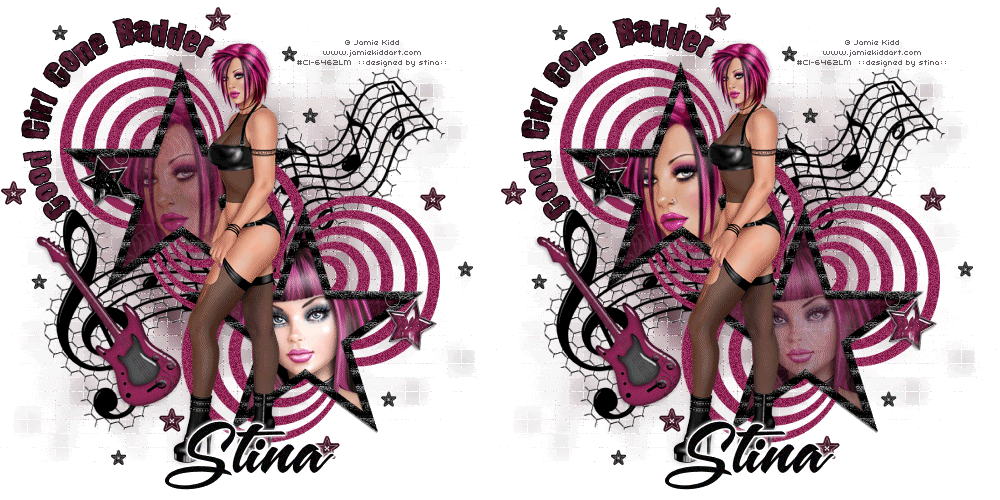
Good Girl Gone Badder


Supplies

Scrap kit of choice - I am using "Good Girl Gone Bad" by Butterfly Flutter Creations which is a freebie available from her blog
Tubes of choice - I am using the lovely artwork of Jamie Kidd available with a licence from CILM
**PLEASE DO NOT USE HER ARTWORK WITHOUT THE APPROPRIATE ARTWORK**
Fonts of choice - I am using 2Peas Bad Attitude and A&S Snapper Script
Plugins: dxb Flux > Bright Noise
Eye Candy 4000 > Gradient Glow (optional for text)


Let's begin...


Open a new 600 x 600 blank canvas flood-filled white

Paste Frame1, 2 or 3 as new layer
Resize by 60%

Select inside Frame with Magic Wand
Selections > Modify > Expand by 10
Add new raster layer
Paste Paper of choice INTO selection
Layers > Arrange > Move Down

KEEP SELECTED!!

Paste two Tubes of choice as new layers
Resize as necessary and position inside Star frames
Selections > Invert
Delete then deselect
Rename Tube1 and Tube2
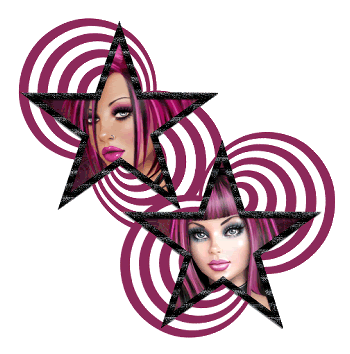


Paste Splatter as new layer
Layers > Arrange > Send to Bottom
Resize by 70%

Adjust > Blur > Gaussian Blur with a radius of 10.00

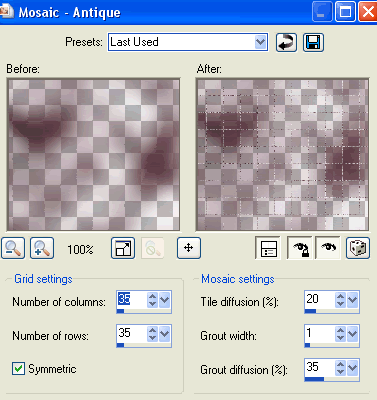
Effects > Texture Effects > Mosaic - Antique with the following settings:


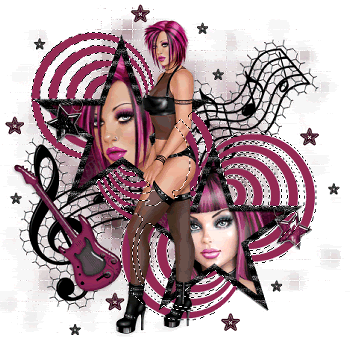
Paste MusicNotes of choice as new layer
Image > Rotate by 15 to the left
Resize by 70%
Position to your liking



Activate top layer

Paste a Star Button as new layer
Resize by 8%
Duplicate several times and position around tag

Paste another Star Button as new layer
Resize by 5%
Duplicate several times and position around tag

Paste Tube of choice as new layer
Resize as necessary
Position in centre
Rearrange Star Buttons to liking around tube

Hide all layers except Star Buttons
Layers > Merge > Merge Visible
Unhide layers again

Paste a Keychain as new layer
Image > Rotate by 15 to the right
Resize by 10%
Position to the right hanging from the Frame

Paste another Keychain as new layer
Repeat rotation and resizing, then
Image > Mirror
Position to the left hanging from Frame

Crop and then resize

Using your Magic Wand select the "circles" on the Frame
Selections > Modify > Expand by 2


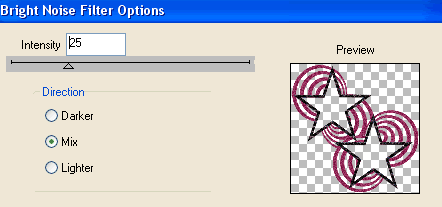
Effects > Plugins > dsb Flux > Bright Noise with the following settings:


Select your Preset Shape Tool to Ellipse and draw out a circle in the upper left

Select your Text Tool and font of choice
I am using 2Peas Bad Attitude
Foreground - #000000
Background - I am using one of the papers from the kit
Stroke width - 1.0

Type out your text on the curve and position
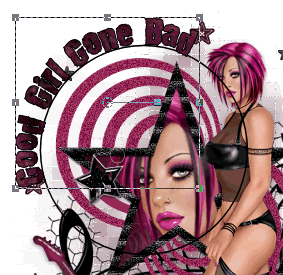


Open your Layer Palette and Vector Layer
Turn off the Ellipse then,
Convert to raster layer
Apply a drop shadow of choice

Select another font of choice
I am using A&S Snapper Script
Text Colour Black

Type out your name
Objects > Align > Horizontal Centre in Canvas
Convert to raster layer
Apply a Gradient Glow and drop shadow of choice

Finally, add your © copyright, licence and watermark, then save as a GIF or JPG and you're done!


** IF YOU WISH TO ANIMATE PLEASE FOLLOW THESE NEXT STEPS **

This is an easy animation!

Activate your Tube1 layer
Lower opacity to 50
Edit > Copy Merged

Open Animation Shop
Edit > Paste as New Animation

Back to PSP
Return opacity to 100 and lower opacity of Tube2 to 50
Edit > Copy Merged

In Animation Shop
Edit > Paste after Current Frame

Select All and change Frame Properties to 50
Save as a gif and you're done!

Thanks for trying my tutorial!

::st!na::


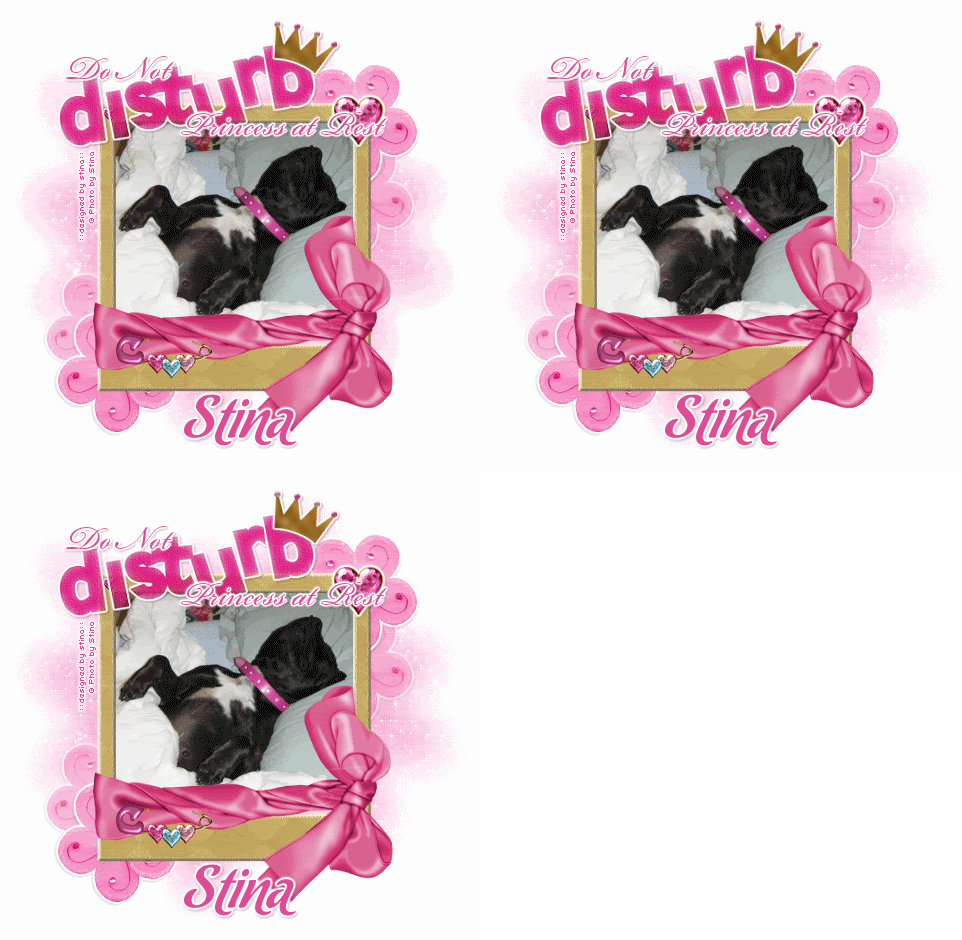
Here is a non-animated version:
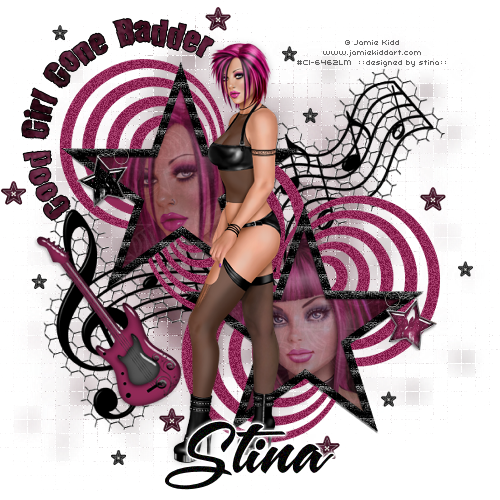


© Tutorial written by Stina on 6th September 2009
All rights reserved

Saturday, May 9, 2009

Do Not Disturb

 
Supplies
 
Scrap kit of choice - I am using "Her Royal Highness" by Twinky which is a special edition scrap kit available from Twinky's Dezines
Image or tube of choice - I am using one of my own photos
WSL_Mask7 by Chelle available from her
blog
Plugin: Eye Candy 4000 Gradient Glow
Plugin: Xero Fritillary
Plugin: Alien Skin Xenofex 2 > Constellation
Font of choice - I am using Chocolate Dulce
 
 
Ready? Let's begin....
 
 
Open a new 600 x 600 blank canvas flood-filled white
 
Paste GoldWrapFrame as new layer
Resize by 65%
 
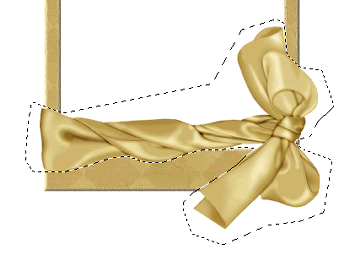
Select you Freehand Tool and draw around the Gold Wrap on the frame, making sure to separate them both with your selection
 
 
Select a colour that you will be using for your tag - I am using #d33f7b
Set it as your Foreground
 
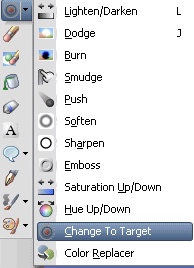
Select your Change to Target brush from your Tool Palette with the following settings:
 
 
Hold your left mouse button down and carefully colourise your selection in a brushing motion
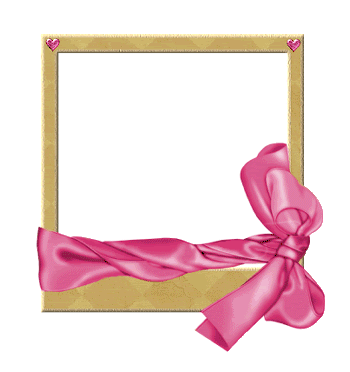
Then deselect
 
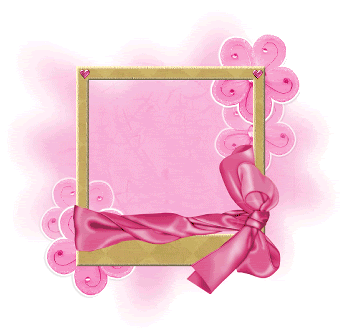
You should now have something like this:
 
 
Before we go any further, let's create our background
 
Paste Paper16 as new layer
Layers > Arrange > Send to Bottom
 
Layers > New Mask Layer > From Image
Locate WSL_Mask7
OK
Layers > Merge > Merge Down
Resize by 85%
 
Paste Flower2 as new layer
Resize by 25%
Position to the upper right on Frame corner
 
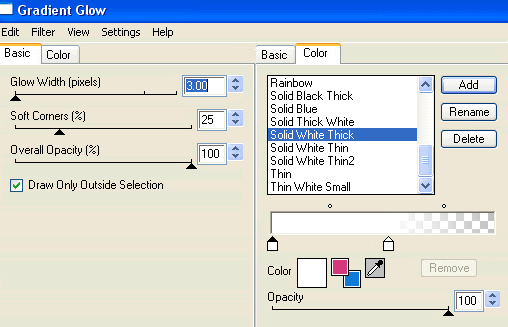
Effects > Plugins > Eye Candy 4000 > Gradient Glow with the following settings:
 
 
Apply a drop shadow:
H & V - 1
Opacity - 20
Blur - 2.00
Colour - #421225
 
Duplicate Flower, then Image > Mirror
Position second flower in the lower left corner of Frame
 
Duplicate again
Resize by 95%
Move up slightly, then
Layers > Arrange > Move Down
Repeat
 
Duplicate again and Image > Mirror
Position just slightly below the first flower in the upper right
 
Layers > Merge > Merge Down
Lower opacity to 65
 
 
Paste your Image or Tube of choice as new layer
I am using one of my own photos
Resize as necessary
Position within Frame to your liking
 
Activate your Frame layer
Select the area inside Frame with your Magic Wand
Selections > Modify > Expand by 10
Selections > Invert
On your image layer press delete
Deselect
 
Paste HeartGem1 as new layer
Resize by 15%
Position in upper right corner
Apply the same Gradient Glow as above but with a Glow Width of 3.00
 
Paste SafetyPin2 as new layer
Resize by 20%
Position somewhere in the Wrap around the Frame
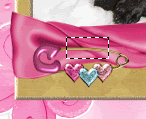
Select a small portion of the pin with your Selection Tool
 
 
Then press delete and deselect
 
Paste a WordArt of choice as new layer
Resize as necessary to fit
I made my own
 
Paste PrincessCrown1 as new layer
Image > Rotate by 20 to the right
Resize by around 15% (depending on the size of your WordArt)
Position on the end letter as if were tilting over
Apply the same Gradient Glow as the HeartGem
 
Crop and resize tag
 
Activate your Mask layer again
 
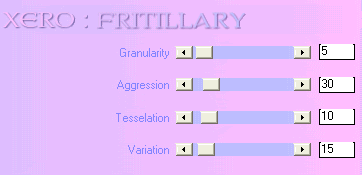
Effects > Plugins > Xero > Fritillary with the following settings:
 
 
Select your Text Tool and font of choice
I am using Chocolate Dulce
Set your Background to a colour matching your tag - I am using #df4e9%
Type out your name
Objects > Align > Horizontal Centre in Canvas
Convert to raster layer
 
Finally, add your © copyright, licence and watermark, then save as a GIF or JPG and you're done!
 

** IF YOU WISH TO ANIMATE PLEASE FOLLOW THESE NEXT STEPS **
 
Duplicate Mask layer twice and rename Sparkle 1, Sparkle2 and Sparkle3
 
Hide Sparkle2 and Sparkle3 activating only Sparkle1
 
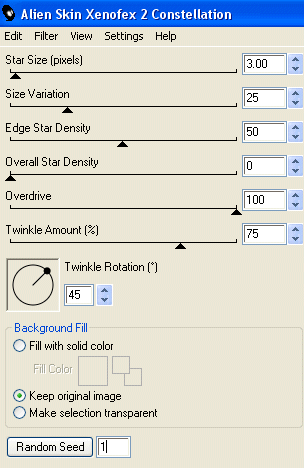
Effects > Plugins > Alien Skin Xenofex 2 > Constellation with the following settings:
 
 
Hide Sparkle1 and activate Sparkle2
Apply the Constellation effect, adjusting the Random Seed
 
Hide Sparkle2 and activate Sparkle3
Apply same again, adjusting the Random Seed
 
Hide Sparkle2 and Sparkle3 again with only Sparkle1 visible
Edit > Copy Merged
 
Open Animation Shop
Edit > Paste as New Animation
 
Back to PSP
Hide Sparkle1 and activate Sparkle2
Edit > Copy Merged
 
In Animation Shop
Edit > Paste AFTER Current Frame
 
Back to PSP
Hide Sparkle2 and activate Sparkle3
Edit > Copy Merged
 
In Animation Shop
Edit > Paste after Current Frame
 
Finally, save as a GIF and you're done!!
 
Thanks for trying my tutorial!
 
::st!na::
 
 
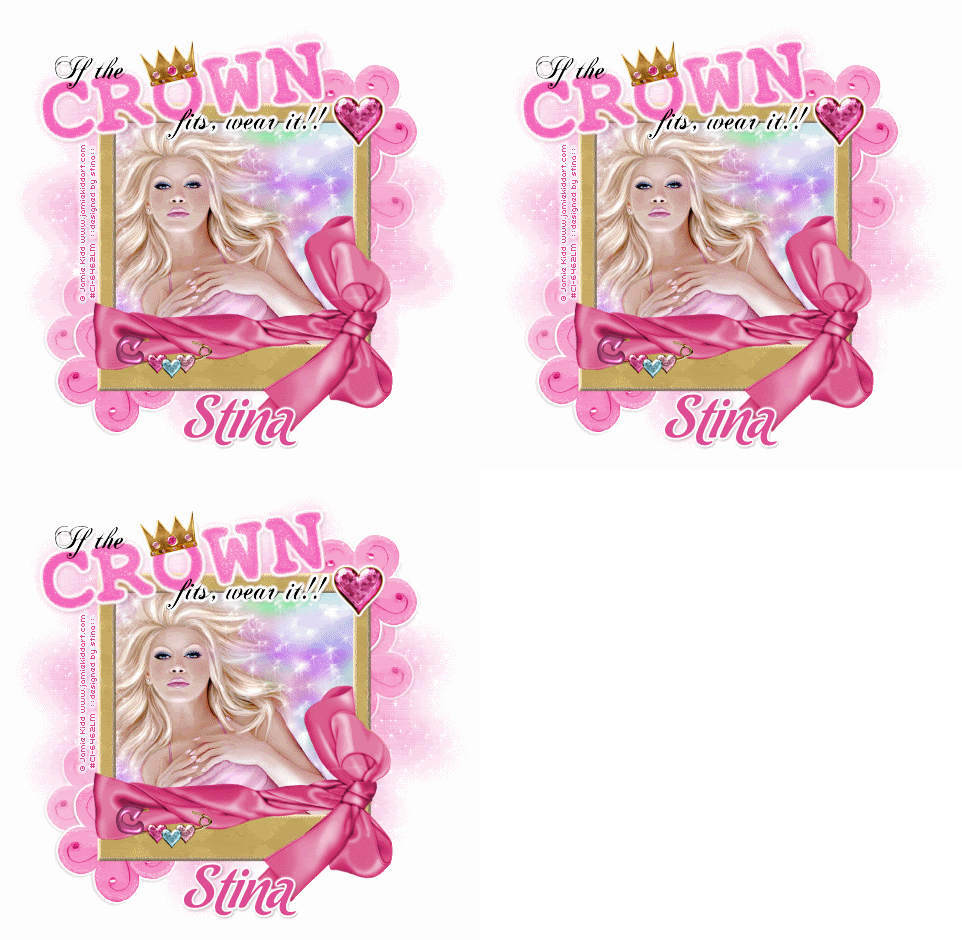
Here is another version:


© Tutorial written by Stina on 8th May 2009
All rights reserved
Sunday, March 22, 2009

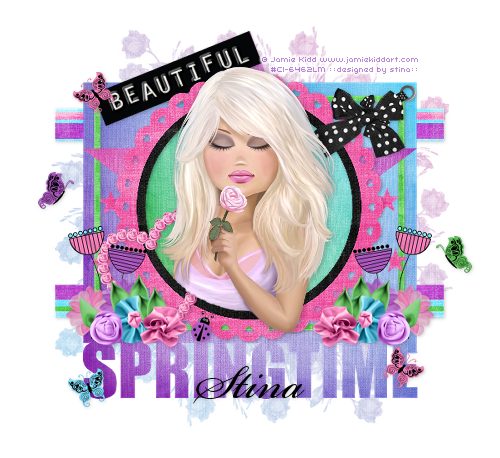
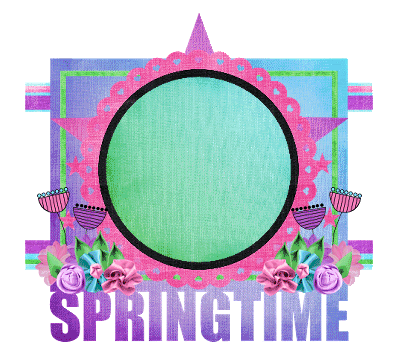
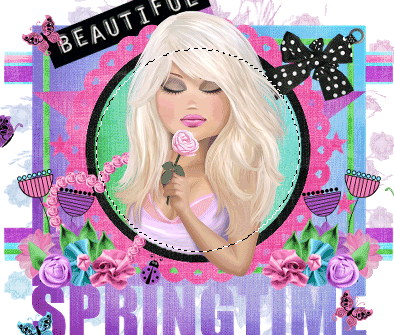
Beautiful Springtime

 
Supplies
 
Scrap kit of choice - I am using the delightful "Kaci" kit by DMK Designs which is available from Creative Scraps, Simply Beautiful Scraps and TKO Scraps
Tube of choice - I am using the artwork of Jamie Kidd which can be purchased from CILM
**PLEASE DO NOT USE HER ARTWORK WITHOUT THE APPROPRIATE LICENCE**
WSL_Mask226 by Chelle available on her blog
Font of choice - I am using Bickham Script Pro Regular
 
 
~ Step 1 ~
 
OK...we are going to start by creating our own template! *g*
But I'll be kind...I promise...
 
Open a new 600 x 600 blank canvas flood-filled white
 
Select your Preset Shape Tool to Rectangle
Foreground - null
Background - #000000
Draw out a rectangle
Objects / Align / Horizontal Centre in Canvas
Convert to raster layer
 
Select your Text Tool and the find the font Impact
Keep your Background set to #000000
You will need to set the font size rather large - I set mine to 85
 
Type out the word "SPRINGTIME" in all caps
Objects / Align / Horizontal Centre in Canvas
Convert to Raster Layer
 
Use the nodes on your Pick Tool on the Rectangle to size it in line with the text
Layers / Merge / Merge Down
Rename this layer Template1
 
Adjust the opacity to 45
 
Draw a long narrow rectangle across ways near the top of Template1
Objects / Align / Horizontal Centre in Canvas
Convert to Raster Layer
Duplicate and move it to the bottom of Template1
Layers / Merge / Merge Down
Rename this layer to Template2
 
Adjust the opacity to 55
 
Toggle the Foreground/Background in the Material Palette so that the Colour is now in your Foreground
Your background should now be null
Set the Line width to 8.00
Draw out a rectangle around the inside of Template1
Use the nodes of your Vector layer to adjust the size
Objects / Align / Horizontal Centre in Canvas
Convert to raster layer
Rename this later to Template3
 
Adjust the opacity to 65
 
Select a Star from your Preset Shapes
Draw out the shape of a large Star to the right
Convert to raster layer
Rename this layer to Template4
 
Adjust the opacity to 75
 
On the left draw out three smaller stars
Layers / Merge / Merge Down
Repeat
Duplicate
Image / Mirror
Layers / Merge / Merge Down
Rename this layer to Template5
 
Adjust the opacity to 85
 
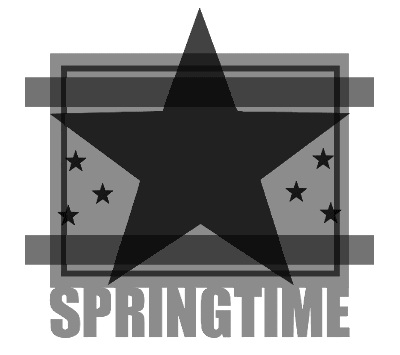
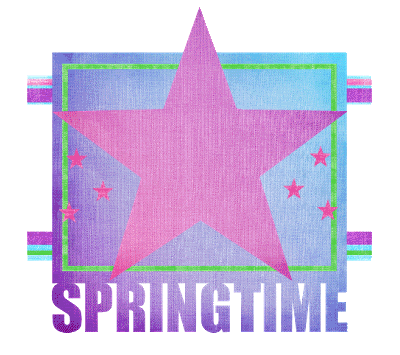
You should now have a Template like this:


~ Step 2 ~
 
Activate Template1
Selections / Select All
Selections / Float
Selections / Defloat
Add a new raster layer
Paste Paper14 into Selection
Deselect
Delete Template1 layer
 
Activate Template2
Selections / Select All
Selections / Float
Selections / Defloat
Add a new raster layer
 
Open Paper21
Image / Rotate by 90 to the right
Edit / Copy
 
Back on new layer of working canvas
Paste into Selection
Deselect
Delete Template2
 
Activate Template3
Selections / Select All
Selections / Float
Selections / Defloat
Add a new raster layer
Paste Paper20 into Selection
Deselect
Delete Template3
 
Activate Template4
Selections / Select All
Selections / Float
Selections / Defloat
Add a new raster layer
Paste Paper13 into Selection
Deselect
Delete Template4
 
Activate Template5
Selections / Select All
Selections / Float
Selections / Defloat
Add a new raster layer
Paste Paper05 into Selection
Deselect
Delete Template5
 
Your Template should now look like this:


~ Step 3 ~
 
Paste Frame03 as new layer
Resize by 30%
Position in centre of Template
 
Use your Magic Wand to select the area inside the Frame
Selections / Modify / Expand by 10
Add new raster layer
Paste Paper16 into Selection
Deselect
Layers / Arrange / Move Down
 
Paste some flowers as new layers
Resizing them to around 8%
Position them to the left of the Frame
Layers / Merge / Merge Down
Repeat till all flowers are one layer
 
Duplicate
Image / Mirror
 
Paste DoodleFlower01 as new layer
Resize by 10%
Position behind flowers
 
Paste DoodleFlower02 as new layer
Resize by 12%
Image / Mirror
Position beside other DoodleFlower and slightly down
Layers / Merge / Merge Down
 
Duplicate
Image / Mirror
 
 
Paste Butterfly05 as new layer
Resize by 8%
Position to the left
 
Paste Butterfly06 as new layer
Image / Mirror
Resize by 8%
Position to the right
 
Paste Ladybug as new layer
Image / Rotate by 20 to the right
Resize by 8%
Position above the I in "Springtime"
 
Paste Butterfly04 as new layer
Image / Rotate by 20 to the left
Resize by 7%
Position on the "S"
 
Paste Butterfly03 as new layer
Image / Rotate by 40 to the right
Resize by 7%
Position on the "E"
 
Duplicate
Image / Mirror
Position in the upper left
 
Paste PolkaDotRibbon&Eyelet as new layer
Image / Rotate by 50 to the right
Resize by 9%
Position in upper right
 
 
Paste PolkaDotBow as new layer
Resize by 12%
Position over bow on Eyelet
 
ACTIVATE CIRCLE FRAME LAYER!
 
Paste SatinFlowerHeart01 as new layer
Image / Rotate by 20 to the left
Resize by 12%
Position BEHIND flowers to the left
 
 
Paste WordLabel02 as new layer
Image / Rotate by 22 to the left
Resize by 35%
Position at top of the Frame
Layers / Arrange / Move Down
Repeat
 
Adjust the Butterfly on the corner to rest on the corner of the label
 
Paste Paper15 as new layer
Layers / Arrange / Send to Bottom
Resize by 50%
Layers / New Mask Layer / From Image
Locate WSL_Mask226
OK
Layers / Merge / Merge Group
 
Move Mask layer up slightly so that it is directly behind Template
 
Apply some slight drop shadows to your elements
 
Crop and resize
 

~ Step 4 ~
 
Paste tube as new layer
Resize as necessary
 
With your Magic Wand select inside the Frame
Selections / Modify / Feather by 2
Selections / Invert
 
Use your Eraser Tool and carefully erase the bottom of the tube
Deselect
 
 
Apply a drop shadow:
H & V - 1
Opacity - 30
Blur - 10.00
#000000
 
Select your Text Tool and font of choice - I am using Bickham Script Pro Regular
Foreground - null
Background - #000000
 
Type out your name
Objects / Align / Horizontal Center in Canvas
Convert to raster layer
 
Apply a drop shadow:
H & V - 1
Opacity - 20
Blur - 5.00
Colour - #000000
 
Finally, add your © copyright, licence and watermark
 
Then save as a GIF or JPG and you're done!
 
Thank you for trying my tutorial!
 
::st!na::
 

© Tutorial written by Stina on 21st March 2009
All rights reserved
 

Saturday, February 21, 2009

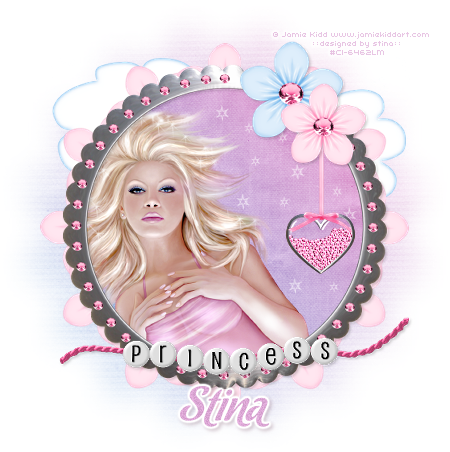
A Princess' Paradise

 
Supplies
 
Scrap kit of choice - I am using "My Prince Has Come" by DMK Designs which can be purchased from Creative Scraps, Simply Beautiful Scraps and TKO Scraps
Tube of choice - I am using the gorgeous work of Jamie Kidd
which can be purchased through CILM
**PLEASE DO NOT USE HER ARTWORK WITHOUT THE APPROPRIATE LICENCE**
WSL_Mask33 by Chelle which can be found on her blog
Plugin: Mura Meister Copies
Plugin: Eye Candy 4000 Gradient Glow (optional)
Brushes of choice
Font of choice - I am using Chocolate Dulce
 

~ Step 1 ~
 
Open a new 600 x 600 blank canvas flood filled white
 
Paste Frame04 as a new layer
Resize by 35%
 
Using your Magic Wand click inside the frame
Selections / Modify / Expand by 10
 
Activate your Background layer
Paste Paper17 as new layer
Resize by 40%
Selections / Invert
Delete
Deselect
 
Paste tube as new layer
Resize as necessary
Position to your liking beneath frame layer
 
Add a drop shadow to your frame:
V & H - 2
Opacity - 20
Blur - 5.00
Colour - #000000
 
Hide your Background layer then
Layers / Merge / Merge Visible
 
 
~ Step 2 ~
 
Paste WordBeads01 as new layer
Resize by 40%
Position at bottom of frame
 
Paste Flower02 as new layer
Resize by 30%
Position in upper right of frame
 
Paste Flower01 as new layer
Resize by 25% and place beside first flower
 
Paste FilledHeart as new layer
Resize by 8%
Position to the right below the Pink flower
Duplicate and blend mode to Screen
Layers / Merge / Merge Down
 
Paste BCS_HangingRibbon (from Vintage Valentine) as new layer
Resize by 15%
Position over the heart with the top of the ribbon tucked underneath the centre of Pink flower
Duplicate then blend mode to Screen
Layers / Merge / Merge Down
 
Paste Clouds as new layer
Resize by 45%
Position below the frame layer towards the top
 
Add a drop shadow to your elements
V & H - 2
Opacity - 20
Blur - 5.00
Colour - #000000
 

~ Step 3 ~
 
Paste Flower01 as new layer again
Resize by 30%
KEEP IT CENTRED!!
 
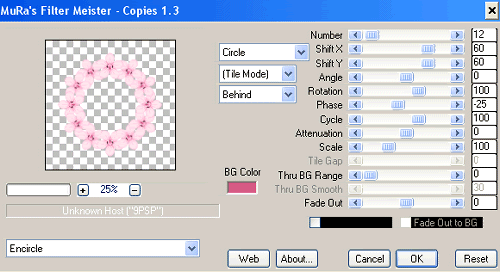
Effects / Plugins / Mura Meister / Copies with the following settings:
 

Move this layer to below the frame
You will see it encircle it
Resize by 95%
 
Activate your Background layer
Paste Paper17 as new layer again
 
Layers / New Mask Layer / From Image
Locate WSL_Mask33
Source luminance
OK
 
Layers / Merge / Merge Group
 
Add some star brushes for effect
DON'T FORGET TO ADD A NEW RASTER LAYER BEFORE APPLYING BRUSHES!!
 
Crop and resize tag
 
Select a font of your choice and type out your name in a colour matching your tube
 
Add your © copyright, licence and watermark and you're done!
 
Thanks for trying my tutorial
 
::st!na::
 

© Tutorial written by Stina on 21st February, 2009
All rights reserved
 

Sunday, February 15, 2009

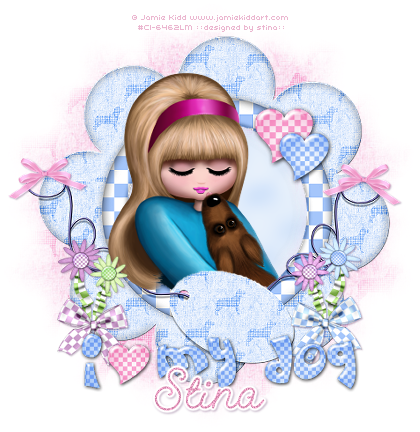
I Love My Dog

lovemydog

Supplies

Scrap kit of choice - I am using the lovely "Love Our Pets" kit by SwheatCreations
which can be purchased from Paradise4Scrappers
Thank you Norma for this gorgeous and adorable kit! I loved using it!
Tube of choice - I am using the lovely artwork of Jamie Kidd which can be purchased from CILM
**PLEASE DO NOT USE ARTWORK WITHOUT APPROPRIATE LICENCE**
WSL_Mask133 by Chelle which can be found on her blog
Font GeeohHmk Bold which can be downloaded here
Eye Candy 4000 Gradient Glow

~ Step 1 ~

Open WSL_Mask133 and GeeohHmk font and minimise for later

Open new image 550 x 550 with a white background

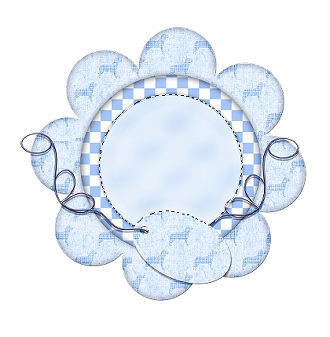
Paste FlowerFrame3 as new layer and resize by 70%
Paste PetBkg5 as new layer and resize by 50%
Activate frame layer and click inside the circle with your magic wand
Selections / Modify / Expand by 5
Selections / Invert
Delete

KEEP SELECTED
lmd03
Selections / Invert
Adjust / Blur / Gaussian Blur
Radius: 10.00
Deselect

Paste tube as new layer and resize as necessary
Position to your liking then with on the frame layer once again click your magic wand inside the frame
Selections / Modify / Feather
Selections / Invert
Selections / Modify / Contract by 2
Set your eraser to a size around 20 and hardness to about 50
(depends on your tube and how much you wish to erase)
Carefully erase the bottom of the tube overhanging the frame
Deselect

~ Step 2 ~

Paste Flowers2 as new layer and resize by 20%
Position to the left of the frame
Paste Flowers3 as new layer and resize by 20%
Image / Mirror and position to the right opposite the first flowers

Paste PinkBow as new layer and resize by 15%
Position to the left on the wire on the frame
Duplicate then Image / Mirror
Position to the right (see my tag for reference)

Paste Heart1 as new layer and resize by 35%
Position on the top right of the frame
Paste Heart2 as new layer and resize by 30%
Position with Heart1
(see below)

lmd-01
Paste Text-LoveDog/Cat as new layer
Resize by 50%
Position along the bottom of the frame

Paste PetBkg3 as new layer
Layers / Arrange / Send to Bottom
Resize by 70%
Layers / New mask Layer / From Image
Locate WSL_Mask133 from drop down menu
Fit to Layer CHECKED
Source luminance checked
Invert Mask Data UNchecked
OK

Layers / Merge / Merge Group
Position mask layer behind frame so that it's central

You should now have something like this:
lmd-02

~ Step 3 ~

Pick a nice colour that complements your tube and scrap kit you are working with
I chose #e398bc

Type out your name as Vector in a nice font of your choice
Objects / Align / Horizontal Centre in Canvas
Adjust / Add/Remove Noise / Add Noise
Uniform
25
Monochrome checked

Effects / Plugins / Eye Candy 4000 / Gradient Glow
Glow width: 3.00
Soft corners: 25
Opacity: 100
Colour: Solid white

Apply drop shadow:
H & V: 1
Opacity: 30
Blur: 2.00
Colour: #37003e

Add your ©copyright, licence and watermark and you're done!

Thank you for trying my tutorial

::st!na::

©Tutorial written by Stina on 4th February 2009
All rights reserved

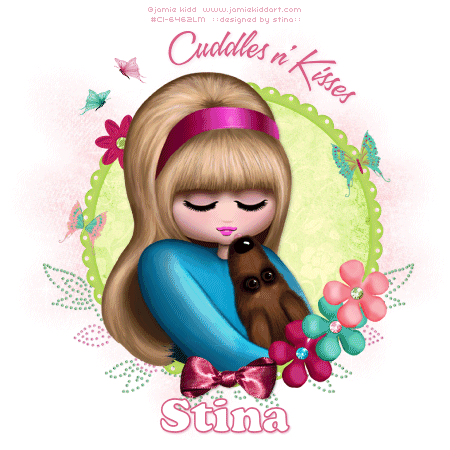
Cuddles n' Kisses


cuddlesnkisses-stina

This tutorial is dedicated to my own "cuddles n' kisses" on four legs - Ciara!
This image reminds me of you, sweets.

Supplies

Scrap kit of choice - I am using "Candy Kisses" by Babycakes Scraps which you can purchase from her blog
Thank you Lynne for this lovely kit! I enjoyed using it!
Tube of choice - I am using the lovely artwork of Jamie Kidd which you can purchase with a licence from CILM
**PLEASE DO NOT USE ART WITHOUT PROPER LICENCE**
WSL_Mask7 by Chelle (supplied)
Fonts of choice - I am using A&S Speedway and Cookie (supplied)

My Supplies here

~ Step 1 ~

Open WSL_Mask7 and minimise for later

Open BCS_RoundFrame
Duplicate close off original
Resize to 400 x 400
Image / Canvas Resize and resize working space to 600 x 600
New Raster layer and flood fill with white
Send to bottom

Paste BCS_Lime Paper Five as new layer
Resize by 45%
With magic wand on following settings:
Mode: Add (shift)
Tolerance: 0
Feather: 1
Anti-alias checked
Click inside the frame and the pin
Selections / Modify / Expand by 8
Selections / Invert
Activate paper layer
Hit delete

KEEP SELECTED!!

Open tube and paste as new layer below frame
Resize as necessary (I resized by 75%)
Duplicate tube and move to layer above frame
Hide duplicate layer
Activate first tube layer and hit delete
Deselect

Unhide duplicated tube layer and with your freehand tool draw around the bottom half of the tube
Hit delete

Now it should look as thought your tube is tucked into the bottom of the frame but protruding the top

~ Step 2 ~

Open BCS_Flower Bling and paste as new layer
Resize by 50%
Image / Rotate to the left by 50
Adjust / Sharpness / Sharpen
Position to the right and just to the edge of the frame
Duplicate and Image / Mirror
Layers / Merge / Merge Down
Move this layer below the frame

You should now have something like this:

bcs_ck01

~ Step 3 ~

Open BCS Painted Bfly and paste as new layer
Resize by 30% then Image / Rotate to the left by 20
Resize by 65% with Bicubic resample
Position to the right on the frame

Paste BCS Painted Bfly Two as new layer
Resize by 30% then Image / Rotate to the right by 20
Resize by 65% with Bicubic resample
Position to the left on the frame

Open BCS Sheer Bfly and paste as new layer
Resize by 20% Smart Size Resample then resize again by 65% Bicubic Resample
Image / Mirror and position to the left above and outside the frame
Duplicate this layer then Image / Mirror
Position just above first sheer butterfly
Go to Adjust / Hue and Saturation / Colourize
with the following settings:
Hue: 240
Saturation: 135
OK
You should now have a green and a pink butterfly

Paste BCS Berry Satin bow as new layer
Resize by 25% and position in the centre of the frame at the bottom

Paste BCS Rose Paper Seven as new layer and move to the bottom above the white background
Layers / New Mask Layer / From Image
Locate WSL_Mask7 in the drop down menu
Source Luminance checked
Invert Mask Data UNchecked
OK
Layers / Merge / Merge Group

CROP AND RESIZE TAG

~ Step 4 ~

Set the colours in your Materials Palette to the following:
Foreground: #d45883
Background: #FFFFFF

Make sure your foreground is active and your background is hidden

Select your Preset Shape tool and make sure the Anti-alias and Create as Vector are CHECKED
Using the Ellipse shape and holding your shift key with one hand draw out a circle around your frame
Release your mouse and shift keys
Objects / Align / Center in Canvas
(THIS WILL ONLY WORK ON A VECTOR LAYER)

Click the arrows in your Materials Palette to swap the colours around
Unhide the background and hide the foreground

Select your text tool and when you see the A of your text tool curve on the line of the circle click to open the text box and type "Cuddles n' Kisses"

In your Layer Palette click the + to open the Vector layer and delete the Ellipse then convert to Raster Layer
Add a subtle drop shadow of your choice

Finally add your name, ©copyright, licence and watermark and you're done!

Thank you for trying my tutorial!

::st!na::


© Tutorial written by Stina on 27th Janary 2009
All rights reserved


I am using the Free version of SPAMfighter.
We are a community of 5.9 million users fighting spam.
SPAMfighter has removed 972 of my spam emails to date.
The Professional version does not have this message.