Please email me designed.by.stina@gmail.com with your creations. I'd love to see them.

Showing posts with label Sticky Kits. Show all posts

Thursday, September 17, 2009

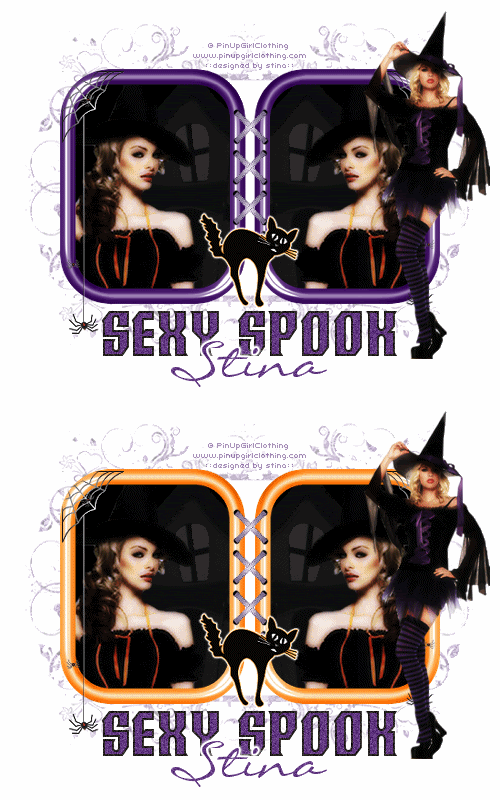
Sexy Spook


Supplies

Scrap kit of choice - I am using "Spookylicious" by Alyssa's Scraps and Such available from Twilight Scraps
Tube of choice - I am using images of PinUpGirl Clothing which are free to use with the proper credit and link on finished tags
CrossStitching_sandi here
Down tubes I used here and here
DBV_Mask_07 here
Fonts of choice - I am using Crucifix-S and LiorahBT
Plugins: Xero > Radiance and Porcelain
Eye Candy 4000 > Gradien Glow


Easy animation tutorial


Let's begin...


Open a new 750 x 600 blank canvas flood-filled white

Paste Frame2 as new layer
Resize by 45%

LEAVE IN POSITION!!

Paste Frame3 as new layer
Resize by 45%

Adjust > Hue & Saturation > Colourise with the following settings:
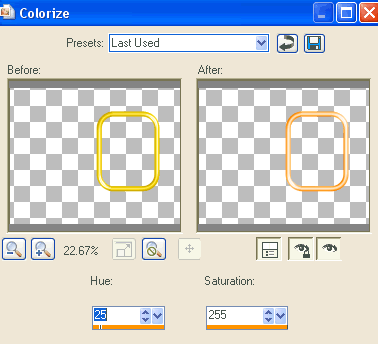


Duplicate, then set blend mode to Multiply
Lower opacity to 60
Layers > Merge > Merge Down

Now open your Layer Palette
Click ONCE on the Layer Link Toggle
Activate your first frame and click the Layer Link Toggle again
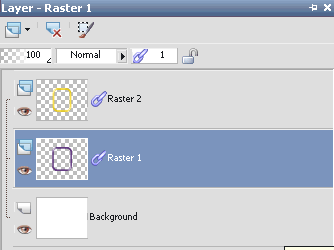


This will LOCK the layers so you can move them both together

Move layers to the left
Click Layer Link Toggle twice again on both layers to UNLOCK them

Duplicate Frame2, then Image > Mirror
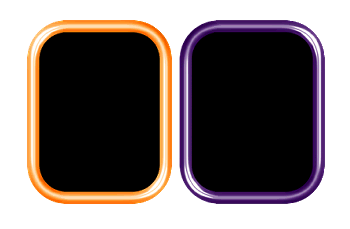


Layers > Merge > Merge Down

Duplicate Frame3 and Image > Mirror also
Layers > Merge > Merge Down

Rename Frame layers PURPLE FRAMEs and ORANGE FRAMES
Hide ORANGE FRAMES and let's work with the PURPLE FRAMES

Select inside frames with your Magic Wand
Selections > Modify > Expand by 10
Add a new raster layer
Flood fill black
Layers > Arrange > Move Down

KEEP SELECTED!!

Paste a Tube of choice as new layer
Resize as necessary
Delete surrounding excess
Deselect

Effects > Plugins > Xero > Radiance with default settings

Effects > Plugins > Xero > Porcelain with default settings

Duplicate, then Image > Mirror
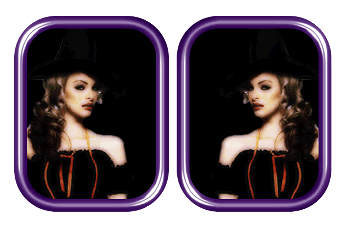


Activate top layer

Paste Spider as new layer
Resize by 50%
Position at the top between the Frames with the spider dangling down
This will join our Frames

Open up the CrossStitching_sandi file
Choose the stitching you wish to use and paste it as a new layer to your working canvas
Resize by 80%
Position in the join toward top of the two Frames
Duplicate three more times and position along join
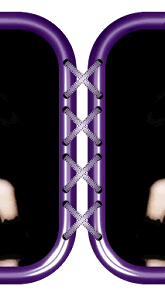


Layers > Merge > Merge Down till all stitching is one layer

Paste Cat as new layer
Resize by 25%
Position between frames towards bottom
Duplicate then set blend mode to Multiply
Layers > Merge > Merge Down

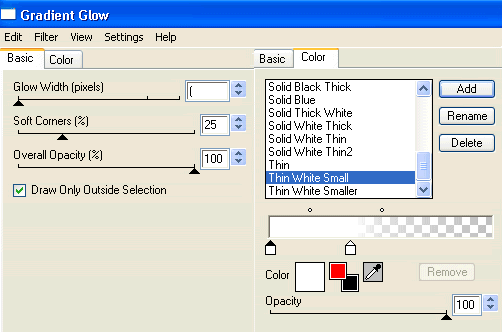
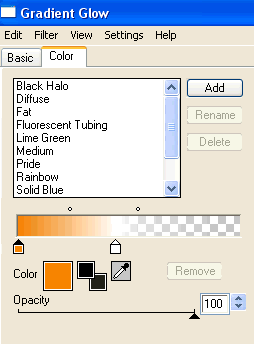
Effects > Plugins > Eye Candy 4000 > Gradient Glow with the following settings:


Paste Spider as new layer
Image > Mirror
Resize by 55%
Position to the left

Duplicate, then Image > Mirror
Resize by 90%
Position directly opposite first spider

Paste another Tube of choice as new layer
Resize as necessary
Position to the right (or to liking)

Effects > Plugins > Xero > Radiance with default settings

Paste Paper of choice as new layer
Layers > Arrange > Send to Bottom

Layers > New Mask Layer > From Image
Apply DBV_Mask_07
OK
Layers > Merge > Merge Group

Use your Selection Tool to make a selection around the centre area between Frames
Delete then deselect
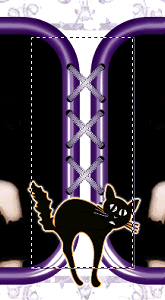


Crop and resize to liking

Select Text Tool and font of choice
I am using Crucifix-S
Foreground - #000000
Background - #643983
Type out text of choice
Objects > Align > Horizontal Centre in Canvas
Convert to raster layer
Apply a drop shadow of choice

Selection another font of choice
I am using LiorahBT
Text colour - #643983
Type out your name
Objects > Align > Horizontal Centre in Canvas
Convert to raster layer
Apply a slight gradient glow

Finally, add your © copyright, licence and watermark, then save as a GIF or JPG and you're done!


** IF YOU WISH TO ANIMATE PLEASE FOLLOW THESE NEXT STEPS **

Activate the PURPLE FRAMES layer
Edit > Copy Merged

Open Animation Shop
Edit > Paste as New Animation

Hide PURPLE FRAMES and activate ORANGE FRAMES
Edit > Copy Merged

Change your Frame Properties for the first Frame to 50, and to 100 for the second

Now save as a GIF and you're done!

Thanks for trying my tutorial!

::st!na::


Here is a non-animated version:
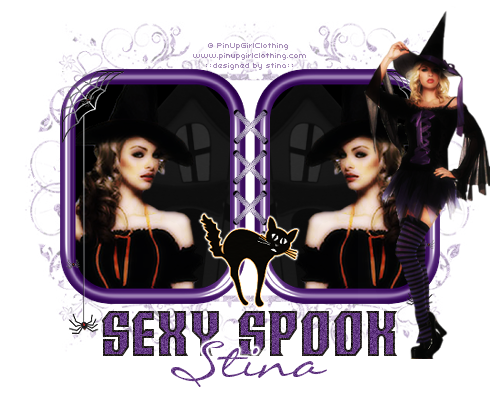


© Tutorial written by Stina on 17th September 2009
All rights reserved

Friday, August 14, 2009

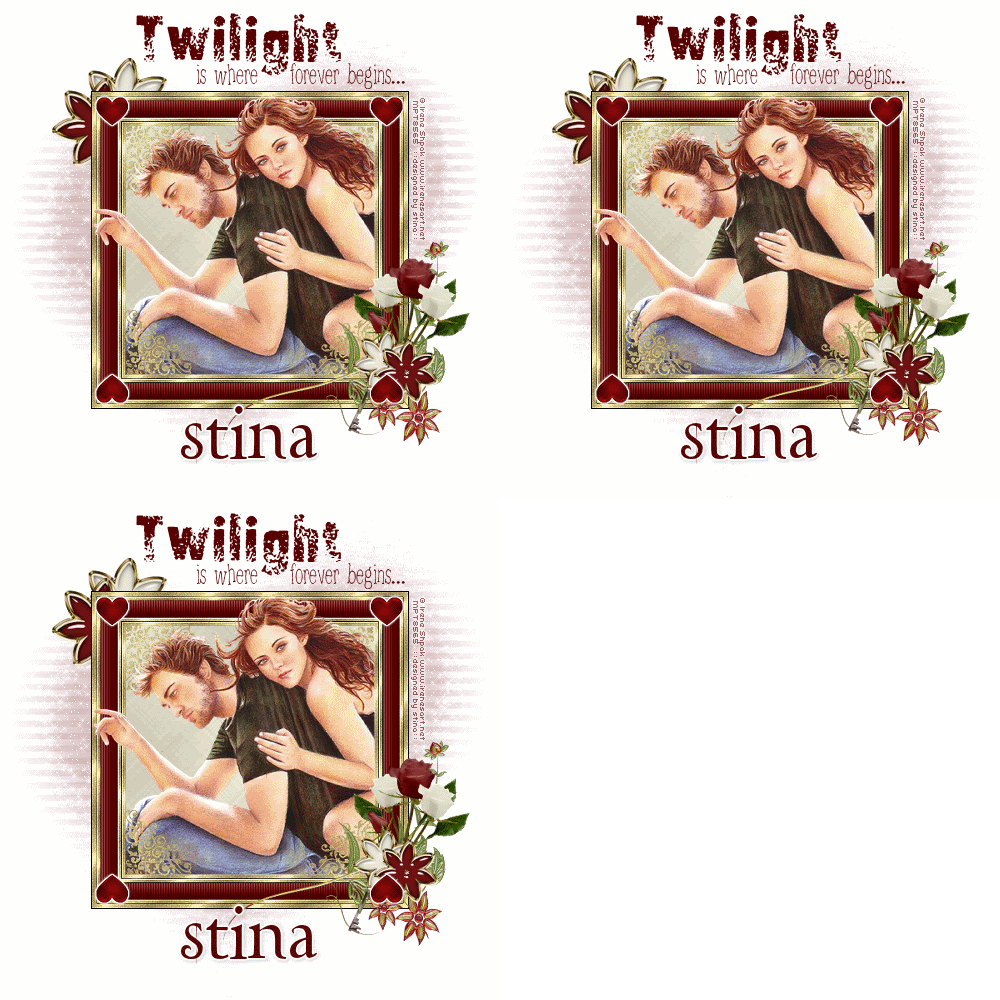
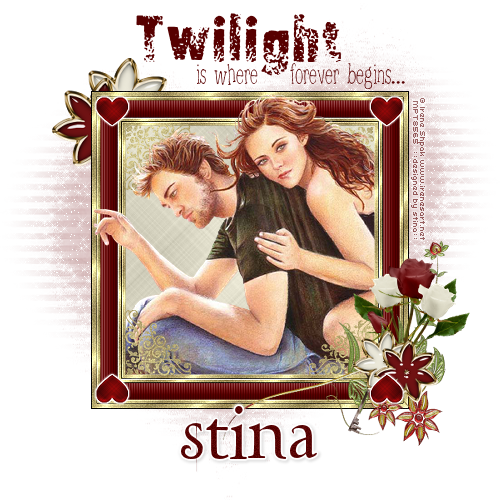
Twilight Begins...


Supplies

Scrap kit of choice - I am using Alyssa's Scraps and Such part of "An Autumn Romance" collab available from Twilight Scraps
Tubes of choice - I am using the artwork of Irene Shpak which is available with a licence from My PSP Tubes
WSL_Mask101 by Chelle available from her blog
Fonts of choice - I am using 2Peas Composition, 2Peas Frazzled and LD Twylight
Plugins: Simple > Top Left Mirror
Eye Candy 4000 > Gradient Glow
Xenofex 2 > Constellation


Let's begin....


Open a new 600 x 600 blank canvas flood-filled white

Paste Frame1 as new layer

Use your Selection Tool to draw out a selection around your Frame
Add a new raster layer
Layers > Arrange > Move Down
Paste Paper of choice INTO selection

KEEP SELECTED!!

Paste Tube of choice as new layer
Resize as necessary and position
If you wish, duplicate the Tube layer then move it above the Frame
Lower the opacity so you can see the Frame through it

Use your Selection Tool again to draw a rectangle around the excess you wish to remove
Then delete and deselect
Paste one of the Hearts (to match your frame) as new layer
Resize by 8%
Position in upper left

Effects > Plugins > Simple > Top Left Mirror
Duplicate then set blend mode to Multiply
Layers > Merge > Merge Down

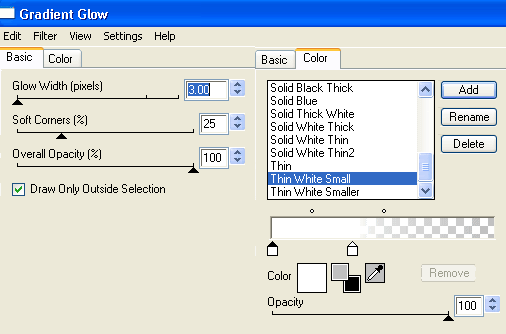
Effects > Plugins > Eye Candy 4000 > Gradient Glow with the following settings:


Paste a Rose as new layer
Image > Rotate by 10 to the right
Resize by 30%
Position in lower right behind Heart

Paste another Rose as new layer
Image > Rotate by 30 to the right
Resize by 25%
Position alongside first rose in the lower right
Duplicate, then Image > Mirror
Position on the opposite side of first rose
Image > Rotate by 15 to the right
Adjust > Sharpness > Sharpen

Paste a FlowerCharm of choice as new layer
Resize by 20%
Position in lower right

Paste another FlowerCharm of choice as new layer
Resize by 20%
Position in lower right also


Paste DoodleFlower as new layer
Resize by 50%
Place to the lower right BEHIND roses, flower charms and heart
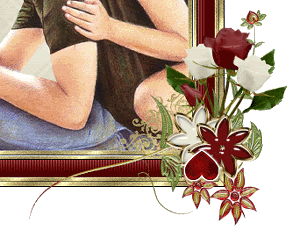
It should now resemble a cluster


Paste the same FlowerCharms as new layers again
Resize each by 30%, then
Layers > Arrange > Send to Bottom
Position in upper left corner of Frame

Paste Paper of choice as new layer
Layers > Arrange > Send to Bottom

Layers > New Mask Layer > From Image
Apply WSL_Mask10
OK
Layers > Merge > Merge Group
Lower opacity to 40

Crop and resize to liking

Select your Text Tool and font of choice
I am using 2Peas Composition and 2 Peas Frazzled
Text colour to match tag - I am using #570000

With the bolder font type out TWILIGHT (or some text of choice)
Position and convert to raster layer
In the smaller font type "where forever begins..." (or some other text of choice)
Position and convert to raster layer

Select another font of choice
I am using LD Twylight
Same text colour

Type out your name
Objects > Align > Horizontal Centre in Canvas
Convert to raster layer
Apply any effects and drop shadow of choice

Finally, add your © copyright, licence and watermark, then save as a GIF or JPG and you're done!


** IF YOU WISH TO ANIMATE PLEASE FOLLOW THESE NEXT STEPS **

Activate your Mask Layer layer
Duplicate twice and rename Sparkles1, Sparkles2 and Sparkles3

Activate Sparkles1 and hide the other two
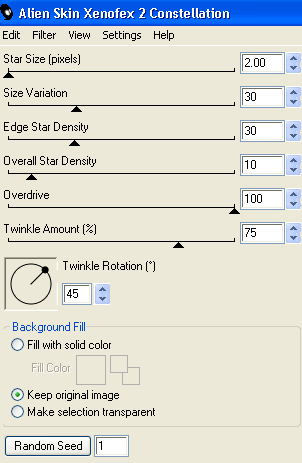
Effects > Plugins > Xenofex 2 > Constellation with the following settings:


Hide Sparkles1 and activate Sparkles2
Repeat Constellation effect, adjusting the Random Seed

Hide Sparkles2 and activate Sparkles3
Repeat Constellation once more, adjusting the Random Seed

Activate Sparkles1 and hide the other two again
Edit > Copy Merged

Open Animation Shop
Edit > Paste as New Animation

Back to PSP
Hide Sparkles1 and activate Sparkles2
Edit > Copy Merged

In Animation Shop
Edit > Paste after Current Frame

Back to PSP
Hide Sparkles2 and activate Sparkles3
Edit > Copy Merged

In Animation Shop
Edit > Paste after Current Frame

Now save as a GIF and you're done!

Thanks for trying my tutorial!

::st!na::


Here is a non-animated version:


© Tutorial written by Stina on 14th August 2009
All rights reserved
Wednesday, August 5, 2009

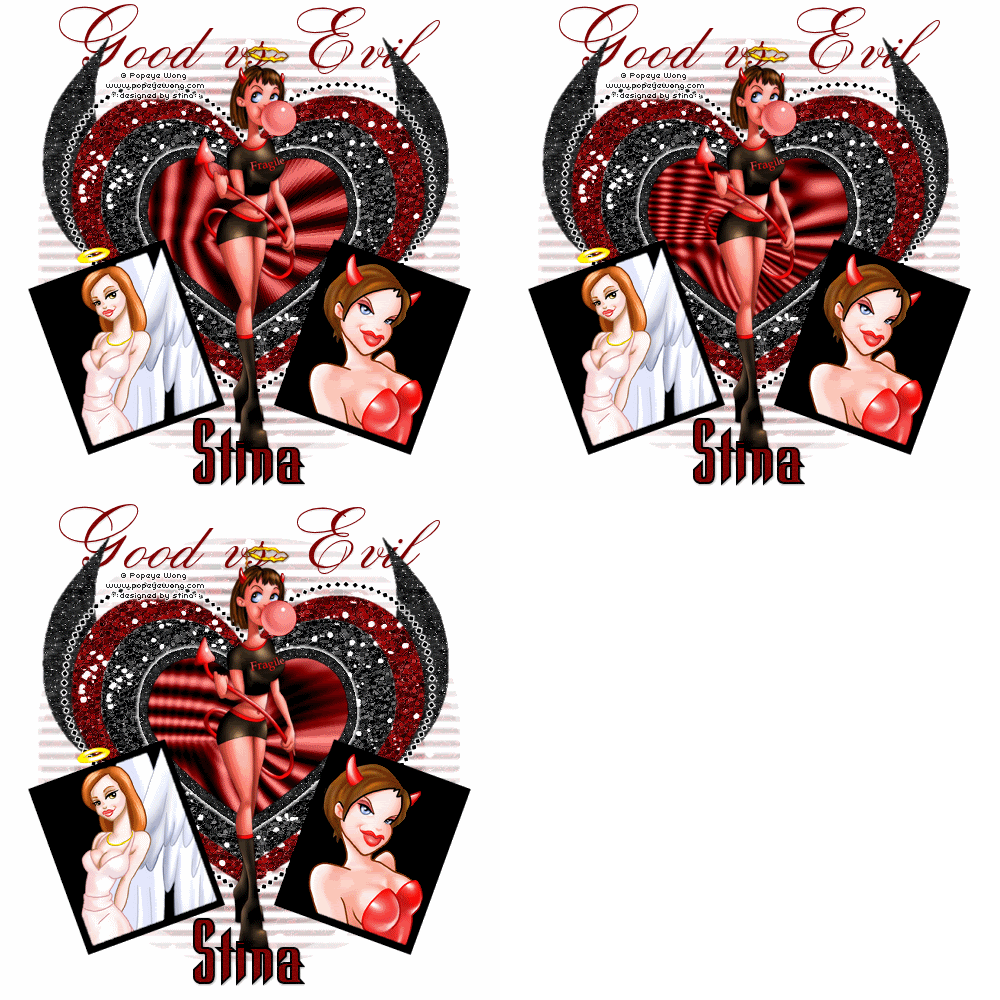
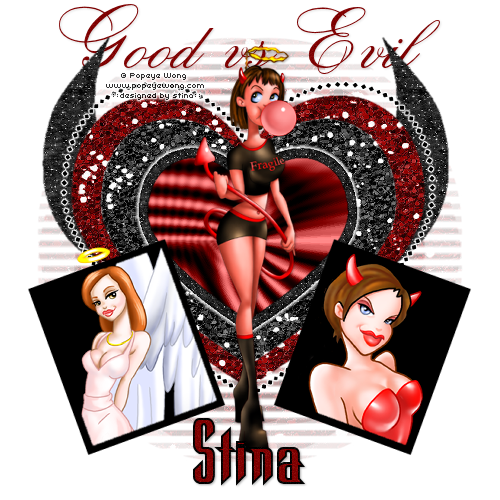
Good vs Evil


Supplies

Scrap kit of choice - I am using "Good vs Evil" by Alyssa's Scraps & Such available from Paradise 4 Scrappers, Twilight Scraps and Dazzling Scraps
Tube of choice - I am using the lovely FTU artwork of Popeye Wong available from his site
WSL_Mask26 by Chelle available from her blog
Template #8 by Chuliiss Designz available from her blog
Fonts of choice - I am using Cynthia Script ES and Warlock
Plugin: Eye Candy 4000 > Gradient Glow
Tramages > Moving Screen


Let's begin....

Open CD Template #8 and duplicate
Close off original
Delete copyright layer

Add a new raster layer and flood-fill white
Layers > Arrange > Send to Bottom

Activate and select HORNS with your Magic Wand
Selections > Modify > Feather by 2
Delete twice
Paste Paper of choice INTO selection
Deselect

Activate and select LARGE HEART
Selections > Modify > Feather by 2
Delete twice
Paste another Paper of choice INTO selection
Deselect
Activate and select MEDIUM HEART
Selections > Modify > Feather by 2
Delete twice
Paste another Paper of choice INTO selection
Deselect

Activate and select HEART BORDER
Selections > Modify > Expand by 1
Selections > Modify > Feather by 2
Add a new raster layer
Paste another Paper of choice INTO selection
Deselect
Layers > Merge > Merge Down

Select outside the HEART BORDER with your Magic Wand
Selections > Invert
Selections > Modify > Contract by 2
Selections > Modify > Feather by 2


Effects > Plugins > Eye Candy 4000 > Gradient Glow with a thin white setting
Deselect

Activate DOTS HEART layer
Selections > Float
Selections > Defloat
Repeat Gradient Glow to your your liking

Select WHITE BACK LEFT
Selections > Modify > Feather by 2
Paste a Tube of choice as new layer and position
Resize as necessary
Selections > Invert
Delete then deselect

Select WHITE BACK RIGHT
Selections > Modify > Feather by 2
Paste another Tube of choice as new layer and position
Resize as necessary
Selections > Invert
Delete then deselect

Delete the WHITE BACK layers so the backgrounds are black

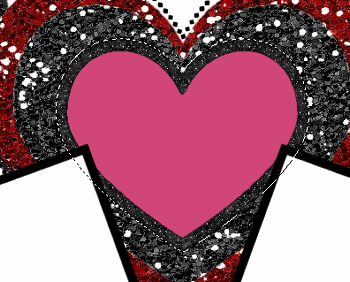
Select PINK HEART and flood-fill with colour of choice
I am using #800000
Duplicate twice and rename RED HEART1, RED HEART2 and RED HEART3
Hide RED HEART2 and RED HEART3
Activate RED HEART1

KEEP SELECTED!!

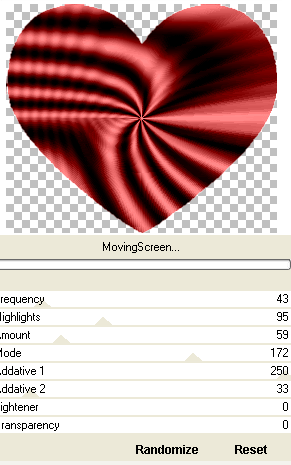
Effects > Plugins > Filters Unlimited > Tramages > Moving Screen with the following settings: (or any of your choice)


Deselect

Paste your main Tube as new layer
Resize as necessary and position in centre
Add a drop shadow of choice

Paste a paper of choice as new layer
Layers > Arrange > Send to Bottom

Layers > New Mask Layer > From Image
Apply WSL_Mask181
OK
Layers > Merge > Merge Group
Lower opacity to 40

Crop and resize

Activate top layer

Select your Text Tool and font of choice
I am using I am using Cynthia Script ES
Background - #800000

Type out text of choice
Objects > Align > Horiztonal Centre in Canvas
Convert to raster layer
Apply some slight noise
Place below HORNS layer

Select another font of choice
I am using Warlock
Foreground - #000000
Background - #800000

Type out your name
Objects > Align > Horizontal Centre in Canvas
Convert to raster layer
Apply some noise and drop shadow of choice

Finally, add your © copyright, licence and watermark, then save as a GIF or JPG and you're done!


** IF YOU WISH TO ANIMATE PLEASE FOLLOW THESE NEXT STEPS **

Activate your RED HEART2 layer

Effects > Plugins > Effects > Plugins > Tramages > Moving Screen with any settings of your choice
(NOTE - Keep the Lightener and Transparency set to 0)

Hide RED HEART2 and activate RED HEART3
Repeat the Moving Screen effect and randomise - keeping Lightener and Transparency set to 0

Now to animate!

Activate RED HEART1 and hide RED HEART2 and RED HEART3
Edit > Copy Merged

Open Animation Shop
Edit > Paste as New Animation

Back to PSP
Hide RED HEART1 and activate RED HEART2
Edit > Copy Merged

In Animation Shop
Edit > Paste After Current Frame

Back to PSP
Hide RED HEART2 and activate RED HEART3
Edit > Copy Merged

In Animation Shop
Edit > Paste After Current Frame

Select All and change Frame Properties to 20
Now save as a GIF and you're done!

Thanks for trying my tutorial!

::st!na::


Here is a non-animated version:


© Tutorial written by Stina on 5th August 2009
All rights reserved
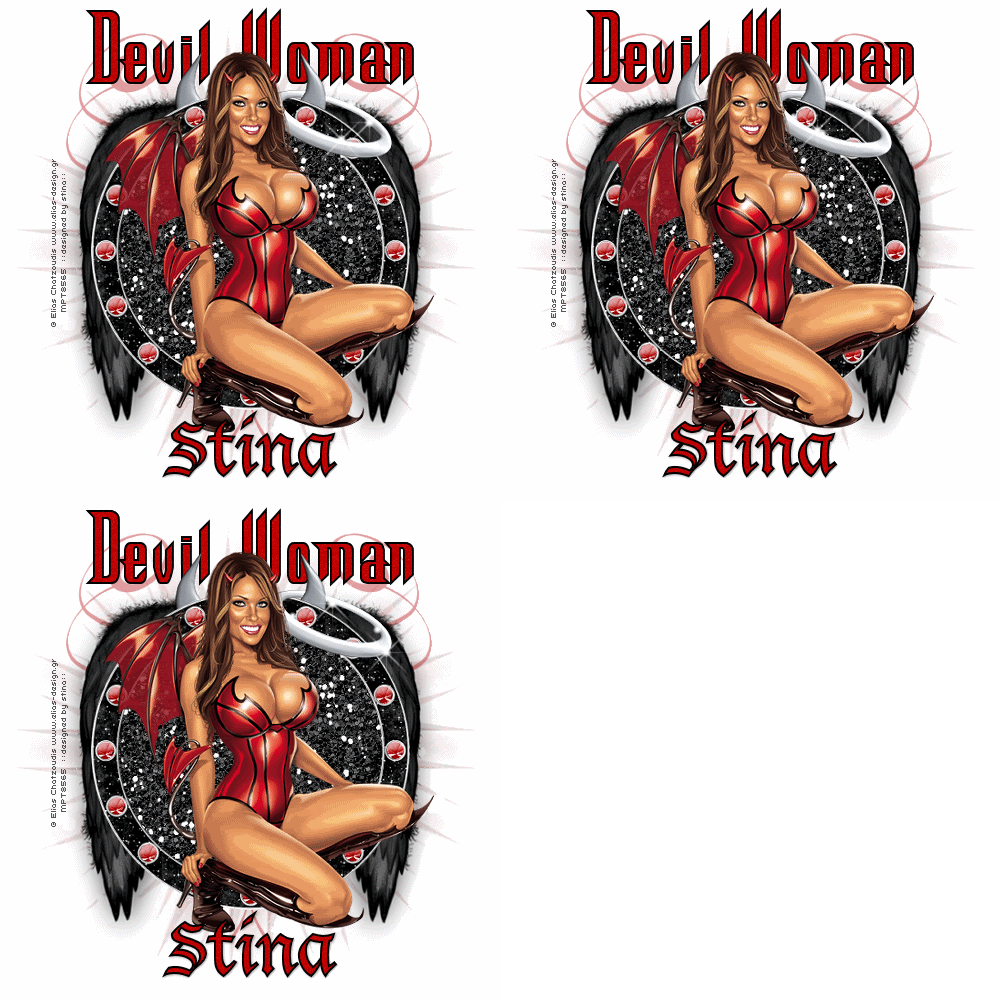
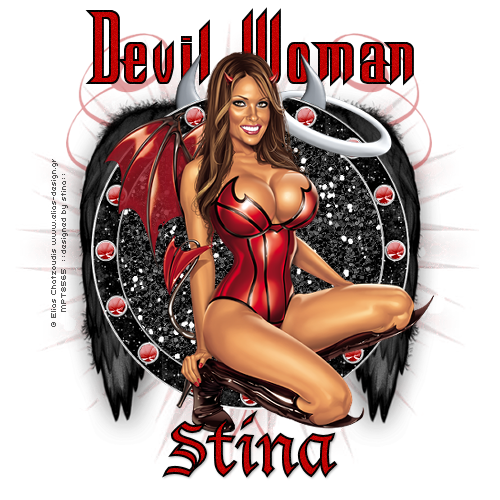
Devil Woman


Supplies

Scrap kit of choice - I am using "Good vs Evil" by Alyssa's Scraps & Such available from Paradise 4 Scrappers, Twilight Scraps and Dazzling Scraps
Tube of choice - I am using the lovely artwork of Elias Chatzoudis available with a licence from My PSP Tubes
WSL_Mask26 by Chelle available from her blog
Fonts of choice - I am using Warlock and Lucida Blackletter
Plugin: Xenofex 2 Constellation


Let's begin...

Open a new 600 x 600 blank canvas flood-filled white

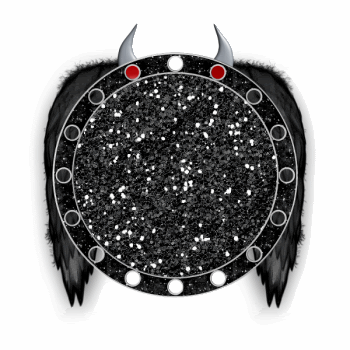
Paste Frame1 as new layer
Resize by 60%

Select inside frame with Magic Wand
Selections > Modify > Expand by 5
Add new raster layer
Layers > Arrange > Move Down
Paste Glitter4 INTO selection
Deselect

Paste BlackWings as new layer
Layers > Arrange > Move Down


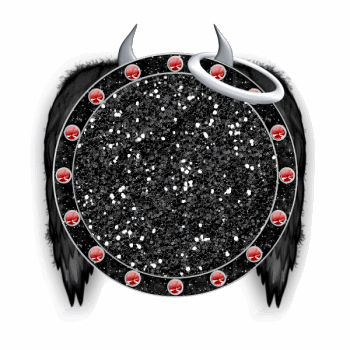
Paste Halo as new layer
Image > Rotate by 20 to the right
Resize by 25%
Position over one of the "horns"

Use your Freehand Tool to draw around the portion of the Halo overlapping the horn
Delete then deselect

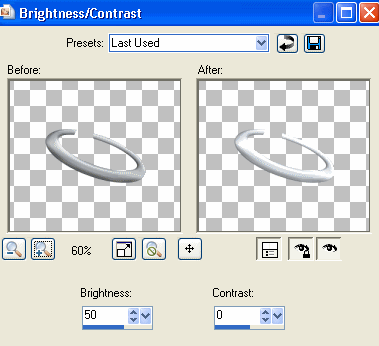
Adjust > Brightness & Contrast > Brightness/Contrast with the following settings:


Paste Red Diamond as new layer
Resize by 16%
Duplicate and paste around Frame till they cover each hole

Hide all layers then,
Layers > Merge > Merge Visible
Unhide layers and move Red Diamonds to layer below Frame
Adjust > Sharpness > Sharpen


Paste Doodle1 as new layer
Resize by 75%
Layers > Arrange > Send to Bottom
Position to the left
Duplicate, then Image > Mirror
Layers > Merge > Merge Down
Lower opacity to 40

Paste Tube of choice as new layer
Resize as necessary and position

Paste Paper of choice as new layer
Layers > Arrange > Send to Bottom

Layers > New Mask Layer > From Image
Apply WSL_Mask26
OK
Layers > Merge > Merge Group

Crop and resize to liking

Select your Text Tool and font of choice
I am using I am using Warlock
Foreground - #000000
Background - #c00000
Stroke width - 2.0

Type out text of choice
Objects > Align > Horiztonal Centre in Canvas
Convert to raster layer
Apply some slight noise
Place below Black Wings layer

Select another font of choice
I am using Lucida Blackletter
Same colours

Type out your name
Objects > Align > Horizontal Centre in Canvas
Convert to raster layer
Apply some noise and drop shadow of choice

Finally, add your © copyright, licence and watermark, then save as a GIF or JPG and you're done!


** IF YOU WISH TO ANIMATE PLEASE FOLLOW THESE NEXT STEPS **

Activate your Halow layer
Duplicate twice and rename Halo1, Halo2 and Halo3

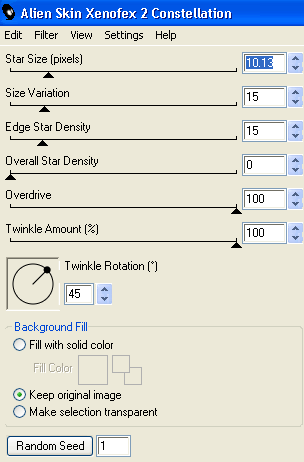
Effects > Plugins > Xenofex 2 > Constellation with the following settings:


Hide Halo1 and activate Halo2
Apply the Constellation effect again, adjusting the Random Seed

Hide Halo2 and activate Halo3
Apply the Constellation effect once more, adjusting the Random Seed

Now to animate!

Hide Halo1 and activate Halo2
Edit > Copy Merged

Open Animation Shop
Edit > Paste as New Animation

Back to PSP
Hide Halo2 and activate Halo3
Edit > Copy Merged

In Animation Shop
Edit > Paste after Current Frame

Select All, and change Frame Properties to 20
Now save as a GIF and you're done!

Thanks for trying my tutorial!

::st!na::


Here is a non-animated version:


© Tutorial written by Stina on 5th August 2009
All rights reserved
Saturday, July 4, 2009

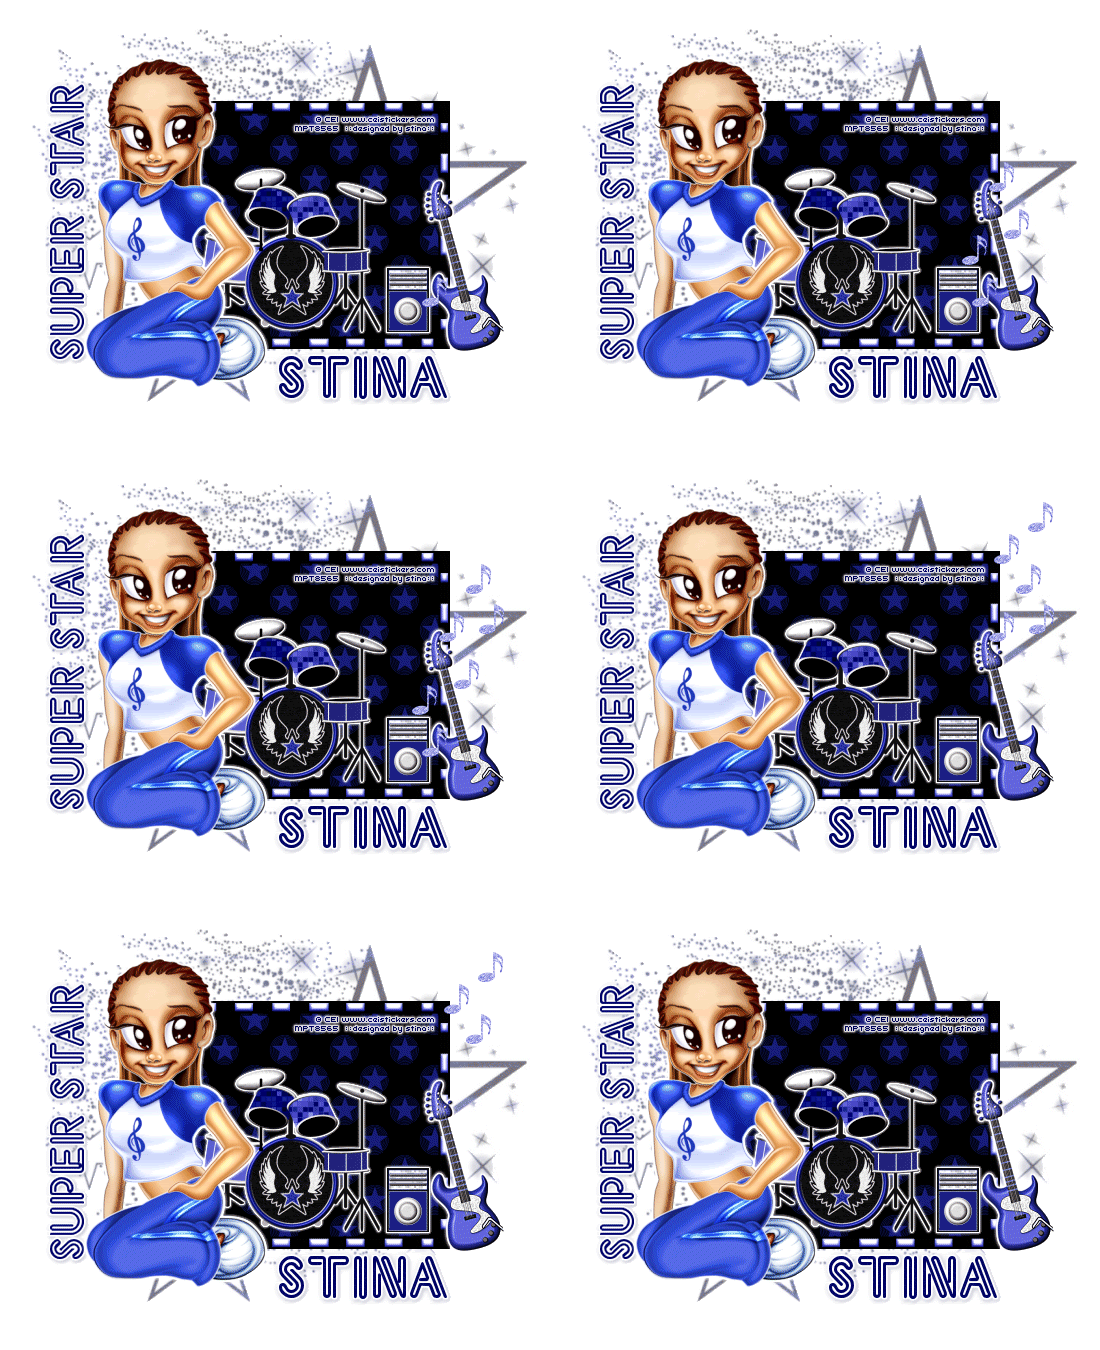
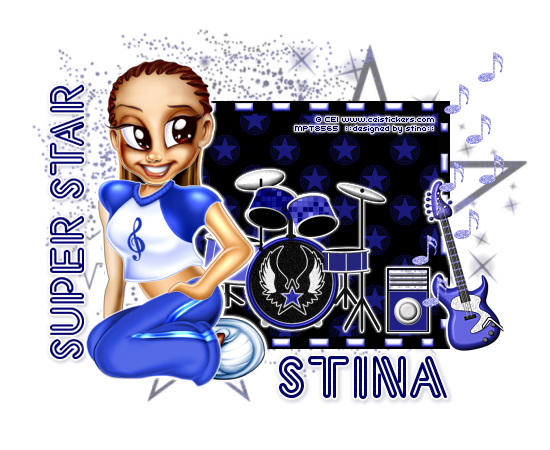
Superstar


Supplies

Scrap kit of choice - I am using "Sweet Rock" by Wicked Princess available from Twilight Scraps and Paradise4Scrappers
Tube of choice - I am using the delightful artwork of CEI which is available with a licence through CILM
**PLEASE DO NOT USE ARTWORK WITHOUT THE APPROPRIATE LICENCE**
tde_maske17 here
Font of choice - NeonThick
Plugin: Eye Candy 4000 Gradient Glow


Let's begin...

Open a new 700 x 550 canvas flood-filled white

Paste a Frame as new layer
Resize by 50%
Select the inside with your Magic Wand
Selections > Modify > Expand by 10
Add new raster layer
Paste Paper of choice INTO selection
Deselect

Activate top layer

Paste Drums as new layer
Resize by 35%
Position in centre

Effects > Plugins > Eye Candy 4000 > Gradient Glow with the following settings:


Paste SpeakerAmp as new layer
Resize by 15%
Position to the right inside Frame
Apply the same Gradient Glow as above

Paste Tube of choice as new layer
Resize as necessary
Position to the left
Apply same Gradient Glow as above

Paste Guitar as new new layer
Image > Rotate by 15 to the left
Resize by 30%
Position to the right leaning against Frame
Adjust > Sharpness > Sharpen
Apply same Gradient Glow as above

Paste a MusicNote as new layer
Resize by 10%
Place alongside and in front of speaker
Duplicate several times and position each in an upward motion
I used 8


Rename each of these layers Musicnote1, Musicnote2, Musicnote3 etc.
(We'll come back to these layer)

Paste a Paper of choice as new layer
Layers > Arrange > Send to Bottom

Layers > New Mask Layer > From Image
Apply tde_maske17
OK
Layers > Merge > Merge Group
Resize layer by 80%
Lower opacity to 60

Crop and resize

Select Text Tool and font of choice
I am using NeonThick
Text colour of choice

Type out text of choice
Convert to raster layer
Image > Rotate by 90 to the left
Apply a slight Gradient Glow and/or drop shadow of choice

Select another font of choice
I am using the same
Same Text colour

Type out your name and position
Convert to raster layer
Apply any effect or drop shadows as necessary to your liking

Finally, add your © copyright, licence and watermark, then save as a GIF or JPG and you're done!


** IF YOU WISH TO ANIMATE PLEASE FOLLOW THESE NEXT STEPS **

Activate your Musicnote1 layer and hide each of the other Musicnotes
Edit > Copy Merged

Open Animation Shop
Edit > Paste as New Animation

Back to PSP
Now unhide MusicNote2
Edit > Copy Merged

In Animation Shop
Edit > Paste AFTER Current Frame

Back to PSP
Unhide MusicNote3
Edit > Copy Merged

In Animation Shop
Edit > Paste AFTER Current Frame

Back to PSP
Unhide MusicNote4
Edit > Copy Merged

In Animation Shop
Edit > Paste AFTER Current Frame

Back to PSP
Unhide Musicnote5
Edit > Copy Merged

In Animation Shop
Edit > Paste AFTER Current Frame

Back to PSP
Unhide Musicnote5
Edit > Copy Merged

In Animation Shop
Edit > Paste AFTER Current Frame

Back to PSP
Unhide MusicNote6
Edit > Copy Merged

In Animation Shop
Edit > Paste AFTER Current Frame

Back to PSP
Hide Musicnote1 and unhide MusicNote7
Edit > Copy Merged

In Animation Shop
Edit > Paste AFTER Current Frame

Back to PSP
Hide Musicnote2 and unhide MusicNote8
Edit > Copy Merged

In Animation Shop
Edit > Paste AFTER Current Frame

Back to PSP
Hide Musicnote3
Edit > Copy Merged

In Animation Shop
Edit > Paste AFTER Current Frame

Back to PSP
Hide Musicnote4
Edit > Copy Merged

In Animation Shop
Edit > Paste AFTER Current Frame

Back to PSP
Hide Musicnote5
Edit > Copy Merged

In Animation Shop
Edit > Paste AFTER Current Frame

Back to PSP
Hide Musicnote6
Edit > Copy Merged

In Animation Shop
Edit > Paste AFTER Current Frame

Back to PSP
Hide Musicnote7
Edit > Copy Merged

In Animation Shop
Edit > Paste AFTER Current Frame

Back to PSP
Hide Musicnote8
Edit > Copy Merged

In Animation Shop
Edit > Paste AFTER Current Frame

You should have a total of 14 Frames
Now Select All and set your Frame Properties to 20
Save as a GIF and you're done!

Thanks for trying my tutorial!

::st!na::


Here is a non-animated version:


© Tutorial written by Stina on 4thJuly 2009
All rights reserved