Please email me designed.by.stina@gmail.com with your creations. I'd love to see them.

Showing posts with label Created by Jill. Show all posts

Friday, August 21, 2009

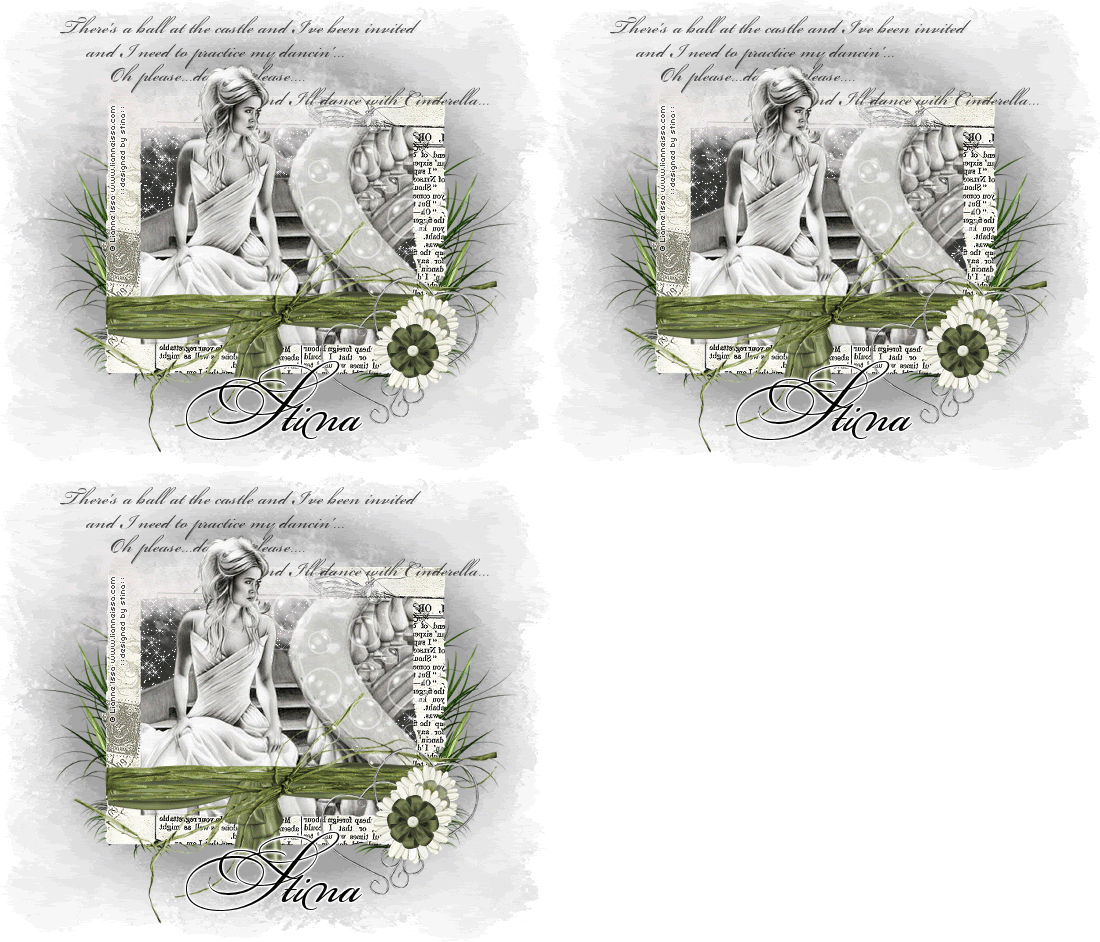
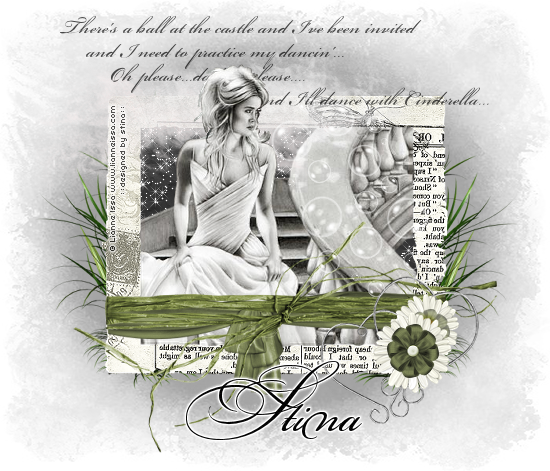
Dance With Cinderella


Supplies

Scrap kit of choice - I am using "This n That Part 2" by Created by Jill available from Twilight Scraps and Aussie Scraps
Tubes of choice - I am using the wonderful FTU artwork of Lianne Issa
Fonts of choice - I am using BeautifulES and BickhamScriptFancy
Plugins: Xero > Radiance
Eye Candy 4000 > Gradient Glow (optional)
Xenofex 2 > Constellation


Let's begin....


Open a new 700 x 600 blank canvas flood-filled white

Paste Frame2 as new layer
Resize by 85%

Select inside Frame with your Magic Wand
Selections > Modify > Expand by 10
Add a new raster layer
Layers > Arrange > Move Down
Paste Paper of choice INTO selection

KEEP SELECTED!!

Paste Tube of choice as new layer
Resize as necessary
Position within Frame
Selections > Invert
Delete then deselect
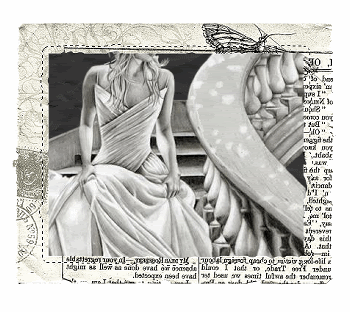

I pasted a "stand alone" copy of the same tube OVER the bottom tube and brought that to top layer (above the Frame)

Select with Magic Wand again
Selections > Invert
Selections > Modify > Contract by 2
Selections > Feather by 2
Erase the excess with your Eraser Tool

Duplicate layer, then
Effects > Plugins > Xero > Radiance with default settings
Lower opacity to 60
Layers > Merge > Merge Down

Paste FrameWrap4 as new layer
Resize by 83%
Position along lower portion of Frame

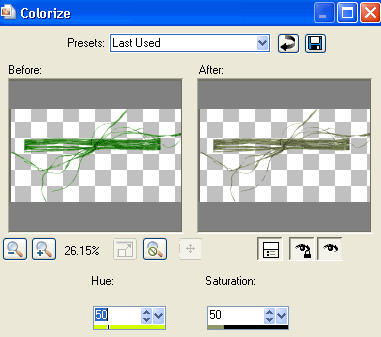
Adjust > Hue & Saturation > Colourise with the following settings:

Duplicate, then set blend mode to Soft Light
Layers > Merge > Merge Down

Paste Flower13 as new layer
Resize by 35%
Position in lower right
Duplicate and resize by 80%
Position below first flower

Paste Bow2 (Red ribbon flower) as new layer
Resize by 20%
Position in the centre of white daisy flower

Adjust > Hue & Saturation > Colourise with the same settings as above
Duplicate, then resize by 80% also
Move below the flowers and position with the smaller daisy
Lower the opacity to 60
Layers > Merge > Merge Down
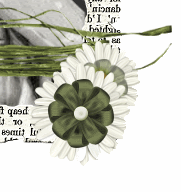

Paste HeartElement as new layer
Resize by 70%
Position in lower left BEHIND FLOWERS
Duplicate, then Image > Mirror
Position the copy from the lower left to lower right, resizing by 90%

Paste Bubbles as new layer
Resize by 40%
Position to your liking

Paste Cloud as new layer
Resize by 85%
Position behind tube above Frame (or to liking)

Paste Grass2 as new layer
Resize by 70%
Position in lower right
Layers > Arrange > Send to Bottom
Duplicate, then Image > Mirror

Paste Paper as new layer and move to bottom
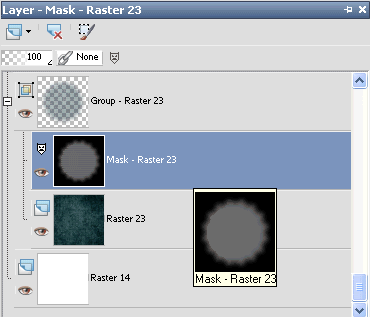
Layers > New Mask Layer > From Image
Apply ET Mask-re05
OK
Layers > Merge > Merge Group

On same layer:
Layers > New Mask Layer > From Image
Apply dmsk0001
OK
Layers > Merge > Merge Group

Crop and resize to liking

Select Text Tool and font of choice
I am using Beautiful ES
Text colour to match tag - I am using #000000

Type out text of choice
Objects > Align > Horizontal Centre in Canvas
Convert to raster layer
Lower opacity to 70

Select another font of choice
I am using BickhamScriptFancy
Same text colour

Type out your name
Objects > Align > Horizontal Centre in Canvas
Convert to raster layer
Apply a Gradient Glow and drop shadow of choice

Finally, add your © copyright, licence and watermark, then save as a GIF or JPG and you're done!


** IF YOU WISH TO ANIMATE PLEASE FOLLOW THESE NEXT STEPS **

Activate the Background layer of your Frame
Duplicate twice and rename Sparkle1, Sparkle2 and Sparkle3

Activate Sparkle1
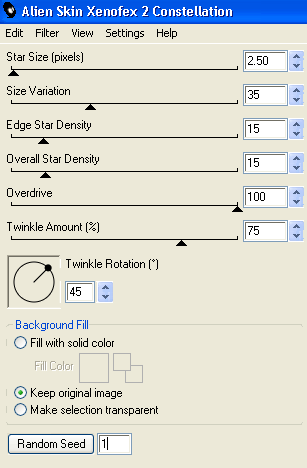
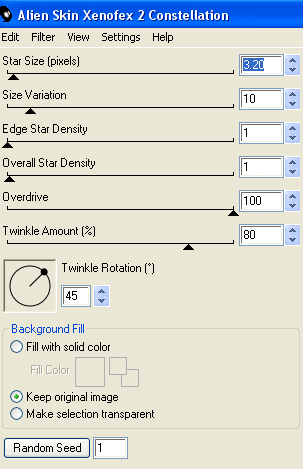
Effects > Plugins > Xenofex 2 > Constellation with the following settings:

Hide Sparkle1 and activate Sparkle2
Repeat Constellation, adjusting the Random Seed

Hide Sparkle2 and activate Sparkle3
Repeat Constellation once again, adjusting the Random Seed

Now to animate!

Activate Sparkle1 and hide Sparkle2 and Sparkle3
Edit > Copy Merged

Open Animation Shop
Edit > Paste as New Animation

Back to PSP
Hide Sparkle1 and activate Sparkle2
Edit > Copy Merged

In Animation Shop
Edit > Paste After Current Frame

Back to PSP
Hide Sparkle2 and activate Sparkle3
Edit > Copy Merged

In Animation Shop
Edit > Paste After Current Frame

Now save as a GIF and you're done!

Thanks for trying my tutorial!

::st!na::


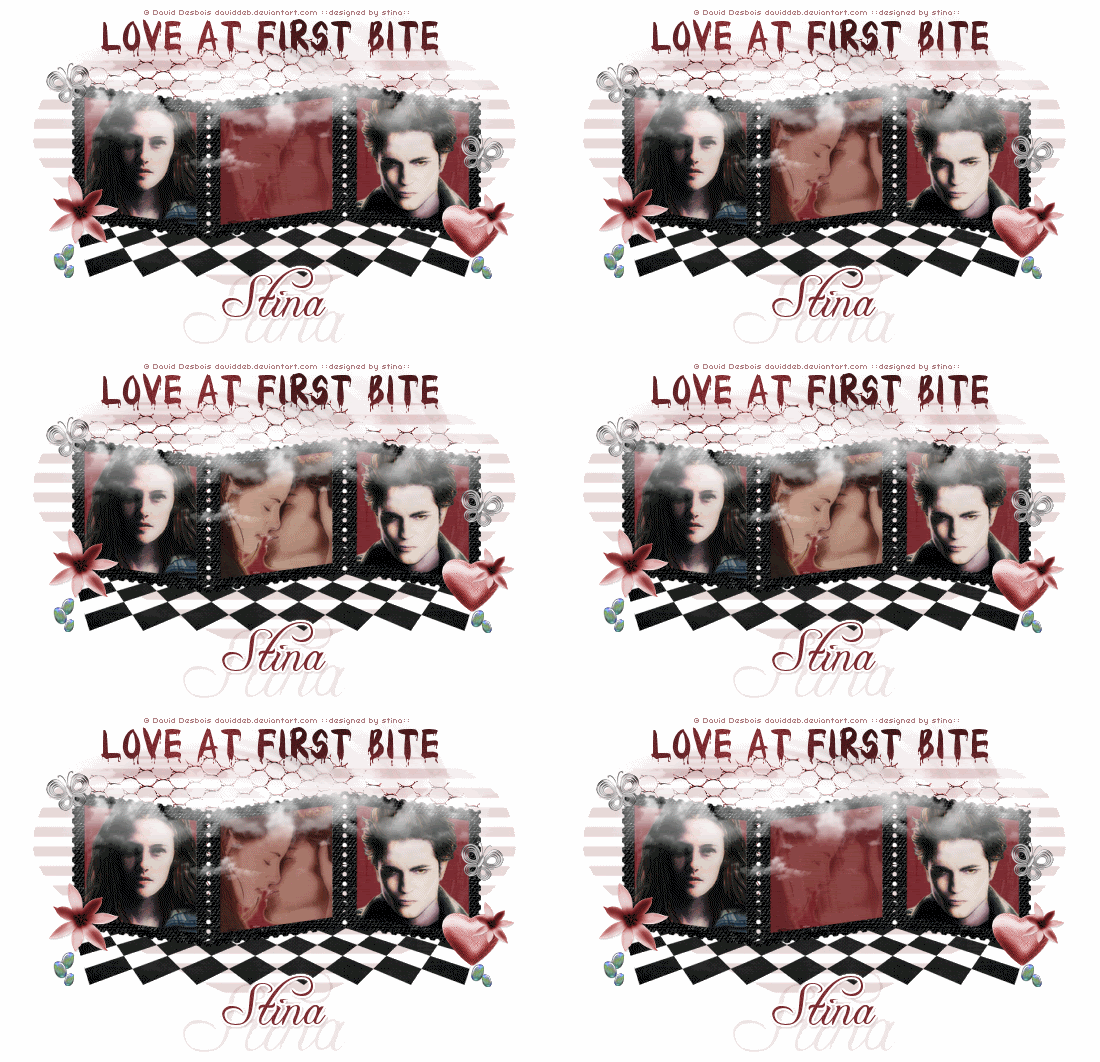
Here is a non-animated version:

© Tutorial written by Stina on 21st August 2009
All rights reserved

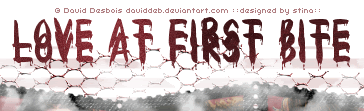
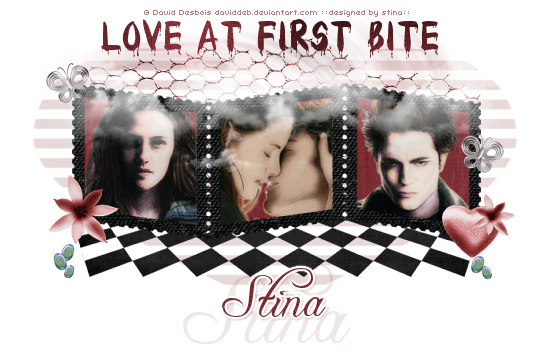
Love at First Bite


Supplies

Scrap kit of choice - I am using "This n That Part 1" by Created by Jill available from Twilight Scraps and Aussie Scraps
Tubes of choice - I am using the wonderful artwork of David Desbois who is FTU with written permission
WSL_Mask191 by Chelle available from her blog
Fonts of choice - I am using Wet Paint and Freebooter Script
Plugins: Xero > Radiance
Greg's Factory Output II > Pool Shadow
Eye Candy 4000 > Gradient Glow (optional)


Let's begin....


Open a new 700 x 550 blank canvas flood-filled white

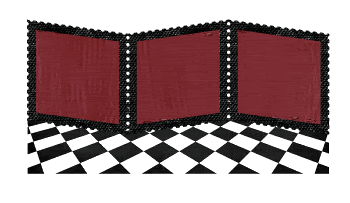
Paste Frame1 as new layer
Resize by 80%
Move upwards slightly

Paste Perspective Flooring as new layer
Resize by 74%
Layers > Arrange > Move Down

Position from beneath Frame
Select inside each Frame with your Magic Wand
Selections > Modify > Expand by 10
Add new raster layer
Paste Paper of choice INTO selection
Deselect


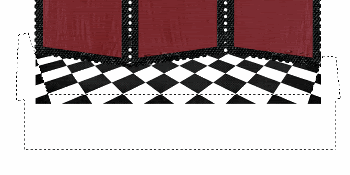
Activate Perspective Flooring again
With your Selection Tool draw out a rectangle along the bottom squares
Then with your Freehand Tool draw around the ends


Selections > Modify > Feather by 2
Delete a few times, then deselect

Paste three Tubes of choice as new layers
Resize as necessary
Position each within the three Frames
Select inside the first Frame with your Magic Wand
Selections > Modify > Expand by 10
Selections > Invert
Delete then deselect
Repeat for the remaining two Frames

Duplicate each of the tubes and apply the following:
Effects > Plugins > Xero > Radiance with default settings
Set blend mode to Multiply, then
Lower opacity to around 70
Layers > Merge > Merge Down

Paste Cloud as new layer
Resize by 75%
Position in upper left
Duplicate, then Image > Mirror
Layers > Merge > Merge Down

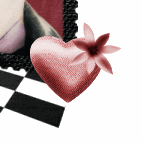
Paste Heart3 as new layer
Resize by 50%
Position to your liking

Adjust > Hue & Saturation > Colourise with the following settings:
Hue - 0
Saturation - 100

Effects > Plugins > Xero > Radiance with default settings

Paste Flower6 as new layer
Resize by 15%
Position to the lower left
Repeat the Hue & Saturation as above
Duplicate and set blend mode to Multiply
Layers > Merge > Merge Down

Effects > Plugins > Xero > Radiance with default settings again
Duplicate then resize by 60%
Position upon the Heart


Paste Butterfly2 as new layer
Image > Rotate by 15 to the right
Resize by 20%
Position to the right
Duplicate, then Image > Mirror
Postion to the upper right

Paste WireBits2 as new layer
Image > Mirror
Resize by 98%
Layers > Arrange > Send to Bottom
Position toward the top of Frame
Repeat the same Hue and Saturation once again

Paste Paper of choice as new layer
Layers > Arrange > Send to Bottom

Layers > New Mask Layer > From Image
Apply WSL_Mask191
OK

DO NOT MERGE!!

Activate Mask layer and resize by 110%
Layers > Merge > Merge Group

Repeat Xero Radiance effect twice
Lower opacity to 15

Crop and resize to liking

Select Text Tool and font of choice
I am using Wet Paint
Text colour to match tag - I am using #7c2c32

Type out text of choice
Objects > Align > Horizontal Centre in Canvas
Convert to raster layer

Effects > Plugins > Gregs Factory Output II > Pool Shadow with default settings
Duplicate text and move partially down


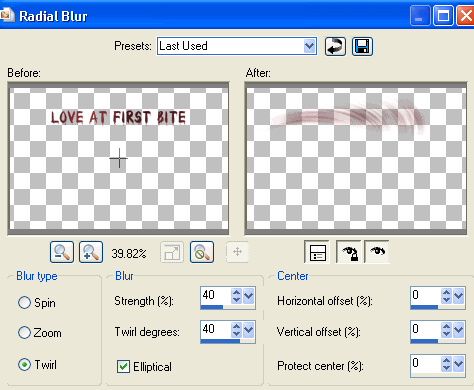
On copy below use the following Radial Blur settings:


Lower opacity to 40

Select another font of choice
I am using Freebooter Script
Same text colour

Type out your name
Objects > Align > Horizontal Centre in Canvas
Convert to raster layer
(I also typed my name in a larger size then lowered the opacity to around 10 and positioned beneath the top layer)
Apply a Gradient Glow and drop shadow of choice

Finally, add your © copyright, licence and watermark, then save as a GIF or JPG and you're done!


** IF YOU WISH TO ANIMATE PLEASE FOLLOW THESE NEXT STEPS **

Activate your Tube in the middle Frame
Lower the opacity to 20
Edit > Copy Merged

Open Animation Shop
Edit > Paste as New Animation

Back to PSP
Change the opacity to 40
Edit > Copy Merged

In Animation Shop
Edit > Paste After Current Frame

Back to PSP
Change to opacity to 60
Edit > Copy Merged

In Animation Shop
Edit > Paste After Current Frame

Back to PSP
Change to opacity to 80
Edit > Copy Merged

In Animation Shop
Edit > Paste After Current Frame

Back to PSP
Change to opacity to 100
Edit > Copy Merged

In Animation Shop
Edit > Paste After Current Frame

Now Select All, Copy then Paste as (another) new animation
Animation > Reverse Frames
Select All and Copy

Go back to your first animation and activate the last frame, then
Paste After Current Frame
Select All, then change Frame Properties to 20
Now save as a GIF and you're done!

Thanks for trying my tutorial!

::st!na::


Here is a non-animated version:


© Tutorial written by Stina on 20th August 2009
All rights reserved
Tuesday, June 9, 2009

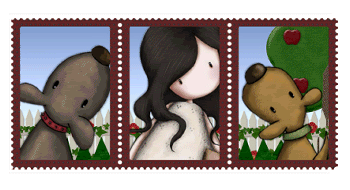
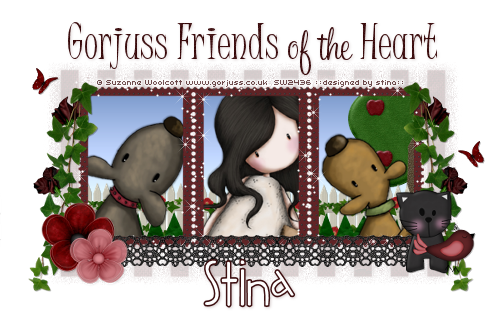
Gorjuss Friends


Supplies

Scrap kit of choice - I am using "Gorjuss II" by Created by Jill available at Twilight Scraps, Scraps with Attitude, Stargazer Scraps, Paradise 4 Scrappers and Exquisite Scraps
Tubes of choice - I am using the adorably "gorjuss" artwork of Suzanne Woolcott available from her store
**PLEASE DO NOT USE HER ARTWORK WITHOUT THE APPROPRIATE LICENCE**
WSL_Mask185 by Chelle available from her blog
Fonts of choice - I am using Juice ITC, SweetheartScript Limited and 2Peas Fat Frog
Plugin: Xenofex 2 Constellation


Ready? Let's begin....


Open a new 600 x 400 blank canvas flood-filled white
Paste Frame03 as new layer
Resize by 70%

Select the inside of each of the squares of your Frame with your Magic Wand
Selections > Modify > Expand by 8
Add a new raster layer

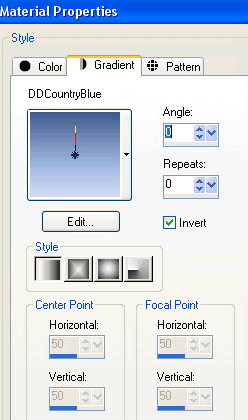
Select your Flood Fill Tool and open the Foreground on your Materials Palette
Choose Gradient and find a blue gradient


Flood fill layer with Gradient, then
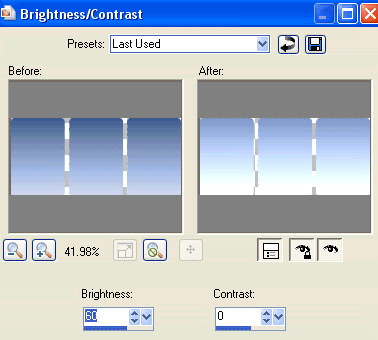
Adjust > Brightness & Contrast > Brightness/Contrast with the following settings:


Layers > Arrange > Move Down

KEEP SELECTED!!

Paste a Tree as new layer
Resize by 40%
Position to the far right (or left) to your liking
Selections > Invert
Delete

STILL SELECTED!!

Paste Fence as new layer
Resize by 40%
Position to the right
Duplicate, then move to the left
Layers > Merge > Merge Down, then
Delete

STILL SELECTED!!

Paste Grass as new layer
Resize by 30%
Position to the bottom and to the right of the Frame
Duplicate and move across
Layers > Merge > Merge Down
Delete

STILL SELECTED....*g*

Paste three tubes of choice as new layers
Resize as necessary and position within each of the Frames to your liking
Delete and deselect!


Paste LaceTrim as new layer
Resize by 60%
Position along bottom of Frame

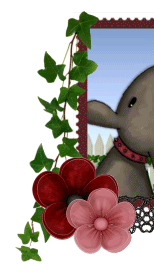
Paste a Flower as new layer
Resize by 25%
Position to the lower left

Paste another Flower as new layer
Resize by 20%
Position alongside first Flower

Paste IvyLeaves as new layer
Image > Rotate by 20 to the left
Resize by 40%
Position to the left from top corner
Move below Flower layers


Duplicate, then Image > Mirror

Layers > Merge > Merge Down

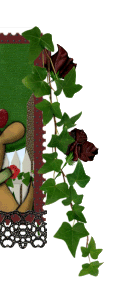
Paste Flowers as new layer
Resize by 40%
Position to the right

Layers > Arrange > Send to Bottom

Duplicate, then Image Mirror
Laters > Merge > Merge Down


Delete then deselect

Paste Kitty as new layer
Layers > Arrange > Bring to Top
Resize by 25%
Position to the lower right

Paste Bird as new layer
Resize by 20%
Position alongside the Kitty

Paste Butterfly as new layer
Resize by 10%
Duplicate, then Image > Mirror
Position both to liking

Paste Paper of choice as new layer
Layers > Arrange > Send to Bottom

Layers > New Mask Layer > From Image
Apply WSL_Mask185
OK
Layers > Merge > Merge Group
Lower opacity to 20

Crop and resize

Select your Text Tool and font of choice
I have used Juice ITC and SweetheartScript Limited
Choose a colour from your tag

Type out text and position to your liking
Objects > Align > Horiztonal Centre in Canvas
Convert to raster layer
Apply drop shadow of choice

Select another font of choice
I am using 2Peas Fat Frog
Foreground - (colour of choice)
Background - #FFFFFF
Stroke width - 1.5

Type out your name
Objects > Align > Horizontal Centre in Canvas
Convert to raster layer

Add some noise and a drop shadow of choice

Finally, add your © copyright, licence and watermark, then save as GIF or JPG and you're done!


** IF YOU WISH TO ANIMATE PLEASE FOLLOW THESE NEXT STEPS **

Activate your Frame layer
Duplicate twice and rename Sparkle1, Sparkle2 and Sparkle3

Hide Sparkle2 and Sparkle3 and activate Sparkle1

Effects > Plugins > Xenofex 2 > Constellation with the following settings:


Hide Sparkle1 and activate Sparkle2
Apply the Constellation effect again, adjusting the Random Seed

Hide Sparkle2 and activate Sparkle3
Apply the Constellation effect again, adjusting the Random Seed

Now for the animation!

Activate Sparkle1 and hide Sparkle2 and Sparkle3
Edit > Copy Merged

Open Animation Shop
Edit > Paste as New Animation

Back to PSP
Hide Sparkle1 and activate Sparkle2
Edit > Copy Merged

In Animation Shop
Edit > Paste AFTER Current Frame

Back to PSP
Hide Sparkle2 and activate Sparkle3
Edit > Copy Merged

In Animation Shop
Edit > Paste AFTER Current Frame
Save as a GIF and you're done!

Thanks for trying my tutorial!

::st!na::


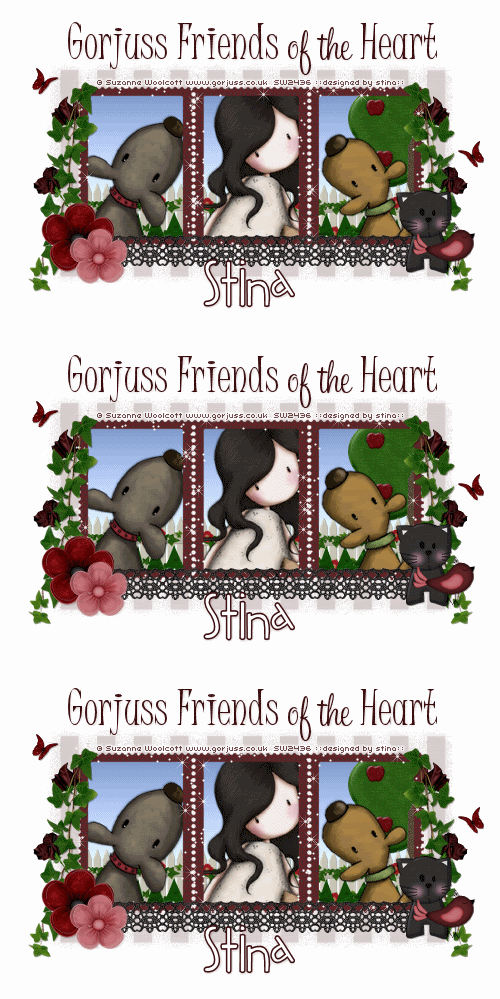
Here is a non-animated version:


© Tutorial written by Stina on 9th June 2009
All rights reserved
Wednesday, March 4, 2009

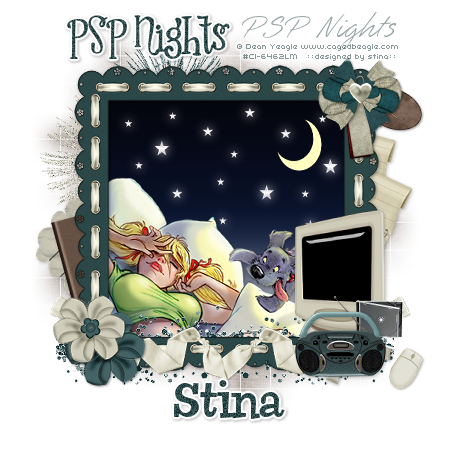
PSP Nights

 
Supplies
 
Scrap kit of choice - I am using the lovely "Suz's All Nighter" kit by Created by Jill which can be purchased from Exquisite Scraps, Paradise 4 Scrappers and Creative Scraps
Tube of choice - I am using the artwork of Dean Yeagle which can be purchased from CILM
**PLEASE DO NOT USE HIS ARTWORK WITHOUT THE APPROPRIATE LICENCE**
WSL_Mask38 by Chelle (supplied)
Preset Shape - Seeing Stars (supplied)
Preset Shape - Luna (supplied)
Teom_127 Gradient (supplied)
Silvers Gradient (supplied)
Fonts of choice - I am using 2 Peas Mister Giggles (pay font),
SlashHmk (supplied) and Chowderhead (supplied)
Plugins: Andromeda Perspective
and Eye Candy 4000 Gradient Glow
 
My Supplies here
 
 
~ Step 1 ~
 
Open your Mask and fonts and minimise them for later
 
Open a blank 600 x 600 canvas flood-filled white
 
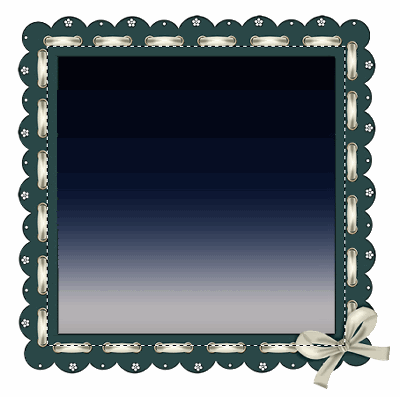
Paste Frame7 as new layer
Resize by 80%
 
Grab your Selection Tool and draw out a rectangle around the inside of the frame
Add a new raster layer
 
Layers / Arrange / Move Down
 
Flood fill layer with teom_127 Gradient
(Angle and Repeats - 0; Style - Linear)
 
Adjust / Blur / Gaussian Blur
Radius - 20.00
Duplicate then set the blend mode to Multiply
Layers / Merge / Merge Down
 
Rename this layer to Sky
 

~ Step 2 ~
 
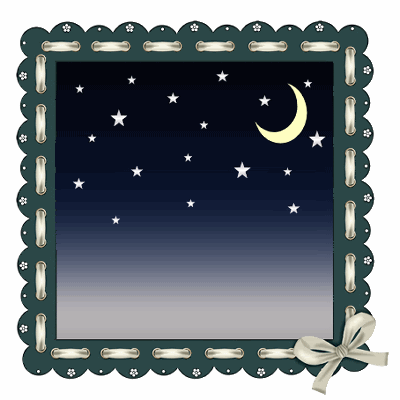
Set your Preset Shape Tool to Seeing Stars-w
 
In your Materials Palette:
Foreground - null
Background - Silvers Gradient
(Angle and Repeats - 0; Style - Linear)
 
Draw out three or four different shaped stars, converting each to raster layer with each star
 
Duplicate stars and place them to your liking
 
Set your Preset Shape Tool to Luna 1
 
In your Materials Palette:
Foreground - null
Background - #ffffc0
 
Draw out the shape of the Moon and place into position
Convert to raster layer
Rename this layer Moon
 
You may need to play with the position of the moon and stars for your desired result
Once satisfied turn off the visibility of your Background, Sky, Moon and Frame
 
Activate one of the visible layers
Layers / Merge / Merge Visible
 
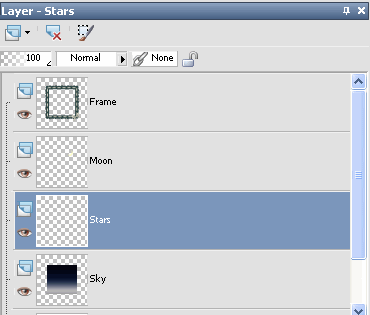
Rename this layer Stars
 
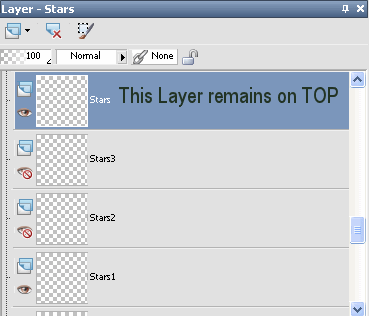
Your layer palette should now look something like this:


~ Step 3 ~
 
Paste your tube as a new layer
Resize if necessary
 
Use your Magic Wand to click inside the frame
Selections / Modify / Expand by 10
Selections / Invert
Activate tube and delete
Deselect
 
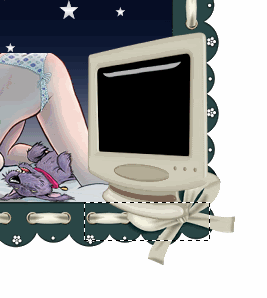
Paste SAN_Computer as new layer
With your Selection Tool draw a rectangle around screen
Add new raster layer
Flood fill black (#000000)
Deselect
Layers / Arrange / Move Down
Layers / Merge / Merge Down
 
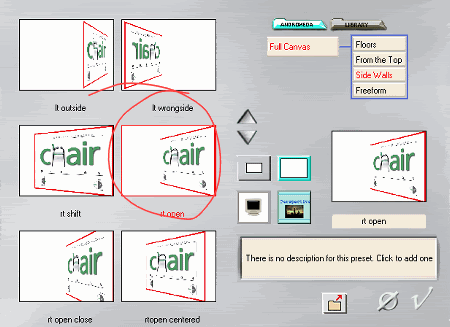
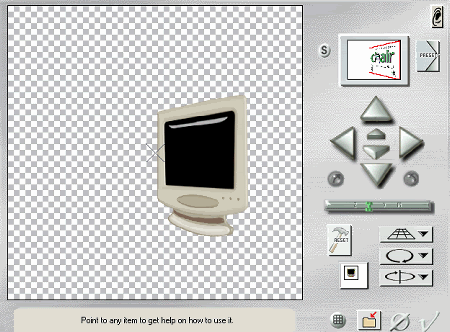
Effects / Plugins / Andromeda / Perspective with the following settings:


Resize by 65% and place to the left
 
If placing computer to the right you will need to use the opposite Andromeda Perspective settings, or simply Image / Mirror
 
** If you do not have the Andromeda plugin you can use your Pick or Deformation Tool to get the same effect by holding your CTRL key and using the top/bottom and side nodes for your desired shape **
 
With your Selection Tool draw out a rectangle along the bottom of the Frame around the computer
 

Delete and deselect
 
Paste Mouse as new layer
Image / Rotate by 30 to the right
Resize by 20%
Position near the computer
 
Paste CDBoombox as new layer
Resize by 30% and place below computer
 
Paste JewelCase1 as new layer
Resize by 20%
Place between BoomBox and computer
 
Paste Glitter3 as new layer
Resize by 75%
Position along bottom and under Frame
Duplicate then Image / Mirror
 
Paste Flower8 as new layer
Resize by 30%
Position in lower left corner of Frame
 
Paste Flower9 as new layer
Resize by 27%
Position slightly above first flower
 
Paste Glitter1 as new layer
Image / Mirror then Image / Flip
Image / Rotate by 40 to the left
Resize by 50%
Position behind Frame in the upper right corner
 
Paste Tag1 as new layer
Image / Rotate by 40 to the right
Resize by 30%
Position in upper right corner of Frame
 
Paste Bow8 as new layer
Resize by 35%
Place over Tag in top right corner
 
Paste HeartSm1 as new layer
Resize by 10% and place in the centre of the bow
 
Paste Notebook as new layer
Image / Rotate by 15 to the left
Position to the left beneath Frame and Sky layers
 
Paste JournalingTag3 as new layer
Resize by 50%
Position behind the Notebook
 
 
Paste NotePaper as new layer
Image / Rotate by 15 to the right
Resize by 40%
Position below Sky layer and so that it partially protrudes the side of the Frame to the right
Duplicate then Image / Rotate by 10 to the right
Adjust / Sharpness / Unsharpen Mask
Raduis - 1.00
Strength - 100
Clipping - 4.00
 
Paste Ribbon3 as new layer
Resize by 80%
Positiong below all element layers to the one just above the Frame
 
Duplicate then set blend mode to Screen
Lower opacity to 80
Layers / Merge / Merge Down
 
Add a drop shadow:
H & V - 1
Opacity - 30
Blur - 3.00
Colour - #000000
 
Crop and resize
 

~ Step 4 ~
 
Paste PaperI as new layer
Move to bottom but above Background layer
Resize by 60%
 
Layers / New Mask Layer / From Image
Locate WSL_Mask84
Source Luminance
OK
 
Layers / Merge / Merge Group
Lower opacity of this layer to 40
 
Add a slight drop shadow to your element layers
 
Select your Text Tool and font of choice - I am using Chowderhead
 
Foreground - null
Background - #2c4848
 
Type out your name
Add some noise if you wish
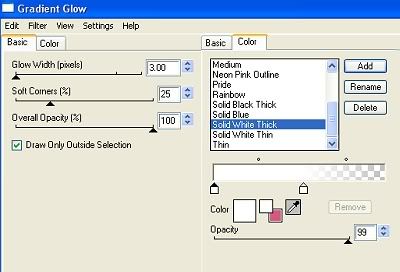
Effects / Plugins / Eye Candy 4000 / Gradient Glow with the following settings:
 
 
Then add a drop shadow:
H & V - 1
Opacity - 30
Blur - 3.00
Colour - #000000
 
Add your © copyright of the tube you are using, licence and watermark
 

~ Step 5 ~
 
** This next step is optional if you wish to animate your tag **
 
Activate your Stars layer
Duplicate
Move your original Stars layer to the top of your duplicate so you know which one it is
 
On your duplicate layer
Adjust / Blur / Gaussian Blur with a Radius of 5.00
 
Duplicate and repeat Gaussian Blur
Then duplicate again
Rename them Stars1, Stars2 and Stars3 from the bottom up
KEEP STARS LAYER AS IS AND REMAINING ABOVE  STARS 1-3 - WHICH ARE THE BLURRED LAYERS!!
 
 
Now turn the visibility off on the Stars2 and the Star3
 
Edit / Copy Merged
 
Go to Animation Shop and paste as new animation
 
Back in PSP
Turn on Stars2
Edit / Copy Merged
 
In Animation Shop
Edit / Paste / Paste After Current Frame
 
Back in PSP
Turn on Stars3
Edit / Copy Merged
 
In Animation Shop
Edit / Paste / Paste After Current Frame
 
Press CTRL + A (which will Select All)
Then ALT + Enter (which will open Frame Properties
Change the properties to 25
 
Now just save as a GIF and you're done!!
 
Thank you for trying my tutorial
 
::st!na::
 
 
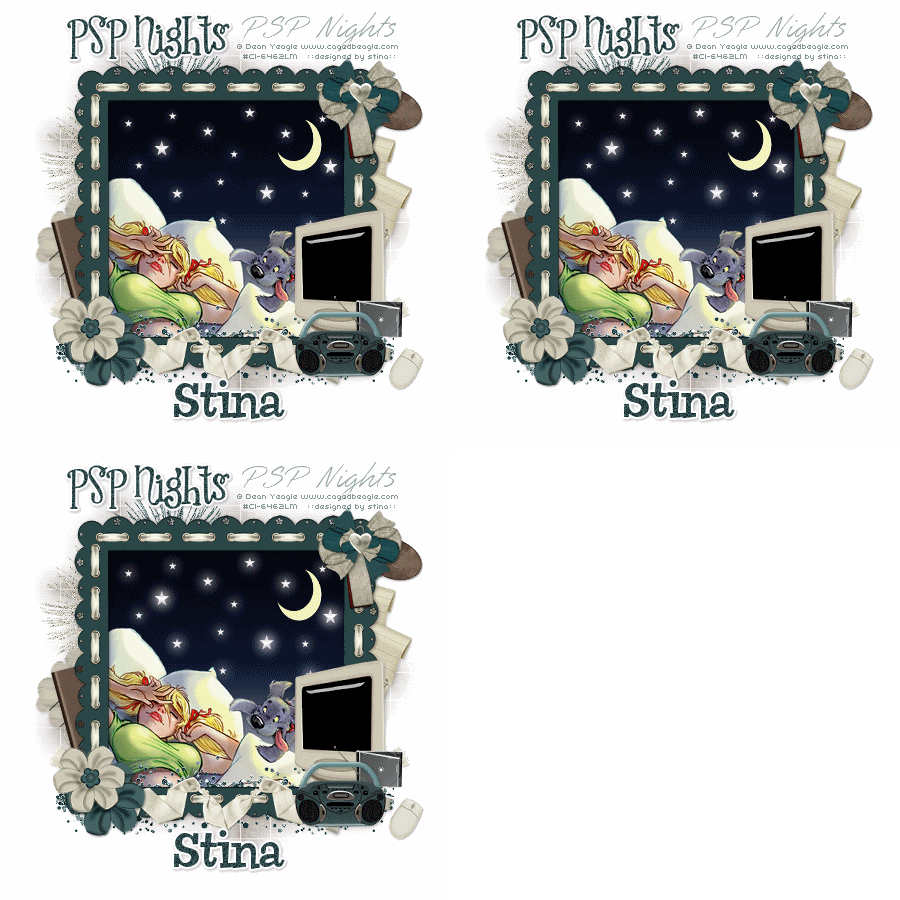
A non-animated version:
 

© Tutorial written by Stina on 4th March 2009
All rights reserved
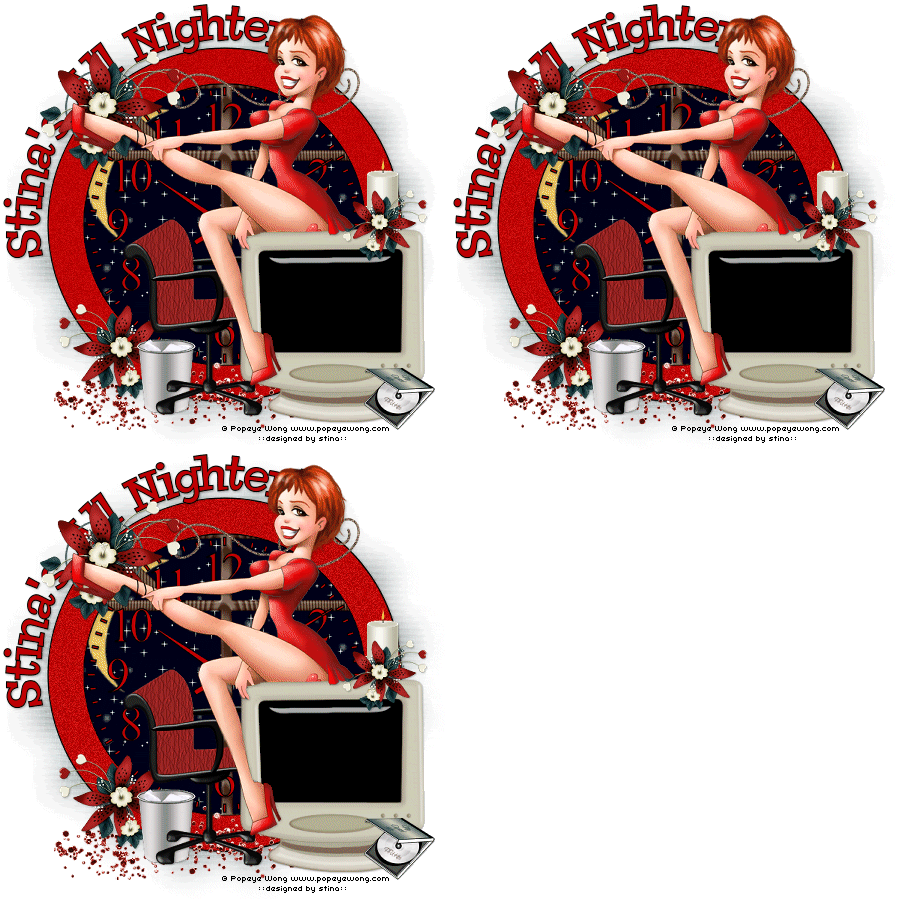
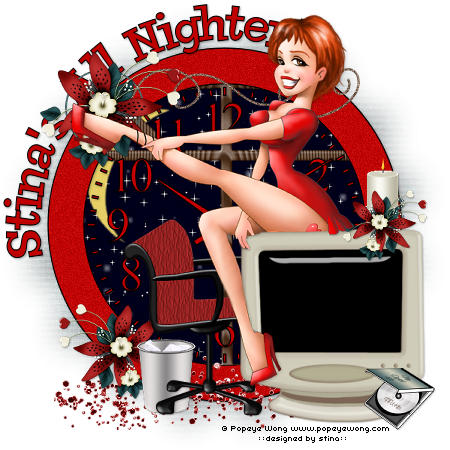
My All Nighter

 
Supplies
 
Scrap kit of choice - I am using the wonderful "Suz's All Nighter" by Created by Jill which can be purchased from Exquisite Scraps, Paradise 4 Scrappers and Creative Scraps
Tube of choice - I am using the delightful artwork of Popeye Wong which is free to use though you must provide credit back to him © Popeye Wong www.popeyewong.com
WSL_Mask33 by Chelle which can be found on her blog
Font of choice - I am using Chowderhead
Paint Shop Pro (I am using X)
Animation Shop
 
My Supplies here
 
 
~ Step 1 ~
 
Open a blank 600 x 600 canvas flood-filled white
 
With your dropper tool pick a colour from your tube and set that as your background
Your Foreground should be black (#000000)
Line width - 2.00
 
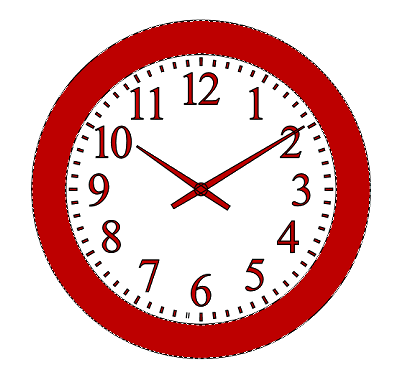
Select your Preset Shape Tool and find the Clock
Hold your Shift key and draw out the clock
Objects / Align / Centre in Canvas
Convert to raster layer
 
Using your Magic Wand select the inside rim of the clock
 
 
Layers / Promote Selection to Layer
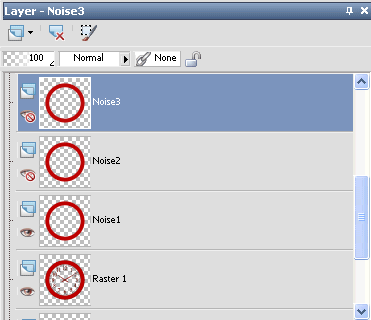
Duplicate twice
Rename them Noise1, Noise2 and Noise3
 

Close off the visibility of Noise 2 and 3, leaving Noise1 visible
 
Adjust / Add/Remove Noise / Add Noise
Gaussian
Noise - 15
Monochrome
OK
 
Close off Noise1 and activate Noise2
Repeat steps, changing Noise to 20
 
Close off Noise2 and activate Noise3
Repeat steps above, changing Noise to 25
 
You can close off these layers until later when we will return to them
 

~ Step 2 ~
 
Paste SAN_Window as new layer
Layers / Arrange / Move Down
Resize by 105%
 
Use your Magic Wand to click outside the clock
Selections / Modify / Expand by 15
 
Activate Window layer again and press delete
 
Paste SAN_Computer as new layer
Resize by 75%
Move to the right
 
With your Selection Tool draw out a rectangle around the monitor screen
Add a new raster layer
Layers / Arrange / Move Down
Flood fill this layer #000000
Deselect
 
Paste SAN_Chair as new layer
Resize by 70%
Layers / Arrange / Move Down
Position slightly tucked behind computer
Duplicate then set blend mode to Soft Light
Layers / Merge / Merge Down
 
Paste SAN_TrashCan as new layer
Resize by 30%
Layers / Arrange / Move Down
Position behind the chair
 
Paste CompactDisk as new layer
Resize by 25%
Position beside computer monitor
 
Paste Candle1 as new layer
Resize by 25%
Place on top of computer
 
Paste FlowerDeco as new layer
Resize by 50%
Position in upper left
Duplicate and set blend mode to Hard Light
Layers / Merge / Merge Down
 
Duplicate and resize by 80%
Image / Mirror
Position in the lower left partially behind Trash Can
 
Duplicate and resize by 80%
Image / Mirror
Position over candle and computer
 
Paste Doodle2 as new layer
Resize by 20%
Place behind Flower in upper left
 
Paste Doodle3 as new layer
Resize by 60%
Place along top of clock tucked under Flower
 
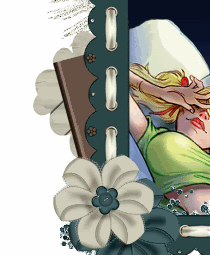
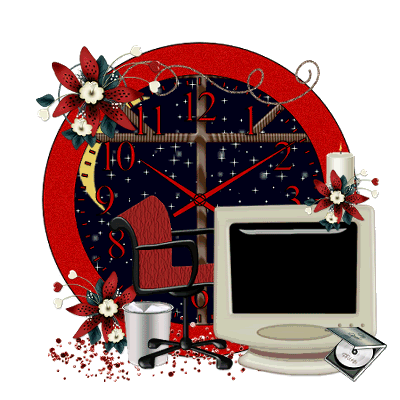
You should now have something that looks like this:
 
You may add any other embellishments you like - this is your creation! *s*
 

~ Step 3 ~
 
Paste your tube as a new layer
Resize if necessary
I used a Popeye Wong tube which is free to use
(though you MUST credit him by including his copyright © Popeye Wong www.popeyewong.com)
 
The tube I used also required some work to get it to how I wanted it
(she was originally on a stool with a dog on the end of a leash that was wrapped round her leg)
After cutting out the stool I then had to clone her leg as if none of it was ever missing (took some work too! *g*)
You can either use the tube I did or one of your own
 
Activate your Background layer
Paste PaperK as new layer
Resize by 75%
 
Layers / New Mask Layer / From Image
Locate WSL_Mask33
Source Luminance
OK
 
In your Layer Palette locate the Mask layer and activate it
 
 
Resize by 105%
 
Layers / Merge / Merge Group
 
Crop and resize tag
 
Select your Preset Shape Tool to Ellipse
Holding your shift key draw out a circle around the clock
Objects / Align / Centre in Canvas
 
Select your Text Tool in a font of your choice (I'm using Chowderhead)
 
Set your Properties to the following:
Stroke width - 1.00
Foreground - #000000
Background - #c00000
 
Over the curve of the ellipse type out "YOUR NAME All Nighter"
Or as an alternative you can simply type "My All Nighter"
 

In the Layer Palette open the Vector Layer and turn off the visibility of the ellipse
Convert to raster layer
Add a slight drop shadow
 
Add © Popeye Wong www.popeyewong.com (if using the same tube)
or the copyright of the tube you are using, licence and watermark
 

~ Step 4 ~
 
** This step is purely optional if you wish to animate **
 
In your Layer Palette find the Noise1, Noise2 and Noise3 layers we created at the beginning
 
Turn the visibility off Noise 2 and 3, leaving Noise1 visible
 
Edit / Copy Merged
 
Open Animation Shop and paste as new animation
 
Back to PSP
Turn off Noise1 and open Noise2
Edit / Copy Merged
 
Go to Animation Shop
Edit / Paste / Paste After Current Frame
 
Back to PSP
Turn off Noise2 and open Noise3
Edit / Copy Merged
 
Go to Animation Shop
Edit / Paste / Paste After Current Frame
 
Now just save as a GIF and you're done!!
 
Thank you for trying my tutorial
 
::st!na::
 
 
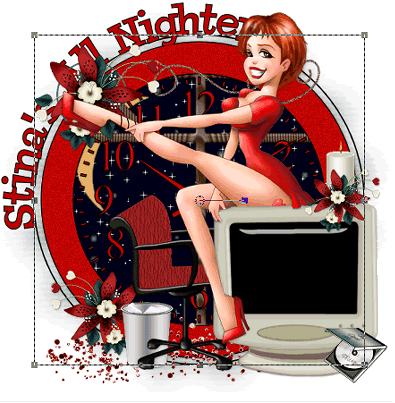
Here is a non-animated version:


© Tutorial written by Stina on 4th March 2009
All rights reserved
Sunday, February 15, 2009

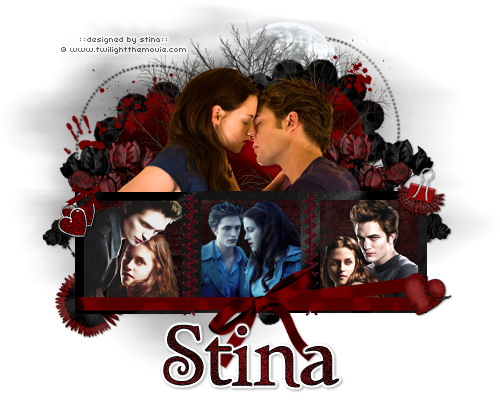
Twilight Love

twilightlove-stina

Supplies

Scrap kit of choice - I am using the "Twilight" kit by Jill from Created by Jill
which can be purchased from Paradise4Scrappers or a variety of stores (listed on her blog)
Four Twilight tubes of choice (or those I have supplied)
Template thrown together by me (supplied)
Twilight Eyelet Ribbon (supplied)
Becky_Mask023 (supplied)
Fire Gradient (supplied)
Twilight font (supplied)
Eye Candy 4000 Gradient Glow (optional for name)

My Supplies here

~ Step 1 ~

Place Fire gradient in your Gradients folder

Open Mask and font and minimise for later

Open Template and duplicate
Close off original
Resize to 450 x 363

Image / Canvas Resize to 600 x 450
On your bottom layer flood fill excess area with white

Activate the Dotted Heart layer
Selections / Float then Selections / Defloat
Selections / Modify / Feather by 2
Paste Paper 18 as new layer
Selections / Invert
(it looks like the marching ants have disappeared but the dotted heart is now an inverted selection)
Hit delete
Deselect

With your magic wand click on the Heart Frill
Selections / Modify / Feather by 2
Paste Paper 15 as new layer
Resize by 65%
Selections / Invert
Delete
Deselect

Click the Heart layer
Selections / Modify / Feather by 2
Paste Paper 9 as new layer
Resize by 65%
Selections / Invert
Delete
Deselect

Click each frame layer
Paste Paper 18 as new layer
Resize by 65%
Selections / Invert
Delete

KEEP SELECTED

Paste Paper 14 as new layer
Delete
Deselect
Lower opacity to 70
Frame background now looks a deep red

Click the Rectangle layer
Paste Paper 6 as new layer
Resize by 65%
Selections / Invert
Delete
Deselect

~ Step 2 ~

Now for your tubes
Open Kirsty08-Twilight-6
Paste as new layer and resize by 20%
Position under the layer in the first frame
With your magic wand click inside the frame
Selections / Modify / Expand by 5
Selections / Invert
Delete
Deselect

Open Kirsty08-Twilight-4
Paste as new layer and resize by 25%
Position under the layer in the second frame
With your magic wand click inside the frame
Selections / Modify / Expand by 5
Selections / Invert
Delete
Deselect

Open Kirsty08-Twilight-1
Paste as new layer and resize by 35%
Position under the layer in the third frame
With your magic wand click inside the frame
Selections / Modify / Expand by 5
Selections / Invert
Delete
Deselect

Open Kirsty08-Twilight-5
Paste as new layer
Resize by 35% and position behind the frame and rectangle layers in the centre at the top of the frame

~ Step 3 ~

Open BowWrap6 and paste as new layer
Resize by 72%
Position at the bottom of the frame with the lower part of the ribbon extending off the frame
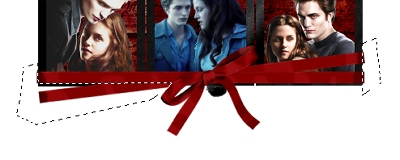
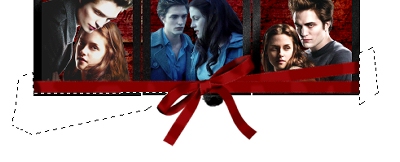
With your freehand tool draw along the edge of the frame EXACTLY along and to the edge of the bow

Now you see it
tl-02

Now you dont!
tl-03

Duplicate the ribbon layer
Blend mode to Multiply and lower opacity to 50
Layers / Merge / Merge Down
Duplicate again and blend mode to Soft Light

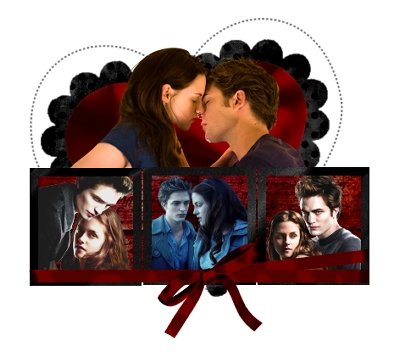
You should now have something like this:
tl-04

~ Step 4 ~

Open Charm1 and paste as new layer
Resize by 40% then resize again by 50%
Adjust / Sharpness / Unsharpen Mask
1.00, 100, 4.00
Position on the top left corner of the frame

Open BinderClip2 and paste as new layer
Resize by 15%
Image / Rotate to the right by 15
Adjust / Sharpness / Unsharpen Mask
(same settings as above)
Position on the top right corner of the frame

Open Flowers1 and paste as new layer
Resize by 40% and position behind Bella's shoulders to the left
Duplicate then Image / Mirror
Position duplicate behind Edward's shoulders

Open Flowers2 and paste as new layer
Resize by 40% and position behind Edward to your liking (I moved them slightly to the right)
Duplicate then Image / Mirror
Position duplicate behind Bella to your liking

Open Flower2 and paste as new layer
Resize by 20% and position in the lower left corner beneath the frame
Paste Flower3 as new layer
Rezise by 25% and position over Flower2

~ Step 5 ~

Open Heart1 and paste as new layer
Resize by 15% then Image / Rotate by 25 to the right
Position in the lower right corner

Open BloodSpatter3 and paste as new layer
Resize by 25% and position to the right to your liking

Paste again (should be in your clipboard) and resize by 18%
Position to to the left to your liking

Open BloodSpatter2 and paste as new layer
Resize by 15% and position between HeartFrill and Heart layers protruding with some splatter

Open BloodHandPrint and paste as new layer
Resuze by 18% then Image / Rotate by 25 to the right
Image / Mirror
Position behind flowers

Add any other elements you wish to your creation

Add any drop shadows to your liking

Delete all template layers as you won't be needing them now

Activate background layer
Paste Paper 14 as new layer
Layers / New Mask Layer / From Image
Locate Becky_Mask023 in drop down menu and apply
Resize by 95% and lower opacity to 65

Crop and resize your tag

~ Step 6 ~

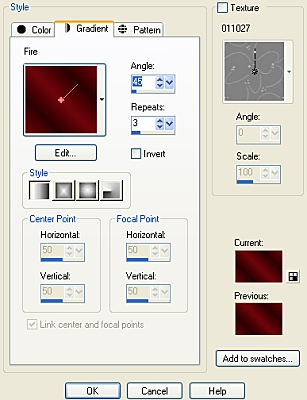
In your materials palette use these settings:
Foreground: #000000
Background: Fire Gradient

tl-05

Gradient settings:
Linear Style
Angle - 45
Repeats - 3
Invert UNchecked
Select your text tool with the following settings:

tl-06

tl-07

Type out your name

Objects / Align / Horizontal Centre in Canvas

Adjust / Add/Remove Noise / Add Noise
Uniform
25%
Monocrhome checked

Effects / Plugins / Eye Candy 4000 / Gradient Glow
Glow width 3.00
Colour settings White

Add drop shadow
H & V - 1
Opacity - 40
Blur - 3.00
Colour - Black

Add your ©copyright and watermark and you're done!

Thank you for trying my tutorial

::st!na::

©Tutorial written by Stina on 30th January 2009
All rights reserved