

Supplies
Scrap kit of choice - I am using the lovely "Suz's All Nighter" kit by Created by Jill which can be purchased from Exquisite Scraps, Paradise 4 Scrappers and Creative Scraps
Tube of choice - I am using the artwork of Dean Yeagle which can be purchased from CILM
**PLEASE DO NOT USE HIS ARTWORK WITHOUT THE APPROPRIATE LICENCE**
WSL_Mask38 by Chelle (supplied)
Preset Shape - Seeing Stars (supplied)
Preset Shape - Luna (supplied)
Teom_127 Gradient (supplied)
Silvers Gradient (supplied)
Fonts of choice - I am using 2 Peas Mister Giggles (pay font),
SlashHmk (supplied) and Chowderhead (supplied)
Plugins: Andromeda Perspective
and Eye Candy 4000 Gradient Glow
My Supplies here
~ Step 1 ~
Open your Mask and fonts and minimise them for later
Open a blank 600 x 600 canvas flood-filled white
Paste Frame7 as new layer
Resize by 80%
Resize by 80%
Grab your Selection Tool and draw out a rectangle around the inside of the frame
Add a new raster layer
Add a new raster layer
Layers / Arrange / Move Down
Flood fill layer with teom_127 Gradient
(Angle and Repeats - 0; Style - Linear)
(Angle and Repeats - 0; Style - Linear)
Adjust / Blur / Gaussian Blur
Radius - 20.00
Duplicate then set the blend mode to Multiply
Layers / Merge / Merge Down
Radius - 20.00
Duplicate then set the blend mode to Multiply
Layers / Merge / Merge Down
Rename this layer to Sky
~ Step 2 ~
Set your Preset Shape Tool to Seeing Stars-w
In your Materials Palette:
Foreground - null
Background - Silvers Gradient
(Angle and Repeats - 0; Style - Linear)
Foreground - null
Background - Silvers Gradient
(Angle and Repeats - 0; Style - Linear)
Draw out three or four different shaped stars, converting each to raster layer with each star
Duplicate stars and place them to your liking
Set your Preset Shape Tool to Luna 1
In your Materials Palette:
Foreground - null
Background - #ffffc0
Foreground - null
Background - #ffffc0
Draw out the shape of the Moon and place into position
Convert to raster layer
Rename this layer Moon
Convert to raster layer
Rename this layer Moon
You may need to play with the position of the moon and stars for your desired result
Once satisfied turn off the visibility of your Background, Sky, Moon and Frame
Once satisfied turn off the visibility of your Background, Sky, Moon and Frame
Activate one of the visible layers
Layers / Merge / Merge Visible
Layers / Merge / Merge Visible
Rename this layer Stars
Your layer palette should now look something like this:
~ Step 3 ~
Paste your tube as a new layer
Resize if necessary
Resize if necessary
Use your Magic Wand to click inside the frame
Selections / Modify / Expand by 10
Selections / Invert
Activate tube and delete
Deselect
Selections / Modify / Expand by 10
Selections / Invert
Activate tube and delete
Deselect
Paste SAN_Computer as new layer
With your Selection Tool draw a rectangle around screen
Add new raster layer
Flood fill black (#000000)
Deselect
Layers / Arrange / Move Down
Layers / Merge / Merge Down
With your Selection Tool draw a rectangle around screen
Add new raster layer
Flood fill black (#000000)
Deselect
Layers / Arrange / Move Down
Layers / Merge / Merge Down
Effects / Plugins / Andromeda / Perspective with the following settings:
Resize by 65% and place to the left
If placing computer to the right you will need to use the opposite Andromeda Perspective settings, or simply Image / Mirror
** If you do not have the Andromeda plugin you can use your Pick or Deformation Tool to get the same effect by holding your CTRL key and using the top/bottom and side nodes for your desired shape **
With your Selection Tool draw out a rectangle along the bottom of the Frame around the computer
Delete and deselect
Paste Mouse as new layer
Image / Rotate by 30 to the right
Resize by 20%
Position near the computer
Image / Rotate by 30 to the right
Resize by 20%
Position near the computer
Paste CDBoombox as new layer
Resize by 30% and place below computer
Resize by 30% and place below computer
Paste JewelCase1 as new layer
Resize by 20%
Place between BoomBox and computer
Resize by 20%
Place between BoomBox and computer
Paste Glitter3 as new layer
Resize by 75%
Position along bottom and under Frame
Duplicate then Image / Mirror
Resize by 75%
Position along bottom and under Frame
Duplicate then Image / Mirror
Paste Flower8 as new layer
Resize by 30%
Position in lower left corner of Frame
Resize by 30%
Position in lower left corner of Frame
Paste Flower9 as new layer
Resize by 27%
Position slightly above first flower
Resize by 27%
Position slightly above first flower
Paste Glitter1 as new layer
Image / Mirror then Image / Flip
Image / Rotate by 40 to the left
Resize by 50%
Position behind Frame in the upper right corner
Image / Mirror then Image / Flip
Image / Rotate by 40 to the left
Resize by 50%
Position behind Frame in the upper right corner
Paste Tag1 as new layer
Image / Rotate by 40 to the right
Resize by 30%
Position in upper right corner of Frame
Image / Rotate by 40 to the right
Resize by 30%
Position in upper right corner of Frame
Paste Bow8 as new layer
Resize by 35%
Place over Tag in top right corner
Resize by 35%
Place over Tag in top right corner
Paste HeartSm1 as new layer
Resize by 10% and place in the centre of the bow
Resize by 10% and place in the centre of the bow
Paste Notebook as new layer
Image / Rotate by 15 to the left
Position to the left beneath Frame and Sky layers
Image / Rotate by 15 to the left
Position to the left beneath Frame and Sky layers
Paste JournalingTag3 as new layer
Resize by 50%
Position behind the Notebook
Resize by 50%
Position behind the Notebook

Paste NotePaper as new layer
Image / Rotate by 15 to the right
Resize by 40%
Position below Sky layer and so that it partially protrudes the side of the Frame to the right
Duplicate then Image / Rotate by 10 to the right
Adjust / Sharpness / Unsharpen Mask
Raduis - 1.00
Strength - 100
Clipping - 4.00
Image / Rotate by 15 to the right
Resize by 40%
Position below Sky layer and so that it partially protrudes the side of the Frame to the right
Duplicate then Image / Rotate by 10 to the right
Adjust / Sharpness / Unsharpen Mask
Raduis - 1.00
Strength - 100
Clipping - 4.00
Paste Ribbon3 as new layer
Resize by 80%
Positiong below all element layers to the one just above the Frame
Resize by 80%
Positiong below all element layers to the one just above the Frame
Duplicate then set blend mode to Screen
Lower opacity to 80
Layers / Merge / Merge Down
Lower opacity to 80
Layers / Merge / Merge Down
Add a drop shadow:
H & V - 1
Opacity - 30
Blur - 3.00
Colour - #000000
H & V - 1
Opacity - 30
Blur - 3.00
Colour - #000000
Crop and resize
~ Step 4 ~
Paste PaperI as new layer
Move to bottom but above Background layer
Resize by 60%
Move to bottom but above Background layer
Resize by 60%
Layers / New Mask Layer / From Image
Locate WSL_Mask84
Source Luminance
OK
Locate WSL_Mask84
Source Luminance
OK
Layers / Merge / Merge Group
Lower opacity of this layer to 40
Lower opacity of this layer to 40
Add a slight drop shadow to your element layers
Select your Text Tool and font of choice - I am using Chowderhead
Foreground - null
Background - #2c4848
Background - #2c4848
Type out your name
Add some noise if you wish
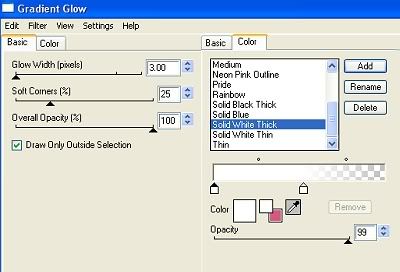
Effects / Plugins / Eye Candy 4000 / Gradient Glow with the following settings:
Add some noise if you wish
Effects / Plugins / Eye Candy 4000 / Gradient Glow with the following settings:
Then add a drop shadow:
H & V - 1
Opacity - 30
Blur - 3.00
Colour - #000000
H & V - 1
Opacity - 30
Blur - 3.00
Colour - #000000
Add your © copyright of the tube you are using, licence and watermark
~ Step 5 ~
** This next step is optional if you wish to animate your tag **
Activate your Stars layer
Duplicate
Move your original Stars layer to the top of your duplicate so you know which one it is
Duplicate
Move your original Stars layer to the top of your duplicate so you know which one it is
On your duplicate layer
Adjust / Blur / Gaussian Blur with a Radius of 5.00
Adjust / Blur / Gaussian Blur with a Radius of 5.00
Duplicate and repeat Gaussian Blur
Then duplicate again
Rename them Stars1, Stars2 and Stars3 from the bottom up
KEEP STARS LAYER AS IS AND REMAINING ABOVE STARS 1-3 - WHICH ARE THE BLURRED LAYERS!!
Then duplicate again
Rename them Stars1, Stars2 and Stars3 from the bottom up
KEEP STARS LAYER AS IS AND REMAINING ABOVE STARS 1-3 - WHICH ARE THE BLURRED LAYERS!!
Now turn the visibility off on the Stars2 and the Star3
Edit / Copy Merged
Go to Animation Shop and paste as new animation
Back in PSP
Turn on Stars2
Edit / Copy Merged
Turn on Stars2
Edit / Copy Merged
In Animation Shop
Edit / Paste / Paste After Current Frame
Edit / Paste / Paste After Current Frame
Back in PSP
Turn on Stars3
Edit / Copy Merged
Turn on Stars3
Edit / Copy Merged
In Animation Shop
Edit / Paste / Paste After Current Frame
Edit / Paste / Paste After Current Frame
Press CTRL + A (which will Select All)
Then ALT + Enter (which will open Frame Properties
Change the properties to 25
Then ALT + Enter (which will open Frame Properties
Change the properties to 25
Now just save as a GIF and you're done!!
Thank you for trying my tutorial
::st!na::
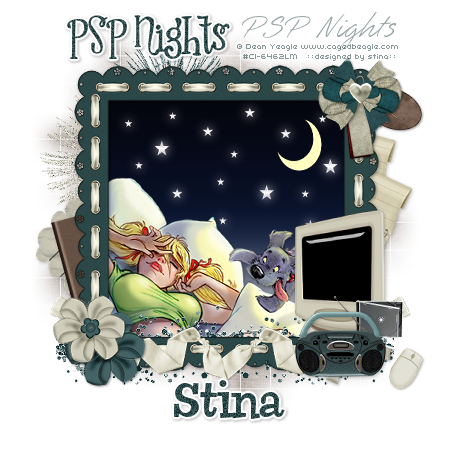
A non-animated version:
© Tutorial written by Stina on 4th March 2009
All rights reserved
No comments:
Post a Comment