
Supplies
Scrap kit of choice - I am using "All About the Flowers" by Swheat Creations which is available at Exquisite Scraps and Paradise 4 Scrappers
**PLEASE DO NOT USE THIS ARTWORK WITHOUT THE APPROPRIATE LICENCE**
Vix_Mask172
Vix_Mask172
WSL_Mask133 by Chelle
Fleur Rouge (red flower)
Fonts of choice - I am using Flower and Daffodil
Plugin: Mura Meister Copies
Plugin: Eye Candy 4000 Gradient Glow
My Supplies here
~ Step 1 ~
Open a new 600 x 600 blank canvas flood-filled white
Open Paper1 and Paper9
Resize both to 400 x 400
And then minimise
Resize both to 400 x 400
And then minimise
Select your Preset Shapes Tool to Ellipse and click on your Background in the Materials Palette
In Material Properties, select Patterns and choose Paper1
In Material Properties, select Patterns and choose Paper1
Draw out a circle
Objects / Align / Centre in Canvas
Convert to raster layer
Convert to raster layer
In Material Properties change your pattern to Paper9
Draw out another circle over the first one
Use the nodes to align circle to the exact size
Resize by 90%
Use the nodes to align circle to the exact size
Resize by 90%
Paste ScallopBack4 as new layer
Resize by 50%
Leave in position
Resize by 50%
Leave in position
Paste FleurRouge (supplied) as new layer
Resize by 10%
Resize by 10%
LEAVE IN POSITION
Effects / Plugins / Mura Meister / Copies with the following settings:
Layers / Arrange / Send to Bottom
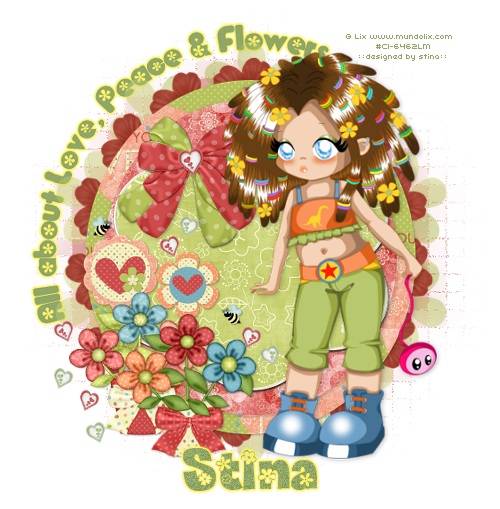
Your canvas should now look like this:

~ Step 2 ~
Paste PotOfFlowers as new layer
Resize by 30%
Position to the left
Resize by 30%
Position to the left
Paste FlowerPot as new layer
Resize by 30%
Position to the left
Resize by 30%
Position to the left
Paste Flower1 as new layer
Resize by 30%
Position behind Flower Pots
Resize by 30%
Position behind Flower Pots
Paste Flower4 as new layer
Resize by 25%
Position behind Flower Pots also
Resize by 25%
Position behind Flower Pots also
Paste LilBee as new layer
Resize by 5%
Duplicate
Image / Mirror
Position Bees around flowers
Resize by 5%
Duplicate
Image / Mirror
Position Bees around flowers
Paste Bow9 as new layer
Image / Mirror
Resize by 25%
Position over existing green bow
Image / Mirror
Resize by 25%
Position over existing green bow
Paste Heart1 as new layer
Image / Rotate by 10 to the left
Resize by 7%
Position over the centre of the bow
Image / Rotate by 10 to the left
Resize by 7%
Position over the centre of the bow
Paste Heart1 again as new layer
Image / Rotate by 20 to the left
Resize by 5%
Position around the flowers or to your liking
Image / Rotate by 20 to the left
Resize by 5%
Position around the flowers or to your liking
Paste Heart4 as new layer
Image / Rotate by 20 to the right
Resize by 5%
Position around the flowers or to your liking
Image / Rotate by 20 to the right
Resize by 5%
Position around the flowers or to your liking
Duplicate then Image / Mirror
Place around tag to your liking
Place around tag to your liking
Paste your tube of choice
Resize as necessary
Position to the right
Resize as necessary
Position to the right
Apply slight drop shadows to each layer:
H & V - 1
Opacity - 30
Blur - 3.00
Colour - #000000
H & V - 1
Opacity - 30
Blur - 3.00
Colour - #000000
~ Step 3 ~
Activate Background layer
Paste Paper4 as new layer
Paste Paper4 as new layer
Adjust / Blur / Gaussian Blur
Radius - 20.00
Radius - 20.00
Layers / New mask Layer / From Image
Locate Vix_Mask172
OK
Locate Vix_Mask172
OK
Layers / Merge / Merge Group
Lower opacity to 45
Lower opacity to 45
Paste Paper5 as new layer
Layers / Arrange / Move Down
Layers / Arrange / Move Down
Layers / New Mask Layer / From Image
Locate WSL_Mask133
OK
Layers / Merge / Merge Group
Locate WSL_Mask133
OK
Layers / Merge / Merge Group
Resize by 80%
Effects / Texture Effects / Mosaic - Antique with the following settings:
Lower opacity to 50
Select your Preset Shape Tool to Ellipse
Foreground - #000000
Background - null
Foreground - #000000
Background - null
Draw out a circle around the outside
Objects / Align / Centre in Canvas
Select your Text Tool and font - I am using Flower
Foreground - null
Background - #91a767 (or one to match your tube)
Foreground - null
Background - #91a767 (or one to match your tube)
Type out the words "All about Love, Peace & Flowers" or words of your choice
In Layer Palette turn off visibility of Ellipse
Convert to raster layer
Convert to raster layer
Effects / Plugins / Eye Candy 4000 / Gradient Glow with the following settings:
Select another font if you wish or use the same - I am using Daffodil
Type out your name
Objects / Align / Horizontal Centre in Canvas
Convert to raster layer
Apply same Gradient Glow as above
Objects / Align / Horizontal Centre in Canvas
Convert to raster layer
Apply same Gradient Glow as above
Finally, add your © copyright, licence and watermark
Save as a GIF and you're done!
Thank you for trying my tutorial
::st!na::
© Tutorial written by Stina on 14th March 2009
All rights reserved
No comments:
Post a Comment