Please email me designed.by.stina@gmail.com with your creations. I'd love to see them.

Showing posts with label Joel Adams. Show all posts

Saturday, July 11, 2009

A Pirate's Life


Supplies

Scrap kit of choice - I am using "Walk the Plank (Girl)" by Kristi Westling available from The Scrapping Divaz Designz and Sunshine Studio Scraps
Tubes of choice - I am using the delightful artwork of Joel Adams available with a licence through CILM
**PLEASE DO NOT USE HIS ARTWORK WITHOUT THE APPROPRIATE LICENCE**
WSL_Mask56 by Chelle available from her blog
Fonts of choice - I am using BakerScript and Windlass
Plugin: Xenofex 2 Constellation


Let's begin...


Open a new 750 x 500 blank canvas flood-filled white

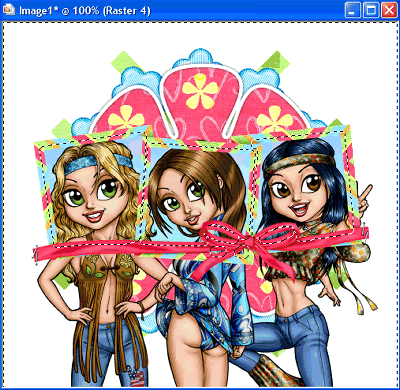
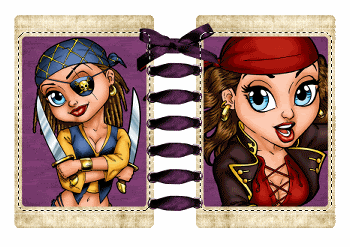
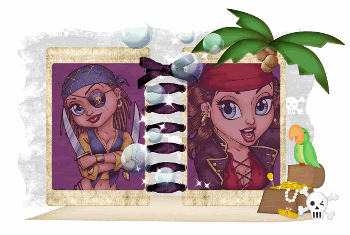
Paste Frame2 as new layer
Image > Rotate by 90
Resize by 40%
Position to the left

Duplicate, then Image > Mirror
Layers > Merge > Merge Down

Paste CorsetRibbon as new layer
Resize by 33%
Position between the Frames

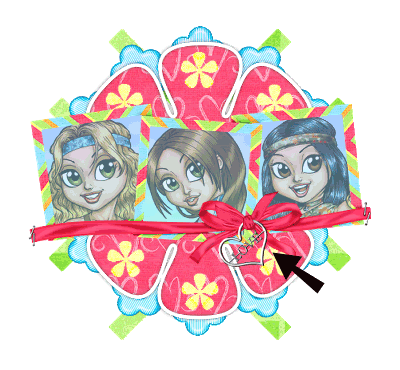
Select inside the Frames with your Magic Wand
Selections > Modify > Expand by 5
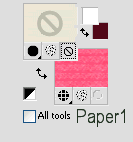
Paste Paper of choice as new layer
Layers > Arrange > Move Down
Selections > Invert
Delete

KEEP SELECTED!!

Paste two Tubes of choice as new layers
Resize as necessary and position within each Frame
Selection should still be inverted
Delete, then deselect

Paste Sand as new layer
Layers > Arrange > Send to Bottom
Position behind Frames

Activate top layer

Paste Tree as new layer
Image > Mirror
Resize by 85%
Position in upper right to liking

Using your Freehand Tool make a selection around the trunk of Tree
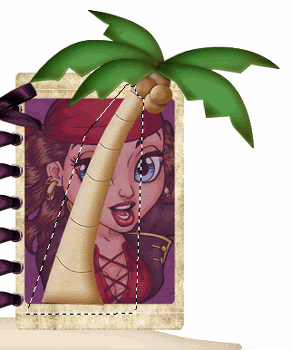

Delete then deselect

Paste Treasure as new layer
Resize by 30%
Position to the lower right

Paste Parrot as new layer
Resize by 25%
Position on top of Treasure chest

Paste Skull as new layer
Resize by 25%
Position alongside Chest

Paste Bottle as new layer
Image > Rotate by 10 to the right
Resize by 25% and position

Paste Bubbles as new layer
Resize by 30%
Position in centre between Frames
Duplicate and set blend mode to Overlay

Paste Paper of choice as new layer
Layers > Arrange > Send to Bottom

Layers > New Mask Layer > From Image
Apply WSL_Mask56
OK
Layers > Merge > Merge Group
Lower opacity to about 30
Position to liking

Paste a Tube of choice as new layer
Layers > arrange > Bring to Top
Resize as necessary and position

Crop and resize

Select your Text Tool and font of choice
I am using BakersScript
Text colour of choice - I am using Black

Type out some text of choice and position
Convert to raster layer
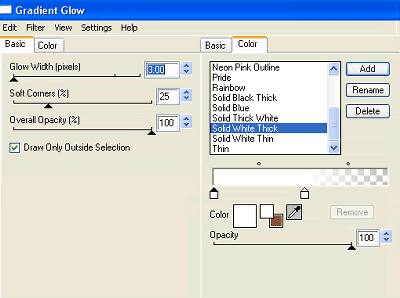
Apply a Gradient Glow and drop shadow of choice

Select another font of choice
I am using Windlass
Foreground - #000000
Background - colour to match (I am using #743c68)

Type out your name
Objects > Align > Horizontal Centre in Canvas
Convert to raster layer
Apply a Gradient Glow and drop shadow of choice

Finally, add your © copyright, licence and watermark, then save as a GIF or JPG and you're done!


** IF YOU WISH TO ANIMATE PLEASE FOLLOW THESE NEXT STEPS **

Layers > Merge > Merge All
Edit > Copy, then
Paste as New Layer TWICE
You should have THREE Layers all up
Rename them what you like - I just call them Layer1, Layer2 and Layer3

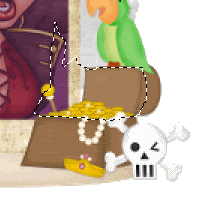
With your Freehand Tool draw a small selection around and slightly above the Gold in the Treasure Chest

Activate Layer1 and hide Layer2 and Layer3
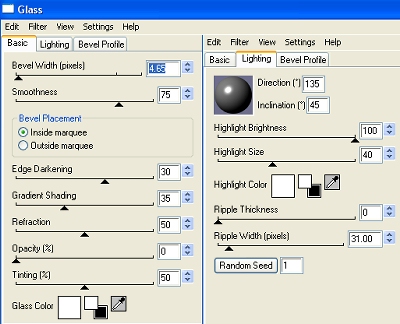
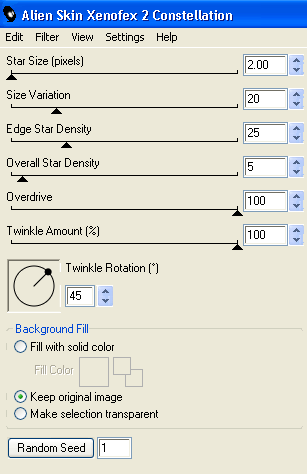
Effects > Plugins > Xenofex 2 > Constellation with the following settings:

Activate Layer2
Apply the Constellation effect again adjusting the Random Seed

Activate Layer3
Repeat the Contstellation effect once more adjusting the Random Seed
Deselect

Now for the animation!!

Hide Layer2 and Layer3 again
Edit > Copy

In Animation Shop
Edit > Paste as New Animation

Back to PSP
Activate Layer2
Edit > Copy

In Animation Shop
Edit > Paste after Current Frame

Back to PSP
Activate Layer3
Edit > Copy

In Animation Shop
Edit > Paste after Current Frame

Select All, and change Frame Properties to 20
Now save as a GIF and you're done!

Thanks for trying my tutorial!

::st!na::


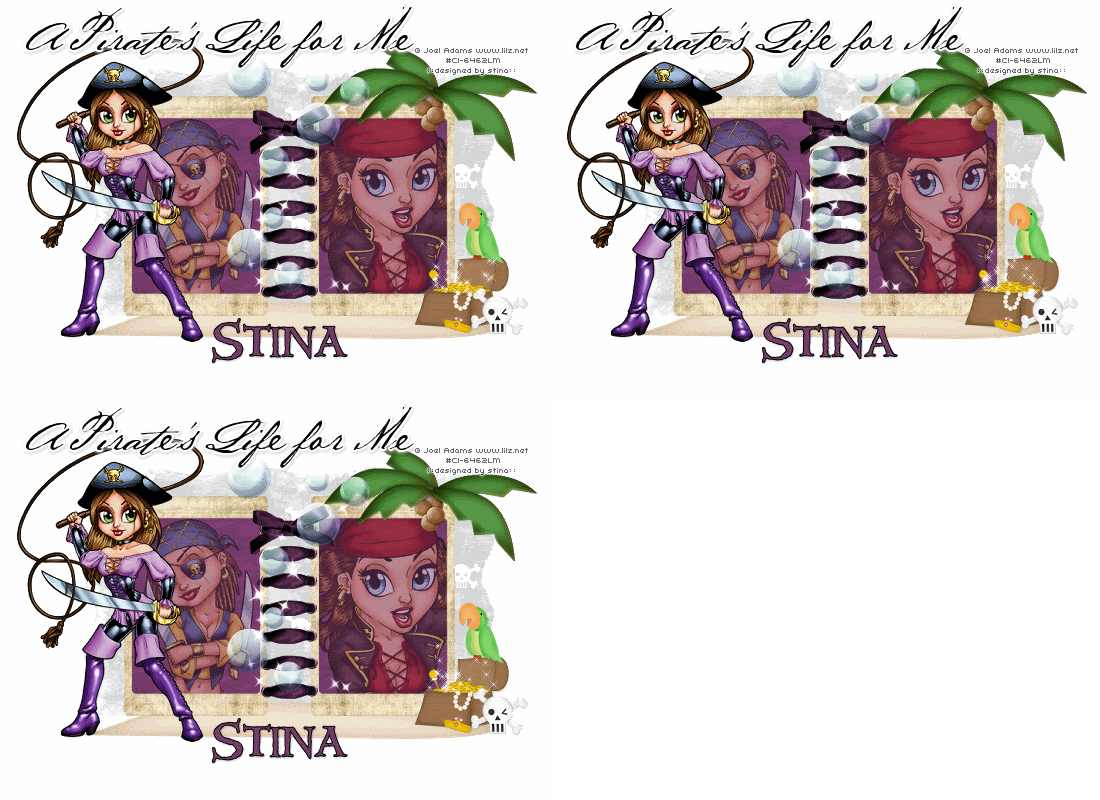
Here is a non-animated version:
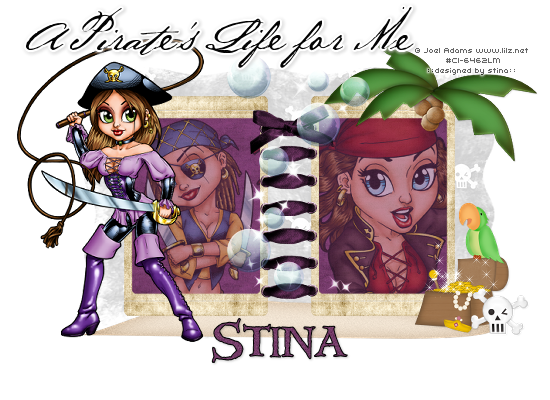

© Tutorial written by Stina on 10th July 2009
All rights reserved
Thursday, June 11, 2009

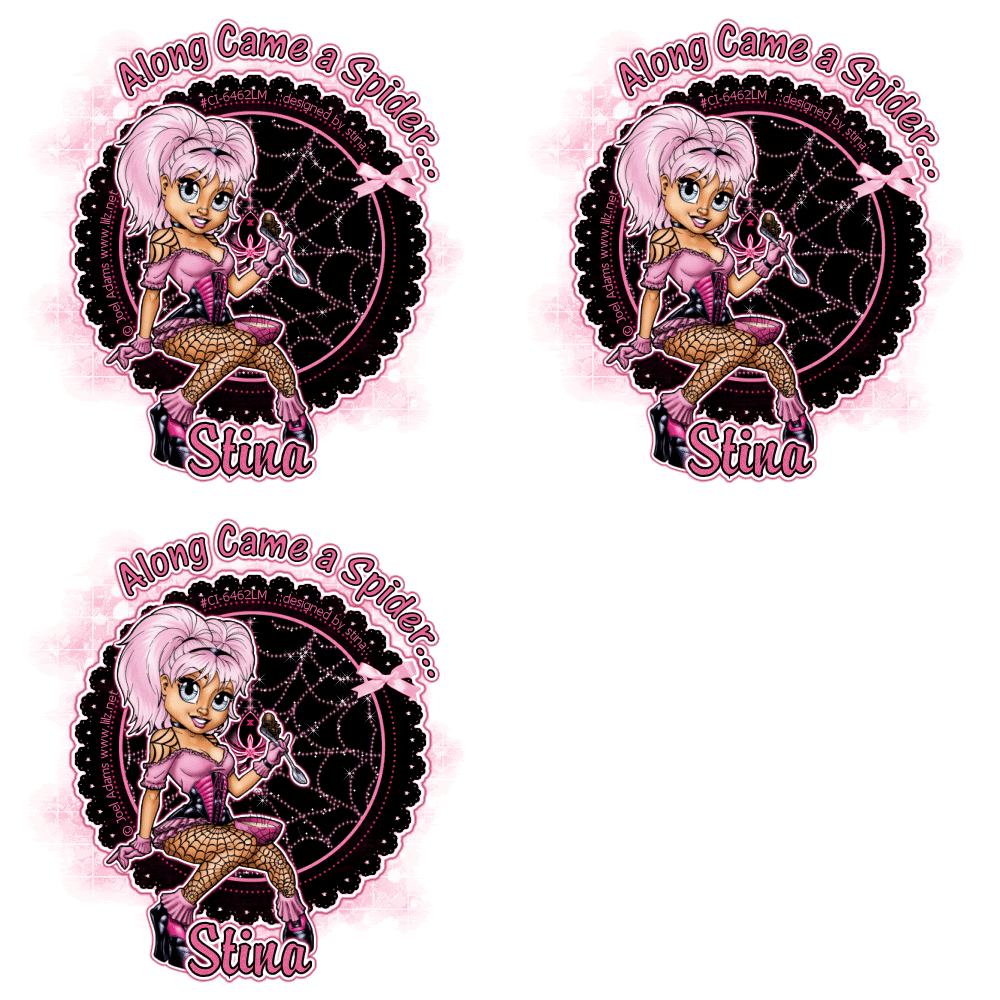
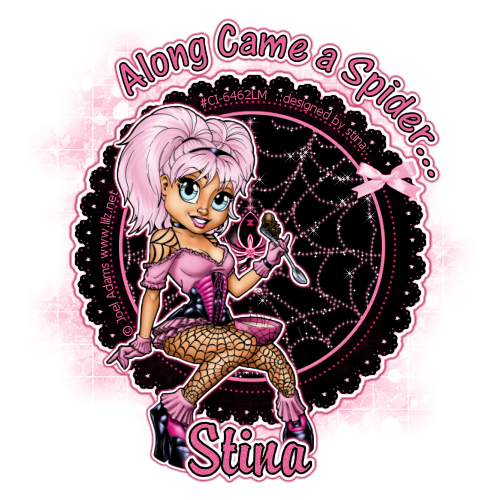
Along Came a Spider


Supplies

Scrap kit of choice - I am using "The Pussycat Girls" by Kristi Westling available from The Scrapping Divaz Designz and Sunshine Studio Scraps
Tube of choice - I am using the adorable artwork of Joel Adams available with a licence through CILM
**PLEASE DO NOT USE HIS ARTWORK WITHOUT THE APPROPRIATE LICENCE**
WSL_Mask147 by Chelle available from her blog
Fonts of choice - I am using One Stroke Script and Brody
Plugins: Eye Candy 4000 Gradient Glow and Xenofex 2 Constellation


Ready? Let's begin...


Open a new 600 x 600 canvas flood-filled white
Paste Frame1 as new layer

Select the inside of frame with your Magic Wand
Selections > Modify > Expand by 10

Add a new raster layer
Flood-fill black (#000000)

KEEP SELECTED!

Paste GlitterWeb as new layer
LEAVE IN POSITION and resize by 75%
Delete

Activate top layer

Paste Tube as new layer
Resize as necessary
Position to your liking

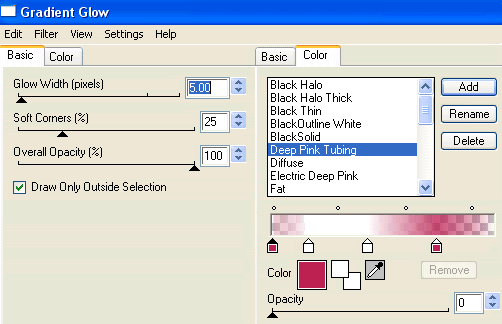
Go to Effects > Plugins > Eye Candy 4000 > Gradient Glow with the following settings:


Activate Frame layer

Select the outer area of Frame with your magic Wand
Selections > Invert
Selections > Modify > Contract by 1
Repeat Gradient Glow as above
Deselect

Paste a paper of choice
Layers > Arrange > Send to Bottom

Layers > New Mask Layer > From Image
Apply WSL_Mask84
OK
Layers > Merge > Merge Group
Lower opacity to 60

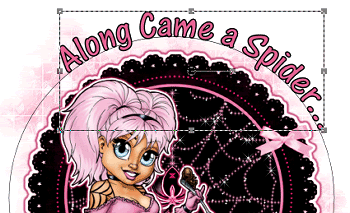
Select your Preset Shape Tool and set to Ellipse
Hold you Shift Key and draw out a circle
Objects > Align > Centre in Canvas

Select your Text Tool and font of choice
I am using One Stroke Script LET
Foreground - #000000
Background - #e56294 (or to match tag)
Stroke width - 1.5

On the curve of the Ellipse type out text of choice


Open your Layer Palette and Vector Layer
Turn off Ellipse and convert to raster layer
Apply same Gradient Glow as above

Select another font of choice
I am using Brody
Use same colours for Foreground and Background as above

Type out your name
Objects > Align > Horizontal Centre in Canvas
Convert to raster layer
Apply same Gradient Glow and a drop shadow of choice

Finally, add your © copyright, licence and watermark, then save as GIF or JPG and you're done!


** IF YOU WISH TO ANIMATE PLEASE FOLLOW THESE NEXT STEPS **

Activate your GlitterWeb layer
Duplicate twice and rename Sparkle1, Sparkle2 and Sparkle3

With your Freehand Tool carefully draw around the Spider ONLY, then
Selections > Invert

Hide Sparkle2 and Sparkle3 and activate Sparkle1

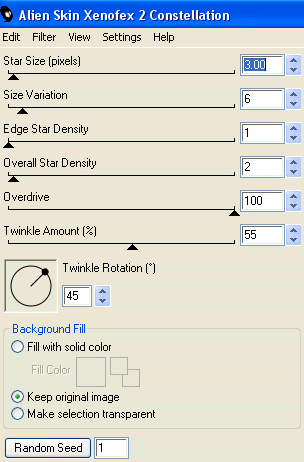
Effects > Plugins > Xenofex > Constellation with the following settings:


Hide Sparkle1 and activate Sparkle2
Apply the Constellation again, adjusting the Random Seed

Hide Sparkle2 and activate Sparkle3
Apply the Constellation effect again, adjusting the Random Seed

Now for the animation!

Activate Sparkle1 and hide Sparkle2 and Sparkle3
Edit > Copy Merged

Open Animation Shop
Edit > Paste as New Animation

Back to PSP
Hide Sparkle1 and activate Sparkle2
Edit > Copy Merged

In Animation Shop
Edit > Paste AFTER Current Frame

Back to PSP
Hide Sparkle2 and activate Sparkle3
Edit > Copy Merged

In Animation Shop
Edit > Paste AFTER Current Frame

Save as a GIF and you're done!

Thanks for trying my tutorial!

::st!na::


Here is a non-animated version:


© Tutorial written by Stina on 10th June 2009
All rights reserved
Tuesday, May 26, 2009

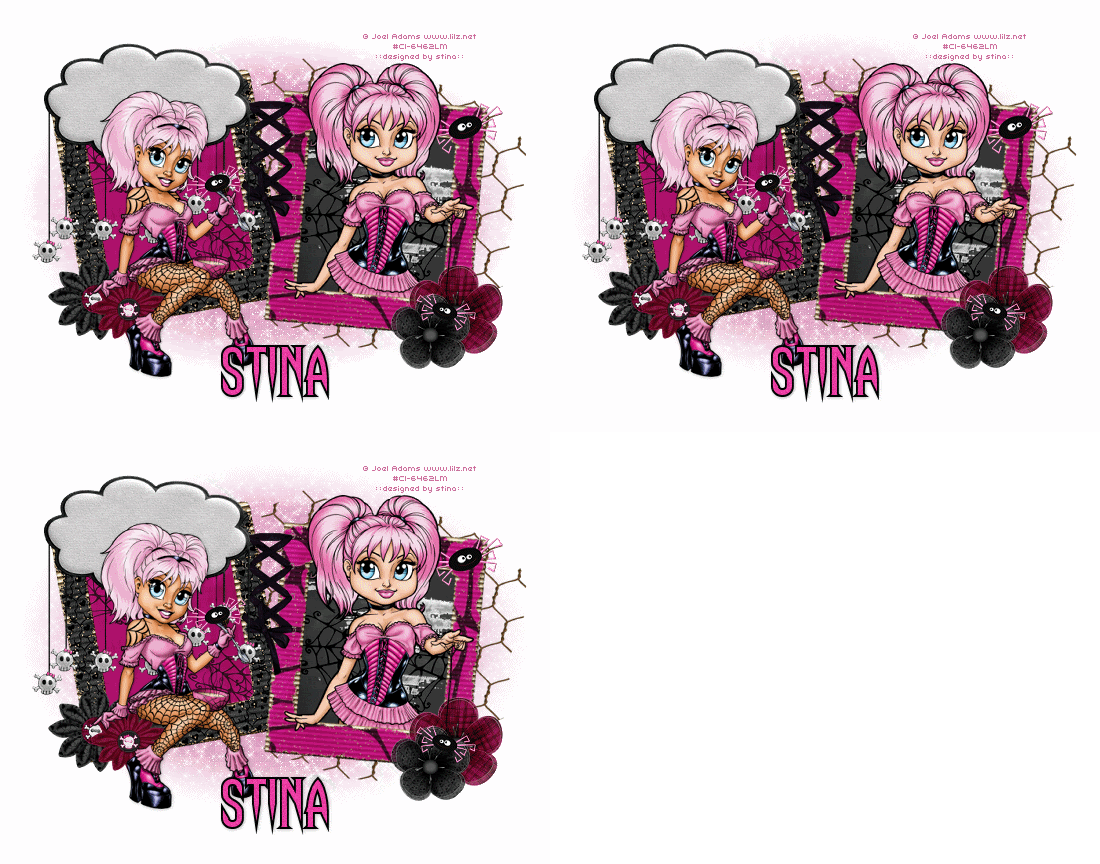
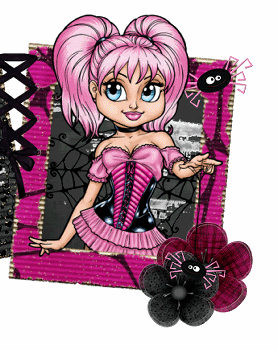
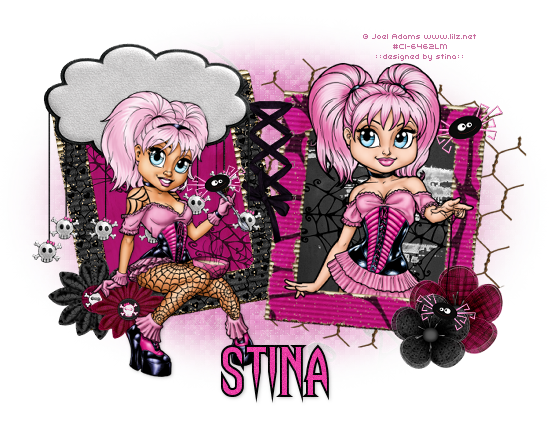
Lil Miss Muffet

 
Supplies
 
Scrap kit of choice - I am using "Tickle Me Emo" by Gina of KiKeKa Designs available from Exquisite Scraps
Tubes of choice - I am using the delightful work of Joel Adams which is available with a licence through CILM
**PLEASE DO NOT USE HIS ARTWORK WITHOUT THE PROPER LICENCE**
Mask of choice - I am using WSL_Mask41 by Chelle
Font of choice - I am using Haunting Attraction
Plugins: Xero Fritillary and Xenofex 2 Constellation
 
 
Ready? Let's begin...
 
 
Open a new 600 x 600 blank canvas flood-filled white
 
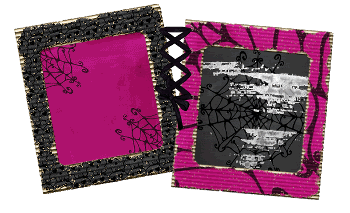
Paste Frame05 as new layer
Image > Rotate by 10 to the left
Resize by 45%
 
Paste Frame04 as new layer
Image > Rotate by 5 to the right
Resize by 45%
Position both Frames alongside one another
 
Paste an Eyelet ribbon or Stitches between the Frames to join them
 
Paste a paper of choice as new layer
Layers > Arrange > Send to Bottom
Image > Rotate 10 to the left
Resize by 33%
Position below the left Frame
 
Paste another paper of choice as new layer
Image > Rotate by 5 to the right
Resize by 33%
Position behind the right Frame
 
 
Paste a Flower of choice as new layer
Resize by 30%
Position in lower right
 
Paste another Flower of choice as new layer
Resize by 25%
Position overlapping first flower
 
Paste another Flower of choice
Resize by 25%
Position in lower left
 
Paste another Flower of choice
Resize by 30%
Position overlapping previous Flower
 
Paste Cloud as new layer
Resize by 35%
Position over one of the Frames
 
Paste Spider as new layer
Image > Rotate by 20 to the left
Resize by 25%
Position in upper right
Duplicate, then Layers > Merge > Merge Down
 
Paste your Tube as new layer
Resize as necessary
Position within right Frame
 
Duplicate and place one layer below Frame
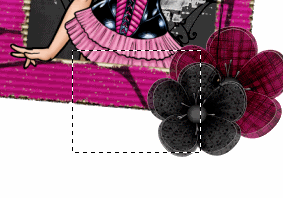
Select the inside of your Frame
Selections > Modify > Expand by 10
Selections Invert
Delete on bottom tube layer
Deselect
 
On top tube layer make a selection around the bottom part of your tube and delete
 
 
Paste second tube as new layer
ResiZe as necessary
Position in left Frame
 
Activate Spider tube we pasted earlier
Duplicate, the Image > Mirror
Resize by 75%
Position a the end of Miss Muffet's web
 
 
Paste Paper of choice as new layer
Layers > Arrange > Send to Bottom
 
Layers > New Mask Layer > From Image
Mask of choice
OK
Layers > Merge > Merge Down
Lower opacity to 50
 
Paste RustedWire as new layer
Image > Rotate by 20 to the right
Resize by 60%
Position behind right Frame
 
Crop to mask layer and resize
 
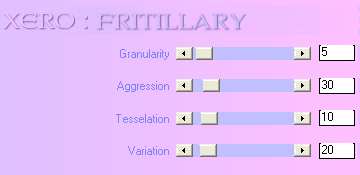
Effects > Plugins > Xero > Fritillary with the following settings:
 
 
Select your Text Tool and font of choice
I am using Haunting Attraction
 
Text colours are:
Foreground - #000000
Background - #eb3da3
 
Stroke width - 2.0
 
Type out your name
Objects > Align > Horizontal Centre in Canvas
Convert to raster layer
Apply drop shadow of choice
 
Finally, add your © copyright, licence and watermark, then save as a GIF or JPG and you're done!
 
 
** IF YOU WISH TO ANIMATE PLEASE FOLLOW THESE NEXT STEPS **
 
Activate the Mask Layer
Duplicate twice and rename Sparkle1, Sparkle2 and Sparkle3
 
Hide Sparkle2 and Sparkle3 activating only Sparkle1
 
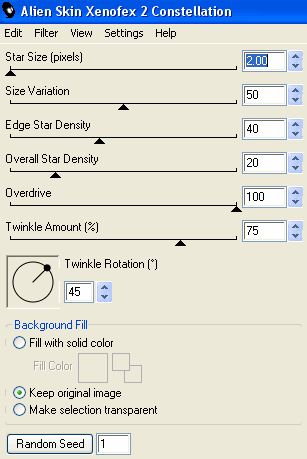
Effects > Plugins > Xenofex 2 > Constellation with the following settings:
 
 
Hide Sparkle1 and activate Sparkle2
Apply the Constellation effect, adjusting the Random Seed
 
Hide Sparkle2 and activate Sparkle3
Apply the Constellation effect again, adjusting the Random Seed once more
 
Hide Sparkle2 and Sparkle3 with only Sparkle1 visible
Edit > Copy Merged
 
Open Animation Shop
Edit > Paste as New Animation
 
Back to PSP
Hide Sparkle1 and activate Sparkle2
Edit > Copy Merged
 
In Animation Shop
Edit > Paste AFTER Current Frame
 
Back to PSP
Hide Sparkle2 and activate Sparkle3
Edit > Copy Merged
 
In Animation Shop
Edit > Paste AFTER Current Frame
 
Save as a GIF and you're done!
 
Thanks for trying my tutorial!
 
::st!na::
 
 
Here is a non-animated version:


© Tutorial written by Stina on 25th May, 2009
All rights reserved
Wednesday, April 8, 2009

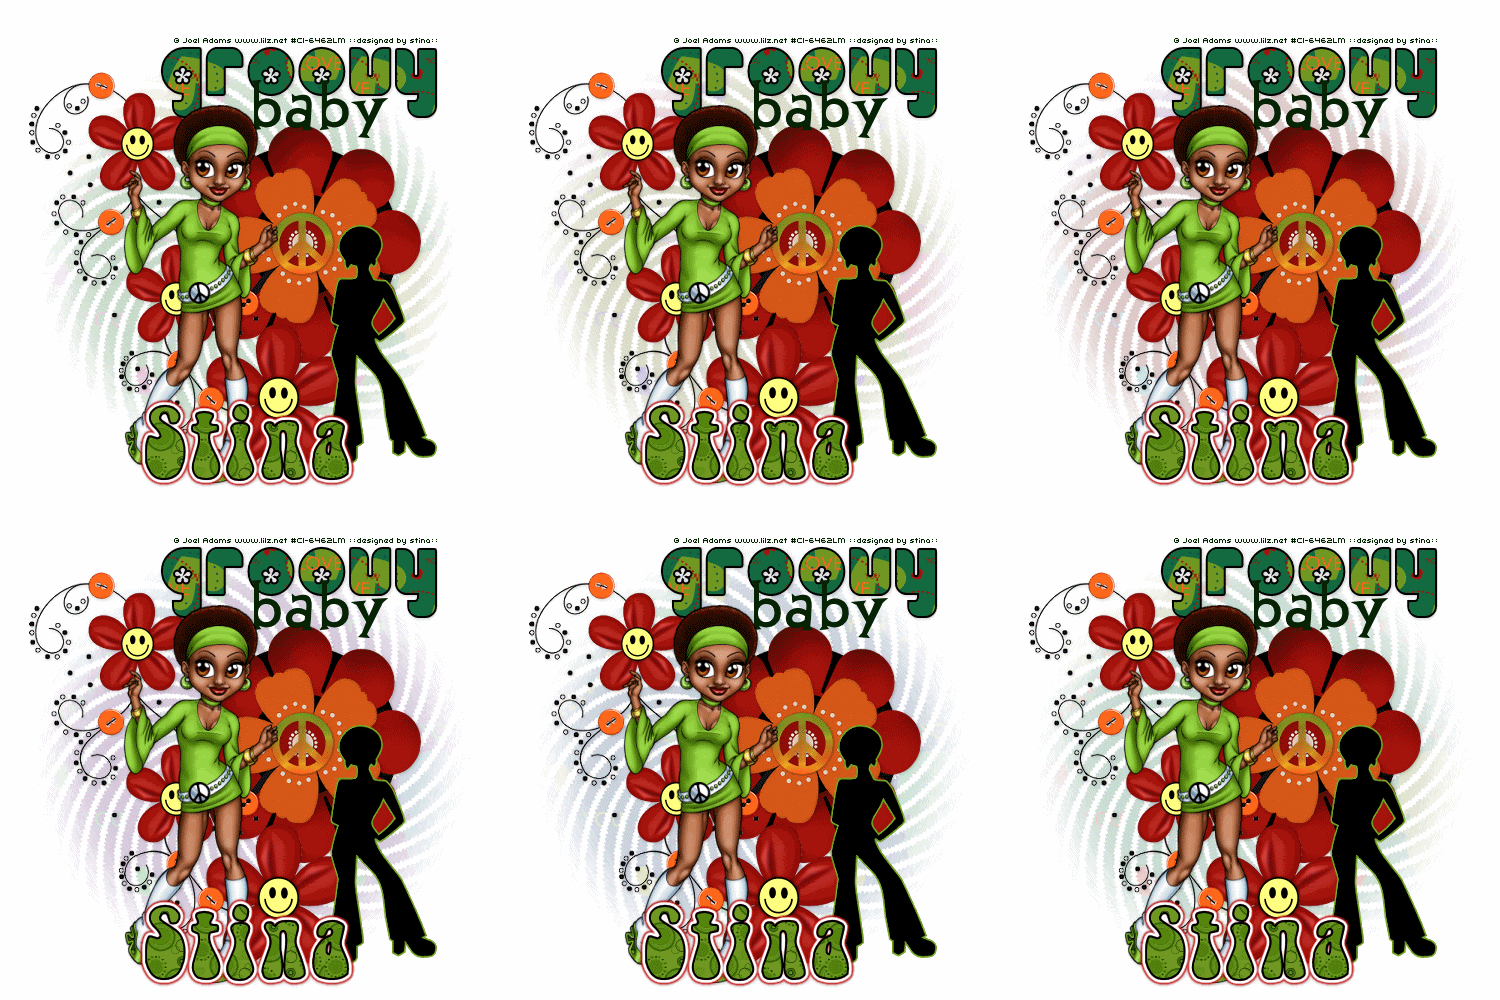
Groovy Baby


Supplies
 
Scrap kit of choice - I am using "Groovylicious" by Just a Girl Designs exclusive to Exquisite Scraps
Tube of choice - I am using the lovely artwork of Joel Adams which can be purchased from CILM
**PLEASE DO NOT USE HIS ARTWORK WITHOUT THE APPROPRIATE LICENCE**
WSL_Mask36 by Chelle available from her blog
Fonts of choice - I am using Chick, CCThingamajig and Bell Bottom.Laser
 
This is a fairy easy animated tutorial
 

Let's get started!!
 
Open a new 600 x 600 blank canvas flood-filled white
 
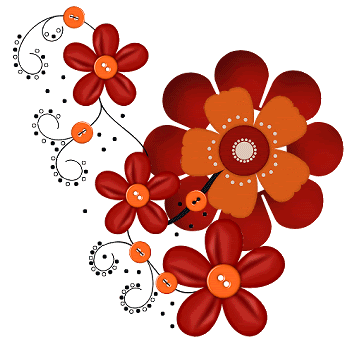
Paste FlowerPower3 as new layer
 
Paste Flowers as new layer
Resize by 85%
Position first flower directly beneath the orange flower
 
 
Paste Record as new layer
Resize by 55%
Position beneath first flower we pasted
 
Paste Silhouette as new layer
Position in lower right
 
Paste Bkg6 as new layer
Resize by 65%
Layers > Arrange > Send to Bottom
 
Layers > New Mask Layer > From Image
Locate WSL_Mask36
Layers > Merge > Merge Group
Lower opacity to 50
 
Paste PeaceSign as new layer
Resize by 18%
Position over centre of orange flower
 
Paste HappyFace as new layer
Resize by 10%
Position over large red flower
 
Duplicate then resize by 80%
Duplicate again
Place over centre of both remaining flowers
 
Crop and resize
 
Open a paper of choice and minimise it
 
Select your Text Tool and font
I am using Chick
 
Set your Material Properties as follows:
Foreground - #000000
Background - Paper of choice
Stroke width - 2.00
 
Type out the word "Groovy"
Convert to raster layer
 
Change your Material Properties:
Foreground - null
Background - #022202
 
Set your font to another one of choice
I am using CCThingamajig
 
Type out the word "baby"
Convert to raster layer
 
Paste your tube as a new layer
Resize as necessary
Position to your liking
 
Now minimise another paper of choice
 
Select your Text Tool and choose another font
I am using Bellbottom.Laser
 
Set your Material Properties to the same as above using a different paper of choice
 
Type out your name
Objects > Align > Horizontal Centre in Canvas
Convert to raster layer
 
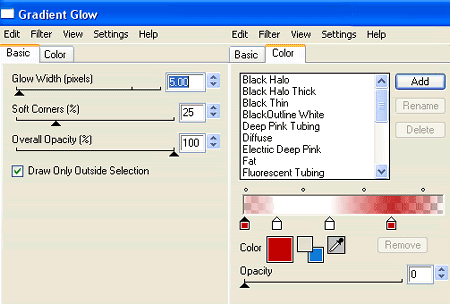
Effects > Plugins > Eye Candy 4000 > Gradient Glow with the following settings:
 
 
Apply a slight drop shadow
 
Add your © copyright, licence and watermark
 
Now let's animate!
 
Hide ALL LAYERS except for your Mask layer
Edit > Copy Merged
 
 
Go to Animation Shop
Edit > Paste as New Animation
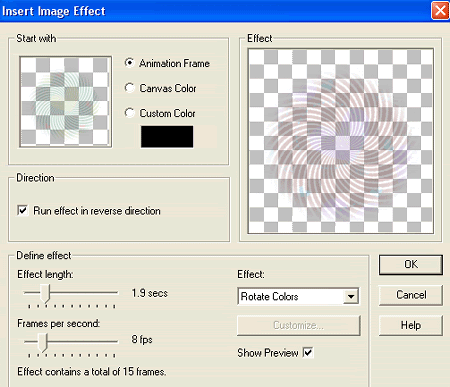
Then Effects > Insert Image Effect with the following settings:
 
 
You should now have 16 Frames
 
Go back to PSP
Activate your White Background layer
Edit > Copy
 
Back to Animation Shop
Edit > Paste as New Animation
Then Edit > Paste After Current Frame UNTIL YOU HAVE A TOTAL OF 16 FRAMES
Edit > Select All
 
Activate the Animation we applied the effect to
Edit > Select All
Edit > Copy
Activate the new "animation" of white background
Edit > Propogate Paste
Then Edit > Paste into Selected Frame
Click to release animation
 
Back to PSP (last time *g*)
Hide your white background and mask layers and unhide EVERy OTHER LAYER
Edit > Copy Merged
 
In Animation Shop
Edit > Paste into Selected Frame
 
**PROPOGATE PASTE MUST BE SELECTED TO ENSURE A SINGLE FRAME IS THEN PASTE INTO MULTIPLE FRAMES**
 
Finally, save as a GIF and you're done!
 
Thanks for trying my tutorial!
 
::st!na::


Here is a non-animated version:


© Tutorial written by Stina on 8th April 2009
All rights reserved
Sunday, March 15, 2009

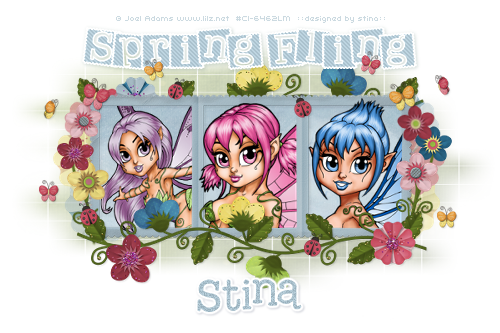
Spring Fling

 
Supplies
 
Scrap kit of choice - I am using "Spring Fling Bling" by LLIELLA which is available from Funky Playground Designs
Tubes of choice - I am using the delightful artwork of Joel Adams which can be purchased from CILM
**PLEASE DO NOT USE HIS ARTWORK WITHOUT THE APPROPRIATE LICENCE**
WSL_Mask84 by Chelle which is available from her blog
Fonts of choice - I am using 2Peas Gone Postal and 2Peas High Tide (both pay fonts)
Plugin: Penta.com / Jeans
Plugin: Eye Candy 4000 Gradient Glow (optional)
 
 
~ Step 1 ~
 
Open a new 600 x 600 blank canvas flood-filled white
 
Paste Frame1 as new layer
Resize by 20%
 
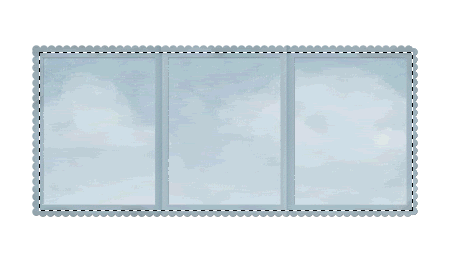
Grab your Selection Tool and draw out a rectangle around the frame
Paste Paper20 as a new layer
Resize by 12%
Selections / Invert
Delete
Deselect
 
 
With your Magic Wand select the inside of the first frame
Selections / Modify / Expand by 2
Selections / Modify / Feather by 2
 
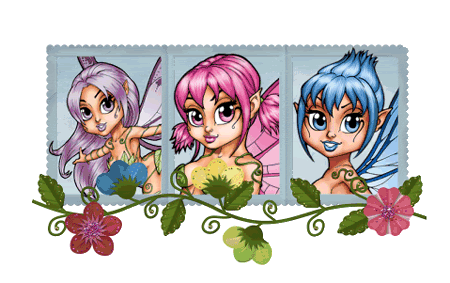
Paste your tube as new layer
Resize as necessary
 
Selections / Invert
Use your Eraser Tool to erase the excess
**NOTE - I DIDN'T SIMPLY DELETE AT THIS POINT BECAUSE I KEPT SOME PARTS OF EACH TUBE OVERHANGING**
Deselect
 
Repeat with two more tubes
 
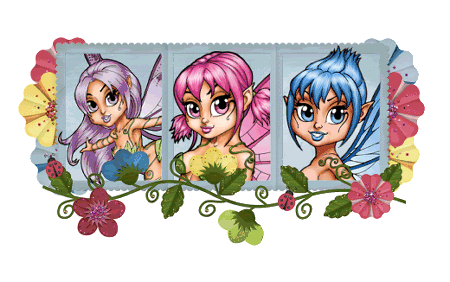
Paste FlowerCluster-noshadow as new layer
Resize by 12%
Position along the bottom of Frame


~ Step 2 ~
 
Paste Ladybug1 as new layer
Image / Rotate by 20 to the right
Duplicate and Image / Mirror
 
Paste Stem1 as new layer
Resize by 10%
Position to the right below the flower cluster
 
Paste PaperFlower6 as new layer
Resize by 9%
Place on Stem to the right
Layers / Merge / Merge Down
 
Paste Stem1 again
Resize by 10%
Position behind first flower
 
Paste two more Flowers of choice
Resize by 8% each
Position to the right above the stem
 
Duplicate Stem1 and position to the left
 
Paste three Flowers of choice
Resize first one by 9% and the next two by 8%
Position above stem
 
Paste PaperFlowers12, 13 and 14 as new layers
Resize each by 20%
Position each behind Frame on either side
 
 
Hide all layers except these six flowers
Layers / Merge / Merge Visible
Lower opacity to about 45
Unhide layers
 
Paste Butterfly5 as new layer
Resize by 3%
Image / Mirror
Position to the left
 
Paste Butterfly6 as new layer
Resize by 3%
Position to the right
 
Paste Butterfly1 as new layer
Image / Rotate by 20 to the right
Resize by 4%
Position in upper left corner
 
Paste Butterfly2 as new layer
Image / Rotate by 20 to the left
Resize by 4%
Position in upper right corner
 
Activate FlowerCluster layer
Duplicate then Image / Mirror
Place at the top of the frame
Layers / Arrange / Send to Bottom
 
Add some more Ladybugs and Butterflies
 
Crop and resize
 

~ Step 3 ~
 
Paste Paper14 as new layer
Resize by 18%
 
Layers / Arrange / Send to Bottom
 
Layers / New Mask Layer / From Image
Locate WSL_Mask84
OK
 
Layers / Merge / Merge Group
 
Select your Pick Tool (Deformation Tool in some versions) and use the nodes to stretch and resize Mask layer
 
 
Pick a colour from your Scrap - I used #aac1cd
Select your Text Tool and font
Set your Material Palette to:
Foreground - #FFFFFF
Background - ##aac1cd (or colour of choice)
 
Type the words "Spring Fling"
Objects / Align / Horizontal Centre in Canvas
Convert to raster layer
 
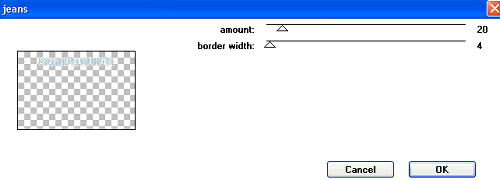
Effects / Plugins / Penta.com / Jeans with the following settings:
 
 
Apply a drop shadow:
H & V - 1
Opacity - 20
Blur - 5.00
Colour - #194a38
 
Keep the same colours in your Material Palette and select another font
Type out your name
Objects / Align / Horizontal Centre in Canvas
Convert to raster layer
Apply any effects you like
Add a drop shadow
 
Finally, add your © copyright, licence and watermark
 
Save as a GIF and you're done!
 
Thank you for trying my tutorial
 
::st!na::
 

© Tutorial written by Stina on 15th March 2009
All rights reserved
 

Friday, March 6, 2009

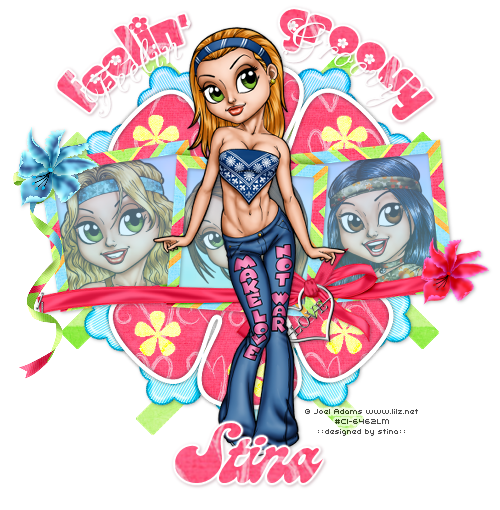
Feelin' Groovy

 
Supplies
 
Scrap kit of choice - I am using the delightful "Retro Love" by Nicole of Simply Irresistable Designs which can be purchased from Creative Scraps, Scrappin Bratz and Aussie Scraps
Tubes of choice - I am using the gorgeous artwork of Joel Adams which canbe purchased from CILM
**PLEASE DO NOT USE HIS ARTWORK WITHOUT THE APPROPRIATE LICENCE**
Template #10 by Cheri of Wyld Creationz
Fonts of choice - I am using Chick, CAC Champagne and Candy
Plugin: Mura Meister Copies
Plugin: Photo Tools Gradient Sky (David Blend Filters)
 
My Supplies here
 
 
~ Step 1 ~
 
Open the Template and resize canvas to 650 wide x 600 high
Flood fill excess area white on Background layer
Delete copyright info
 
Open Paper2
Edit / Copy
 
Activate Bars1
With your Magic Wand click inside the bars
Selections / Modify / Feather by 1
Edit / Paste into Selection
Deselect
 
Open Paper1
Edit / Copy
 
Activate Dark Grey Flower
Click inside the Flower
Selections / Modify / Feather by 1
Edit / Paste in to Selection
Deselect
 
REMAIN ON THIS LAYER
 
Click inside each of the little flowers
Selections / Modify / Expand by 5
Add a new raster layer and called it Flowers
Layers / Arrange / Move Down
 
Open Paper4
Edit / Copy
Edit / Paste into Selection
Deselect
 

~ Step 2 ~
 
Activate top layer
 
Paste FlowerBrad2 as new layer
Resize by 60%
Use your Mover Tool to ensure Flower is central
 
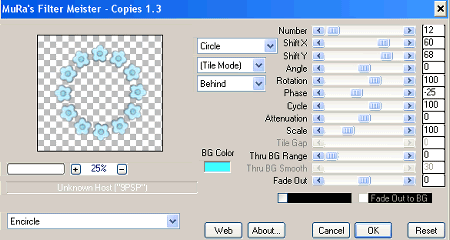
Effects / Plugins / Mura Meister / Copies with the following settings:


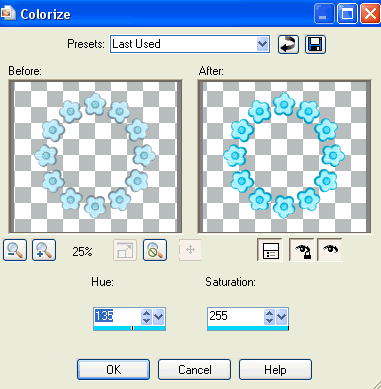
Then Adjust / Hue & Saturation / Colourise with the following settings:


Layers / Arrange / Move Down
Repeat this step twice
 
Duplicate then hide duplicate layer
On original go to
Effects / Plugins / Photo Tools / Gradient Sky
Add a drop shadow:
H & V – 1
Opacity – 30
Blur – 5.00
Colour - #000000
 
Unhide duplicate layer and turn the opacity down to 65
 
Paste Frame1 as new layer
Resize by 70%
Click inside each frame with your Magic Wand (make sure your mode is on Add (Shift) )
Selections / Modify / Expand by 10
Open Paper3 and Edit / Copy
Layers / Arrange / Move Down
Edit / Paste as New Layer
Resize by 70%
Adjust / Blur / Gaussian Blur with a Radius of 10.00
Selections / Invert
Delete
 
KEEP SELECTED
 
Selections / Invert
Effects / Plugins / Photo Tools / Gradient Sky
Deselect
 
Resize your Canvas to about 500 wide ALL LAYERS CHECKED
 

~ Step 3 ~
 
Open three tubes you wish to use in the frames
 
Click inside each of the frames
Selections / Modify / Expand by 5
 
Paste each tube as a new layer below the Frame positioning it to your liking
Selections / Invert


Ensuring that each tube is in position, press delete on each layer
Deselect
 
Activate the top tube layer then
Layers / Merge / Merge Down twice
Lower the opacity to 55
 
Activate Frame layer and apply a drop shadow:
H & V – 1
Opacity – 30
Blur – 5.00
Colour - #000000
 
Paste LoveRibbon1 as new layer
Resize by 35%
Position over the bow on Frame
 
Add a drop shadow:
H & V – 1
Opacity – 30
Blur – 5.00
Colour - #000000
 

Paste Ribbon2 as new layer
Resize by 35%
Position in upper left corner of Frame
 
Paste Flower1 as new layer
Resize by 30% and position over the Ribbon in upper left
Paste Flower2 as new layer
Resize by 25% and position in lower right
 
Add a drop shadow:
H & V – 1
Opacity – 30
Blur – 5.00
Colour - #000000
 
Paste your main tube as a new layer
Resize as necessary (I resized by 80%)
Position to your liking or leave as is
 
Apply the same drop shadow:
H & V – 1
Opacity – 30
Blur – 5.00
Colour - #000000
 

~ Step 4 ~
 
Activate the Bars1 layer
Select your Preset Shape Tool to Ellipse
Foreground - #000000
Background – null
Draw out your circle around your tag
 
Select your Text Tool and set your font to Chick
Open Paper1 (if you haven't already kept it open) and minimize it
 
In your Materials Palette use the following settings:
 
 
Set your Kerning to 25
 
Type out the word "Feelin' Groovy" with several spaces between the two words to enable them to sit on either side of your tube
Position to your liking, then
Convert to raster layer
Layers / Merge / Merge Down
 
Effects / Plugins / Eye Candy 4000 / Gradient Glow with the following settings:


Then apply a drop shadow:
H & V – 1
Opacity – 30
Blur – 5.00
Colour - #520b1f
Select your Preset Shape Tool to Ellipse again
Foreground - #000000
Background – null
Draw out your circle slightly smaller than the previous
 
Now choose a nice script font and change your Background to #FFFFFF
Type out the same words again as above
(you  may have to play with the spacing between the words till you get something you are happy with)
Adding a drop shadow of:
H & V – 1
Opacity – 20
Blur – 2.00
Colour - #520b1f
 
Activate top layer again
Toggle your Material Palette colours again to return to the Paper1 Pattern
Select another "groovy" font
 (I'm using Candy – some other great ones are BellBottomLaser, Husky Stash, LMS Hippy Chick, Peace, PuppyLike or Shagadelic to name a few)
Return the Kerning to 0
 
Type out your name
Objects / Align / Horizontal Centre in Canvas
Convert to raster layer
 
Effects / Plugins / Eye Candy 4000 / Gradient Glow with the same settings as above
Apply a drop shadow:
H & V – 1
Opacity – 30
Blur – 4.00
Colour - #520b1f
 
Finally add your © copyright, licence, your watermark then save as a GIF or JPG and you're done!
 
Thanks for trying my tutorial
 
::st!na::
 

© Tutorial written by Stina on 6th March 2009
All rights reserved
 

Sunday, February 15, 2009

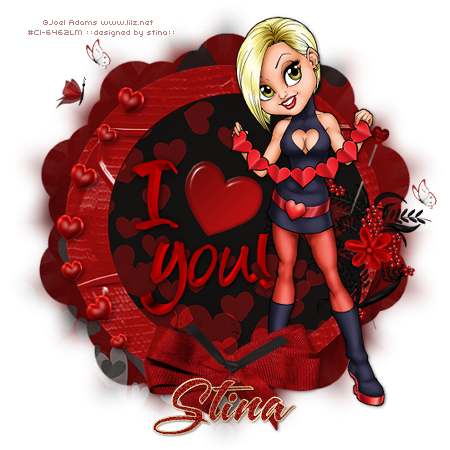
I Heart You

Supplies

Scrap kit of choice - I am using the lovely "I Heart You" by Captivated Visions
which can be purchased from Exquisite Scraps or Paradise4Scrappers
Thank you Rachel for this gorgeous kit! I truly enjoy working with it!
Tube of choice - I am using the gorgeous work of Joel Adams
which can be purchased from CILM with the proper licence
**PLEASE DO NOT HIS WORK WITHOUT THE APPROPRIATE LICENCE**
WSL_Mask 131 and 133 by Chelle which can be found on her blog
Font of choice - I am using A&S Snapper Script
Eye Candy 4000 Glass

~ Step 1 ~

Open Masks and font and minimise for later

Open a new blank canvas 600 x 600 flood-filled white
Paste Frame 6 as a new layer
LEAVE IN POSITION

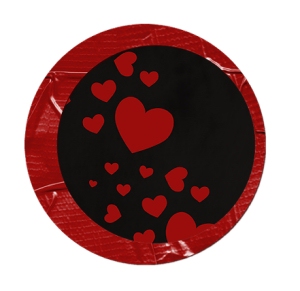
Paste Paper 20 as new layer and move below frame layer
Position the paper slightly down ensuring one of the large hearts is somewhere
within the frame near the centre (see below)
cv_ihy-01
Once happy with the position activate your frame layer
Click inside the frame
Selections / Modify / Expand by 10
Back on the paper layer
Selections / Invert
Delete

KEEP SELECTED!!

Hide your paper layer

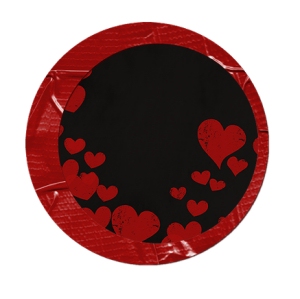
Paste Paper 07 as new layer and move below first paper layer
Position with hearts surrounding the frame (see below)
cv_ihy-02
Once happy with the position activate your frame layer
Click inside the frame
Selections / Modify / Expand by 10
Back on the paper layer
Selections / Invert
Delete
Deselect

Paste Falling Hearts as new layer
Image / Mirror then position so the curve of the hearts lines up with the curve of the frame
With your Eraser Tool erase the remaining hearts

Add a drop shadow:
H & V - 2
Opacity - 60
Blur - 8.00
Colour - #000000

~ Step 2 ~

Resize your tag to 400 x 400
Image / Canvas Resize and enlarge working space to 500 x 500

Paste Flowers as new layer and resize by 20%
Image / Mirror then position to the lower right of the frame

Paste Pin 02 as new layer and resize by 12%
Image / Rotate by 20 the right
Position in the top right

Paste Bow 05 as new layer
Resize by 50% and position at the bottom of frame in the centre
Duplicate then change blend mode to Screen
Reduce the opacity of this layer to 50

Paste Bow 01 as new layer
Resize by 30% then position over the bow at the bottom of the frame

~ Step 3 ~

Paste your tube as new layer and resize if necessary
Position to the left to your liking
You may need to adjust the position of some of your elements

Activate your background layer

Paste Paper 09 as new layer (no need to resize it unless you wish to)
Duplicate and hide original layer

On duplicate layer go to
Layers / New Mask Layer / From Image
Locate WSL_Mask131 in the list
Source Luminance checked
Invert Mask Data UNchecked
OK
Layers / Merge / Merge Group

Unhide original paper layer
Layers / New Mask Layer / From Image
Locate WSL_Mask133 in the list
Source Luminance checked
Invert Mask Data UNchecked
OK
Layers / Merge / Merge Group

~ Step 4 ~

Paste WordArt 01 as new layer and resize by 35%
Position in the frame beside your tube
With your freehand tool draw around the word LOVE and hit delete, then deselect

Activiate the paper layer with the hearts and using your magic wand click inside the large heart
Selections / Promote Selection to Layer

KEEP SELECTED!!

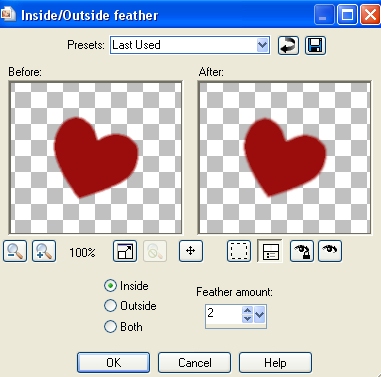
Selections / Modify / Inside/Outside Feather with the following settings:

cv_ihy-03

STILL SELECTED

Selections / Invert
Delete
Deselect

Still on this layer
Effects / Plugins / Eye Candy 4000 / Glass with the following settings:

cv_ihy-04

Go to your paper layers and reduce the opacity of the top one to about 50

You will see the hearts from the second papyer layer we did below show through

Add a drop shadow to the WordArt layer:
H & V - 1
Opacity - 100
Blur - 10.00
Colour - #000000

Add any other elements or embellishments you wish

Type your name in a font of your choice using a colour which matches your tube

Add your © copyright, licence and watermark and you're done!

Thank you for trying my tutorial

::st!na::

©Tutorial written by Stina on 6th February 2009
All rights reserved