Please email me designed.by.stina@gmail.com with your creations. I'd love to see them.

Showing posts with label Easter. Show all posts

Thursday, April 9, 2009

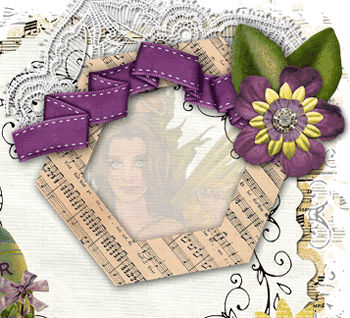
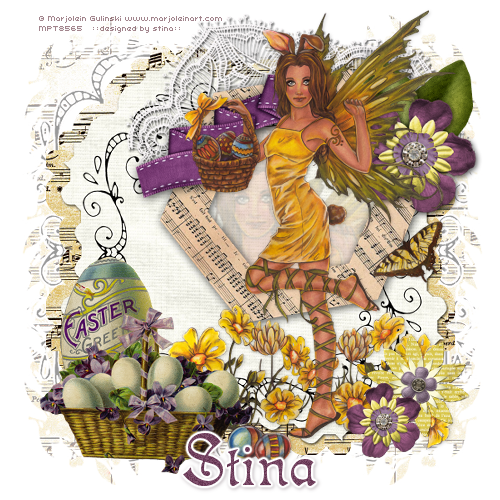
Vintage Easter

 
Supplies
 
"Vintage Easter" freebie scrap kit available from Pixel Music
Tube of choice - I am using the lovely artwork of Marjolein Gulinski which can be purchased from My PSP Tubes
**PLEASE DO NOT USE HER ARTWORK WITHOUT THE APPROPRIATE LICENCE**
WSL_Mask251 by Chelle available from her blog
Plugin: Eye Candy 4000 Gradient Glow
Font of choice - I am using Isabella
 
This is an easy tutorial ideal for Beginners
 
 
Let's begin!
 
Open a new 600 x 600 blank canvas flood-filled white
 
Paste Textbox3 as new layer
Resize by 35%
Leave in position
 
Paste ClusterFrame as new layer
Resize by 50%
Position up and slightly to the right
 
Paste Basket as new layer
Resize by 25%
Position in the lower left corner
 
Paste EasterEgg as new layer
Resize by 20%
Layers > Arrange > Move Down
Position behind the Basket and slightly up
 
Paste YellowFlower as new layer
Resize by 15%
Position in lower right
 
Paste PurpleFlower as new layer
Resize by 20%
Position in lower right overlapping the Yellow flower
 
Add a new raster layer
Selections > Select All
Paste SheetMusicBorder INTO selection
Deselect
Resize by 95%
Layers > Arrange > Send to Bottom
 
Layers > New Mask Layer > From Image
Locate WSL_Mask251
 
In your Layer Palette locate your Mask layer
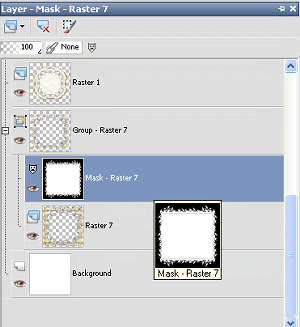
 
 
With your Pick Tool use the nodes to pull the layer up at the top and down at the bottom
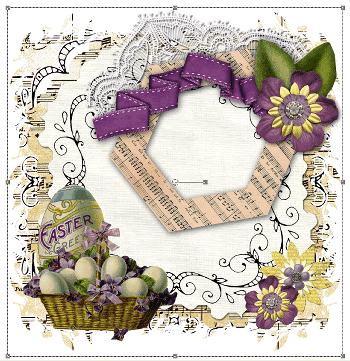
 
 
Layers > Merge > Merge Group
Lower opacity to around 40
 
Crop and Resize
 
Paste your tube below cluster frame
Enlarge/resize to fit partially inside cluster frame
With your Magic Wand select inside the frame (be sure to select the shadow as well to include the entire inside)
Selections > Modify > Expand by 10
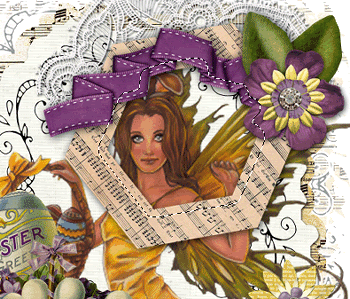
 
 
Selections > Invert
Delete and deselect
 
 
Paste your tube as new layer again
Layers > Arrange > Move Up (one layer above frame)
Resize as necessary and place in position
Apply drop shadow of choice
 
Select your Text Tool and font of choice
I am using Isabella
Choose a colour from your tube or scrap
Set your Material Properties:
Foreground - null
Background - #734360
 
Apply a Gradient Glow and drop shadow:
H & V - 1
Opacity - 30
Blur - 5.00
Colour - #301826
 
Finally, add your © copyright, licence and watermark then save as a GIF or JPG and you're done!
 
Thanks for trying my tutorial
 
::st!na::
 

© Tutorial written by Stina on 9th April 2009
All rights reserved

Wednesday, April 8, 2009

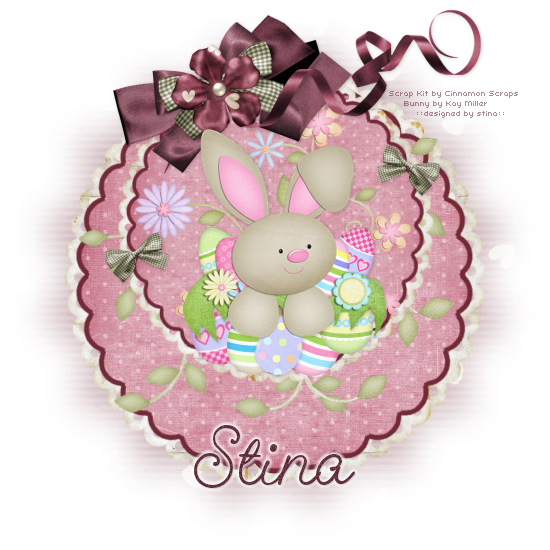
Easy Scallop Tag

 
Supplies
 
Scrap kit of choice - I am using the gorgeous "All About Love" by Cinnamon Scraps which is available from Simply Beautiful Scraps
Tube or clip art of choice - I am using those from the scrap kit "Easter Joy" by Kay Miller available at her store
WS_Mask33 by Chelle available on her blog
Font of choice - I am using GeeohHmk Bold
Plugin: Mura Meister Copies
Plugin: Eye Candy 4000 Gradient Glow (optional)
 
 
Let's begin!
 
First we shall make the scallop template which is the basis of this tag
 
Open a new 600 x 600 blank canvas flood-filled white
 
Set your Preset Shape Tool to Ellipse
Foreground - null
Background - #000000
 
Draw out a small circle (depend on what size you want your scallop to be)
 

Actual size
 
Objects > Align > Centre in Canvas
Convert to raster layer
 
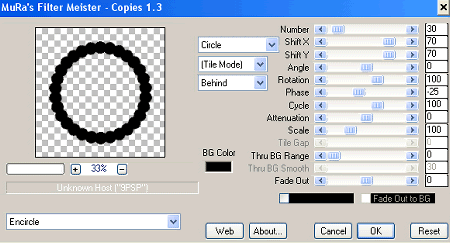
Effects > Plugins > Mura Meister > Copies with the following settings:
 
 
Go back to your Preset Shape Tool (same settings)
Holding your Shift key draw out a circle to fill the scalloped circle
 
Objects > Align > Centre in Canvas
 
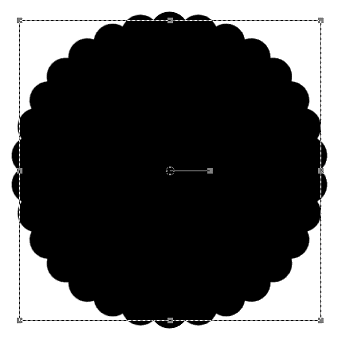
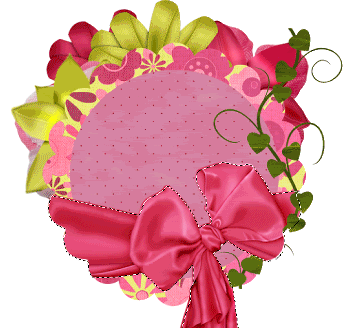
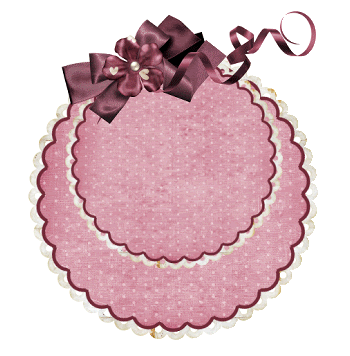
At this very point your image should resemble this:
 
 
Convert to raster layer
Layers > Merge > Merge Down
 
Congratulations - You have just made a Scalloped Tag Back template!
Now let's decorate it
 
Selections > Select All
Selections > Float
Selections > Defloat
 
Add a new raster layer
 
Flood fill layer with your colour of choice (one that will complement your creation)
 
Selections > Modify > Contract by 5
 
Paste your paper of choice into Selection
Deselect
 
**You can delete your scalloped template now**
 
Paste Element39 (Frame) as a new layer
Resize by 65%
Layers > Arrange > Move Down
Then Layers > Merge > Merge Down
 
 
Duplicate and resize by 75%
Move up slightly so the tops both meet
 
Paste Element54 (Bow) as a new layer
Image > Rotate by 15 to the left
Resize by 30%
Position at the top slightly to the left
 
Paste Element6 (Bow) as new layer
Resize by 50%
Position over first bow
 
Paste Element49 (Curled Ribbon with staple) as new layer
Resize by 40%
Position over the bows so that the staple is in the centre
 
Paste Element22 (flower) as new layer
Resize by 30%
Position over the centre of the bows and staple
 
 
So now we have this:
 
 
OK...time to add your tube and other embellishments you wish
I will leave those entirely up to you - after all, this is YOUR creation
 
Then Paste Paper15 as a new layer
Layers > Arrange > Send to Bottom
Layers > New Mask Layer > From Image
Locate WSL_Mask33
OK
Layers > Merge > Merge Group
 
Crop and resize
 
Now choose a colour from your tag
Select your Text Tool and font of choice
I am using GeeohHmk Bold
 
Set your Materials Palette to the following:
Foreground - null
Background - #63333f
 
Type out your name
Objects > Align > Horizontal Centre in Canvas
Convert to raster layer
Apply a Gradient Glow and drop shadow of choice
 
Finally, add your © copyright and watermark then save as a GIF or JPG and you're done!
 
Thanks for trying my tutorial
 
::st!na::
 

© Tutorial written by Stina on 8th April 2009
All rights reserved
Tuesday, April 7, 2009

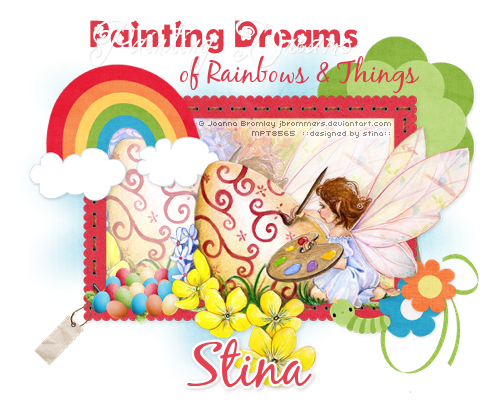
Painting Dreams

 
Supplies
 
Scrap kit of choice - I am using "Easter Fun" by Shanmomt4 Designs available from Paradise 4 Scrappers
Image and Tube of choice - I am using the lovely artwork of Joanna Bromley which can be purchase from My PSP Tubes
WSL_Mask7 by Chelle available from her blog
Fonts of choice - I am using 2Peas Groovy Bloom, 2 Peas Sonnet Script and Black Jack
 
 
Let's begin....
 
Open a new 600 x 600 blank canvas flood-filled white
 
Paste Frame5 as new layer
(no need to resize)
 
Paste Image of choice as new layer
Layers > Arrange > Move Down
Resize and position below Frame to your liking
 
Activate Frame layer
Select inside area with Magic Wand
Selections > Modify > Expand by 10
Selections > Invert
Activate Image layer
Delete
 
KEEP SELECTED!!
 
Selections > Invert
Activate Background Layer
Selections > Promote Selection to Layer
Deselect
 
Lower the opacity of your image layer to around 50
Layers > Merge > Merge Down
 
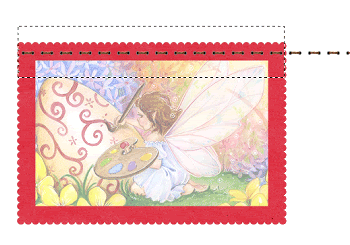
Paste Stitching as new layer
Position along top of Frame
Draw a selection around this area
Selections > Invert
Press delete and deselect
 
 
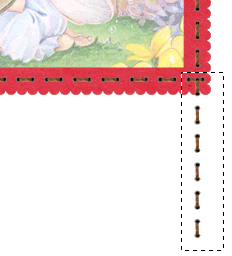
Duplicate then Image > Flip
Duplicate again
Image > Rotate by 90
Position along side of Frame
Draw a selection around the excess
 
 
Delete and deselect
Duplicate then Image > Mirror
 
Hide all layers except for the Stitching
Layers > Merge > Merge Visible
Unhide layers
 
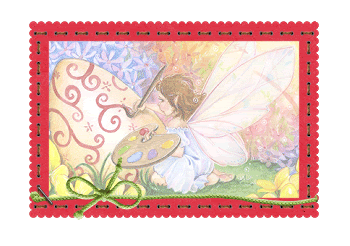
Paste String2 as new layer
Resize by 15%
Position along bottom of Frame
 
Paste Staple as new layer
Image > Rotate by 50 to the right
Resize by 50%
Position over String to secure it to the Frame
 
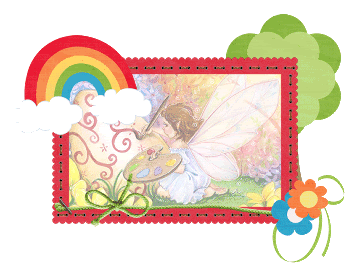
You should have something a little like this:
 
 
Paste Flower2 as new layer
Using your Magic Wand Tool with a Tolerance set to around 25 click INSIDE the stem, leaves and pot
Press delete and deselect
 
 
Resize by 60%
Position in lower right corner
 
Paste Flower3 as new layer
Select the inside of stem, leaves and pot
Delete and deselect
 
Resize by 60%
Position alongside first flower
 
Paste Doodle as new layer
Image > Mirror, then Image > Flip
Image > Rotate by 20 to the left
Resize by 35%
Position in lower right
Layers > Arrange > Send to Bottom
 
Paste Tree as new layer (still on bottom layer)
Resize by 55%
Position to the right
 
Paste Rainbow as new layer
Resize by 55% - 60%
Position in upper left corner
 
 
Paste Tube of choice as new layer
Resize as necessary and position to your liking
 
Paste various Easter eggs
Resize and rotate them to your liking
Position them to the left of your tube
 
Paste Worm as new layer
Resize by 30%
Position to the lower right
 
Paste Tag2 as new layer
Image > Rotate by 20 to the right
Resize by 30%
Position in lower left
Drag layer to below the Staple
 
Image > Canvas Resize 600 wide by 500 high centred
 
paste Paper5 as new layer
Layers > Arrange > Send to Bottom
 
Layers > New Mask Layer > From Image
Locate WSL_Mask7
OK
Layers > Merge > Merge Group
 
Apply drop shadows to your elements:
H & V - 1
Opacity - 20
Blur - 5.00
Colour - #000000
 
Select your Text Tool and font of choice
I am using three different fonts for the Phrase -
2Peas Groovy Bloom,
2Peas Sonnet Script (Painting Dreams), and
Black Jack (of Rainbows & Things)
 
Pick a colour from your tube or scrap
Type in any text or phrase of your choice
Convert to raster layer
 
Select another font and type out your name
Apply a Gradient Glow (optional) and drop shadow of choice
 
Finally, add your © copyright, licence and watermark the save as a GIF or JPG and you're done
 
Thanks for trying my tutorial!
 
::st!na::
 

© Tutorial written by Stina on 7th April 2009
All rights reserved
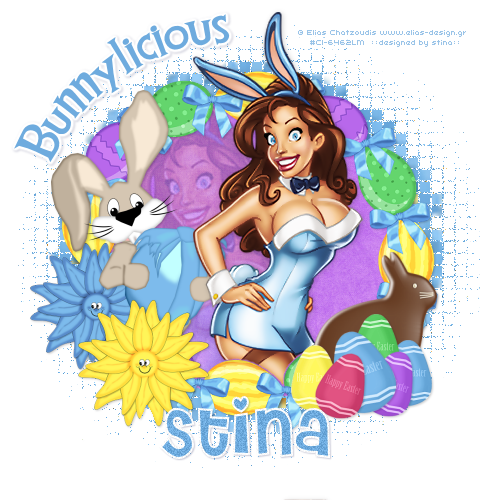
Bunnylicious

 
Supplies
 
Scrap kit of choice - I am using the cute "Easter Bunny" kit by Creative Intentionz which is available for purchase from Exquisite Scraps and Paradise 4 Scrappers
Tube of choice - I am using the delightful artwork of Elias Chatzoudis which can be purchased from CILM
**PLEASE DO NOT USE HIS ARTWORK WITHOUT THE APPROPRIATE LICENCE**
Fonts of choice - I am using CCThingamajig and Cheri
Plugin: Mura Meister Copies
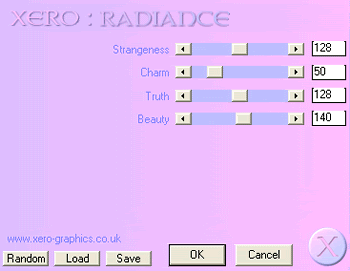
Plugins: Xero Improver and Xero Radiance
Plugin: Eye Candy 4000 Gradient Glow
 
 
Let's begin!
 
Open a new 500 x 500 blank canvas flood-filled white
 
Paste Wreath2 as new layer
Resize by 70%
 
Select inside the Frame with your Magic Wand
Selections > Modify > Expand by 10
Add a new raster layer
Paste Paper15 into Selection
Deselect
Layers > Arrange > Move Down
 
Paste Flower4 as new layer
Resize by 35%
LEAVE IN POSITION
 
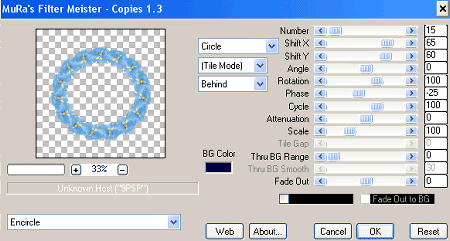
Effects > Plugins > Mura Meister > Copies with the following settings:
 
 
Layers > Arrange > Send to Bottom
 
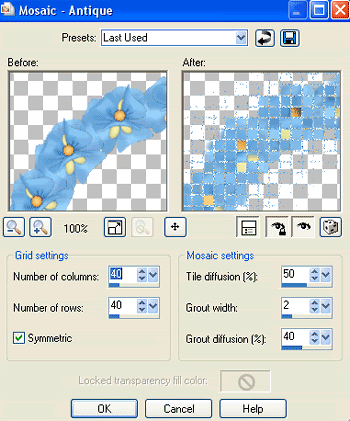
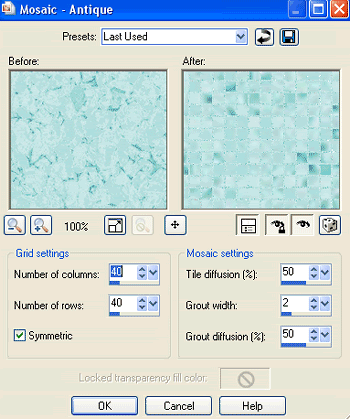
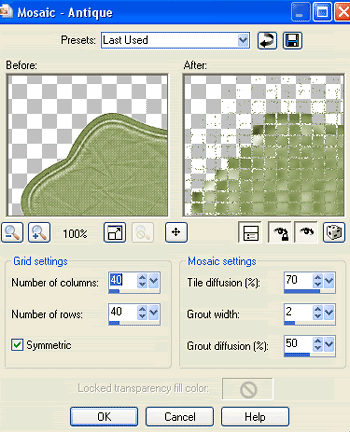
Effects > Texture Effects > Mosaic - Antique with the following settings:
 
 
Activate top layer
 
Paste any FunnyFlower from 1 to 5 as new layer
Resize by 50%
 
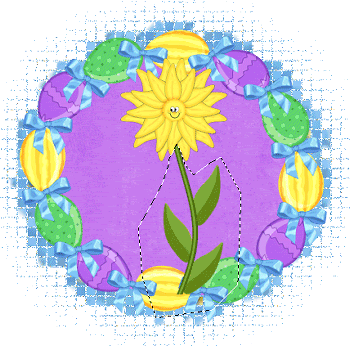
Select your Freehand Tool and draw around the stem on the flower
Delete then deselect
 
 
Repeat with another FunnyFlower in a different colour
Position both to the lower left to your liking
 
Paste BunnyEgg9 as new layer
Resize by 30%
Position to the left behin the first flower ONLY
Erase his foot protruding
 
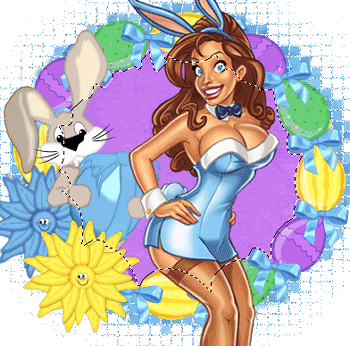
Paste your tube as new layer
Resize as necessary
Position to your liking
 
Activate Wreath Layer
Select the area inside the wreath/frame with your Magic Wand
Selections > Invert
Selections > Modify > Contract by 2
Selections > Modify > Feather by 3
Select your Eraser Tool and carefully the bottom of the tube


KEEP SELECTED!!
 
Paste your tube again and resize if necessary
Position off centre to still remain visible
Move to between the Paper and Wreath layers
Press delete and deselect
Lower opacity to around 25
 
Activate your tube layer again
Effects > Plugins > Xero > Improver
Default Settings
 
Effects > Plugins > Xero > Radiance with the following settings:
 
 
Paste various Eggs from 1 to 5 as new layers
Resizing by 40% - 50%
Position to your liking
Image > Rotating the alternatively
 
Paste ChocBunny2 as new layer
Resize by 65%
Position to the lower right behind easter eggs
 
Add a slight drop shadow to the eggs
Activate the top egg then,
Layers > Merge > Merge Down
Repeat until all the eggs are one layer
 
Add the same drop shadow to each of your element layers
 
Select your Preset Shape Tool to Ellipse
Foreground - #000000
Background - null
 
Draw out a cirle/ellipse around your tag
 
Select your Text Tool and font of your choice
I am using CCThingamajig
 
Choose a colour from your tube and/or tag
Foreground - null
Background - #6eabde (or your choice of colour)
 
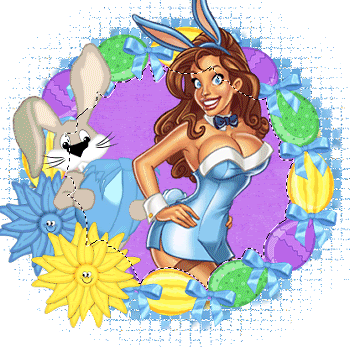
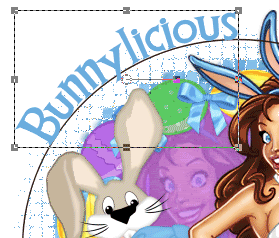
Type out "Bunnylicious"
 

Open Vector Layer in Palette and hide Ellipse
Convert to raster layer
Apply a Gradient Glow followed by a drop shadow:
H & V - 1
Opacity - 20
Blur - 2.00
Colour - #000040
 
Select another font of your choice for your name
Apply any effects you wish followed by a drop shadow
 
Finally, add your © copyright, licence and watermark the save as a GIF or JPG and you're done
 
Thanks for trying my tutorial!
 
::st!na::
 

© Tutorial written by Stina on 6th April 2009
All rights reserved
Monday, April 6, 2009

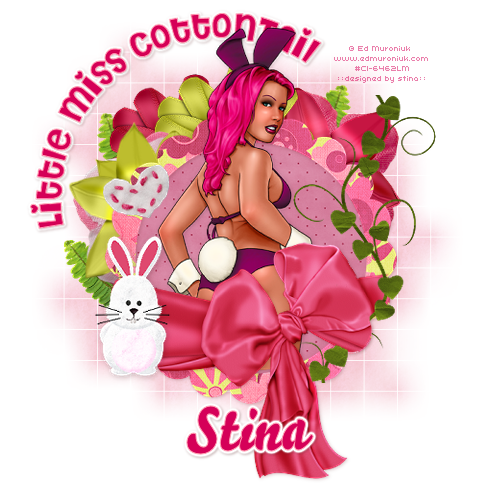
Little Miss Cottontail

 
Supplies
 
Scrap kit of choice - I am using "Cotton Tail" by Pimp'd Dezigns which is available from Paradise 4 Scrappers and Stargazer Scraps
Tube of choice - I am using the lovely artwork of Ed Muroniuk which can be purchased from CILM
**PLEASE DO NOT USE HIS ARTWORK WITHOUT THE APPROPRIATE LICENCE**
WSL_Mask84 by Chelle available from her blog
Fonts of choice - I am using Cheri and Bello Script
Plugin: Eye Candy 4000 Gradient Glow
 
Let's begin...
 
 
Open a new 700 x 700 blank canvas flood-filled white
 
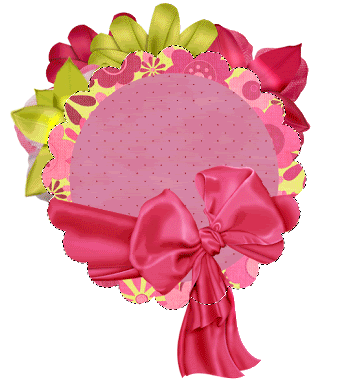
Paste Frame02 as new layer
Resize by 85%
 
Select inside the Frame with your Magic Wand
Selections > Modify > Expand by 10
Add a new raster layer
Paste PP01 into Selection
Deselect
Layers > Arrange > Move Down
 
Paste Flower01 and Flower02 as new layers respectively
Layers > Arrange > Move Down
Place each in position
 
Paste Flower09 and Flower10 as new layers
Resize by 70%
Position each upon each Flower respectively
 
Paste Flower03 and Flower06 as new layers
Resize by 70%
Position alongside other flowers on bottom layer
 
Close off Background, Frame and Frame background
Activate one of the Flower layers
Layers > Merge > Merge Visible
Unhide all layers
 
Paste Wrap01 as new layer
Resize by 90%
 
Select the area outside the Frame with your Magic Wand
Selections > Modify > Contract by 2
Selections > Modify > Feather by 2
 
Use your Erase Tool to erase each end of the Wrap then deselect
 
 
Paste Vine as new layer
Resize by 70% and place to the right
 
Activate Wrap layer and select the area around it with your magic Wand
Then erase part of the Vine overlapping the Wrap
Deselect
 
 
Paste Greens01 as new layer
Image > Rotate by 40 to the left
Layers > Arrange > Send to Bottom
Position behind flowers
Duplicate then Image > Rotate by 20 to the right
Duplicate then Image > Mirror
Position greenery to your liking
 
Paste Bunny as new layer
Resize by 35%
Position to the left of the Wrap and Frame
 
Paste your tube as a new layer
Position behind Wrap
Erase any excess protruding below the Wrape and Frame
Add a slight drop shadow
 
Crop and resize
 
Paste PP10 as new layer
Layers > Arrange > Send to Bottom
Layers > New Mask Layer > From Image
Locate WSL_Mask84
OK
Layers > Merge > Merge Group
Lower opacity to around 30
 
Select your Preset Shape Tool to Ellipse
Foreground - #000000
Background - null
 
Draw out a circle around your tag
 
Select your Text Tool and font of choice
I am using Cheri
Choose two colours from your tube and/or scrap
Set the Materials Palette:
Foreground - #ff9bb0
Background - #d50058
 
Stroke Width - 1.00
 
Rest your mouse over the Ellipse till you see an A with a curve beneath it
Type out your text and position
 
 
In your Layer Palette open your Vector Layer
Hide the Ellipse and convert to raster layer
Add a slight drop shadow
Apply a Gradient Glow and another small drop shadow
 
Select another font of choice - I am using Bello Script
Type out your name
Objects > Align > Horizontal Centre in Canvas
Convert to raster layer
Apply Gradient Glow and drop shadow
 
Finally, add your © copyright, licence and watermark the save as a GIF or JPG and you're done
 
Thanks for trying my tutorial!
 
::st!na::
 

© Tutorial written by Stina on 6th April 2009
All rights reserved
Sunday, April 5, 2009

Bunny Garden

 
Supplies
 
"Easter" freebie Scrap Kit by Bel Vidotti which is available from her blog
Tube of choice - I am using the lovely artwork of Rion Vernon and PinUpToons which you can purchase from CILM
**PLEASE DO NOT USE HIS ARTWORK WITHOUT THE APPROPRIATE LICENCE**
WSL_Mask226 by Chelle available from her blog
Fonts of choice - I am using 2Peas Frazzled and AKApprique Black
Plugin: Eye Candy 4000 Gradient Glow (optional)
 
 
Let's begin
 
Open a new 700 x 600 blank canvas flood-filled white
 
Paste Frame05 as new layer
 
Select area inside Frame with Magic Wand
Selections / MOdify / Expand by 10
 
Add new raster layer
 
Paste Paper03 into Selection
Deselect
 
Layers / Arrange / Move Down
 
Paste WordArt as new layer
Resize by 60%
Position in lower left corner
 
 
Paste Tree as new layer
Resize by 70%
Layers / Arrange / Move Down
Position in left corner behind word art
 
 
Paste Grass as new layer
Resize by 55%
Position to the bottom of Frame
Layers / Arrange / Move Down
Repeat so Grass is behind Frame layer
 
Paste Mushroom01 as new layer
Resize by 20%
Paste Mushroom02 as new layer
Resize by 25%
Position both to the lower right beside each other
 
Paste Sun as new layer
Resize by 30%
Position to your liking
Duplicate then set blend mode to Soft Light
Layers / Merge / Merge Down
 
Paste Cloud02 as new layer
Resize by 40%
Place in position
Duplicate then resize by 85%
Position slightly to the left
 
Paste various flowers, resizing them and placing them to your liking
 
Paste Rabbit02 as new layer
Resize by 35%
Position under the tree within the word art circle
 
 
Paste Rabbit01 as new layer
Resize by 20%
Position on top of one of the Mushrooms
 
Paste Tag03 as new layer
Image / Rotate by 10 to the right
Resize by 25%
Position in upper right
 
Paste Tag03 again
Image / Rotate by 30 to the right
Resuze by 25%
Position over first tag
Layers / Merge / Merge Down
 
 
Paste BowRabbit02 as new layer
Resize by 20%
Place over the two tags in upper right
 
Paste various Butterflies
Resize by 10%
Position to your liking
 
Paste various Easter Eggs
Resize by 8%
Rotate alternatively, scattering them to your liking
 
Now paste your tube as new layer
Resize as necessary
Position to your liking
Add a drop shadow of choice
 
Paste Paper05 as new layer
Layers / Arrange / Send to Bottom
 
Layers / New Mask Layer / From Image
Locate WSL_Mask226
OK
Layers / Merge / Merge Group
Lower opacity to 40
 
Activate top layer
 
Select your Text Tool and font of choice
I am using 2Peas Frazzled
 
Choose a colour from your tag for your Background/text
 
Type out some words of your choice
Convert to raster layer
Apply a Gradient Glow if you wish and a drop shadow of choice
 
Select another font of choie
I am using AKApprique Black
 
Type out your name
Apply any effects you wish and a drop shadow of choice
 
Finally add your © copyright, licence and watermark, then save as a GIF or JPG and you're done!
 
Thank you for trying my tutorial!
 
::st!na::
 

© Tutorial written by Stina on 5th April 2009
All rights reserved
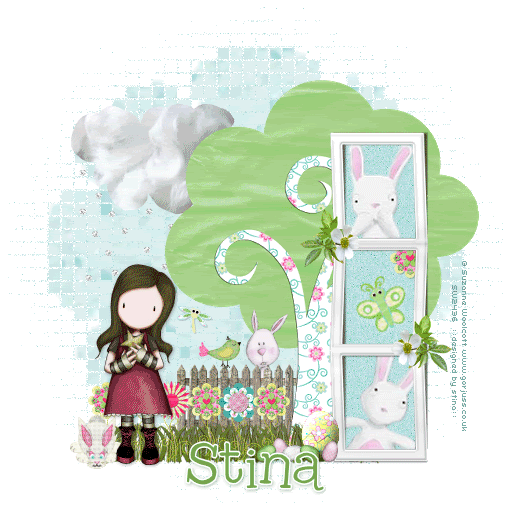
Gorjuss Bunnies

 
Supplies
 
Scrap kit of choice - I am using the lovely "Silly Wabbit" by Oopsie Daisy which is available from Exquisite Scraps
Tubes of choice - I am using the gorgeous artwork of Suzanne Woolcott which can be purchased from her store
**PLEASE DO NOT USE HER ARTWORK WITHOUT THE APPROPRIATE LICENCE**
Preset Shape of choice - I am using a Flower shape
Font of choice - I am using 2Peas Typo
 
 
~ Step 1 ~
 
Open a new 700 x 700 blank canvas flood-filled white
 
Paste Frame2 as new layer
Resize by 20%
Position to the right
 
Select inside each of the Frames using your Magic Wand
(don't forget to click on the shadow part as well to select the whole area)
Selections / Modify / Expand by 10
 
Add a new raster layer
Paste PP8 into Selection
Deselect
Layers / Arrange / Move Down
 

~ Step 2 ~
 
Paste Tree as new layer
Resize by 15%
Layers / Arrange / Move Down
Repeat
Position to the right beneath Frame
 
Paste Grass Fence Border as new layer
Resize by 15%
Position along bottom
 
Paste Diamonds From Heaven as new layer
Resize by 10%
Position partially tucked behind tree
 
Paste Wooden Fence as new layer
Resize by 8%
Position behind Tree
 
Paste Yellow Gel Swirl as new layer
Resize by 5%
Duplicate then Layers / Merge / Merge Down
Position in the grass
Duplicate several times and space along the fenceline
 
Paste various flowers
Resize by 7 - 10% each
Position on stems/swirls
 
Paste a bird
Resize by around 5%
Place on fence
 
Paste some Easter Eggs
Resize as necessary
Scatter in position
 
Then paste Egg2 as new layer
Resize by 17% TWICE
Duplicate and set blend mode to Soft Light
Layers / Merge / Merge Down
 
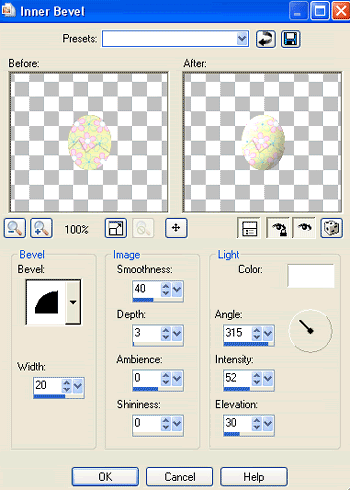
Effects / 3D Effects / Inner Bevel with the following settings:
 
 
Then duplicate and blend mode to Multiply
Layers / Merge / Merge Down
 
Image / Resize
 

~ Step 3 ~
 
Open PP8 and minimise
 
Select your Preset Shape Tool on a Flower or any round shape of your choice
Draw out your shape
Objects / Align / Centre in Canvas
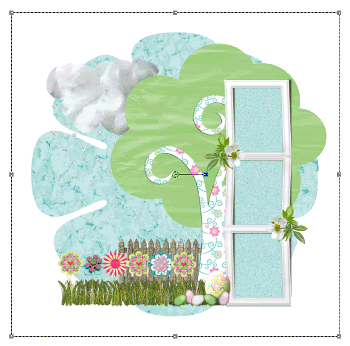
Convert to raster layer
 
 
Effects / Texture Effects / Mosaic - Antique with the following settings:
 
 
Lower opacity to around 60
 
Still on this layer
Select your Selection Tool
Then in your Tool Options Palette click on Layer Opaque which will make a selection around that layer
Now go to Image / Crop to Selection
 
Now all that is left is to decorate your creation
 
Add some tubes and elements into the frames
Don't forget to select inside the frames
Selections / Modify / Expand by 5
Selections / Invert
Delete and deselect
 
Activate your top layer
Paste your main tube and resize as necessary
Apply a drop shadow of choice
 
Select your Text Tool and font of choice
I am using 2Pease Typo
Choose a colour to match your tag
 
In your Materials Palette:
Foreground - #FFFFFF
Background - #71a852 (or colour of your choice)
 
Stroke width - 1.5
 
Type out your name
Objects / Align / Horiztonal Centre in Canvas
Convert to raster layer
 
Apply a drop shadow:
H & V - 1.00
Opacity - 30
Blur - 5.00
Colour - #004000
 
Finally add your © copyright, licence and watermark, then save as a GIF or JPG and you're done!
 
Thank you for trying my tutorial!
 
::st!na::
 

© Tutorial written by Stina on 4th April 2009
All rights reserved
Saturday, April 4, 2009

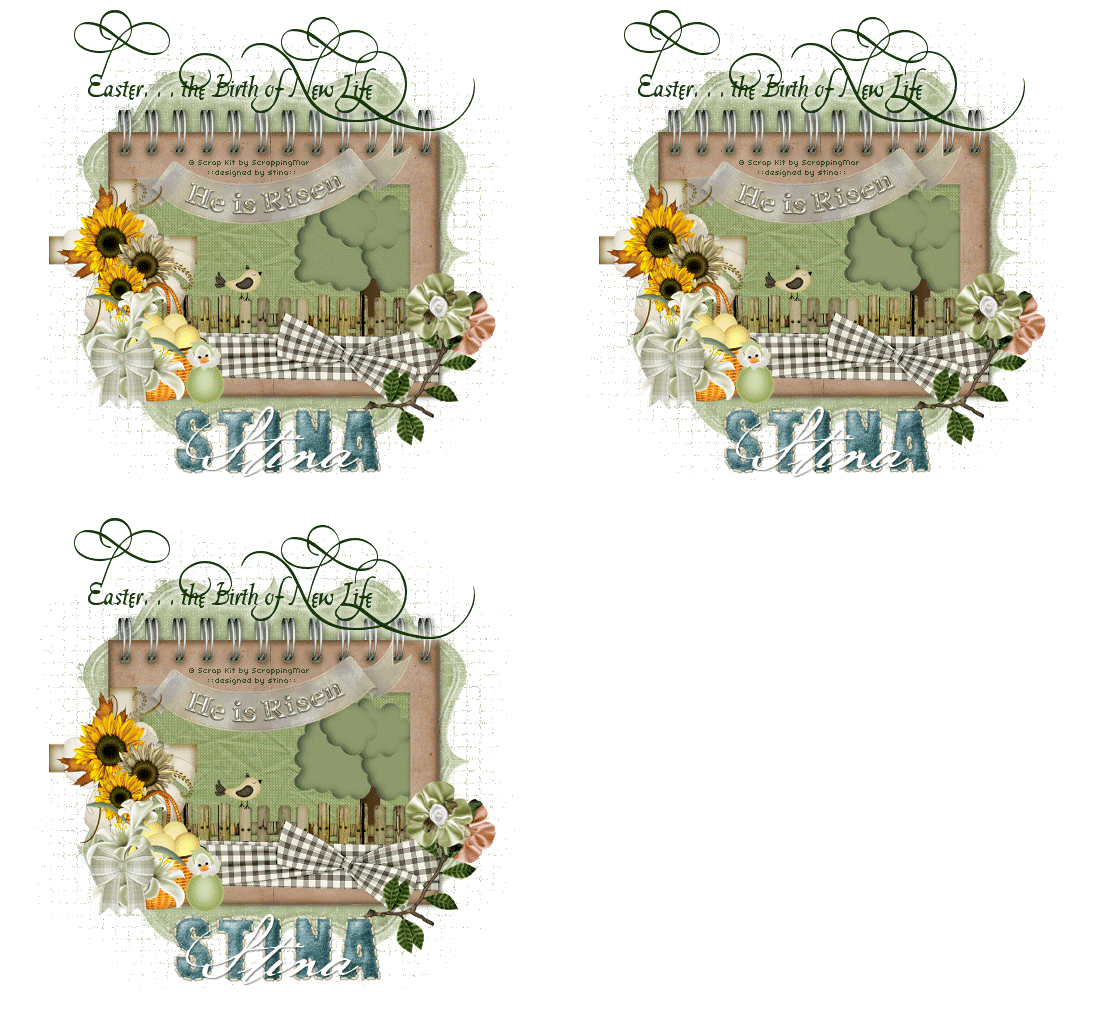
Easter...the Birth of New Life

 
Supplies
 
Scrap kit of choice - I am using the lovely "Easter Blessings" by ScrappingMar which is available for purchase from Cotton Candy Kreations
Tube of choice - I used the elements supplied in the kit
Fonts of choice - I am using Platthand and BakerScript
Plugin: Eye Candy 4000 Gradient Glow
Plugin: Alien Skin Xenofex 2 Constellation
Paint Shop Pro (I am using x, but any version will work)
Animation Shop
 
 
~ Step 1 ~
 
Open a new 700 x 500 blank canvas flood-filled white
 
Paste Element28 (green bracket tagback) as new layer
Resize by 70%
 
Paste Element74 (blank frame) as new layer
Resize by 50%
 
Select the area inside the Frame with your Magic Wand (you will need to select the shadow as well for the whole area)


Selections / Modify / Expand by 10
Selections / Promote Selection to Layer
Deselect
 

~ Step 2 ~
 
Paste Element48 (tree) as new layer
Resize by 25%
Position to the far right behind fence
 
Paste Element73 (fence) as new layer
Resize by 20%
Position to the far left partially tucked under the frame
Image / Mirror
Layers / Merge / Merge Down
 
Paste Element37 (brown bird) as new layer
Resize by 10%
Place on the fence
Duplicate then set the blend mode to Soft Light
Layers / Merge / Merge Down
 
Paste Element68 (brown checked ribbon) as new layer
Resize by 42%
Position over bottom of Frame
 
 
Paste Element55 (cross with sunflowers) as new layer
Resize by 25%
Layers / Arrange / Bring to Top
Position to the left
 
 
Paste Element56 (floral easter basket) as new layer
Resize by 25%
Position to the left with the Cross
 
Paste Element57 (chick in egg) as new layer
Resize by 10%
Position beside easter basket
 
Paste Element43 (branch) as new layer
Resize by 20%
Position to the right
 
Paste a silk flower element as new layer
Resize by 22%
Place on far right branch
 
Paste another silk flower element as new layer
Resize by 22%
Place on next branch
Layers / Merge / Merge Down
Repeat so flowers and branch are one
 
Activate Frame layer
Paste Element53 (He is Risen banner) as new layer
Resize by 45%
Position partially to the left of the centre
Duplicate
Set blend mode to Multiply
Layers / Merge / Merge Down
 
 
Add drop shadows of choice to your layers
 

~ Step 3 ~
 
Image / Canvas Resize by 650 x 600
 
Then image resize (I resized mine to 550 x 508)
 
Select your Text Tool and font of choice
I chose Platthand - a nice old style loopy font *s*
Choose a colour complimenting your tag
 
Set your Material Properties to:
Foreground - null
Background - #043004 (colour of choice)
 
At the top type out your text of choice
Objects / Align / Horizontal Centre in Canvas
Convert to raster layer
Effects / Plugins / Eye Candy 4000 / Gradient Glow with the following settings:
Glow width - 8.00
Soft Corners - 25
Opacity - 100
Setting - Diffuse
Colour - #FFFFFF
 
Add your © copyright, licence and watermark
 
Select another font and type out your name
Objects / Align / Horizontal Centre in Canvas
Convert to raster layer
Apply any effects you wish and drop shadow of choice
 
OR
 
Use the Alpha supplied with the Easter Blessings kit
 
Activate Tagback layer
Duplicate
Effects / Texture Effects / Mosaic - Antique with the following settings:


**THIS NEXT STEP IS FOR ANIMATION ONLY**
 
Duplicate twice and rename layers Sparkle1, Sparkle2 and Sparkle3
 
Activate the Tagback layer again
Selections / Modify / Expand by 10
 
Hide Sparkle 2 and 3
Activate Sparkle1
 
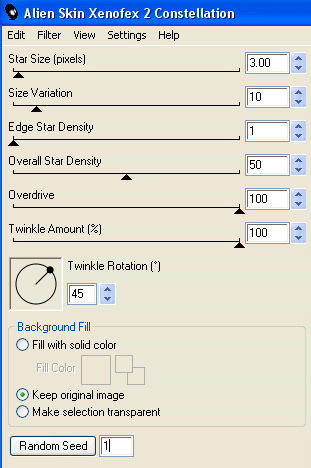
Effects / Plugins / Alien Skin Xenofex 2 / Constellation with the following settings:
 
 
Hide Sparkle1 and activate and unhide Sparkle2
Apply Constellation again clicking to change the Random Seed
 
Hide Sparkle2 and activate and unhide Sparkle3
Apply Constellation again clicking to change the Random Seed
 
Now you can deselect
 
Once again, hide Sparkle 2 and 3
Edit / Copy Merged
 
Open Animation Shop
Edit / Paste as New Animation
 
Back in PSP
Hide Sparkle1 and unhide Sparkle2
Edit / Copy Merged
 
Go to Animation Shop
Edit / Paste After Current Frame
 
Back in PSP
Hide Sparkle2 and unhide Sparkle3
Edit / Copy Merged
 
Go to Animation Shop
Edit / Paste After Current Frame
 
Finally save as a GIF and you're done!
 
Thank you for trying my tutorial!
 
::st!na::
 

© Tutorial written by Stina on 4th April 2009
All rights reserved
Friday, April 3, 2009

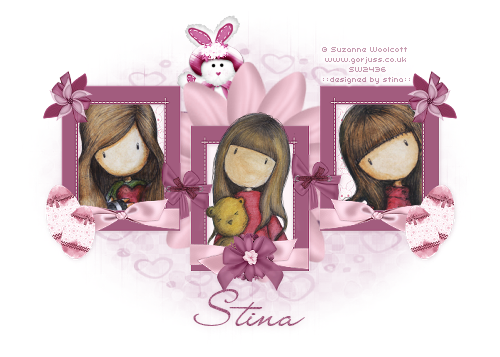
Bunny Hugs

 
Supplies
 
Scrap kit of choice - I am using "Hip Hop Easter" by Stacey's Designs available from Creative Scraps Store
Tube of choice - I am using the artwork of Suzanne Woolcott which can be purchased from her store
**PLEASE DO NOT USE HER ARTWORK WITHOUT THE APPROPRIATE LICENCE**
WSL_Mask214 by Chelle available from her blog
Font of choice - LainieDaySH
 
 
~ Step 1 ~
 
Open a new 700 x 500 blank canvas flood-filled white
 
Paste DarkPinkTripleFrame as new layer
Resize by 85%
 
Select inside each frame with your Magic Wand
Selections / Modify / Expand by 10
 
Paste  Paper7 as new layer
Resize by 85%
Selections / Invert
Delete
Layers / Arrange / Move Down
 
KEEP SELECTED
 
Paste your first tube of choice as new layer
Position to the left
Resize to fit within Frame
Press delete to delete excess
 
Paste second tube of choice as new layer
Position to the right
Resize to fit within Frame
Press delete to delete excess
 
STILL KEEP SELECTED!
 
Paste your main tube as new layer into centre Frame
Resize as necessary
Layers / Arrange / Move Up
(this layer will be on top of the Frame)
Position to your liking
 
Selections / Invert
Selections / Modify / Contract by 10
Use your Eraser Tool to erase the excess from the bottom of the tube along the bottom of Frame
Deselect
Adjust your tube into position if needed
 
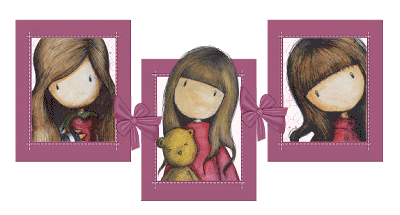
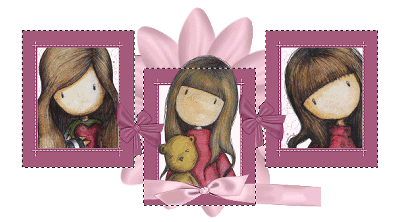
You should now have something like this:


~ Step 2 ~
 
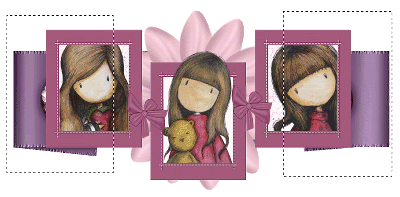
Paste PurpleAndLightPinkFastner as new layer
Layers / Arrange / Send to Bottom
Position so that flower surrounds frame
 
Draw a selection around each end that is showing
 
 
Press delete then deselect
 
Paste LightPinkRibbonBow as new layer
Resize by 50%
Place over the bottom of the centre Frame
 
Activate Frame layer
Select the area outside of the Frame with your Magic Wand
Selections / Modify / Feather by 1
 
Activate your Ribbon layer
Use your Eraser Tool to erase both ends of the ribbon
 
 
Duplicate and position carefully on the bottom of the left Frame
Duplicate again, then
Image / Mirror
 
Paste DarkPinkSatinFlower as new layer
Resize by 10%
Position in upper left Frame
Duplicate
Image / Mirror
Position in upper right
 
Paste DarkPinkEyeletRibbon as new layer
Resize by 5%
Position over Bow on Frame
Duplicate
Image / Mirror
Position over other Bow
 
Paste DarkPinkSatinFlowerBow as new layer
Resize by 15%
Position over centre ribbon in middle Frame
 
Paste LightPinkDecoratedEgg as new layer
Image / Rotate by 15 to the left
Resize by 15%
Position to the left on corner of Frame
Duplicate then set blend mode to multiply
Layers / Merge / Merge Down
 
Duplicate, then Image / Mirror
Resize by 85%
Then position alongside first egg
Layers / Merge / Merge Down
 
Duplicate then Image / Mirror
 
 
Hide your Background layer
Layers / Merge / Merge Visible
 
Crop and resize
 

~ Step 3 ~
 
Paste DarkPinkStandingBunny as new layer
Image / Rotate by 15 to the left
Resize by 20%
Position Bunny to appear above flower
Layers / Arrange / Send to Bottom
Duplicate then set blend mode to Overlay
Layers / Merge / Merge Down
 
 
Paste Paper11 as new layer
Layers / Arrange / Send to Bottom
 
Layers / New Mask Layer / From Image
Locate WSL_Mask214
OK
Layers / Merge / Merge Group
 
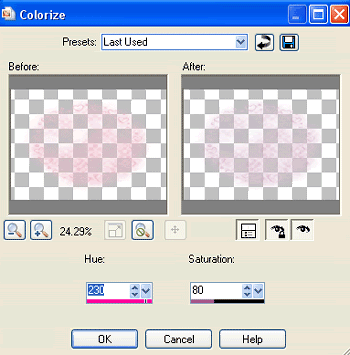
Adjust / Hue & Saturation / Colourise with the following settings:
 
 
Add your © copyright, licence and watermark
 
Select your Text Tool and font of your choice
I am using LainieDaySH
 
Foreground - null
Background - #a25c7e (or colour of choice)
 
Type out your name
Objects / Align / Horiztonal Centre in Canvas
Convert to raster layer
 
Apply a drop shadow:
H & V - 1
Opacity - 20
Blur - 10.00
Colour - #7e385e (or one of your choice)
Repeat
 

~ Step 4 ~
 
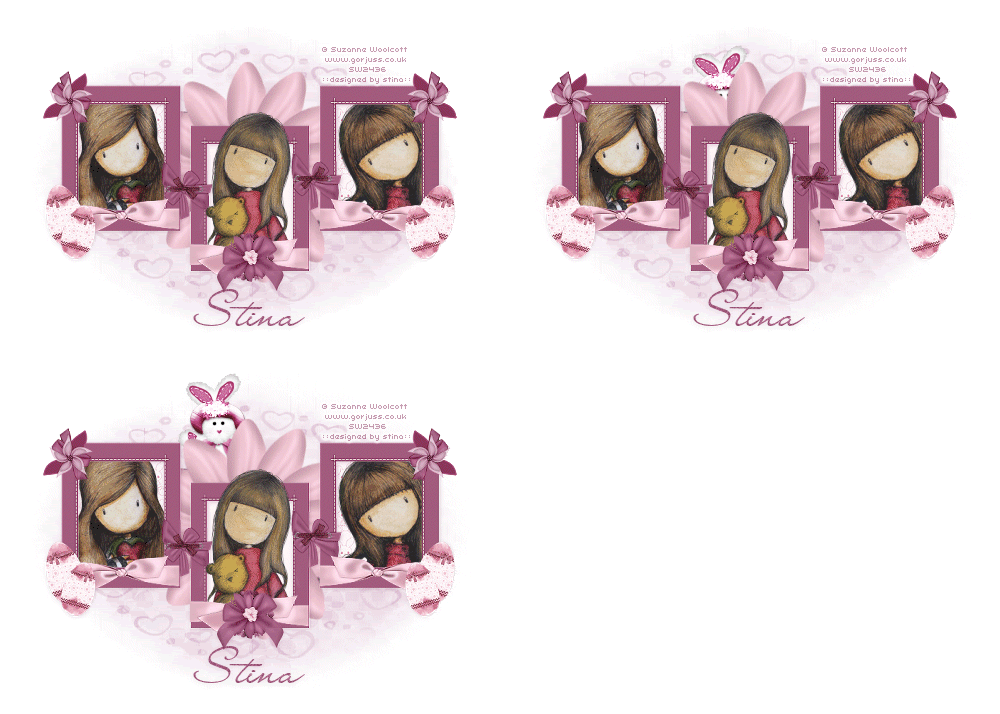
**THIS NEXT STEP IS FOR ANIMATION! IF YOU DO NOT WISH TO ANIMATE YOU MAY SKIP THIS STEP AND SAVE YOUR CREATION NOW**
 
Activate your Bunny
Duplicate it
Now space them in layers
Rename them Bunny1 and Bunny2 (from bottom to top)
 
 
LEAVE THEM IN POSITION!
 
Turn the visibility off on all Bunnies
Edit / Copy Merged
 
Open Animation Shop and Paste as new Animation
 
Go back to PSP
Turn the visibility Bunny1
Edit / Copy Merged
 
In Animation Shop
Edit / Paste AFTER Current Frame
 
Back to PSP
Turn off Bunny1 and turn on Bunny2
Edit / Copy Merged
 
In Animation Shop
Edit / Paste After Current Frame
 
You should now have 3 Frames
 
Edit / Select All
Animation / Frame Properties
Set to 30
Go to your last frame
Animation / Frame Properties (again)
Set to 100
 
Finally save as a GIF and you're done!
 
Thank you for trying my tutorial!
 
::st!na::
 
 
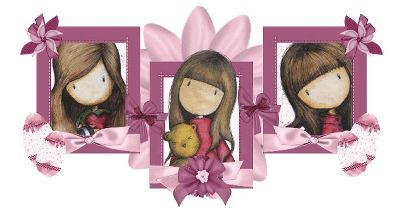
Below is a non-aminated version:
 

© Tutorial written by Stina on 3rd April 2009
All rights reserved