Please email me designed.by.stina@gmail.com with your creations. I'd love to see them.

Showing posts with label KiKeKa Designs. Show all posts

Tuesday, May 26, 2009

Lil Miss Muffet

 
Supplies
 
Scrap kit of choice - I am using "Tickle Me Emo" by Gina of KiKeKa Designs available from Exquisite Scraps
Tubes of choice - I am using the delightful work of Joel Adams which is available with a licence through CILM
**PLEASE DO NOT USE HIS ARTWORK WITHOUT THE PROPER LICENCE**
Mask of choice - I am using WSL_Mask41 by Chelle
Font of choice - I am using Haunting Attraction
Plugins: Xero Fritillary and Xenofex 2 Constellation
 
 
Ready? Let's begin...
 
 
Open a new 600 x 600 blank canvas flood-filled white
 
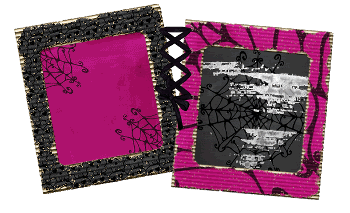
Paste Frame05 as new layer
Image > Rotate by 10 to the left
Resize by 45%
 
Paste Frame04 as new layer
Image > Rotate by 5 to the right
Resize by 45%
Position both Frames alongside one another
 
Paste an Eyelet ribbon or Stitches between the Frames to join them
 
Paste a paper of choice as new layer
Layers > Arrange > Send to Bottom
Image > Rotate 10 to the left
Resize by 33%
Position below the left Frame
 
Paste another paper of choice as new layer
Image > Rotate by 5 to the right
Resize by 33%
Position behind the right Frame
 
 
Paste a Flower of choice as new layer
Resize by 30%
Position in lower right
 
Paste another Flower of choice as new layer
Resize by 25%
Position overlapping first flower
 
Paste another Flower of choice
Resize by 25%
Position in lower left
 
Paste another Flower of choice
Resize by 30%
Position overlapping previous Flower
 
Paste Cloud as new layer
Resize by 35%
Position over one of the Frames
 
Paste Spider as new layer
Image > Rotate by 20 to the left
Resize by 25%
Position in upper right
Duplicate, then Layers > Merge > Merge Down
 
Paste your Tube as new layer
Resize as necessary
Position within right Frame
 
Duplicate and place one layer below Frame
Select the inside of your Frame
Selections > Modify > Expand by 10
Selections Invert
Delete on bottom tube layer
Deselect
 
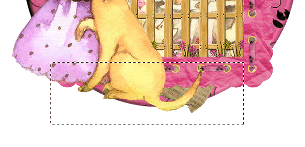
On top tube layer make a selection around the bottom part of your tube and delete
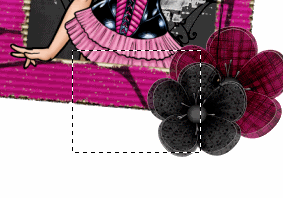
 
 
Paste second tube as new layer
ResiZe as necessary
Position in left Frame
 
Activate Spider tube we pasted earlier
Duplicate, the Image > Mirror
Resize by 75%
Position a the end of Miss Muffet's web
 
 
Paste Paper of choice as new layer
Layers > Arrange > Send to Bottom
 
Layers > New Mask Layer > From Image
Mask of choice
OK
Layers > Merge > Merge Down
Lower opacity to 50
 
Paste RustedWire as new layer
Image > Rotate by 20 to the right
Resize by 60%
Position behind right Frame
 
Crop to mask layer and resize
 
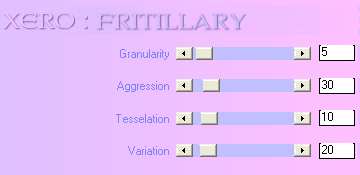
Effects > Plugins > Xero > Fritillary with the following settings:
 
 
Select your Text Tool and font of choice
I am using Haunting Attraction
 
Text colours are:
Foreground - #000000
Background - #eb3da3
 
Stroke width - 2.0
 
Type out your name
Objects > Align > Horizontal Centre in Canvas
Convert to raster layer
Apply drop shadow of choice
 
Finally, add your © copyright, licence and watermark, then save as a GIF or JPG and you're done!
 
 
** IF YOU WISH TO ANIMATE PLEASE FOLLOW THESE NEXT STEPS **
 
Activate the Mask Layer
Duplicate twice and rename Sparkle1, Sparkle2 and Sparkle3
 
Hide Sparkle2 and Sparkle3 activating only Sparkle1
 
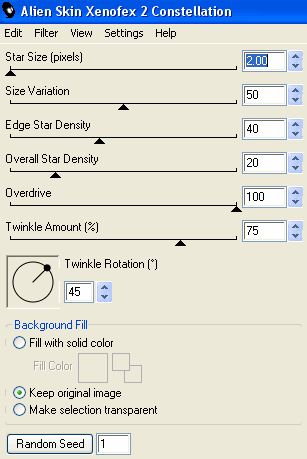
Effects > Plugins > Xenofex 2 > Constellation with the following settings:
 
 
Hide Sparkle1 and activate Sparkle2
Apply the Constellation effect, adjusting the Random Seed
 
Hide Sparkle2 and activate Sparkle3
Apply the Constellation effect again, adjusting the Random Seed once more
 
Hide Sparkle2 and Sparkle3 with only Sparkle1 visible
Edit > Copy Merged
 
Open Animation Shop
Edit > Paste as New Animation
 
Back to PSP
Hide Sparkle1 and activate Sparkle2
Edit > Copy Merged
 
In Animation Shop
Edit > Paste AFTER Current Frame
 
Back to PSP
Hide Sparkle2 and activate Sparkle3
Edit > Copy Merged
 
In Animation Shop
Edit > Paste AFTER Current Frame
 
Save as a GIF and you're done!
 
Thanks for trying my tutorial!
 
::st!na::
 
 
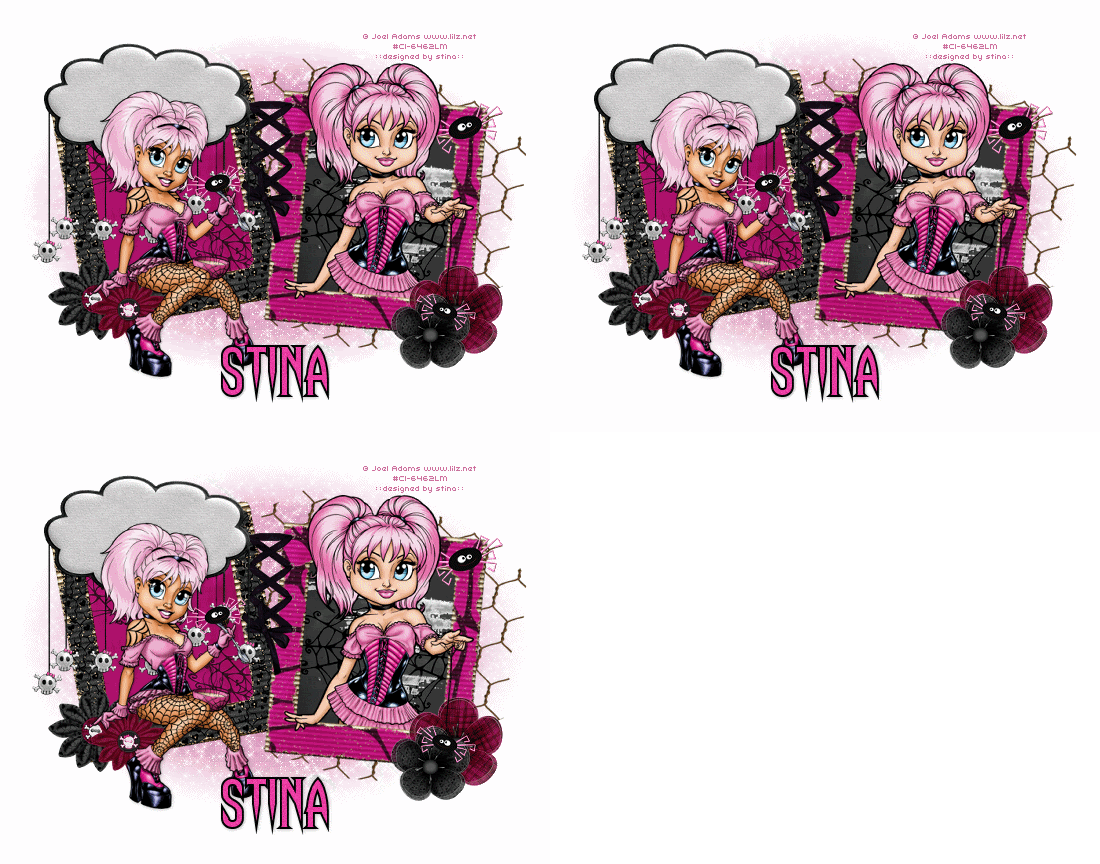
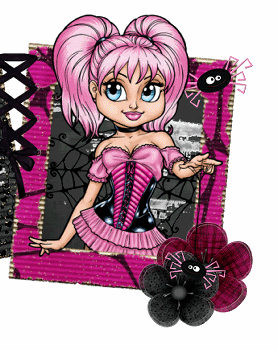
Here is a non-animated version:
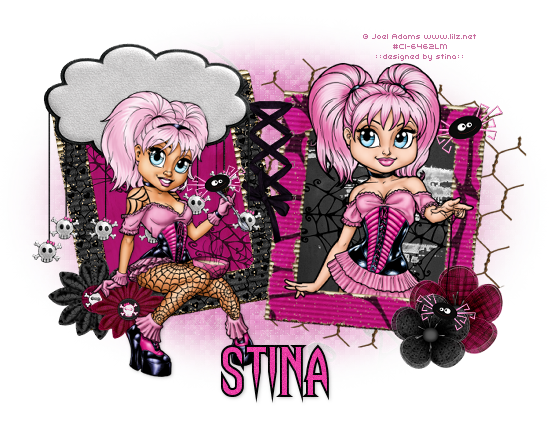


© Tutorial written by Stina on 25th May, 2009
All rights reserved

Friday, April 24, 2009

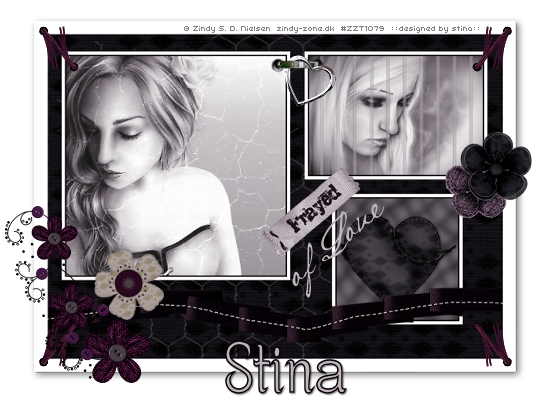
Frayed of Love

 
Supplies
 
Scrap kit of choice - I am using "Frayed of Love" by Gina of KiKeKa Designs available at Paradise 4 Scrappers
Images of choice - I am using the lovely artwork of Zindy Nielsen (one PTU and one free image) available from her store
Plugin: Xero Improver
Plugin: Filters Unlimited > Photo Aging Kit & Special Effects1
Plugin: Dreamsuite
Fonts of choice - I am using Baker Script and Centime
 
 
Ready? Let's go!
 
 
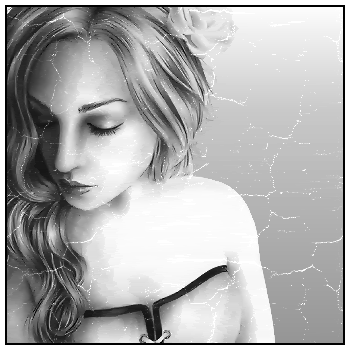
Open your image of choice (preferably square in size)
Resize down so that smallest side is 350
Image > Canvas Resize
Crop image so that image becomes 350 x 350
Edit > Copy
 
Open a new 350 x 350 transparent canvas
Selections > Select All
Edit > Paste into Selection
Deselect
 
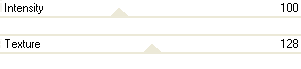
Effects > Plugins > Xero > Improver
Default settings
 
Effects > Plugins > IC Net Software > Filters Unlimited > Photo Aging Kit > Cracked Paper with the following settings:
 
 
Add new raster layer
Flood fill layer with #FFFFFF
Select All
Selections > Modify > Contract by 5
Delete
Selections > Modify > Contract by 2
Delete then deselect
 
Layers > Merge > Merge Visible
 
Minimise and we'll come back to it
 
 
Open another image of choice
Shift D to duplicate image then close off original
Resize so that the top side is 280
Image > Canvas Resize
Crop image to 280 wide and 195 high
 
Effects > Plugins > Xero > Improver
Default settings
 
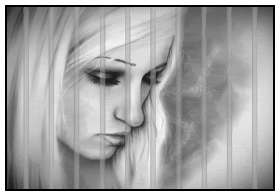
Effects > Plugins > IC Net Software > Filters Unlimited > Photo Aging Kit > Centrespot/Vignetting
 
Duplicate layer
 
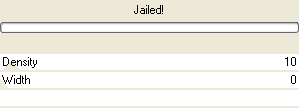
Effects > Plugins > IC Net Software > Filters Unlimited > Special Effects1 > Jailed! with the following settings:
 
 
Lower opacity of layer to 50
 
Add new raster layer
Flood fill layer with #FFFFFF
Select All
Selections > Modify > Contract by 5
Delete
Selections > Modify > Contract by 2
Delete then deselect
 
Layers > Merge > Merge Visible
 
Minimise and we'll come back to it
 
 
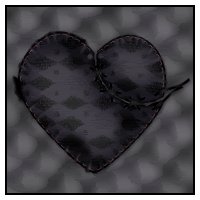
Open a new 200 x 200 transparent canvas
Open Paper12 and minimise
 
Select your Flood Fill Tool
Click on your Foreground colour and select Pattern
Find the Paper4 you just minimised
Flood fill canvas with your pattern
 
Adjust > Blur > Gaussian Blur with a radius of 5.00
 
Adjust > Hue & Saturation > Colourise
And set your Hue & Saturation BOTH to 0
 
Paste Heart1 as new layer
Resize by 38%
Apply a small drop shadow
 
Add new raster layer
Flood fill layer with #FFFFFF
Select All
Selections > Modify > Contract by 5
Delete
Selections > Modify > Contract by 2
Delete then deselect
 
Layers > Merge > Merge Visible
 
Minimise for now
 
 
Open a new 700 x 500 blank canvas with transparent background
 
Open Paper4 and minimise it
 
Select your Flood Fill Tool
Click on your Foreground colour and select Pattern
Find the Paper4 you just minimised
Flood fill canvas with your pattern
 
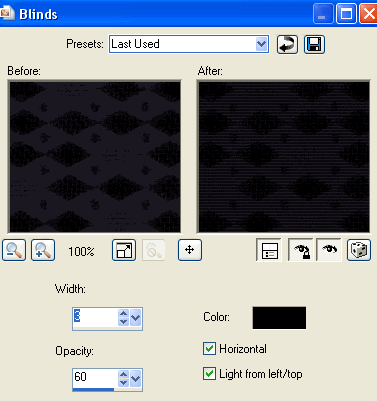
Effects > Texture Effects > Blinds with the following settings:
 
 
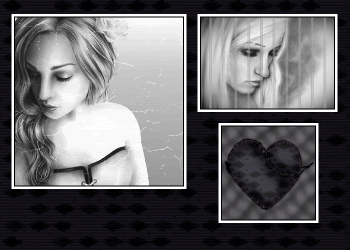
Activate your first image, then
Edit > Copy
Paste on your canvas as new Layer
Position toward the upper left
 
Activate your second image
Edit > Copy
Paste on your canvas as new layer
Position toward upper right
 
Activate your third image
Edit > Copy
Paste on your canvas as new layer
Position toward lower right
 
 
Hide background layer, then
Layers > Merge > Merge Visible
Unhide Background
 
Paste Wire1 as new layer
Adjust your Hue & Saturation BOTH to 0
Layers > Arrange > Move Down
Position Wire from top to bottom and up to the edge of your bottom image
Lower opacity to 55
 
Paste Ribbon1 as new layer
Position along the bottom
Duplicate layer
Adjust your Hue & Saturation BOTH to 0
Set blend mode to Multiply
Layers > Merge > Merge Down
 
Select All
Selections > Float
Selections > Defloat
You should now have "marching ants" around your ribbon
 
 
Add new raster layer
 
Open Ribbon2 and Edit > Copy
 
Then back on your canvas
Edit > Paste into Selection
Deselect
 
Merge Visible
 
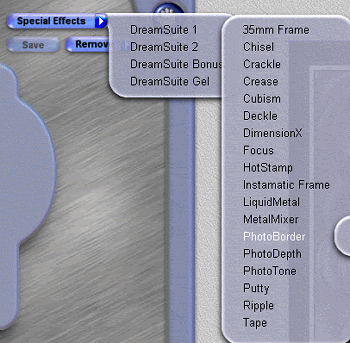
Effects > AutoFX Software > Dreamsuite > Special Effects > Dreamsuite 1 > Photo Border
OK
 
 
Paste Staple1 as new layer
Resize by 65%
Position between the two top images, joining them together
 
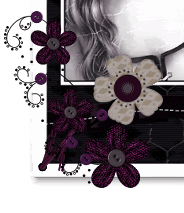
Paste Flowers1 as new layer
Resize by 45%
Position in lower left corner
Duplicate, then
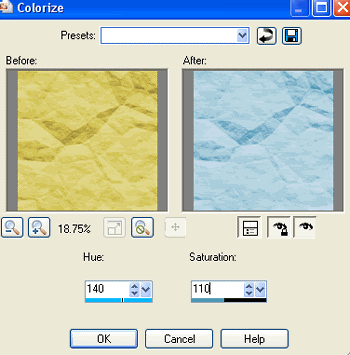
Adjust > Hue & Saturation > Colourise
Hue - 220
Saturation - 20
Set Blend mode to Multiply
Layers > Merge > Merge Down
 
 
Paste Flower4 as new layer
Resize by 28%
Position to the right in corner of image
 
Paste Flower2 as new layer
Resize by 25%
Adjust > Hue & Saturation > Colourise
Hue - 220
Saturation - 20
Duplicate, then set blend mode to Multiply
Layers > Merge > Merge Down
Position alongside first flower
Layers > Arrange > Move Down
 
Activate your main layer (the one with the images and frame)
Paste Eyelet1 as new layer
Image > Rotate by 50 to the right
Resize by 28%
Position in upper left corner
 
 
Duplicate, then
Image > Mirror
Layers > Merge > Merge Down
Duplicate again
Image > Flip
Layers > Merge > Merge Down
 
Eyelets now form a border
 
Duplicate layer again
Adjust > Hue & Saturation > Colourise
Hue - 220
Saturation - 20
Set blend mode to Multiply
Layers > Merge > Merge Down
 
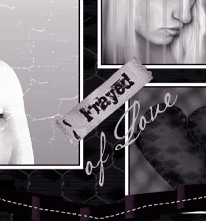
Paste Tag1 as new layer
Adjust > Hue & Saturation > Colourise
Hue - 220
Saturation - 20
Set blend mode to Multiply
Layers > Merge > Merge Down
 
Image > Rotate by 40 to the left
Resize by 45%
Position between all three images, overlapping each
 
Hide your Main layer again, then
Layers > Merge > Merge Visible
 
Unhide Main layer and duplicate
Adjust > Hue & Saturation > Colourise
Hue - 220
Saturation - 20
Lower opacity to 50
 
Add a new raster layer
Layers > Arrange > Send to Bottom
Flood fill white
 
Using your Selection Tool draw a selection around your tag ON the white border
Selections > Invert
 
Activate the colourised Main layer with the lowered opacity
Press delete (which will remove the darkened shadow)
Deselect
 
Layers > Merge > Merge Visible
Resize to your liking
 
Select your Text Tool and font of choice
I am using Baker Script
Choose a colour from your tag and set as Background colour
I am using #beb5bd
 
Type out the words "of Love" on a Vector layer
Image > Rotate by 40 to the left
Position then Convert to raster layer
 
 
Select another font of choice
I am using Centime
Choose another colour and set as your Foreground
 
Foreground - #080308
Background - #beb5bd
Stroke width - 1.5
 
Type out your name
Position to your liking and convert to raster layer
Apply a slight drop shadow:
H & V - 1
Opacity - 50
Blur - 2.00
Colour - #080308
 
Finally, add your © copyright, licence and watermark, then save as a GIF or JPG and you're done!
 
Thanks for trying my tutorial!
 
::st!na::
 
© Tutorial written by Stina on 24th April 2009
All rights reserved
Tuesday, April 7, 2009

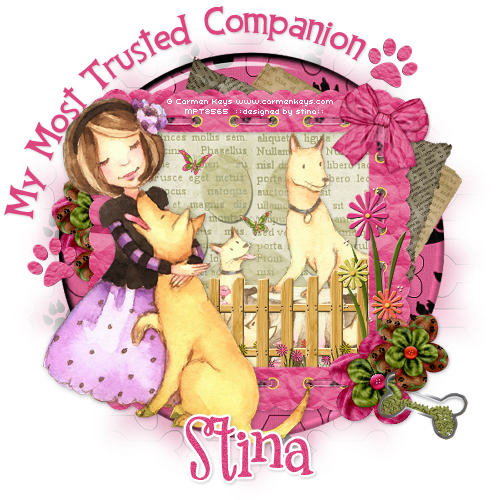
My Most Trusted Companion


This tutorial is dedicated with much love to my beloved Ciara and to the memory of Sheba - my most trusted companions

Supplies
 
Scrap kit of choice - I am using the gorgeous "Precious Pup" kit by Gina of KiKeKa Designs available from Paradise 4 Scappers
Tubes of choice - I am using the delightful artwork of Carmen Keys which can be purchased from CILM
WSL_Mask133 by Chelle available from her blog
Plugin: Alien Skin Eye Candy 5 Impact > Glass
Plugin: Xero Improver
Fonts of choice - I am usinf CCThingamajig and 2Peas Mister Giggles
 
 
Let's begin!
 
Open a new 600 x 600 blank canvas flood-filled white
 
Open Paper3 and minimise
 
Set your Preset Shape Tool to Ellipse
Open your Material Palette and find the Paper you just minimised and set your Palette to:
 
Foreground - null
Background - Paper3
 
Holding the Shift key draw out a circle
Objects > Align > Centre in Canvas
Convert to raster layer
 
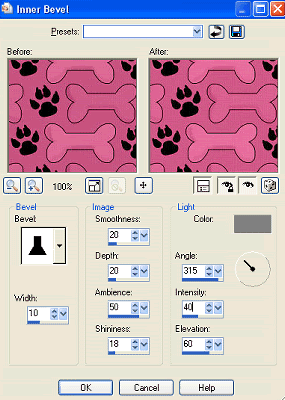
Effects > 3D Effects > Inner Bevel with the following settings:
 
 
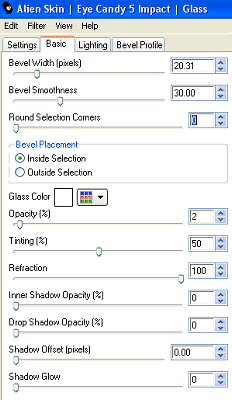
Then Effects > Plugins > Alien Skin Eye Candy 5 Impact > Glass with the following settings:
 
 
Paste Frame3 as new layer
Resize by 65%
 
Select in the inner area of the Frame
Selections > Modify > Expand by 10
Add a new raster layer
Paste Paper13 into Selection
Deselect
 
Layers > Arrange > Move Down
 
Paste Fence as new layer
Resize by 45%
Position along bottom of (and beneath) Frame
 
Paste a tube of choice as new layer
Resize as necessary
Layers > Arrange > Move Down
Position behind Fence and slightly to the right
 
With your Frame layer activated select inside the Frame again
Selections > Modify > Expand by 10
Selections > Invert
Delete then deselect
 
 
Paste your main tube of choice as new layer
Resize as necessary
Position to the left of Frame
 
Duplicate
Effects > Plugins > Xero > Improver with default settings
Then lower opacity to 60
 
Layers > Merge > Merge Down
 
Paste Newsprint1 as new layer below Frame
Image > Flip
Image > Rotate by 15 to the right
Resize by 55%
Position so that it protrudes slightly
 
Paste Newsprint2 as new layer
Image > Rotate by 35 to the right
Resize by 65%
Layers > Arrange > Move Down
Position behind first newsprint paper and Frame
 
 
Then make a selection along the bottom around the excess newsprint
 
 
Press delete then deselect
 
Paste Flowers1 as new layer
Resize by 85%
Position in lower right of Frame
 
Paste Flower1 (singular) as new layer
Resize by 30%
Position in lower right over Flowers
 
paste Flower2 as new layer
Resize by 25%
Position beside Flower1
 
Paste Bow2 as new layer
Image > Rotate by 15 to the right
Resize by 20%
Position in upper right
 
Paste Charm3 as new layer
Image > Mirror
Resize by 35%
Position in the lower right between the two Flowers
 
 
Paste Pawprint2 as new layer
Position in the Frame and move to the layer below the tube
Set your blend mode to Luminance
Lower opacity to 55
 
Paste Pawprint2 as new layer again
Image > Rotate by 35 to the left
Resize by 20%
Position to the left
Duplicate
Image > Mirror
Position to your liking
 
Paste Paper3 as new layer
Layers > Arrange > Send to Bottom
Layers > New Mask Layer > From Image
Locate WSL_Mask133
OK
Layers > Merge > Merge Group
Lower opacity to 50
 
Activate top layer
 
Select your Preset Shape Tool to Ellipse
Foreground - #000000
Background - null
 
Draw out a circle around your tag
 
Select your Text Tool and font of choice
I am using CCThingamajig
 
Choose a colour to complement your tag
On the curve of the circle type out your text
 
Open the Vector Layer in your Palette and hide the Ellipse
Convert to raster layer
Apply a small drop shadow
 
Select another font of choice
I am using 2Peas Mister Giggles
Type out your name and apply any effects you wish
Add a drop shadow
 
Finally, add your © copyright, licence and watermark the save as a GIF or JPG and you're done
 
Thanks for trying my tutorial!
 
::st!na::
 

© Tutorial written by Stina on 7th April 2009
All rights reserved
Monday, March 30, 2009

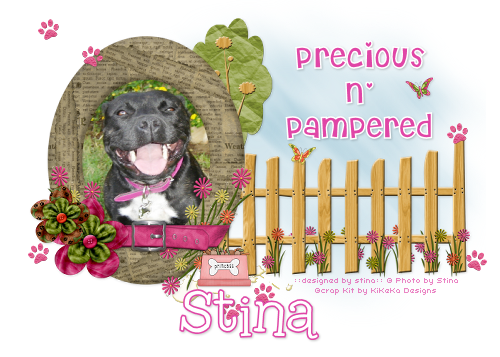
Precious n' Pampered

 
Supplies
 
Scrap kit of choice - I am using the delightful "Precious Pup" kit by KiKeKa Designs aka Crafted by Gina which is available from Paradise 4 Scrappers
Tube or image of choice - I am using one of my own of my own "precious" pup
Becky_Mask023
Fonts of choice - I am using Cheri and 2Peas Typo


~ Step 1 ~
 
Open a new 700 x 500 blank canvas flood-filled white
 
Paste Frame6 as new layer
Resize by 60%
Position slightly to the left
 
Paste Fence as new layer
Resize by 50%
Position to the right of Frame
Layers / Arrange / Move Down
 
Paste Tree1 as new layer
Resize by 40%
Position behind Frame so that it protrudes slightly
 
 
Paste Puddle1 as new layer
Resize by 30%
Position below fence to the right of the Frame
 
Paste Flower1 as new layer
Resize by 30%
Position on the lower left corner of Frame
 
Paste Flower2 as new layer
Resize by 22%
Position alongside first flower
 
 
Paste Butterfly1 as new layer
Resize by 10%
Position above Fence
 
Paste Butterfly3 as new layer
Resize by 10%
Image / Mirror
Position above Fence also
 
Add any other elements you like to make it your own
 

~ Step 2 ~
 
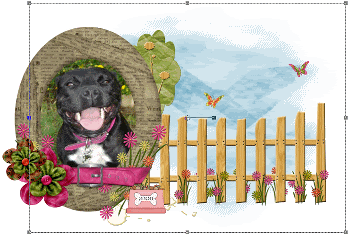
Now, let's add our photo, image or tube of choice
 
If you are using a tube, you should add a nice paper to the Frame for a background
 
So first choose an image or tube to use
Since I am using one of my own photos I will refer to this as "image"
 
Now, select the area inside the Frame with your Magic Wand
Selections / Modify / Expand by 10
Paste your image as new layer
Resize as necessary to fit nicely within Frame
Selections / Invert
Delete and deselect
 
Paste Paper9 as new layer
Layers / Arrange / Send to Bottom
Adjust / Hue & Saturation / Colourise with the following settings:
 
 
Then Layers / New Mask Layers / From Image
Locate Becky_Mask023
OK
Image / Mirror
 
Select your Pick Tool and use the Nodes to adjust the size and placing of the mask
 
 
Then Adjust / Blur / Motion Blur
Angle - 140
Strength - 100
Repeat
Lower opacity to around 70
 
Activate top layer
Paste Pawprint2 as new layer
Image / Rotate by 20 to the left
Resize by 10%
Duplicate several times, Mirror and position to your liking around tag
 
Crop and resize
 

~ Step 3 ~
 
Choose a colour from your scrap and set your Material Palette with these settings:
Foreground - #FFFFFF
Background - #e046a6 (or colour from your scrap)
 
Select your Text Tool and font of choice
I am using Cheri
Stroke width - 1.5
Size - 30
Align centre
 
Type in your text
Place in position
Convert to raster layer
 
Apply a drop shadow:
H & V - 1
Opacity - 20
Blur - 3.00
Colour - #000000
 
Add your name in same or other font
 
Finally add your © copyright, licence and watermark
 
Save as GIF or JPG and you're done!
 
Thanks for trying my tutorial
 
::st!na::
 

© Tutorial written by Stina on 30th March 2009
All rights reserved