Please email me designed.by.stina@gmail.com with your creations. I'd love to see them.

Friday, February 27, 2009

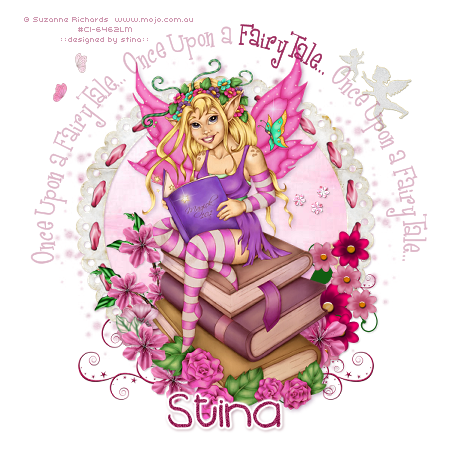
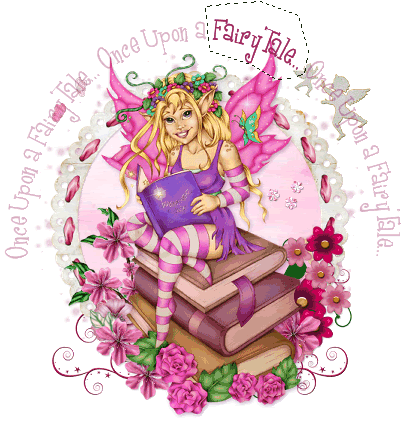
Once Upon a Fairytale...

 
Supplies
 
Scrap kit of choice - I am using the lovely "All About Love" by BabyCakes Scraps which can be purchased from her blog, Creative Scraps, Cotton Candy Kreations and Aussie Scraps (full list available on her blog)
Tube of choice - I am using the delightful artwork of Suzanne Richards which can be purchased from CILM
**PLEASE DO NOT USE HER ARTWORK WITHOUT THE APPROPRIATE LICENCE**
Frame by Cinnamon Scraps from her "All About Love" kit
WSL_Mask1 by Chelle
Fonts of choice - I am using Girls Are Weird and 2Peas Blueberry Pie
Plugin: Eye Candy 4000 Gradient Glow (optional)
 
 
~ Step 1 ~
 
Open a new blank 600 x 600 canvas flood filled white
 
Paste AllAboutLoveFrame as new layer
Resize by 65%
With your magic wand click inside the frame
Selections / Modify / Expand by 10
Paste Soft Pink Paper as new layer
Move below Frame
Selections / Invert
Delete
Deselect
 
Duplicate and set blend mode to Multiply
 
Paste FancyDoodle as new layer
Resize by 50%
Move below Frame
 
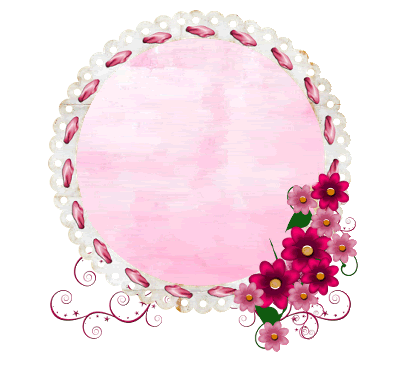
Paste ClusterFrame as new layer
Resize by 30%
With your Eraser Tool carefully erase out ALL PARTS of the frame - you may have to zoom in to see better
Position to the lower right


~ Step 2 ~
 
Paste your tube as a new layer
Resize as necessary
Position in the centre of frame
 
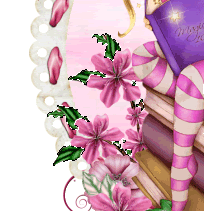
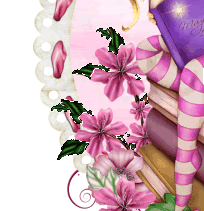
Paste BlossomWithLeaves as new layer
Resize by 25% then Image / Mirror
Position to the left
 
Paste PrettyPinkFlower as new layer
Resize by 15%
Position to the left behind flower and books
 
Paste BlossomBranch as new layer
Image / Rotate by 20 to the right
Resize by 40%
Position tucked behind tube and flowers
 
Select your magic wand with the following settings:
 
 
Carefully select inside the dark green areas of the leaves on the branch (zoom in for a better look if you prefer)
When each of the desired areas have been selected, go to
Layers / Promote Selection to Layer
Deselect
Set your blend mode to Screen and duplicate


Paste Cluster as new layer
Resize by 50% and position to the right in the frame
 
Paste DoubleWings as new layer
Resize by 20% twice
Position to the upper left
 
Paste PinkDoubleWings as new layer and repeat resizing as above
Image / Mirror and position alongside first set of wings to the left
 
Paste LargeCupid as new layer
Resize by 40% twice
Position in upper right
 
Duplicate then resize by 50%
Image / Mirror and position with other cupid
Lower the opacity of both these layers to 60
 
Apply slight drop shadows to your layers
Then crop and resize
 

~ Step 3 ~
 
Activate your background
Paste SpongeTexturePaper as new layer
 
Layers / New Mask Layer / From Image
Locate WSL_Mask1
SOurce Luminance
OK
 
In your Layer Palette locate the Mask Layers
Click on the + to open the Group
Activate the actual Mask layer itself
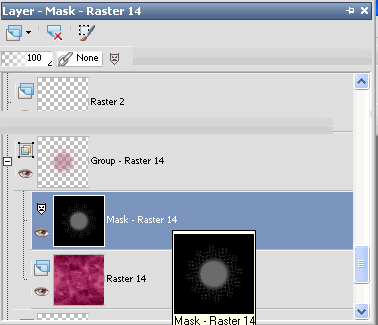
 

Resize by 105%
Then Layers / Merge / Merge Group
 
Select your Preset Shapes Tool with your foreground coloured and background null
Choose Ellipse and draw out a circle around your tag
 
Select your Text Tool and choose a font
On the curve type out "Once upon a FairyTale..." or anything you choose
 
In your layer palette open the Vector Layer and close off the Ellipse
Convert to raster layer
Lower the opacity of this layer to about 35
 
Grab your Freehand Tool and draw around one of the words that stand out in the text
Layers / Promote Selection to Layer
You will see this layer revert to its normal opacity and therefore stands out from the rest of the text
 

Deselect
 
Select another font, type out your name and add any effects you wish
(I used some Noise, Gradient Glow on my usual settings and a slight drop shadow)
 
Add your © copyright, licence and watermark then save as a GIF or JPG and you're done!
 
Thanks for trying my tutorial
 
::st!na::
 

© Tutorial written by Stina on 26th Febraury 2009
All rights reserved
 

Thursday, February 26, 2009

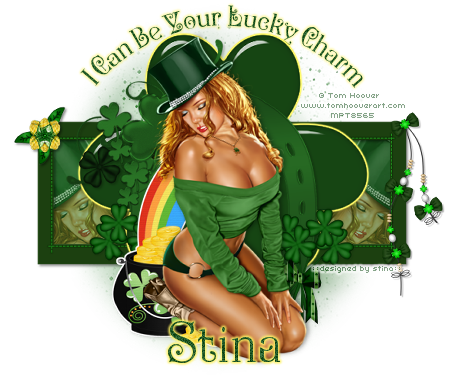
I Can Be Your Lucky Charm

 
Supplies
 
Scrap kit of choice - I am using the lovely "Luck O the Irish" by Rachelz Expressionz which can be purchased from Cotton Candy Kreations
Tube of choice - I am using the artwork of Tom Hoover which can be purchased from My PSP Tubes
**PLEASE DO NOT USE HIS ARTWORK WITHOUT THE APPROPRIATE LICENCE**
Becky_Mask009 here
Plugin: Alien Skin Eye Candy Impact/Glass
Plugin: Eye Candy 4000/Gradient Glow
Font of choice - I am using P22 Kilkenny
 
 
~ Step 1 ~
 
Open a new blank 600 x 600 canvas flood filled white
 
Now we are going to make our own shamrock
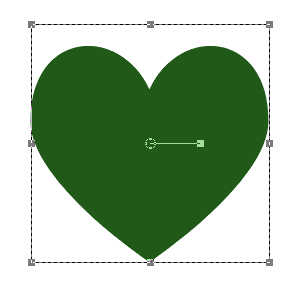
So to start select your Preset Shapes Tool on Heart
 
Set your Background to #225a28, Foreground to null
 
Draw out a heart on your canvas
Objects / Align / Horizontal Centre in Canvas
(just to make sure it is centred)
 
 
KEEP AS VECTOR LAYER
 
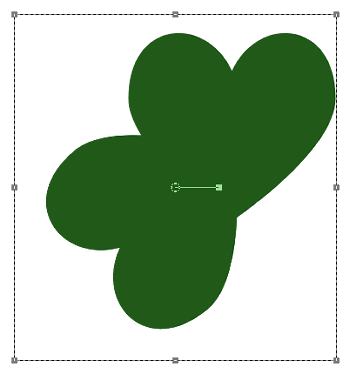
Duplicate then Image / Rotate by 130 to the left
Position slightly to the left
 
 
Duplicate again then Image / Mirror
Convert each layer to raster layer
 
Now we will make the stem
 
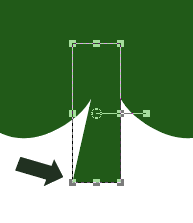
Select your Preset Shapes Tool again in Rectangle
Same colour settings
Draw out a rectangle from the bottom centre of your shamrock about the size of a stem
 
Now hold your shift key and pull the bottom left node slightly to the left
Then convert to raster layer
 
 
Hide your background and
Layers / Merge / Merge Visble
 
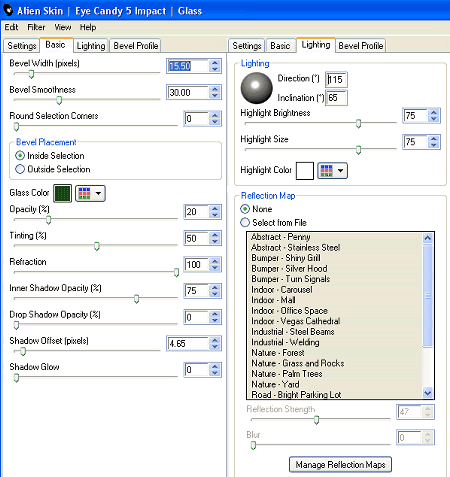
Effects / Plugins / Alien Skin Eye Candy Impact / Glass with the following settings:
 

Glass colour the same that you used to make the shamrock
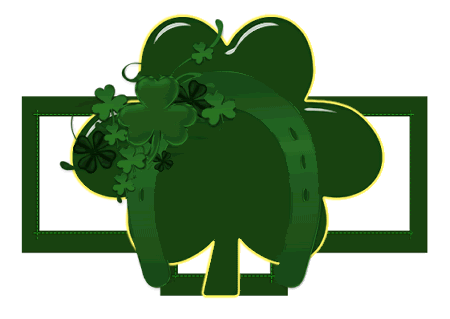
Now this is what you should have:
 

~ Step 2 ~
 
Now Paste TripleFrame02 as a new layer
Move it to below your shamrock
Resize by 45% and place in position
We'll leave that for the moment and come back to it later
 
Paste LuckyShoe1 as new layer
Position centrally over you shamrock
(it will automatically paste slightly off-centre because of the shamrock embellishments)
 
Apply a drop shadow:
H & V - 1
Opacity - 30
Blur - 5.00
Colour - #000000
 
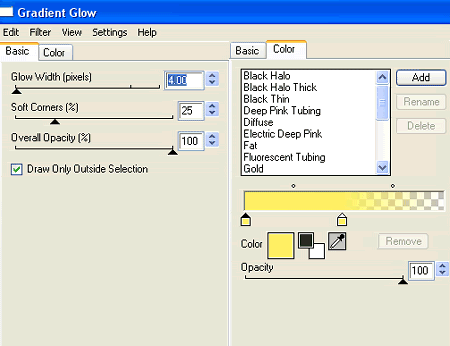
Effects / Plugins / Eye Candy 4000 / Gradient Glow with the following settings:
 
 
Colour is a Gold setting: #fff263


Paste CloverSpray5 as a new layer
Resize by 35%
Position to the bottom left of the Shoe
Dupicate then Image / Mirror
 
Paste Charm1 as new layer
Resize by 25%
Position to the right
 
Paste Flower3 as new layer
Resize by 30% then Image / Mirror
Position on the upper left of the frame
 
Now Add the same drop shadow as above to CloverSprays, Charm and Flower
 
Now let's add our tube
Paste as new layer and resize as nececcary
Position in the centre
 
Add a drop shadow:
Vertical: -1
Horiztontal: 2
Opacity: 50
Blur: 10.00
Colour: #000000
 
Paste Sticker5 as new layer (this is the pot of gold with rainbow)
Resize by 40%
Position to the left and behind your tube
 
 
~ Step 3 ~
 
Now let's go back to our frame
 
Paste your tube again and place below left frame
Duplicate then Image / Mirror
Position in right frame opposite
 
Activate tube in left frame then
Layers / Merge / Merge Down
 
Activate Frame layer
With your magic wand click inside the left and right frames
Selections / Modify / Expand by 10
 
Paste StPatrick6 paper as new layer
Move below the frame
Selections / Invert
Delete on Paper layer
Delete on tube layer
Deselect
 
Lower opacity to 50
 
Add a drop shadow to your Frame layer
H & V - 1
Opacity - 50
Blur - 5.00
Colour - #000000
 
 
~ Step 4 ~
 
Now we want to Crop our tag
First Image / Canvas Resize to 600 wide x 500 high
 
Activate your Background layer
 
Paste the StPatrick6 paper as a new layer
Layers / New Mask Layer / From Image
Locate Becky_Mask009
Source luminance
OK
 
Resize your tag to your liking
 
Select your Preset Shapes Tool again and choose Ellipse
Hold your Shift Key down and draw out a circle
Objects / Align / Centre in Canvas
 
Select your Text Tool
Colour - #225a28
Choose your font (I am using P22 Kilkenny)
 
Position over the curve of the cirle till you see the Text Tool curve
Type out your text
"I Can Be Your Lucky Charm"
or anything you like
 
In your layer palette open the Vector Layer and hide the Ellipse
Convert to raster layer
 
Adjust / Add/Remove Noise / Add Noise
Gaussian checked
Noise - 15
Monochrome checked
 
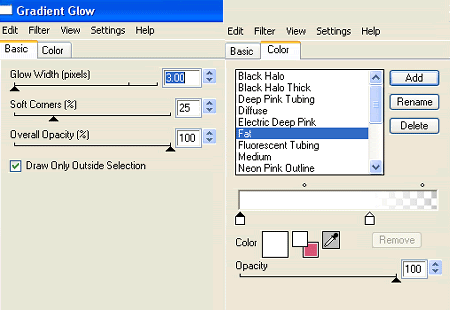
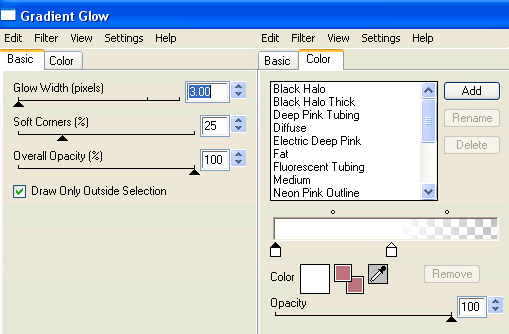
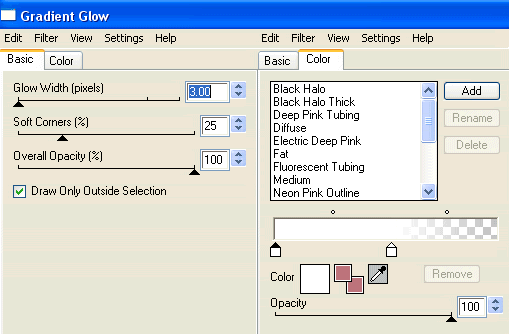
Effects / Plugins / Eye Candy 4000 / Gradient Glow
Glow width - 3.00
Soft corners - 25
Opacity - 60
Setting - Medium
Colour - #fff263
 
Choose another font for your name
Apply the same Gradient Glow as above
BUT CHANGE THE OPACITY TO 100!!!
 
Add your © copyright, licence and watermark then save as a GIF or JPG and you're done!
 
Thanks for trying my tutorial
 
::st!na::
 

© Tutorial written by Stina on 26th Febraury 2009
All rights reserved
 

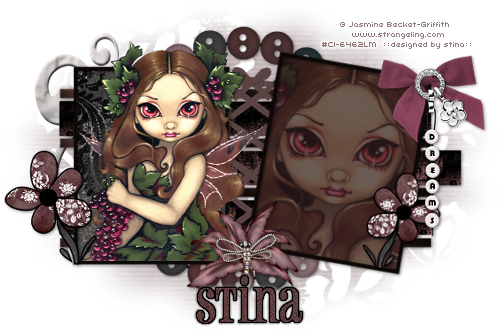
Fairy Dreams

 
Supplies
 
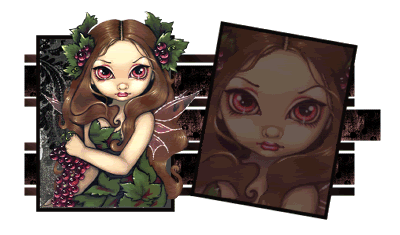
Scrap kit of choice - I am using the lovely "Fairy Dreams" kit by Melisa's Scraps which you can purchase from Cotton Candy Kreations and Creative Scraps
Tube of choice - I am using the delightful artwork of Jasmine Becket-Griffith which can be purchased from CILM
WSL_Mask33 by Chelle
Font of choice - I am using Pharmacy
Plugin: Eye Candy 4000 Gradient Glow
 
 
~ Step 1 ~
 
Open a new blank canvas 600 x 400 flood filled white
 
Open Paper1 and resize 200 x 200
Minimise it and select your Preset Shapes Tool
Set it to Rectangle
 
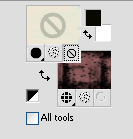
In your Materials Palette set your Foreground to null and your background to the Paper you just resized
 
 
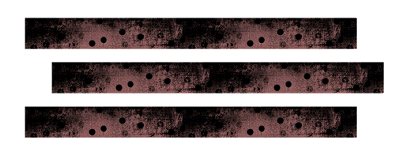
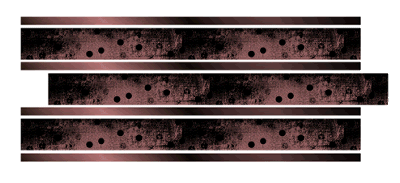
Draw out a long rectangle about 400 pixels long and 50 high
Objects / Align / Centre in Canvas
Convert to raster layer
 
Duplicate and position slightly down and across
 
Duplicate again and position down and in line with the top rectangle
 

Now with your Dropper Tool select two colours from the paper pattern you just drew out
Set them to your Foreground and Background
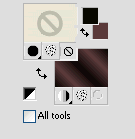
Select your background to Foreground/Background Gradient with the following settings:
 

Make sure your Foreground is set to Null
 
 
Draw out a rectangle the length of the first one but much thinner
Position directly above the top rectangle
Convert to raster layer
 
Image / Rotate by 90 degrees (either way)
 
**IMPORTANT** DO NOT MOVE - LEAVE IN PLACE
 
Effects / Plugins / Graphics Plus / Cross Shadow
Default settings
Repeat
 
Image / Rotate  by 90 degrees back again
 
Duplicate and move between next rectangles
Duplicate again and repeat step
Duplicate again and place last one at the bottom


~ Step 2 ~
 
Select your Preset Shape Tool again on Rectangle
Set your Foreground to black and your Background to null
Stroke width - 5.00
 
Draw out a rectangle which will be our frame
Use the nodes to size it up or down
Convert to raster layer
 
Duplicate then Image / Rotate by 10 to the right
Position first frame to the left and the second to the right

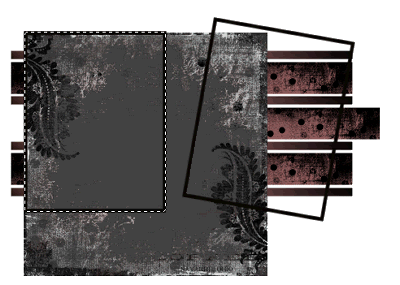
With your magic wand click inside the first frame
Selections / Modify / Expland by 3
 
Now open Paper6 and resize to 300 x 300
Paste as new layer on your canvas and position along the left edge of your frame
 
 
Selections / Invert
Delete
 
Add a new raster layer
 
Using your magic wand click inside your second frame
Selections / Modify / Expand by 3
Flood fill new layer with a colour from the either from your tube or the kit
Deselect
 
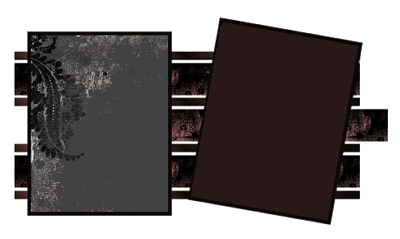
Your canvas should now look something like this:


~ Step 3 ~
 
You've made your template and frames - now let's decorate!! *s*
First let's add our tubes!
 
Paste your tube of choice as new layer
Resize as necessary
Position along the bottom edge of frame but so top and side overhangs
 
Paste your tube again
Image / Rotate by 10 to the right
Position under second frame to your liking
Use your magic wand to click inside frame
Selections / Modify / Expand by 3
Selections / Invert
Activtate tube layer
Delete
Deselect
 
 
Paste Frame1 as new layer
Resize by 50%
Layers / Arrange / Send to Bottom and place behind template and frames in the centre
 
Paste FlowerPatch1 as new layer
Resize by 30% and place along the edge of left frame
Duplicate then Image / Mirror
 
Paste Bow1 as new layer
Resize by 50% then Image / Mirror
Place in the upper right frame
Duplicate then set blend mode to Soft Light
 
Paste DreamsText1 as new layer
Resize by 20%
Adjust / Sharpness / Unsharpen Mask
Radius - 1.00
Strength - 100
Clipping - 4
OK
 
Position over the centre of the bow
 
Paste Flower5 as new layer
Resize by 35% and place in centre between the two frames
 
Add any other elements you wish to personalise your creation
 
Apply some drop shadows to your elements
 

~ Step 4 ~
 
Paste Paper3 as new layer
Layers / Arrange / Send to Bottom
 
Layers / New Mask Layer / From Image
Locate WSL_Mask33
Source luminance
OK
 
Layers / Merge / Merge Group
 
Choose a nice font to type out your name
Apply a Gradient Glow in Black
and a drop shadow in white
 
Add your © copyright, licence and watermark
Save as a GIF or JPG and you're done!
 
Thanks for trying my tutorial
 
::st!na::
 

© Tutorial written by Stina on 25th February 2009
All rights reserved
 

Wednesday, February 25, 2009

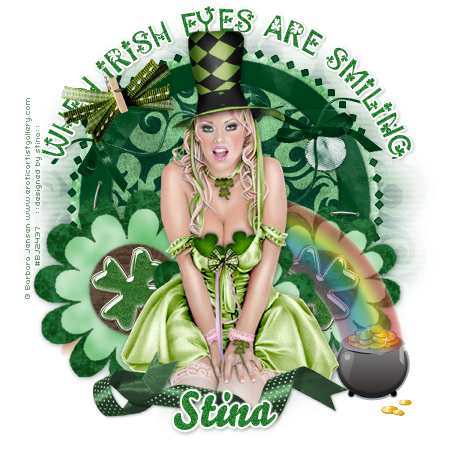
When Irish Eyes are Smiling

 
Supplies
 
Scrap kit of choice - I am using "Just My Luck" by Pimp'd Designs which can be purchased from Paradise 4 Scrappers
Tube of choice - I am using the lovely artwork of Barbara Jensen which can be purchased from her site
Template #20 by Pookers Creations
WSL_Mask33 by Chelle
Fonts of choice - I am using PattyDay and Bello Script (which are pay fonts)
Plugin: Eye Candy 4000 Gradient Glow
 
 
~ Step 1 ~
 
Open Pooker's Template and resize canvas
Image / Canvas Resize 600 x 600
Activate Background layer and flood fill excess white
 
With your magic wand click inside Large circle layer
Selections / Modify / Feather by 2
Paste PP05 as new layer
Resize by 70%
Selections / Invert
Delete
Deselect
 
Delete Large circle template layer
 
Click inside Medium circle layer
Selections / Modify / Feather by 2
Paste PP01 as new layer
Resize by 70%
Selections / Invert
Delete
Deselect
 
Delete Medium circle template layer
 
Click inside Small circle layer
Selections / Modify / Feather by 2
Paste PP07 as new layer
Resize by 65%
Selections / Invert
Delete
Deselect
 
Delete Small circle template layer
 
Add a drop shadow to the last two layers:
H & V - 1
Opacity - 50
Blur - 10.00
Colour - #223324
 
Activate Diamond Frame layer
Selections / Float
Selections / Defloat
Selections / Modify / Feather by 2
Paste PP01 as new layer
Selections / Invert
Delete
Deselect
Layers / Merge / Merge Down
Duplicate
 

~ Step 2 ~
 
Now we'll work on the flowers
 
Click inside Largeflowerset1
Selections / Modify / Feather by 2
Paste PP04 as new layer
Selections / Invert
Delete twice
Deselect
 
Repeat with Largeflowerset 2 & 3
 
Now click inside Smallflowerset1
Selections / Modify / Feather by 2
Paste PP05 as new layer
Adjust / Blur / Gaussian Blur
Radius - 5.00
 
Selections / Invert
Delete twice
Deselect
 
Repeat with Smallflowerset2 & 3
 
Now click inside Flowercircle1
Selections / Modify / Feather by 2
Paste PP10 as new layer
Selections / Invert
Delete ONCE
Deselect
 
Repeat with Flowercircle 2 & 3
 
Delete Smallflower template sets and flower circle layers
**KEEP LARGE ONES IN TACT**
 
Add a drop shadow to each of the layers:
H & V - 1
Opacity - 50
Blur - 10.00
Colour - #223324
 
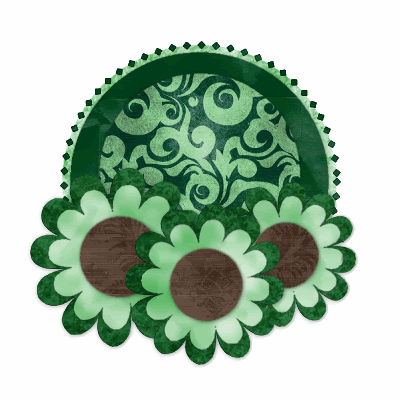
Now you should have something like this:
 
 
~ Step 3 ~
 
Paste Shamrock-01 as new layer
Resize by 50%
Position within the small brown circle layer
Duplicate then Image / Mirror
Position in opposite flower
 
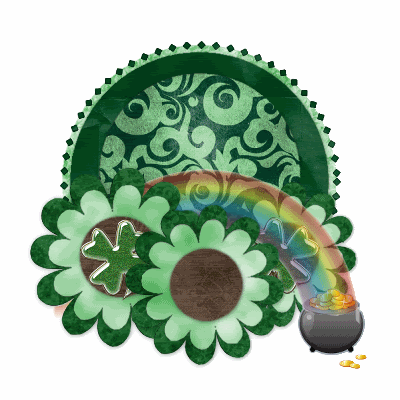
Paste Pot-o-gold as new layer
Position to the right
 
Paste Rainbow as new layer
Resize by 80%
Position with one end on Pot of Gold
 
Activate the Large Flower layer on the left
With your magic wand click the inside the  flower
Activate the middle large flower layer and click inside
 
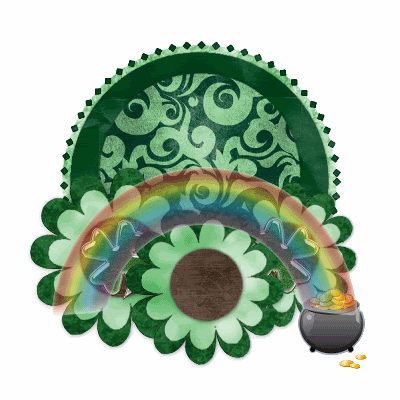
Now activating each layer hit delete to eliminate the  rainbow so it looks as though it is going behind the flowers
 
Paste Green-Ribbon-Bows as new layer
Resize by 90% and position across tag with the bows "joining" the layers

Move this layer below the Rainbow
 
Paste Ribbon-clipped as new layer
Resize by 50%
Position in upper left
Duplicate then blend mode to Soft Light
Layers / Merge / Merge Down
 
Paste your tube as a new layer
Resize if necessary
Add a drop shadow:
H & V - 1
Opacity - 50
Blur - 10.00
Colour - #223324
 
Paste Ribbon-03 as new layer
Image / Rotate by 20 to the left
Resize by 55%
Position at the bottom of the tube
 
With your magic wand click outside of the ribbon
Activate the tube layer and erase the bottom part of the tube protruding below the ribbon
 
Paste Staple-02 as new layer
Resize by 45%
Position to the right over the flower and a background layer
Duplicate then Image / Rotate 80 to the left
Position over the left flower and background
 
Paste Trash-tag as new layer
Image / Rotate by 20 to the left
Resize by 25%
Position beneath the Green Ribbon and Bows layer
Add a drop shadow:
H & V - 1
Opacity - 60
Blur - 5.00
Colour - #223324
 
Crop and resize
 

~ Step 4 ~
 
Activate white background layer
Paste PP07 as new layer
 
Layers / New Mask Layer / From Image
Locate WSL_Mask33
Source luminance
OK
 
Layers / Merge / Merge Group
 
Paste PP01 as new layer
Layers / New Mask Layer / From Image
Locate WSL_Mask33 again
Source luminance
OK
 
Layers / Merge / Merge Group
 
Lower the opacity of this layer to around 60
 
Select your Preset Shape Tool on Ellipse
Holding down your shift key draw out a circle
around the outer layer of your tag
 
Select your Text Tool on a font of your choice
I am using Patty Day
 
Foreground - null
Background - #225a28
 
Position your Text Tool over the circle and type out your text
Position to your liking
In your layer palette open Vector layer
Hide Ellipse and the convert to raster layer
 
Effects / Plugins / Eye Candy 4000 / Gradient Glow with the following settings:
 

Add a drop shadow:
H & V - 1
Opacity - 30
Blur - 3.00
Colour - #225a28
 
Repeat similar effect in either the same or a different font for your name
Before converting to raster layer
Objects / Align / Horizontal Centre in Canvas
Then convert to raster layer and continue same steps
 
Add your © copyright, licence and watermark and you're done
 
Thank you for trying my tutorial
 
::st!na::
 

© Tutorial written by Stina on 25th February 2009
All rights reserved
 

Honey Bee


Supplies
 
Scrap kit of choice - I am using the delightful mini kit "Beautiful Day" by Connie's Creative Chaos which can be purchased from Creative Scraps
Tube of choice - I am using the lovely artwork of Rion Vernon and PinUpToons which can b e purchased from CILM
**PLEASE DO NOT USE HIS ARTWORK WITHOUT THE APPROPRIATE LICENCE**
Becky_Mask023 (supplied)
tp_tiger Gradient (supplied)
Plugin: Eye Candy 4000 Gradient Glow
 
My Supplies here
 
Place the tp_tiger gradient into your Gradients folder
and your Mask into your Masks folder
 
 
~ Step 1 ~
 
Open a new blank canvas 600 x 600 flood filled white
 
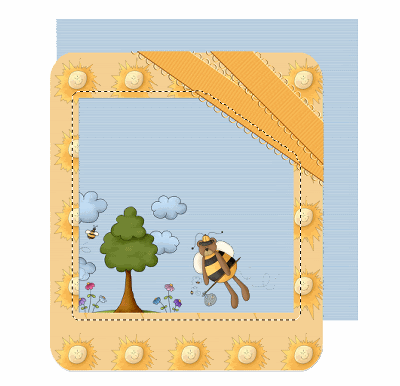
Paste BDFraming2 as new layer (leave in position)
With your magic wand click inside the frame
Selections / Modify / Expand by 10
 
Paste BDPaper04 as new layer
Resize by 50% and move into desired position
 
 
Selections / Invert
Delete
Deselect
 
Add a drop shadow to your frame:
H & V - 1
Opacity - 25
Blur - 10.00
Colour - #000000
 

~ Step 2 ~
 
Paste your tube as new layer
Resize if necessary
Position to the centre of the frame
The clouds and tree should be somewhat visible behind your tube
 
Add a drop shadow:
H & V - 3
Opacity - 25
Blur - 10.00
Colour - #000000
 
Paste Beehive1 as new layer
Resize by 65%
Position in lower corner of frame alongside your tube
 
With your Freehand Tool draw along one of the petals of your tube
Selections / Modify / Feather by 2
Hit delete once or twice
Deselect
 
Paste Hearts1 as new layer
Resize by 50%
Position in the upper right corner of the frame
Duplicate
 
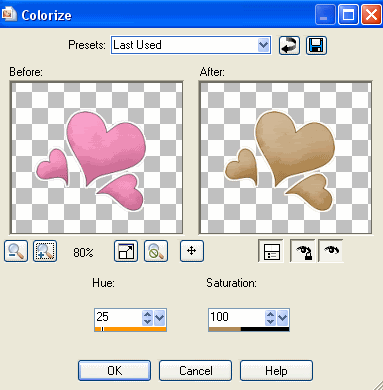
Adjust / Hue & Saturation / Colourise with the following settings:
 
 
Set the blend mode to Overlay or Hard Light whichever you prefer
 
Activate original heart layer and apply a drop shadow:
 
Veritcal - 0
Horizontal - 2
Opacity - 15
Blur - 10.00
Colour - #000000
 

Paste some bees as new layers
Resize as necessary
Duplicate
Image / Mirror then resize slightly once again
 
Apply a slight drop shadow
 
Crop and resize


~ Step 3 ~
 
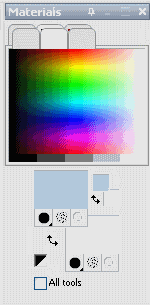
With your Dropper Tool select a colour from your tag by left clicking anywhere on that colour
 

The colour should now be your foreground in your Materials Palette
 
 
Activate your white background layer
Add a new raster layer
Flood will with your foreground colour by left clicking
 
Layers / New Mask Layer / From Image
Locate Becky_Mask023
Source luminance
OK
 
Layers / Merge / Merge Group
 
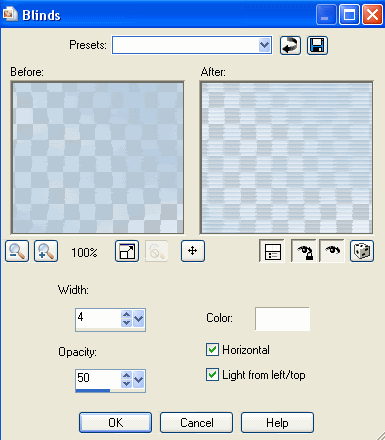
Effects / Texture Effects / Blinds with the following settings: 


~ Step 4 ~
 
Select your Text Tool and font of choice - a flowery font would look nice
I am using 2Peas Groovy Bloom
 
Foreground - #000000 (Black)
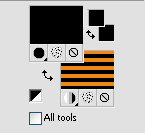
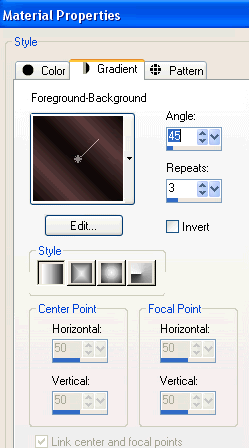
Background - Tiger Gradient
 
With the following settings:
 

Stroke width - 1.00
 
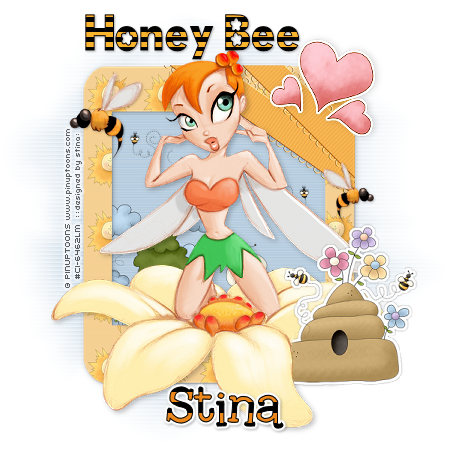
Type out the words Honey Bee
Apply a slight drop shadow
Duplicate
Set blend mode to Screen then lower opacity to 70
 
Change the number of repeats in the Material Properties to 3
 
Choose another font and type out your name
Objects / Align / Horizontal Centre in Canvas
Convert to raster layer
 
Effects / Plugins / Eye Candy 4000 / Gradient Glow with the following settings:
 

Add a drop shadow:
H & V - 1
Opacity - 30
Blur - 3.00
Colour - #000000
 
Add your © copyright, licence and watermark and you're done!
 
Thank you for trying my tutorial
 
::st!na::
 

© Tutorial written by Stina on 25th February 2009
All rights reserved
 

Monday, February 23, 2009

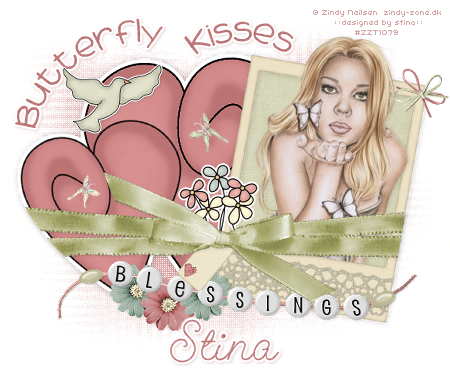
Butterfly Kisses


Supplies

Scrap kit of choice - I am using "Heavenly Inspirations" by DMK Designs which can be purchased at Creative Scraps
Tube of choice - I am using the lovely artwork of Zindy Neilsen which can be purchased from her store
**PLEASE DO NOT USE HER ARTWORK WITHOUT THE APPROPRIATE LICENCE**
WSL_Mask81 by Chelle which can be downloaded from her blog
Fonts of choice - I am using 2Peas Sunshine and GeeoHhmk
Plugin: Penta.com / Color Dot
Plugin: Eye Candy 4000 Gradient Glow (optional)


~ Step 1 ~

Open a new blank canvas 600 x 600 flood filled white

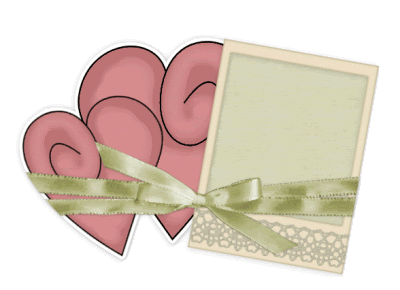
Paste DoubleHeart as new layer
Position slightly the left
Add a drop shadow:
H & V - 1
Opacity - 30
Blur - 10.00
Colour - #000000

Paste Frame3 as new layer
Image / Rotate by 10 to the right
Resize by 40%
Position slightly to the right

With your Magic Wand select inside the frame
Selections / Modify / Expand by 8
Open Paper02 and Edit / copy
Add a new raster layer
Move below Frame layer
Then paste into selection
Deselect


~ Step 2 ~

Paste Lace04 as new layer
Resize by 70%
Image / Rotate by 10 to the right
Position along the bottom of the frame

Activate the Frame Layer and using your magic wand select OUTSIDE of the frame
Acticate the Lace layer and hit delete
Deselect

Paste TiedRibbon02 as new layer
Resize by 70%
Position across Hearts and Frame

Apply a slight drop shadow

Paste Daisy01 and Daisy02 as new layers
Resize both by 20%
Position at the bottom of the hearts to the frame

Paste Dove as a new layer
Resize by 30%
Position to your liking in or around the hearts
Apply a slight drop shadow

Paste Flowers as new layer
Resize by 50%
Position in the centre between the Hearts and Frame, below the Ribbon

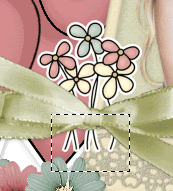
With your Selection Tool draw out a rectangle around excess shwoing below the ribbon
Then delete

Paste StringBow01 as new layer
Image / Rotate by 40 to the right
Position in the upper right corner of the frame

Paste StringBow02 as new layer
Image / Rotate by 20 to the left
Position over the first bow in the upper corner of frame

Paste Butterfly02 as new layer
Resize by 50% three times
Then resize again by 60%
Image / Mirror
Position above flowers

Paste Butterfly04 as new layer
Resize by 50% four times
Position to your liking

Paste WordBeads02 as new layer
Resize by 60%
Position toward the bottom beneath the Ribbon layer

Paste Tag02 as new layer
Resize by 50% twice
Image / Rotate by 40 to the right
Position below the ribbon and above the beads

Apply a slight drop shadow to elements:
H & V - 1
Opacity - 20
Blur - 3.00
Colour - #000000

Crop and resize


~ Step 3 ~
Paste your tube of choice as a new layer
Resize as necessary
Image / Rotate by 10 to the right
Position in the frame (but not under it as the top of the tube needs to protrude the frame)
Using your Magic Wand click INSIDE the frame
Selections / Modify / Feather by 2
Selections / Invert
Use your Eraser Tool to erase the excess at the bottom of the frame
Deselect
Paste Paper01 as new layer
Layers / Arrange / Move to Bottom
Resize by 50%

Layers / New Mask Layer / From Image
Locate WSL_Mask81
Source luminance
OK

Layers / Merge / Merge Group

Effects / Plugins / Penta.com / Color Dot
Default Settings

Now depending on the kind of tube you used any text you add may be different - if you choose to add text at all

Now using your Preset Shapes Tool on Ellipse draw out a circle above the heart

Select your Text Tool and choose a colour that matches your tag
Type out your text of choice - I wrote "Butterfly Kisses" with "Butterfly" on this circle

Once happy with it's position open your Layer palette, locate the Vector Layer and hide the ellipse
Convert to Raster layer
Effects / Plugins / Eye Candy 4000 / Gradient Glow with the following settings:


Repeat the Ellispe shape slightly to the right and type the rest of your text - mine was "Kisses"

Repeat steps above

Add a drop shadow:
H & V - 1
Opacity - 20
Blur - 3.00
Colour - #be7778

Now add your name in a nice font and same colour (if you wish)

Add your copyright, licence (if applicable) and watermark and you're done!

Thanks for trying my tutorial

::St!na::


© Tutorial written by Stina on 22nd February 2009
All rights reserved
Sunday, February 22, 2009

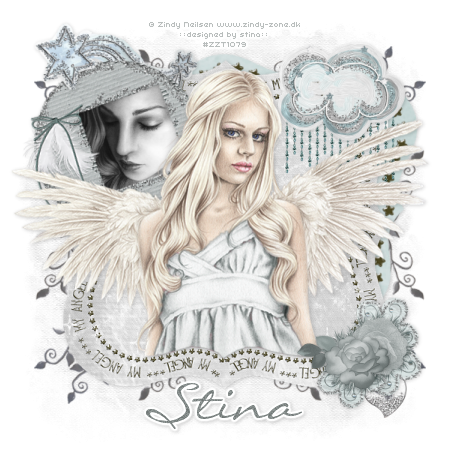
Angel


Supplies

Scrap kit of choice - I am using "Angelic" by Creationz by Jo which can be purchased from Creative Scraps
Tubes (or 1 image) of choice - I am using the lovely artwork of Zindy Neilsen which can be purchased from her store
**PLEASE DO NOT USE HER ARTWORK WITHOUT THE APPROPRIATE LICENCE**
Becky_Mask022 (supplied)
Font of choice - I am using LiorahBT
Plugin: Simple / Top Left Mirror (supplied)
Plugin: Eye Candy 4000 Gradient Glow (optional)
My Supplies here


~ Step 1 ~

Open a new blank canvas 600 x 600 flood filled white

Open Bracket1 and paste as new layer
Resize by 80%

Paste Bracket2 as new layer
Resize by 60%
Image / Rotate by 10 to the right
Move up and to the right, positioning behind the main bracket layer

Paste Frame2 as new layer
Image / Rotate by 20 to the left
Resize by 30% and place in top left

Open one of your tubes or image and paste it as a new layer
Resize it to fit in the frame
Move it below the frame layer and position
Image / Rotate by 20 to the left

Activate Frame layer
Using your magic wand select the inside of the frame
Selections / Modify / Expand by 10
Selections / Invert
Activate tube/image layer then delete
Deselect


~ Step 2 ~

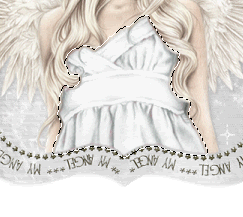
Paste your main tube as a new layer
Resize as necessary

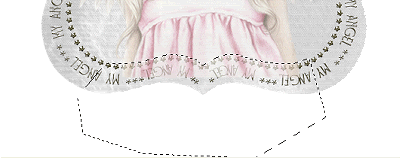
Now we need to trim the bottom so lower the opacity of your tube layer so we can see what we're doing

With your Freehand Tool draw carefully along the stars on the Bracket we are using as the background

Selections / Modify / Feather by 2
Hit delete TWICE
Deselect
Turn the opacity back to normal

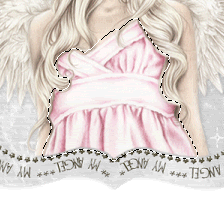
If your tube is a different colour to your tag use your magic wand with a tolerance set to about 20
(depending on the lightness/darkness in your tube)
Select the area of clothing as I have in mine
Selections / Modify / Feather by 2
(this will soften the selection)
Layers / Promote Selection to Layer

Select your Change to Target Brush in your Tool Options bar and set your foreground to a colour matching the rest of your tag

Duplicate then set blend mode to Multiply
Deselect


~ Step 3 ~

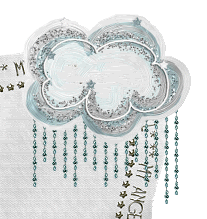
Paste Cloud as new layer
Resize by 35%
Place below tube layer in upper right

Paste Rose1 as new layer
Resize by 17%
Place in lower left

Paste Silk Flower as new layer
Resize by 15%
Position beside Rose!

Paste CupidsCartFlower as new layer
Resize by 23%
Place below Rose
Duplicate and repeat with other flower

Paste Gem Flower as new layer
Resize by 20%
Position behind the Roses
Duplicate and position
Duplicate again and repeat

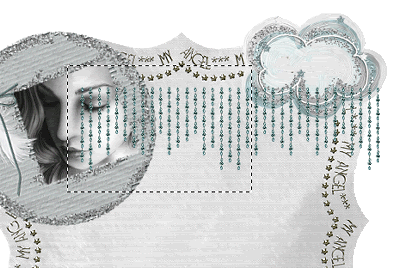
Paste Gem Curtain as new layer
Resize by 28%
Position over the cloud in upper right
Use your Selection Tool to draw a rectangle around the excess
Then delete and deselect

Move this layer to BELOW the Cloud

Paste Dust Charm2 as new layer
Resize by 30%
Position behind flowers

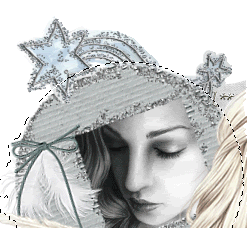
Paste Star as new layer
Resize by 30%
Position over frame in upper left

On your Frame later use your Magic Wand to select the area outside of the frame
Selections / Modify / Expand by 2
Selections / Invert
Selections / Modify / Feather by 2

Using your Eraser Tool erase just the area of the star trail partially covering the frame
Leave the Star overlapping

Paste Stardust2 as new layer
Duplicate and Image / Mirror
Layers / Merge / Merge Down
Set blend mode to Screen

Apply a drop shadow to your element and tube layers:
H & V - 1.00
Opacity - 20
Blur - 8.00
Colour - #000000


~ Step 4 ~

Paste SwirlChrome as new layer
Resize by 50% then Image / Rotate by 20 to the left
Position in upper right corner
Duplicate
Image / Mirror
Image / Rotate by 90 to the right
Position with the other swirlie
Once happy with positioning
Layers / Merge / Merge Down

Layers / Arrange / Send to Bottom
(this should send it to the layer above your white background)

Image / Mirror
Effects / Plugins / Simple / Top Left Mirror
Resize by 95% Bicubic resample
Position to your liking

Paste Paper4 as new layer
Layers / New Mask Layer / From Image
Locate Becky_Mask022
Source luminance checked
OK

Layers / Merge / Merge Group

Crop and resize

Select your Text Tool and font of your choice
I am using LiorahBT
Size - 48
Colour - #b5bab9
Add a Gradient Glow (optional)
Apply a drop shadow

Add your copyright, licence (if applicable) and watermark and you're done!

Thanks for trying my tutorial

::St!na::


© Tutorial written by Stina on 22nd February 2009
All rights reserved