
Supplies
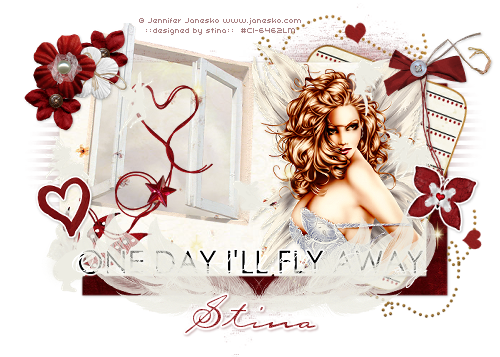
Scrap kit of choice - I am using the gorgeous "I'll Fly Away" kit by Helly which can be purchased from Cotton Candy Kreations
Thank you Helly for this wonderful kit - I simply enjoyed using it!!
Tube of choice - I am using the gorgeous artwork of Jennifer Janesko which can be purchased from CILM
**PLEASE DO NOT USE HER ARTWORK WITHOUT THE APPROPRIATE LICENCE**
WSL_Mask10 by Chelle which is available from her blog
Fonts are Century Gothic and Carpenter Script
Eye Candy 4000 Gradient Glow
~ Step 1 ~
Open Missy's Template #156
Duplicate (Shift D) and close off original
Delete watermark layer
Duplicate (Shift D) and close off original
Delete watermark layer
Activate background
Image / Canvas Resize to 650 x 500
Flood fill the excess areas white
Image / Canvas Resize to 650 x 500
Flood fill the excess areas white
Activate Raster 1 (Black Rectangle)
Click inside it with your magic wand
Selections / Modify / Feather by 2
Add new raster layer
Paste Paper7 as new selections
Delete
Deselect
Click inside it with your magic wand
Selections / Modify / Feather by 2
Add new raster layer
Paste Paper7 as new selections
Delete
Deselect
Activate Rectangle layer (grey)
Click the area inside it
Selections / Modify / Feather by 2
Click the area inside it
Selections / Modify / Feather by 2
Paste Paper 10 AS NEW LAYER
Selections / Invert
Delete
Deselect
Delete
Deselect
**FOLLOW THESE NEXT STEPS IF YOU WISH TO KEEP THE HANGING HEARTS AS PART OF YOUR TAG**
Activate THIN RECTANGLES
Click inside first and third ones
Now activate the HEARTS layer
Click inside the first and third hearts
Click inside first and third ones
Now activate the HEARTS layer
Click inside the first and third hearts
Paste Paper 3 as new layer
Selections / Invert
Delete
Deselect
Delete
Deselect
Repeat with the other two THIN RECTANGLES and HEARTS with Paper 9
~ Step 2 ~
Paste Sparklies as new layer
Resize by 70% and erase any excess
Resize by 70% and erase any excess
Paste PaperFlower as new layer
Resize by 20% and position in the top right hand corner
Resize by 20% and position in the top right hand corner
Paste Button Flower as new layer
Resize by 15% and tuck behind the flower in the upper left
Duplicate and move this layer on the other side of flower
Resize by 15% and tuck behind the flower in the upper left
Duplicate and move this layer on the other side of flower
Paste Paper Flower 2 as new layer
Resize by 25% and tuck in between flowers in upper left
Resize by 25% and tuck in between flowers in upper left
Paste Window as new layer
Image / Mirror then position to the left
Reduce opacity of this layer to 45
Image / Mirror then position to the left
Reduce opacity of this layer to 45
Paste HeartString has new layer
Resize by 22% then Image / Mirror
Position in the window (beneath Sparklies layer)
Resize by 22% then Image / Mirror
Position in the window (beneath Sparklies layer)
Paste RaffiaBow as new layer
Resize by 25% and position over the heart string in upper right
Resize by 25% and position over the heart string in upper right
Paste Butterfly as new layer
Resize by 15% then Image / Rotate by 14 to the right
Resize by 95% Bicubic resample
Position to the right
Add a Gradient Glow
Resize by 15% then Image / Rotate by 14 to the right
Resize by 95% Bicubic resample
Position to the right
Add a Gradient Glow
Paste PaintedHeart as new layer
Resize by 15% and position to the left
Add a Gradient Glow
Resize by 15% and position to the left
Add a Gradient Glow
Paste Wings1 as new layer
Resize by 40%
Position at the bottom of the template
Resize by 40%
Position at the bottom of the template
Paste JournalBlock as new layer
Resize by 55% then Image / Rotate by 20% to the right
Position between the two paper layers
Resize by 55% then Image / Rotate by 20% to the right
Position between the two paper layers
~ Step 3 ~
Paste your tube as a new layer
Resize as necessary
Position to the right
Resize as necessary
Position to the right
Erase any excess that may be "squared" in the upper right corner
Add a slight drop shadow
In your Materials Palette set your background to #000000
Select your Text Tool and locate Century Gothic in font list
Size - 48
Type in all caps "ONE DAY I'LL FLY AWAY"
Select your Text Tool and locate Century Gothic in font list
Size - 48
Type in all caps "ONE DAY I'LL FLY AWAY"
Position along the bottom of top paper layer (beneath Wings layer)
Convert to raster layer
Effects / Plugins / Eye Candy / Gradient Glow with the following settings:
Now change your background colour to #FFFFFF
Locate Carpenter Script in your font list
Change the size to 40
Change the case to Mixed and re-type the words "One Day I'll Fly Away"
Change the size to 40
Change the case to Mixed and re-type the words "One Day I'll Fly Away"
Position directly over the black text
Convert to raster layer
Duplicate
Convert to raster layer
Duplicate
Set Blend Mode to Screen and then
Layers / Merge / Merge Down
Layers / Merge / Merge Down
Activate your Background layer
Paste Paper 7 as new layer
Layers / New Mask Layer / From Image
Locate WSL_Mask10
Source luminance
OK
Paste Paper 7 as new layer
Layers / New Mask Layer / From Image
Locate WSL_Mask10
Source luminance
OK
Layers / Merge / Merge Group
Crop and resize
Add your name, © copyright, licence and watermark and you're done!
Thanks for trying my tutorial
::st!na::
©Tutorial written by Stina 17th February 2009
All rights reserved
No comments:
Post a Comment