Supplies
Scrap kit of choice - I am using the "Twilight" kit by Jill from Created by Jill
which can be purchased from Paradise4Scrappers or a variety of stores (listed on her blog)
Four Twilight tubes of choice (or those I have supplied)
Template thrown together by me (supplied)
Twilight Eyelet Ribbon (supplied)
Becky_Mask023 (supplied)
Fire Gradient (supplied)
Twilight font (supplied)
Eye Candy 4000 Gradient Glow (optional for name)
My Supplies here
~ Step 1 ~
Place Fire gradient in your Gradients folder
Open Mask and font and minimise for later
Open Template and duplicate
Close off original
Resize to 450 x 363
Image / Canvas Resize to 600 x 450
On your bottom layer flood fill excess area with white
Activate the Dotted Heart layer
Selections / Float then Selections / Defloat
Selections / Modify / Feather by 2
Paste Paper 18 as new layer
Selections / Invert
(it looks like the marching ants have disappeared but the dotted heart is now an inverted selection)
Hit delete
Deselect
With your magic wand click on the Heart Frill
Selections / Modify / Feather by 2
Paste Paper 15 as new layer
Resize by 65%
Selections / Invert
Delete
Deselect
Click the Heart layer
Selections / Modify / Feather by 2
Paste Paper 9 as new layer
Resize by 65%
Selections / Invert
Delete
Deselect
Click each frame layer
Paste Paper 18 as new layer
Resize by 65%
Selections / Invert
Delete
KEEP SELECTED
Paste Paper 14 as new layer
Delete
Deselect
Lower opacity to 70
Frame background now looks a deep red
Click the Rectangle layer
Paste Paper 6 as new layer
Resize by 65%
Selections / Invert
Delete
Deselect
~ Step 2 ~
Now for your tubes
Open Kirsty08-Twilight-6
Paste as new layer and resize by 20%
Position under the layer in the first frame
With your magic wand click inside the frame
Selections / Modify / Expand by 5
Selections / Invert
Delete
Deselect
Open Kirsty08-Twilight-4
Paste as new layer and resize by 25%
Position under the layer in the second frame
With your magic wand click inside the frame
Selections / Modify / Expand by 5
Selections / Invert
Delete
Deselect
Open Kirsty08-Twilight-1
Paste as new layer and resize by 35%
Position under the layer in the third frame
With your magic wand click inside the frame
Selections / Modify / Expand by 5
Selections / Invert
Delete
Deselect
Open Kirsty08-Twilight-5
Paste as new layer
Resize by 35% and position behind the frame and rectangle layers in the centre at the top of the frame
~ Step 3 ~
Open BowWrap6 and paste as new layer
Resize by 72%
Position at the bottom of the frame with the lower part of the ribbon extending off the frame
With your freehand tool draw along the edge of the frame EXACTLY along and to the edge of the bow
Now you see it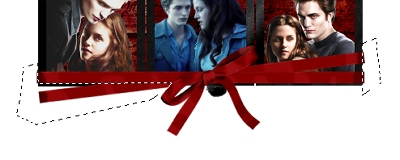
Now you dont!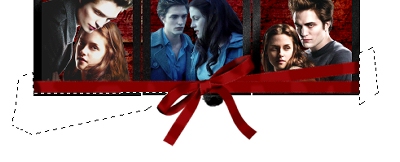
Duplicate the ribbon layer
Blend mode to Multiply and lower opacity to 50
Layers / Merge / Merge Down
Duplicate again and blend mode to Soft Light
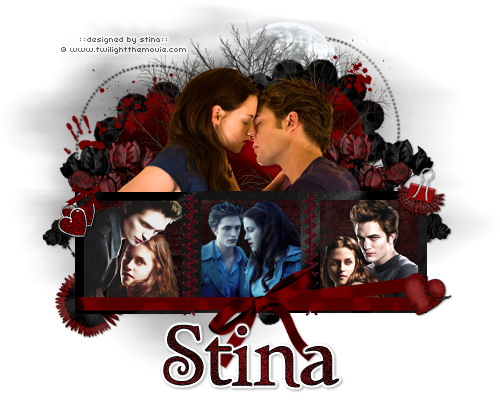
You should now have something like this: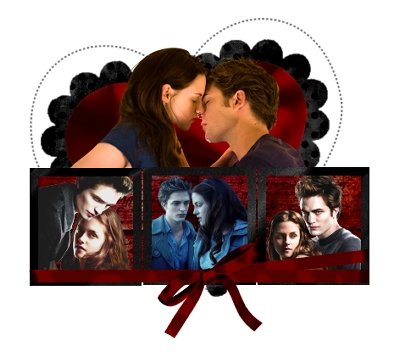
~ Step 4 ~
Open Charm1 and paste as new layer
Resize by 40% then resize again by 50%
Adjust / Sharpness / Unsharpen Mask
1.00, 100, 4.00
Position on the top left corner of the frame
Open BinderClip2 and paste as new layer
Resize by 15%
Image / Rotate to the right by 15
Adjust / Sharpness / Unsharpen Mask
(same settings as above)
Position on the top right corner of the frame
Open Flowers1 and paste as new layer
Resize by 40% and position behind Bella's shoulders to the left
Duplicate then Image / Mirror
Position duplicate behind Edward's shoulders
Open Flowers2 and paste as new layer
Resize by 40% and position behind Edward to your liking (I moved them slightly to the right)
Duplicate then Image / Mirror
Position duplicate behind Bella to your liking
Open Flower2 and paste as new layer
Resize by 20% and position in the lower left corner beneath the frame
Paste Flower3 as new layer
Rezise by 25% and position over Flower2
~ Step 5 ~
Open Heart1 and paste as new layer
Resize by 15% then Image / Rotate by 25 to the right
Position in the lower right corner
Open BloodSpatter3 and paste as new layer
Resize by 25% and position to the right to your liking
Paste again (should be in your clipboard) and resize by 18%
Position to to the left to your liking
Open BloodSpatter2 and paste as new layer
Resize by 15% and position between HeartFrill and Heart layers protruding with some splatter
Open BloodHandPrint and paste as new layer
Resuze by 18% then Image / Rotate by 25 to the right
Image / Mirror
Position behind flowers
Add any other elements you wish to your creation
Add any drop shadows to your liking
Delete all template layers as you won't be needing them now
Activate background layer
Paste Paper 14 as new layer
Layers / New Mask Layer / From Image
Locate Becky_Mask023 in drop down menu and apply
Resize by 95% and lower opacity to 65
Crop and resize your tag
~ Step 6 ~
In your materials palette use these settings:
Foreground: #000000
Background: Fire Gradient
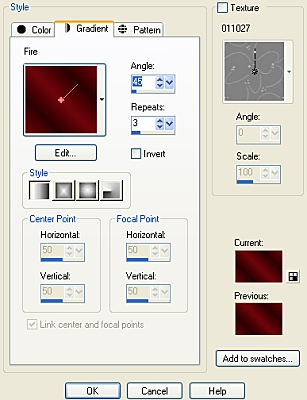
Gradient settings:
Linear Style
Angle - 45
Repeats - 3
Invert UNchecked
Select your text tool with the following settings:
![]()
![]()
Type out your name
Objects / Align / Horizontal Centre in Canvas
Adjust / Add/Remove Noise / Add Noise
Uniform
25%
Monocrhome checked
Effects / Plugins / Eye Candy 4000 / Gradient Glow
Glow width 3.00
Colour settings White
Add drop shadow
H & V - 1
Opacity - 40
Blur - 3.00
Colour - Black
Add your ©copyright and watermark and you're done!
Thank you for trying my tutorial
::st!na::
©Tutorial written by Stina on 30th January 2009
All rights reserved

No comments:
Post a Comment