
Supplies
Scrap kit of choice - I am using "My Prince Has Come" by DMK Designs which can be purchased from Creative Scraps, Simply Beautiful Scraps and TKO Scraps
Tube of choice - I am using the gorgeous artwork of Suzanne Richards which can be purchased from CILM
**PLEASE DO NOT USE HER ARTWORK WITHOUT THE APPROPRIATE LICENCE**
Chain (supplied)
Rainbow (supplied)
Plugin: Penta.com / Dot and Cross
Plugin: Eye Candy 4000 Gradient Glow
Font of choice - I am using Pharmacy
My Supplies here
~ Step 1 ~
Open a new blank canvas 600 x 600 flood filled white
Open Paper10 and resize it to 500 x 500 then minimise
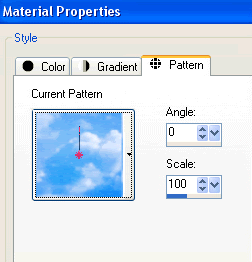
In your Materials Palette find the paper patten and select it as your background
Keep your Foreground null
Keep your Foreground null
Select your Preset Shape Tool and set it to Ellipse
Hold down your Shift key and draw out a circle
(Holding shift ensures the circle is drawn symmetrical)
Objects / Align / Centre in Canvas
Convert to Raster Layer
Hold down your Shift key and draw out a circle
(Holding shift ensures the circle is drawn symmetrical)
Objects / Align / Centre in Canvas
Convert to Raster Layer
Paste Frame06 as new layer
Resize by 36%
Position below and behind Circle layer
Resize by 36%
Position below and behind Circle layer
Duplicate
Adjust / Blur / Gaussian Blur
Radius - 20.00
Repeat
Adjust / Blur / Gaussian Blur
Radius - 20.00
Repeat
Image / Flip and re-position behind frame
Now activate your Circle layer and add a drop shadow:
H & V - 2
Opacity - 40
Blur - 15.00
Colour - #000000
H & V - 2
Opacity - 40
Blur - 15.00
Colour - #000000
Repeat but change the H & V to -2
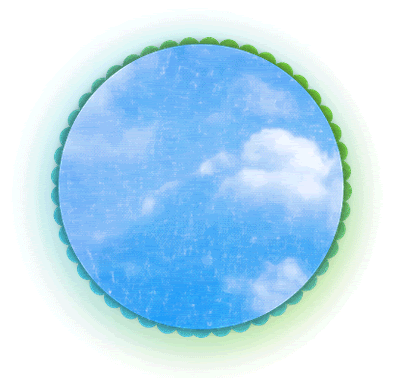
~ Step 2 ~
Paste Clouds as new layer
Resize by 40% and place in position
Resize by 40% and place in position
Paste Button05 as new layer
Resize by 25%
Position towards lower left
Resize by 25%
Position towards lower left
Paste FrogPrince as new layer
Resize by 12%
Position in the lower right
(these can be rearranged once tube is in place)
Resize by 12%
Position in the lower right
(these can be rearranged once tube is in place)
Paste AcrylicDoodle03 as new layer
Resize by 20%
Position to the left in the cloud
Resize by 20%
Position to the left in the cloud
Paste FilledHeart as new layer
Resize by 5%
Position to the right below the cloud
Resize by 5%
Position to the right below the cloud
Paste Chain (supplied) as new layer
Resize by 30%
Move it down a layer and attach it to the heart
Activate the Heart layer again then
Layers / Merge / Merge Group
Move this layer below the cloud so the chain tucks underneath it
Resize by 30%
Move it down a layer and attach it to the heart
Activate the Heart layer again then
Layers / Merge / Merge Group
Move this layer below the cloud so the chain tucks underneath it
Paste Flower01 and Flower02 as new layers
Resize by 20% each and position beneath the frog
Resize by 20% each and position beneath the frog
Add a drop shadow to each flower:
H & V - 1
Opacity - 15
Blur - 5.00
Colour #000000
H & V - 1
Opacity - 15
Blur - 5.00
Colour #000000
Add the same drop shadow to the frog but change the opacity to 25
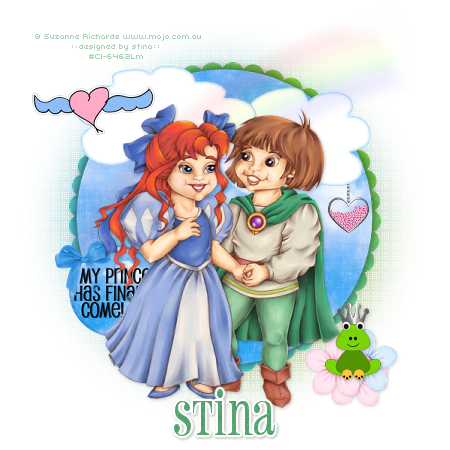
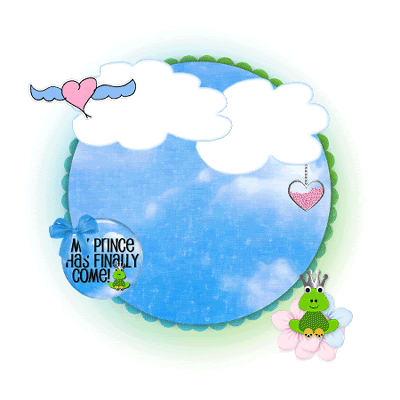
You should now have something like this
Now crop and resize
~ Step 3 ~
Add your tube of choice and resize as necessary
Apply a drop shadow as above
Apply a drop shadow as above
Paste a frame from the Rainbow.psp file (supplied) beneath your tube
Adjust / Blur / Gaussian
Radius - 5.00
Adjust / Blur / Gaussian
Radius - 5.00
Duplicate then set blend mode to Hard Light
Layers / Merge / Merge Down
Layers / Merge / Merge Down
Select your Eraser Tool with the following settings:

Then carefully erase the excess rainbow from the bottom and soften the edge to it at the top
Now activate your blurred background layer below the frame
Effects / Plugins / Penta.com / Dot and Cross
Default settings
Repeat
Effects / Plugins / Penta.com / Dot and Cross
Default settings
Repeat
Select your Text Tool and font of choice
I am using Pharmacy
Set your background to a colour matching your tube - I used #56a570
I am using Pharmacy
Set your background to a colour matching your tube - I used #56a570
Type out your name
Effects / Plugins / Eye Candy 4000 / Gradient Glow
Glow width - 3.00
Soft Corners - 25
Opacity - 100
Setting - Fat
Effects / Plugins / Eye Candy 4000 / Gradient Glow
Glow width - 3.00
Soft Corners - 25
Opacity - 100
Setting - Fat
Apply a drop shadow:
H & V - 1
Opacity - 30
Blur - 3.00
Colour - #000000
H & V - 1
Opacity - 30
Blur - 3.00
Colour - #000000
Add your copyright, licence (if applicable) and watermark and you're done!
Thanks for trying my tutorial
::St!na::
© Tutorial written by Stina on 21st February 2009
All rights reserved
No comments:
Post a Comment