Supplies
Scrap kit of choice - I am using the gorgeous "Steal my Breath" kit by Helly which you find on her blog or can purchase at Cotton Candy Kreations
Tube of choice - I am using the gorgeous work of Jennifer Janesko which you can purchase through CILM. Please do not use her work without the proper licence.
WSL_Mask226 by Chelle
Font of choice - I am using 0 Whoa DNA
Eye Candy 4000 Gradient Glow
~ Step 1 ~
Open font and mask and minimise for later
Using your scrap kit of choice open a frame (I am using SMB_Bracket) and duplicate (shift D) then close off original
Resize to 400 x 400 pixels
Now duplicate the frame layer (Layers / Duplicate) and hide original layer by clicking the Eye on your Layer palette
Go to Image / Canvas Resize and resize you working canvas to 600 x 500 (for more room to work with)
Add new raster layer and flood fill with white then send to bottom
~ Step 2 ~
Open a paper which compliments your tube and paste as new layer below your duplicate frame layer (I used SMB_Papers 6 & 9 for my colour effect)
Using your magic wand with Tolerance and Feather set to o click inside the frame
Selections / Modify / Expand by 5
Selections / Invert
Hit delete
Deselect
Hide your white background leaving only your papers and frame layer visible, then Layers / Merge / Merge Visible
Hide this layer and unhide white background and original frame layer
Open another paper of choice (I used SMB_Paper 11) and paste as new layer below this frame
Using your magic wand again click inside frame then;
Selections / Modify / Expand by 5
Selections / Invert
Hit delete
Deselect
With your original (bottom) frame layer activated go to Layers / Merge / Merge Down
Still on this layer Image / Rotate by 10 to the right
Move frame slightly up and to the right
Unhide all layers
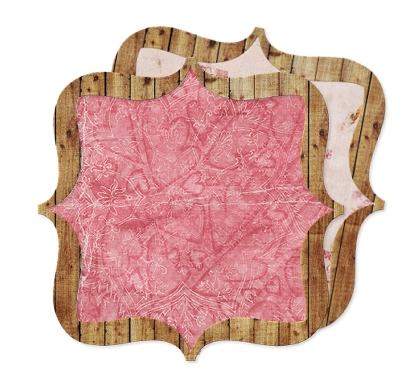
You should now have something like this:
~ Step 3 ~
Open your tube and paste as new layer
Resize if necessary and move to the top
Position to your liking with it partially overhanging the edge of the frame
Open heart element (for this I used SMB_Heart Butterfly) and paste as new layer
Resize by about 50% (depending on the size of the element you're using)
Position in bottom left corner of frame
Open SMB_Pinned Flower and resize by 40%
Position at the top left corner of frame and rotate by 25 to the right
Adjust / Sharness / Unsharp Mask with the following settings:
Radius: 1
Strength: 100
Clipping: 4
Luminance UNchecked
Open Flower element (I used SMB Paper Flower) and paste as new layer
Duplicate this layer
Hide the duplicate and work on your original
Resize this layer by 45%
Move to layer below frame and position it behind the Pinned Flower
Duplicate and position beside original so that they are both sticking out like so: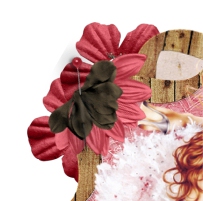
Go back to your duplicate flower and unhide it
Adjust / Hue and Saturation / Colorise with the following settings:
Hue: 30
Saturation: 40
Apply
Resize this layer by 40% and then position it on a layer between the frame and the flower
Image / Rotate by 10 to right
Adjust / Sharpness / Unsharpen Mask with the same settings as above
Duplicate this flower and position as you did with the first flower
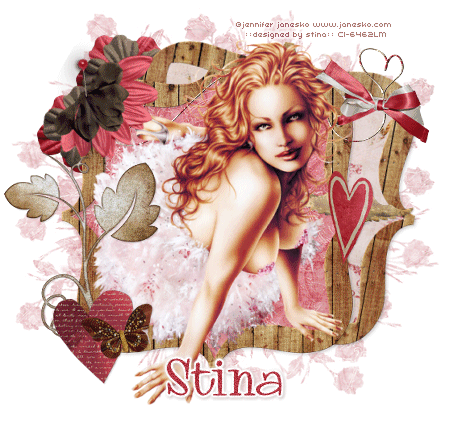
You should now have something like this: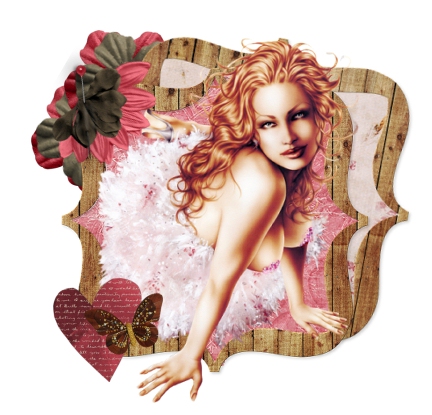
Open SMB Eyelet Ribbon 1
Go to Image / Mirror
Rotate by 110 to the left and resize by 35%
Position in the top right so it looks as though the two frames are joined
Open SMB Bow 1 and resize by 30%
Position over the eyelet ribbon
From here you can add any other elements you wish to your liking
Remember this is your creation to do what you wish with! *s*
~ Step 4 ~
Activate your white background and paste a paper of your choice as a new layer (I used SMB_Paper 6)
Layers / New Mask Layer / From Image
Locate WSL_Mask226 which you minimised in the beginning
Fit to Canvas
Source Luminance checked
Invert Mask Data UNchecked
OK
Layers / Merge / Merge Group
Reduce the opacity of this layer to around 50
You may need to resize by 95% position it further depending on the size of your canvas
Mask should protrude as a background not overtake the rest of your tag
Crop and resize
~ Step 5 ~
Now we will add our name
Find 0 Whoa DNA in your font list (if you opened the font at the start and minimised it then it will show in your list)
Choose a nice colour from your tube or elements
I used #b13541
In your material palette set this as your background
Foreground colour to #FFFFFF
Stroke width 1.0
Create as Vector
Size: 48
Type out your name
Convert to Raster layer
Adjust / Add/Remove Noise / Add Noise
Uniform
Noise: 20%
Monochrome: checked
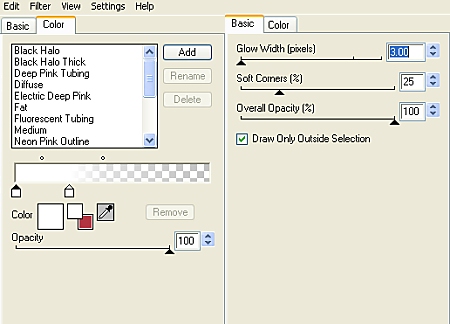
Effects / Plugins / Eye Candy 4000 / Gradient Glow
Add drop shadows to your layers
Now just add your watermark, © copyright and appropriate licence and you're done!
Thanks for trying my tutorial.
::st!na::
©This tutorial was written on 25th January 2009
All rights reserved

No comments:
Post a Comment