Please email me designed.by.stina@gmail.com with your creations. I'd love to see them.

Showing posts with label Caron Vinson. Show all posts

Monday, May 18, 2009

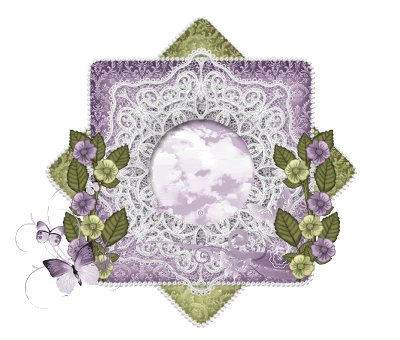
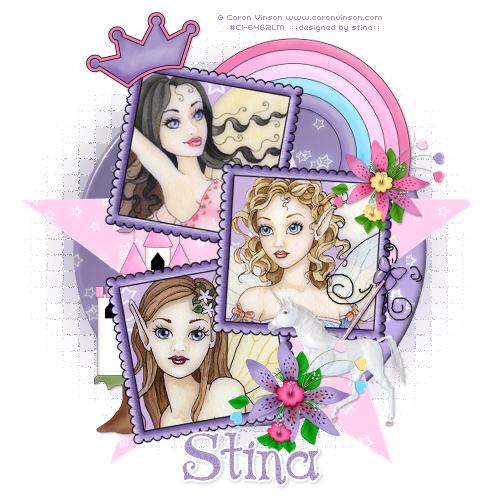
Fairy Tales

 
Supplies
 
Scrap kit of choice - I am using "Spring Fairy Tales" by Tootie's Creationz available from Paradise 4 Scrappers and Stargazer Scraps
Tubes of choice - I am using the magical artwork of Caron Vinson which is available for purchase from CILM
**PLEASE DO NOT USE HER ARTWORK WITHOUT THE APPROPRIATE LICENCE**
Font of choice - I am using AL Age Old Love
Plugins:  Eye Candy 4000 Glass and Gradient Glow
Xero Porcelain
 
 
Ready? Let's begin...
 
 
Open a new 600 x 600 blank canvas flood-filled white
 
Open a Paper of choice from your scrap kit
Set it to your Background in your Materials Palette
Open your Palette on Pattern and set the scale to 50
 
Select your Preset Shape Tool and set to Ellipse
 
Holding your Shift key down draw out a circle with your Paper
 
Objects > Align > Centre in Canvas
Convert to raster layer
 
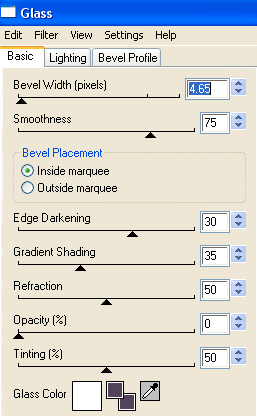
Effects > Plugins > Eye Candy 4000 > Glass with the following settings:
 
 
Set your Preset Shape Tool to a Star shape
Hold your Shift key down again and draw out the Star
 
Objects > Align > Centre in Canvas
Convert to raster layer
 
Paste a Triple Frame as new layer
Resize by 60%
 
With your Magic Wand select the inside of each Frame
Selections > Modify > Expand by 10
Paste a paper of choice as new layer
Selections > Invert
Delete and deselect
 
Open three tubes of choice
Paste each within each Frame and resize as necessary
Position to your liking
 
With your Magic Wand select the first Frame
Selections > Modify > Expand by 10
Selections > Invert
Delete and deselect
 
Repeat this step for the other two Frames
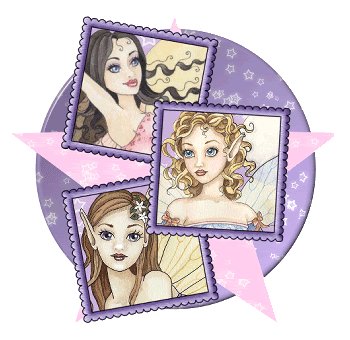
 
 
Hide your Background, Circle, Star, Frame Background and Frame
Layers > Merge > Merge Visible
 
Effects > Plugins > Xero > Porcelain with default settings
 
Then Unhide all layers again
 
Paste FairyWand as new layer
Resize by 30%
Position in lower right of bottom Frame
Repeat Glass effect as above
 
Paste a Flower of choice as new layer
Resize by 25%
Place over the Wand in the lower right and resposition both as necessary
 
Paste another Flower
Resize by 20%
Position in upper right of middle Frame
 
Paste Crown as new layer
Image > Rotate by 20 to the left
Resize by 25%
Position in upper left of top Frame
 
Paste Unicorn as new layer
Resize by 20%
Position in lower left behind Flower layer
 
Paste Castle as new layer
Resize by 35%
Position to the left then move down to between the Star and Frame Background layers
 
Paste Rainbow as new layer
Image > Rotate by 20 to the right
Resize by 35%
Position in the upper right between the top and middle Frames
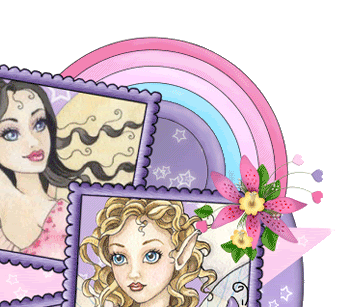
 
 
Activate the Circle layer we drew at the beginning and duplicate
On the bottom layer go to:
 
Adjust > Blur > Gaussian Blur with a radius of 20.00
 
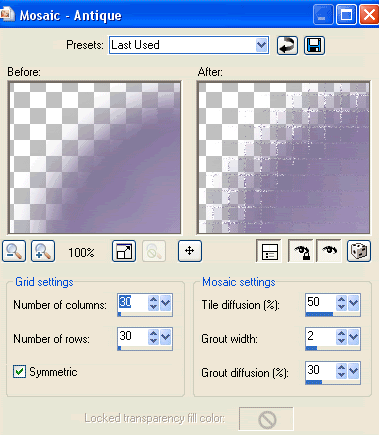
Then go to Effects > Texture Effects > Mosaic Antique with the following settings:
 
 
Select your Text Tool and font of choice
I am using AL Age Old Love
Choose a colour from your tag and set it as your background
I am using #a997c9
 
Type out your name
Objects > Align > Horizontal Centre in Canvas
Convert to raster layer
 
Apply a Gradient Glow using Eye Candy 4000, and a drop shadow of choice
 
Finally, add your © copyright, licence and watermark, then save as a GIF or JPG and you're done!
 
Thanks for trying my tutorial!
 
::st!na::
 

© Tutorial written by Stina on 17th May 2009
All rights reserved

Sunday, May 3, 2009

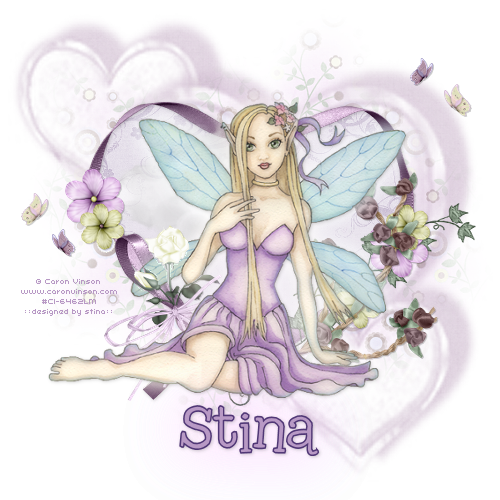
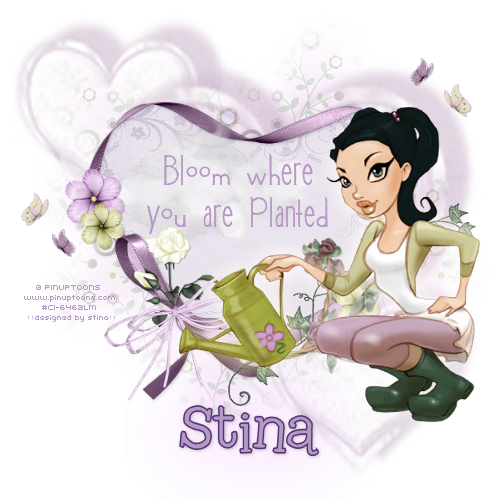
Soft as Spring

 
Supplies
 
Scrap kit of choice - I am using "Fresh Awakenings" by Lynn Earwicker of Moo Designs available from The Scrapping Divaz Designz
Tube of choice - I am using the delightful artwork of
Caron Vinson which is available from CILM
**PLEASE DO NOT USE HER ARTWORK WITHOUT THE APPROPRIATE LICENCE**
3HeartStings
Mask
WSL_Mask7 by Chelle
Plugin: Xero Porcelain
Font of choice - I am using 2Peas Type
 
 
Ready? Let's begin....
 
 
Open a new 600 x 600 blank canvas flood-filled white
 
Paste HeartRibbon as new layer
Resize by 25%
 
LEAVE IN POSITION
 
Select the inner area with your Magic Wand
Selections > Modify > Expand by 3
Add a new raster layer
Paste Paper07 (or one of choice) into Selection
Deselect
 
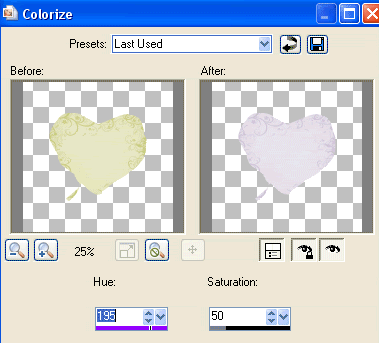
Adjust > Hue & Saturation > Colourise with the following settings:
 
 
Paste Paper12 as new layer
Resize by 20%
Layers > Arrange > Send to Bottom
 
Layers > New Mask Layer > From Image
Locate 3HeartStings Mask
OK
Layers > Merge > Merge Group
Resize by 95%
Position as if shadowing heart
Lower opacity to around 60
 
Paste Paper01 as new layer
Resize by 20%
Layers > Arrange > Send to Bottom
 
Layers > New Mask Layer > From Image
Locate WSL_Mask7
OK
Layers > Merge > Merge Group
Position so that it is centred behind Heart
 
 
Paste Ivy as new layer
Image > Rotate by 10 to the right
Resize by 12%
Position along lower right of Ribbon
 
Select your Freehand Tool and carefully draw around the bow on the Ribbon
 
 
Press delete then deselect
 
Paste RoseBranch as new layer
Resize by 12%
Position over the Ivy
 
Paste DelicateRose as new layer
Image > Rotate by 20 to the left
Resize by 12%
Position over the centre of bow
 
Select your Freehand Tool and draw around the bottom half of the roses
Delete then deselect
 
 
Paste FluffyClouds2 as new layer
Resize by 20%
Position inside the Frame
Lower opacity to around 70
 
Paste Flower1 as new layer
Resize by 8%
Duplicate and position to your liking
 
Paste Flower3 as new layer
Resize by 6%
Duplicate and position to your liking
 
Paste PrettyButterfly02 as new layer
Resize by 3%
Position and duplicate then Image > Mirror
Position to liking
 
Paste PrettyButterfly01 as new layer
Resize by 3%
Duplicate and set Blend Mode to Soft Light
Layers > Merge > Merge Down
Resize again by 85%
Position then duplicate then Image > Mirror
Position again to your liking
 
Ok let's paste our tube
I am using one of the delightful Caron Vinson's
And to set the mood I chose to soften it a little
 
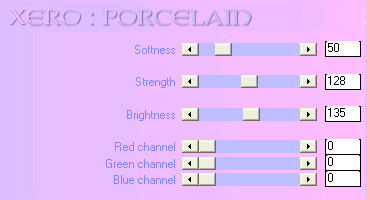
Effects > Plugins > Xero > Porcelain with the following settings:
 
 
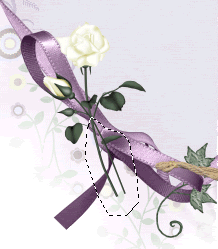
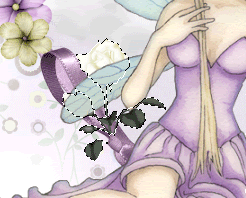
OK, so one of her wings is covering the rose
 
Activate the Delicate Rose layer
Select the outer area around the rose with your Magic Wand
Selections > Invert
 
Now activate the tube layer
Press delete once or twice (to soften the edges)
Deselect
 
 
Duplicate tube layer
Activate bottom tube layer
Adjust > Blur > Gaussian Blur with a radius of 10.00
Set Blend Mode to Screen
 
Add a slight/soft drop shadow to your element layers
 
Select your Text Tool and font of choice
I am using 2Peas Typo
 
Set your Materials Palette to the following:
Foreground - #503776
Background - #b899c5
Stroke width - 1.5
 
Type out your name
Objects > Align > Horizontal Centre in Canvas
Convert to raster layer
Add a drop shadow
 
Duplicate, then
On bottom text layer go to:
Adjust > Blur > Gaussian Blur with a radius of 30.00
Set Blend Mode to Hard Light
Lower opacity to 75
 
Finally, add your © copyright, licence and watermark, then save as a GIF or JPG and you're done!!
 
Thanks for trying my tutorial!
 
::st!na::
 
 
Here is another version:
 

© Tutorial written by Stina on 3rd May 2009
All rights reserved
Sunday, March 15, 2009

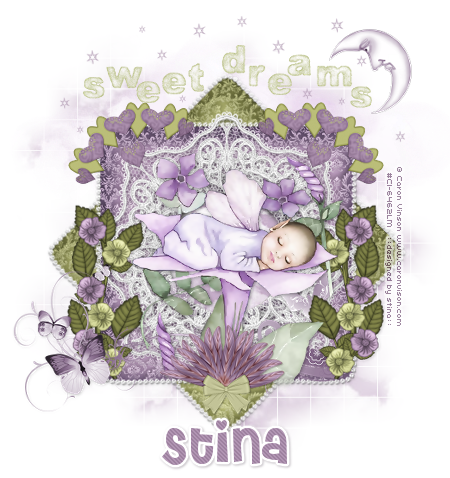
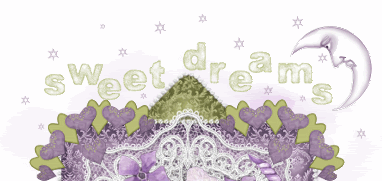
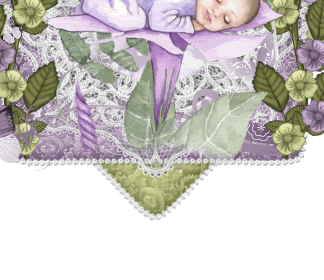
Sweet Dreams

 
Supplies
 
Scrap kit of choice - I am using "Wishing Dreams" by ChaDesigns which is available at Creative Scraps and Cotton Candy Kreations
Tube of choice - I am using the gorgeous artwork of Caron Vinson which can be purchased from CILM
**PLEASE DO NOT USE HER ARTWORK WITHOUT THE APPROPRIATE LICENCE**
WSL_Mask84 by Chelle
Font of choice - I am using Cheri
Plugin: Xero Improver and Xero Radiance
Plugin: Penta.com Jeans (optional)
Plugin: Eye Candy 4000 Gradient Glow (optional)
 
My Supplies here
 
 
~ Step 1 ~
 
Open a new 600 x 600 blank canvas flood-filled white

Paste Frame1 as new layer
Resize by 30%
Image / Rotate by 45 to the left (or right *g*)
 
Paste Frame2 as new layer
Resize by 30%
 
Add new raster layer
Layers / Arrange / Move Down
 
Grab your Selection Tool and draw out a rectangle anywhere inside the frame
 
 
Open Paper9
Edit / Copy
 
Activate new layer
Edit / Paste into Selection
Deselect
 
Lower opacity to 65
 

~ Step 2 ~
 
Paste Doodle2 as new layer
Resize by 50%
Position along the bottom of frame
 
Paste Leaves1 as new layer
Image / Rotate by 10 to the right
Resize by 30%
Position to the right
Duplicate then Image / Mirror
Place the one on the left beneath the Doodle layer
 

Paste Heart as new layer
Image / Rotate by 25 to the left
Resize by 15%
Position in upper left corner
Duplicate then Image / Mirror
 
Paste Moon as new layer
Resize by 15%
Position in the upper right
 
Paste Cloud as new layer
Resize by 40%
Layers / Arrange / Send to Bottom
Position near the top
 
Activate top layer
 
Open the Alpha sheet
Using your Selection or Freehand Tool draw around each letter
Paste each one as new layer
Resize by 20%
 
Position along the top at varying lengths
 
Once satisfied hide all layers but the Letters then
Layers / Merge / Merge Visible
 
Add a new raster layer
 
Select
 
Select a Star Brush and a colour from your scrap as your Foreground
Paste the brush on your layer by clicking your mouse - Left click for foreground; Right click for background
 
 
Paste your tube as new layer
Resize as necessary and place in centre
Use an Eraser with a soft edge to softly erase the bottom of your tube
 
 
Effects / Plugins / Xero / Improver with default settings
 
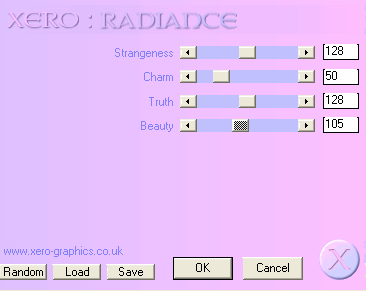
Effects / Plugins / Xero / Radiance with the following settings:


Paste Flower5 as new layer
Resize by 25%
Position at the bottom of the frame layer over the erased edge of the tube
 
Crop and Resize
 

~ Step 3 ~
 
Activate Background layer
 
Paste Paper9 as new layer
Layers / New Mask Layer / From Image
Locate WSL_Mask84
OK
 
Layers / Merge / Merge Group
LOwer opacity to 55
 
Select your Text Tool, font and colour
Type your name
Objects / Align / Horizontal Centre in Canvas
Convert to Raster layer
Apply an effect of your choice (I used Penta.com/Jeans)
Apply a Gradient Glo, then
Add a drop shadow:
H & V - 1
Opacity - 30
Blur - 3.00
Colour - #342335
 
Finally, add your © copyright, licence and watermark
 
Save as a GIF and you're done!
 
Thank you for trying my tutorial
 
::st!na::
 

© Tutorial written by Stina on 14th March 2009
All rights reserved
 

Monday, March 9, 2009

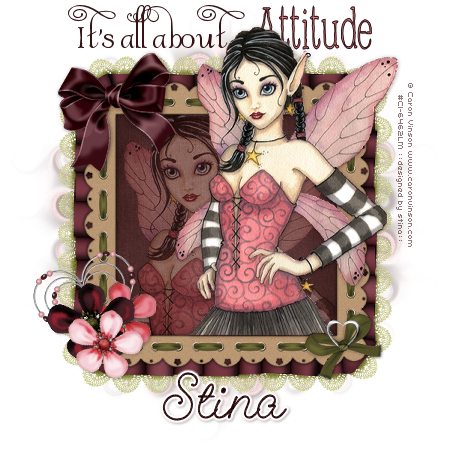
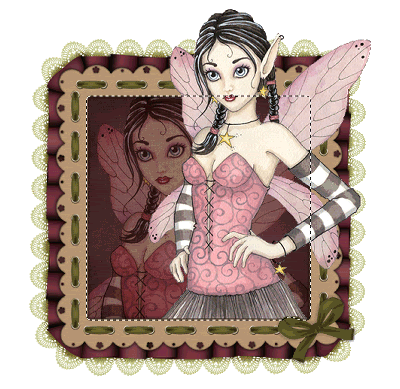
The Attitude Fairy

 
Supplies
 
"Cherry Love" scrap kit by Seachell Scrapz which is a freebie available on her blog
Tube of choice - I am using the lovely work of Caron Vinson which can be purchased from CILM
**PLEASE DO NOT USE HER ARTWORK WITHOUT THE APPROPRIATE LICENCE**
WSL_Mask133 by Chelle (supplied)
Fonts of choice - I am using Albemarle Swash (supplied), 2Peas Frazzled (pay to use) and GeeohHmk (supplied)
Plugin: Xero / Soft Mood (supplied)
Plugin: Eye Candy 4000 Gradient Glow (optional)
 
My Supplies here
 
 
~ Step 1 ~
 
Open a new 600 x 600 blank canvas flood-filled white
 
Paste Element17 (Frame) as new layer
Resize by 75%
Paste Element14 (Frame) as new layer
Resize by 75%
Position centrally over first frame
 
Add a drop shadow to top frame
H & V – 1
Opacity – 50
Blur – 5.00
Colour - #000000
Repeat Drop Shadow changing the H & V to -1
Layers / Merge / Merge Down
 
With your Magic Wand click inside the frame
Selections / Modify / Expand by 15
Add a new raster layer
Layers / Arrange / Move Down
Copy Paper2 and Paste into Selection
 
KEEP SELECTED
 
Open your tube and paste as new layer
Resize larger is necessary
Position in frame
Selections / Invert
Delete
 
Set blend mode of layer to Soft Light


~ Step 2 ~
 
Paste your new as new layer once again
Position to the right (or left – depending on the tube you use)
Then click inside the Frame with your Magic Wand again
Selections / Modify / Expand by 8
Selections / Invert
Selections / Modify / Feather by 2
Then using your Eraser carefully erase along the bottom of the tube where it meets the Frame
Deselect
 
 
Duplicate layer and set blend mode to Multiply
Lower opacity to 50
 
Still on same layer
Effects / Plugins / Xero / Soft Mood with default settings
 
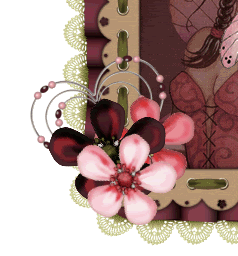
Paste Element2 (Dark Flower) as new layer
Resize by 35%
Position to the lower left of the Frame
 
Paste Element3 (Light Pink Flower) as new layer
Resize by 30%
Position alongside first flower
 
Paste Element5 (Beaded Heart) as new layer
Image / Rotate by 20 to the left
Resize by 35%
Position behind flowers to the left
 
 
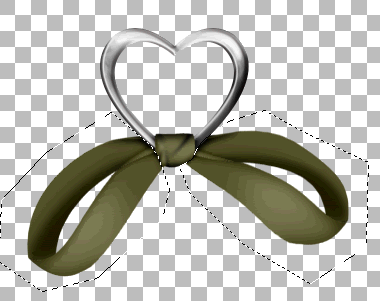
Open Element22 and duplicate it (Shift D), and close off original
Using your Freehand Tool draw around the Ribbon on either side
Press delete
 
 
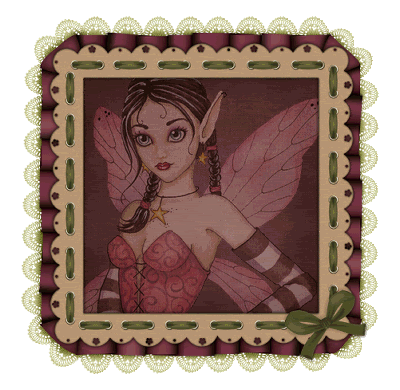
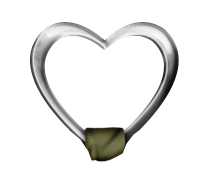
Now your heart should look like this:
 
 
Paste it as a new layer to your working canvas
Resize by 30%
Position over the centre of the Green bow in the lower right of the Frame
 
Paste Element11 (Burgundy bow) as new layer
Image / Mirror
Resize by 40%
Position in the upper left corner
 

~ Step 3 ~
 
Activate your Background layer
Paste Paper4 as new layer
Resize by 70%
Layers / Load/Save Mask / Load Mask from Disk
Locate WSL_Mask133
Source Luminance
Fit to Layer
OK
Layers / Merge / Merge Group
Lower opacity to 40
 
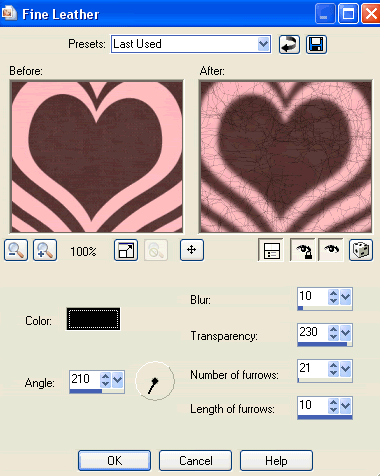
Effects / Texture Effects / Fine Leather with the following settings:


Repeat Fine Leather
 
Effects / Distortion Effects / Curlicues with default settings
 
Crop and resize
 
 
~ Step 4 ~
 
Choose two colours from your tube and/or scrap kit and set them as your Background and foreground colours in your Materials Palette
 
Foreground - #d28184
Background - #341215
 
Turn your foreground off to null for the moment and type out the words:
"It's All About" or "Love My"
 
Now turn the visibility back on the Foreground and toggle the colours so they are now the other way around
Foreground - #341215
Background - #d28184
 
Choose another font slightly bolder (but not too much, though it is entirely up to you) and type the word:
"Attitude"
 
Your text should now read "It's All About Attitude" or "Love My Attitude"
 
Change to another font, or one of those you have already used, and type out your name
Add any effects you wish to make your name stand out
Then apply a slight drop shadow
 
Finally add your © copyright, licence and watermark
Then save as a GIF or JPG and you're done!
 
Thanks for trying my tutorial
 
::st!na::
 

©Tutorial written by Stina on 8th March 2009
All rights reserved