
Supplies
Scrap kit of choice - I am using "Fresh Awakenings" by Lynn Earwicker of Moo Designs available from The Scrapping Divaz Designz
Tube of choice - I am using the delightful artwork of Caron Vinson which is available from CILM
**PLEASE DO NOT USE HER ARTWORK WITHOUT THE APPROPRIATE LICENCE**
3HeartStings Mask
WSL_Mask7 by Chelle
Plugin: Xero Porcelain
Font of choice - I am using 2Peas Type
Tube of choice - I am using the delightful artwork of Caron Vinson which is available from CILM
**PLEASE DO NOT USE HER ARTWORK WITHOUT THE APPROPRIATE LICENCE**
3HeartStings Mask
WSL_Mask7 by Chelle
Plugin: Xero Porcelain
Font of choice - I am using 2Peas Type
Ready? Let's begin....
Open a new 600 x 600 blank canvas flood-filled white
Paste HeartRibbon as new layer
Resize by 25%
Resize by 25%
LEAVE IN POSITION
Select the inner area with your Magic Wand
Selections > Modify > Expand by 3
Add a new raster layer
Paste Paper07 (or one of choice) into Selection
Deselect
Selections > Modify > Expand by 3
Add a new raster layer
Paste Paper07 (or one of choice) into Selection
Deselect
Adjust > Hue & Saturation > Colourise with the following settings:
Paste Paper12 as new layer
Resize by 20%
Layers > Arrange > Send to Bottom
Resize by 20%
Layers > Arrange > Send to Bottom
Layers > New Mask Layer > From Image
Locate 3HeartStings Mask
OK
Layers > Merge > Merge Group
Resize by 95%
Position as if shadowing heart
Lower opacity to around 60
Locate 3HeartStings Mask
OK
Layers > Merge > Merge Group
Resize by 95%
Position as if shadowing heart
Lower opacity to around 60
Paste Paper01 as new layer
Resize by 20%
Layers > Arrange > Send to Bottom
Resize by 20%
Layers > Arrange > Send to Bottom
Layers > New Mask Layer > From Image
Locate WSL_Mask7
OK
Layers > Merge > Merge Group
Position so that it is centred behind Heart
Locate WSL_Mask7
OK
Layers > Merge > Merge Group
Position so that it is centred behind Heart

Paste Ivy as new layer
Image > Rotate by 10 to the right
Resize by 12%
Position along lower right of Ribbon
Image > Rotate by 10 to the right
Resize by 12%
Position along lower right of Ribbon
Select your Freehand Tool and carefully draw around the bow on the Ribbon

Press delete then deselect
Paste RoseBranch as new layer
Resize by 12%
Position over the Ivy
Resize by 12%
Position over the Ivy
Paste DelicateRose as new layer
Image > Rotate by 20 to the left
Resize by 12%
Position over the centre of bow
Image > Rotate by 20 to the left
Resize by 12%
Position over the centre of bow
Select your Freehand Tool and draw around the bottom half of the roses
Delete then deselect

Paste FluffyClouds2 as new layer
Resize by 20%
Position inside the Frame
Lower opacity to around 70
Resize by 20%
Position inside the Frame
Lower opacity to around 70
Paste Flower1 as new layer
Resize by 8%
Duplicate and position to your liking
Resize by 8%
Duplicate and position to your liking
Paste Flower3 as new layer
Resize by 6%
Duplicate and position to your liking
Resize by 6%
Duplicate and position to your liking
Paste PrettyButterfly02 as new layer
Resize by 3%
Position and duplicate then Image > Mirror
Position to liking
Resize by 3%
Position and duplicate then Image > Mirror
Position to liking
Paste PrettyButterfly01 as new layer
Resize by 3%
Duplicate and set Blend Mode to Soft Light
Layers > Merge > Merge Down
Resize again by 85%
Position then duplicate then Image > Mirror
Position again to your liking
Resize by 3%
Duplicate and set Blend Mode to Soft Light
Layers > Merge > Merge Down
Resize again by 85%
Position then duplicate then Image > Mirror
Position again to your liking
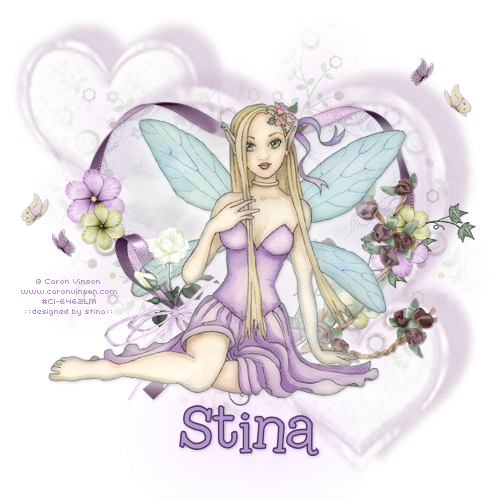
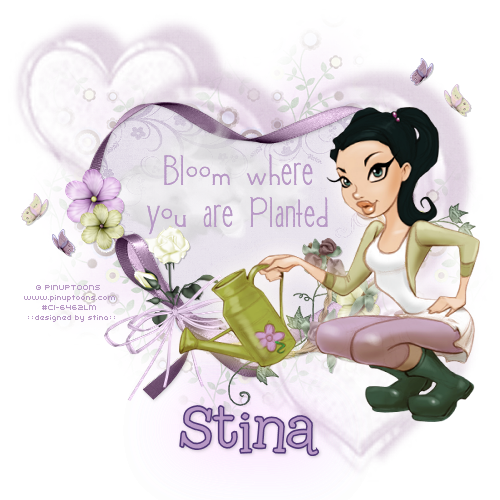
Ok let's paste our tube
I am using one of the delightful Caron Vinson's
And to set the mood I chose to soften it a little
I am using one of the delightful Caron Vinson's
And to set the mood I chose to soften it a little
Effects > Plugins > Xero > Porcelain with the following settings:
OK, so one of her wings is covering the rose
Activate the Delicate Rose layer
Select the outer area around the rose with your Magic Wand
Selections > Invert
Select the outer area around the rose with your Magic Wand
Selections > Invert
Now activate the tube layer
Press delete once or twice (to soften the edges)
Deselect
Press delete once or twice (to soften the edges)
Deselect
Duplicate tube layer
Activate bottom tube layer
Adjust > Blur > Gaussian Blur with a radius of 10.00
Set Blend Mode to Screen
Activate bottom tube layer
Adjust > Blur > Gaussian Blur with a radius of 10.00
Set Blend Mode to Screen
Add a slight/soft drop shadow to your element layers
Select your Text Tool and font of choice
I am using 2Peas Typo
I am using 2Peas Typo
Set your Materials Palette to the following:
Foreground - #503776
Background - #b899c5
Stroke width - 1.5
Foreground - #503776
Background - #b899c5
Stroke width - 1.5
Type out your name
Objects > Align > Horizontal Centre in Canvas
Convert to raster layer
Add a drop shadow
Objects > Align > Horizontal Centre in Canvas
Convert to raster layer
Add a drop shadow
Duplicate, then
On bottom text layer go to:
Adjust > Blur > Gaussian Blur with a radius of 30.00
Set Blend Mode to Hard Light
Lower opacity to 75
On bottom text layer go to:
Adjust > Blur > Gaussian Blur with a radius of 30.00
Set Blend Mode to Hard Light
Lower opacity to 75
Finally, add your © copyright, licence and watermark, then save as a GIF or JPG and you're done!!
Thanks for trying my tutorial!
::st!na::
Here is another version:
© Tutorial written by Stina on 3rd May 2009
All rights reserved
No comments:
Post a Comment