
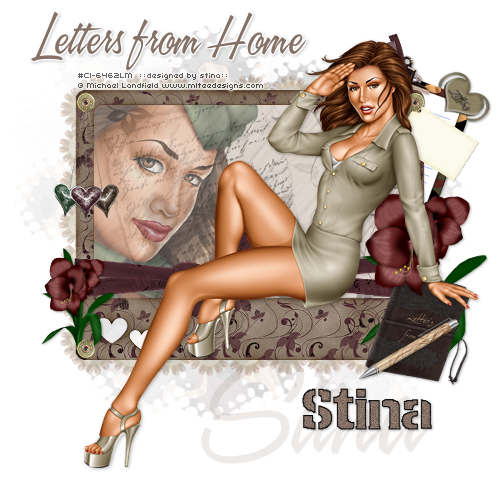
**Grand Opening of Twilight Scraps tut**
Supplies
Scrap kit of choice - I am using "Letters from Home" by StitchyAngel Creationz available as part of the Grand Opening of Twilight Scraps
**Kit is a FREEBIE from 15th to 18th May then it goes on sale**
Tube of choice - I am using the lovely artwork of Michael Landfield available from CILM
Becky_Mask038 here
Fonts of choice - I am using A&S Speedway and 2Peas Frazzled Stencil
Plugins:
Simple > Top Left Mirror
Mura Meister Copies
Eye Candy 4000 Gradient Glow (optional)
Ready? Let's begin...
Open a new 700 x 600 blank canvas flood-filled white
Paste WrapFrame1 as new layer
Resize by 60%
Resize by 60%
LEAVE IN POSITION
With your Selection Tool draw out a rectangle around the Frame along the inside
Paste Paper1 as new layer
Resize by 80%
Position paper so the letter is to the left
Selections > Invert
Delete but
KEEP SELECTED
Paste Paper1 as new layer
Resize by 80%
Position paper so the letter is to the left
Selections > Invert
Delete but
KEEP SELECTED
Duplicate layer
Adjust > Hue & Saturation > Colourise with both Hue and Saturation set to 0
Set blend mode to Hard Light, then
Layers > Merge > Merge Down
Layers > Merge > Merge Down
Duplicate again and set blend mode to Screen
Lower opacity to 30
Layers > Merge > Merge Down
Lower opacity to 30
Layers > Merge > Merge Down
STILL SELECTED
Add new raster layer
Flood-fill layer with #c0c0c0
Lower opacity to 75 (or to your liking)
Layers > Merge > Merge Down
Flood-fill layer with #c0c0c0
Lower opacity to 75 (or to your liking)
Layers > Merge > Merge Down
STILL SELECTED
Add a new raster layer
Flood-fill with #FFFFFF
Layers > Arrange > Move Down
Flood-fill with #FFFFFF
Layers > Arrange > Move Down
Activate layer above
Lower opacity to 50, then
Layers > Merge > Merge Down
Lower opacity to 50, then
Layers > Merge > Merge Down
Now you can deselect! *g*
You should have something like this:
Paste Clipboard as new layer
Image > Rotate by 20 to the right
Resize by 60%
Layers > Arrange > Send to Bottom
Position to the right
Image > Rotate by 20 to the right
Resize by 60%
Layers > Arrange > Send to Bottom
Position to the right
Paste Journal as new layer
Layers > Arrange > Bring to Top
Image > Rotate by 20 to the right
Resize by 20%
Position in the lower right
Layers > Arrange > Bring to Top
Image > Rotate by 20 to the right
Resize by 20%
Position in the lower right
Paste Flower as new layer
Resize by 35% and place over the Journal
Then uSe your Freehand Tool to carefully draw around the Journal and the edge of the flower's petals
Resize by 35% and place over the Journal
Then uSe your Freehand Tool to carefully draw around the Journal and the edge of the flower's petals
Selections > Modify > Feather by 1
Delete then deselect
Delete then deselect
Paste Flower as new layer again
Resize by 20%
Place in lower left of Frame
Resize by 20%
Place in lower left of Frame
Paste Pen as new layer
Image > Rotate by 30 to the left
Resize by 35%
Position over the Journal to your liking
Image > Rotate by 30 to the left
Resize by 35%
Position over the Journal to your liking
Paste BulletHead as new layer
Resize by 10%
Place in upper left, then
Resize by 10%
Place in upper left, then
Effects > Plugins > Simple > Top left Mirror
This will place the bullets in each corner of the Frame
Adjust > Sharpness > Sharpen
This will place the bullets in each corner of the Frame
Adjust > Sharpness > Sharpen
Erase the bullet visible over the Journal (we don't need that one)
Paste SwingHearts2 as new layer
Resize by 25%
Position in upper left with the small centre heart position in the centre of the bullethead, then
Layers > Arrange > Move Down
Resize by 25%
Position in upper left with the small centre heart position in the centre of the bullethead, then
Layers > Arrange > Move Down
It should now appear as if the hearts are hanging from the BulletHead
Paste a BlankTag as new layer
Image > Rotate by 30 to the left
Resize by 28%
Position in upper right with the ring from the tag beneath the BulletHead
Image > Rotate by 30 to the left
Resize by 28%
Position in upper right with the ring from the tag beneath the BulletHead
Use your Selection Tool to draw out a rectangle along the EXACT edge of the Frame
Paste Bullets (shaped like a flower) as new layer
Resize by 20%
Resize by 20%
LEAVE IN POSITION
Effect > Plugins > Mura Meister > Copies with the following settings:
You can deselect now
Position the row of Bullets to the top of the Frame
Layers > Arrange > Send to Bottom
Layers > Arrange > Send to Bottom
Duplicate, then Image > Flip
Duplicate again, then Image > Rotate by 90 to the right
Position along the left of the Frame
Position along the left of the Frame
With your Selection Tool draw around the excess Bullets and delete
Duplicate again, then Image > Mirror
Position each so they are only slightly protruding
Make sure you are on the top layer of Bullets, then
Layers > Merge > Merge Down
Repeat twice more
Lower opacity to 30
Make sure you are on the top layer of Bullets, then
Layers > Merge > Merge Down
Repeat twice more
Lower opacity to 30
It should look something like this now:
Paste Paper of choice as new layer - I used Paper8
Layers > Arrange > Send to Bottom
Layers > Arrange > Send to Bottom
Layers > New Mask Layer > From Image
Locate Becky_Mask038
OK
Layers > Merge > Merge Group
Lower opacity to 20
Locate Becky_Mask038
OK
Layers > Merge > Merge Group
Lower opacity to 20
Activate top layer and select your Text Tool and font of choice
I am using A&S Speedway
Choose a colour from your tag - I am using #857166
I am using A&S Speedway
Choose a colour from your tag - I am using #857166
Type out text of your choice
Convert to raster layer and apply a Gradient Glow
Add a drop shadow of choice
Convert to raster layer and apply a Gradient Glow
Add a drop shadow of choice
Select your Text Tool again and another of choice
I am using 2Peas Frazzled Stencil
I am using 2Peas Frazzled Stencil
Set your Foreground to #000000 and keep your Background the same
Type out your name and position to your liking
Convert to raster layer
Apply any effects you wish and a drop shadow of choice
Convert to raster layer
Apply any effects you wish and a drop shadow of choice
Finally, add your © copyright, licence and watermark, then save as a GIF or JPG and you're done!
Thanks for trying my tutorial!
::st!na::
© Tutorial written by Stina on 15th May 2009
All rights reserved
No comments:
Post a Comment