Supplies
Scrap kit of choice - I am using "Sutble Gifts" by Lynn of Designs by Moo available from The Scrappin Divaz Designz
Tube of choice - I am using the lovely artwork of Zindy Nielsen available from her store
**PLEASE DO NOT USE HER ARTWORK WITHOUT THE APPROPRIATE LICENCE**
Plugin: Alien Skin Xenofex 2.0 Constellation
Font of choice - I am using Be Safe (aka Camilla)
Tube of choice - I am using the lovely artwork of Zindy Nielsen available from her store
**PLEASE DO NOT USE HER ARTWORK WITHOUT THE APPROPRIATE LICENCE**
Plugin: Alien Skin Xenofex 2.0 Constellation
Font of choice - I am using Be Safe (aka Camilla)
Ready? Let's begin....
Open a new 600 x 600 blank canvas flood-filled white
Paste LaceFrame as new layer
Resize by 30%
Resize by 30%
Select the inner area with your Magic Wand
Selections > Modify > Expand by 10
Selections > Modify > Expand by 10
Open Paper04
Resize by 30%
Edit > Copy
Resize by 30%
Edit > Copy
On your working canvas
Add add a new raster layer
Paste into Selection
Deselect
Layers > Arrange > Move Down
Add add a new raster layer
Paste into Selection
Deselect
Layers > Arrange > Move Down
Paste SatinFlower3 as new layer
Resize by 30%
Resize by 30%
LEAVE IN POSITION!
Layers > Arrange > Send to Bottom
Lower opacity to 35
Lower opacity to 35
Adjust > Blur > Gaussian Blur with a radius of 25.00
Effects > Distortion Effects > Twirl with the following settings:
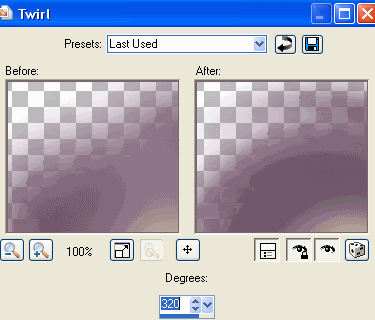
Repeat Twirl effect again
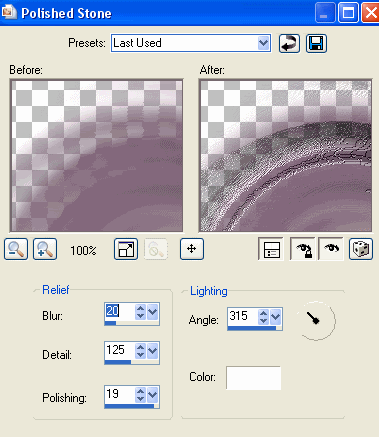
Effects > Texture Effects > Polished Stone with the following settings:
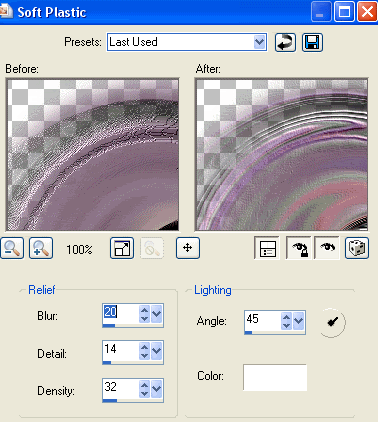
Then Effects > Texture Effects > Soft Plastic with the following settings:
Activate top layer again
Paste SatinFlower3 as new layer
Resize by 4%
Paste SatinFlower3 as new layer
Resize by 4%
Effects > Plugins > Mura Meister > Copies with the following settings:
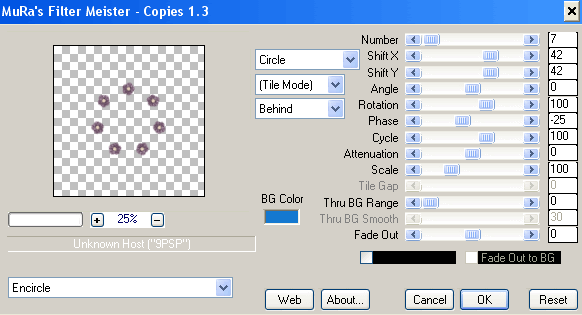
Paste SatinFlower1 as new layer
Resize by 4%
Resize by 4%
Effects > Plugins > Mura Meister > Copies with the same settings
LEAVE IN POSITION
Duplicate layer, then
Image > Rotate by 25 to the left
Adjust > Sharpness > Sharpen
Image > Rotate by 25 to the left
Adjust > Sharpness > Sharpen
Back to the first of the Second set of flowers we left in position over the first set (still with me? LOL)
Set blend mode to Soft Light
Layers > Merge > Merge Down
Set blend mode to Soft Light
Layers > Merge > Merge Down
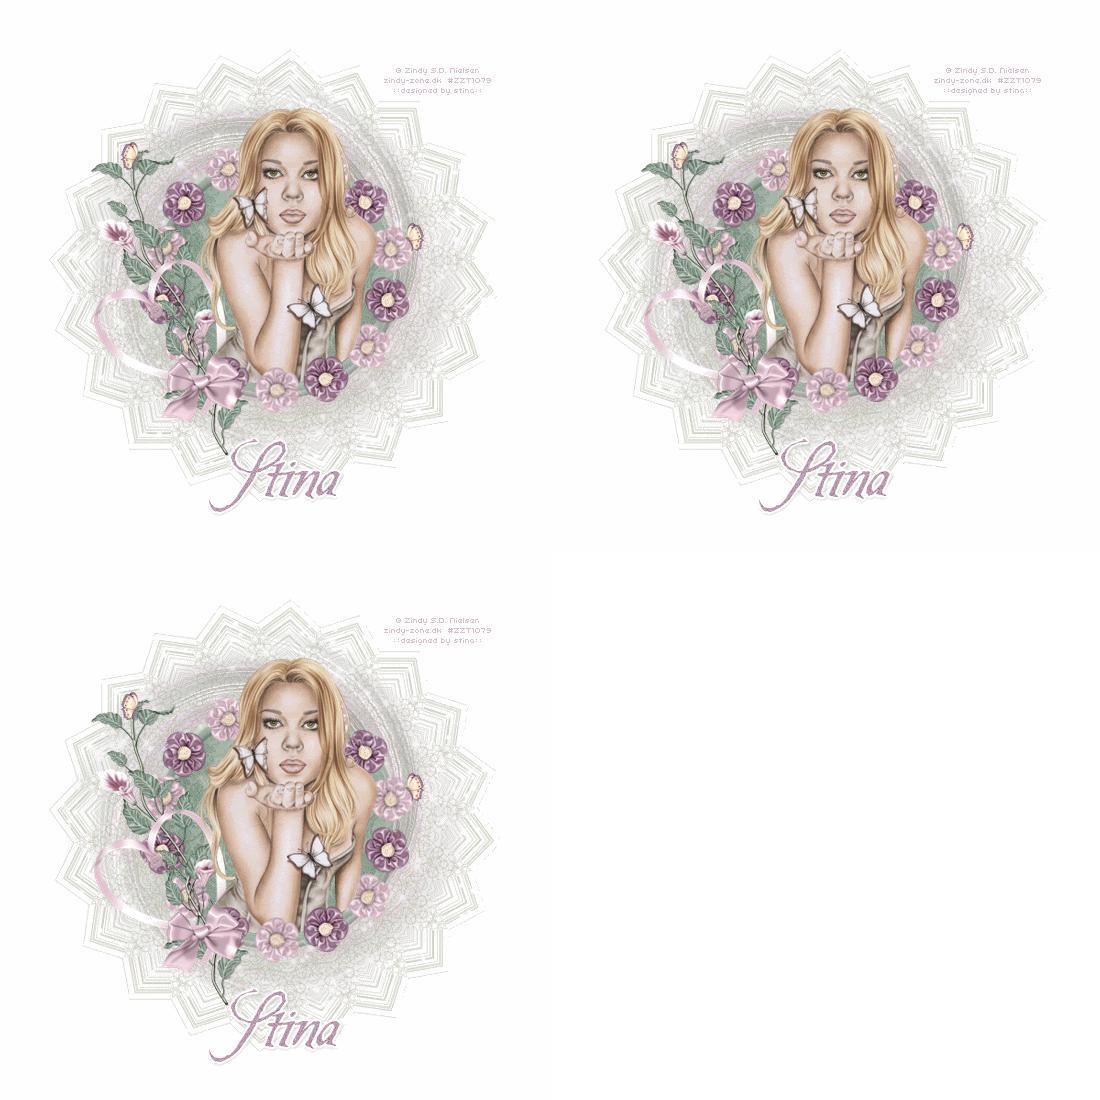
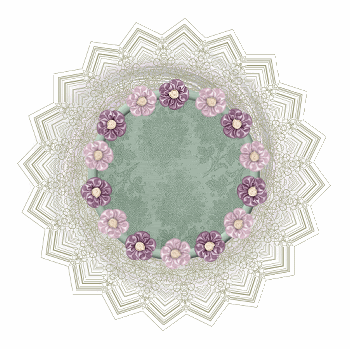
You should now have something like this:
Paste IvyWithFlowers as new layer
Image > Rotate by 20 to the left
Resize by 10%
Position to the left
Image > Rotate by 20 to the left
Resize by 10%
Position to the left
Paste HeartRibbon as new layer
Resize by 15%
Position behind Bow1 and over the Ivy
Resize by 15%
Position behind Bow1 and over the Ivy
Paste Bow1 as new layer
Image > Rotate by 20 to the left
Resize by 8%
Position over the Ivy adjoining the Frame
Image > Rotate by 20 to the left
Resize by 8%
Position over the Ivy adjoining the Frame
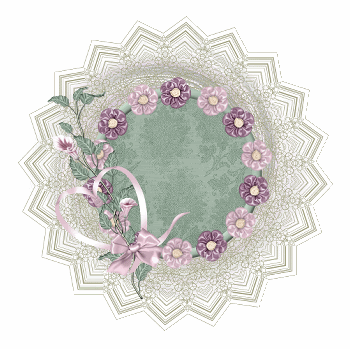
Paste Tube as new layer
Resize as necessary and place in position
Use your Magic Wand to select the inner area of the Frame once again
Selections > Invert
Selections > Modify > Contract by 2
Selections > Modify > Feather by 2
Erase the bottom excess of your tube
Deselect
Resize as necessary and place in position
Use your Magic Wand to select the inner area of the Frame once again
Selections > Invert
Selections > Modify > Contract by 2
Selections > Modify > Feather by 2
Erase the bottom excess of your tube
Deselect
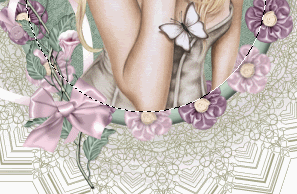
Duplicate tube layer and move original to one above the Frame
On duplicate layer use your Selection Tool to draw out a small rectangle over the lower portion of your tube
On duplicate layer use your Selection Tool to draw out a small rectangle over the lower portion of your tube
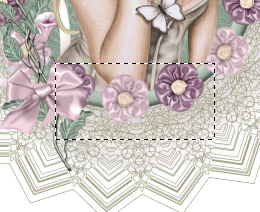
Add any other elements you wish
Crop and resize
Activate your Frame Layer and lower opacity to 50
Duplicate twice
Rename Frame1, Frame2 and Frame3
Hide Frame2 and Frame3 and activate Frame1
Duplicate twice
Rename Frame1, Frame2 and Frame3
Hide Frame2 and Frame3 and activate Frame1
Effects > Plugins > Xenofex 2 > Constellation with the following settings:
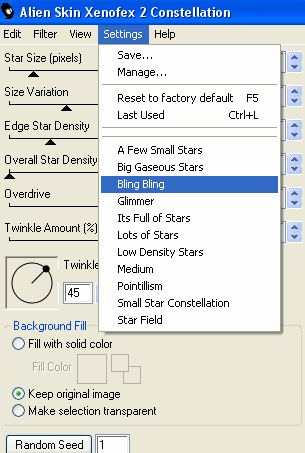
Hide Frame1 and activate Frame2
Repeat Constellation effect, adjusting the Random Seed
Repeat Constellation effect, adjusting the Random Seed
Hide Frame2 and activate Frame3
Repeat Constellation effect, adjusting the Random Seed once more
Repeat Constellation effect, adjusting the Random Seed once more
Select your Text Tool and font of choice
I am using Be Safe (aka Camilla)
Choose a colour from your tube and set as your Background in your Materials Palette
I am using Be Safe (aka Camilla)
Choose a colour from your tube and set as your Background in your Materials Palette
Type out your name
Objects > Align > Horizontal Centre in Canvas
Convert to raster layer
Apply any effects and drop shadow of choice
Objects > Align > Horizontal Centre in Canvas
Convert to raster layer
Apply any effects and drop shadow of choice
Now add any © copyright, licence and watermark you may have
To animate hide Frame2 and Frame3 once again, leaving Frame1 visible
Edit > Copy Merged
Edit > Copy Merged
Open Animation Shop
Edit > Paste as New Animation
Edit > Paste as New Animation
Back to PSP
Hide Frame1 and activate Frame2
Edit > Copy Merged
Hide Frame1 and activate Frame2
Edit > Copy Merged
In Animation Shop
Edit > Paste after Current Frame
Edit > Paste after Current Frame
Back to PSP
Hide Frame2 and activate Frame3
Edit > Copy Merged
Hide Frame2 and activate Frame3
Edit > Copy Merged
In Animation Shop
Edit > Paste after Current Frame
Edit > Paste after Current Frame
Select All frames
Animation > Frame Properties
Set to 15
Animation > Frame Properties
Set to 15
Finally save as a GIF and you're done!
Thanks for trying my tutorial!
::st!na::
© Tutorial written by Stina on 5th May 2009
All rights reserved

No comments:
Post a Comment