

Supplies
Scrap kit of choice - I am using "Backyard Garden" by Kristi Westling of Designs by Kristi available from The Scrapping Dviaz Designz and Sunshine Studio Scraps
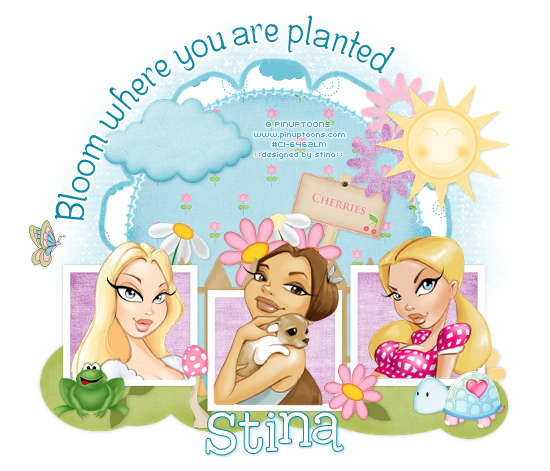
Tubes of choice - I am using the artwork of Rion Vernon and PinUpToons which is available with a licence from CILM
**PLEASE DO NOT USE HIS ARTWORK WITHOUT THE APPROPRIATE LICENCE**
Lacarolita Template #11 available from her blog
WSL_Mask33 by Chelle available from her blog
Fonts of choice - I am using Centime and 2Peas High Tide
Plugins: Eye Candy 4000 Gradient Glow and Xenofex 2 Constellation
Ready? Let's begin....
Open the Lacarolita Template #11
Shift D to duplicate, then close off the original
Delete copyright layer
Delete copyright layer
Image > Canvas Resize 700 x 600 centred
Activate Background layer and flood-fill excess area white
Activate Background layer and flood-fill excess area white
Activate RASTER1 (large Flower)
Select with Magic Wand
Selections > Modify > Feather by 2
Press delete several times until the greyed area is removed
Paste Paper of choice (I used Paper3) INTO selection
Select with Magic Wand
Selections > Modify > Feather by 2
Press delete several times until the greyed area is removed
Paste Paper of choice (I used Paper3) INTO selection
KEEP SELECTED!!
Selections > Modify > Contract by 7
Paste another Paper of choice (I am using Paper7) INTO selection
Deselect
Paste another Paper of choice (I am using Paper7) INTO selection
Deselect
Activate RASTER2
Select black area with Magic Wand
Selections > Modify > Feather by 2
Press delete to remove black
Paste Paper of choice INTO selection
Deselect
Select black area with Magic Wand
Selections > Modify > Feather by 2
Press delete to remove black
Paste Paper of choice INTO selection
Deselect
STILL ON SAME LAYER
Select inside the circled area with Magic Wand
Selections > Modify > Feather by 2
Add new raster layer
Paste Paper of choice INTO selection
Deselect
Select inside the circled area with Magic Wand
Selections > Modify > Feather by 2
Add new raster layer
Paste Paper of choice INTO selection
Deselect
Activate RASTER3 (Frame Backgrounds)
Select each Frame with Magic Wand
Paste Paper of choice as new layer
Resize by 15%
Selections > Invert
Delete then deselect
Layers > Merge > Merge Down
Select each Frame with Magic Wand
Paste Paper of choice as new layer
Resize by 15%
Selections > Invert
Delete then deselect
Layers > Merge > Merge Down
Activate RASTER4 (Frames)
Select each Frame with Magic Wand
Delete dark grey and flood fill with white
Deselect
Select each Frame with Magic Wand
Delete dark grey and flood fill with white
Deselect
Apply a drop shadow:
H & V - 0
Opacity - 25
Blur - 5.00
Colour - #000000
H & V - 0
Opacity - 25
Blur - 5.00
Colour - #000000
Activate RASTER5 (top flower)
Selections > Float
Selections > Defloat
Selections > Modify > Feather by 2
Delete till the flower is removed
Paste Paper of choice INTO selection
Deselect
Selections > Float
Selections > Defloat
Selections > Modify > Feather by 2
Delete till the flower is removed
Paste Paper of choice INTO selection
Deselect
Activate RASTER6 (right flower)
Selections > Float
Selections > Defloat
Selections > Modify > Feather by 2
Delete till the flower is removed
Paste Paper of choice INTO selection
Deselect
Selections > Float
Selections > Defloat
Selections > Modify > Feather by 2
Delete till the flower is removed
Paste Paper of choice INTO selection
Deselect
Activate RASTER7 (left flower)
Selections > Float
Selections > Defloat
Selections > Modify > Feather by 2
Delete till the flower is removed
Paste Paper of choice INTO selection
Deselect
Selections > Float
Selections > Defloat
Selections > Modify > Feather by 2
Delete till the flower is removed
Paste Paper of choice INTO selection
Deselect
Paste Fence as new layer
Resize by 20%
Position BEHIND Frame Backgrounds
Resize by 20%
Position BEHIND Frame Backgrounds

Select the inside of each Frame with your Magic Wand
Selections > Modify > Contract by 2
Selections > Modify > Feather by 2
Selections > Modify > Contract by 2
Selections > Modify > Feather by 2
Paste three tubes of choice as new layers
Resize each to fit within Frames
Position so the heads of each tube sits above Frame
Resize each to fit within Frames
Position so the heads of each tube sits above Frame
With your Eraser Tool carefully erase the bottom of each tube completely
Then deselect
Then deselect
Paste various Flowers as new layers
Resize by 5% and position behind the fence
Resize by 5% and position behind the fence
Paste a Sign as new layer
Image > Rotate by 15 to the right
Resize by 20%
Position behind the flowers
Image > Rotate by 15 to the right
Resize by 20%
Position behind the flowers
Paste Frog as new layer
Layers > Arrange > Bring to Top
Resize by 5%
Position to the lower left
Layers > Arrange > Bring to Top
Resize by 5%
Position to the lower left
Paste Mushroom as new layer
Resize by 5% and position
Resize by 5% and position
Paste Turtle as new layer
Resize by 10%
Position to the lower right
Resize by 10%
Position to the lower right
Paste Cloud as new layer
Resize by 8% and position
Resize by 8% and position
Paste Sun as new layer
Resize by 15% and position
Resize by 15% and position
Paste Butterfly as new layer
Resize by 10% and position
Resize by 10% and position
Paste Bush as new layer
Layers > Arrange > Send to Bottom
Resize by 28%
Move and position along the bottom from behind the Frames for a "grass" effect
Re-position the frog, mushroom and turtle on the "grass"
Layers > Arrange > Send to Bottom
Resize by 28%
Move and position along the bottom from behind the Frames for a "grass" effect
Re-position the frog, mushroom and turtle on the "grass"
Paste Flower2 as new layer
Layers > Arrange > Bring to Top
Select the greenery area of the stem with your Magic Wand, then press delete
Deselect
Resize by 4%
Position on the grass and corner of Frame
Layers > Arrange > Bring to Top
Select the greenery area of the stem with your Magic Wand, then press delete
Deselect
Resize by 4%
Position on the grass and corner of Frame
Paste Paper of choice as new layer
Layers > Arrange > Send to Bottom
Layers > Arrange > Send to Bottom
Layers > New Mask Layer > From Image
Locate WSL_Mask33
OK
Layers > Merge > Merge Group
Locate WSL_Mask33
OK
Layers > Merge > Merge Group
Add drop shadows to your layers then resize
Select your Preset Shape Tool and set to Ellipse
Draw out a circle around your tag with your Foreground on a dark colour
Draw out a circle around your tag with your Foreground on a dark colour
Select your Text Tool and font of choice
I am using Centime
Text colour is #0a89a6
Type your text on the curve and position to your liking
Open the Vector Layer in the layer palette and close off the Ellipse
Convert to raster layer
Apply a white Gradient Glow (optional) if you wish
I am using Centime
Text colour is #0a89a6
Type your text on the curve and position to your liking
Open the Vector Layer in the layer palette and close off the Ellipse
Convert to raster layer
Apply a white Gradient Glow (optional) if you wish
Select another font of choice
I am using 2Peas High Tide
Foreground - #0a89a6
Background - #FFFFFF
Stroke width - 1.0
I am using 2Peas High Tide
Foreground - #0a89a6
Background - #FFFFFF
Stroke width - 1.0
Type out your name
Objects > Align > Horizontal Centre in Canvas
Convert to raster layer
Apply drop shadow of choice
Objects > Align > Horizontal Centre in Canvas
Convert to raster layer
Apply drop shadow of choice
Finally, add your © copyright, licence and watermark, then save as a GIF or JPG and you're done!
** IF YOU WISH TO ANIMATE PLEASE FOLLOW THESE NEXT STEPS **
Activate the Mask Layer
Duplicate twice and rename Sparkle1, Sparkle2 and Sparkle3
Hide Sparkle2 and Sparkle3 activating only Sparkle1
Effects > Plugins > Xenofex 2 > Constellation with the following settings:
Activate the Mask Layer
Duplicate twice and rename Sparkle1, Sparkle2 and Sparkle3
Hide Sparkle2 and Sparkle3 activating only Sparkle1
Effects > Plugins > Xenofex 2 > Constellation with the following settings:
Hide Sparkle1 and activate Sparkle2
Apply the Constellation effect, adjusting the Random Seed
Hide Sparkle2 and activate Sparkle3
Apply the Constellation effect again, adjusting the Random Seed once more
Hide Sparkle2 and Sparkle3 with only Sparkle1 visible
Edit > Copy Merged
Open Animation Shop
Edit > Paste as New Animation
Back to PSP
Hide Sparkle1 and activate Sparkle2
Edit > Copy Merged
In Animation Shop
Edit > Paste AFTER Current Frame
Back to PSP
Hide Sparkle2 and activate Sparkle3
Edit > Copy Merged
In Animation Shop
Edit > Paste AFTER Current Frame
Save as a GIF and you're done!
Thanks for trying my tutorial!
::st!na::
Here is a non-animated version:
© Tutorial written by Stina on 22nd May 2009
All rights reserved
All rights reserved
No comments:
Post a Comment