Please email me designed.by.stina@gmail.com with your creations. I'd love to see them.

Showing posts with label Designs by Ali. Show all posts

Saturday, September 12, 2009

Spook Me Baby


Supplies

Scrap kit of choice - I am using "Spookylicious" by Designs by Ali available from Twilight Scraps
Tube of choice - I am using the artwork of Keith Garvey available with a licence from My PSP Tubes
**PLEASE DO NOT USE HIS ARTWORK WITHOUT THE APPROPRIATE LICENCE**
Template 101 by Beth available from her blog
WSL_Mask185 by Chelle available from her blog
Fonts of choice - I am using Poultrygeist and Whackadoo Upper
Plugins: Greg's Factory Output II > Pool Shadow
Eye Candy 4000 > Gradient Glow (optional) and HSB Noise


Let's begin...


Open Template 101 by Beth
Shift D to duplicate and close off original

Image > Canvas Resize 700 x 500 (centred)
Flood fill excess background white

Activate ORANGE RECT FRAME and select with Magic Wand
Selections > Modify > Expand by 1
Flood fill with Black

Selections > Modify > Contract by 3
Paste Paper of choice INTO selection

KEEP SELECTED!!

Effects > Plugins > Greg's Factory Output II > Pool Shadow with default settings
Repeat once

Activate ORANGE STAR FRAME and repeat above steps

Select RECT BACKGROUND with your Magic Wand
Paste a paper of choice as new layer (one with the spider web)
Resize by 60%
Position to liking
Selections > Invert
Delete then deselect

Activate SPOOKY WORD ART
Adjust Brightness and Contrast with the Bright Preset setting
Brightness - 100
Contrast - 0

Repeat twice

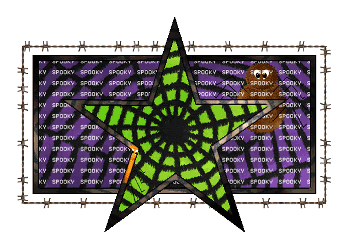
Select BLACK STAR BG with Magic Wand
Paste a spider Web paper of choice as new layer
Resize by 60%
Centre the web to the centre of the Star
Selections > Invert
Delete then deselect

Paste Barbed Wire as new layer
Resize by 40%
Position along Black Dotted Line
Erase any overhanging excess
Duplicate, then Image > Flip

Duplicate again, Image > Rotate by 90
Position to the left on Dotted Line
Erase overhanging excess, then
Duplicate and Image > Mirror

Layers > Merge > Merge Down till all Barbed Wire is one layer
Delete Dotted Line layer


Paste Grass2 as new layer
Resize by 20%
Position to the left inside Frame
Duplicate several times and position
Layers > Merge > Merge Down to one layer
Move down slight
Make a selection around bottom of Grass
Delete then deselect
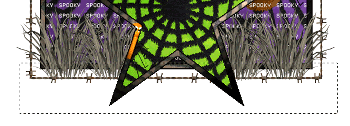


Paste Ghost1 as new layer
Resize by 45%
Position to the left
Lower opacity to 50

Paste Cat as new layer
Resize by 25%
Position in lower right

Paste Bat as new layer
Image > Mirror
Resize by 15%
Position in upper right

Paste Tube of choice as new layer
Resize as necessary and position

Paste Paper of choice as new layer
Layers > Arrange > Send to Bottom

Layers > New Mask Layer > From Image
Apply WSL_Mask185
OK
Layers > Merge > Merge Group
Lower opacity to 30

Crop and resize

Select your Text Tool and font of choice
I am using Poultrygeist
Foreground - #4ddc4c
Background - #000000
Stroke width - 1.0

Type out your text of choice
Objects > Align > Horizontal Centre in Canvas
Convert to raster layer
Apply drop shadow of choice

Select another font of choice
I am using Whackadoo Upper
Same text colours

Type out your name
Objects > Align > Horizontal Centre in Canvas
Convert to raster layer
Add a drop shadow of choice

Finally, add your © copyright, licence and watermark, then save as a GIF or JPG and you're done!


** IF YOU WISH TO ANIMATE PLEASE FOLLOW THESE NEXT STEPS **

Activate your SPOOKY WORD ART layer
Duplicate twice and rename WordArt1, WordArt2 and WordArt3

Activate WordArt1
Effects > Plugins > Eye Candy 4000 > HSB Noise with the following settings:
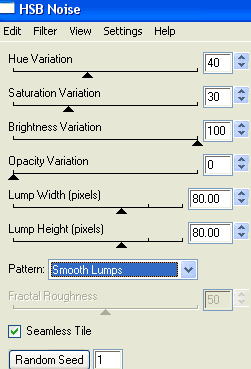


Hide WordArt1 and activate WordArt2
Repeat Noise, adjusting Random Seed

Hide WordArt2 and activate WordArt3
Repeat Noise once again, adjusting the Random Seed

Now to animate!

Activate WordArt1 and hide WordArt2 and WordArt3
Edit > Copy Merged

Open Animation Shop
Edit > Paste as New Animation

Back to PSP
Hide WordArt1 and activate WordArt2
Edit > Copy Merged

In Animation Shop
Edit > Paste After Current Frame

Back to PSP
Hide WordArt2 and activate WordArt3
Edit > Copy Merged

In Animation Shop
Edit > Paste After Current Frame

Select all and change Frame Properties to 20
Now save as a GIF and you're done!

Thanks for trying my tutorial!

::st!na::


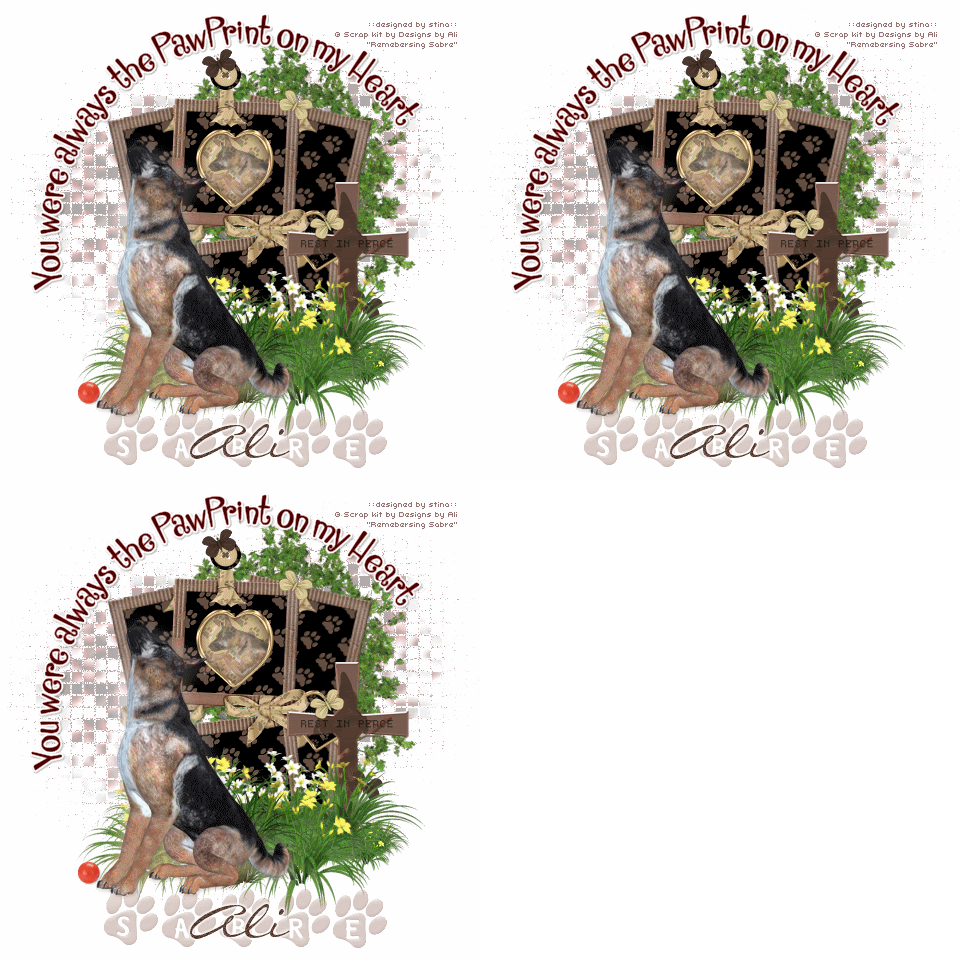
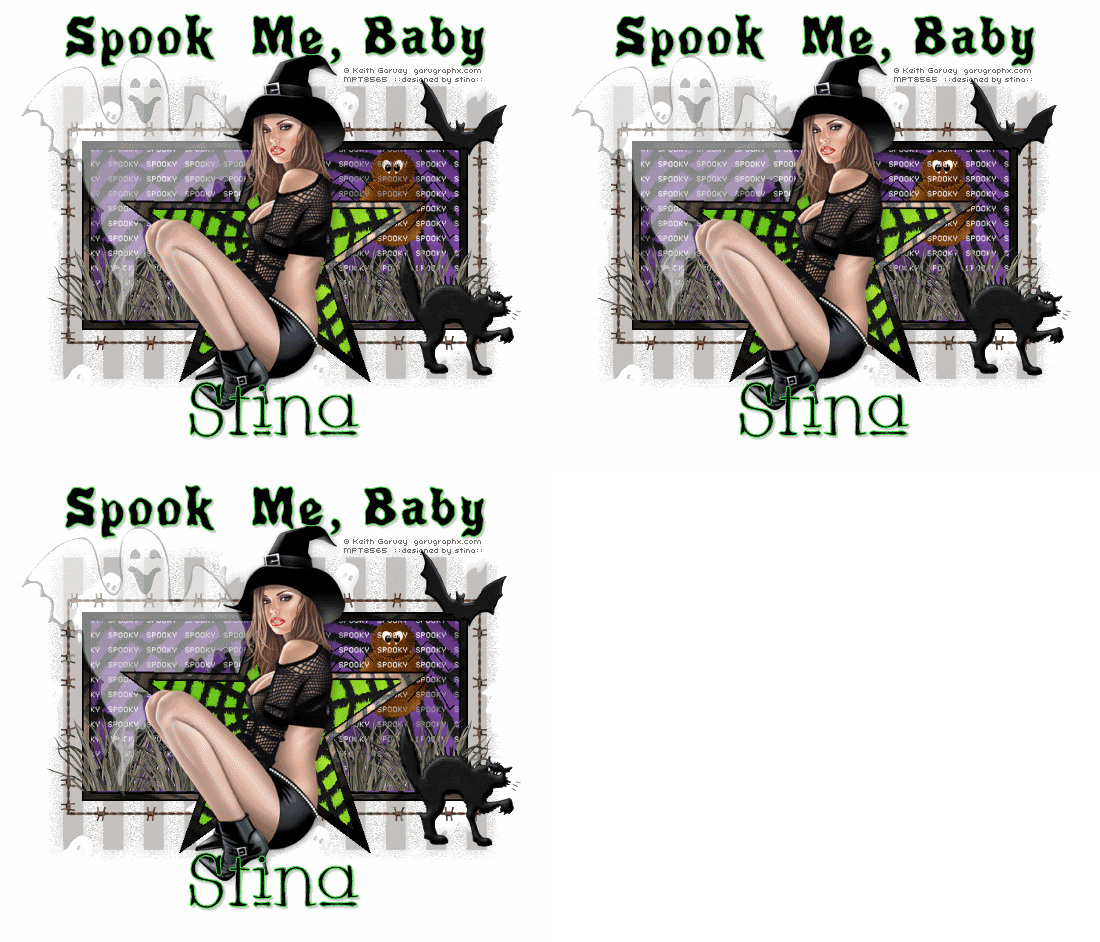
Here is a non-animated version:
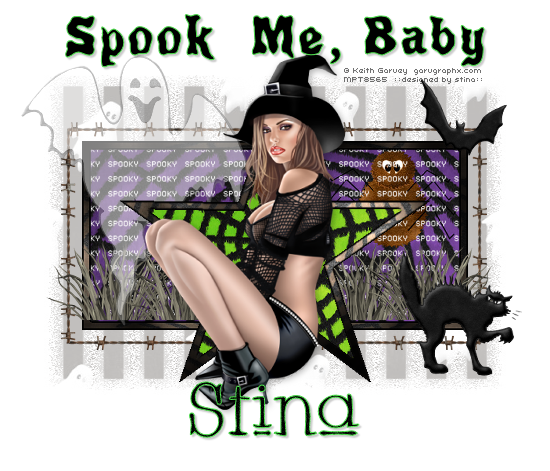


© Tutorial written by Stina on 12th September 2009
All rights reserved

Friday, May 8, 2009

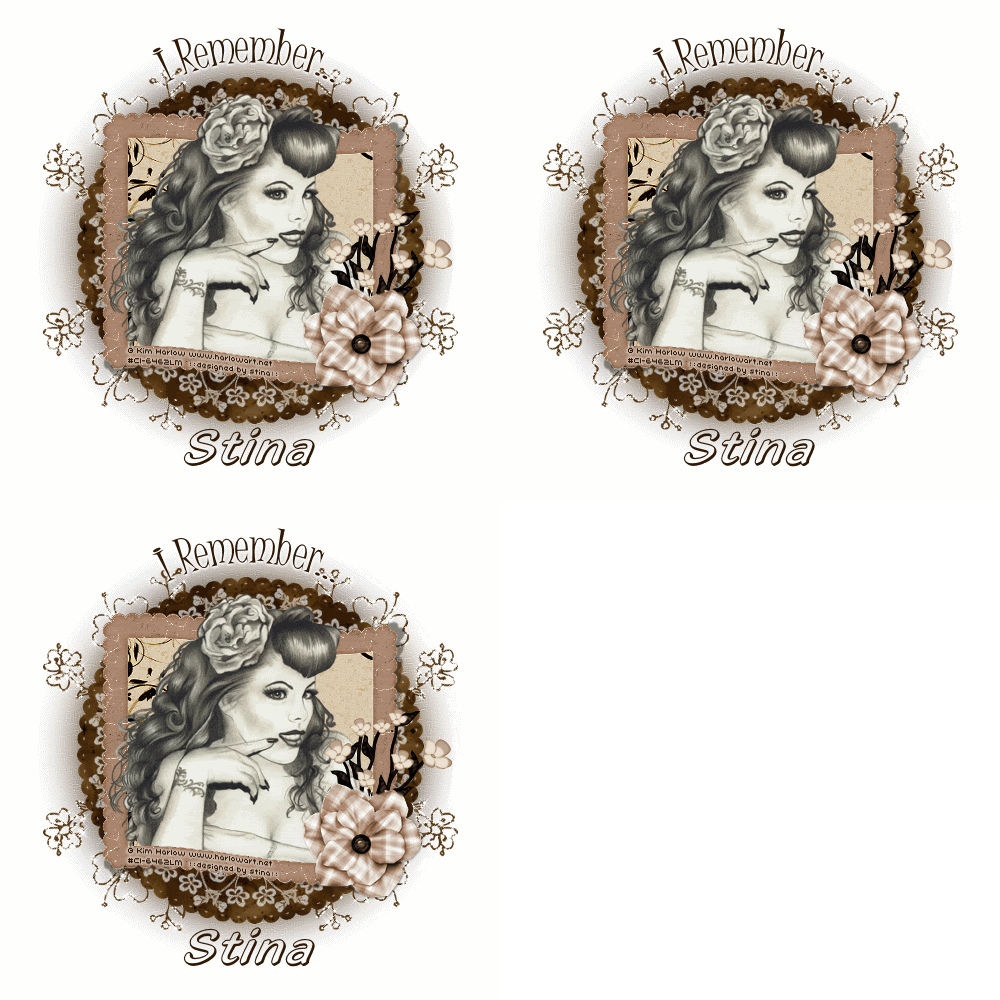
I Remember


Supplies
 
Scrap kit of choice - I am using "New and Old" by Designs by Ali which is available for a limited time from Scraps with Attitude, Stargazer Scraps and Paradise 4 Scrappers
Tube if choice - I am using the lovely artwork of
Kim Harlow which is available from CILM
Lace tube of choice - the one I used is
here
Fonts of choice - I am using Juice ITC and Highlight LET
Plugin: FM Tile Tools Blend Emboss
Plugin: Simple > Top Left Mirror
Plugin: Filters Unlimited > Photo Aging Kit > Cracked Paper and Hair & Dust
Plugin: Alien Skin Xenofex 2 > Constellation
 
Ready? Let's begin...
 
 
Open a new 600 x 600 blank canvas flood-filled white
 
Paste one of the templates as new layer
Resize by 80%
 
LEAVE IN POSITION
 
Duplicate and on bottom layer go to
Adjust > Blur > Gaussian Blur with a Radius of 25.00
 
Still on same layer
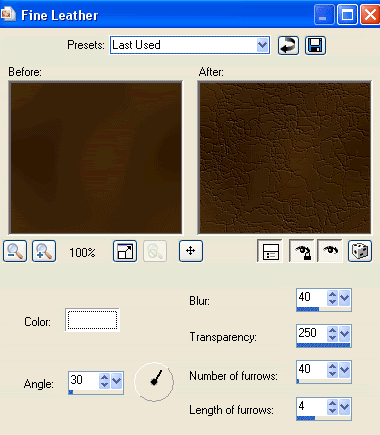
Effects > Texture Effects > Fine Leather with the following settings:
 
 
Then Effects > Plugins > FM Tile Tools > Blend Emboss with default settings
 
Activate top layer
Paste a Frame as new layer
Resize by 60%
Position centrally over template
 
Select the inside of Frame with your Magic Wand
Selections > Modify > Expand by 10
 
Paste DBA Paper5 as new layer
resize by 60%
Selections > Invert
Delete and deselect
 
Layers > Arrange > Move Down
 
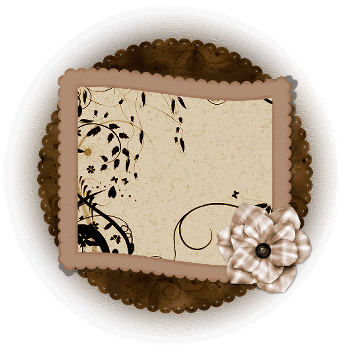
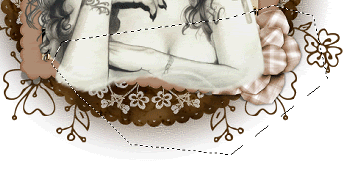
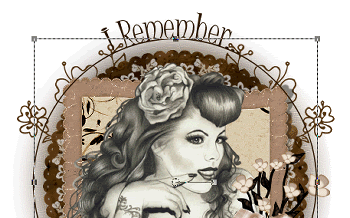
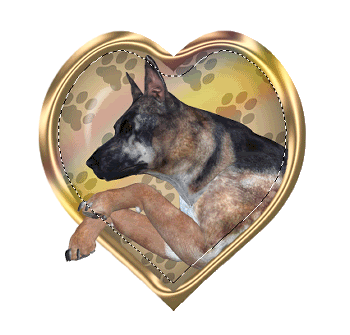
You should now have something a little like this:
 
 
Paste one of the Doodles as new layer
Resize by 50%
Place in upper left
Layers > Arrange > Send to Bottom
Position to your liking
 
Effects > Simple > Top Left Mirror
Resize by 95% Bicubic resample
 
 
Activate your Template layer (not the blurred one)
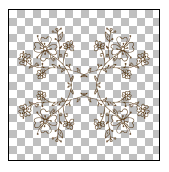
Paste your lace of choice as new layer
If using the one I supplied resize by 85%
Lower opacity to around 70%
 
Back to top layer and paste your tube of choice as new layer
Resize as necessary
Duplicate and move copy to layer below Frame
Hide top tube copy
 
Select the inside of your Frame with your Magic Wand
Selections > Modify > Expand by 10
Selections > Invert
Activate tube below Frame
Press delete then deselect
 
Unhide tube above Frame
With your Freehand Tool draw a selection around the bottom part of your Tube
 
 
Press delete then deselect
 
Crop and resize
 
With your Magic Wand set to the following:
Mode - Add (shift)
Match Mode - RGB Value
Tolerance - 22
Contiguous - checked
Tolerance - 0
 
Select your Frame NOT THE FLOWER!
 
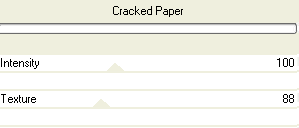
Effects > Plugins > I.C.Net Software > Filters Unlimited > Photo Aging Kit > Cracked Paper with the following settings:
 
 
Then Effects > Plugins > I.C.Net Software > Filters Unlimited > Photo Aging Kit > Hair & Dust with the default settings
 
Deselect
 
Paste a flower stem bunch as new layer
Resize by 30%
Position to the right over flower on Frame corner
 
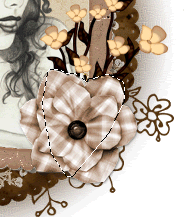
Select your Freehand Tool to draw around the flower on the Frame
Selections > Modify > Feather by 2
Delete then deselect
 
 
Duplicate
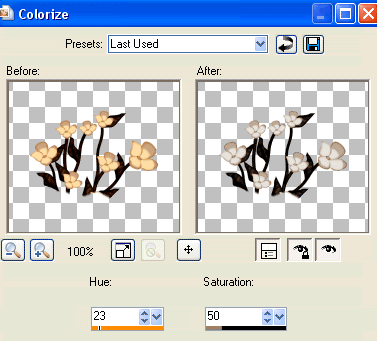
Adjust > Hue & Saturation > Colourise with the following settings:
 
 
Lower opacity to 80
Layers > Merge > Merge Down
 
Select your Preset Shape Tool and set to Ellipse
Set your Foreground to a dark colour and your Background to null
 
Hold your shift key down and draw out a circle (holding Shift will ensure it remains symmetrical)
Objects > Align > Centre in Canvas
 
Select your Text Tool and font of choice
I am using Juice ITC
Set your Background to a colour matching your tube - I am using #2f1906
 
Hold your mouse over the Ellipse till you see a curved Letter A (or Rockin' A some call it)
Type out your text and position to your liking
 

Open the Vector Layer in your Layer Palette and hide the Ellipse
Convert to Raster layer
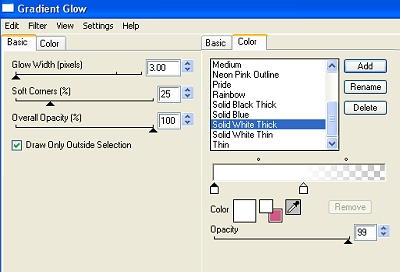
Apply a Gradient Shadow with the Medium setting and Glow width of 3.00
 
Select your Text Tool again and another font of choice
I am using Highlight LET
Type out your name
Objects > Align > Horizontal Centre in Canvas
Convert to raster layer
Apply a drop shadow to your liking
 
Finally, add your © copyright, licence and watermark, then save as a GIF or JPG and you're done!
 

**IF YOU WISH TO ANIMATE PLEASE READ ON**
 
Activate your Doodle layer
Duplicate twice and rename Sparkle 1, Sparkle2 and Sparkle3
 
Hide Sparkle2 and Sparkle3 activating only Sparkle1
 
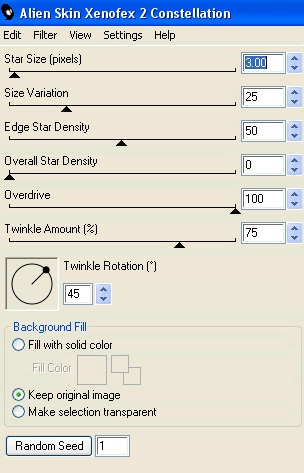
Effects > Plugins > Alien Skin Xenofex 2 > Constellation with the following settings:
 
 
Hide Sparkle1 and activate Sparkle2
Apply the Constellation effect, adjusting the Random Seed
 
Hide Sparkle2 and activate Sparkle3
Apply same again, adjusting the Random Seed
 
Hide Sparkle2 and Sparkle3 again with only Sparkle1 visible
Edit > Copy Merged
 
Open Animation Shop
Edit > Paste as New Animation
 
Back to PSP
Hide Sparkle1 and activate Sparkle2
Edit > Copy Merged
 
In Animation Shop
Edit > Paste AFTER Current Frame
 
Back to PSP
Hide Sparkle2 and activate Sparkle3
Edit > Copy Merged
 
In Animation Shop
Edit > Paste after Current Frame
 
Finally, save as a GIF and you're done!!
 
Thanks for trying my tutorial!
 
::st!na::


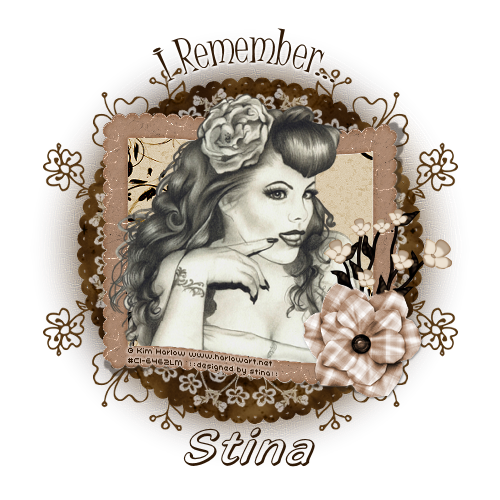
Here is a non-animated version:


© Tutorial written by Stina on 8th May 2009
All rights reserved
Tuesday, April 14, 2009

Remembering You


Tutorial written and dedicated to the memory of my beloved Sheba,
who crossed Rainbow Bridge 22nd September 2008 (last year)....after two strokes, doggy dementia, the loss of the use of her back legs and many many years of love
Always Remembered


Supplies
 
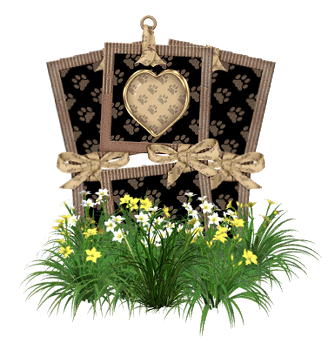
Scrap kit of choice - I am using the RSPCA charity kit "Remembering Sabre" by Designs by Ali available fromStargazer Scraps
Tube of choice - I am using one from the scrap kit
WSL_Mask84 by Chelle available from her blog
Plugin: Eye Candy 4000 Gradient Glow
Plugin: Alien Skin Xenofex 2 Constellation
Fonts of choice - I am using 2Peas Tiger Tails and Mayfair


Let's begin!
 
Open a new 600 x 600 blank canvas flood-filled white
 
Paste DBA Brad2 as new layer
LEAVE IN POSITION
 
Paste DBA Rainbow1 as new layer
Position over the brad
Set blend mode to Soft Light
 
With your Magic Wand select the outer area of the heart
Press delete
 
KEEP SELECTED
 
Paste tube of choice as new layer
Resize as necessary
Position within the heart Brad
 
Selections > Modify > Expand by 23
Selections > Modify > Feather by 2
Use your Eraser to erase the excess you wish to remove
Deselect
 
 
Reposition tube so it sits along the gold trim edge of the Brad heart
 
Paste DBA Dog Tag1 as new layer
Resize by 35%
Position at the bottom of the Heart
Layers > Arrange > Send to Bottom
 
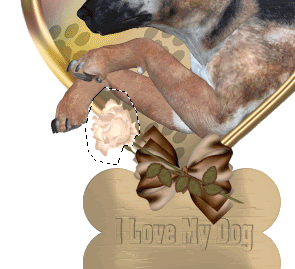
Paste LadySnowflake-Sabre-Bow3 as new layer
Layers > Arrange > Bring to Top
Resize by 30%
Position over the base of the Heart joining the Tag
 
 
Paste LadySnowflake-Sabre-Rose as new layer
Image > Mirror, then
Image > Rotate by 60 to the left
Resize by 35%
Position over the Bow
 
Use your Freehand Tool to draw around the Rose head (not the stem!)
 
 
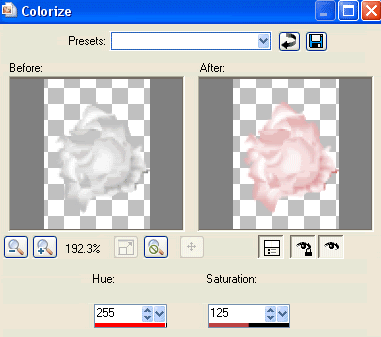
Go to Adjust > Hue & Saturation > Colourise with the following settings:
 
 
Still selected go to Selections > Promote Selection to Layer
Set blend mode to Multiply
Then deselect
Layers > Merge > Merge Down
 
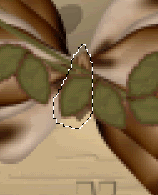
Now with your Freehand Tool again draw around the knot in the Bow and the excess leaves
Lower the opacity of the Rose and Zoom in for a better view
 
 
Now delete and deselect
 
Paste DBA PawPrints1 as new layer
Image > Rotate by 15 to the left
Resize by 12%
Position to the right
Duplicate, then Image > Mirror
Repeat to your liking
 
Image > Canvas Resize 600 w x 650 h
Centre top CHECKED
 
Image > Canvas Resize 550 x 550
Centre CHECKED
 
Resize tag
 
Select your Preset Shape Tool to Ellipse
Foreground - #000000
Background - null
 
Draw out an oval and shape to your liking
 
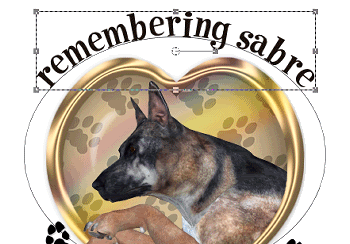
Select your Text Tool and font of choice
I am using 2Peas Tiger Tails
 
Choose a colour from your tag
I am using #1c120e
 
On the curve type your text
Position to your liking
 

In your Layer Palette open the Vector Layer
Turn off the Ellipse and convert to raster layer
Apply a Gradient glow and slight drop shadow
 
H & V - 1
Opacity - 20
Blur - 2.00
Colour - #000000
 
Add a new raster layer
Selections > Select All
Paste DBA Paper22 into Selection
Deselect
 
Layers > Arrange > Send to Bottom
 
Layers > New Mask Layer > From Image
Locate WSL_Mask84
OK
Layers > Merge > Merge Group
Lower opacity to around 30
 
Duplicate twice and rename layers to:
Sparkle1, Sparkle2 and Sparkle3
 
Hide Sparkle2 and Sparkle3 and activate Sparkle1
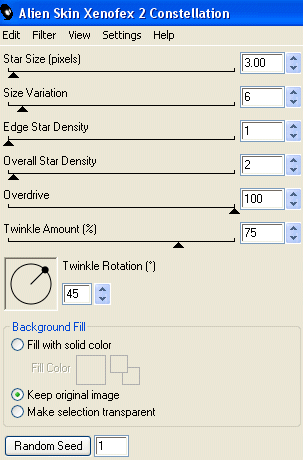
Effects > Plugins > Alien Skin Xenofex 2 > Constellation with the following settings:
 
 
Hide Sparkle1 and activate Sparkle2
Repeat the Constellation effect, adjusting the Random Seed
 
Hide Sparkle2 and activate Sparkle3
Repeat the Constellation effect, adjusting the Random Seed
 
Select your Text Tool and font of choice
I chose Mayfair
Type out your name and place in the Tag
Apply a slight drop shadow
 
Add your © copyright, licence and watermark
 
To animate, copy merged with each respective Mosaic layer into Animation Shop
Each new layer to PASTE AFTER CURRENT FRAME
 
Leave Frame Properties at 10
 
Finally, save as a GIF and you're done!
 
Thank you for trying my tutorial!
 
::st!na::
 
 
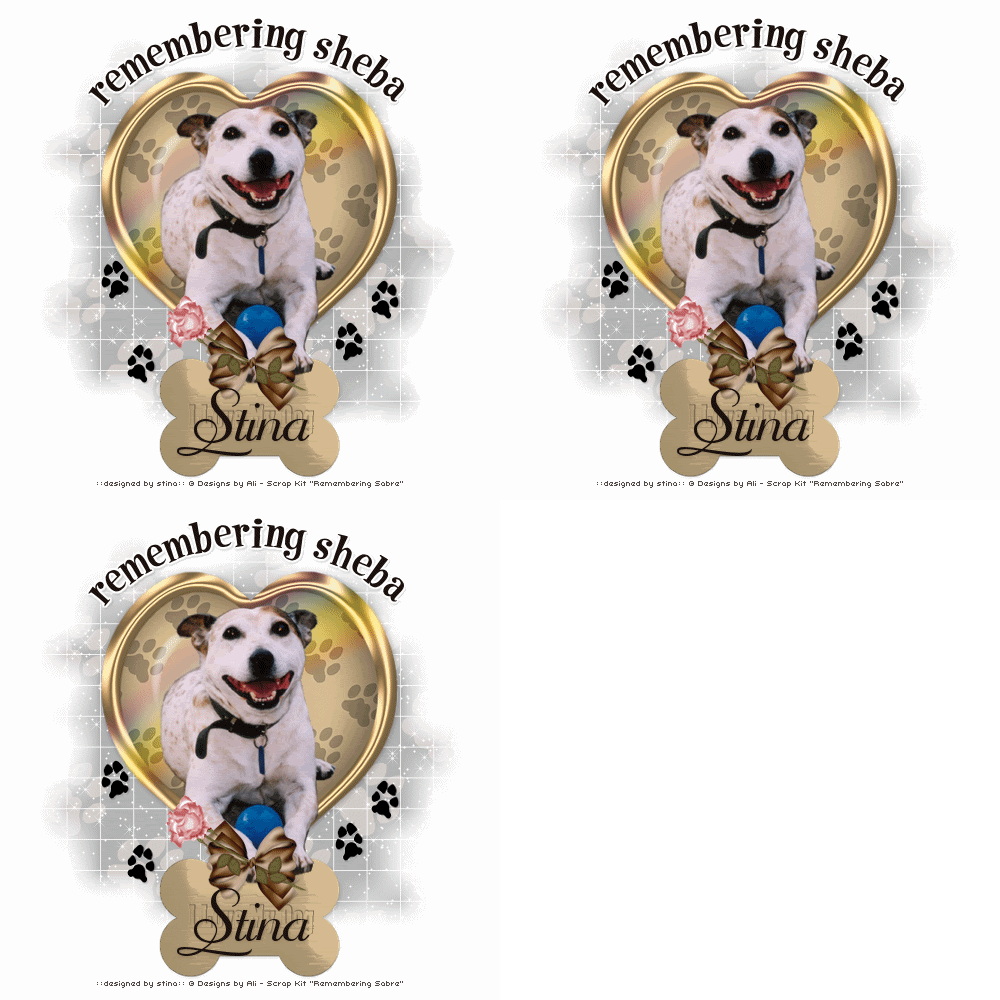
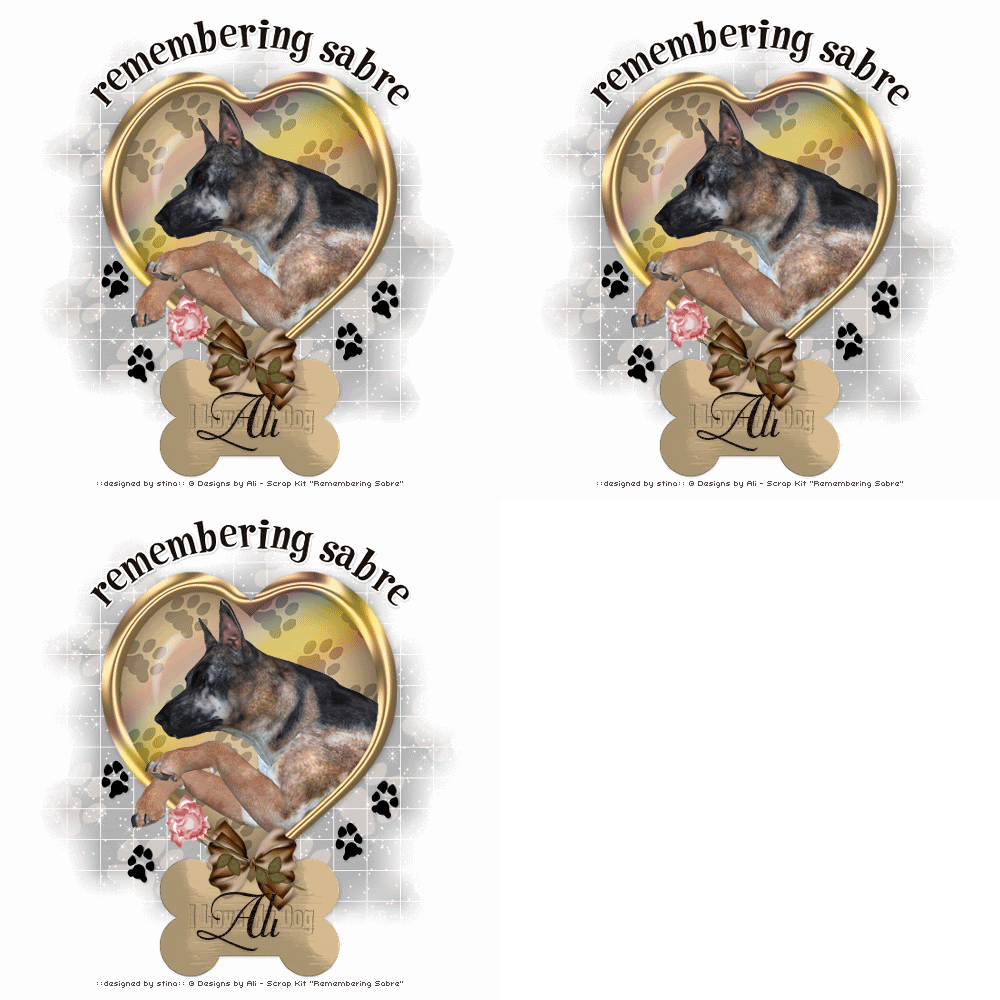
Tag for Ali:
  

© Tutorial written by Stina on 13th April 2009
All rights reserved
Monday, April 13, 2009

Sabre - For Ali

 
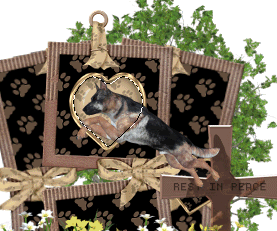
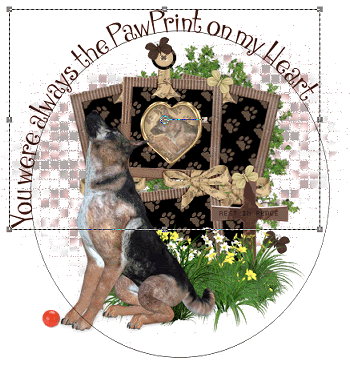
This tutorial is written and dedicated to Ali, who created the scrap kit in memory of her beloved German Shepherd Sabre
 
 
Supplies
 
Scrap kit of choice - I am using the RSPCA charity kit "Remembering Sabre" by Designs by Ali available from Stargazer Scraps
Tube of choice - I am using one from the scrap kit
WSL_Mask170 by Chelle available from her blog
Pawprint Alpha by Created by Jill available from Exquisite Scraps or Scrappin Divaz
Plugin: Eye Candy 4000 Gradient Glow
Fonts of choice - I am using Cinderella ITC TT and LiorahBT
 
 
Let's get started!!
 
Open a new 600 x 600 blank canvas flood-filled white
 
Paste Frame4 as new layer
Resize by 50%
 
Use your Magic Wand to select the area inside the frames
Selections > Modify > Expand by 10
 
Paste DBA PAPER22 as new layer
Resize by 20%
Position in top Frame
Selections > Invert
Delete
 
KEEP SELECTED
 
Paste the paper and resize by 20% again
Position in lower Frame
Delete and deselect
 
Layers > Merge > Merge Down
Repeat
 
Duplicate, then
Image > Rotate by 10 to the right
Position slightly to the right
 
Duplicate again, then
Image > Mirror
 
Paste DBA Brad2 as new layer
Resize by 30%
Place in top Frame
 
Paste DBA Flowers1 as new layer
Resize by 65%
Position along bottom of lower Frame
 
Paste DBA Grass4 as new layer
Resize by 30%
Position in the centre covering the bottom eyelet from the Frame
 
 
Paste your tube of choice or one from the kit alongside Frame
I am using DBA German Shepherd4
Resize as necessary (I resized by 60%)
 
Paste DBA Tree2 as new layer
Layers > Arrange > Send to Bottom
Resize by 70%
Position slightly to the right
 
Paste DBA Rest in Peace Cross2 as new layer
Layers > Arrange > Bring to Top
Resize by 30%
Position to the right amongst and behind the flowers
 
 
Paste DBA German Shepherd9 as new layer
Resize by 30%
Position within the Brad heart in the top Frame
 
Activate the Brad layer and use your Magic Wand to select the area around the heart
Selections > Modify > Expand by 7
 
 
Use your Eraser Tool to erase any excess
Deselect
Lower the opacity to around 50
 
Paste DBA Button2 as new layer
Resize by 8%
Place over ring at top of Frame
 
Paste DBA Butterfly3 as new layer
Image > Rotate by 20 to the left
Resize by 10%
Position on the button to your liking
 
Paste DBA Butterfly1 as new layer
Image > Rotate by 30 to the right
Resuze by 10%
Position on the Frame to your liking
 
Duplicate Butterflies, mirror and position them as you like
 
Paste DBA Ball1 as new layer
Resize by 10%
Place at Shepherd's feet
 
Crop and resize
 
Add new raster layer
Layers > Arrange > Send to Bottom
Selections > Select All
Paste Paper of choice into Selection
Deselect
 
Layers > New Mask Layer > From Image
Locate WSL_Mask170
OK
Layers > Merge > Merge Group
 
Move Mask layer up slightly
Erase any excess from bottom
 
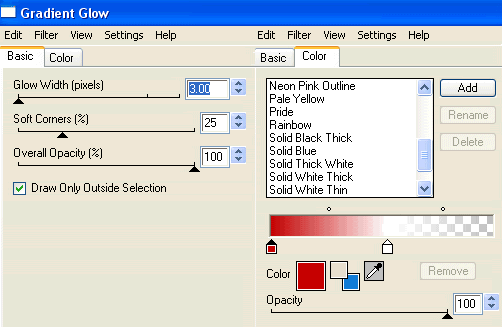
Effects > Plugins > Eye Candy 4000 > Gradient Glow with the following settings:
 
 
Lower opacity to around 35
 
Duplicate layer twice
Rename Mosaic1, Mosaic2 and Mosaic3
 
Hide Mosaic2 and Mosaic3 and activate Mosaic1
 
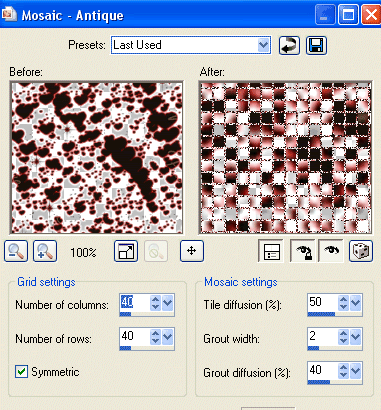
Effects > Texture Effects > Mosaic - Antique with the following settings:
 
 
Hide Mosaic1 and activate Mosaic2
Repeat the Mosaic Antique effect, changing the Grout Diffusion to 41
 
Hide Mosaic2 and activate Mosaic3
Repeat the effect again, changing the Grout Diffusion to 42
 
OK, let's leave this for now - we'll come back to it when we need to animate
 
Activate your top layer
 
Select your Preset Shape Tool to Ellipse
Foreground - #000000
Background - null
 
Draw out a circle
 
Select your Text Tool and font of choice
I am using Cinderella ITC TT
Choose a colour from your tag for your text
 
Click on the curve and type out your choice of text
Position to your liking
 
 
In your Layer Palette open the Vector Layer
Close off the Ellipse and convert to raster layer
Apply a drop shadow of choice
 
Finally, add your © copyright, licence and watermark
 
To add your name you can select a font and colour of your choice, adding any effects and drop shadow you wish
OR
You may use an alpha as I have here (as created by Jill)
 
Colourise Alpha to match your tag
 
I also used a script font over the pawprings for the name
Adding a slight Gradient Glow with the setting on Medium
 
To animate, copy merged with each respective Mosaic layer into Animation Shop
Each new layer to PASTE AFTER CURRENT FRAME
 
Leave Frame Properties at 10
 
Finally, save as a GIF and you're done!
 
Thank you for trying my tutorial!
 
::st!na::
 

© Tutorial written by Stina on 13th April 2009
All rights reserved
Monday, March 30, 2009

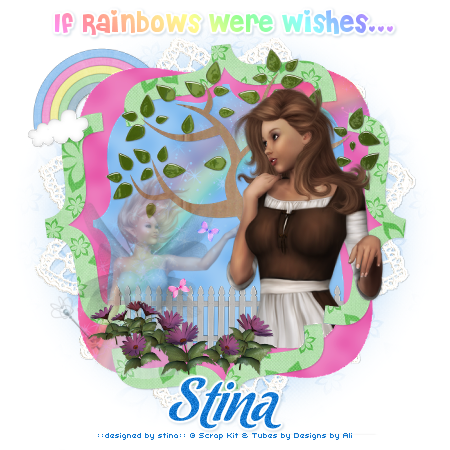
If Rainbows were Wishes...

 
Supplies
 
Scrap kit of choice - I am using "Happily Ever After" by Designs by Ali which is available from Stargazer Scraps and Scraps With Attitude
Tubes of choice - I am using those which were supplied and came in the kit
Template #59 by Ali available from her blog
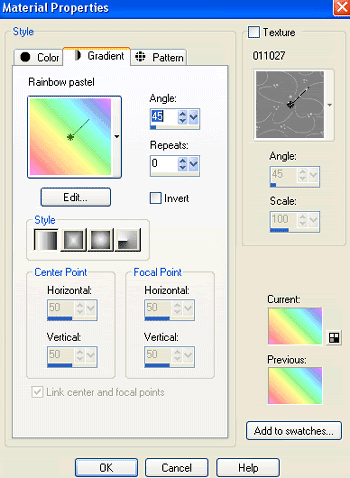
Rainbow Pastel gradient (supplied)
WSL_Mask44 by Chelle (supplied)
A-Dozi's Lace Frame 04 (supplied)
Fonts of choice - I am using Cheri and Chocolate Dulce (supplied)
Plugin: Eye Candy 4000 Gradient Glow
 
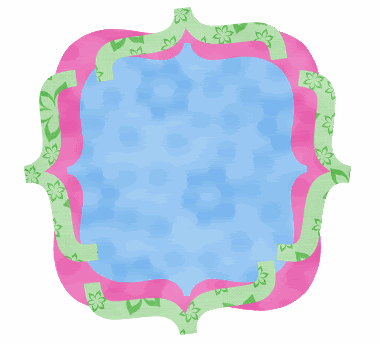
My Supplies here
 
 
~ Step 1 ~
 
Open Template 59 by Ali
Shift D to duplicate then close the original
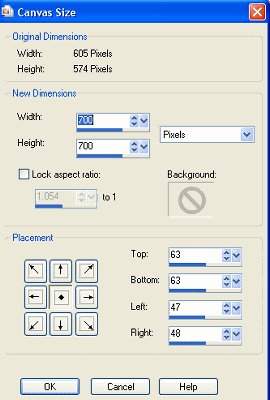
Image / Canvas Resize with the following settings:
 
 
Add a new raster layer
Flood fill white
Layers / Arrange / Send to Bottom
 
Activate SHAPE1
Selections / Select All
Selections / Float
Selections / Defloat
Selections / Modify / Expand by 1
Paste Paper12 as new layer
Resize by 75% ALL LAYERS UNCHECKED
Adjust / Blur / Gaussian Blur with a radius of 10.00
Selections / Invert
Delete then deselect
Duplicate the set blend mode to Multiply
Lower opacity to 55
Layers / Merge / Merge Down
Repeat
 
Activate SHAPE2
Selections / Select All
Selections / Float
Selections / Defloat
Selections / Modify / Expand by 1
Paste Paper11 as new layer
Resize by 75% ALL LAYERS UNCHECKED
Adjust / Blur / Gaussian Blur with a radius of 10.00
Selections / Invert
Delete then deselect
Layers / Merge / Merge Down
 
Hide all your layers except your Brackets
Layers / Merge / Merge Visible
Rename this layer simply to BRACKETS
Now Unhide your other layers again
 
Activate BRACKETS
Selections / Select All
Selections / Float
Selections / Defloat
Selections / Modify / Expand by 1
Paste Paper14 as new layer
Resize by 75% ALL LAYERS UNCHECKED
Selections / Invert
Delete then deselect
Layers / Merge / Merge Down
 

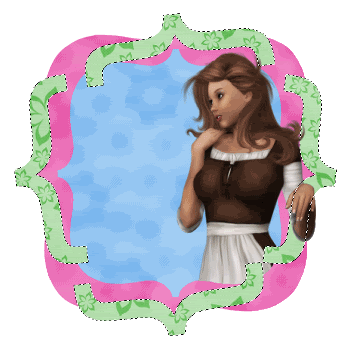
Now you should have something like this:


~ Step 2 ~
 
Paste Cinderella2 as new layer
Position to the right and slightly down
Activate SHAPE2 layer and click the area outside the shape
 
Selections / Modify / Inside/Outside Feather
Inside CHECKED
Feather by 2
 
Use your Eraser Tool to erase the BOTTOM ONLY of Cinderella
Deselect
 
Activate BRACKETS
Selections / Select All
Selections / Float
Selections / Defloat
Selections / Modify / Contract by 1
 
Activate Cinderella again and erase the part of her over the Brackets
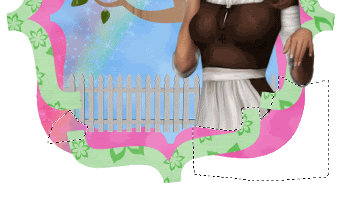
So it should now look like this:
 
 
Paste Tree2 as new layer
Resize by 60%
Position BEHIND Cinderella
Use your Eraser Tool to erase the area that protrudes over the brackets where you just erased Cinders *g*
 
Activate SHAPE2
Paste Rainbow3 as new layer
Activate SHAPE1
Select the area outside with your Magic Wand
On your Rainbow layer hit delete
Deselect
 
Paste Flower13 as new layer
Resize by 30%
Position next to Cinderella to the left
 
Paste Flower7 as new layer
Resize by 30%
Position to fill in spaces, erasing any excess
Layers / Merge / Merg Down
 
Flowers should now be ONE layer
Hide this layer for now while we work on the next
 
Paste Fence1 as new layer
Resize by 30%
Position to the right
Duplicate then Image / Mirror
Layers / Merge / Merge Down
Then resize by 90%
 
Move this layer to the layer BELOW the Brackets
Use your Freehand Tool to select the areas where you wish to delete the fence showing
 
 
Press delete and deselect
 
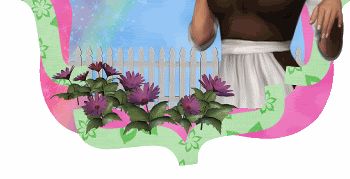
Unhide your Flowers layer and position in front of the fence
 
 
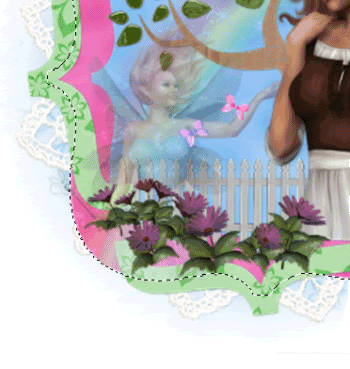
Paste FairyGodmother as new layer
Resize by 50%
Position in lower corner of "garden" at the end of the rainbow
 
Activate SHAPES1
Use your Magic Wand to select the outer area
Back on your FairyGodmother layer
Erase the bottom part of her
 
 
Paste one of the butterflies as new layer
Image / Rotate by 30 to the right
Resize by 5%
Position in your "garden"
 
Paste another butterfly
Repeat rotation but this time to the left
Resize by 5% and position
 
Activate your top layer
 
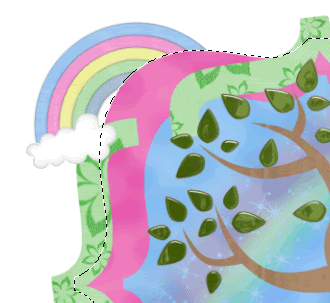
Paste Rainbow1 as new layer
Resize by 30%
Position in the upper left
On your SHAPE1 layer select the outer area
Selections / Invert
 
With your Eraser Tool set to around 15 - 20 in size erase just the area of the rainbow overlapping
 
 
Now activate your Background layer
Paste A-Dozi's Lace Frame as new layer
Resize by 65%
Leave in position
 
Paste Paper12 as new layer
Layers / Arrange / Move Down
 
Layers / New Mask Layer / From Image
Locate WSL_Mask44
OK
Layers / Merge / Merge Group
 
Crop and resize
 

~ Step 3 ~
 
Select your Text Tool and font of choice
I am using Cheri
In your Materials Palette set your Background to the following:
 
 
Type out the text of your choice
I used "If Rainbows were Wishes..."
Objects / Align / Horizontal Centre in Canvas
Convert to raster layer
Apply a gradient glow:
Glow width - 3.00
Soft corners - 25
Opacity - 100
Setting - Fat
Colour - #FFFFFF
 
Add a drop shadow:
H & V - 1
Opacity - 20
Blur - 3.00
Colour - #023f70
 
Select a colour to match or contrast your tag
and choose a Script font
I am using Chocolate Dulce
 
Type out your name
 
Repeat the Gradient Glow and drop shadow above
 
Finally, add your © copyright, licence and watermark
 
Save as a GIF or JPG and you're done!
 
Thanks for trying my tutorial!
 
::st!na::
 

© Tutorial written by Stina on 29th March 2009
All rights reserved
Sunday, February 15, 2009

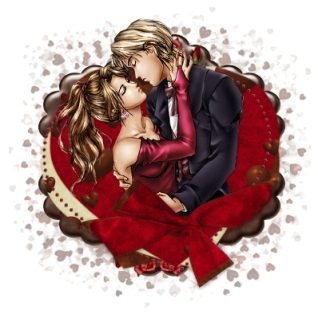
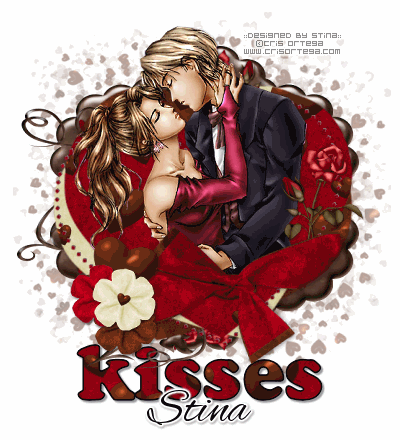
Chocolate Kisses


chocokisses-stina_stina0109

Supplies

Scrap kit of choice - I am using "Valentine Chocolate & Roses" by Designs by Ali which can be purchased at
Scraps With Attitude and Stargazer Scraps
Template 117 by Missy from Divine Intentionz
Tube of choice - I am using the art of Cris Ortega (supplied)
Mask - sg_heart_burst (supplied)
Fonts are Coolsville (supplied) and Alex Brush (which is a pay font and not supplied)

My Supplies

~ Step 1 ~

Open supplies and minimise for later
Open three patterened papers of choice, or use those supplied with the scrap kit
(I used Papers 13, 14 & 15) and a plain paper (I used Paper 7)

Open Missy's template and duplicate
Close off original
Delete credit layer

Go to Image / Canvas size and resize canvas to 500 x 500
Flood fill outer gaps in bottom layer with white

~ Step 2 ~

Activate Heart1 layer
Paste first paper of choice (I used Paper 14 for this layer) and resize if necessary
Go to Selections / float / defloat
Then Selections / Invert
Activate paper layer then hit delete
Deselect

Activate heart2 layer
Paste second paper of choice (I used Paper 15 for this layer) and resize if necessary
Go to Selections / float / defloat
Then Selections / Invert
Activate paper layer then hit delete
Deselect

Activate heart3 layer
Paste third paper of choice (I used Paper 13 for this layer) and resize if necessary
Go to Selections / float / defloat
Then Selections / Invert
Activate paper layer then hit delete
Deselect

Activate dotted circle layer
Paste plain paper of choice (I used Paper 7 for this layer) and resize if necessary
Go to Selections / float / defloat
Then Selections / Invert
Activate paper layer then hit delete
Deselect

Delete template layers

~ Step 3 ~

Open ChocolateFrame4, resize by 75% and paste as new layer
Move this layer below the bottom heart and position behind it so it is fairly central
Choose one of your papers of choice (I used Paper 14 again)
and paste as new layer between the chocolate frame and the white background
Keep this layer activated
Open mask supplied
Go to Layers / New Mask Layer / From Image and select sg_heart_burst mask
Source luminance AND Invert mask data both CHECKED
Apply
Layers / Merge / Merge Group
Position mask layer so that the hearts appear to be bursting from behind
Reduce opacity to 45 and resize if necessary

~ Step 4 ~

Paste your tube as a new layer and resize if necessary
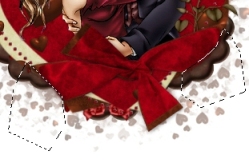
Open a ribbon (I used Ribbon1 and mirrored then flipped it)
Resize by 50% and rotate 10 to the left
Position across the bottom of the hearts then using your eraser on a medium soft setting,
carefully erase the edges of the ribbon along the outside of the hearts
so it looks as though it is wrapped around all three hearts

ck-01

Your tag should now look like this:
ck-02

~ Step 5 ~

Now the fun part!
Use your imagination to decorate the tag with any elements of your choice
I used Flowers 5, 6 & 7
Resize as necessary and position them to one side where you erased the ribbon
I also used Chocolate Heart1 and tucked it behind the flowers
Find a nice rose (I used Rose 6), resize and then tuck down behind the ribbon but above the tube
Open a doodle element (I used Doodle6), resize
and paste below the mask layer so the edges show slightly
Now is the time to crop and resize your tag

~ Step 6 ~

Open one of your patterned papers (for this I used Paper 13) and minimise it
In your Tool Options Select the Coolsville font to about 72 (depends on your version of PSP)
Always ensure your text layer is set to Create as Vector

In your materials palette set your foreground to #000000, stroke width at 1.5,
and your background to your patterned paper with the following settings:
Angle - 0, Scale - 50

In upper or lower case (whichever your prefer) type out the word "KISSES"

Still as a vector layer go to Objects / Align / Horizontal Center in Canvas
Once centred convert to raster layer
Give a slight drop shadow and move this layer to just above the mask layer

Add your name in a script font of choice (I used Alex Brush)
and apply Effects / Plugins / Eye Candy 4 / Gradient Glow with following settings:

ck-031

Add your © copyright info and your watermark.

Save as GIF or JPG and you're done!

Thank you for trying my tutorial.

::st!na::

©Tutorial written by Stina on 19th January 2009
All rights reserved

Vintage Valentine

vintagevalentine-stina_stina0109

Supplies

Template #42 by Yvette of Essence of Creativity
Scrap kit of choice - I used "Vintage Valentine" by Designs by Ali
which can be purchased at Scraps With Attitude and Stargazer Scraps
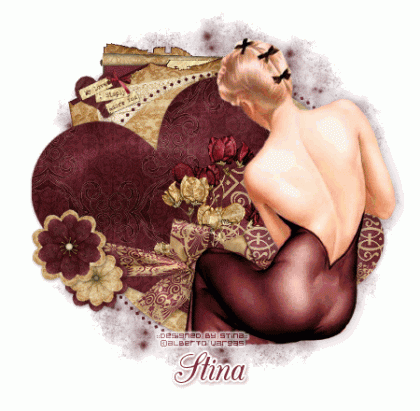
Tube of choice - I used a pin up by Alberto Vargas
WSL_Mask75 by Chelle
Font of choice - I used CAC Champagne
Eye Candy 4 Gradient Glow (optional)

~ Step 1 ~

Open WSL_Mask75 and minimise (we will come back to that later)
Open Template and duplicate by pressing SHIFT + D. Close off original
Delete copyright layer
Image/Canvas Size and increase your working canvas to 600 x 550
Add new raster layer, move to bottom (Layers / Arrange / Send to bottom),
then flood fill with white

~ Step 2 ~

With your magic wand set to tolerance 0 and feather 1 click inside the circle layer
If using the same kit select paper 16, resize by 60% and paste as new layer
Position over the circle then invert selection (by going to Selections / Invert)
then press delete
Deselect

Repeat these steps for Heart1 using paper 2, and Heart2 using paper 18.
For the dotted circle repeat using paper 2.
Delete template layers.

~ Step 3 ~

Open Vintage Ribbon with Bow3 and resize by 45% (all layers UNchecked),
then paste as new layer
Rotate to the right by 10 (or to the left by 10 if you reversed the template as I did)
Position ribbon over the lower section of the hearts
Using your freehand tool with the following settings:
Selection type - Point to point
Mode - Add (shift)
Feather - 1
Smoothing - 0
Anti-alias - checked

Draw along the edge of the heart around the ribbon, the press delete
Repeat with the other side
Ribbon should look as though it is wrapped around the hearts and tucked behind them

~ Step 4 ~

Choose a couple of journaling elements
Resize them then position above the hearts
(where you do depends on the tube you use)
Move them down to below the dotted circle layer
so that they appeared tucked below the hearts

Open some flowers (I used Flowers 5 and 6, and place one on top of the other
then vice versa for the second flower) and resize as necessary
and position them to the edge of the ribbon on one side

Use some floral foilage and tuck them under the bow in the centre

~ Step 5 ~

Paste the paper 2 as new layer
Move to the bottom to the layer above your white background. Resize if necessary
Go to Layers / New Mask Layer / From Image and find WSL_Mask75
Source luminance checked;
Invert mask data unchecked
Merge group
Reduce opacity to around 50%

~ Step 6 ~

Paste your tube as new layer - resize if necessary - and position to your liking
Add drop shadows to each of the template layers and to your tube

**At this point I usually choose to crop the tag and then resize it before adding any text**

Add your name (I used Eye Candy Gradient Glow, which is optional)
Add your © copyright/licence number of artist used and your watermark

Save as GIF or JPG (me, I'm a GIF girl…*lol*) and you're done!

I hope you enjoyed my tutorial. *s*

::st!na::


©Tutorial written by Stina on 18th January 2009
All rights reserved