Please email me designed.by.stina@gmail.com with your creations. I'd love to see them.

Showing posts with label Vintage. Show all posts

Monday, June 22, 2009

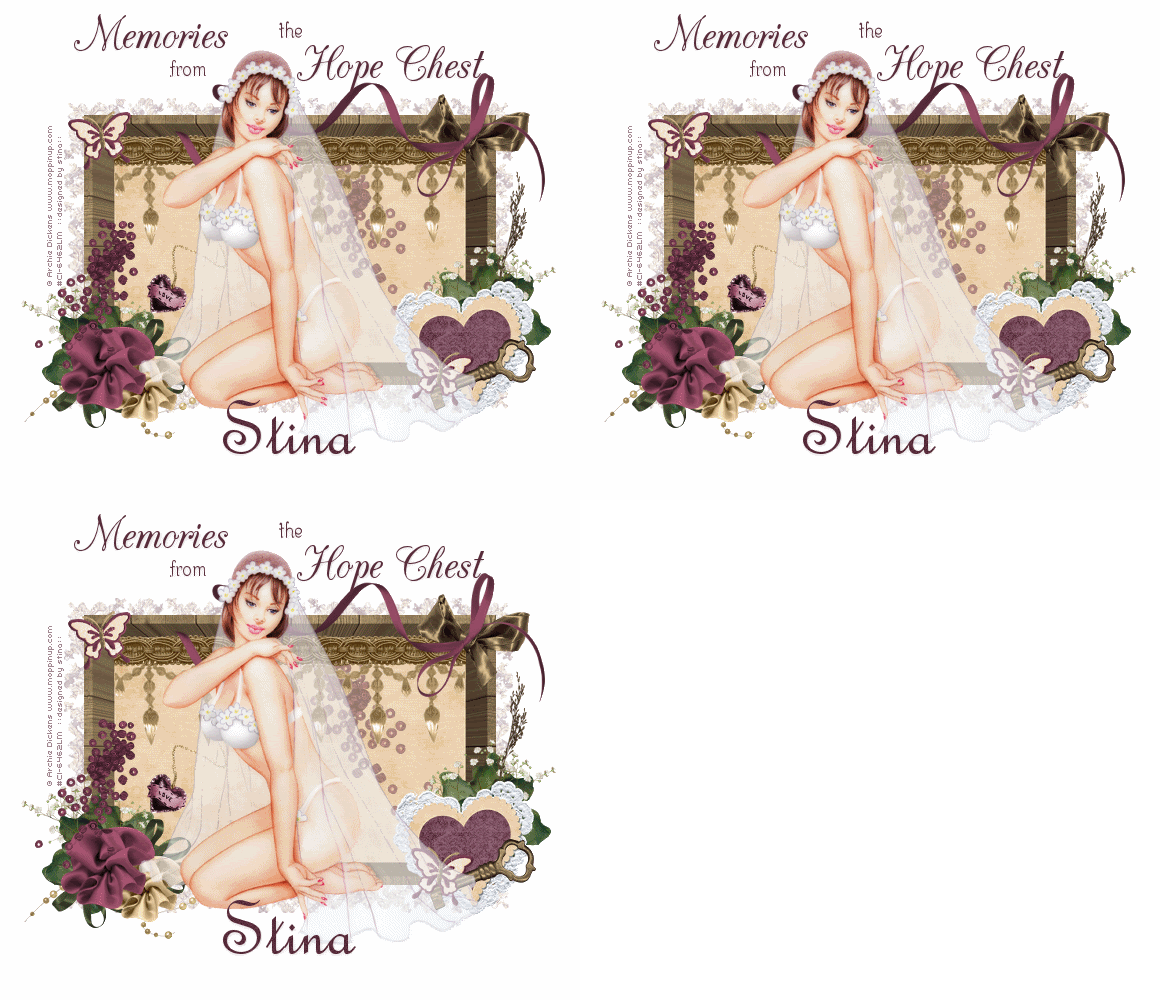
Memories from the Hope Chest

Supplies

Scrap kit of choice - I am using the lovely "Among my Souvenirs" by Lynn Earwicker available from The Scrapping Divaz Designz
Tube of choice - I am using the artwork of Archie Dickesn available with a licence through CILM
**PLEASE DO NOT USE HIS ARTWORK WITHOUT THE APPROPRIATE LICENCE**
sg_OldFashionedLace Mask here
Fonts of choice - I am using CAC Champagne, Centime and FrenchScript
Plugins: Xero Porcelain, Xero Radiance and Xenofex 2 Constellation


Let's begin....


Open a new 600 x 600 canvas flood-filled white

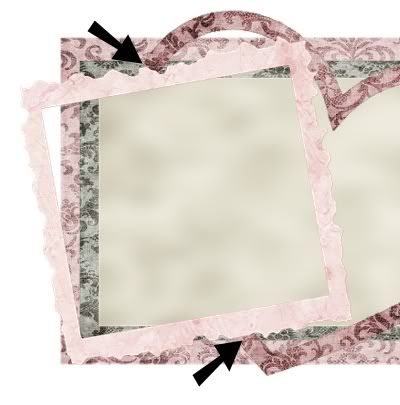
Paste Box as new layer
Resize by 70%

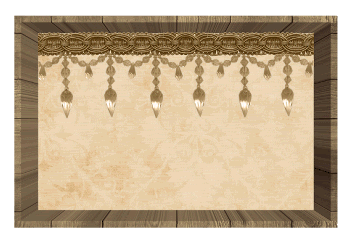
Paste AntiqueDanglers as new layer
Resize by 56%
Position in the upper edge of inside of box

Paste CrochetHeartFrame as new layer
Resize by 25%
Position in lower right

Select inside the Frame with Magic Wand
Selections > Modify > Expand by 5
Add new raster layer
Paste paper of choice INTO selection
Deselect

Paste StitchedButterfly as new layer
Resize by 10%
Position on the edge of Heart

Duplicate, then Image > Mirror
Position in upper left

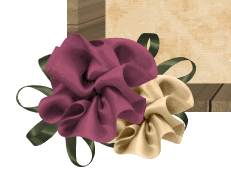
Paste Rossette1 as new layer
Resize by 12%
Position toward lower left

Paste Rossette2 as new layer
Resize by 15%
Position in lower left with first Rossette

Paste RibbonFlower as new layer
Resize by 15% and duplicate
Position both below Rossettes

Paste Beadspill as new layer
Resize by 25%
Position to the left overlapping Rossettes

Paste Beadspill again
Image > Mirror
Resize by 30%
Position on bottom of box beneath AntiqueDanglers

Lower opacity to around 50
Paste Locket as new layer
Image > Rotate by 40 to the right
Resize by 25%
Position in bottom of box toward the left

Paste OldFlower as new layer
Resize by 20%
Duplicate, then Image > Mirror
Position one behind CrochetedHeart and the other behind Flowers on the lower left

Paste BeadString as new layer
Resize by 28%
Position behind Flowers to the left

Paste DriedFlower as new layer
Image > Rotate by 10 to the right
Resize by 35%
Position to the right behind Heart

Paste Key as new layer
Image > Flip, then Image > Mirror
Resize by 18%
Position over bottom of Heart

Paste SatinBow1 as new layer
Resize by 18%
Position in upper right

Paste TwistedRibbon as new layer
Resize by 60%
Position over SatinBow

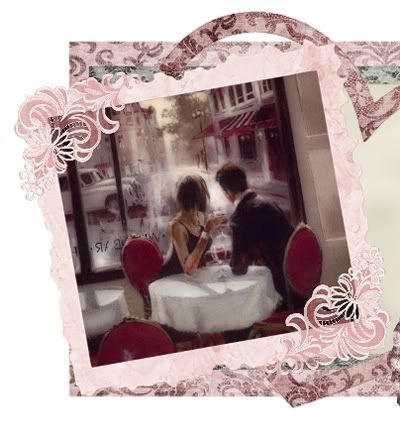
You should now have a conglomerate of treasures in your "box"
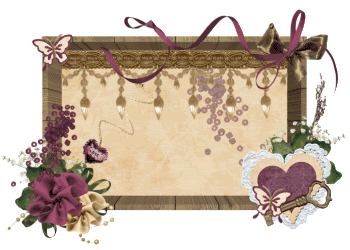

OK time to add our Tube

Paste Tube of choice as new layer
Resize as necessary
Position in centre of box

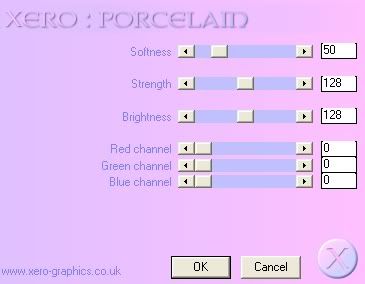
Effects > Plugins > Xero > Porcelain with the following settings:
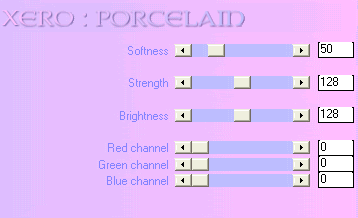

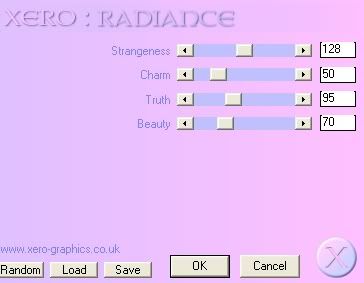
Effects > Plugins > Xero > Radiance with the following settings:
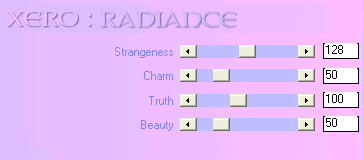

(Depending on the tube you use you may have to play around with the settings for your desired effect)

Paste Paper of choice as new layer
Layers > Arrange > Send to Bottom

Layers > New Mask Layer > From Image
Apply sg_OldFashionedLace

DO NOT MERGE YET!!

Select Pick Tool (Deformation Tool in some versions) and use nodes to resize Mask around box to liking)
Layers > Merge > Merge Group
Lower opacity to 40

Crop and resize

Select your Text Tool and a font of choice
I am using two fonts - a script one called CAC Champagne and a print one called Centime
Background - #592d3b (or to match your tag)

Type out some text of your choice
Position it to your liking
Convert to raster layer

Select another font of choice
I am using French Script
Text colour - #592d3b

Type out your name
Objects > Align > Horizontal Centre in Canvas
Convert to raster layer
Add some noise
Apply a drop shadow of choice

Finally, add your © copyright, licence and watermark, then save as GIF or JPG and you're done!


** IF YOU WISH TO ANIMATE PLEASE FOLLOW THESE NEXT STEPS **

Activate your Mask layer
Duplicate twice and rename Sparkle1, Sparkle2 and Sparkle3

Hide Sparkle2 and Sparkle3 and activate Sparkle1
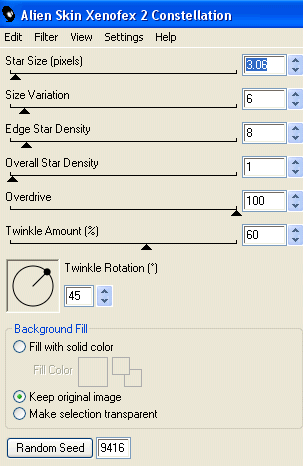
Effects > Plugins > Xenofex > Constellation with the following settings:
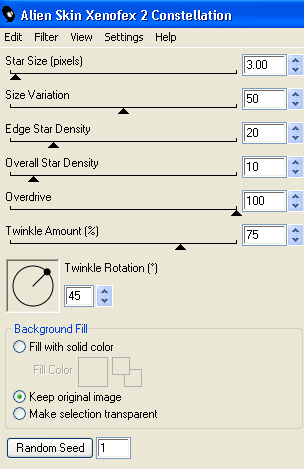

Hide Sparkle1 and activate Sparkle2
Apply the Constellation again, adjusting the Random Seed

Hide Sparkle2 and activate Sparkle3
Apply the Constellation effect again, adjusting the Random Seed

Now for the animation!

Activate Sparkle1 and hide Sparkle2 and Sparkle3
Edit > Copy Merged

Open Animation Shop
Edit > Paste as New Animation

Back to PSP
Hide Sparkle1 and activate Sparkle2
Edit > Copy Merged

In Animation Shop
Edit > Paste AFTER Current Frame

Back to PSP
Hide Sparkle2 and activate Sparkle3
Edit > Copy Merged

In Animation Shop
Edit > Paste AFTER Current Frame

Save as a GIF and you're done!

Thanks for trying my tutorial!

::st!na::


Here is a non-animated version:
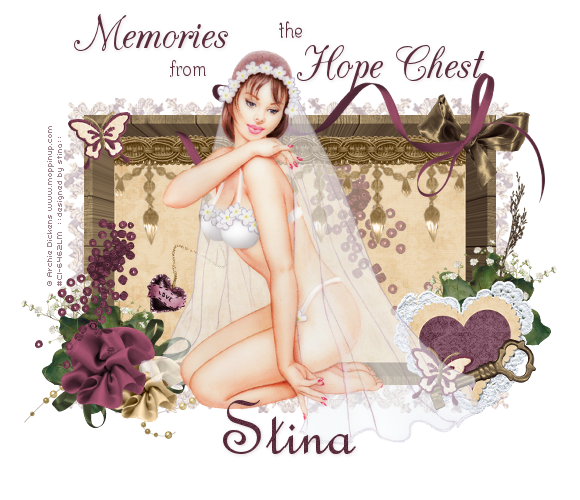


© Tutorial written by Stina on 21st April 2009
All rights reserved

Friday, May 22, 2009

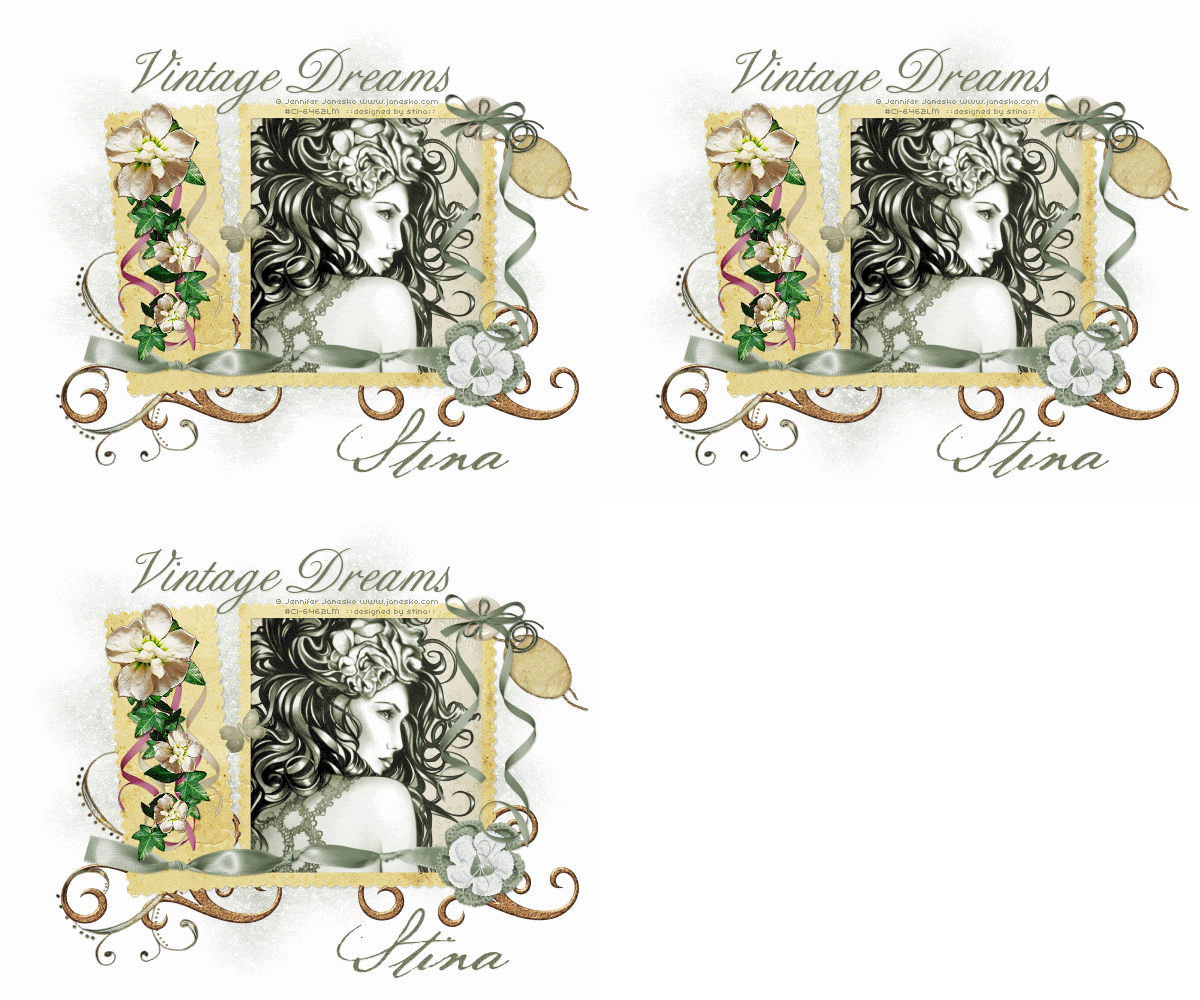
Vintage Dreams

 
Supplies
 
Scrap kit of choice - I am using "Vintage Floral" by Babycakes Scraps available from Creative Scraps, Scraps With Attitude and Cotton Candy Kreations
Tube of choice - I am using the lovely artwork of Jennifer Janesko which is available with a licence from CILM
**PLEASE DO NOT USE HER ARTWORK WITHOUT THE APPROPRIATE LICENCE**
WSL_Mask7 by Chelle available from her blog
Fonts of choice - I am using BixAntiqueScriptHmk and Baker Script
Plugin: Xenofex 2 Constellation
 
 
Ready? Let's begin....
 
 
Open a new 600 x 600 blank canvas flood-filled white
 
Paste StampFrame as new layer
Resize by 70%
 
Select the area inside the Frame with your Magic Wand
Selections > Modify > Expand by 8
Add new raster layer
Paste Paper of choice INTO selection
Deselect
 
Layers > Arrange > Move Down
 
Paste RibbonFlower of choice as new layer
resize by 15%
Position in lower right
 
Paste a Ribbon of choice as new layer
Resize as necessary, depending on size
Position along bottom of Frame
 
With your Freehand Tool draw around the part of the leaf on the Frame that overlaps the Ribbon
Delete then deselect
 
 
Paste TiedButton as new layer
Resize by 25%
Position in upper right
 
Paste Bow & Ribbon as new layer
Resize by around 30%
Position in upper right over the centre of Button
 
Paste a Tag as new layer
Image > Rotate by 50 to the left
Resize by 15%
Position in upper right and below the Tied Button
 
 
Paste SwirlTwo as new layer
Resize by 30%
Position to the lower right
 
Layers > Arrange > Send to Bottom
 
Duplicate, then move across to the left
 
Paste Doodle as new layer
Resize by 40%
Use your Pick Tool to rotate slightly to the left
Position over Swirl in lower left
 
 
Paste Butterfly as new layer
Image > Rotate by 30 to the left
Resize by 10%
Position to your liking
 
Paste your Tube of choice as new layer
Resize as necessary and position
 
Paste Paper of choice as new layer
Layers > Arrange > Send to Bottom
 
Layers > New Mask Layer > From Image
Locate WSL_Mask7
OK
Layers > Merge > Merge Group
Lower opacity to 80
 
Activate top layer
 
Select your Text Tool and font of choice
I am using BixAntiqueScriptHmk
Text colour is #787c62
 
Type out text of choice
Position and convert to raster layer
Apply a drop shadow of choice
 
Select another font of choice
I am using BakerScript
 
Type out your name and position
Convert to raster layer
Apply drop shadow of choice
 
Finally, add your © copyright, licence and watermark, then save as a GIF or JPG and you're done!
 
 
** IF YOU WISH TO ANIMATE PLEASE FOLLOW THESE NEXT STEPS **
 
Activate the Mask Layer
Duplicate twice and rename Sparkle1, Sparkle2 and Sparkle3
 
Hide Sparkle2 and Sparkle3 activating only Sparkle1
 
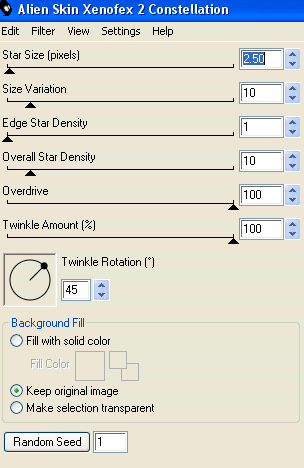
Effects > Plugins > Xenofex 2 > Constellation with the following settings:
 
 
Hide Sparkle1 and activate Sparkle2
Apply the Constellation effect, adjusting the Random Seed
 
Hide Sparkle2 and activate Sparkle3
Apply the Constellation effect again, adjusting the Random Seed once more
 
Hide Sparkle2 and Sparkle3 with only Sparkle1 visible
Edit > Copy Merged
 
Open Animation Shop
Edit > Paste as New Animation
 
Back to PSP
Hide Sparkle1 and activate Sparkle2
Edit > Copy Merged
 
In Animation Shop
Edit > Paste AFTER Current Frame
 
Back to PSP
Hide Sparkle2 and activate Sparkle3
Edit > Copy Merged
 
In Animation Shop
Edit > Paste AFTER Current Frame
 
Save as a GIF and you're done!
 
Thanks for trying my tutorial!
 
::st!na::
 
 
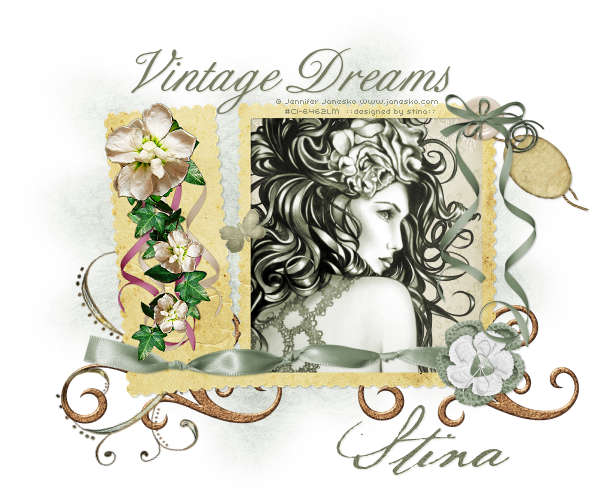
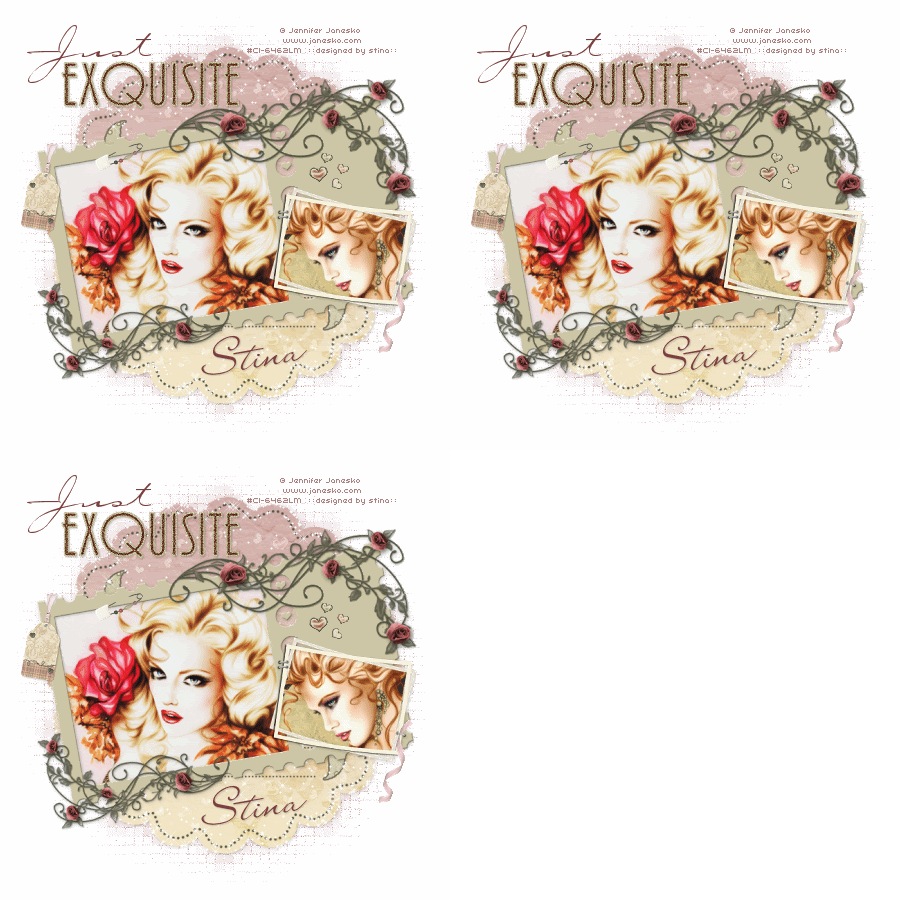
Here is a non-animated version:


© Tutorial written by Stina on 22nd May 2009
All rights reserved
Thursday, March 12, 2009

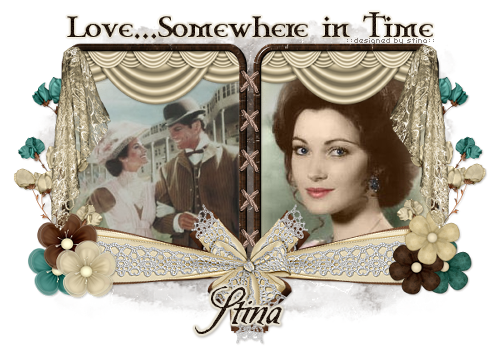
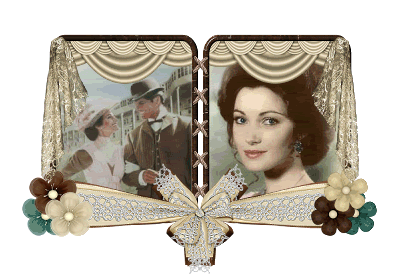
Heritage Love (Somewhere in Time)

 
Supplies
 
Scrap kit of choice - I am using the lovely "Heritage Love" kit by Creative Intentionz which is available from Exquisite Scraps and Paradise 4 Scrappers
Images  of choice
CrossStitch (supplied)
Becky_Mask022 (supplied)
Fonts of choice - I used Celtic Garamond and Be Safe (supplied)
Plugin: Filters Unlimited Photo Aging Kit (supplied)
Plugin: Eye Candy 4000 Glass and Gradient Glow
 
My Supplies here
 
 
~ Step 1 ~
 
Open a new 600 x 400 blank canvas flood-filled white
 
Open Paper3 and minimise
 
Select your Preset Tool to Rounded Rectangle
Line Width - 10.00
 
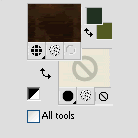
In your Materials Palette set the following:
Foreground - Paper3
Background - null
 

On the left draw out a rectangle
Convert to raster layer
Duplicate then Image / Mirror
Layers / Merge / Merge Down
 
Effects / Plugins / IC Net Software / Filters Unlimited
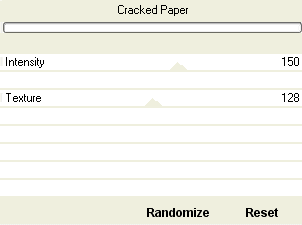
Select Photo Aging Kit / Cracked Paper with the following settings:
 

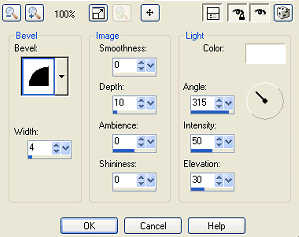
Apply an Inner Bevel with the following settings:


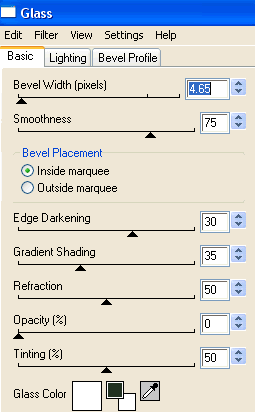
Effects / Plugins / Eye Candy 4000 / Glass with the following settings:
 

Open Paper11
Edit / Copy
 
On your working canvas select the area inside the left frame with your Magic Wand
Selections / Modify / Expand by 5
Add new raster layer
Edit / Paste into selection
Deselect
Layers / Arrange / Move Down
 
Select inside the right frame
Selections / Modify / Expand by 5
Activate existing layer with paperfor left frame on
Edit / Paste into Selection (should still be in clipboard memory)
Deselect
 
Open CrossStitch (supplied separately)
Edit / Copy
Paste as new layer on your canvas
Image / Rotate by 10 to the left
Resize by 35%
Place between the Frames
Duplicate four times
Space evenly down the centre joining the two frames
 
Hide your background, Frames and Frame background
Layers / Merge / Merge Visible
Unhide your layers
 
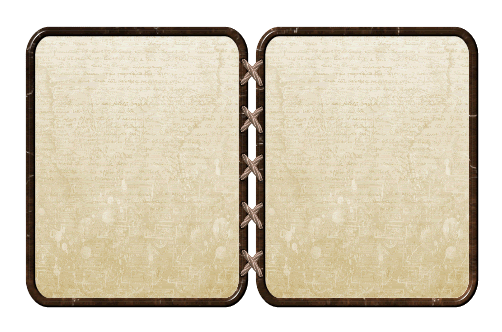
You should now have something like this: 

 
~ Step 2 ~
 
Paste PaperCurtain1 as new layer
Resize by 30%
Position along the top of the Frame
Layers / Arrange / Move
Repeat
 
Duplicate then Image / Mirror
 
Paste Organza1 as new layer
Resize by 25%
Position to the left
 
Paste Organza3 as new layer
Resize by 25%
Position to the left overlapping the first flower
 
Paste Organza5 as new layer
Resize by 25%
Position to the left overlapping both flowers
 
Now repeat on the other side with Flowers1, 3 and 5 but resizing them by 30%
 
Paste Draperies5 as new layer
Resize by 35%
Position to the left
 
Open your images or tubes of choice
Edit / Copy
 
Select the inside of your left frame
Selections / Modify / Expand by 5
Paste Image/Tube as new layer and resize  if necessary
Position to your liking
Selections / Invert
Delete
 
Repeat steps for other image in right Frame
 
Layers / Merge / Merge Down
 
Move these images below Paper Curtain layers beneath the Frame layer
 
Paste Wrap3 as new layer
Resize by 43%
Position to the edge of the right frame with the bow in the centre
Duplicate then Image / Mirror
Layers / Merge / Merge Down
 
Paste Wrap1 as new layer
Repeat step above
 
Once Wrap1 is merged Resize by 85% Bicubic and position over Wrap3 (brown wrap)
 
You should have something like this:

 
Paste Bouganville2 as new layer
Resize by 30%
Place to the left beneath Bow Wraps
 
Now paste Bougainville5 as new layer
Resize by 30%
Place to the right above the first
 
Layers / Merge / Merge Down
Layers / Arrange / Send to Bottom
 
This should bring them to below the Frame layers
 
Apply drop shadows to your elements
 
  
~ Step 3 ~
 
Paste Paper3 as new layer
Layers / Arrange / Send to Bottom
 
Layers / New Mask Layer / From Image
Locate Becky_Mask022
OK
 
Resize by 95%
 
Apply Filters Unlimited Cracked Paper with default settings to Mask Layer
 
Select your Text Tool and font
Set your colour to something that matches your tag
 
Type out words of your choice above the tag - what I chose related to the images from the movie I featured in mine
 
Convert to raster layer
Apply a Gradient Glow with the following settings:
Glow width - 3.00
Soft corners - 25
Opacity - 100
Setting - Thin
Colour - #c4b695
 
Select a script font and type out your name
Objects / Align / Horizontal Centre in Canvas
Convert to raster layer
 
Apply a Gradient Glow with similar settings as above, changing the following:
Setting - Fat
Colour - #e6e0d0
 
Add a slight drop shadow
 
Finally, add your © copyright, licence and watermark
 
Save as a GIF or JPG and you're done!
 
Thank you for trying my tutorial
 
::st!na::
 

© Tutorial written by Stina on 12th March 2009
All rights reserved
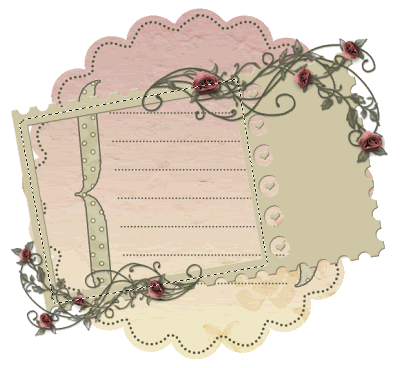
 

Tuesday, March 10, 2009

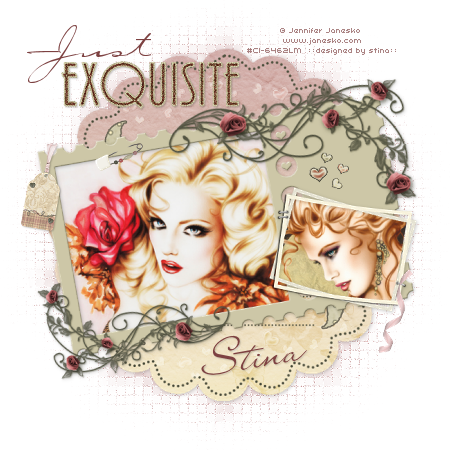
Just Exquisite

 
Supplies
 
"Exquisite Love" by Sam's Scraps available exclusively at her store
Images of choice - I used the lovely artwork of Jennifer Janesko which can be purchased from CILM
**PLEASE DO NOT USE HER ARTWORK WITHOUT THE APPROPRIATE LICENCE**
WSL_Mask133 by Chelle available from her blog
Fonts of choice - Carpenter Script and LainieDay
Plugin: Alien Skin Xenofex 2 Constellation
 
 
~ Step 1 ~
 
Open a new 600 x 600 blank canvas flood-filled white
 
Paste Journal Tag as new layer
Resize by 70%
Leave in position
 
Paste Frame1 as new layer
Resize by 35%
Image / Rotate by 10 to the left
 
Paste your first image of choice as new layer
Image / Rotate by 10 to the left
Layers / Arrange / Move Down
Position beneath Frame to your liking
Resize if necessary
 
Draw around the outside of your Frame with your Freehand Tool
 
 
Selections / Invert
Delete
Deselect
 
Add a drop shadow to the Frame

Paste Frame2 as new layer
Image / Rotate by 10 to the right
Resize by 11%
Position to the right of the first Frame as if it is stapled
Paste your second image of choice as new layer
Image / Rotate by 10 to the right
Resize as necessary
Layers / Arrange / Move Down
Position below Frame
 
Click inside Frame with your Magic Wand
Selections / Modify / Expand by 3
Selections / Invert
Delete
Deselect
 
Add a drop shadow of choice
  
 
~ Step 2 ~
 
Paste Heart Border as new layer
Image / Rotate by 10 to the left
Resize by 10%
Position along the bottom of the Journal Tag
 
Duplicate and move to the top
 
Erase any excess hearts from outside of the tag on both layers
 
Layers / Merge / Merge Down
Blend mode to Soft Light
 
Back to the HeartBorder
Using your Freehand Tool draw around various hearts
Paste them each as new layers
Resize by 10%
Position them above your second Frame
 
Once satisfied with their position
Layers / Merge / Merge Down on each till you have one layer (for the hearts)
 
Set the Blend mode to Multiply
Duplicate and set the blend mode of this layer to Soft Light
 
Paste Safety Pin With Beads as new layer
Image / Rotate by 30 to the left
Resize by 12%
Position anywhere to your liking
Use your Eraser Tool to carefully erase a small part of the pin to look as though it is "pinned" to the Frame
 
Paste Tag as new layer
Image / Rotate by 10 to the right
Resize by 8%
Position in upper left of first frame
Add a drop shadow of choice
 
Paste Ribbon1 as new layer
Image / Rotate by 40 to the left
Resize by 8%
Position over the staple in the lower left of second frame
Add a drop shadow of choice


~ Step 3 ~
 
Add a new raster layer
 
Selections / Select All
Copy Paper1 then Paste into Selection
Deselect
 
Layers / Arrange / Move to Bottom
 
Layers / New Mask Layer / From Image
Locate WSL_Mask133
OK
 
Layers / Merge / Merge Group
 
Image / Canvas Resize to 650 x 650 centred
 
Activate Mask Layer
 
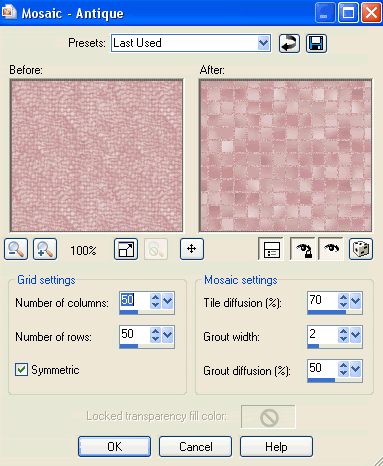
Effects / Texture Effects / Mosiac - Antique with following settings:


Open the WordArt and with your Selection Tool make a selection around the word "Exquisite"
Edit / Copy
Then paste as new layer
Resize by 15%
Position in the upper left
 
Resize your tag (I resized mine to 450 x 450)
 
Select your Text Tool
Set your colour to one that matches your images - I chose mine from the roses on the Frame (#7d4141)
 
Set your Foreground to null
And your Background to #7d4141 (or one of your choice)
 
In a script font type the word "Just" and place it above the word "Exquisite"
 
In the same colour choose another script font and type your name
Image / Rotate by 10 to the left
Apply a drop shadow and place at the bottom of the Journal Tag
 
Add your © copyright, licence and watermark
  
 
~ Step 4 ~
 
**This next step is if you wish to animate**
 
Activate your Journal Tag layer
Duplicate three times to give you a total of FOUR layers
Rename them from the bottom up:
Journal Tag (your original)
Sparkle1
Sparkle2
Sparkle3

Hide Sparkle2 & 3

Give the Journal Tag layer a drop shadow:
H & V - 1
Opacity - 2-
Blur - 5.00
Colour - #000000
(this layer will remain visible at all times to give each of your animated layers the drop shadow)
  
Effects / Plugins / Alien Skin Xenofex 2 / Constellation with the following settings:


Repeat the Constellation effect on the other two layers changing the Random Seed each time
Deselect
 
Once again hide the top two layers (Sparkle2 & 3) leaving Sparkle1 visible
 
Edit / Copy Merged
 
Open Animation Shop
Edit / Paste as new animation
 
Back in PSP
Turn off visibility of Sparkle1 and turn on next layer Sparkle2
Edit / Copy Merged
 
In Animation Shop
Edit / Paste after Current Frame
 
Back in PSP
Turn off visibility of Sparkle2 and turn on last layer Sparkle3
Edit / Copy Merged
 
In Animation Shop
Edit / Paste after current frame
 
Select All frames
Go to Frame Properties and change to 20
 
Finally save as a GIF and you're done!
 
Thank you for trying my tutorial
 
::st!na::
  
 
Here is a non-animated version:
 
 
© Tutorial written by 10th March 2009
All rights reserved
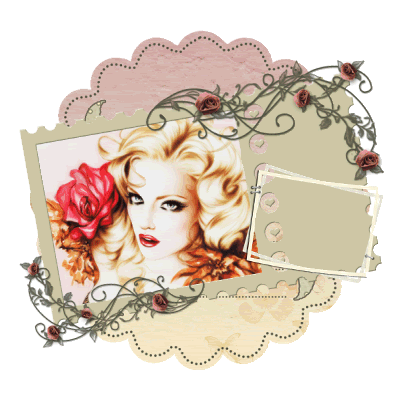
Friday, March 6, 2009

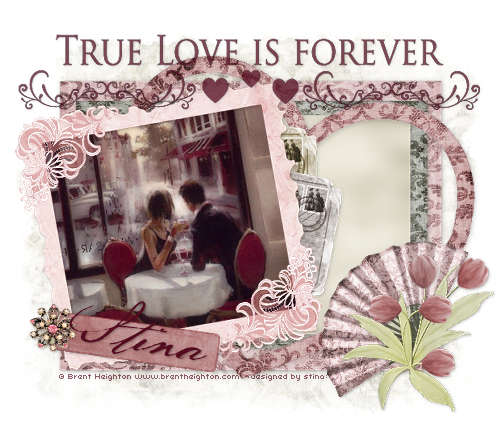
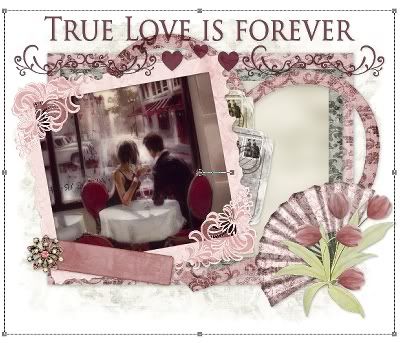
True Love Forever

 
Supplies
 
Scrap kit of choice - I am using "Exquisite Love" by Soxsational Scraps 
Image of choice or any of those I supplied
Template #38 by Missy which can found on her blog
Becky_Mask022 (supplied)
Font of choice - I am using BakerScript (pay font - not supplied)
Plugins: Xero Porcelain and Xero Radiance
 
My Supplies here
 
 
~ Step 1 ~
 
Open mask and minimise for later
 
Open the Template and resize canvas to 620 wide x 550 high
Flood fill excess area white on Background layer
Delete copyright info
 
Open Paper4
Edit / Copy
 
Activate Rectangle3
With your Magic Wand click the area inside the rectangle
Selections / Modify / Feather by 2
Edit / Paste into Selection
Deselect
 
Open Paper6
Edit / Copy
 
Activate Rectangle1 and click inside it
Selections / Modify / Feather by 2
Edit / Paste into Selection
Deselect
 
Open Paper11
Adjust / Blur / Gaussian Blur
Radius – 20.00
Repeat
Edit / Copy
 
Activate Rectangle2 and click inside it
Selections / Modify / Feather by 2
Edit / Paste into Selection
Deselect
 
Apply a drop shadow to each layer:
H & V – 1
Opacity – 30
Blur – 8.00
 
Back to Paper4
Edit / Copy
 
Activate Heart and click inside it
Selections / Modify / Feather by 2
Edit / Paste into Selection
Deselect
Duplicate then set blend mode to Multiply
Layers / Merge / Merge Down
 
Apply a drop shadow to this layer:
H & V – 1
Opacity – 20
Blur – 8.00
 

~ Step 2 ~
 
Paste Frame3 as new layer
Image / Rotate by 10 to the left
Resize by 65%
Position to the left between the two ends of the heart that "appear" to tuck behind top rectangle
 
 
Open your image of choice and paste as new layer
Image / Rotate by 10 to the left
Resize if necessary and to your liking
(I resized the one I used by 70%)
Layers / Arrange / Move Down
Position beneath Frame
 
With your Magic Wand click inside the Frame
Selections / Modify / Expand by 5
Selections / Invert
Delete and deselect
 
Duplicate your image layer, then
Effects / Plugins / Xero / Porcelain with the following settings:


Then Effects / Plugins / Xero / Radiance with the following settings:
 
 
Lower the opacity of this layer to 90
Layers / Merge / Merge Group
 
Apply a drop shadow to Frame layer:
H & V – 1
Opacity – 30
Blur – 5.00
 
Paste Deco1 as new layer
Resize by 30% and position on the upper left corner of the Frame
Duplicate then Image / Mirror
Image / Flip
Then Position in lower right of Frame
 
 
Paste Tag4 as new layer
Image / Rotate by 10 to the right
Resize by 35%
Position in the lower left of the Frame
 
Paste Jewel1 as new layer
Resize by 35%
Position over the Floral part of the tag
 
Using your Eraser carefully erase the bits of green you can see beneath the Jewel element
 
Apply a drop shadow to these layers:
H & V – 1
Opacity – 30
Blur – 5.00
 
Paste PostCard as new layer
Duplicate and hide layer
 
On original layer
Resize by 50%
Adjust / Hue & Saturation / Colourise with the following settings:
Hue – 30
Saturation – 55
Position behind Frame and Image layer slightly protruding
 
Go back to your Duplicate and turn the visibility back on
Image / Rotate by 10 to the right
Resize by 50%
Adjust / Hue & Saturation / Colourise with the following settings:
Hue – 15
Saturation – 20
Position behind Frame and Image layer and over first postcard slightly protruding
 
Apply a drop shadow to this layer:
H & V – 1
Opacity – 20
Blur – 5.00
 
Paste Fan3 as new layer
Resize by 50%
Position in lower right at the edge of the middle rectangle
 
Paste Tulips as new layer
Resize by 50%
Position in lower left over the partial edge of the fan
 
Apply a drop shadow to these layers:
H & V – 1
Opacity – 30
Blur – 5.00
  
 
~ Step 3 ~
 
Paste WordArt1 as new layer
Layers / Arrange / Bring to Top
Position at the top in the centre
 
Add new raster layer
Flood fill this layer with #520b1f
 
Back to Word Art layer
Selections / Float
Selections / Defloat
Selections / Modify / Feather by 1
Selections / Invert
Activate Flood-filled layer and press delete
Deselect
 
Go to original WordArt layer and lower the opacity to 50
Activate top layer then
Layers / Merge / Merge Down
 
This layer will automatically lighten
Duplicate
Add a drop shadow to this layer:
H & V – 1
Opacity – 30
Blur – 5.00
 
Activate Background layer and paste Paper7 as new layer
Layers / New Mask Layer / From Image
Locate Becky_Mask022
Source luminance
OK
 
Use your Pick (or Deformation) Tool to pull the nodes of the Mask layer to your liking
 
 
Select your Text Tool and choose your font
I am using BakerScript which is a pay font
 
Set your Materials Palette with:
Foreground – null
Background - #520b1f
 
Type out your name (short names work best)
Image / Rotate by 10 to the right
Position over the Tag
Convert to raster layer
 
Add a slight drop shadow:
H & V – 1
Opacity – 30
Blur – 3.00
 
Finally add your © copyright (if you are using any of the images I supplied please provide credit back to
© Brent Heighton www.brentheigton.com), your watermark then save as a GIF or JPG and you're done!
 
Thanks for trying my tutorial
 
::st!na::
 

© Tutorial written by Stina on 5th March 2009
All rights reserved
 

Monday, February 16, 2009

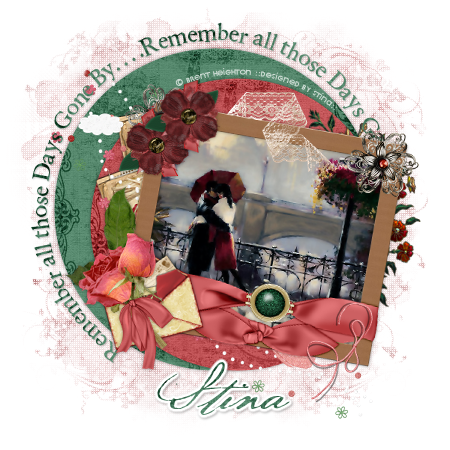
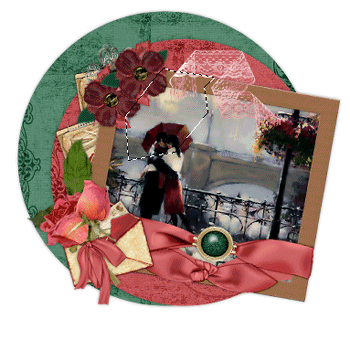
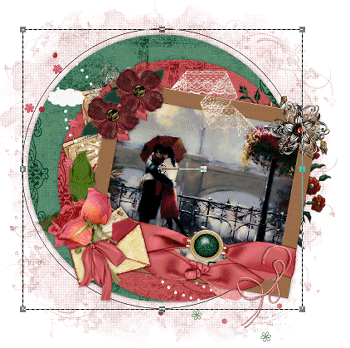
Days Gone By

Supplies

Scrap kit of choice - I am using "Days Gone By" by Babycakes Scraps which can be purchased from Creative Scraps, Cotton Candy Kreations, Aussie Scraps with more listed on her blog
Image of choice or the one I have supplied
SabreL_BraveheartScrapKitMask1 by Sabre (supplied)
Fonts of choice - I am using 2Peas Rennaisance and Baker Script (pay fonts)
Xero Improver and Xero Radiance (supplied)
Penta.Com Colour Dots

My Supplies here

~ Step 1 ~

Open Mask and fonts and minimise for later

Open a new blank canvas 600 x 600 flood filled white

Select a paper of choice from the scrap kit (I'm using Love Paper Rust)
Open and minimise it

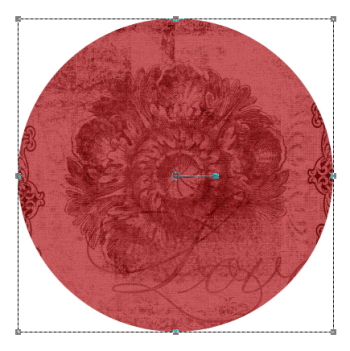
Select your Preset Shape Tool on Ellipse

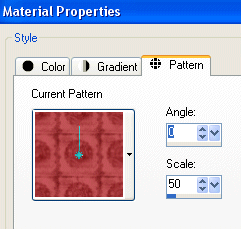
In your Materials Palette:
Foreground - paper of choice
Background - null

Set the properties for the paper as following:

bcs_dgb-01

Holding your shift key down draw out a circle with your Preset Shape Tool then release

Your paper should be centred in the circle
If slightly off centre use the nodes to adjust the size

bcs_dgb-02

Once satisfied go to
Objects / Align / Centre in Canvas
Convert to raster layer

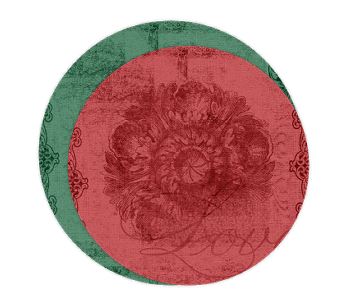
Choose another paper of choice (I used Love Paper Green) and follow the same steps as above, making the circle slightly larger

Move it to the layer below your first circle to get a better idea

Use the nodes to adjust the size and
Objects / Align / Centre in Canvas
each time you make an adjustment

Once satisfied and circle is centred, convert to raster layer

Move background circle up slightly

bcs_dgb-03

~ Step 2 ~

Paste Paper Frame (or frame of choice) as new layer
Resize by 35%
Image / Rotate by 10 to the right
Position slightly to the right

Choose an image of choice or use the one supplied and paste as new layer
Resize if necessary
(If using the image supplied you do not need to resize)

Activate the frame layer and with your magic wand click outside the frame
Selections / Modify / Expand by 10
Activate the image layer again
Delete
Deselect

Duplicate the image layer
On duplicate go to
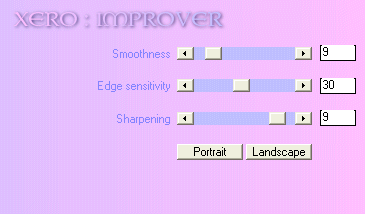
Effects / Plugins / Xero / Improver with the following settings:

bcs_dgb-04

On the same layer
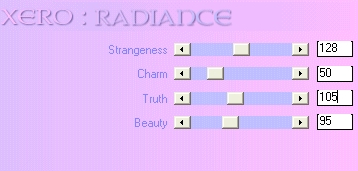
Effects / Plugins / Xero / Radiance with the following settings:

bcs_dgb-05
Then reduce the opacity of this layer to 80

Hide your Background and two circle layers then go to
Layers / Merge / Merge Visible

Unhide all layers

Paste Rose Cluster as new layer
Image / Mirror and resize by 30%
Position in the left corner of frame

Paste Envlope as new layer
Image / Rotate by 10 to the left then resize by 40%
Position in lower left beneath the Rose Cluster

Paste Paper as new layer
Image / Rotate by 10 to the left
Resize by 25% and position tucked behind frame
Duplicate and then Image / Rotate by 10 to the left and move slightly down

Paste Flower as new layer and resize by 25%
Paste Torn Flower as new layer and resize by 35% then position over Flower
Layers / Merge / Merge Down
Position in top left corner

Duplicate and move up slightly
Image / Rotate 20 to the right
Position flowers to your liking

Paste Rust Lace as new layer
Resize by 20%
Position at the top of the frame
With your Freehand Tool draw around the bottom of part of the lace then Delete
Now it will look as though it is tucked behind and over the frame

bcs_dgb-06
Adjust / Hue & Saturation / Colourise
Hue - 20
Saturation - 65

Adjust / Brightness & Contrast / Brightness/Contrast:
Brightness - 15
Contrast - 0

Paste Rusty String as new layer
Resize by 25% and position at the lower right of frame

Paste Filigree Flower as new layer
Resize by 50%
Adjust / Brightness & Contrast / Clarify
Strength of Effect - 5.0
Duplicate and set blend mode to Soft Light

Crop and resize

Add a drop shadow to your element layers:
H & V - 0
Opacity - 30
Blur - 5.00
Colour - #000000

~ Step 3 ~

Activate Background layer
Paste Rust Swirl Paper as new layer
Resize by 65%

Layers / New Mask Layer / From Image
Locate SabreL_BraveheartScrapkitMask
Source Luminance checked
OK

On same layer
Effects / Plugins / Penta.Com / Colour Dot
Default settings
Repeat

Select your Preset Shape Tool to Ellipse
In your Materials Palette set your Foreground to #000000 and your Background to null

Draw out a circle around the larger circle and position it evenly

bcs_dgb-07

Then select your Text Tool with your font of choice
Set your Foreground to null and your Background to one of papers of choice (I used the same paper as my background circle)

Type out the words "Remember all those Days Gone By…Remember all those Days Gone By" or a phrase of your choice

In your layer palette click on the + to open your Vector layer and hide the Ellipse
Convert to Raster Layer

Add a slight drop shadow

Type out your name in a Script font of choice

Add your ©copyright, licence and watermark and you're done!

Thank you for trying my tutorial

::st!na::

©Tutorial written by Stina on 13th February 2009
All rights reserved
Sunday, February 15, 2009

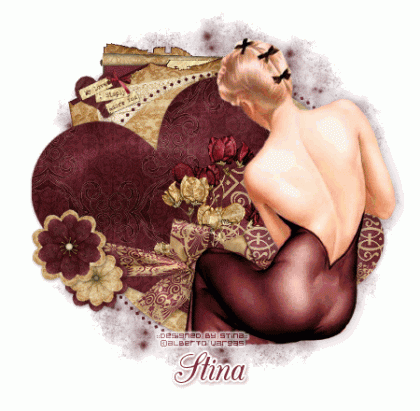
Vintage Valentine

vintagevalentine-stina_stina0109

Supplies

Template #42 by Yvette of Essence of Creativity
Scrap kit of choice - I used "Vintage Valentine" by Designs by Ali
which can be purchased at Scraps With Attitude and Stargazer Scraps
Tube of choice - I used a pin up by Alberto Vargas
WSL_Mask75 by Chelle
Font of choice - I used CAC Champagne
Eye Candy 4 Gradient Glow (optional)

~ Step 1 ~

Open WSL_Mask75 and minimise (we will come back to that later)
Open Template and duplicate by pressing SHIFT + D. Close off original
Delete copyright layer
Image/Canvas Size and increase your working canvas to 600 x 550
Add new raster layer, move to bottom (Layers / Arrange / Send to bottom),
then flood fill with white

~ Step 2 ~

With your magic wand set to tolerance 0 and feather 1 click inside the circle layer
If using the same kit select paper 16, resize by 60% and paste as new layer
Position over the circle then invert selection (by going to Selections / Invert)
then press delete
Deselect

Repeat these steps for Heart1 using paper 2, and Heart2 using paper 18.
For the dotted circle repeat using paper 2.
Delete template layers.

~ Step 3 ~

Open Vintage Ribbon with Bow3 and resize by 45% (all layers UNchecked),
then paste as new layer
Rotate to the right by 10 (or to the left by 10 if you reversed the template as I did)
Position ribbon over the lower section of the hearts
Using your freehand tool with the following settings:
Selection type - Point to point
Mode - Add (shift)
Feather - 1
Smoothing - 0
Anti-alias - checked

Draw along the edge of the heart around the ribbon, the press delete
Repeat with the other side
Ribbon should look as though it is wrapped around the hearts and tucked behind them

~ Step 4 ~

Choose a couple of journaling elements
Resize them then position above the hearts
(where you do depends on the tube you use)
Move them down to below the dotted circle layer
so that they appeared tucked below the hearts

Open some flowers (I used Flowers 5 and 6, and place one on top of the other
then vice versa for the second flower) and resize as necessary
and position them to the edge of the ribbon on one side

Use some floral foilage and tuck them under the bow in the centre

~ Step 5 ~

Paste the paper 2 as new layer
Move to the bottom to the layer above your white background. Resize if necessary
Go to Layers / New Mask Layer / From Image and find WSL_Mask75
Source luminance checked;
Invert mask data unchecked
Merge group
Reduce opacity to around 50%

~ Step 6 ~

Paste your tube as new layer - resize if necessary - and position to your liking
Add drop shadows to each of the template layers and to your tube

**At this point I usually choose to crop the tag and then resize it before adding any text**

Add your name (I used Eye Candy Gradient Glow, which is optional)
Add your © copyright/licence number of artist used and your watermark

Save as GIF or JPG (me, I'm a GIF girl…*lol*) and you're done!

I hope you enjoyed my tutorial. *s*

::st!na::


©Tutorial written by Stina on 18th January 2009
All rights reserved