Please email me designed.by.stina@gmail.com with your creations. I'd love to see them.

Showing posts with label Fantasy. Show all posts

Friday, April 3, 2009

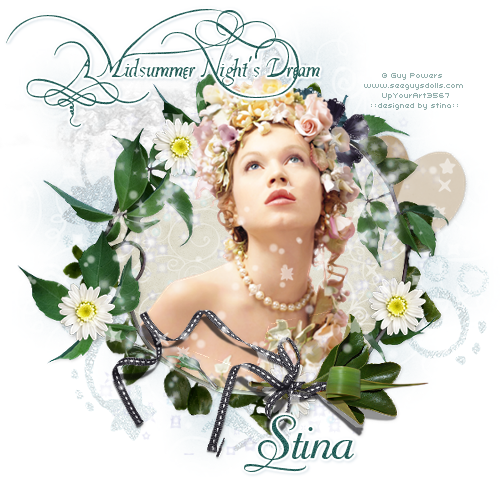
A Midsummer Night's Dream

 
Supplies
 
Scrap kit of choice - I am using the lovely "Midsummer Night's Dream" by Pimpd Designs available at Paradise for Scrappers
Tube of choice - I am using the lovely artwork of Guy Powers which can be purchased at UpYourArt
WSL_Mask7 by Chelle available from her Blog
Fonts of choice - I am using Platthand, Mayfair and Mayfair Alt
Plugin: Eye Candy 4000 Gradient Glow
 
 
~ Step 1 ~
 
Open a new 600 x 600 blank canvas flood-filled white
 
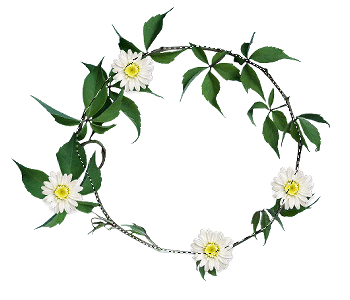
Paste Green-08 as new layer
Resize by 85%
Leave in position
 
Select your Freehand Tool and draw around the "stem" careful not to go either inside or outside the area
 
 
Add a new raster later
Paste PP17 into Selection
Deselect
Layers / Arrange / Move Down
 

~ Step 2 ~
 
Paste Cloud as new layer
Place between the paper and Green Frame layers protruding slightly
 
Paste Green01 as new layer
Resize by 35%
Position in upper right slightly protruding
Layers / Arrange / Send to Bottom
 
Duplicate then Image / Mirror
Image / Rotate by 80 to the left
Position on the underside in the lower left
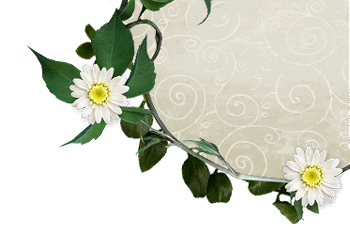
 
 
Paste Paper-Heart as new layer
Image / Rotate by 20 to the right
Position in upper right then
Layers / Arrange / Send to Bottom
 
Paste Flower-07 as new layer
Resize by 25%
Position at the top of Frame
 
Paste Flower-08 as new layer
Resize by 23%
Position along the top beside first flower
 
Paste Fairy-Dust-02 as new layer
Resize by 40%
Position over Frame
Select your Eraser Tool and lower the opacity to around 30
Then carefully click on some of the excess to soften it
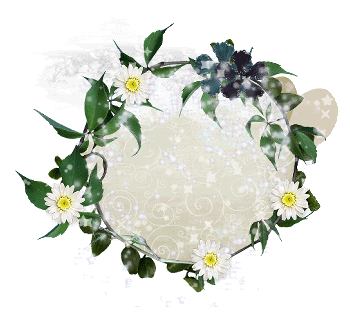
 
 
Paste Stardust as new layer
Position over Frame as desired
 
Paste Star-Cluster as new layer
Layers / Arrange / Send to Bottom
Position it centrally behind Frame
Lower opacity to 20
 

~ Step 3 ~
 
Paste Tube as new layer
Resize as necessary
Place as desired then LEAVE IN POSITION
Duplicate then move duplicate layer beneath Greenery Frame
 
Lower opacity of top tube layer or turn off visibility altogether
Use your Eraser Tool to erase the bottom of the duplicate Tube that protrudes the Frame
Return to your top tube layer
With your Freehand Tool draw around the bottom of your tube
Delete then deselect
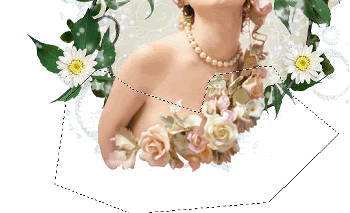
 
 
Layers / Arrange / Move Down
The layer should now fall below your Stardust layer
 
Paste Greens-Ribbon as new layer
Resize by 50%
Position along the bottom with the bow over one of the flowers
 
Paste Green-03 as new layer
Resize by 35%
Position in the centre of the greenery with ribbon
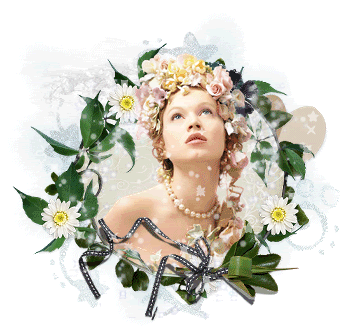
 
 
Paste PP16 as new layer
Layers / Arrange / Send to Bottom
 
Layers / New Mask Layer / From Image
Locate WSL_Mask7
OK
Layers / Merge / Merge Group
 
Crop and resize
 

~ Step 4 ~
 
Select your Text Tool and a colour from your tube or scrap
Set it as your Background colour with your Foreground NULL
 
Foreground - null
Background - #28605b (colour I am using)
 
Select your font
I am using Platthand
Type out your text of choice
Convert to raster layer
Add a gradient glow
 
Apply a drop shadow:
H & V - 1
Opacity - 20
Blur - 3.00
Colour - #4c7994
 
Select another font of choice
I am using Mayfair Alt
Type out your name
Object / Align / Horizontal centre in Canvas
Convert to raster layer
Add the same Gradient Glow as above following the same drop shadow
 
Finally, add your © copyright, licence and watermark then save as a GIF or JPG and you're done!
 
Thank you for trying my tutorial!
 
::st!na::
 

© Tutorial written by Stina on 2nd April 2009
All rights reserved

Monday, March 30, 2009

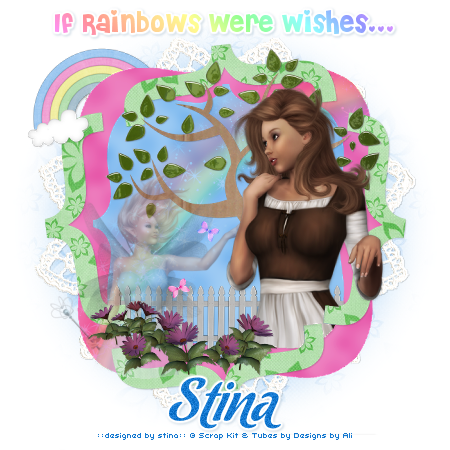
If Rainbows were Wishes...

 
Supplies
 
Scrap kit of choice - I am using "Happily Ever After" by Designs by Ali which is available from Stargazer Scraps and Scraps With Attitude
Tubes of choice - I am using those which were supplied and came in the kit
Template #59 by Ali available from her blog
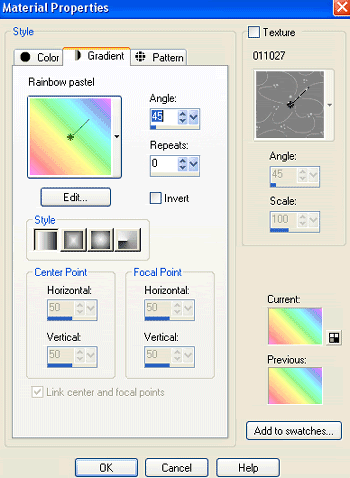
Rainbow Pastel gradient (supplied)
WSL_Mask44 by Chelle (supplied)
A-Dozi's Lace Frame 04 (supplied)
Fonts of choice - I am using Cheri and Chocolate Dulce (supplied)
Plugin: Eye Candy 4000 Gradient Glow
 
My Supplies here
 
 
~ Step 1 ~
 
Open Template 59 by Ali
Shift D to duplicate then close the original
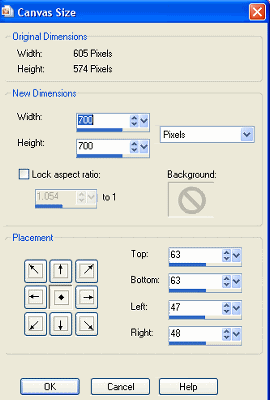
Image / Canvas Resize with the following settings:
 
 
Add a new raster layer
Flood fill white
Layers / Arrange / Send to Bottom
 
Activate SHAPE1
Selections / Select All
Selections / Float
Selections / Defloat
Selections / Modify / Expand by 1
Paste Paper12 as new layer
Resize by 75% ALL LAYERS UNCHECKED
Adjust / Blur / Gaussian Blur with a radius of 10.00
Selections / Invert
Delete then deselect
Duplicate the set blend mode to Multiply
Lower opacity to 55
Layers / Merge / Merge Down
Repeat
 
Activate SHAPE2
Selections / Select All
Selections / Float
Selections / Defloat
Selections / Modify / Expand by 1
Paste Paper11 as new layer
Resize by 75% ALL LAYERS UNCHECKED
Adjust / Blur / Gaussian Blur with a radius of 10.00
Selections / Invert
Delete then deselect
Layers / Merge / Merge Down
 
Hide all your layers except your Brackets
Layers / Merge / Merge Visible
Rename this layer simply to BRACKETS
Now Unhide your other layers again
 
Activate BRACKETS
Selections / Select All
Selections / Float
Selections / Defloat
Selections / Modify / Expand by 1
Paste Paper14 as new layer
Resize by 75% ALL LAYERS UNCHECKED
Selections / Invert
Delete then deselect
Layers / Merge / Merge Down
 

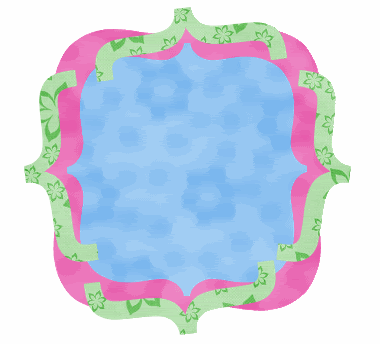
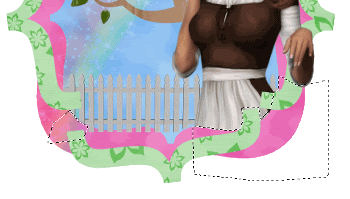
Now you should have something like this:


~ Step 2 ~
 
Paste Cinderella2 as new layer
Position to the right and slightly down
Activate SHAPE2 layer and click the area outside the shape
 
Selections / Modify / Inside/Outside Feather
Inside CHECKED
Feather by 2
 
Use your Eraser Tool to erase the BOTTOM ONLY of Cinderella
Deselect
 
Activate BRACKETS
Selections / Select All
Selections / Float
Selections / Defloat
Selections / Modify / Contract by 1
 
Activate Cinderella again and erase the part of her over the Brackets
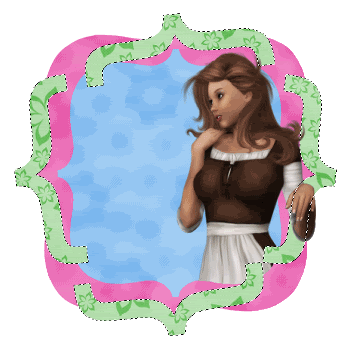
So it should now look like this:
 
 
Paste Tree2 as new layer
Resize by 60%
Position BEHIND Cinderella
Use your Eraser Tool to erase the area that protrudes over the brackets where you just erased Cinders *g*
 
Activate SHAPE2
Paste Rainbow3 as new layer
Activate SHAPE1
Select the area outside with your Magic Wand
On your Rainbow layer hit delete
Deselect
 
Paste Flower13 as new layer
Resize by 30%
Position next to Cinderella to the left
 
Paste Flower7 as new layer
Resize by 30%
Position to fill in spaces, erasing any excess
Layers / Merge / Merg Down
 
Flowers should now be ONE layer
Hide this layer for now while we work on the next
 
Paste Fence1 as new layer
Resize by 30%
Position to the right
Duplicate then Image / Mirror
Layers / Merge / Merge Down
Then resize by 90%
 
Move this layer to the layer BELOW the Brackets
Use your Freehand Tool to select the areas where you wish to delete the fence showing
 
 
Press delete and deselect
 
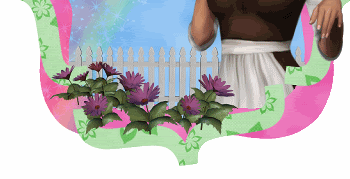
Unhide your Flowers layer and position in front of the fence
 
 
Paste FairyGodmother as new layer
Resize by 50%
Position in lower corner of "garden" at the end of the rainbow
 
Activate SHAPES1
Use your Magic Wand to select the outer area
Back on your FairyGodmother layer
Erase the bottom part of her
 
 
Paste one of the butterflies as new layer
Image / Rotate by 30 to the right
Resize by 5%
Position in your "garden"
 
Paste another butterfly
Repeat rotation but this time to the left
Resize by 5% and position
 
Activate your top layer
 
Paste Rainbow1 as new layer
Resize by 30%
Position in the upper left
On your SHAPE1 layer select the outer area
Selections / Invert
 
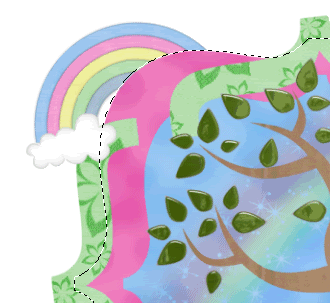
With your Eraser Tool set to around 15 - 20 in size erase just the area of the rainbow overlapping
 
 
Now activate your Background layer
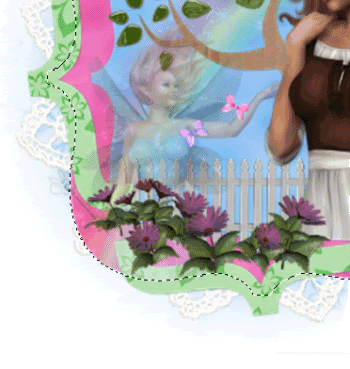
Paste A-Dozi's Lace Frame as new layer
Resize by 65%
Leave in position
 
Paste Paper12 as new layer
Layers / Arrange / Move Down
 
Layers / New Mask Layer / From Image
Locate WSL_Mask44
OK
Layers / Merge / Merge Group
 
Crop and resize
 

~ Step 3 ~
 
Select your Text Tool and font of choice
I am using Cheri
In your Materials Palette set your Background to the following:
 
 
Type out the text of your choice
I used "If Rainbows were Wishes..."
Objects / Align / Horizontal Centre in Canvas
Convert to raster layer
Apply a gradient glow:
Glow width - 3.00
Soft corners - 25
Opacity - 100
Setting - Fat
Colour - #FFFFFF
 
Add a drop shadow:
H & V - 1
Opacity - 20
Blur - 3.00
Colour - #023f70
 
Select a colour to match or contrast your tag
and choose a Script font
I am using Chocolate Dulce
 
Type out your name
 
Repeat the Gradient Glow and drop shadow above
 
Finally, add your © copyright, licence and watermark
 
Save as a GIF or JPG and you're done!
 
Thanks for trying my tutorial!
 
::st!na::
 

© Tutorial written by Stina on 29th March 2009
All rights reserved
Saturday, March 14, 2009

Starchild

 
Supplies
 
Scrap kit of choice - I am using "Moment in Time" by Annie's Designs which can be purchased from Paradise 4 Scrappers and Creative Scraps
Tube of choice - I am using the lovely work of Jasmine Becket-Griffith which can be purchased from CILM
**PLEASE DO NOT USER HER ARTWORK WITHOUT THE APPROPRIATE LICENCE**
Vix_Mask143 (supplied)
Star Preset Shape (supplied)
Font of choice - Pornstar (supplied)
 
My Supplies here
 
 
~ Step 1 ~
 
Open a new 600 x 600 blank canvas flood-filled white
 
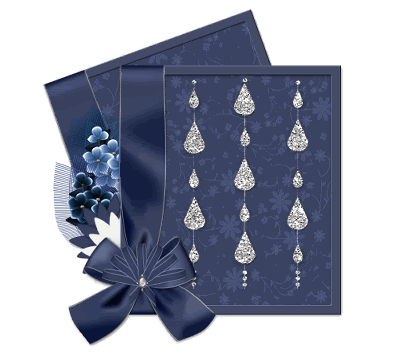
Paste Frame6 as new layer
Resize by 35%
Duplicate
Image / Rotate by 20 to the left
Layers / Arrange / Move Down
 
Rename them Frame1 (bottom) and Frame2 (top)
 
Activate Frame1 and using your Magic Wand select the inside of them frame
Selections / Modify / Expand by 10
Add new raster layer
Paste Paper7 into Selection
Deselect
 
Activate Frame2 and repeat step
 
On Frame1 Layers / Merge / Merge Down
DO NOT DO THIS STEP FOR FRAME2
 
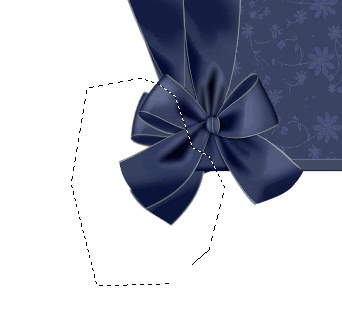
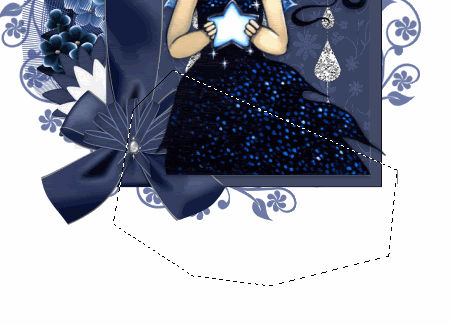
With your Freehand Tool make a small selection around the excess bow from the borrom frame
 
 
Delete
 
Paste Bow9 as new layer
Resize by 15%
Position over centre of bow on frame
 

~ Step 2 ~
 
Paste Flower6 as new layer
Resize by 25%
Position between Frame1 and Frame2
 
Paste Flower5
Resize by 25%
Position between Frame1 and Frame2
 
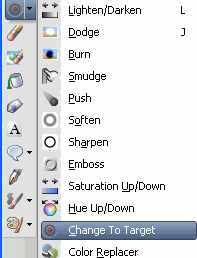
Set your Foreground to a colour matching your frames - I chose #1a2448
 
Now select your Change to Target Tool with the following settings:
 
 
Dust your brush over both your Flower layers to change their colour
 
Paste Flower as new layer
Resize by 40%
Position behind bow
 
Paste Flower4 as new layer
Resize by 40%
Position behind Flower behind bow
 
Activate paper layer of Frame1
Paste DustOfPearl as new layer
Resize by 80% Bicububic
Position in the centre of the frame
 

Paste Frame as new layer
Resize by 45%
Layers / Arrange / Send to Bottom
Position centrally behind frames to look like a circle of "doodles"
 
Paste tube as new layer
Resize as necessary
Position in Frame1 on top layer
Duplicate and move below Frame1
 
Add a drop shadow to the top Tube layer:
H & V - 1
Opacity - 50
Blur - 8.00
Colour - #000000
 
With your Freehand Tool draw around the excess over the bow then Delete
Deselect
 
 
Crop and resize
 

~ Step 3 ~
 
Activate your Background layer
 
Paste Paper4 as new layer
Adjust / Blur / Gaussian Blur
Radius - 20.00
 
Layers / New Mask Layer / From Image
Locate Vix_Mask143
OK
 
Layers / Merge / Merge Group
Lower opacity to 30
 
Activate your top layer
 
Select your Preset Shapes Tool to Seeing_Stars_W
Set your Background colour to one matching your tube and frame - I am using #384160
 
Draw out 4 stars of varying sizes
Rename them Star1 - 4
Duplicate and position to your liking
 
Once you have positioned your stars hide all layers EXCEPT the Stars, then
Layers/ Merge / Merge Visible
 
Unhide layers
 
Select your Text Tool and font (I used Pornstar)
Foreground - Silver colour
Background - #384161
 
Type out your name
Add some noise and a drop shadow:
H & V - 1
Opacity - 50
Blur - 1.00
Colour - #384161
 
Finally, add your © copyright, licence and watermark
 

~ Step 4 ~
 
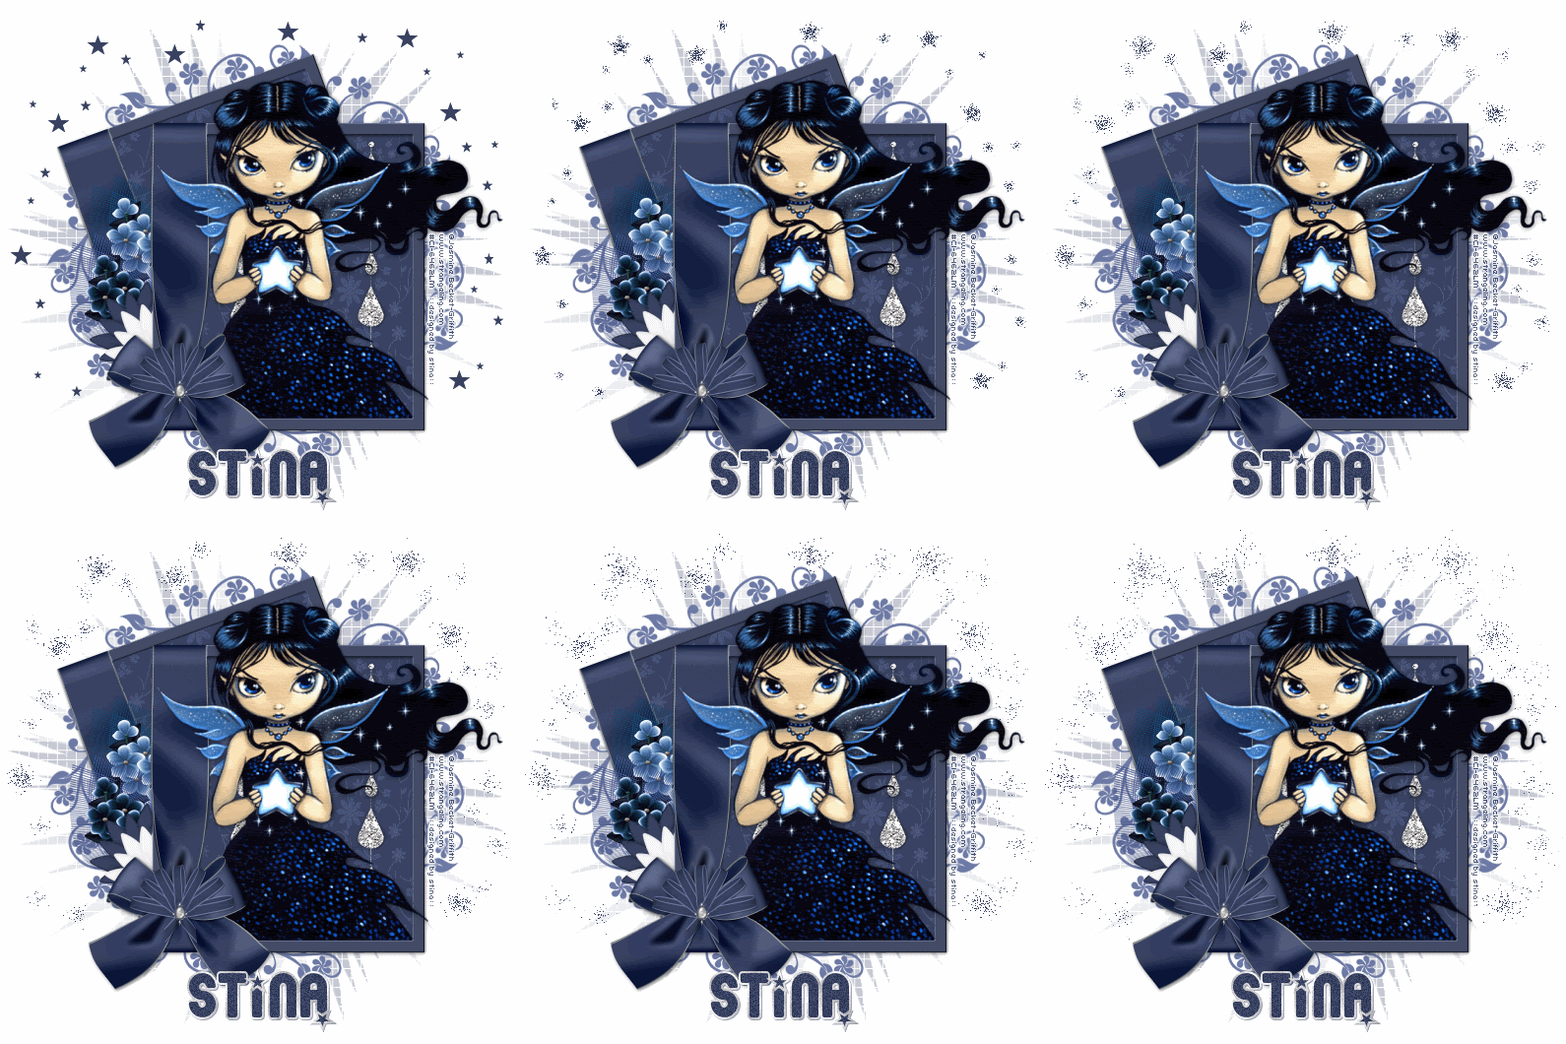
**This next step is for animation**
 
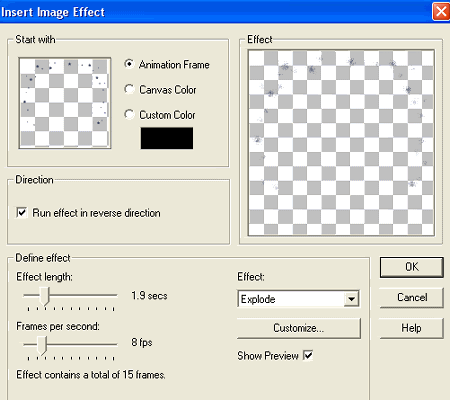
Copy your Stars layer and paste into Animation Shop
 
Effects / Insert Image Effect with the following settings:
 
 
You should now have 16 frames
 
Back in PSP turn off the visibility of your Stars layer
Edit / Copy Merged
 
In Animation Shop
Edit / Paste as New Animation
Then Paste After Current Frame until you have 16 Frames of your tag
 
Now back to your Star animation we have just created
Edit / Select All
Animation / Reverse Frames
Edit / Copy
 
Activate the tag you just pasted
Edit / Propogate Paste (MUST BE SELECTED)
Edit / Paste
 
DO NOT CLICK YOUR MOUSE BUTTON UNTIL YOU ARE SATISFIED WITH THE POSITION
 
Animation / Frame Properties
Change to 15
 
Save as a GIF and you're done!
 
Thank you for trying my tutorial
 
::st!na::
 
 
A non-animated version:
 

© Tutorial written by Stina on 14th March 2009
All rights reserved
Monday, March 9, 2009

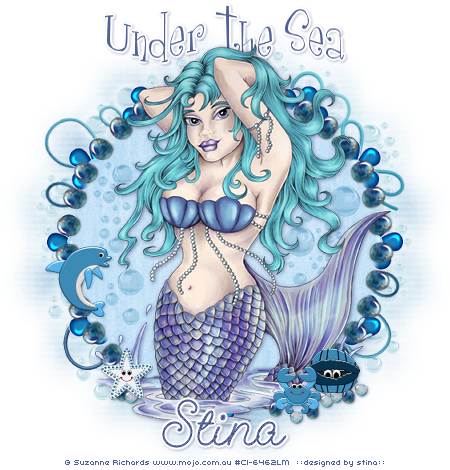
Under the Sea


Supplies
 
"Sea Life" scrap kit by Bel Vidotti Scraps which is a freebie available on her blog
Tube of choice - I am using the artwork of Suzanne Richards which can be purchased from CILM
**PLEASE DO NOT USE HER ARTWORK WITHOUT THE APPROPRIATE LICENCE**
WSL_Mask33 by Chelle (supplied)
Fonts of choice - Girls are Weird and GeeoHhmk (supplied
Plugin: Mura Meister Copies (supplied)
Plugin: Eye Candy 4000 Gradient Glow
 
My Supplies here
 
 
~ Step 1 ~
 
Open a new 600 x 600 blank canvas flood-filled white
 
Paste FramePebble as new layer
Resize by 80%
Leave in position
 
Grab your Selection Tool and choose Circle
Now this is the part I always find fiddly *g*
Position your point in the centre of the canvas – you will see in your Status bar at the bottom the co-ordinates
You need to position your pointer at Y – 300 and X – 300
 

Then draw out your circle till it reaches the centre of the pebbles on the frame
 
Add new raster layer
Layers / Arrange / Move Down
Open Paper06
Edit / Copy
Then Edit / Paste into Selection
KEEP SELECTED
Selections / Invert
Selections / Modify / Feather by 10
On the Paper layer press delete once or twice
Deselect
 
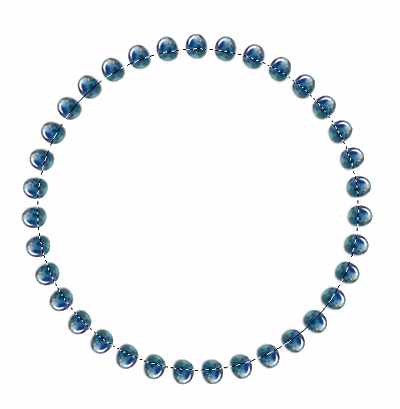
Paste Flower01 as new layer
Resize by 25%
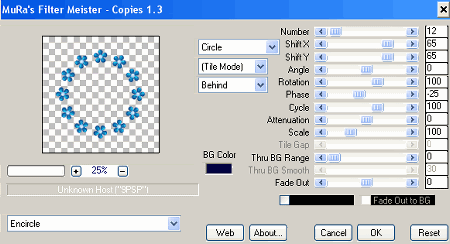
Effects / Plugins / Mura Meister / Copies with the following settings:
 
 
Layers / Arrange / Send to Bottom
 
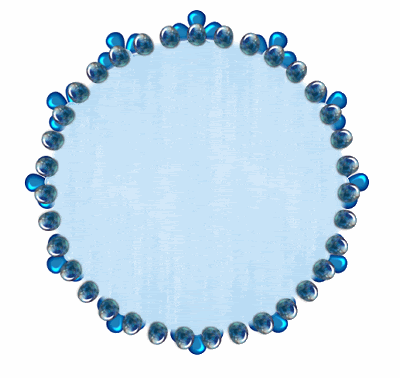
You should now have something like this:


~ Step 2 ~
 
Paste your tube as new layer
Resize as necessary and position to your liking
 
Paste Bubbles03 as new layer
Place into position and set blend mode to Multiply
 
Paste Bubbles02 as new layer
Image / Mirror
Place into position
Set blend mode to Multiply
 
Paste Dolphin as new layer
Resize by 20%
Place to the left to your liking
 
Paste Clam as new layer
Resize by 15%
Place to the lower right
 
Paste Crab as new layer
Resize by 15%
Place alongside Clam
 
Paste Starfish as new layer
Resize by 12%
Position in the lower left
 
Paste Pebble01 and Pebble02 as new layers
Resize them by 15% and place them in various positions to your liking
 

~ Step 3 ~
 
Paste some bubbles around the frame
Once you are happy with their position merge each of them down till they are one layer then
Layers / Arrange / Send to Bottom
Duplicate
 
Activate Background layer
Paste Paper04 as new layer
Resize by 75%
 
Layers / New Mask Layer / From Image
Locate WSL_Mask33
Source Luminance
OK
 
Layers / Merge / Merge Group
 
Add some drop shadows to your elements
 
Crop and resize
 
Select your Text tool, font and colour of choice to match your tube and kit
I chose #516097
 
Type out "Under the Sea" or anything you like
 
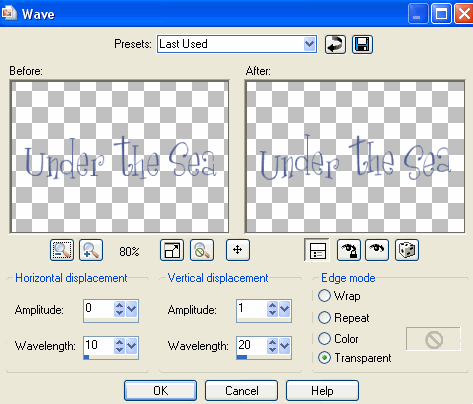
Effects / Distortion Effects / Wave with the following settings:


Add a Gradient Glow and drop shadow:
H & V – 1
Opacity – 25
Blur – 2.00
Coloir - #000040
 
Choose another font for your name
Finally add your © copyright, licence and watermark
Then save as a GIF or JPG and you're done!
 
Thanks for trying my tutorial
 
::st!na::
 

©Tutorial written by Stina on 8th March 2009
All rights reserved
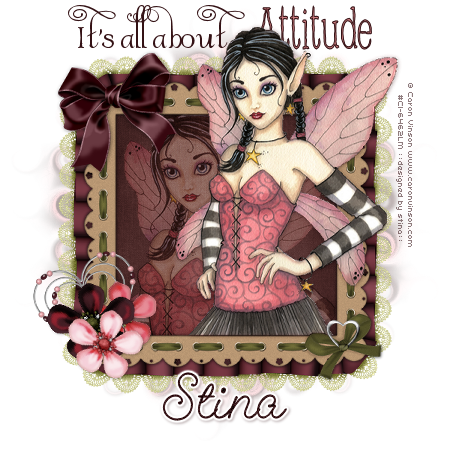
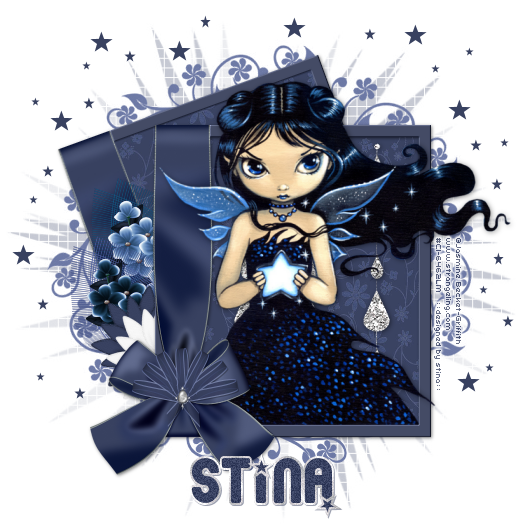
The Attitude Fairy

 
Supplies
 
"Cherry Love" scrap kit by Seachell Scrapz which is a freebie available on her blog
Tube of choice - I am using the lovely work of Caron Vinson which can be purchased from CILM
**PLEASE DO NOT USE HER ARTWORK WITHOUT THE APPROPRIATE LICENCE**
WSL_Mask133 by Chelle (supplied)
Fonts of choice - I am using Albemarle Swash (supplied), 2Peas Frazzled (pay to use) and GeeohHmk (supplied)
Plugin: Xero / Soft Mood (supplied)
Plugin: Eye Candy 4000 Gradient Glow (optional)
 
My Supplies here
 
 
~ Step 1 ~
 
Open a new 600 x 600 blank canvas flood-filled white
 
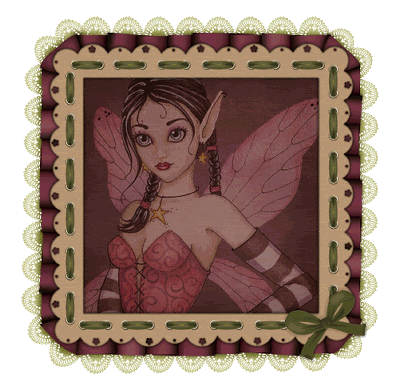
Paste Element17 (Frame) as new layer
Resize by 75%
Paste Element14 (Frame) as new layer
Resize by 75%
Position centrally over first frame
 
Add a drop shadow to top frame
H & V – 1
Opacity – 50
Blur – 5.00
Colour - #000000
Repeat Drop Shadow changing the H & V to -1
Layers / Merge / Merge Down
 
With your Magic Wand click inside the frame
Selections / Modify / Expand by 15
Add a new raster layer
Layers / Arrange / Move Down
Copy Paper2 and Paste into Selection
 
KEEP SELECTED
 
Open your tube and paste as new layer
Resize larger is necessary
Position in frame
Selections / Invert
Delete
 
Set blend mode of layer to Soft Light


~ Step 2 ~
 
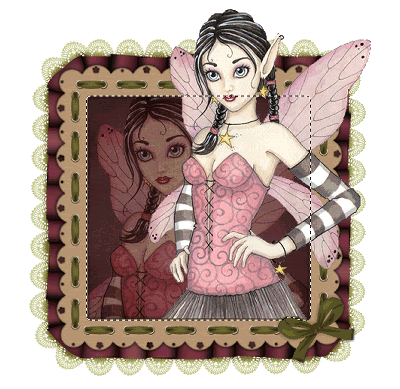
Paste your new as new layer once again
Position to the right (or left – depending on the tube you use)
Then click inside the Frame with your Magic Wand again
Selections / Modify / Expand by 8
Selections / Invert
Selections / Modify / Feather by 2
Then using your Eraser carefully erase along the bottom of the tube where it meets the Frame
Deselect
 
 
Duplicate layer and set blend mode to Multiply
Lower opacity to 50
 
Still on same layer
Effects / Plugins / Xero / Soft Mood with default settings
 
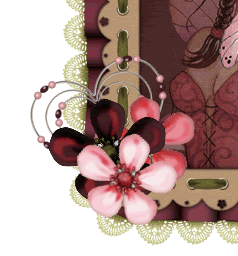
Paste Element2 (Dark Flower) as new layer
Resize by 35%
Position to the lower left of the Frame
 
Paste Element3 (Light Pink Flower) as new layer
Resize by 30%
Position alongside first flower
 
Paste Element5 (Beaded Heart) as new layer
Image / Rotate by 20 to the left
Resize by 35%
Position behind flowers to the left
 
 
Open Element22 and duplicate it (Shift D), and close off original
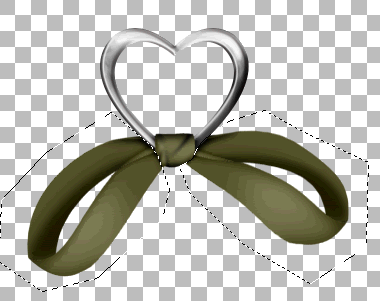
Using your Freehand Tool draw around the Ribbon on either side
Press delete
 
 
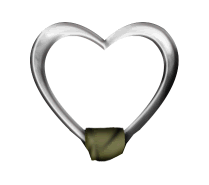
Now your heart should look like this:
 
 
Paste it as a new layer to your working canvas
Resize by 30%
Position over the centre of the Green bow in the lower right of the Frame
 
Paste Element11 (Burgundy bow) as new layer
Image / Mirror
Resize by 40%
Position in the upper left corner
 

~ Step 3 ~
 
Activate your Background layer
Paste Paper4 as new layer
Resize by 70%
Layers / Load/Save Mask / Load Mask from Disk
Locate WSL_Mask133
Source Luminance
Fit to Layer
OK
Layers / Merge / Merge Group
Lower opacity to 40
 
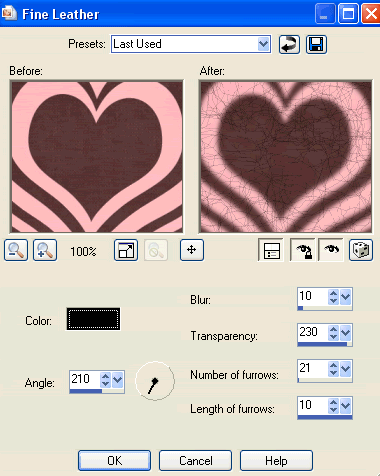
Effects / Texture Effects / Fine Leather with the following settings:


Repeat Fine Leather
 
Effects / Distortion Effects / Curlicues with default settings
 
Crop and resize
 
 
~ Step 4 ~
 
Choose two colours from your tube and/or scrap kit and set them as your Background and foreground colours in your Materials Palette
 
Foreground - #d28184
Background - #341215
 
Turn your foreground off to null for the moment and type out the words:
"It's All About" or "Love My"
 
Now turn the visibility back on the Foreground and toggle the colours so they are now the other way around
Foreground - #341215
Background - #d28184
 
Choose another font slightly bolder (but not too much, though it is entirely up to you) and type the word:
"Attitude"
 
Your text should now read "It's All About Attitude" or "Love My Attitude"
 
Change to another font, or one of those you have already used, and type out your name
Add any effects you wish to make your name stand out
Then apply a slight drop shadow
 
Finally add your © copyright, licence and watermark
Then save as a GIF or JPG and you're done!
 
Thanks for trying my tutorial
 
::st!na::
 

©Tutorial written by Stina on 8th March 2009
All rights reserved
 

Friday, February 27, 2009

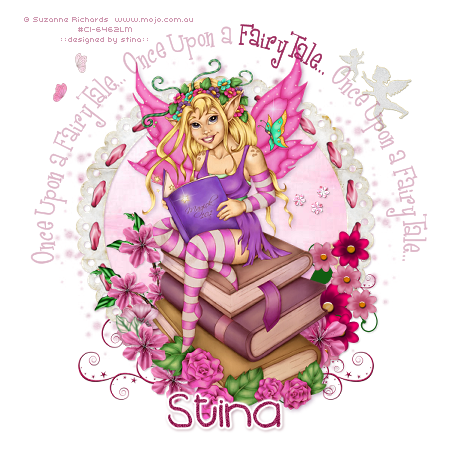
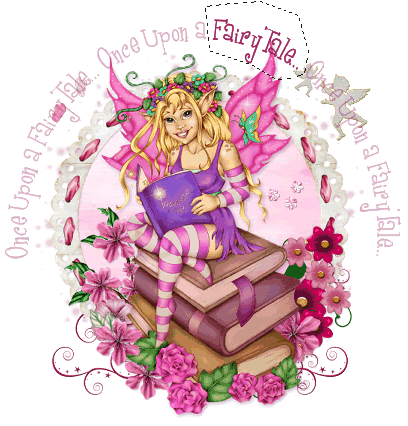
Once Upon a Fairytale...

 
Supplies
 
Scrap kit of choice - I am using the lovely "All About Love" by BabyCakes Scraps which can be purchased from her blog, Creative Scraps, Cotton Candy Kreations and Aussie Scraps (full list available on her blog)
Tube of choice - I am using the delightful artwork of Suzanne Richards which can be purchased from CILM
**PLEASE DO NOT USE HER ARTWORK WITHOUT THE APPROPRIATE LICENCE**
Frame by Cinnamon Scraps from her "All About Love" kit
WSL_Mask1 by Chelle
Fonts of choice - I am using Girls Are Weird and 2Peas Blueberry Pie
Plugin: Eye Candy 4000 Gradient Glow (optional)
 
 
~ Step 1 ~
 
Open a new blank 600 x 600 canvas flood filled white
 
Paste AllAboutLoveFrame as new layer
Resize by 65%
With your magic wand click inside the frame
Selections / Modify / Expand by 10
Paste Soft Pink Paper as new layer
Move below Frame
Selections / Invert
Delete
Deselect
 
Duplicate and set blend mode to Multiply
 
Paste FancyDoodle as new layer
Resize by 50%
Move below Frame
 
Paste ClusterFrame as new layer
Resize by 30%
With your Eraser Tool carefully erase out ALL PARTS of the frame - you may have to zoom in to see better
Position to the lower right


~ Step 2 ~
 
Paste your tube as a new layer
Resize as necessary
Position in the centre of frame
 
Paste BlossomWithLeaves as new layer
Resize by 25% then Image / Mirror
Position to the left
 
Paste PrettyPinkFlower as new layer
Resize by 15%
Position to the left behind flower and books
 
Paste BlossomBranch as new layer
Image / Rotate by 20 to the right
Resize by 40%
Position tucked behind tube and flowers
 
Select your magic wand with the following settings:
 
 
Carefully select inside the dark green areas of the leaves on the branch (zoom in for a better look if you prefer)
When each of the desired areas have been selected, go to
Layers / Promote Selection to Layer
Deselect
Set your blend mode to Screen and duplicate


Paste Cluster as new layer
Resize by 50% and position to the right in the frame
 
Paste DoubleWings as new layer
Resize by 20% twice
Position to the upper left
 
Paste PinkDoubleWings as new layer and repeat resizing as above
Image / Mirror and position alongside first set of wings to the left
 
Paste LargeCupid as new layer
Resize by 40% twice
Position in upper right
 
Duplicate then resize by 50%
Image / Mirror and position with other cupid
Lower the opacity of both these layers to 60
 
Apply slight drop shadows to your layers
Then crop and resize
 

~ Step 3 ~
 
Activate your background
Paste SpongeTexturePaper as new layer
 
Layers / New Mask Layer / From Image
Locate WSL_Mask1
SOurce Luminance
OK
 
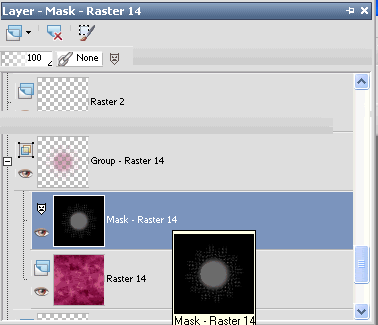
In your Layer Palette locate the Mask Layers
Click on the + to open the Group
Activate the actual Mask layer itself
 

Resize by 105%
Then Layers / Merge / Merge Group
 
Select your Preset Shapes Tool with your foreground coloured and background null
Choose Ellipse and draw out a circle around your tag
 
Select your Text Tool and choose a font
On the curve type out "Once upon a FairyTale..." or anything you choose
 
In your layer palette open the Vector Layer and close off the Ellipse
Convert to raster layer
Lower the opacity of this layer to about 35
 
Grab your Freehand Tool and draw around one of the words that stand out in the text
Layers / Promote Selection to Layer
You will see this layer revert to its normal opacity and therefore stands out from the rest of the text
 

Deselect
 
Select another font, type out your name and add any effects you wish
(I used some Noise, Gradient Glow on my usual settings and a slight drop shadow)
 
Add your © copyright, licence and watermark then save as a GIF or JPG and you're done!
 
Thanks for trying my tutorial
 
::st!na::
 

© Tutorial written by Stina on 26th Febraury 2009
All rights reserved
 

Thursday, February 26, 2009

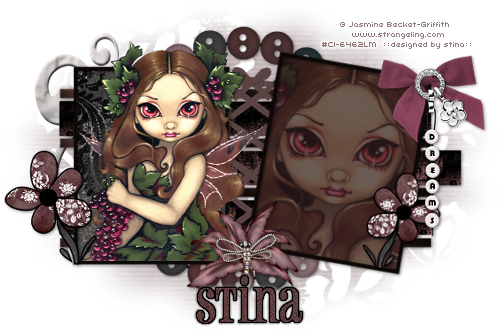
Fairy Dreams

 
Supplies
 
Scrap kit of choice - I am using the lovely "Fairy Dreams" kit by Melisa's Scraps which you can purchase from Cotton Candy Kreations and Creative Scraps
Tube of choice - I am using the delightful artwork of Jasmine Becket-Griffith which can be purchased from CILM
WSL_Mask33 by Chelle
Font of choice - I am using Pharmacy
Plugin: Eye Candy 4000 Gradient Glow
 
 
~ Step 1 ~
 
Open a new blank canvas 600 x 400 flood filled white
 
Open Paper1 and resize 200 x 200
Minimise it and select your Preset Shapes Tool
Set it to Rectangle
 
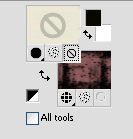
In your Materials Palette set your Foreground to null and your background to the Paper you just resized
 
 
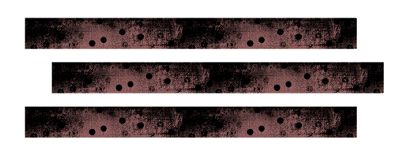
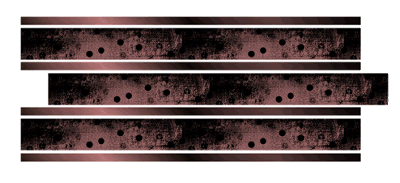
Draw out a long rectangle about 400 pixels long and 50 high
Objects / Align / Centre in Canvas
Convert to raster layer
 
Duplicate and position slightly down and across
 
Duplicate again and position down and in line with the top rectangle
 

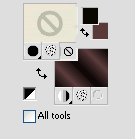
Now with your Dropper Tool select two colours from the paper pattern you just drew out
Set them to your Foreground and Background
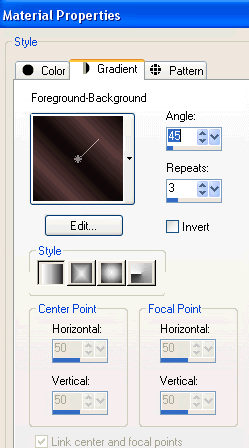
Select your background to Foreground/Background Gradient with the following settings:
 

Make sure your Foreground is set to Null
 
 
Draw out a rectangle the length of the first one but much thinner
Position directly above the top rectangle
Convert to raster layer
 
Image / Rotate by 90 degrees (either way)
 
**IMPORTANT** DO NOT MOVE - LEAVE IN PLACE
 
Effects / Plugins / Graphics Plus / Cross Shadow
Default settings
Repeat
 
Image / Rotate  by 90 degrees back again
 
Duplicate and move between next rectangles
Duplicate again and repeat step
Duplicate again and place last one at the bottom


~ Step 2 ~
 
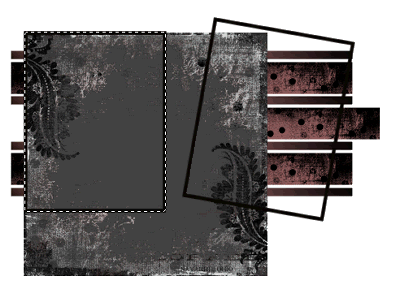
Select your Preset Shape Tool again on Rectangle
Set your Foreground to black and your Background to null
Stroke width - 5.00
 
Draw out a rectangle which will be our frame
Use the nodes to size it up or down
Convert to raster layer
 
Duplicate then Image / Rotate by 10 to the right
Position first frame to the left and the second to the right

With your magic wand click inside the first frame
Selections / Modify / Expland by 3
 
Now open Paper6 and resize to 300 x 300
Paste as new layer on your canvas and position along the left edge of your frame
 
 
Selections / Invert
Delete
 
Add a new raster layer
 
Using your magic wand click inside your second frame
Selections / Modify / Expand by 3
Flood fill new layer with a colour from the either from your tube or the kit
Deselect
 
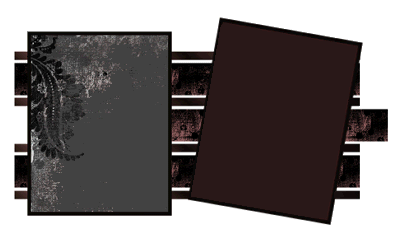
Your canvas should now look something like this:


~ Step 3 ~
 
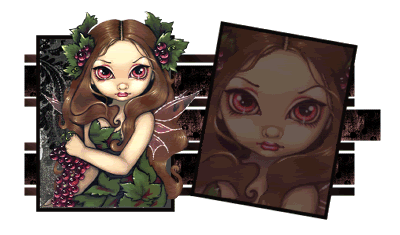
You've made your template and frames - now let's decorate!! *s*
First let's add our tubes!
 
Paste your tube of choice as new layer
Resize as necessary
Position along the bottom edge of frame but so top and side overhangs
 
Paste your tube again
Image / Rotate by 10 to the right
Position under second frame to your liking
Use your magic wand to click inside frame
Selections / Modify / Expand by 3
Selections / Invert
Activtate tube layer
Delete
Deselect
 
 
Paste Frame1 as new layer
Resize by 50%
Layers / Arrange / Send to Bottom and place behind template and frames in the centre
 
Paste FlowerPatch1 as new layer
Resize by 30% and place along the edge of left frame
Duplicate then Image / Mirror
 
Paste Bow1 as new layer
Resize by 50% then Image / Mirror
Place in the upper right frame
Duplicate then set blend mode to Soft Light
 
Paste DreamsText1 as new layer
Resize by 20%
Adjust / Sharpness / Unsharpen Mask
Radius - 1.00
Strength - 100
Clipping - 4
OK
 
Position over the centre of the bow
 
Paste Flower5 as new layer
Resize by 35% and place in centre between the two frames
 
Add any other elements you wish to personalise your creation
 
Apply some drop shadows to your elements
 

~ Step 4 ~
 
Paste Paper3 as new layer
Layers / Arrange / Send to Bottom
 
Layers / New Mask Layer / From Image
Locate WSL_Mask33
Source luminance
OK
 
Layers / Merge / Merge Group
 
Choose a nice font to type out your name
Apply a Gradient Glow in Black
and a drop shadow in white
 
Add your © copyright, licence and watermark
Save as a GIF or JPG and you're done!
 
Thanks for trying my tutorial
 
::st!na::
 

© Tutorial written by Stina on 25th February 2009
All rights reserved