Please email me designed.by.stina@gmail.com with your creations. I'd love to see them.

Tuesday, July 28, 2009

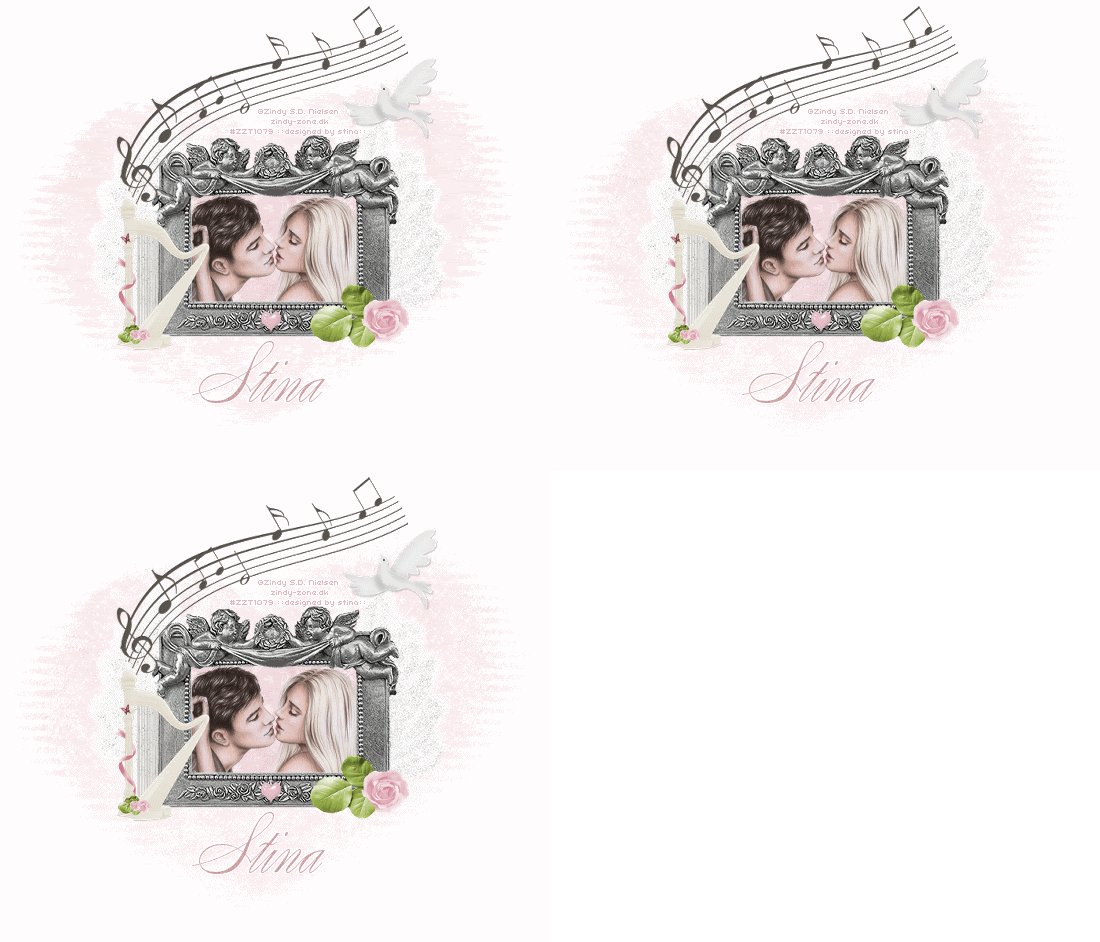
Angel Kisses


Supplies

Scrap kit of choice - I am using "Angel Kisses" by Kristi Westling available from The Scrapping Divaz Designz and Sunshine Studio Scraps
Tube of choice - I am using the lovely artwork of Zindy Nielsen available from her store
**PLEASE DO NOT USE HER ARTWORK WITHOUT THE APPROPRIATE LICENCE**
WSL_Mask10 and WSL_Mask51 by Chelle available from her blog
Font of choice - I am using SplendidES


Let's begin...


Open a new 700 x 600 blank canvas flood-filled white

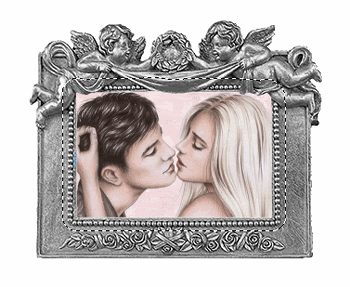
Paste Frame1 as new layer
No need to resize

Select inside the Frame with your Magic Wand
Selections > Modify > Expand by 10
Add new raster layer
Paste paper of choice INTO selection
Layers > Arrange > Move Down

KEEP SELECTED!!

Paste Tube of choice as new layer
Resize as necessary and position
Selections > Invert
Delete any excess, then deselect

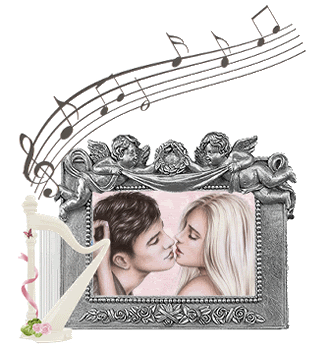
Paste Harp as new layer
Resize by 65%
Position to the left

Paste MusicNotes as new layer
Image > Rotate by 30 to the left
Resize by 35%
Position from the harp and across the top of Frame

Paste Rose2 as new layer
Resize by 20%
Image > Mirror
Position to the lower right

Paste Bird as new layer
Resize by 20%
Image > Mirror
Position to the upper right below the end of the MusicNotes

Paste Paper of choice as new layer
Layers > Arrange > Send to Bottom
Duplicate and hide

Layers > New Mask Layer > From Image
Apply WSL_Mask51
OK
Layers > Merge > Merge Group

Unhide duplicate layer
Layers > New Mask Layer > From Image
Apply WSL_Mask10
OK
Layers > Merge > Merge Group
Duplicate, then
Layers > Merge > Merge Down

Paste Wings as new layer
Resize by 65%

LEAVE IN POSITION!!

Crop and resize to your liking

Select your Text Tool and font of choice
I am using SplendidES
Text colour of choice
I am using #cea4a7

Type out your name
Objects > Align > Horizontal Centre in Canvas
Convert to raster layer
Apply a Gradient Glow and drop shadow of choice

Finally, add your © copyright, licence and watermark, then save as a GIF or JPG and you're done!


** IF YOU WISH TO ANIMATE PLEASE FOLLOW THESE NEXT STEPS **

Activate your Mask Layer layer
Duplicate twice and rename Sparkles1, Sparkles2 and Sparkles3

Activate Sparkles1 and hide the other two
Effects > Plugins > Xenofex 2 > Constellation with the following settings:
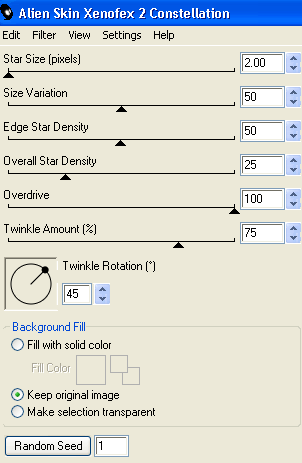

Hide Sparkles1 and activate Sparkles2
Repeat Constellation effect, adjusting the Random Seed

Hide Sparkles2 and activate Sparkles3
Repeat Constellation once more, adjusting the Random Seed

Activate Sparkles1 and hide the other two again
Edit > Copy Merged

Open Animation Shop
Edit > Paste as New Animation

Back to PSP
Hide Sparkles1 and activate Sparkles2
Edit > Copy Merged

In Animation Shop
Edit > Paste after Current Frame

Back to PSP
Hide Sparkles2 and activate Sparkles3
Edit > Copy Merged

In Animation Shop
Edit > Paste after Current Frame

Now save as a GIF and you're done!

Thanks for trying my tutorial!

::st!na::


Here is a non-animated version:
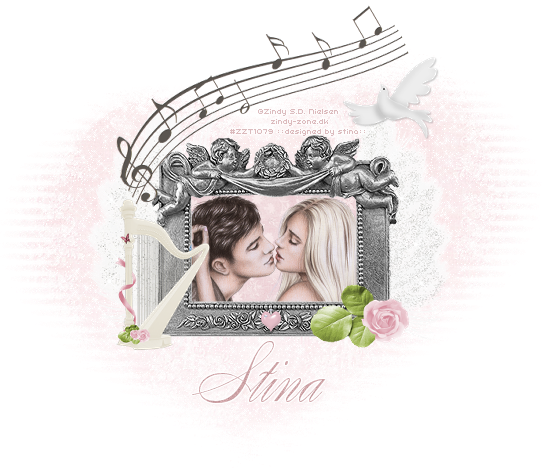


© Tutorial written by Stina on 28th July 2009
All rights reserved

Stairway to the Stars


Supplies

Scrap kit of choice - I am using "Angel Kisses" by Kristi Westling available from The Scrapping Divaz Designz and Sunshine Studio Scraps
Tube of choice - I am using the lovely artwork of Zindy Nielsen available from her store
**PLEASE DO NOT USE HER ARTWORK WITHOUT THE APPROPRIATE LICENCE**
WSL_Mask84 by Chelle available from her blog
Fonts of choice - I am using AgencyFB and AKAppriqueBlack


Let's begin...


Open a new 700 x 600 blank canvas flood-filled white

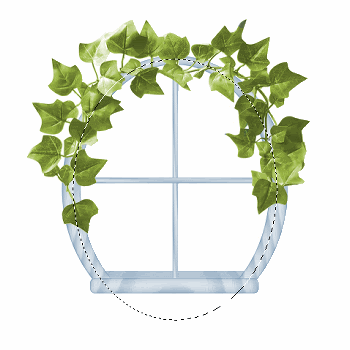
Paste Window as new layer
Resize by 50%
With your Selection Tool set to Ellipse start from just below the centre of the Window and draw out a circle


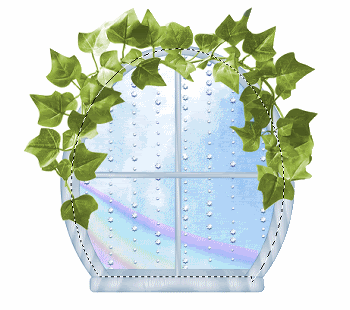
Add a new raster layer
Paste paper of choice INTO selection
Deselect
Layers > Arrange > Move Down
Change your Selection Tool to Rectangle and make a selection at the bottom of the window where the excess paper is
Delete the deselect

Paste Rainbow as new layer
Resize by 30%
Position along bottom of window
Lower opacity to 60

On your Paper background layer select the area outside layer
Activate Rainbow and press delete

KEEP SELECTED!!

Paste DiamondBling as new layer
Resize by 55
Position in Window
Press delete then deselect


(I also set blend mode to Overlay and lower opacity to 75)

Paste a Star as new layer
Position to your liking
Set blend mode to Screen
Rename STAR

Back to top layer

Paste StarWire as new layer
Image > Rotate by 15 to the right
Resize by 30%
Position along window sill

Paste Flower1 and Flower2 as new layer
Resize each by around 5%
Position along ivy around Window

Paste Ladder as new layer
Resize by 25%
Position to the left of window
Paste Bird as new layer
Resize by 20%
Position in upper left or to your liking

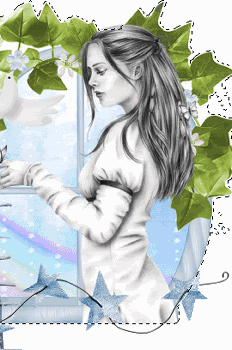
Paste Tube of choice as new layer
Resize as necessary and position
Apply a drop shadow of choice

Select outside the Window with your Magic Wand, then
Erase any excess from your tube below the window


Place StarWire over bottom of Tube and bring Ladder to top

Crop and resize to your liking

Paste paper of choice as new layer
Layers > Arrange > Send to Bottom

Layers > New Mask Layer > From Image
Apply WSL_Mask84
OK
Layers > Merge > Merge Down
Lower opacity if you need to
Select your Text Tool and font of choice
I am using AgencyFB
Text colour of choice - I am using #9cb5d0

Type out your text of choice and position
Convert to raster layer
Apply a drop shadow odf choice

Select another font of choice
I am using AKApprique Black
Text colour of choice
I am using #9cb5d0

Type out your name
Position to your liking
Convert to raster layer
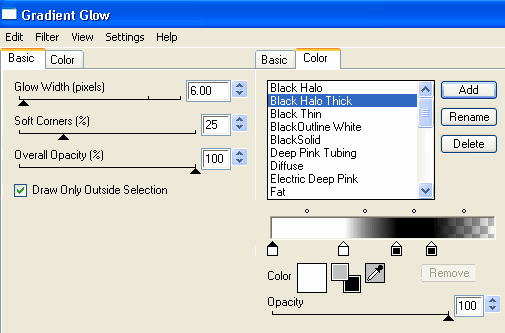
Apply a Gradient Glow and drop shadow of choice

Finally, add your © copyright, licence and watermark, then save as a GIF or JPG and you're done!


** IF YOU WISH TO ANIMATE PLEASE FOLLOW THESE NEXT STEPS **

Activate your STAR layer
Duplicate and resize bottom copy by 110%
Duplicate then Layers > Merge > Merge Down
Rename to STARBURST

Activate STAR and hide STARBURST
Edit > Copy Merged

Open Animation Shop
Edit > Paste as New Animation

Back to PSP
Hide STAR and activate STARBURST
Edit > Copy Merged

In Animation Shop
Edit > Paste after Current Frame

Select All and change Frame Properties to 50
Now save as a GIF and you're done!

Thanks for trying my tutorial!

::st!na::


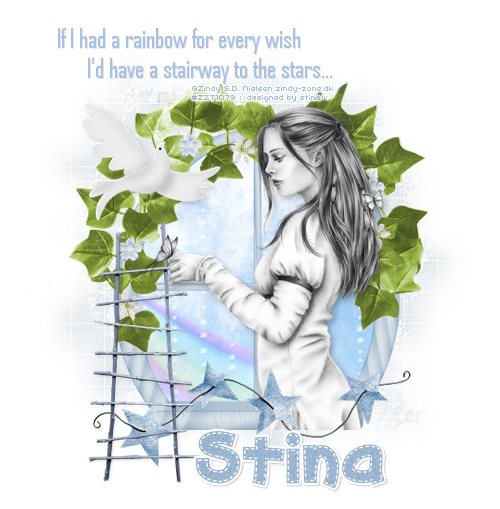
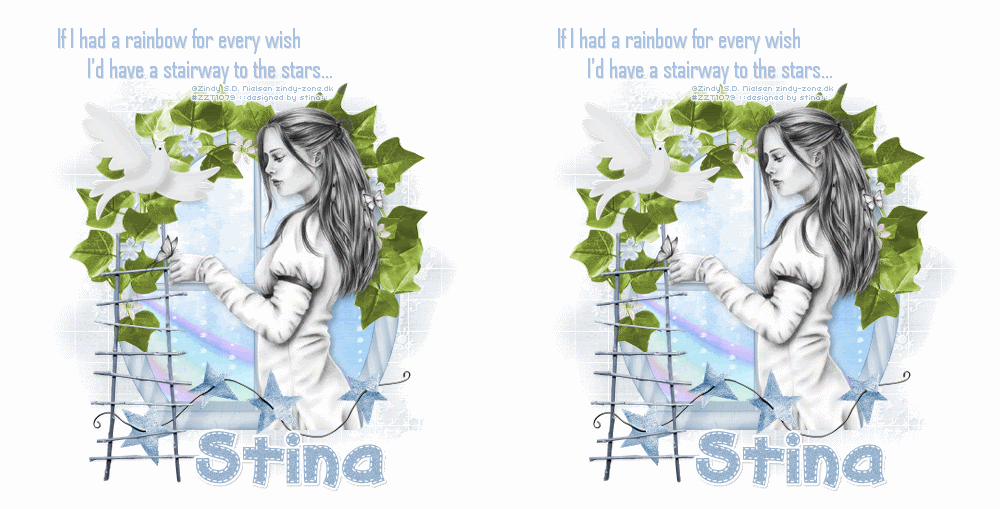
Here is a non-animated version:


© Tutorial written by Stina on 28th July 2009
All rights reserved
Monday, July 27, 2009

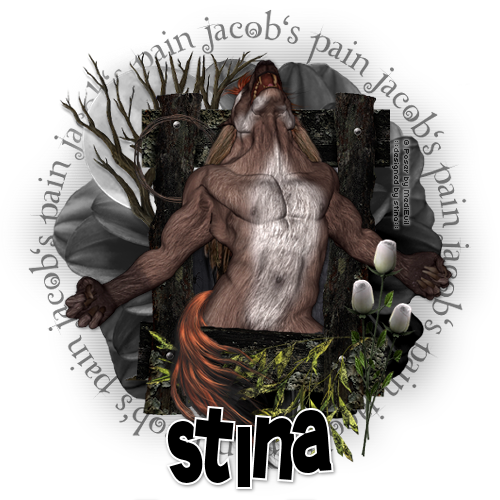
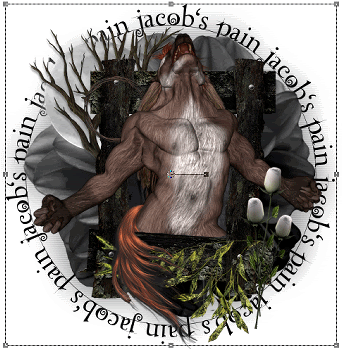
Jacob's Pain


Supplies

Scrap kit of choice - I am using "Dark Nights" by Missy Lynn Scraps available from Totally Sweet Designs, Scraps with Attitude, Paradise 4 Scrappers and Katelynn Designs
Tube of choice - I am using one of the Jacob Black Poser tubes from the Twilight Collection by MediEvil available from Twilight Scraps
Fonts of choice - I am using LDTwylight and TangledUp
Plugin: PhotoEffex Scanlines


Let's begin...


Open a new 700 x 600 blank canvas flood-filled white

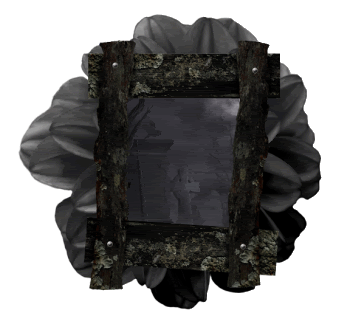
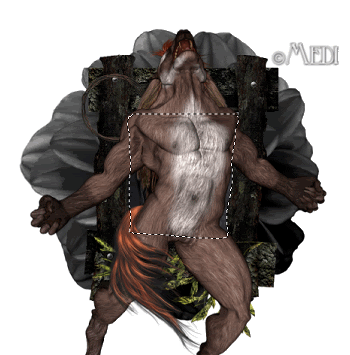
Paste Flower7 (black flower) as new layer
DO NOT RESIZE!

Paste Frame6 as new layer
Resize by 70%

Select inside Frame6 with your Magic Wand
Selections > Modify > Expand by 15
Add new raster layer
Layers > Arrange > Move Down
Paste paper of choice INTO selection
Deselect

Duplicate
Adjust > Hue & Saturation > Colourisie
Set both to 0
Lower opacity 70


Back to top layer

Paste Flower2 (leaves) as new layer
Resize by 55%
Position along bottom of Frame

Paste Frame7 as new layer
Resize by 20%
Position in upper left

Paste Tube of choice as new layer
I am using one of MediEvil's posers from her Twilight Saga
Resize and position to your liking

Activate your Frame and select inside with your Magic Wand
Selections > Modify > Contract by 2
Selections > Modify > Feather by 2
Selections > Invert


Now carefully erase the lower part of your Tube, decreasing the shape size and hardness to your liking to erase extra detail

Paste Rose16 (supplied) as new layer
Image > Mirror
Image > Rotate by 30 to the left
Resize by 80%
Position to the lower right

Paste Rose18 (supplied) as new layer
Resize by 80%
Position alongside first rose
Duplicate, then Image > Mirror
Image > Rotate by 15 to the right
Resize by 90% and position


Paste Moon as new layer
Resize by 60%
Move down below Frame layer to the upper left
Duplicate, then set blend mode to Screen

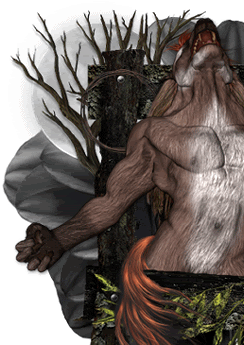
Paste Tree as new layer
Resize by 70%
Position in front of Moon protruding to the left


Crop and resize to your liking

Activate BlackFlower (background) layer
Duplicate
Resize by 110%
Adjust > Blur > Gaussian Blur with a Radius of 20.00
Effects > Plugins > Photo Effex > Scanlines with default settings
Repeat
Lower opacity to 35

Select your Preset Shape Tool and set to Ellipse
Stroke width - 1.00
Foreground - #000000
Background - null

Hold your shift key and draw out a circle around your tag
Objects > Align > Centre in Canvas

Select your Text Tool and font of choice
I am using LDTwylight
Type out text of your choice or use the template I've provided made by me


In your Layer Palette open the vector layer and turn off the Ellipse
Convert to raster layer
Lower opacity to 50

Back to top layer

Select another font of choice
I am using TangledUp
Foreground - #FFFFFF
Background - #000000
Stroke width - 2.00

Type out your name
Objects > Align > Horizontal Centre in Canvas
Convert to raster layer
Apply a drop shadow of choice

Finally, add your © copyright, licence and watermark, then save as a GIF or JPG and you're done!

Thanks for trying my tutorial!

::st!na::


© Tutorial written by Stina on 27th July 2009
All rights reserved
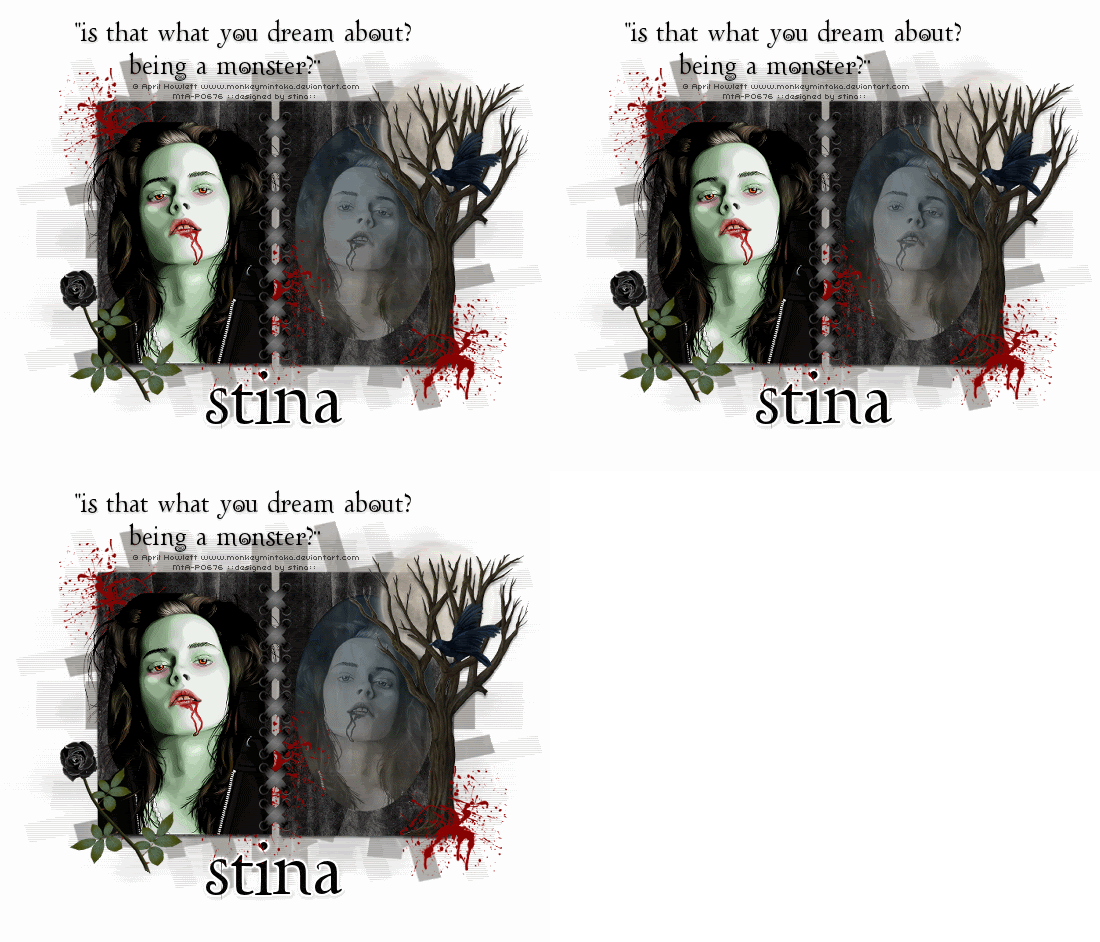
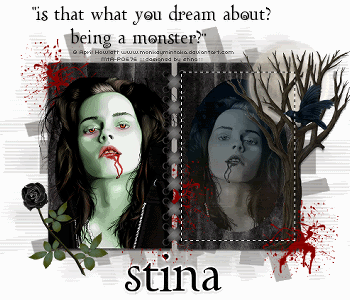
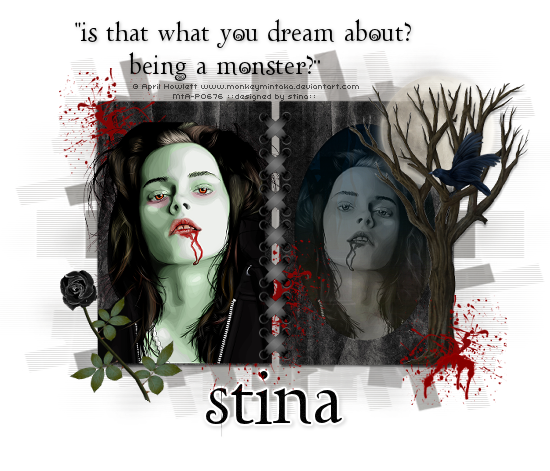
Being a Monster


Supplies

Scrap kit of choice - I am using "Dark Nights" by Missy Lynn Scraps available from Totally Sweet Designs, Scraps with Attitude, Paradise 4 Scrappers and Katelynn Designs
Tube of choice - I am using April Howlett's artwork of Bella Swan available for purchase from Mistaken Art with the appropriate licence
**PLEASE DO NOT USE THIS ARTWORK WITHOUT THE PROPER LICENCE**
Stitching or CrossStitch of choice - I am using CrossRibbons from the "Majestic Midnight Freebie Add On" by Tanya of Scraps by Joe's Wife
WSL_Mask147 by Chelle available from her blog
Font of choice - I am using LDTwylight
Plugins: Filters Unlimited Blue Sky, dsb fluxx Linear Transmission, Mura Meister Cloud and Eye Cand 4000 Gradient Glow


Let's begin....


Open a new 700 x 600 blank canvas flood-filled white

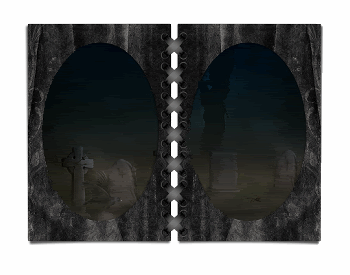
Paste Frame2 as new layer
Resize by 60%
Position to the right
Duplicate, then Image > Mirror
Layers > Merge > Merge Down

Paste some Stitching or CrossStitch as new layer
Resize as necessary
Position between Frames to hold them together

Select the inside of frames with your Magic wand
Selections > Modify > Expand by 15
Paste paper of choice as new layer
Layers > Arrange > Move Down
Resize by 70% and position to liking
Selections > Invert
Delete, then deselect

Effects > Plugins > Filters Unlimited > Color Filters > Blue Sky
Repeat


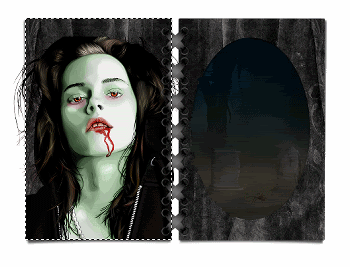
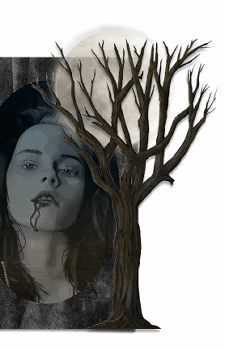
Paste Tube as new layer
Layers > Arrange > Move Up
Resize as necessary
Position in one of the Frames
With your Selection Tool draw out a rectangle on the exact edge of the outside of the Frame
Selections > Invert


Use your Eraser to remove excess
Duplicate, then Image > Mirror
Layers > Arrange > Move Down
(duplicate should now be BELOW Frame layer)
Resize by 85% and position inside opposite Frame
Set blend mode to Luminance Legacy
Lower opacity to around 40
Rename to BellaShadow

Back to top

Paste Moon as new layer
Resize by 50%
Position in upper corner to your liking
Duplicate and set blend mode to Screen
On original Moon layer lower opacity to 70

Paste Rose as new layer
Resize by 50%
Position in lower left
Use your Freehand Tool to select the lower half and then delete

Paste Tree as new layer
Resize by 60%
Position to the right


Splatter some Blood about

To darken blood:
Duplicate then set blend mode to Multiply
Lower opacity to 60
Layers > Merge > Merge Down

Add a new raster layer
Layers > Arrange > Send to Bottom
Select All
Paste Paper of choice INTO selection
Deselect

Layers > New Mask Layer > From Image
Apply WSL_Mask147

DO NOT MERGE!!!

Activate Mask layer and resize by 110%

Layers > Merge > Merge Group
Lower opacity to 35

Crop and resize to liking

Duplicate Mask layer
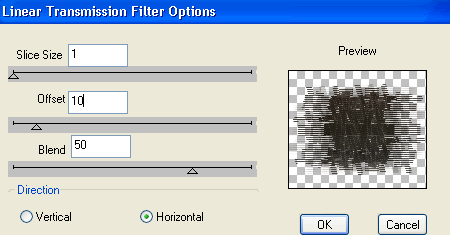
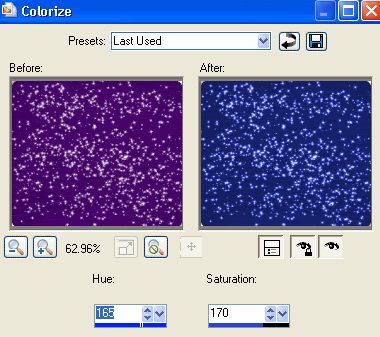
Effects > Plugins > dsb fluxx > Linear Transmission with the following settings:


Lower opacity to 15%

Back to top layer

Select your Text Tool and font of choice
I am using LDTwylight
Colour of choice to match your tag - I am using Black

Type out some Text of your choice and position
Apply a drop shadow of choice

Select another font
I am using the same font and text colour

Type out your name
Objects > Align > Horizontal Centre in Canvas
Convert to raster layer
Apply a Gradient Glow and drop shadow of choice

Finally, add your © copyright, licence and watermark, then save as a GIF or JPG and you're done!


** IF YOU WISH TO ANIMATE PLEASE FOLLOW THESE NEXT STEPS **

Activate your BellaShadow layer
Add three new raster layers and name them Cloud1, Cloud2 and Cloud3
Make a selection around the image with your Selection Tool


Activate Cloud1
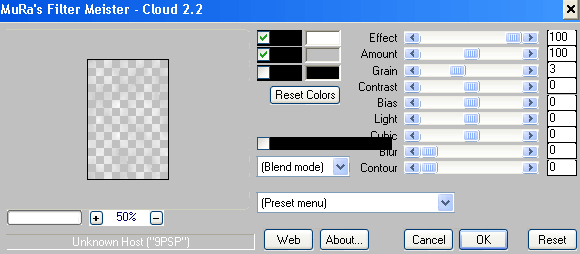
Effects > Plugins > Mura Meister > Clouds with the following settings:


Hide Cloud1 and activate Cloud2
Repeat Cloud effect, checking the box below Colours

Hide Cloud2 and activate Cloud3
Repeat Cloud effect once more, UNchecking the box again
Deselect

Activate Cloud1 and hide the other two again
Edit > Copy Merged

Open Animation Shop
Edit > Paste as New Animation

Back to PSP
Hide Cloud1 and activate Cloud2
Edit > Copy Merged

In Animation Shop
Edit > Paste after Current Frame

Back to PSP
Hide Cloud2 and activate Cloud3
Edit > Copy Merged

In Animation Shop
Edit > Paste after Current Frame

Select All and change the Frame Properties to 30
Now save as a GIF and you're done!

Thanks for trying my tutorial!

::st!na::


Here is a non-animated version:


© Tutorial written by Stina on 27th July 2009
All rights reserved
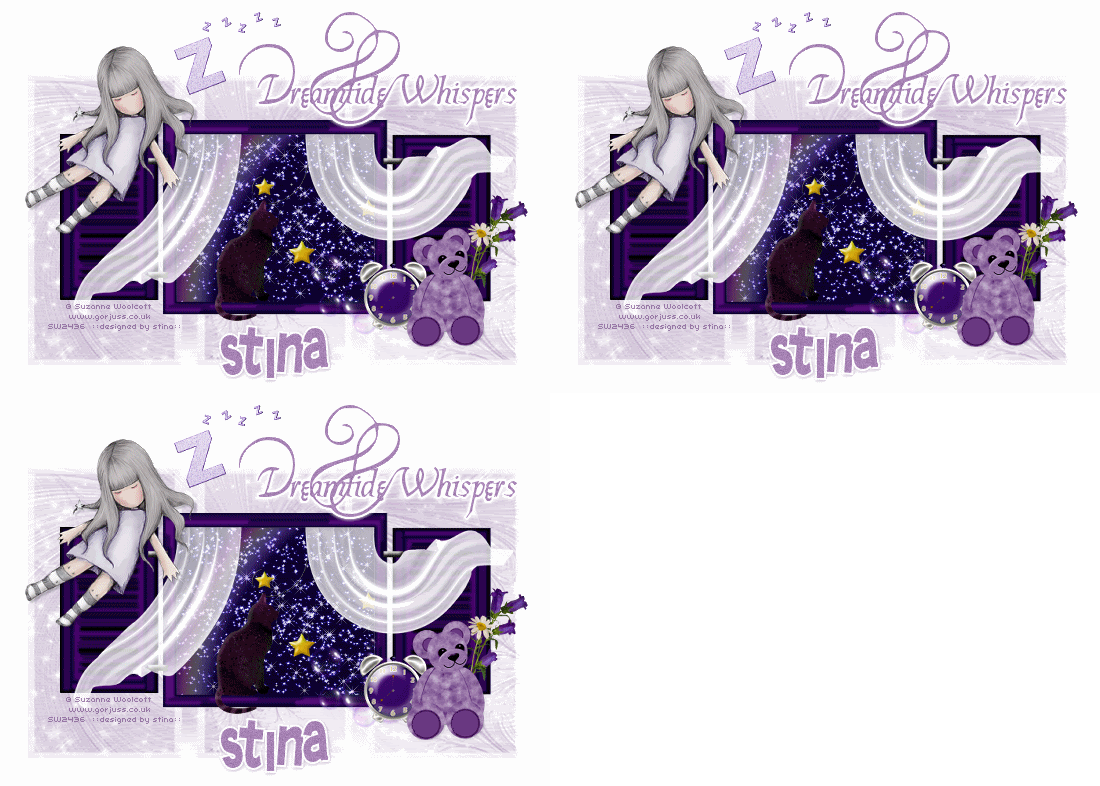
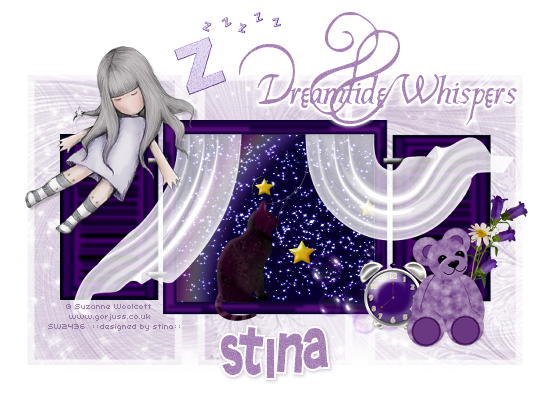
Dreamtide Whispers


Supplies

Scrap kit of choice - I am using "Midnight Whispers" by Missy available from Scraps with Attitude
Tube of choice - I am using the delightful artwork of Suzanne Woolcott available from her store
**PLEASE DO NOT USE HER ARTWORK WITHOUT THE APPROPRIATE LICENCE**
Masks: sg_fractual2222 (here) and WSL_Mask148 by Chelle available from her blog
Fonts of choice - I am using Platthand and TangledUp
Plugins: Eye Candy 4000 Gradient Glow and Xenofex 2 Constellation


Let's begin....


Open a new 700 x 600 blank canvas flood-filled white

Paste Window1 as new later
Resize by 70%

Select inside the window with Magic Wand
Selections > Modify > Expand by 10
Add new raster layer
Layers > Arrange > Move Down
Paste Paper of choice (I am using Paper2) INTO selection
Duplicate

On bottom copy go to:
Adjust > Hue & Saturation > Colourise with the following settings:


Set Blend Mode of top copy to Multiply

KEEP SELECTED!!

Paste Rainbow as new layer
Resize by 50%
Position to your liking
Selections > Invert
Delete, then deselect
Lower opacity to 50

Paste Stars as new layer
Resize by 23% and position to liking

Activate top layer

Paste Curtain1 as new layer
Resize by 35%
Position to the right of Window

Paste Curtain2 as new layer
Resize by 35%
Position to the left of Window

Paste Clock as new layer
Resize by 15%
Position off side to the Window

Paste TeddyBear as new layer
Resize by 20%
Position beside the Clock

Paste FlowerGroup as new layer
Image > Rotate by 20 to the right
Resize by 25%
Position behind Teddy

Paste Flower1 as new layer
Image > Rotate by 70 to the left
Resize by 20%
Position alongside FlowerGroup

Paste Cat as new layer
Resize by 20%
Position in the Window

Paste Tube as new layer
Resize as necessary and position

Paste Zzzzz as new layer
Resize by 18%
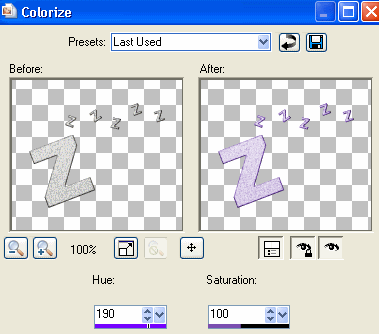
Adjust > Hue & Saturation > Colourise with the following settings:


Paste Paper of choice as new layer
Layers > Arrange > Send to Bottom

Layers > New Mask Layer > From Image
Apply sg_fractual2222
OK
Layers > Merge > Merge Group

Duplicate, then Image > Mirror then Image > Flip
Lower opacity to 50
Layers > Merge > Merge Down

Layers > New Mask Layer > From Image
Apply WSL_Mask148
OK
Layers > Merge > Merge Group
Lower opacity to 55

Image > Canvas Size 700 x 550 centred
Repeat Canvas Size to 700 x 500 with the bottom setting at -50

Back to top layer

Select your Text Tool and font of choice
I am using Platthand
Colour of choice to match your tag - I am using #a883b5

Type out some Text of your choice and position
Apply a white Gradient Glow of choice

Select another font
I am using TangledUp
Foreground - #FFFFFF
Background - #a883b5
Stroke width - 2.00

Type out your name
Objects > Align > Horizontal Centre in Canvas
Convert to raster layer
Apply a drop shadow of choice

Finally, add your © copyright, licence and watermark, then save as a GIF or JPG and you're done!


** IF YOU WISH TO ANIMATE PLEASE FOLLOW THESE NEXT STEPS **

Activate your Window background layer
Duplicate twice and rename Stars1, Stars2 and Stars3

Select outside the layer with your Magic Wand, then
Selections > Invert

Activate Stars1 and hide the other two

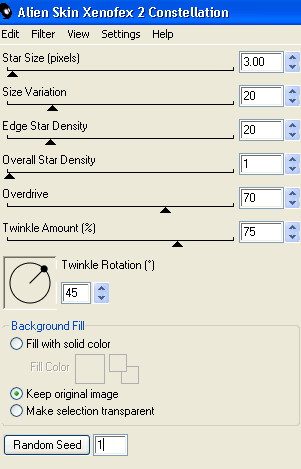
Effects > Plugins > Xenofex 2 > Constellation with the following settings:


Hide Stars1 and activate Stars2
Repeat Constellation effect, adjusting the Random Seed

Hide Stars2 and activate Stars3
Repeat Constellation once more, adjusting the Random Seed

Activate Stars1 and hide the other two again
Edit > Copy Merged

Open Animation Shop
Edit > Paste as New Animation

Back to PSP
Hide Stars1 and activate Stars2
Edit > Copy Merged

In Animation Shop
Edit > Paste after Current Frame

Back to PSP
Hide Stars2 and activate Stars3
Edit > Copy Merged

In Animation Shop
Edit > Paste after Current Frame

Now save as a GIF and you're done!
Thanks for trying my tutorial!

::st!na::


Here is a non-animated version:


© Tutorial written by Stina on 26th July 2009
All rights reserved
Sunday, July 26, 2009

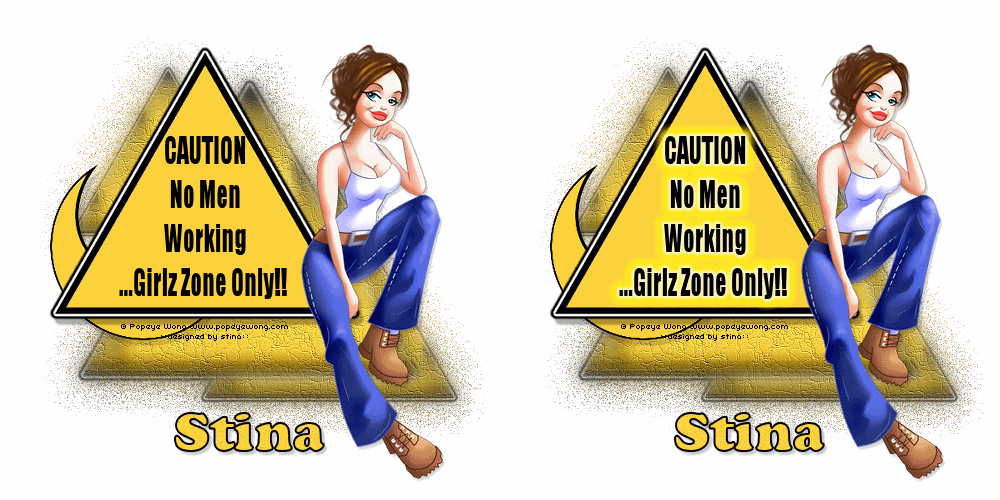
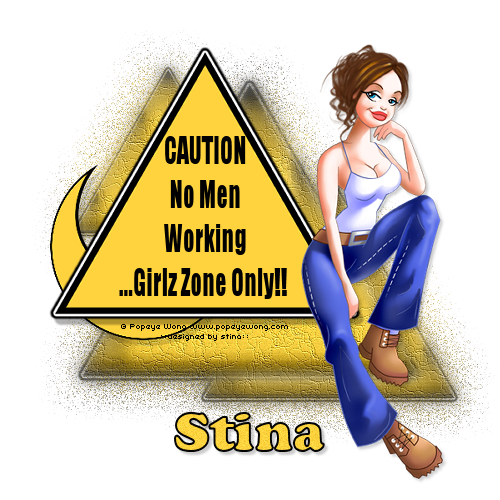
Girlz Zone Only


Supplies

Tube of choice - I am using the artwork of Popeye Wong which is free to use with credit
Fonts of choice - I am using Impact and Cookie
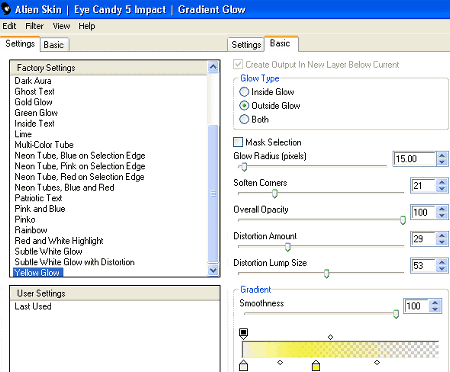
Plugins: Eye Candy 4000 Gradient Glow and Alien Skin Eye Candy 5: Impact Gradient Glow
No Scraps

**This is an old tag I made some time ago and have redone it as a tut, adding a few extra effects.
It predominantly uses the effects in PSP**


Let's begin...


Open a new 700 x 600 blank canvas flood-filled white

Select your Preset Shape tool and set to Triangle
Foreground - #000000
Background - #fed33e
Set Width to 10.00
Create as Vector

Hold Shift key and draw out a Triangle
Objects > Align > Centre in Canvas
Convert to raster layer
Duplicate three times and hide top two layers

Activate bottom Triangle

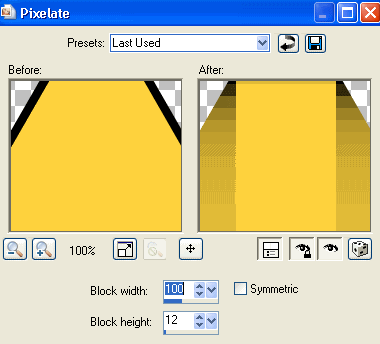
Effects > Distortion Effects > Pixelate with the following settings:


Effects > Plugins > Eye Candy 4000 > Gradient Glow with the following settings:


Duplicate and resize by 75%
Position slightly down and to the right
Duplicate again and resize by 75%
Position to the upper left
Layers > Merge > Merge Down
Repeat
Rename Pixelate
Duplicate twice and rename first one Fine Leather and second one Glass

Activate Fine Leather

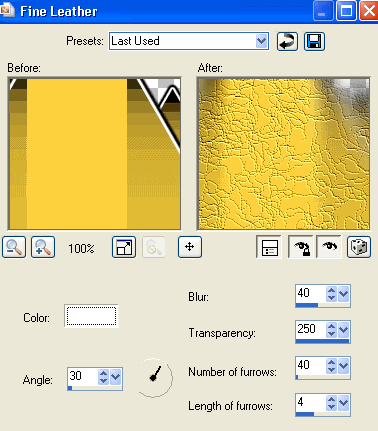
Adjust > Texture Effects > Fine Leather with the following settings:


On Glass,
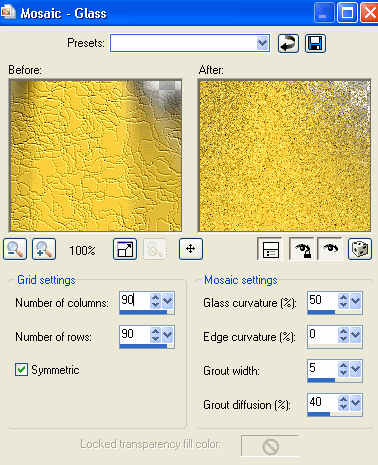
Adjust > Texture Effects > Mosaic - Glass with the following settings:


Lower the opacity of Fine Leather to 80 and Glass to 70

Activate top Triangle layer
Resize by 90%
Apply same Gradient Glow as above
Position between two Triangles to the left

Apply a drop shadow:
V - 7
H - 5
Opacity - 30
Blur - 2.00
Colour - #000000

Activate second Triangle layer
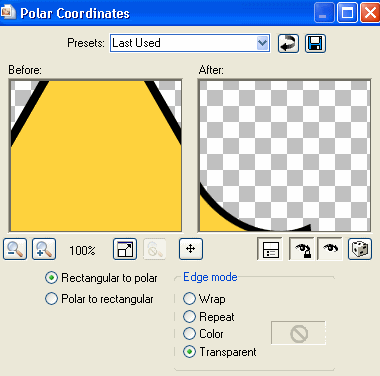
Effects > Distortion Effects > Polar Coordinates with the following settings:


Resize by 50%
Position to the lower left of Triangle
Apply same drop shadow as above but lower opacity to 15

Paste Tube of choice as new layer
Resize and position to liking
Apply a drop shadow of choice

Crop and resize

Select your Text Tool and font of choice
I am using Impact
Colour is Black

Type out your text of choice
Position within the main triangle
Duplicate

On bottom text layer,
Effects > Alien Skin Eye Candy 5: Impact > Gradient Glow with the following settings:


Rename Caution Text and Caution Text Glow

Select another font of choice
I am using Cookie
Foreground - #000000
Background - #fed33e
Stroke width - 2.00

Type our your name
Objects > Align > Horizontal Centre in Canvas
Convert to raster layer
Apply a drop shadow of choice

Finally, add your © copyright, licence and watermark, then save as a GIF or JPG and you're done!


** IF YOU WISH TO ANIMATE PLEASE FOLLOW THESE NEXT STEPS **

Activate your Caution Text layer and hide Caution Text Glow
Edit > Copy Merged

Open Animation Shop
Edit > Paste as New Animation

Back to PSP
Activate Caution Text Glow
Edit > Copy Merged

In Animation Shop
Edit > Paste after Current Frame

Select All and change the Frame Properties to 80
Now save as a GIF and you're done!

Thanks for trying my tutorial!

::st!na::


Here is a non-animated version:


© Tutorial written by Stina on 26th July 2009
All rights reserved
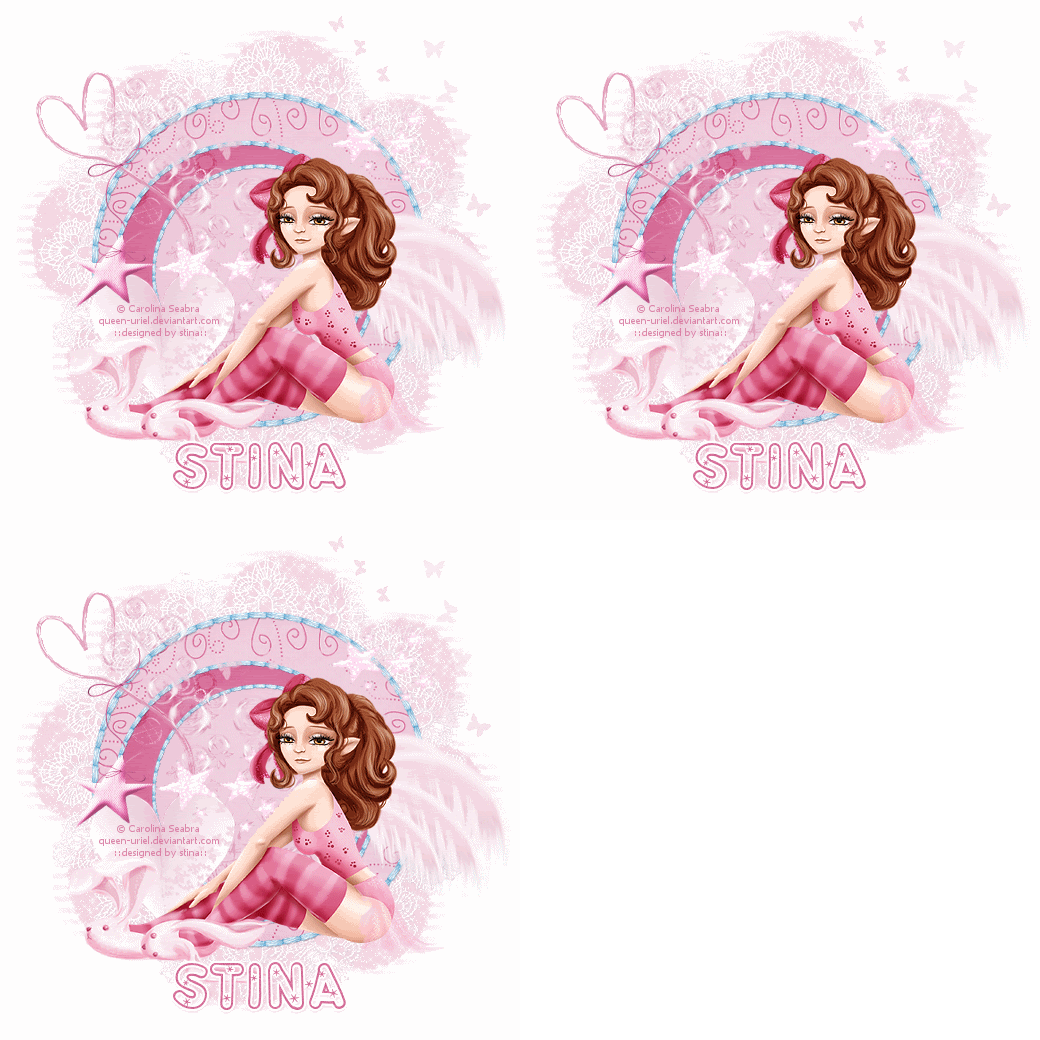
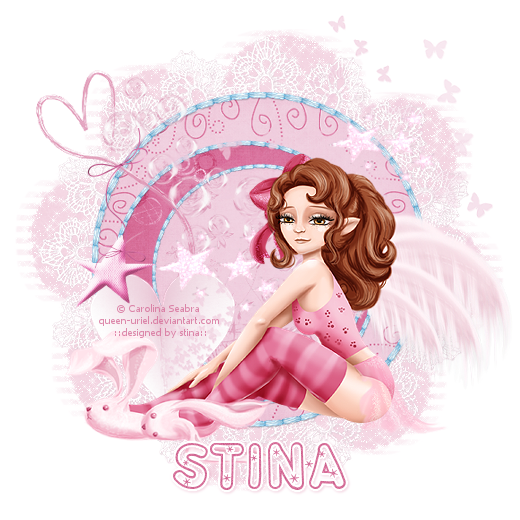
Bedtime Bunny


Supplies

Scrap kit of choice - I am using "Tiny Dancer" by Lynn Earwicker of Moo Designs available from The Scrapping Divaz Designz
Tube of choice - I am using Carolina Seabra which is FTU and available from her site in PNG format
WSL_Mask239 by Chelle available from her blog
Font of choice - I am using StarryFHope
Plugin: Xenofex 2 Constellation


Let's begin....


Open a new 600 x 600 blank canvas flood-filled white

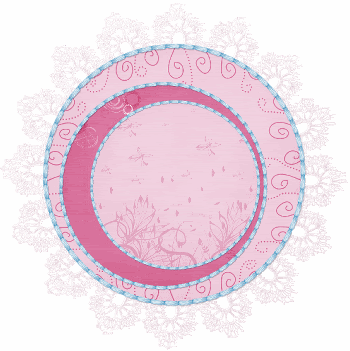
Paste LaceFrame as new layer
Resize by 95%

Paste Stitches as new layer
Resize by 70%

Select inside the first "circle" with your Magic Wand
Selections > Modify > Expand by 3
Add new raster layer
Layers > Arrange > Move Down
Paste a paper of choice INTO Selection
Deselect

Select the next circle
Selections > Modify > Expand by 3
Activate Paper layer
Paste another paper of choice INTO selection
Deselect

Select the next circle
Selections > Modify > Expand by 3
Activate Paper layer again
Paste another paper of choice INTO selection
Deselect


Paste Bubbles as new layer
Resize by 60%
Position to your liking

Paste HeartDoodle as new layer
Resize by 50%
Position to the upper left

Paste ButterflyCluster as new layer
Resize by 75%
Position with bottom of cluster within the inner lower left

Paste PaperHeart as new layer
Resize by 30%
Position to your liking


Paste StarTrail as new layer
Image > Rotate by 10 to the left
Resize by 40%
Adjust > Brightness & Contrast > Brightness/Contrast with the Bright preset setting
Position to your liking

Paste your Tube as new layer
Resize as necessary and position to liking
Add any other elements of your choice

Paste a Paper of choice as new layer
Layers > Arrange > Send to Bottom

Layers > New Mask Layers > From Image
Apply WSL_Mask239
OK
Layers > Merge > Merge Group
Lower opacity to around 20

Crop and resize

Select your Text Tool and font of choice
I am using StarryFHope
Colour of choice

Type our your name and position
Objects > Align > Horizontal Centre in Canvas
Convert to raster layer
Apply a Gradient Glow in white and add a drop shadow of choice

Finally, add your © copyright, licence and watermark, then save as a GIF or JPG and you're done!


** IF YOU WISH TO ANIMATE PLEASE FOLLOW THESE NEXT STEPS **

Activate your Mask layer
Duplicate twice and rename Sparkle1, Sparkle2 and Sparkle3

Activate Sparkle1
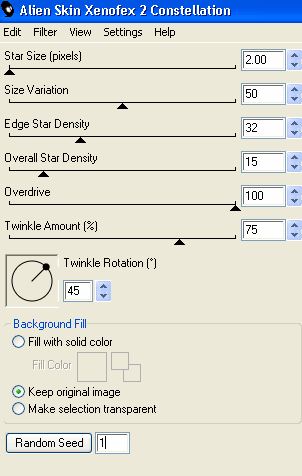
Effects > Plugins > Xenofex 2 > Constellation with the following settings:


Hide Sparkle1 and activate Sparkle2
Repeat Constellation effect adjusting the Random Seed

Hide Sparkle2 and activate Sparkle3
Repeat Constellation effect once more adjusting the Random Seed

Activate Sparkle1 and hide Sparkle2 and Sparkle3
Edit > Copy Merged

Open Animation Shop
Edit > Paste as New Animation

Back to PSP
Hide Sparkle1 and activate Sparkle2
Edit > Copy Merged

In Animation Shop
Edit > Paste after Current Frame

Back to PSP
Hide Sparkle2 and activate Sparkle3
Edit > Copy Merged

In Animation Shop
Edit > Paste after Current Frame

Now save as a GIF and you're done!
Thanks for trying my tutorial!

::st!na::

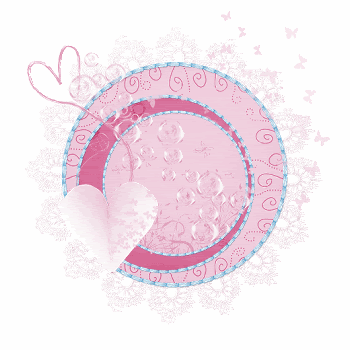
Here is a non-animated version:


© Tutorial written by Stina on 26th July 2009
All rights reserved
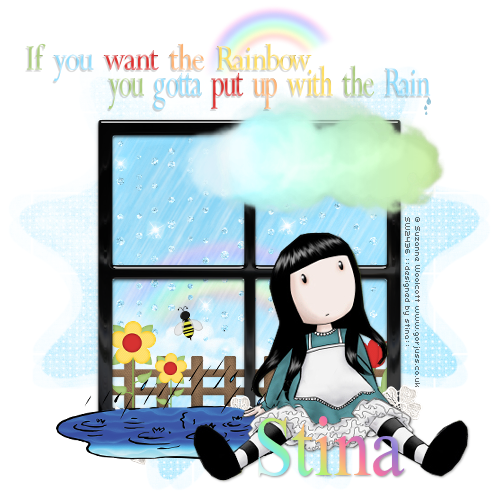
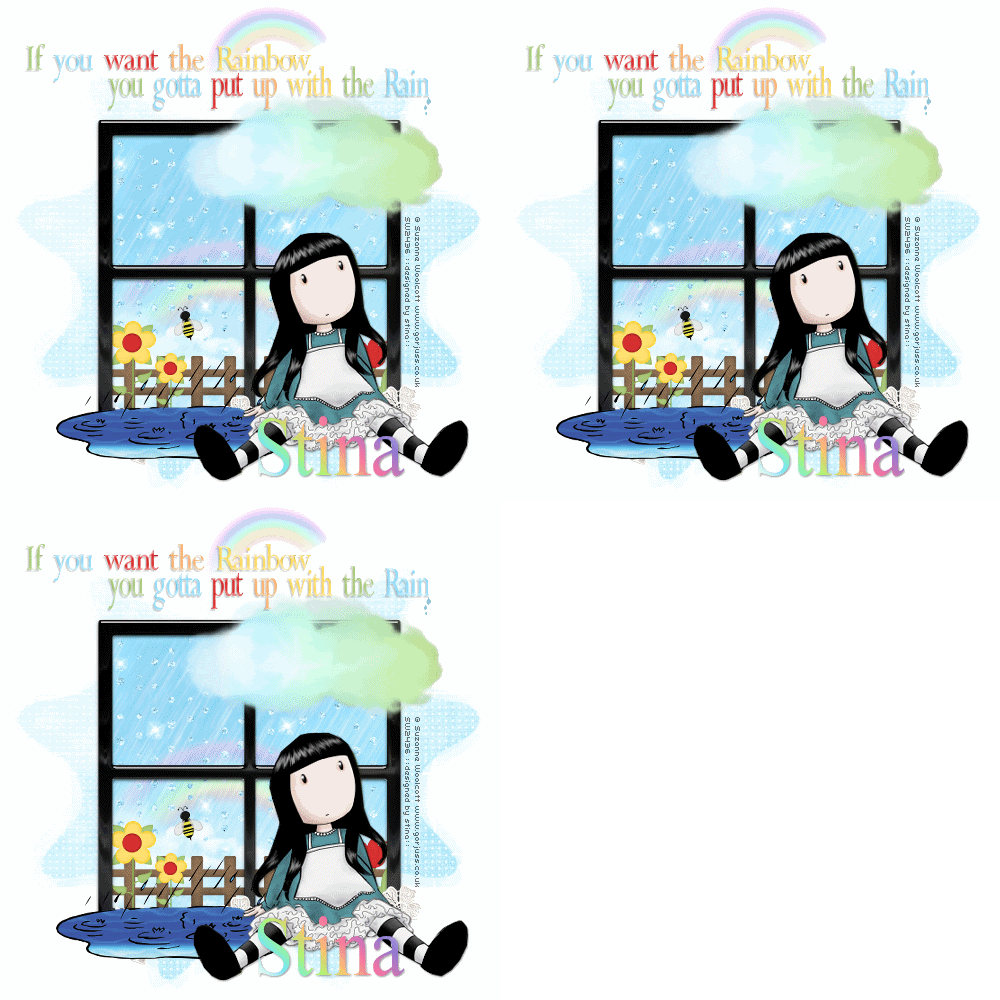
Rain Rain Rainbows


Supplies

Scrap kit of choice - I am using the "Rain Rain Go Away" collab by The Scrapping Divaz Designers available from The Scrapping Divaz Designz
Tube of choice - I am using the artwork of Suzanne Woolcott available from her store
**PLEASE DO NOT USE HER ARTWORK WITHOUT THE APPROPRIATE LICENCE**
WSL_Mask111 by Chelle available from her blog
Font of choice - I am using Times New Roman
Plugins: Alien Skin Eye Candy 5: Impact Glass
VDL Adrenaline Snowflakes


Let's begin....


Open a new 700 x 600 blank canvas flood-filled white
Select your Preset Shape Tool and set to Rectangle
Foreground - #000000
Background - null
Create as Vector
Set your width to 20.00

Hold you shift key and draw out a square on your canvas
Objects > Align > Centre in Canvas
Convert to raster layer

Change your Width to 15.00
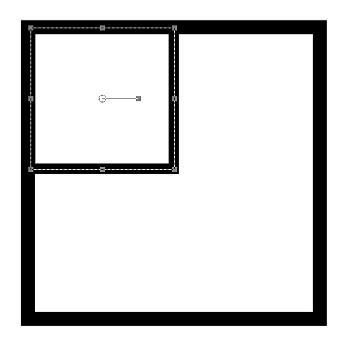
Hold your shift key again and draw out a smaller square within the upper left corner of main rectangle


Convert to raster layer
Duplicate, then Image > Mirror
Layers > Merge > Merge Down
Duplicate again, then Image > Flip
Layers > Merge > Merge Down
Then Merge Down once more

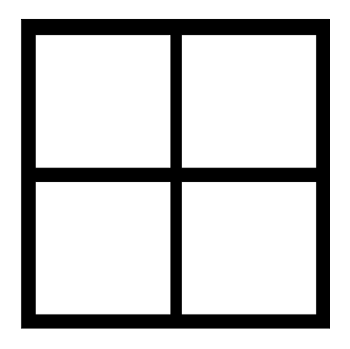
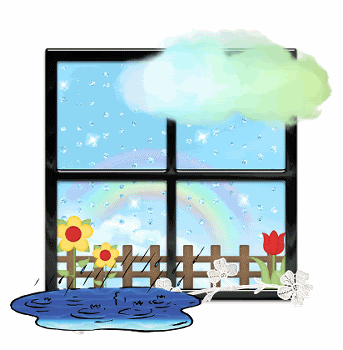
You should have something like this:


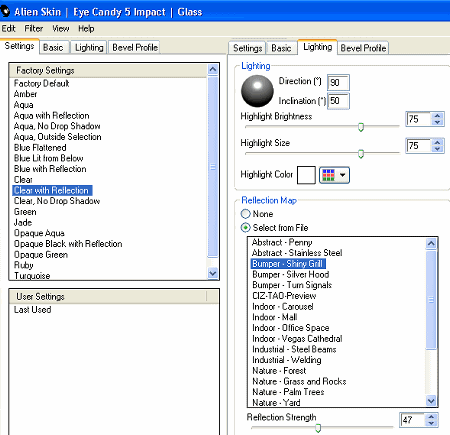
Effects > Plugins > Alien Skin Eye Candy 5: Impact > Glass with the following settings:


With your Selection Tool draw out a rectangle around your window frame
Add a new raster layer
Layers > Arrange > Move Down
Paste paper of choice INTO Selection
Deselect

Paste moo_GlitterDrops as new layer
Resize by 23%
Position to left half of window
Duplicate then carefully move to the right
Erase any overlapping excess
Layers > Merge > Merge Down

Paste kristiw_Fence as new layer
Resize by 20%
Position in lower left window
Duplicate, then Image > Mirror
Layers > Merge > Merge Down

Paste a couple of flowers and resize as necessary
Position them to your liking

Activate top layer

Paste tammyjo_Lace as new layer
Image > Rotate by 10 to the left
Image > Mirror, then resize by 25%
Position along bottom of Window

Paste KISM_Cloud as new layer
Resize by 25%
Position to your liking in an upper corner

Paste ellenm_Puddle as new layer
Resize by 15%
Position to opposite side of Cloud in a lower corner
** Depending on the position of your Cloud, you may have to Mirror the Puddle due to the direction of the raindrops **


Paste a WordArt of choice as new layer
Resize by around 18% and position to your liking

Add any other elements of your choice

Paste your Tube as new layer
Resize as necessary and position to your liking

Add a new raster layer
Layers > Arrange > Send to Bottom
Select All
Paste a paper of choice INTO selection
Deselect

Layers > New Mask Layer > From Image
Apply WSL_Mask111

DO NOT MERGE!!

Resize Mask layer by 110%
Layers > Merge > Merge Group
Lower opacity to around 55

Select your Text Tool and font of choice
I am using Times New Roman
Colour of choice - I am using a Gradient called "pj-summercolors" set to 45° angle)

Type our your name and position
Apply a drop shadow of choice

Finally, add your © copyright, licence and watermark, then save as a GIF or JPG and you're done!


** IF YOU WISH TO ANIMATE PLEASE FOLLOW THESE NEXT STEPS **

Activate your Window Background layer
With your Magic wand click OUTSIDE the paper, then
Selections > Invert
(this will select JUST the window area)

Add three raster layers and name them Rain1, Rain2 and Rain3

Activate Rain1
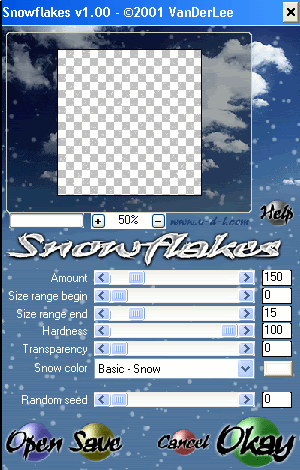
Effects > Plugins > VDL Adrenaline > Snowflakes with the following settings:


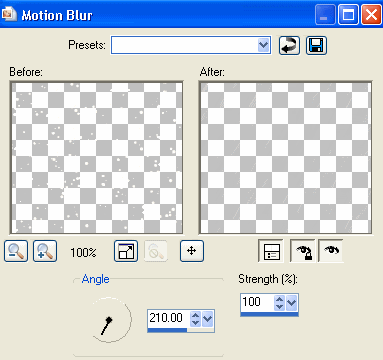
Then Adjust > Blur > Motion Blur with the following settings:


** PLEASE NOTE - If your puddle is on the opposite side to mine you will need to change the direction of the Motion Blur to 140 **

Hide Rain1 and activate Rain2
Repeat Snowflake effect adjusting the Random Seed
Apply Motion Blur again

Hide Rain2 and activate Rain3
Repeat Snowflake effect once more adjusting the Random Seed
Apply Motion Blur again
Deselect

Activate Rain1 and hide Rain2 and Rain3
Edit > Copy Merged

Open Animation Shop
Edit > Paste as New Animation

Back to PSP
Hide Rain1 and activate Rain2
Edit > Copy Merged

In Animation Shop
Edit > Paste after Current Frame

Back to PSP
Hide Rain2 and activate Rain3
Edit > Copy Merged

In Animation Shop
Edit > Paste after Current Frame

Now save as a GIF and you're done!
Thanks for trying my tutorial!

::st!na::

Here is a non-animated version:


© Tutorial written by Stina on 26th July 2009
All rights reserved