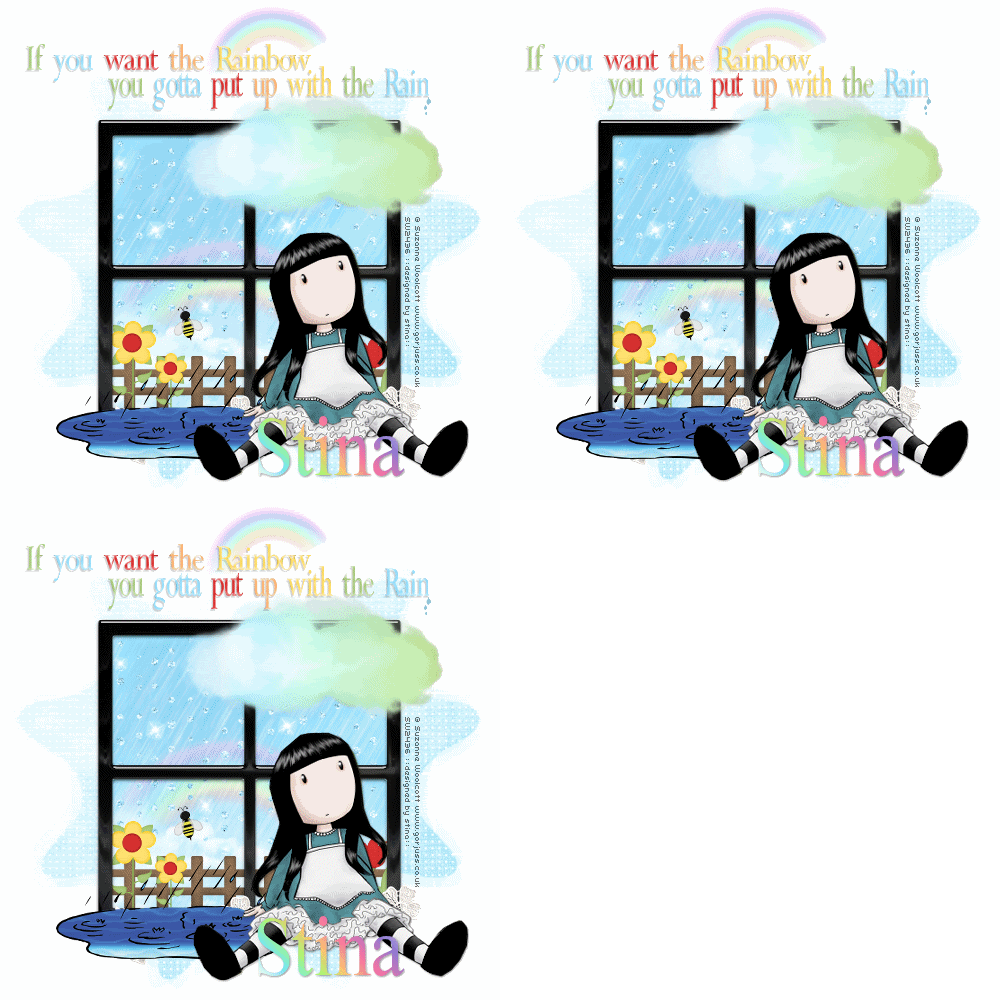
Supplies
Scrap kit of choice - I am using the "Rain Rain Go Away" collab by The Scrapping Divaz Designers available from The Scrapping Divaz Designz
Tube of choice - I am using the artwork of Suzanne Woolcott available from her store
**PLEASE DO NOT USE HER ARTWORK WITHOUT THE APPROPRIATE LICENCE**
WSL_Mask111 by Chelle available from her blog
Font of choice - I am using Times New Roman
Plugins: Alien Skin Eye Candy 5: Impact Glass
VDL Adrenaline Snowflakes
Let's begin....
Open a new 700 x 600 blank canvas flood-filled white
Select your Preset Shape Tool and set to Rectangle
Foreground - #000000
Background - null
Create as Vector
Set your width to 20.00
Foreground - #000000
Background - null
Create as Vector
Set your width to 20.00
Hold you shift key and draw out a square on your canvas
Objects > Align > Centre in Canvas
Convert to raster layer
Objects > Align > Centre in Canvas
Convert to raster layer
Change your Width to 15.00
Hold your shift key again and draw out a smaller square within the upper left corner of main rectangle
Hold your shift key again and draw out a smaller square within the upper left corner of main rectangle
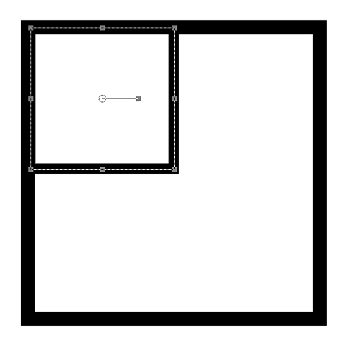
Convert to raster layer
Duplicate, then Image > Mirror
Layers > Merge > Merge Down
Duplicate again, then Image > Flip
Layers > Merge > Merge Down
Then Merge Down once more
Duplicate, then Image > Mirror
Layers > Merge > Merge Down
Duplicate again, then Image > Flip
Layers > Merge > Merge Down
Then Merge Down once more
You should have something like this:
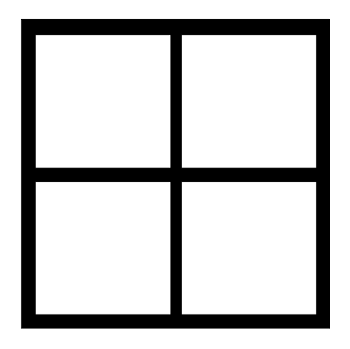
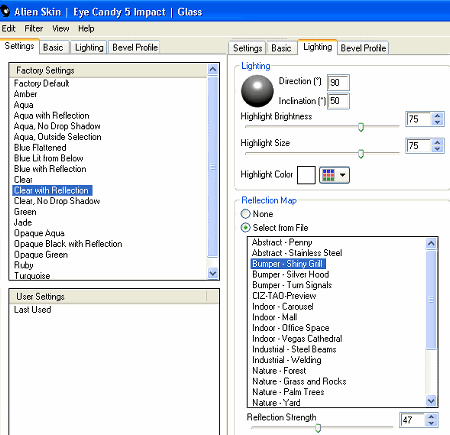
Effects > Plugins > Alien Skin Eye Candy 5: Impact > Glass with the following settings:
With your Selection Tool draw out a rectangle around your window frame
Add a new raster layer
Layers > Arrange > Move Down
Paste paper of choice INTO Selection
Deselect
Add a new raster layer
Layers > Arrange > Move Down
Paste paper of choice INTO Selection
Deselect
Paste moo_GlitterDrops as new layer
Resize by 23%
Position to left half of window
Duplicate then carefully move to the right
Erase any overlapping excess
Layers > Merge > Merge Down
Resize by 23%
Position to left half of window
Duplicate then carefully move to the right
Erase any overlapping excess
Layers > Merge > Merge Down
Paste kristiw_Fence as new layer
Resize by 20%
Position in lower left window
Duplicate, then Image > Mirror
Layers > Merge > Merge Down
Resize by 20%
Position in lower left window
Duplicate, then Image > Mirror
Layers > Merge > Merge Down
Paste a couple of flowers and resize as necessary
Position them to your liking
Position them to your liking
Activate top layer
Paste tammyjo_Lace as new layer
Image > Rotate by 10 to the left
Image > Mirror, then resize by 25%
Position along bottom of Window
Image > Rotate by 10 to the left
Image > Mirror, then resize by 25%
Position along bottom of Window
Paste KISM_Cloud as new layer
Resize by 25%
Position to your liking in an upper corner
Resize by 25%
Position to your liking in an upper corner
Paste ellenm_Puddle as new layer
Resize by 15%
Position to opposite side of Cloud in a lower corner
Resize by 15%
Position to opposite side of Cloud in a lower corner
** Depending on the position of your Cloud, you may have to Mirror the Puddle due to the direction of the raindrops **
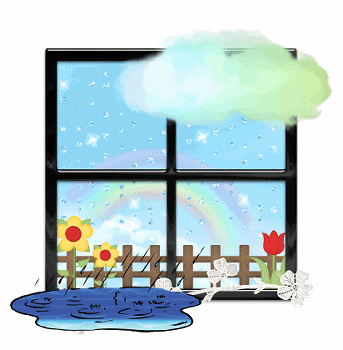
Paste a WordArt of choice as new layer
Resize by around 18% and position to your liking
Resize by around 18% and position to your liking
Add any other elements of your choice
Paste your Tube as new layer
Resize as necessary and position to your liking
Resize as necessary and position to your liking
Add a new raster layer
Layers > Arrange > Send to Bottom
Select All
Paste a paper of choice INTO selection
Deselect
Layers > Arrange > Send to Bottom
Select All
Paste a paper of choice INTO selection
Deselect
Layers > New Mask Layer > From Image
Apply WSL_Mask111
Apply WSL_Mask111
DO NOT MERGE!!
Resize Mask layer by 110%
Layers > Merge > Merge Group
Lower opacity to around 55
Layers > Merge > Merge Group
Lower opacity to around 55
Select your Text Tool and font of choice
I am using Times New Roman
Colour of choice - I am using a Gradient called "pj-summercolors" set to 45° angle)
I am using Times New Roman
Colour of choice - I am using a Gradient called "pj-summercolors" set to 45° angle)
Type our your name and position
Apply a drop shadow of choice
Apply a drop shadow of choice
Finally, add your © copyright, licence and watermark, then save as a GIF or JPG and you're done!
** IF YOU WISH TO ANIMATE PLEASE FOLLOW THESE NEXT STEPS **
Activate your Window Background layer
With your Magic wand click OUTSIDE the paper, then
Selections > Invert
(this will select JUST the window area)
With your Magic wand click OUTSIDE the paper, then
Selections > Invert
(this will select JUST the window area)
Add three raster layers and name them Rain1, Rain2 and Rain3
Activate Rain1
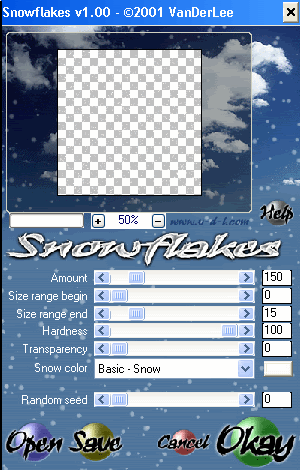
Effects > Plugins > VDL Adrenaline > Snowflakes with the following settings:
Then Adjust > Blur > Motion Blur with the following settings:
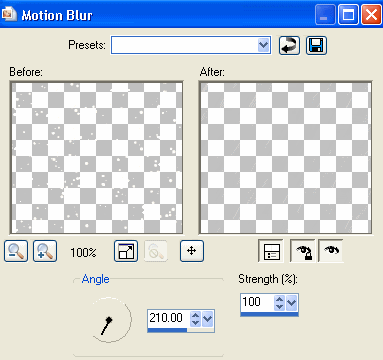
** PLEASE NOTE - If your puddle is on the opposite side to mine you will need to change the direction of the Motion Blur to 140 **
Hide Rain1 and activate Rain2
Repeat Snowflake effect adjusting the Random Seed
Apply Motion Blur again
Repeat Snowflake effect adjusting the Random Seed
Apply Motion Blur again
Hide Rain2 and activate Rain3
Repeat Snowflake effect once more adjusting the Random Seed
Apply Motion Blur again
Deselect
Repeat Snowflake effect once more adjusting the Random Seed
Apply Motion Blur again
Deselect
Activate Rain1 and hide Rain2 and Rain3
Edit > Copy Merged
Edit > Copy Merged
Open Animation Shop
Edit > Paste as New Animation
Edit > Paste as New Animation
Back to PSP
Hide Rain1 and activate Rain2
Edit > Copy Merged
Hide Rain1 and activate Rain2
Edit > Copy Merged
In Animation Shop
Edit > Paste after Current Frame
Edit > Paste after Current Frame
Back to PSP
Hide Rain2 and activate Rain3
Edit > Copy Merged
Hide Rain2 and activate Rain3
Edit > Copy Merged
In Animation Shop
Edit > Paste after Current Frame
Edit > Paste after Current Frame
Now save as a GIF and you're done!
Thanks for trying my tutorial!
::st!na::
Here is a non-animated version:
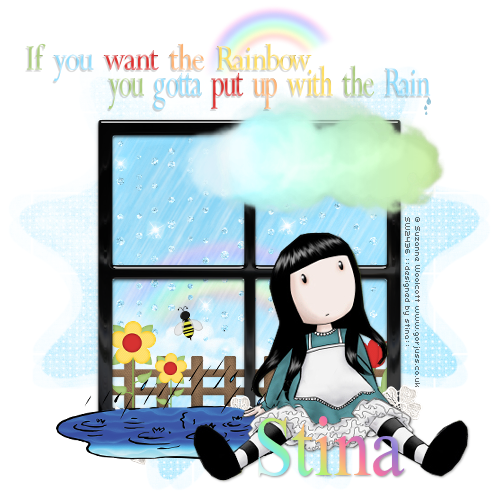
© Tutorial written by Stina on 26th July 2009
All rights reserved
All rights reserved

No comments:
Post a Comment