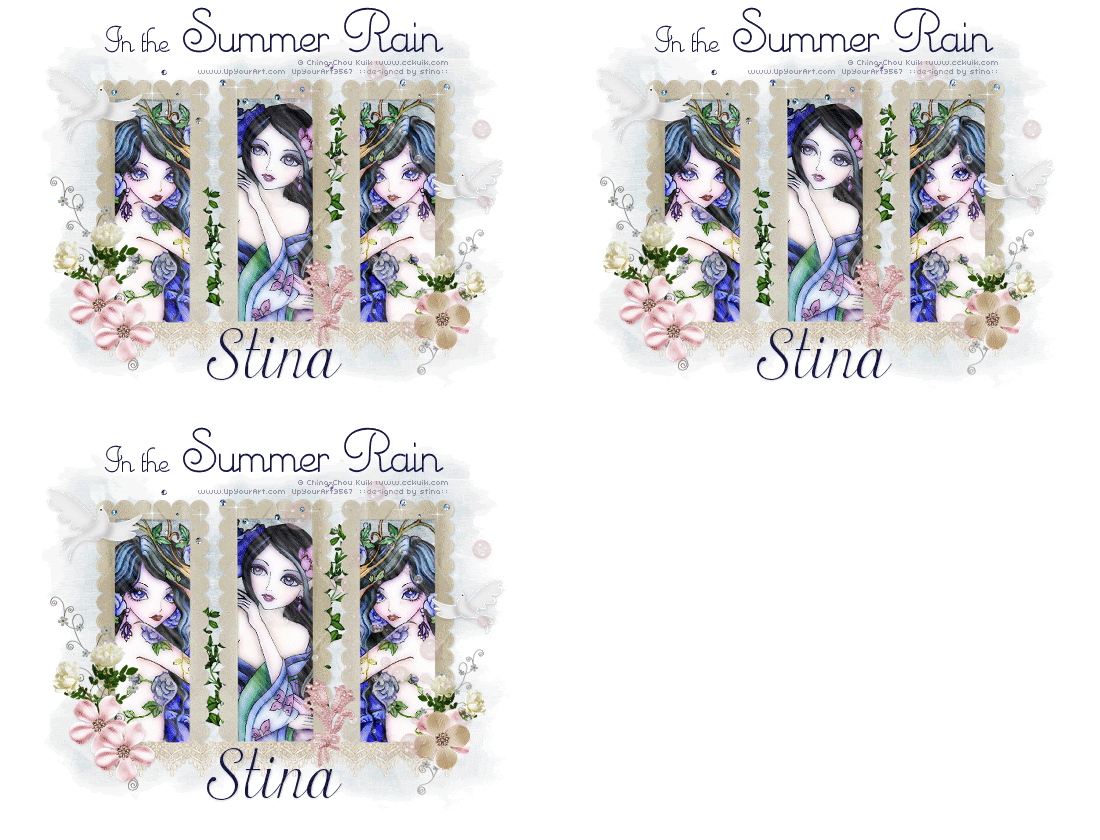
Supplies
Scrap kit of choice - I am using "Summer Rain" by Kristi Westling available from The Scrapping Divaz Designz and Sunshine Studio Scraps
Tubes of choice - I am using the lovely artwork of Ching-Chou Kuik which is available with a licence for purchase from Up Your Art
**PLEASE DO NOT USE HER ARTWORK WITHOUT THE APPROPRIATE LICENCE**
CreativeDesiresMask21 here
Fonts of choice - I am using MonteCarloScriptNF and OttumHmk
Plugins: Xero Improver, Xero Radiance, Xero Porcelain, VDL Adrenaline Snowflakes
Let's begin....
Open a new 700 x 500 blank canvas flood-filled white
Paste Frame2 as new layer
Image > Rotate by 90
Image > Rotate by 90
LEAVE IN POSITION!
Duplicate then carefully move across and position alongside centre Frame
Duplicate again and Image > Mirror
Duplicate again and Image > Mirror
Hide Background and Merge Visible all Frames
Unhide Background layer
Select the inside of each Frame with your Magic Wand
Selections > Modify > Expand by 10
Add a new raster layer
Paste Paper of choice INTO selection
Selections > Modify > Expand by 10
Add a new raster layer
Paste Paper of choice INTO selection
Layers > Arrange > Move Down
KEEP SELECTED!!
Paste three Tubes of choice as new layers
Resize as necessary
Position each within each Frame
Selections > Invert
Delete excess then deselect
Resize as necessary
Position each within each Frame
Selections > Invert
Delete excess then deselect
Merge each of the Tubes into ONE layer
Then Duplicate
Then Duplicate
Effects > Plugins > Xero > Improver with default settings
Effects > Plugins > Xero > Radiance with default settings
Effects > Plugins > Xero > Porcelain with default settings
Layers > Merge > Merge Down
Now activate Frame layer again and Duplicate
Adjust > Hue & Saturation > Colourise with the following settings:
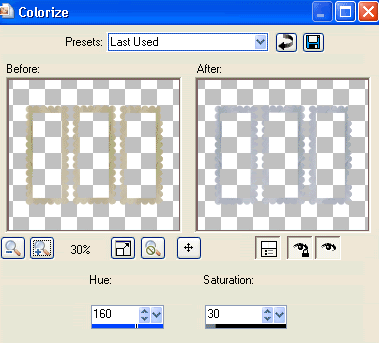
Set blend mode to Soft Light
Layers > Merge > Merge Down
Layers > Merge > Merge Down
Paste Lace as new layer
Resize by 70%
Position along bottom of Frames
Resize by 70%
Position along bottom of Frames
Paste Glitter as new layer
Position along top of Frames
Use Selection Tool to make selections around the excess at either end then delete
Position along top of Frames
Use Selection Tool to make selections around the excess at either end then delete
Paste Swirl as new layer
Image > Rotate by 20 to the right
Resize by 32%
Position to the lower left
Image > Rotate by 20 to the right
Resize by 32%
Position to the lower left
Duplicate, then Image > Mirror
Resize by 75%
Position in lower right
Resize by 75%
Position in lower right
Paste Flower2 as new layer
Resize by 30%
Position to the lower left over Swirl
Resize by 30%
Position to the lower left over Swirl
Paste Jewel as new layer
Resize by 15%
Position over centre of Flower
Resize by 15%
Position over centre of Flower
Layers > Merge > Merge Down
Duplicate and move slightly over and alongside
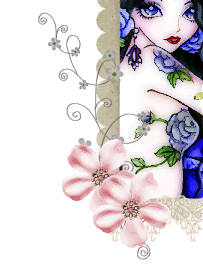
Then Duplicate again and position to the lower right
Paste Flower1 as new layer
Resize by 28%
Position over Flower to the lower right
Resize by 28%
Position over Flower to the lower right
Paste Charm as new layer
Resize by 40% and position
Resize by 40% and position
Paste Roses as new layer
Image > Rotate by 20 to the left
Resize by 23%
Position to the lower left BEHIND Flowers
Image > Rotate by 20 to the left
Resize by 23%
Position to the lower left BEHIND Flowers
Duplicate, then Image > Mirror
Resize by 80%
Place in position
Resize by 80%
Place in position
Paste Bird as new layer
Image > Rotate by 10 to the left
Resize by 55%
Position in upper left
Image > Rotate by 10 to the left
Resize by 55%
Position in upper left
Duplicate, then Image > Mirror
Resize by 75%
Position above flowers to the lower right
Resize by 75%
Position above flowers to the lower right
Paste Bubbles as new layer
Position to your liking
Position to your liking
Paste Leaves as new layer
Resize by 40%
Layers > Arrange > Send to Bottom
Position between centre and right Frames
Duplicate, then Image > Mirror
Position slightly lower
Resize by 40%
Layers > Arrange > Send to Bottom
Position between centre and right Frames
Duplicate, then Image > Mirror
Position slightly lower
Make a Selection around the excess and delete
Add another elements you wish
Paste Paper of choice as new layer
Layers > Arrange > Send to Bottom
Layers > Arrange > Send to Bottom
Layers > New Mask Layer > From Image
Apply CreativeDesiresMask21
OK
Apply CreativeDesiresMask21
OK
DO NOT MERGE!!
Select Pick Tool and use nodes to shape Mask layer to your liking
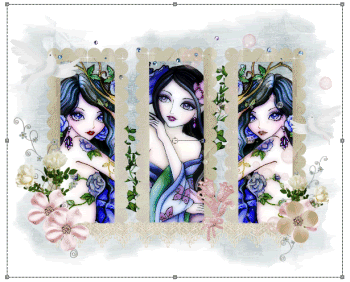
Layers > Merge > Merge Group
Lower opacity to 60
Lower opacity to 60
Crop and resize
Select your Text Tool and font of choice
I am using MonteCarloScript
Text colour to match - I am using #181845
I am using MonteCarloScript
Text colour to match - I am using #181845
Type out text or quote of choice
Objects > Align > Horizontal Centre in Canvas
Convert to raster layer
Apply a drop shadow of choice
Objects > Align > Horizontal Centre in Canvas
Convert to raster layer
Apply a drop shadow of choice
Select another font of choice
I am using OttumHmk
Same Text colour
I am using OttumHmk
Same Text colour
Type out your name
Objects > Align > Horizontal Centre in Canvas
Convert to raster layer
Apply a drop shadow of choice
Objects > Align > Horizontal Centre in Canvas
Convert to raster layer
Apply a drop shadow of choice
Finally, add your © copyright, licence and watermark, then save as a GIF or JPG and you're done!
** IF YOU WISH TO ANIMATE PLEASE FOLLOW THESE NEXT STEPS **
Activate your Frame layer
Select the inside of each Frame again
Selections > Modify > Expand by 10
Select the inside of each Frame again
Selections > Modify > Expand by 10
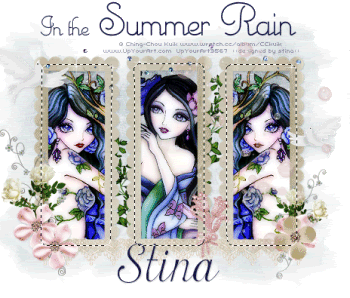
Add three new Raster layers and name them Rain1, Rain2 and Rain3
Activate Rain1
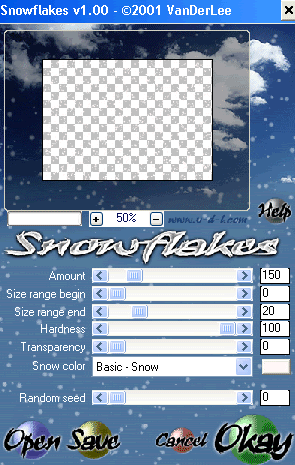
Effects > Plugins > VDL Adrenaline > Snowflakes with the following settings:
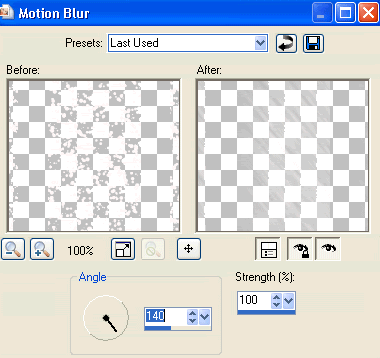
Then...Adjust > Blur > Motion Blur with the following settings:
Hide Rain1 and activate Rain2
Apply Snowflakes effect again, adjusting the Random Seed to your liking
Apply Motion Blur again
Apply Snowflakes effect again, adjusting the Random Seed to your liking
Apply Motion Blur again
Hide Rain2 and activate Rain3
Apply Snowflakes effect once more, adjusting the Random Seed to your liking
Apply Motion Blur again
Apply Snowflakes effect once more, adjusting the Random Seed to your liking
Apply Motion Blur again
Deselect
Now for the animation!
Activate Rain1 and hide Rain2 and Rain3
Edit > Copy Merged
Edit > Copy Merged
Open Animation Shop
Edit > Paste as New Animation
Back to PSP
Hide Rain1 and activate Rain2
Edit > Copy Merged
Hide Rain1 and activate Rain2
Edit > Copy Merged
In Animation Shop
Edit > Paste AFTER Current Frame
Edit > Paste AFTER Current Frame
Back to PSP
Hide Rain2 and activate Rain3
Edit > Copy Merged
Hide Rain2 and activate Rain3
Edit > Copy Merged
In Animation Shop
Edit > Paste AFTER Current Frame
Edit > Paste AFTER Current Frame
Save as a GIF and you're done!
Thanks for trying my tutorial!
::st!na::
Here is a non-animated version:
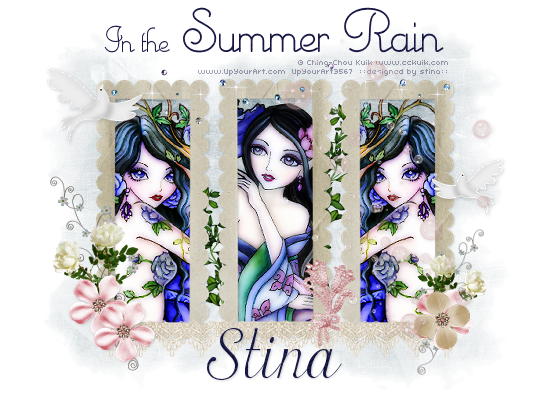
© Tutorial written by Stina on 2nd July 2009
All rights reserved
All rights reserved

Love your new design on the template. It is very beautiful and you are very talented person. What type of software do you use to make templates and all these beautiful things? I use PSP 7 & 12. That is why I was wondering. Thanks again for all the wonderful stuff you have on your site. Keep up the great work and hope to see more. God bless and many hugs, KAT
ReplyDeleteGorgeous tutorial! Thank you.
ReplyDelete