
Supplies
Scrap kit of choice - I am using "Chosen" by Lynn Earwicker available from The Scrapping Divaz Designz
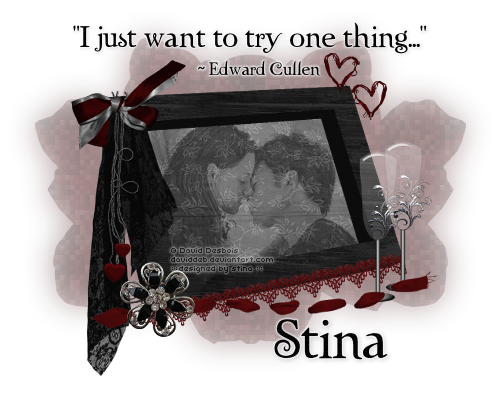
Image of choice - I am using the lovely artwork of David Desbois who is FTU with written permission
Font of choice - I am using Twilight
Plugins: Xero Fritillary and Xenofex 2 Constellation
Let's begin...
Open a new 700 x 550 canvas flood-filled white
Paste 3dFrame as new layer
Resize by 50%
Resize by 50%
Select inside the Frame with your Magic Wand
Selections > Modify > Expand by 10
Add a new raster layer
Paste Paper of choice INTO selection
Layers > Arrange > Move Down
Selections > Modify > Expand by 10
Add a new raster layer
Paste Paper of choice INTO selection
Layers > Arrange > Move Down
KEEP SELECTED!!
Add another raster layer
Paste an Image of choice (with similar proportions ..ie, landscape image) INTO selection
Deselect
Paste an Image of choice (with similar proportions ..ie, landscape image) INTO selection
Deselect
If you are using a colour image you will need to change it to Black and White
Adjust > Hue and Saturation > Colourise with both Hue and Saturation set to 0
Lower opacity to around 40
Activate top layer
Paste LaceStrip as new layer
Image > Rotate by 12 to the left
Resize by 42%
Position along bottom edge of Frame
Image > Rotate by 12 to the left
Resize by 42%
Position along bottom edge of Frame
Paste EyeletRibbon as new layer
Resize by 55%
Position along bottom of Frame
Resize by 55%
Position along bottom of Frame
Paste BlackLace as new layer
Resize by 40%
Position in upper left of Frame
Resize by 40%
Position in upper left of Frame
Paste HeartDangler as new layer
Resize by 35%
Position in upper left over lace
Resize by 35%
Position in upper left over lace
Paste Ribbon as new layer
Image > Rotate by 15 to the left
Resize by 20%
Position in upper left
Image > Rotate by 15 to the left
Resize by 20%
Position in upper left
Paste ChampagneFlute as new layer
Resize by 28%
Position to the lower right
Duplicate and move slightly up and alongside
Resize by 28%
Position to the lower right
Duplicate and move slightly up and alongside
Paste Pin as new layer
Resize by 12%
Position over EyeletRibbon in lower left
Resize by 12%
Position over EyeletRibbon in lower left
Paste EntwinedHeartRibbon as new layer
Resize by 10%
Position in upper right
Duplicate, then Image > Mirror and position alongside it slightly below
Resize by 10%
Position in upper right
Duplicate, then Image > Mirror and position alongside it slightly below
Paste GlitteryFlower as new layer
Layers > Arrange > Send to Bottom
Resize by 50% and move slight to the right
Duplicate, then Image > Mirror
Layers > Merge > Merge Down
Resize by 50% and move slight to the right
Duplicate, then Image > Mirror
Layers > Merge > Merge Down
Lower opacity to around 35
Duplicate again then activate bottom layer
Adjust > Blur > Gaussian Blur with a Radius of 20.00
Rename top layer Roses
Crop and resize
Select Text Tool and font of choice
I am using Twilight
Text colour of choice
I am using Twilight
Text colour of choice
Type out text of choice and position
Objects > Align > Horizontal Centre in Canvas
Convert to raster layer
Apply a slight Gradient Glow and/or drop shadow of choice
Objects > Align > Horizontal Centre in Canvas
Convert to raster layer
Apply a slight Gradient Glow and/or drop shadow of choice
Select another font of choice
I am using the same
Same Text colour
I am using the same
Same Text colour
Type out your name and position
Convert to raster layer
Apply any effect or drop shadows as necessary to your liking
Convert to raster layer
Apply any effect or drop shadows as necessary to your liking
Finally, add your © copyright, licence and watermark, then save as a GIF or JPG and you're done!
** IF YOU WISH TO ANIMATE PLEASE FOLLOW THESE NEXT STEPS **
Activate your Roses layer
Duplicate twice and rename Roses1, Roses2 and Roses3
Duplicate twice and rename Roses1, Roses2 and Roses3
Activate Roses1
Effects > Plugins > Xero > Fritillary with the following settings:
Hide Roses1 and activate Roses2
Apply Fritillary effect again adjusting the variation by 5
Apply Fritillary effect again adjusting the variation by 5
Hide Roses2 and activate Roses3
Apply Fritillary effect again adjusting the variation by 5 once more
Apply Fritillary effect again adjusting the variation by 5 once more
Now we need to copy merge with each Rose Fritillary layer into a new image with three layers
So activate Roses1 and hide Roses2 and Roses3
Edit > Copy Merged
Then Paste AS NEW IMAGE
Edit > Copy Merged
Then Paste AS NEW IMAGE
Hide Roses1 and activate Roses2
Edit > Copy Merged
Edit > Copy Merged
On the new image
Paste as new layer
Paste as new layer
Hide Roses2 and activate Roses3
Edit > Copy Merged
Edit > Copy Merged
Back to new image
Paste as new layer
Paste as new layer
Now we are going to add sparkles and we needed the layers merged for this effect
So using your Freehand Tool carefully draw around the Champagne Flutes where you want to add the Sparkles
Hiding the top two layers go to:
Effects > Plugins > Xenofex 2 > Constellation with the following settings:
Repeat with the remaining two layers adjusting the Random Seed
Now let's animate!!!
Activate Layer1 and hide Layer2
Edit > Copy
Edit > Copy
Open Animation Shop
Edit > Paste as New Animation
Edit > Paste as New Animation
Back to PSP
Hide Layer1 and activate Layer2
Edit > Copy
Hide Layer1 and activate Layer2
Edit > Copy
In Animation Shop
Edit > Paste AFTER Current Frame
Edit > Paste AFTER Current Frame
Back to PSP
Hide Layer2 and activate Layer3
Edit > Copy
Hide Layer2 and activate Layer3
Edit > Copy
In Animation Shop
Edit > Paste AFTER Current Frame
Edit > Paste AFTER Current Frame
Save as a GIF and you're done!
Thanks for trying my tutorial!
::st!na::
Here is a non-animated version without the sparkles:
© Tutorial written by Stina on 4thJuly 2009
All rights reserved
No comments:
Post a Comment