
Supplies
Scrap kit of choice - I am using "Icing on the Cake" by Kristi Westling available from The Scrapping Divaz Designz and Sunshine Studio Scraps
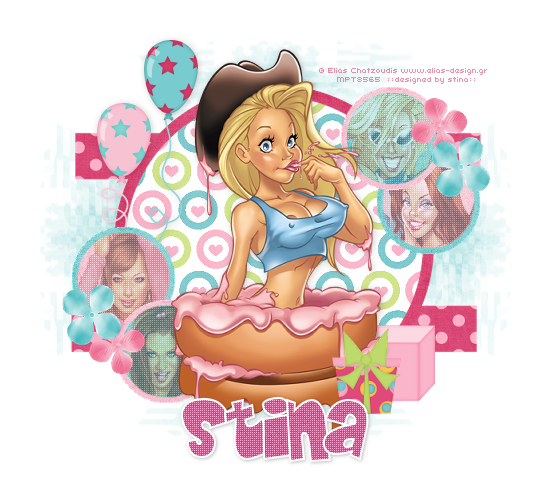
Tubes of choice - I am using the lovely artwork of Elias Chatzoudis which is available with a licence through My PSP Tubes
**PLEASE DO NOT USE HIS ARTWORK WITHOUT THE APPROPRIATE LICENCE**
Template #1 by Pookers Creations
WSL_Mask159 by Chelle available from her blog
Font of choice - I am using Baby Kruffy
Plugin: Penta.com Colour Dot
Let's begin...
Open Template #1 by Pooker's Creations
Shift D to duplicate and close off original
On your new working canvas delete copyright layer
Image > Canvase Resize 730 x 600 centred
Merge Rectangle1 and Rectangle2 as one layer
Selections > Float, then Defloat
Selections > Modify > Feather by 1
Delete a couple of times to remove the rectangles
Selections > Float, then Defloat
Selections > Modify > Feather by 1
Delete a couple of times to remove the rectangles
Paste Paper of choice as new layer
Resize as necessary
Selections > Invert
Delete then deselect
Resize as necessary
Selections > Invert
Delete then deselect
Layers > Merge > Merge Down
Select the LargeCircle with your Magic Wand
Paste Paper of choice INTO selection
Deselect
Paste Paper of choice INTO selection
Deselect
Select CircleFrame with Magic Wand
Selections > Modify > Feather by 1
Delete a couple of times
Paste Paper of choice INTO selection
Deselect
Selections > Modify > Feather by 1
Delete a couple of times
Paste Paper of choice INTO selection
Deselect
Select LittleCircle1 with Magic Wand
Selections > Modify > Feather by 1
Delete a couple of time
Paste Paper of choice INTO selection
Selections > Modify > Feather by 1
Delete a couple of time
Paste Paper of choice INTO selection
DO NOT DESELECT!!
Selections > Modify > Contract by 8
Paste another Paper of choice INTO selection
Deselect
Paste another Paper of choice INTO selection
Deselect
Repeat same with LittleCircle2
Repeat again with LittleCircle3 and 4, inverting the colours
You should have something like this:
Paste Flower1 as new layer
Resize by 5%
Position on edge of LittleCircle Frame
Resize by 5%
Position on edge of LittleCircle Frame
Paste Flower2 as new layer
Resiz eby 5%
Position alongside Flower1
Resiz eby 5%
Position alongside Flower1
Duplicate both flowers and position opposite
Paste some gifts as new layers
Resize by around 10%
Position to the edge of Frame
Resize by around 10%
Position to the edge of Frame
Paste Tube as new layer
Resize as necessary
Position in centre
Resize as necessary
Position in centre
Beginning with LittleCircle1 select your Magic Wand
Set your Tolerance to 50
Select the inside of the Circle
Selections > Modify > Feather by 1
Set your Tolerance to 50
Select the inside of the Circle
Selections > Modify > Feather by 1
Paste a tube of choice as a new layer
Resize as necessary
Selections > Invert
Delete excess
Deselect
Resize as necessary
Selections > Invert
Delete excess
Deselect
Effects > Plugins > Penta.com > Colour Dot
Default settings
Default settings
Repeat same steps with the other three Circles
Paste Balloon1 and Balloon2 as new layers
Resize by 10%
Position to the left behind LittleCircle layers
Resize by 10%
Position to the left behind LittleCircle layers
Paste Paper of choice as new layer
Layers > Arrange > Send to Bottom
Then move up one layer above Background
Layers > Arrange > Send to Bottom
Then move up one layer above Background
Layers > New Mask Layer > From Image
Apply WSL_Mask159
OK
Layers > Merge > Merge Group
Lower opacity to 65
Apply WSL_Mask159
OK
Layers > Merge > Merge Group
Lower opacity to 65
Crop and resize
Select your Text Tool and font of choice
I am using BabyKruffy
Foreground - #FFFFFF
Background - #da4975
I am using BabyKruffy
Foreground - #FFFFFF
Background - #da4975
Stroke width - 2.00
Type out your name
Objects > Align > Horizontal Centre in Canvas
Convert to raster layer
Objects > Align > Horizontal Centre in Canvas
Convert to raster layer
Effects > Plugins > Penta.com > Colour Dot with the same settings
Apply drop shadow of choice
Finally, add your © copyright, licence and watermark, then save as a GIF or JPG and you're done!
** IF YOU WISH TO ANIMATE PLEASE FOLLOW THESE NEXT STEPS **
Activate Tube in Little Circle1
Lower opacity to 50
Edit > Copy Merged
Lower opacity to 50
Edit > Copy Merged
Open Animation Shop
Edit > Paste as New Animation
Edit > Paste as New Animation
Back to PSP
Return to normal opacity and activate LittleCircle2
Lower opacity to 50
Edit > Copy Merged
Return to normal opacity and activate LittleCircle2
Lower opacity to 50
Edit > Copy Merged
In Animation Shop
Edit > Paste AFTER Current Frame
Edit > Paste AFTER Current Frame
Back to PSP
Return to normal opacity and activate LittleCircle3
Lower opacity to 50
Edit > Copy Merged
Return to normal opacity and activate LittleCircle3
Lower opacity to 50
Edit > Copy Merged
In Animation Shop
Edit > Paste AFTER Current Frame
Edit > Paste AFTER Current Frame
Back to PSP
Return to normal opacity and activate LittleCircle4
Lower opacity to 50
Edit > Copy Merged
Return to normal opacity and activate LittleCircle4
Lower opacity to 50
Edit > Copy Merged
In Animation Shop
Edit > Paste AFTER Current Frame
Edit > Paste AFTER Current Frame
Select All, and adjust Frame Properties to 50
Save as a GIF and you're done!
Save as a GIF and you're done!
Thanks for trying my tutorial!
::st!na::
Here is a non-animated version:
© Tutorial written by Stina on 1st July 2009
All rights reserved
No comments:
Post a Comment