

Supplies
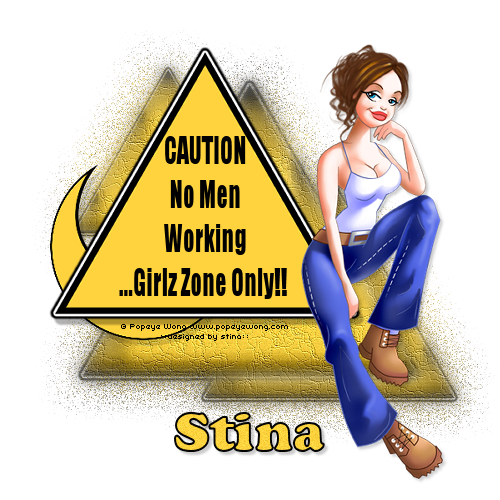
Tube of choice - I am using the artwork of Popeye Wong which is free to use with credit
Fonts of choice - I am using Impact and Cookie
Plugins: Eye Candy 4000 Gradient Glow and Alien Skin Eye Candy 5: Impact Gradient Glow
No Scraps
**This is an old tag I made some time ago and have redone it as a tut, adding a few extra effects.
It predominantly uses the effects in PSP**
Let's begin...
Open a new 700 x 600 blank canvas flood-filled white
Select your Preset Shape tool and set to Triangle
Foreground - #000000
Background - #fed33e
Set Width to 10.00
Create as Vector
Foreground - #000000
Background - #fed33e
Set Width to 10.00
Create as Vector
Hold Shift key and draw out a Triangle
Objects > Align > Centre in Canvas
Convert to raster layer
Duplicate three times and hide top two layers
Objects > Align > Centre in Canvas
Convert to raster layer
Duplicate three times and hide top two layers
Activate bottom Triangle
Effects > Distortion Effects > Pixelate with the following settings:
Effects > Plugins > Eye Candy 4000 > Gradient Glow with the following settings:
Duplicate and resize by 75%
Position slightly down and to the right
Position slightly down and to the right
Duplicate again and resize by 75%
Position to the upper left
Position to the upper left
Layers > Merge > Merge Down
Repeat
Rename Pixelate
Repeat
Rename Pixelate
Duplicate twice and rename first one Fine Leather and second one Glass
Activate Fine Leather
Adjust > Texture Effects > Fine Leather with the following settings:
On Glass,
Adjust > Texture Effects > Mosaic - Glass with the following settings:
Adjust > Texture Effects > Mosaic - Glass with the following settings:
Lower the opacity of Fine Leather to 80 and Glass to 70
Activate top Triangle layer
Resize by 90%
Apply same Gradient Glow as above
Position between two Triangles to the left
Resize by 90%
Apply same Gradient Glow as above
Position between two Triangles to the left
Apply a drop shadow:
V - 7
H - 5
Opacity - 30
Blur - 2.00
Colour - #000000
V - 7
H - 5
Opacity - 30
Blur - 2.00
Colour - #000000
Activate second Triangle layer
Effects > Distortion Effects > Polar Coordinates with the following settings:

Resize by 50%
Position to the lower left of Triangle
Position to the lower left of Triangle
Apply same drop shadow as above but lower opacity to 15
Paste Tube of choice as new layer
Resize and position to liking
Apply a drop shadow of choice
Resize and position to liking
Apply a drop shadow of choice
Crop and resize
Select your Text Tool and font of choice
I am using Impact
Colour is Black
I am using Impact
Colour is Black
Type out your text of choice
Position within the main triangle
Duplicate
Position within the main triangle
Duplicate
On bottom text layer,
Effects > Alien Skin Eye Candy 5: Impact > Gradient Glow with the following settings:
Effects > Alien Skin Eye Candy 5: Impact > Gradient Glow with the following settings:
Rename Caution Text and Caution Text Glow
Select another font of choice
I am using Cookie
Foreground - #000000
Background - #fed33e
Stroke width - 2.00
I am using Cookie
Foreground - #000000
Background - #fed33e
Stroke width - 2.00
Type our your name
Objects > Align > Horizontal Centre in Canvas
Convert to raster layer
Apply a drop shadow of choice
Objects > Align > Horizontal Centre in Canvas
Convert to raster layer
Apply a drop shadow of choice
Finally, add your © copyright, licence and watermark, then save as a GIF or JPG and you're done!
** IF YOU WISH TO ANIMATE PLEASE FOLLOW THESE NEXT STEPS **
Activate your Caution Text layer and hide Caution Text Glow
Edit > Copy Merged
Edit > Copy Merged
Open Animation Shop
Edit > Paste as New Animation
Edit > Paste as New Animation
Back to PSP
Activate Caution Text Glow
Edit > Copy Merged
Activate Caution Text Glow
Edit > Copy Merged
In Animation Shop
Edit > Paste after Current Frame
Edit > Paste after Current Frame
Select All and change the Frame Properties to 80
Now save as a GIF and you're done!
Now save as a GIF and you're done!
Thanks for trying my tutorial!
::st!na::
Here is a non-animated version:
© Tutorial written by Stina on 26th July 2009
All rights reserved
All rights reserved
No comments:
Post a Comment