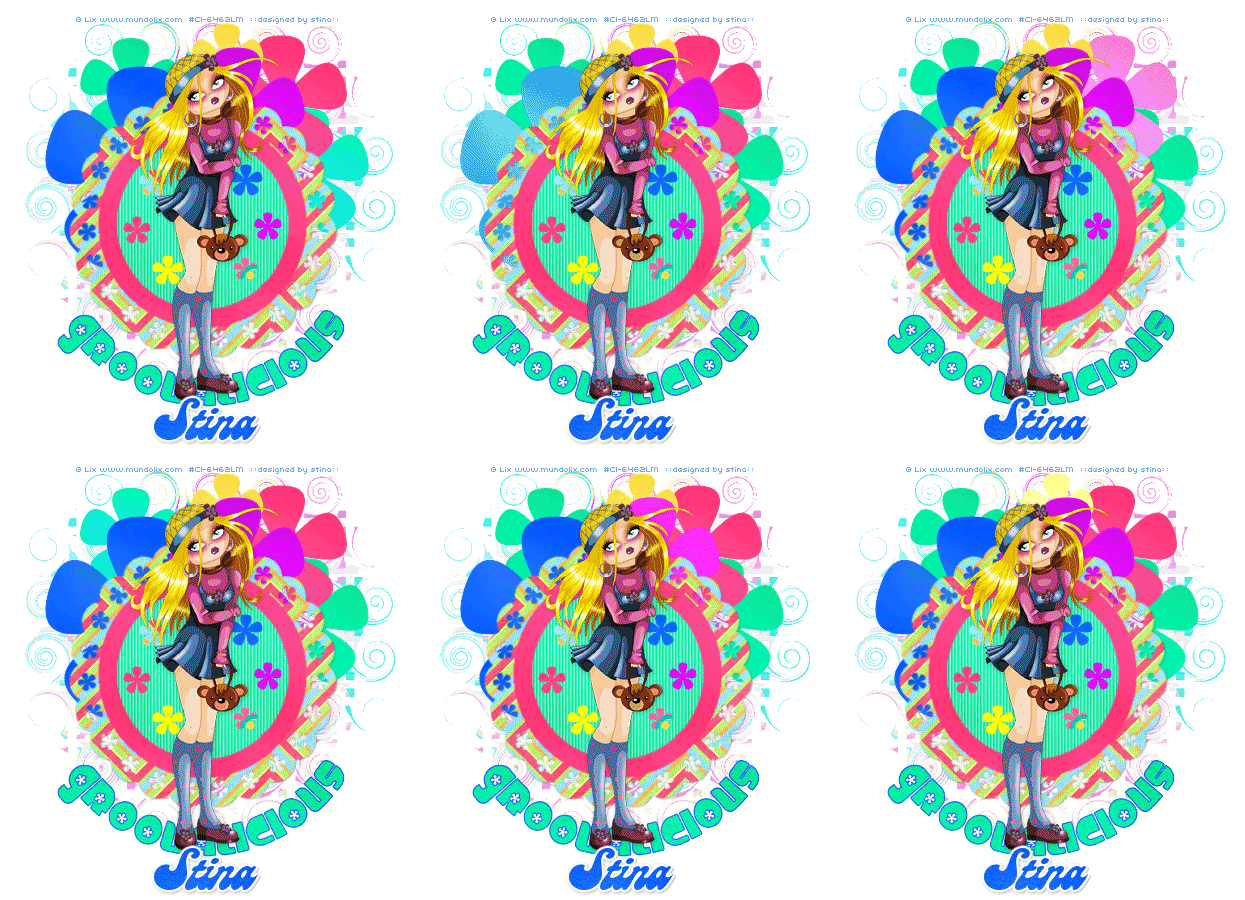
Please email me designed.by.stina@gmail.com with your creations. I'd love to see them.

Showing posts with label PinUp Toons. Show all posts

Thursday, May 28, 2009

Hot Chocolate

 
Supplies
 
Scrap kit of choice - I am using "Mocha Latte" by Kittie's Sinful Scraps available from Paradise 4 Scrappers
Tube of choice - I am using the lovely artwork of Rion Vernon and PinUpToons which is available with a licence from CILM
**PLEASE DO NOT USE HIS ARTWORK WITHOUT THE APPROPRIATE LICENCE**
WSL_Mask26 by Chelle available from her blog
Fonts of choice - I am using Agency FB and Rollergirls
Plugins: Mura Meister Copies and Alien Skin Eye Candy5: Nature Smoke
 
 
Ready? Let's begin...
 
 
Open a new 600 x 600 blank canvas flood-filled white
 
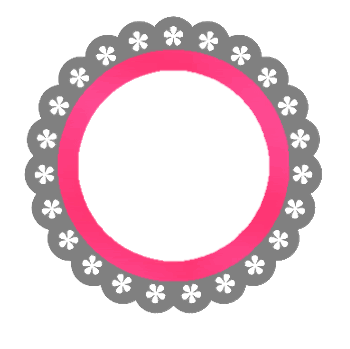
Paste Frame1 as new layer
Resize by 85%
 
LEAVE IN POSITION
 
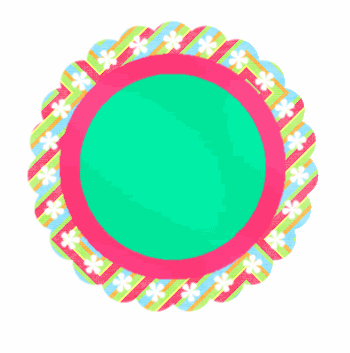
Paste Frame2 as new layer
Resize by 85%
 
Select inside the first Frame with your Magic Wand
Selections > Modify > Expand by 10
Paste Paper of choice as new layer (a colourful paper works best)
Resize by around 50%
 
Adjust > Blur > Gaussian Blur with a radius of 20.00
 
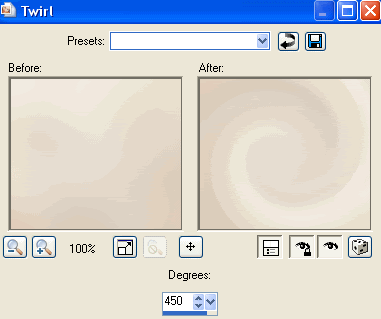
Effects > Distortion Effects > Twirl with the following settings:
 
 
Deselect
 
Paste a Flower of choice as new layer
Resize by 65%
 
LEAVE IN POSITION!
 
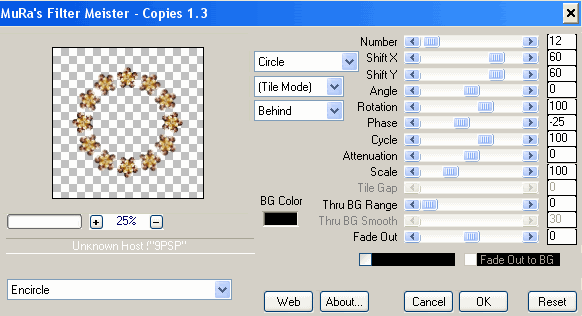
Effects > Plugins > Mura Meister > Copies with the following settings:
 
 
Paste your Tube as new layer
Resize as necessary and position
 
Paste Purse as new layer
Resize by 28%
Position to the right of your tube
 
Paste Pastry3 as new layer
Resize by 18%
Position to the left
 
Paste Pastry2 as new layer
Resize by 15%
Position to the left in front of first pastry and partially tucked behind tube
 
Paste CoffeePot as new layer
Resize by 25%
Position behind pastries and Tube layers
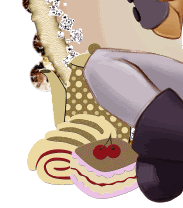
 
 
Paste MochaFlowers as new layers
Resize each by 30 - 35% and position behind Tube
 
Paste Ribbon1 as new layer
Resize by 45% and position in upper right
 
Paste Bow6 as new layer
Reszie by 20% and position OVER ribbon
 
Paste Butterflies as new layers
Resize by 25%
Position, duplicate, then Image > Mirror
Position and duplicate again
 
Add new raster layer and select all
Paste Paper of choice INTO selection
Layers > Arrange > Send to Bottom
Deselect
 
Adjust > Blur > Gaussian Blur with a radius of 20.00
 
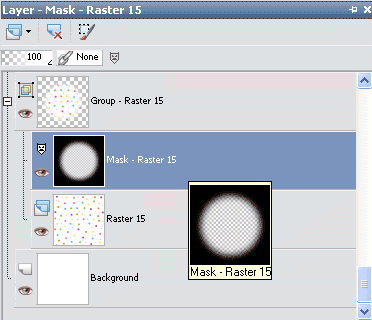
Layers > New Mask Layer > From Image
Locate WSL_Mask36
OK
Layers > Merge > Merge Group
 
Adjust > Blur > Gaussian Blur with a radius of 5.00
Duplicate
Lower opacity to 55
Layers > Merge > Merge Down
 
Crop and resize
 
Select your Preset Shape Tool and set to Ellipse
Draw out a circle around your Frame
 
Select your Text Tool and font of choice
I am using Agency FB
Text Colour is #48301a
 
On the curve type out your text of choice
Position to your liking then convert to raster layer
Add a drop shadow of choice
 
Select another font of choice
I am using RollerGirls
Foreground colour - #FFFFFF
Background colour - #48301a
Stroke wodth - 2.0
 
Type out your name
Objects > Align > Horizontal Centre in Canvas
Convert to raster layer
Apply a drop shadow of choice
 
Finally, add your © copyright, licence and watermark, then save as a GIF or JPG and you're done! 
 
 
** IF YOU WISH TO ANIMATE PLEASE FOLLOW THESE NEXT STEPS **
 
Activate the Tube Layer
Duplicate twice and rename Steam1, Steam2 and Steam3
 
With your Freehand Tool make a selection around the top of the coffee cup
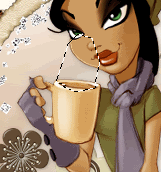


Hide Steam2 and Steam3 activating only Steam1
 
Effects > Plugins > Alien Skin Eye Candy 5: Nature > Smoke
Go to the Settings Tab and select "Medium, Steaming Coffee"
Then use the following settings:
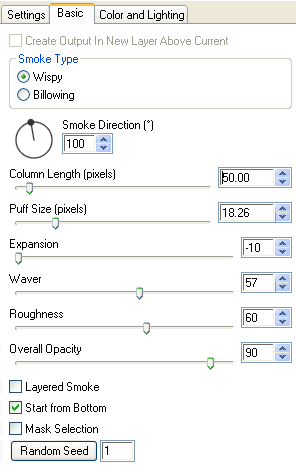
 
 
Hide Steam1 and activate Steam2
Apply the Smoke effect, adjusting the Random Seed
 
Hide Steam2 and activate Steam3
Apply the Smoke effect again, adjusting the Random Seed once more
 
Hide Steam2 and Steam3 with only Steam1 visible
Edit > Copy Merged
 
Open Animation Shop
Edit > Paste as New Animation
 
Back to PSP
Hide Steam1 and activate Steam2
Edit > Copy Merged
 
In Animation Shop
Edit > Paste AFTER Current Frame
 
Back to PSP
Hide Steam2 and activate Steame3
Edit > Copy Merged
 
In Animation Shop
Edit > Paste AFTER Current Frame
 
Go to Frame Properties and change to 30, then save as a GIF and you're done!
 
Thanks for trying my tutorial!
 
::st!na::
 
 
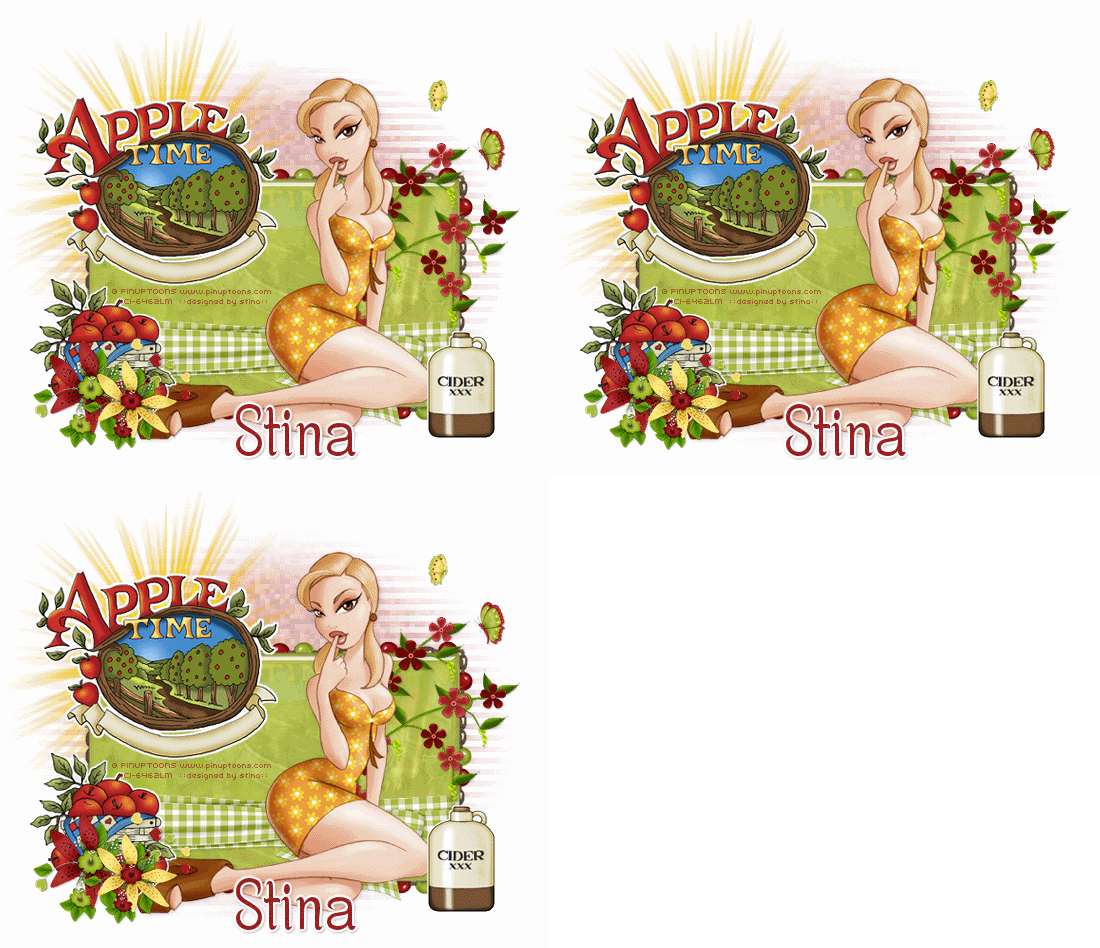
Here is a non-animated version:



© Tutorial written by Stina on 27th May 2009
All rights reserved

Monday, May 25, 2009

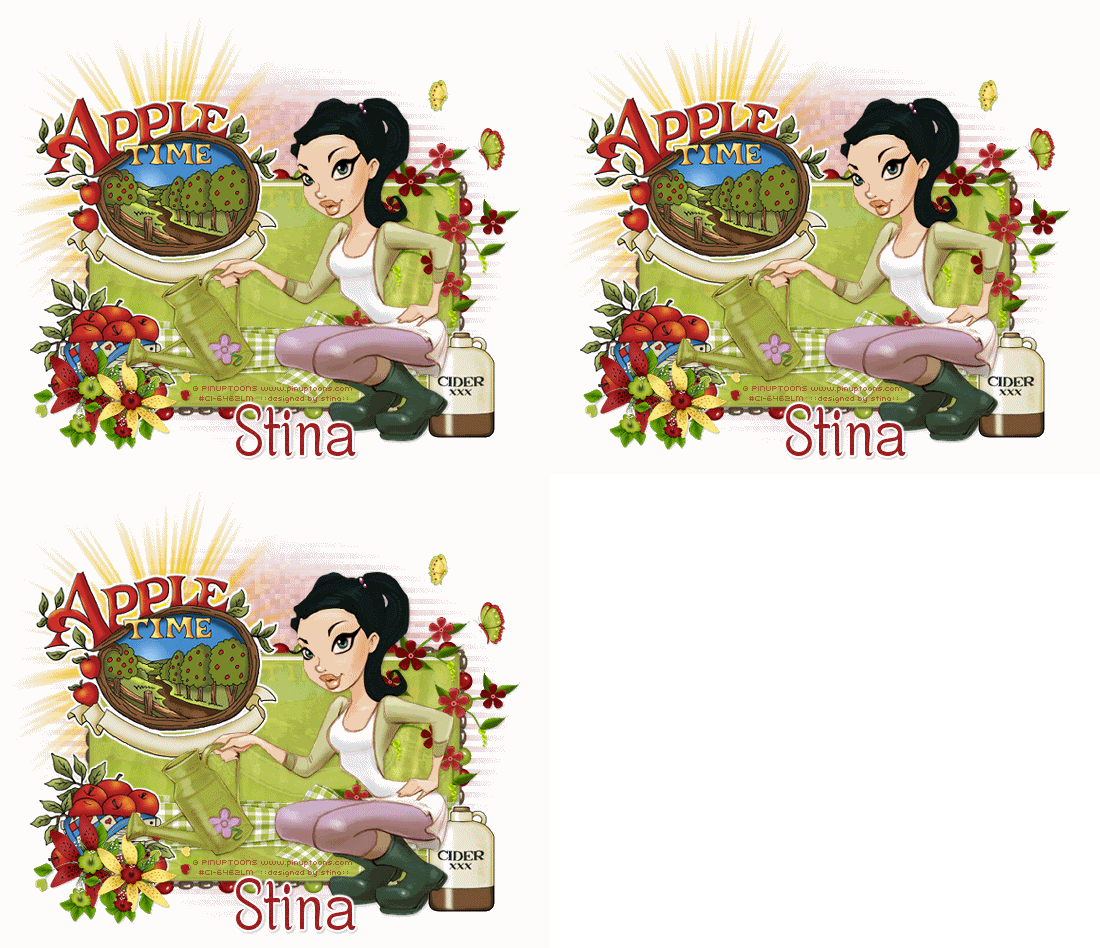
Apple Time

 
Supplies
 
Scrap kit of choice - I am using the delicious "The Apple Orchard" by Creative Intentionz available from Twilight Scraps and Paradise 4 Scrappers
Tube of choice - I am using the artwork of Rion Vernon and PinUpToons which is available with a licence through CILM
**PLEASE DO NOT HIS ARTWORK WITHOUT THE APPROPRIATE LICENCE**
WSL_Mask 41 to 44 by Chelle available from her blog
Plugins:
Alien Skin Eye Candy 5: Impact Glass
dsb Fluxx Linear Transmission
Xero Fritillary
Eye Candy 4000 Gradient Glow (optional)
Font of choice - I am using Centime
 
 
Ready? Let's begin....
 
 
Open a 600 x 600 blank canvas flood-filled white
 
Open a paper of choice and minimise
 
Select your Preset Shape Tool and set to Rectangle
In your Materials Palette, choose Pattern and locate the paper you just minimised
 
Draw out a rectangle towards the bottom of your canvas and position
Objects > Align > Horizontal Centre in Canvas
 
 
Convert to raster layer
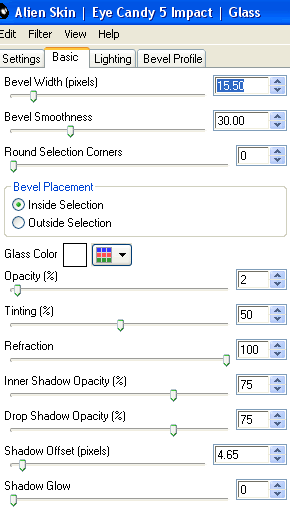
Effects > Plugins > Alien Skin Eye Candy 5: Impact > Glass with the following settings:
 
 
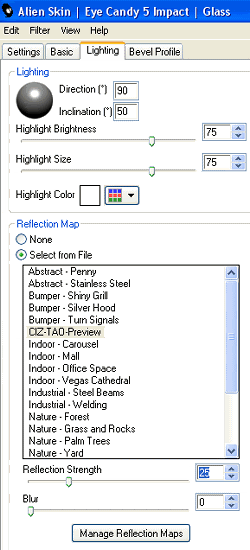
Under LIGHTING Tab choose Reflection Map and "Select from File"
Choose one from the list or import your own by selecting "Manage Reflection Maps"
I imported the preview for this kit
 

Paste one of the BeadedFrames as new layer
Resize by 70%
Place over the Rectangle for positioning, then
Use your Pick Tool (Deformation Tool in some versions) to pull the nodes down and in line with the rectangle
Your Frame SHOULD then me the same size as the Rectangle, then
Layers > Arrange > Move Down
 
 
Paste a CrissCrossRibbon of choice as new layer
Layers > Arrange > Move Up
Resize by 65%
Position along the bottom of rectangle
 
Paste ForgetMeNots as new layer
Resize by 50%
Position to the right over the bow on Ribbon
 
Carefully erase part of the stem OVER THE BOW so it looks as though flowers are tied IN the bow
 
 
Paste a Basket as new layer
Reszie by 75%
Position in lower left corner
 
Paste a DecorationFlower as new layer
Resize by 60%
Position in lower left at the bottom of Basket
 
Paste another DecorationFlower as new layer
Resize by 50%
Place alongside first flower and position both to your liking
 
Paste Cider as new layer
Resize by 55%
Position in lower right
 
Paste Sign as new layer
Resize by 90%
Position to left
 
Paste your tube as new layer
Resize as necessary and position to your liking
 
Paste Butteflies as new layers, resizing them to around 20% each
Position to liking
 
Crop and resize
 
Paste Paper of choice as new layer
Layers > Arrange > Send to Bottom
 
Layers > New Mask Layer > From Image
Locate WSL_Masks 41 to 44 and select one
OK
Layers > Merge > Merge Group
 
Lower opacity to 40
Resize layer by 90%
 
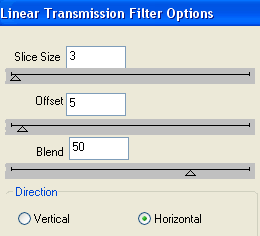
Effects > Plugins > dsb Fluxx > Linear Transmission with the following settings:
 
 
Paste Sun as new layer
Layers > Arrange > Send to Bottom
Position behind sign
 
Duplicate, then
Adjust > Brightness & Contrast > Brightness/Contrast with the following:
Brightness - 0
Contrast - 60
Layers > Merge > Merge Down
 
Select Text Tool and font of choice
I am using Centime
Choose a colour from your tag
Type out your name
Objects > Align > Horiztonal Centre in Canvas
Convert to raster layer
Apply any effects and drop shadow of choice
 
Finally, add your © copyright, licence and watermark, then save as a GIF or JPG and you're done!
 
 
** IF YOU WISH TO ANIMATE PLEASE FOLLOW THESE NEXT STEPS **
 
Activate the Mask Layer
Duplicate twice and rename Fritillary1, Fritillary2 and Fritillary3
 
Leave Fritillary2 and Fritillary3 and activate Fritillary1
 
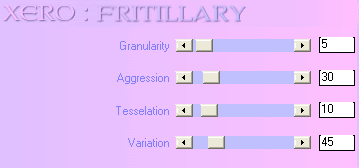
Effects > Plugins > Xero > Fritillary with the following settings:
 

Hide Fritillary1 and activate Fritillary2
Repeat Fritillary, adjusting the Variation to 50
 
Hide Fritillary2 and activate Fritillary3
Repeat Fritillary again and asjust the Variation to 55
 
Hide Fritillary2 and Fritillary3 with only Fritillary1 visible
Edit > Copy Merged
 
Open Animation Shop
Edit > Paste as New Animation
 
Back to PSP
Hide Fritillary1 and activate Fritillary2
Edit > Copy Merged
 
In Animation Shop
Edit > Paste AFTER Current Frame
 
Back to PSP
Hide Fritillary2 and activate Fritillary3
Edit > Copy Merged
 
In Animation Shop
Edit > Paste AFTER Current Frame
 
Save as a GIF and you're done!
 
Thanks for trying my tutorial!
 
::st!na::
 
 
With another tube:


© Tutorial written by Stina on 25th May 2009
All rights reserved
Saturday, May 23, 2009

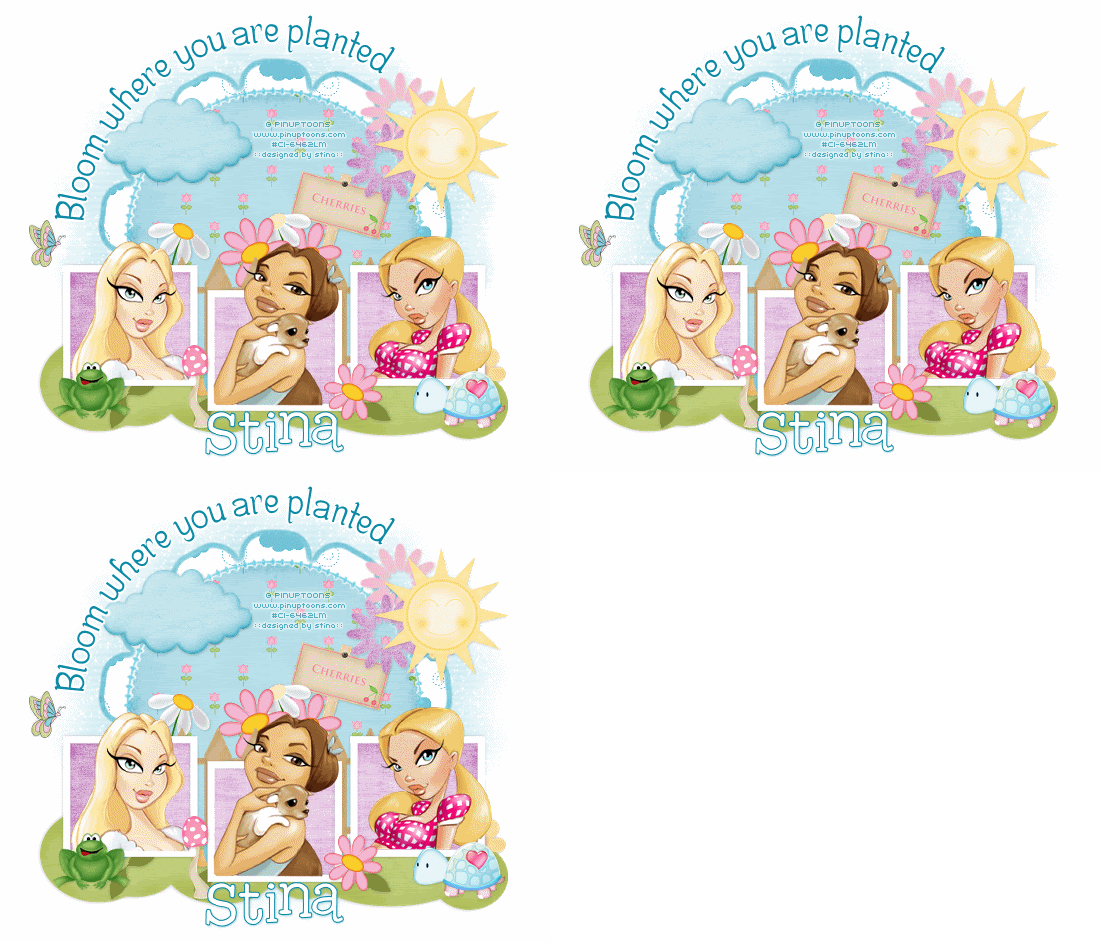
Garden Blooms

 
Supplies
 
Scrap kit of choice - I am using "Backyard Garden" by Kristi Westling of Designs by Kristi available from The Scrapping Dviaz Designz and Sunshine Studio Scraps
Tubes of choice - I am using the artwork of Rion Vernon and PinUpToons which is available with a licence from CILM
**PLEASE DO NOT USE HIS ARTWORK WITHOUT THE APPROPRIATE LICENCE**
Lacarolita Template #11 available from her blog
WSL_Mask33 by Chelle available from her blog
Fonts of choice - I am using Centime and 2Peas High Tide
Plugins: Eye Candy 4000 Gradient Glow and Xenofex 2 Constellation
 
 
Ready? Let's begin....
 
 
Open the Lacarolita Template #11
 
Shift D to duplicate, then close off the original
Delete copyright layer
 
Image > Canvas Resize 700 x 600 centred
Activate Background layer and flood-fill excess area white
 
Activate RASTER1 (large Flower)
Select with Magic Wand
Selections > Modify > Feather by 2
Press delete several times until the greyed area is removed
Paste Paper of choice (I used Paper3) INTO selection
 
KEEP SELECTED!!
 
Selections > Modify > Contract by 7
Paste another Paper of choice (I am using Paper7) INTO selection
Deselect
 
Activate RASTER2
Select black area with Magic Wand
Selections > Modify > Feather by 2
Press delete to remove black
Paste Paper of choice INTO selection
Deselect
 
STILL ON SAME LAYER
Select inside the circled area with Magic Wand
Selections > Modify > Feather by 2
Add new raster layer
Paste Paper of choice INTO selection
Deselect
 
Activate RASTER3 (Frame Backgrounds)
Select each Frame with Magic Wand
Paste Paper of choice as new layer
Resize by 15%
Selections > Invert
Delete then deselect
Layers > Merge > Merge Down
 
Activate RASTER4 (Frames)
Select each Frame with Magic Wand
Delete dark grey and flood fill with white
Deselect
 
Apply a drop shadow:
H & V - 0
Opacity - 25
Blur - 5.00
Colour - #000000
 
Activate RASTER5 (top flower)
Selections > Float
Selections > Defloat
Selections > Modify > Feather by 2
Delete till the flower is removed
Paste Paper of choice INTO selection
Deselect
 
Activate RASTER6 (right flower)
Selections > Float
Selections > Defloat
Selections > Modify > Feather by 2
Delete till the flower is removed
Paste Paper of choice INTO selection
Deselect
 
Activate RASTER7 (left flower)
Selections > Float
Selections > Defloat
Selections > Modify > Feather by 2
Delete till the flower is removed
Paste Paper of choice INTO selection
Deselect
 
 
Paste Fence as new layer
Resize by 20%
Position BEHIND Frame Backgrounds
 
 
Select the inside of each Frame with your Magic Wand
Selections > Modify > Contract by 2
Selections > Modify > Feather by 2
 
Paste three tubes of choice as new layers
Resize each to fit within Frames
Position so the heads of each tube sits above Frame
 
With your Eraser Tool carefully erase the bottom of each tube completely
Then deselect
 
 
Paste various Flowers as new layers
Resize by 5% and position behind the fence
 
Paste a Sign as new layer
Image > Rotate by 15 to the right
Resize by 20%
Position behind the flowers
 
Paste Frog as new layer
Layers > Arrange > Bring to Top
Resize by 5%
Position to the lower left
 
Paste Mushroom as new layer
Resize by 5% and position
 
Paste Turtle as new layer
Resize by 10%
Position to the lower right
 
Paste Cloud as new layer
Resize by 8% and position
 
Paste Sun as new layer
Resize by 15% and position
 
Paste Butterfly as new layer
Resize by 10% and position
 
Paste Bush as new layer
Layers > Arrange > Send to Bottom
Resize by 28%
Move and position along the bottom from behind the Frames for a "grass" effect
Re-position the frog, mushroom and turtle on the "grass"
 
Paste Flower2 as new layer
Layers > Arrange > Bring to Top
Select the greenery area of the stem with your Magic Wand, then press delete
Deselect
Resize by 4%
Position on the grass and corner of Frame
 
Paste Paper of choice as new layer
Layers > Arrange > Send to Bottom
 
Layers > New Mask Layer > From Image
Locate WSL_Mask33
OK
Layers > Merge > Merge Group
 
Add drop shadows to your layers then resize
 
Select your Preset Shape Tool and set to Ellipse
Draw out a circle around your tag with your Foreground on a dark colour
 
Select your Text Tool and font of choice
I am using Centime
Text colour is #0a89a6
Type your text on the curve and position to your liking
Open the Vector Layer in the layer palette and close off the Ellipse
Convert to raster layer
Apply a white Gradient Glow (optional) if you wish
 
Select another font of choice
I am using 2Peas High Tide
Foreground - #0a89a6
Background - #FFFFFF
Stroke width - 1.0
 
Type out your name
Objects > Align > Horizontal Centre in Canvas
Convert to raster layer
Apply drop shadow of choice
 
Finally, add your © copyright, licence and watermark, then save as a GIF or JPG and you're done!


** IF YOU WISH TO ANIMATE PLEASE FOLLOW THESE NEXT STEPS **
 
Activate the Mask Layer
Duplicate twice and rename Sparkle1, Sparkle2 and Sparkle3
 
Hide Sparkle2 and Sparkle3 activating only Sparkle1
 
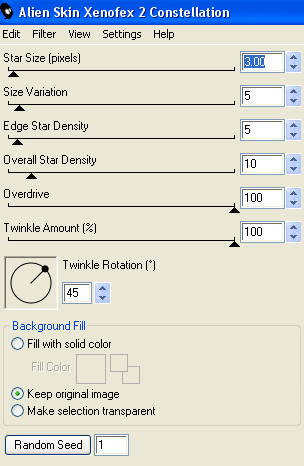
Effects > Plugins > Xenofex 2 > Constellation with the following settings:
 
 
Hide Sparkle1 and activate Sparkle2
Apply the Constellation effect, adjusting the Random Seed
 
Hide Sparkle2 and activate Sparkle3
Apply the Constellation effect again, adjusting the Random Seed once more
 
Hide Sparkle2 and Sparkle3 with only Sparkle1 visible
Edit > Copy Merged
 
Open Animation Shop
Edit > Paste as New Animation
 
Back to PSP
Hide Sparkle1 and activate Sparkle2
Edit > Copy Merged
 
In Animation Shop
Edit > Paste AFTER Current Frame
 
Back to PSP
Hide Sparkle2 and activate Sparkle3
Edit > Copy Merged
 
In Animation Shop
Edit > Paste AFTER Current Frame
 
Save as a GIF and you're done!

 
Thanks for trying my tutorial!
 
::st!na::
 
 
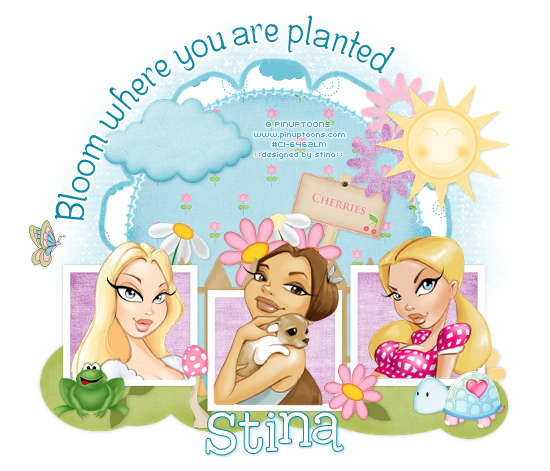
Here is a non-animated version:


© Tutorial written by Stina on 22nd May 2009
All rights reserved

Wednesday, May 13, 2009

Strawberry Parfait


Supplies
 
Scrap kit of choice - I am using "Strawberry Parfait" by Lynn of Moo Designs available from The Scrapping Divaz Designz
Tube of choice - I am using the artwork of Rion Vernon and PinUpToons which may be purchased from CILM
**PLEASE DO NOT HIS ARTWORK WITHOUT THE APPROPRIATE LICENCE**
Font of choice - I am using 2Peas Fat Frog
 
 
Ready? Ok, let's go...
 
 
Open a new 700 x 700 blank canvas flood-filled white
 
Paste PearlCircleFrame as new layer
Resize by 20%
 
LEAVE IN POSITION
 
Paste SparkleCircle2 as new layer
Resize by 25%
Adjust > Sharpness > Sharpen
 
Paste ButtonFlowerStem as new layer
Resize by 10%
Position to the lower left
Duplicate, then Image > Mirror
 
 
Paste a HeartFlower as new layer
Resize by 12%
Position in lower centre, slightly to the left
 
Paste another HeartFlower as new layer
Resize by 10%
Position beside first HeartFlower slightly lower
 
Paste third HeartFlower as new layer
Resize by 8%
Layers > Arrange > Move Down
Position behind second flower slightly overlapping first
 
 
Paste a Butterfly as new layer
Resize by 14%
Position to your liking around Frame
 
Paste Bee as new layer
Image > Rotate by 15 to the left
Resize by 7%
Position to your liking
 
Paste Ladybug as new layer
Image > Rotate by 15 to the right
Resize by 5%
Position to your liking on Frame
 
Paste ButtonHeart as new layer
Image > Rotate by 15 to the right
Resize by 8%
Position behind flowers to your liking - either to the right or centre flowers (it's up to you
 
Paste CandyBouquet as new layer
Image > Rotate by 15 to the right
Resize by 10%
Place in centre of ButtonHeart
 
Select the inside of your Frame with your Magic Wand
Selections > Modify > Expand by 10
Add new raster layer
Paste a Paper of choice as new layer
Deselect
 
Layers > Arrange > Send to Bottom
 
Activate your Frame layer and duplicate
Layers > Arrange > Send to Bottom
 
Adjust > Blur > Gaussian Blur with a Radius of 15.00
 
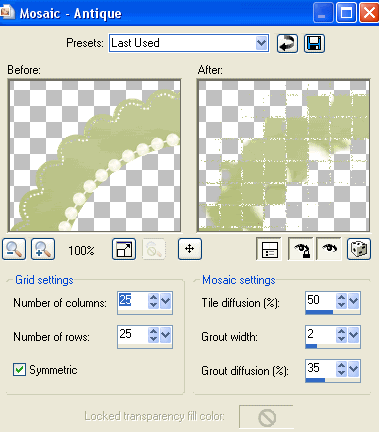
Effects > Texture Effects > Mosaic Antique with the following settings:
 
 
Now paste your tube as new layer
Resize as necessary
Position below Flower layers
 
With your Magic Wand select the inside of the Frame again
Selections > Invert
Carefully erase the excess of your tube from the bottom
Deselect
 
Crop and resize tag
 
Select your Text Tool and font of choice
I am using 2Peas Fat Frog
 
Set your Foreground to a dark colour from your tag (I used #767d43) and your Background to a light colour (I used #FFFFFF)
Type out your name
Objects > Align > Horizontal Centre in Canvas
Convert to Raster Layer
Add a drop shadow:
H & V - 1
Opacity - 30
Blur - 5.00
Colour - #3a4018
 
Finally, add your © copyright, licence and watermark, then save as a GIF or JPG and you're done!
 

** IF YOU WISH TO ANIMATE PLEASE FOLLOW THESE NEXT STEPS **
 
Activate SparkleCircle layer
Duplicate layer twice and rename Sparkle1, Sparkle2 and Sparkle3
 
Hide Sparkle2 and Sparkle3 activating only Sparkle1
 
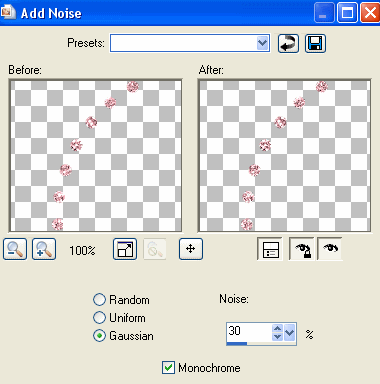
Adjust > Add/Remove Noise > Add Noise with the following settings:


Hide Sparkle1 and activate Sparkle2
Apply the Constellation effect, adjusting the Random Seed
 
Hide Sparkle2 and activate Sparkle3
Apply same again, adjusting the Random Seed
 
Hide Sparkle2 and Sparkle3 again with only Bling1 visible
Edit > Copy Merged
 
Open Animation Shop
Edit > Paste as New Animation
 
Back to PSP
Hide Sparkle1 and activate Sparkle2
Edit > Copy Merged
 
In Animation Shop
Edit > Paste AFTER Current Frame
 
Back to PSP
Hide Sparkle2 and activate Sparkle3
Edit > Copy Merged
 
In Animation Shop
Edit > Paste after Current Frame
 
Thanks for trying my tutorial!
 
::st!na::
 
 
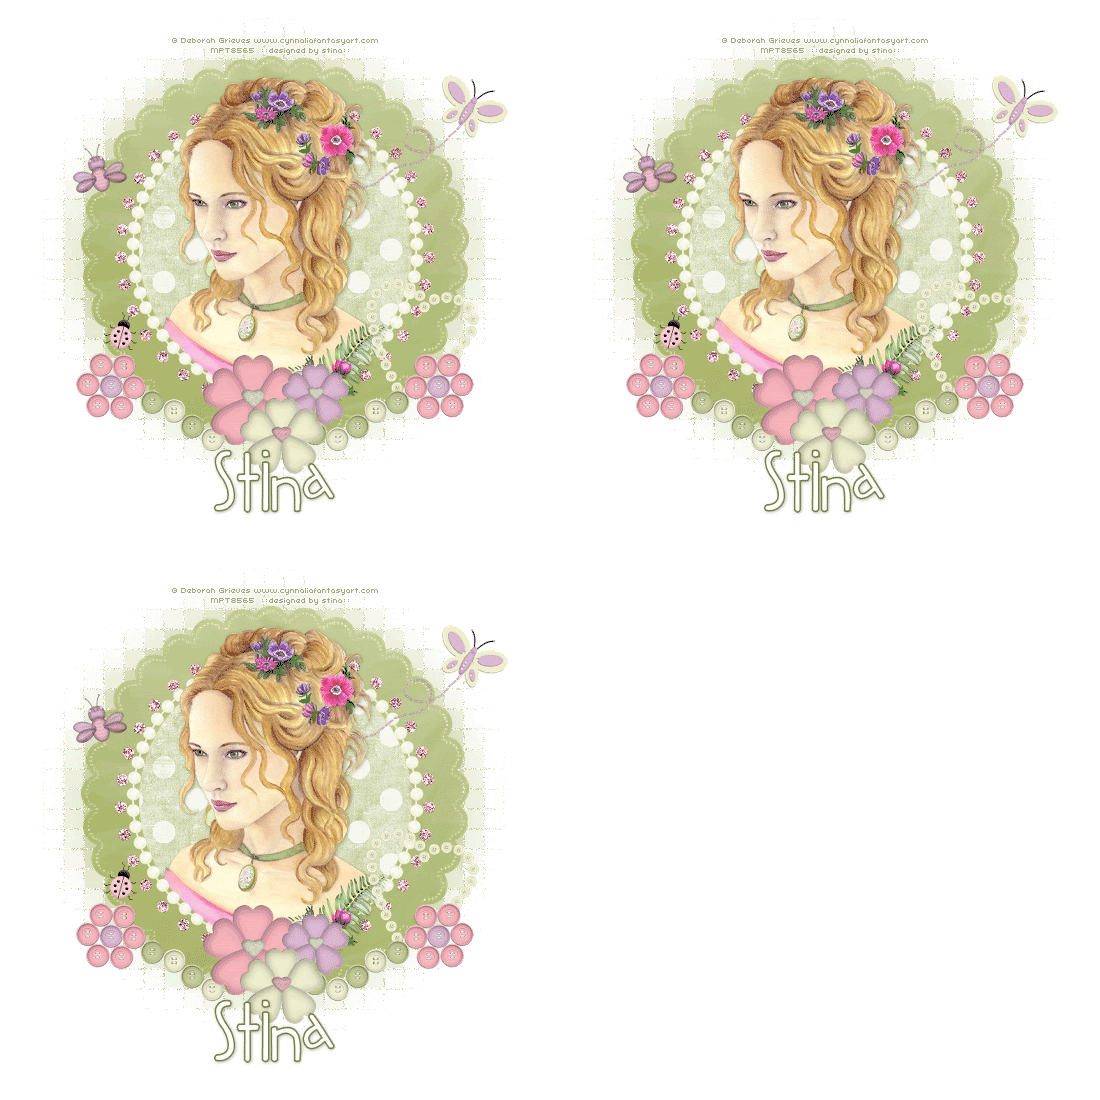
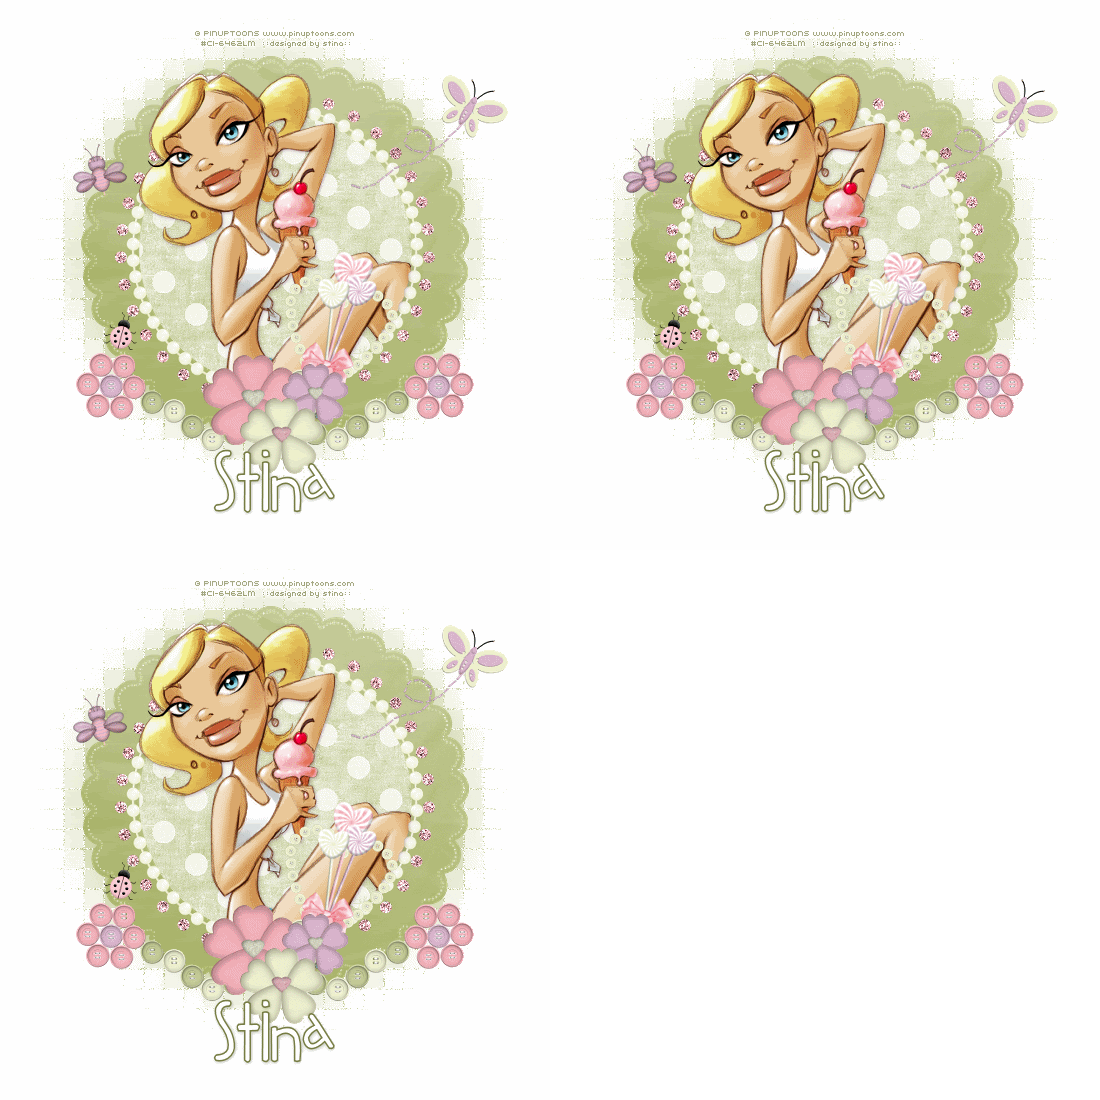
Here is another version:


© Tutorial written by Stina on 12th May 2009
All rights reserved
Thursday, April 23, 2009

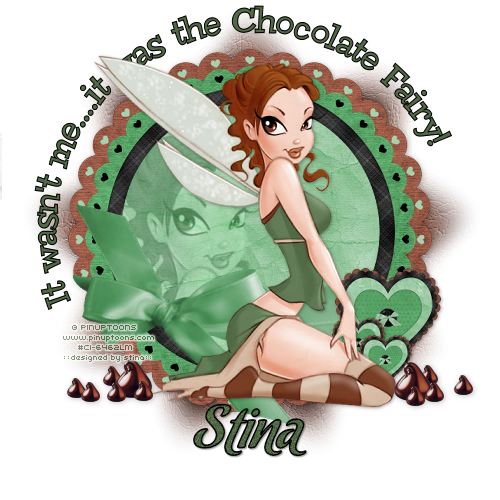
It Wasn't Me

 
Supplies
 
Scrap kit of choice - I am using the delicious "Chocolate Mint" by DMK Designs which is available from Creative Scraps, Simply Beautiful Scraps and TKO Scraps
Tube of choice - I am using the artwork of Rion Vernon and PinUpToons which can be purchased from CILM
**PLEASE DO NOT USE HIS ARTWORK WITHOUT THE APPROPRIATE LICENCE**
WSL_Mask209 by Chelle available from her blog
Chocolate tube of choice - mine is here
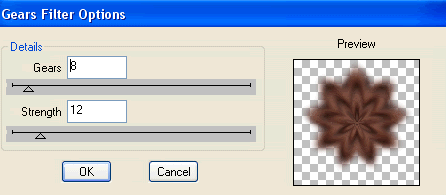
Plugin: dbs Fluxx Gears
Fonts of choice - I am using Chowderhead and Chocolate Dulce
 
 
Ready? Let's go!!
 
 
Open a new 650 x 650 blank canvas flood-filled white
 
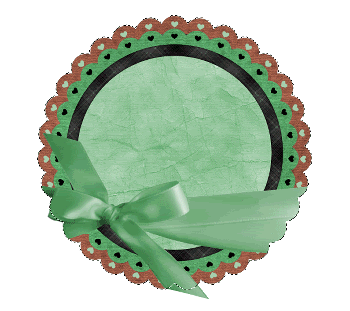
Paste Frame04 as new layer
Resize by 40%
Leave in position
 
Paste Frame02 as new layer
Resize by 44%
Layers > Arrange > Move Down
 
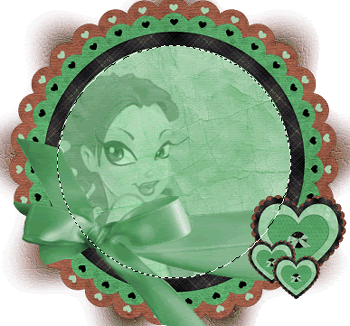
Select the inner area of Frame04 with your Magic Wand
Selections > Modify > Expand by 10
 
Paste Paper10 as new layer
Resize by 35%
Layers > Arrange > Move Down
Selections > Invert
Delete and deselect
 
Paste RibbonWrap01 as new layer
Resize by 38%
Position in lower section of Frame to your liking
Select the area outside of the Frame02 with your Magic Wand
Selections > Modify > Feather by 2
Erase the excess overhanging Frame
Deselect
 
 
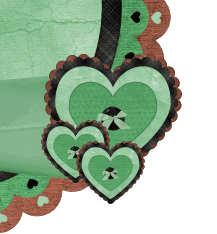
Paste PaperHeart03 as new layer
Resize by 13%
LEAVE IN POSITION
 
Paste PaperHeart04 as new layer
Resize by 12%
LEAVE IN POSITION
 
Layers > Merge > Merge Down
 
Position to right at the edge of the Wrap
Duplicate, then resize by 50%
Position slightly below heart to the left
Duplicate again and move slightly down and to the right
 
 
Paste Paper07 as new layer
Resize by 55%
Layers > Arrange > Send to Bottom
 
Layers > New Mask Layer > From Image
Locate WSL_Mask209
OK
Move Mask layer slightly so that it is centred behind Frame
 
Resize
 
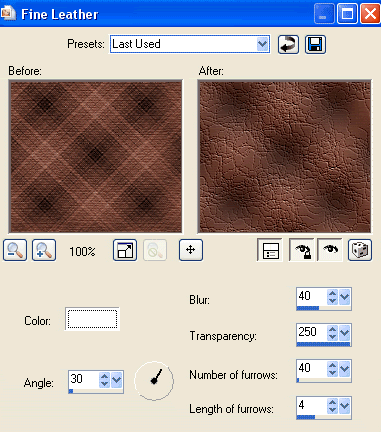
Effects > Texture Effects > Fine Leather with the following settings:


Effects > Plugins > dbs Fluxx > Gears with the following settings:
 
 
Paste tube as new layer
Resize if needed or leave as is
Position to the left inside Frame below Wrap
Set blend mode to Luminance Legacy
Lower opacity to 35
 
Select inside the Frame with your Magic Wand
Selections > Modify > Contract by 2
Selections > Modify > Feather by 2
Selections > Invert
Delete then deselect
 
 
Paste your tube as new layer again
Layers > Arrange > Bring to Top
Resize slightly smaller and position to your liking
 
Paste some chocolates and scatter them around your tube to your liking
 
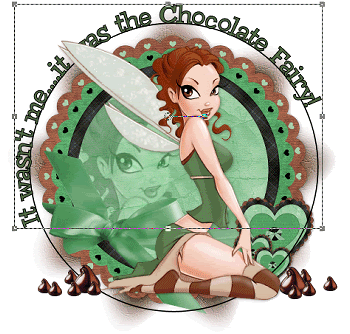
Now select your Preset Shape Tool to Ellipse
Foreground - #000000
Background - null
 
Hold your shift key down and draw out a circle around your tag
Objects > Align > Centre in Canvas
Move up slightly if not completely centred
 
Select your Text Tool and font of choice
I am using Chowderhead
Set your Foreground and Background to two colours from your tube
 
Foreground - #000000
Background - #516945
Stroke width - 1.00
 
 
Type your choice of text
Position to your liking
Then open the layer palette and the Vector Layer
Close off the ellipse then
Convert to raster layer
 
Select another font of choice
I am using Chocolate Dulce
 
Type out your name
Objects > Align > Horizontal Centre in Canvas
Convert to raster layer
Add a drop shadow of choice
 
Finally, add your © copyright, licence and watermark, then save as a GIF or JPG and you're done!
 
Thanks for trying my tutorial!
 
::st!na::
 
© Tutorial written by Stina on 22nd April 2009
All rights reserved
Sunday, April 5, 2009

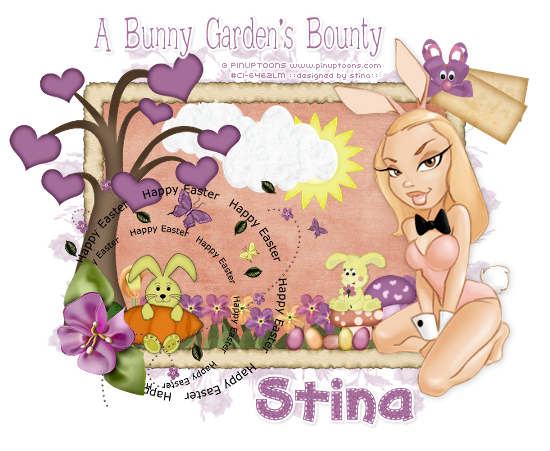
Bunny Garden

 
Supplies
 
"Easter" freebie Scrap Kit by Bel Vidotti which is available from her blog
Tube of choice - I am using the lovely artwork of Rion Vernon and PinUpToons which you can purchase from CILM
**PLEASE DO NOT USE HIS ARTWORK WITHOUT THE APPROPRIATE LICENCE**
WSL_Mask226 by Chelle available from her blog
Fonts of choice - I am using 2Peas Frazzled and AKApprique Black
Plugin: Eye Candy 4000 Gradient Glow (optional)
 
 
Let's begin
 
Open a new 700 x 600 blank canvas flood-filled white
 
Paste Frame05 as new layer
 
Select area inside Frame with Magic Wand
Selections / MOdify / Expand by 10
 
Add new raster layer
 
Paste Paper03 into Selection
Deselect
 
Layers / Arrange / Move Down
 
Paste WordArt as new layer
Resize by 60%
Position in lower left corner
 
 
Paste Tree as new layer
Resize by 70%
Layers / Arrange / Move Down
Position in left corner behind word art
 
 
Paste Grass as new layer
Resize by 55%
Position to the bottom of Frame
Layers / Arrange / Move Down
Repeat so Grass is behind Frame layer
 
Paste Mushroom01 as new layer
Resize by 20%
Paste Mushroom02 as new layer
Resize by 25%
Position both to the lower right beside each other
 
Paste Sun as new layer
Resize by 30%
Position to your liking
Duplicate then set blend mode to Soft Light
Layers / Merge / Merge Down
 
Paste Cloud02 as new layer
Resize by 40%
Place in position
Duplicate then resize by 85%
Position slightly to the left
 
Paste various flowers, resizing them and placing them to your liking
 
Paste Rabbit02 as new layer
Resize by 35%
Position under the tree within the word art circle
 
 
Paste Rabbit01 as new layer
Resize by 20%
Position on top of one of the Mushrooms
 
Paste Tag03 as new layer
Image / Rotate by 10 to the right
Resize by 25%
Position in upper right
 
Paste Tag03 again
Image / Rotate by 30 to the right
Resuze by 25%
Position over first tag
Layers / Merge / Merge Down
 
 
Paste BowRabbit02 as new layer
Resize by 20%
Place over the two tags in upper right
 
Paste various Butterflies
Resize by 10%
Position to your liking
 
Paste various Easter Eggs
Resize by 8%
Rotate alternatively, scattering them to your liking
 
Now paste your tube as new layer
Resize as necessary
Position to your liking
Add a drop shadow of choice
 
Paste Paper05 as new layer
Layers / Arrange / Send to Bottom
 
Layers / New Mask Layer / From Image
Locate WSL_Mask226
OK
Layers / Merge / Merge Group
Lower opacity to 40
 
Activate top layer
 
Select your Text Tool and font of choice
I am using 2Peas Frazzled
 
Choose a colour from your tag for your Background/text
 
Type out some words of your choice
Convert to raster layer
Apply a Gradient Glow if you wish and a drop shadow of choice
 
Select another font of choie
I am using AKApprique Black
 
Type out your name
Apply any effects you wish and a drop shadow of choice
 
Finally add your © copyright, licence and watermark, then save as a GIF or JPG and you're done!
 
Thank you for trying my tutorial!
 
::st!na::
 

© Tutorial written by Stina on 5th April 2009
All rights reserved
Wednesday, April 1, 2009

Sweet Easter

 
Supplies
 
"Sweet as Easter" scrap kit by Pamela of The Posh Box Scraps which is a freebie available on her blog
Tube of choice - I am using the artwork of Rion Vernon and PinUpToons which can be purchased from CILM
**PLEASE DO NOT USE HIS ARTWORK WITHOUT THE APPROPRIATE LICENCE**
Template #9 by Babe's Designz
WSL_Mask208 by Chelle
Font of choice - I am using Bello Script
Plugins: Xero Improver and Xero Radiance here
 
 
~ Step 1 ~
 
Open Template #9 by Babe's Designz
Duplicate by pressing Shift D
Close off original
Image / Canvas Resize
650 x 650
Centre checked
 
Activate FRAME
Selections / Select All
Selections / Float
Selections / Defloat
Selections / Modify / Expand by 1
Paste Paper13 into Selection
Deselect
 
Activate HEARTS
Selections / Select All
Selections / Float
Selections / Defloat
Selections / Modify / Expand by 1
Paste Paper12 into Selection
Deselect
 
Activate FRAME
Select the area inside the Frame with your Magic Wand
Selections / Modify / Expand by 10
Add a new raster layer
Paste Paper9 into Selection
Deselect
Layers / Arrange / Move Down
 
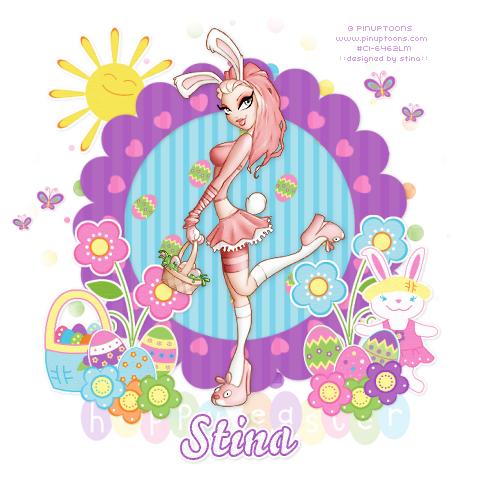
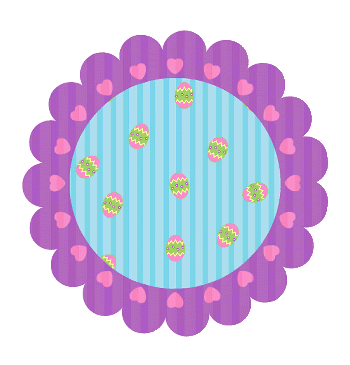
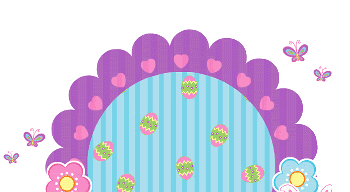
Your Template should now look like this:


~ Step 2 ~
 
Open Flowers1
Select one of the Flowers (I chose the Blue)
Edit / Copy
Then paste as new layer
Resize by 60%
Position to the right
 
Back on the Flowers1 image
Select another of the flowers (I chose the Pink)
Edit / Copy
Then paste as new layer
Resize by 60%
Image / Mirror
Position on the opposite side
 
Layers / Merge / Merge Down
Rename this layer to Flowers1
 
Open Eggs2
Paste an Easter Egg of choice as a new layer
Image / Rotate by 20 to the left
Resize by 40%
Position to the left at the base of the flowers
 
Paste another egg as new layer
Image / Rotate by 10 to the right
Resize by 40%
Position alongside first egg
 
Paste another egg as new layer
Resize by 40%
Position between the two eggs
 
Layers / Merge / Merge Down
Repeat
Rename this layer Eggs1
 
Now paste another egg as new layer
Image / Rotate by 20 to the right
Resize by 40%
Position to the right at the base of the flowers
 
Paste another egg as new layer
Image / Rotate by 10 to the left
Resize by 40%
Position alongside previous egg
 
Paste another egg as new layer
Resize by 40%
Position between the two eggs
 
Laters / Merge / Merge Down
Repeat
Rename this layer Eggs2
 
Open Flowers4
Select each of the flowers and paste them one by one on your tag
Resize each by 30%
Alternate the position of each on either side of Frame
Layers / Merge / Merge Down
Repeat till each of the little flowers are one layer
Rename to Flowers2
 
Paste Basket as new layer
Resize by 50%
Position to the left between Flowers1 and Eggs1 layer
 
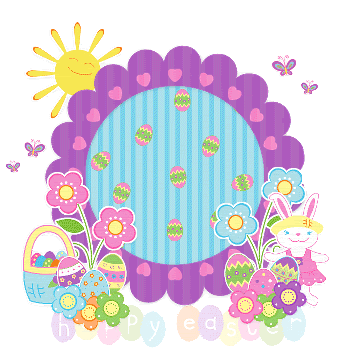
Paste Bunnie as new layer
Resize by 50%
Position to the right between Flowers1 and Eggs2 layers
 
 
Open the Butterflies psp file
Paste Small Butterfly as new layer
Resize by 30%
Position in the upper right
Duplicate
Image / Mirror
Resize by 70%
Position just slight below first butterfly
Layers / Merge / Merge Down
Rename Butterflies1
 
Duplicate
Image / Mirror
Resize by 90%
Position somewhere on the opposite side
Rename Butterflies2
 
 
Paste Sun as new layer
Resize by 60%
Place in the upper left
Layers / Arrange / Send to Bottom
Position so it is partially behind Frame
 
Open HappyEaster psp file
Select Happy Easter2 words and paste as new layer
Position along the bottom
Resize by 70%
Reposition again so that the words are in place
Lower opacity to around 20
 
Apply a drop shadow to each of the elements:
H & V - 1
Opacity - 15
Blur - 5.00
Colour - #000000
 
And the following to your Frame:
H & V - 1
Opacity - 20
Blur - 8.00
Colour - #000000
 
 
Crop and resize
 

~ Step 3 ~
 
Activate top layer
 
Paste your tube as new layer
Resize as necessary
 
Effects / Plugins / Xero / Improver with default settings
 
Duplicate
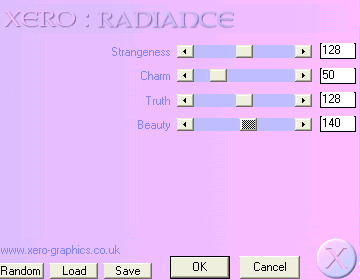
Effects / Plugins / Xero / Radiance with the following settings:
 
 
Add a drop shadow to your tube
H & V - 1
Opacity - 20
Blur - 8.00
Colour - #000000
 
Paste Paper19 as a new layer
Resize by 110%
Layers / Arrange / Send to Bottom
 
Layers / New Mask Layer / From Image
Locate WSL_Mask208
DO NOT MERGE GROUP YET!!
 
In your Layer Palette activate Mask Layer
 

Resize by 80%
Layers / Merge / Merge Group
Then resize layer by 98%
 
Select your Text Tool and font of choice
I am using Bello Script
Set your Material Palette:
Foreground - #ad5cc1
Background - #FFFFFF
 
Type your name and apply a slight drop shadow
 
Finally, add your © copyright, licence and watermark
 
Save as a GIF or JPG and you're done!
 
Thanks for trying my tutorial
 
::st!na::
 

© Tutorial written by Stina on 31st March 2009
All rights reserved
 

Saturday, March 14, 2009

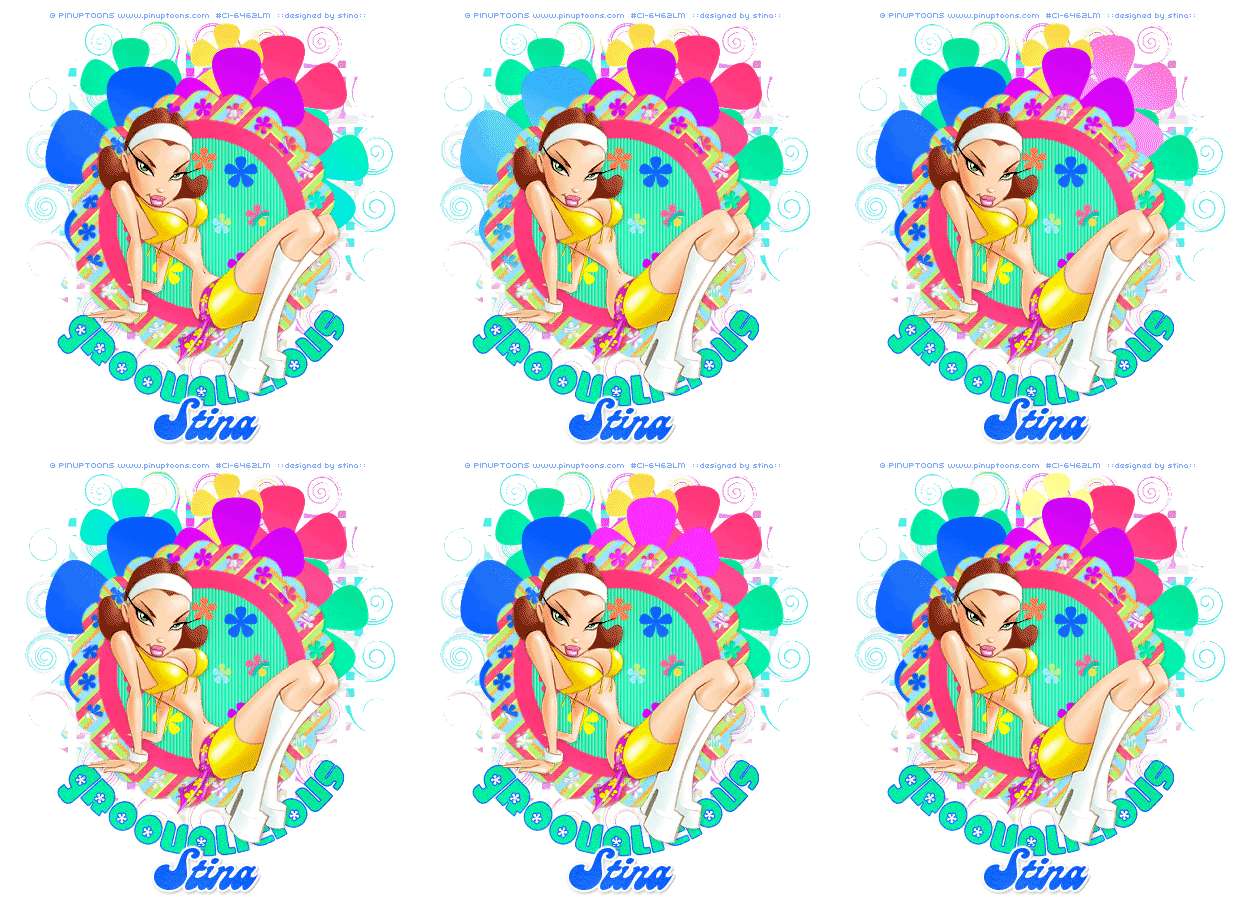
Groovalicious


Supplies
 
Flower Preset Shapes
Satin Fill Patterns
Flower Frame by Yvette
Paper of choice
Fonts of choice - I am using Chick and Candy
Tube of choice - I am using the delightful artwork of Rion Vernon and PinUpToons
which can be purchased from CILM
**PLEASE DO NOT USE HIS ARTWORK WITHOUT THE APPROPRIATE LICENCE**
Plugin: DBX Linear Transmission
Plugin: Eye Candy 4000 Gradient Glow (optional)
 
My Supplies here
 
Level: Beginner Animation
 
Place the Patterns in your PSP Patterns Folder
and your Flower shapes into your PSP Preset Shapes Folder
The Linear Transmission file goes into your Plugins folder for PSP
 
 
~ Step 1 ~
 
Open a new 700 x 500 blank canvas flood-filled white
 
Paste Yvette Flower Frame as new layer
Resize by 50%
 
Using your Magic Wand select the inner light grey area of the frame
Selections / Modify / Feather by 2
Add new raster layer
Flood fill with one of the pattern colours provided
Deselect
 
 
Activate Frame again
Selections / Float, then Selections / Defloat
Selections / Modify / Feather by 2
Paste a colourful paper of choice into selection
Deselect
 
Add a drop shadow:
H & V - 1
Opacity - 30
Blur - 1.00
Colour - #000000
 
Select the inside of the frame
Selections / Modify / Expand by 10
Add a new raster layer
Flood fill with one of the pattern colours or colour of choice
Deselect
 
 
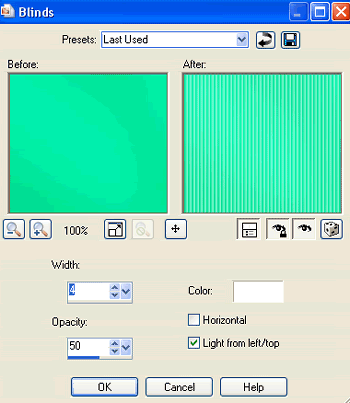
Effects / Texture Effects / Blinds with the following settings:
 
 
Select your Preset Shape Tool to Flower2
 
Use the Patterns provided, or your own colours if you wish, and draw out flowers of various sizes
Place them around your frame
Rename these flowers as Flower1, Flower2, Flower3....and so forth

Select Flower in your Preset Shapes Tool
Draw out various flowers within the Frame
Convert them each to raster layer
 
Hide your background
Edit / Copy Merged
Then Paste as new Image
 
Minimise for later
 
Paste your tube
Resize if necessary and position to your liking
 

~ Step 2 ~
 
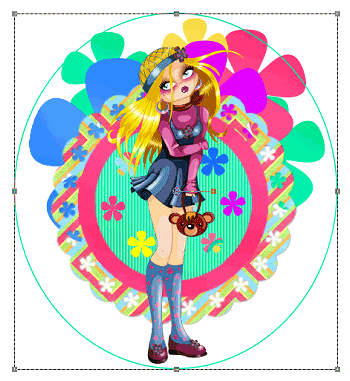
Select your Preset Shapes Tool to Ellipse
Foreground - #000000
Background - null
Draw out a circle around your tag
 
Image / Flip
Position Ellipse with an even space at the bottom
 

Select your Text Tool and font
Choose two bright colours (your own or use the patterns supplied) for your foreground and background
 
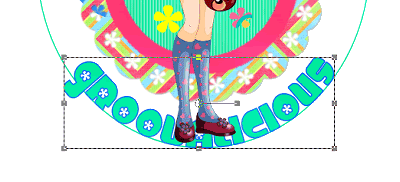
On the curve type out the words "Groovalicious"
 
Because we flipped the Ellipse our text will be inverted
 

In your Layer Palette open the Vector Layer and turn off the visibility of the Ellipse
Convert to raster layer
Add some slight noise if you wish
 

~ Step 3 ~
 
Now let's go back to the image we copied and minimised earlier
 
Activate your Background layer, then
Paste it as a new layer
Position it with your Mover Tool so that it sits directly behind and in-line with the Frame and flowers etc.
 
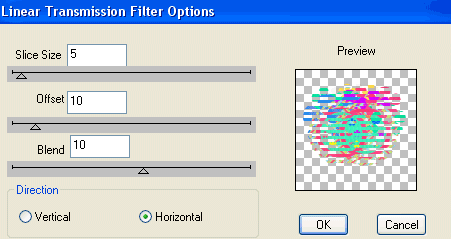
Effects / Plugins / DBX / Linear Transmission with the following settings:
 
 
Repeat but change the Direction to Vertical
 
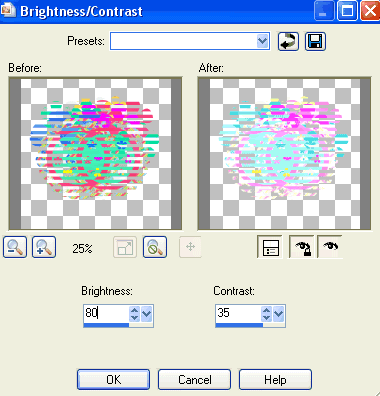
Then Adjust / Brightness & Contrast / Brightness/Contrast with the following settings:
 
 
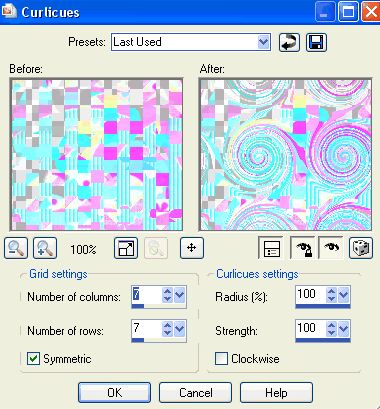
Effects / Distortion Effects / Cirlicues with the following settings:
 
 
Resize by 80%
 
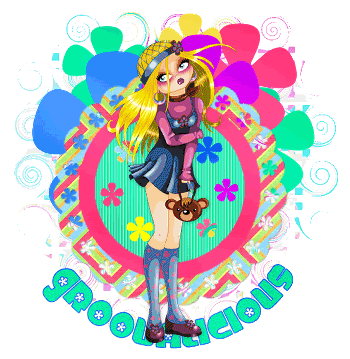
You should now have something like this:


Select your Text Tool, font and colour - something funky *g*
Type out your name
Add some noise - I added Noise of 15
Apply a Gradient Glow in white and a slight drop shadow
 
Add your © copyright, licence and watermark
 

~ Step 4 ~
 
Now comes the animation
This gets a little fiddly so be patient *g*
 
Duplicate each of your Flower layers (1, 2, 3 etc) so you should have Copy of Flower1 etc of each one
 
Activate the Copy of Flower1
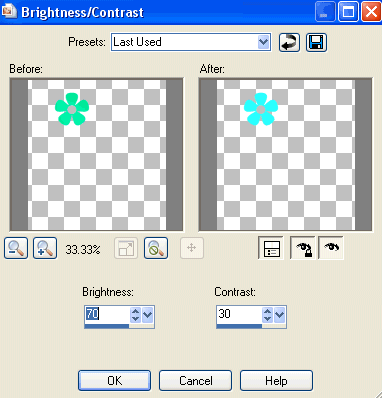
Adjust / Brightness & Contrast with the following settings:
 
 
Repeat with all of the Copy of Flower layers
 
Now comes the tricky fiddly bit *g*
 
Hide ALL Copy of Flower layers except for one
Edit / Copy Merged
 
Go to Animation Shop
Edit / Paste as New Animation
 
Back to PSP
Hide the first Copy of layer and unhide another
Edit / Copy Merged
 
In Animation Shop
Edit / Paste after current Frame
 
Back to PSP
Hide the copy of layer and unhide the next
Edit / Copy Merged
 
In Animation Shop
Edit / Paste after current frame
 
Repeat the copy of each "copy of" layer, alternating them, and pasting them AFTER the current frame in Animation Shop
 
When you have finished copying you should have a total of the same amount of Frames as you do flowers in Animation Shop
That is, I have 6 flowers so I have 6 Frames
 
In Animation Shop Select All frames
Animation / Frame Properties
Change the Properties to 20
 
Finally, Save as a GIF and you're done!
 
Thank you for trying my tutorial
 
::st!na::
 
 
Another version of the tutorial:


© Tutorial written by Stina on 13th March 2009
All rights reserved