Please email me designed.by.stina@gmail.com with your creations. I'd love to see them.

Showing posts with label Exquisite Scraps. Show all posts

Saturday, June 20, 2009

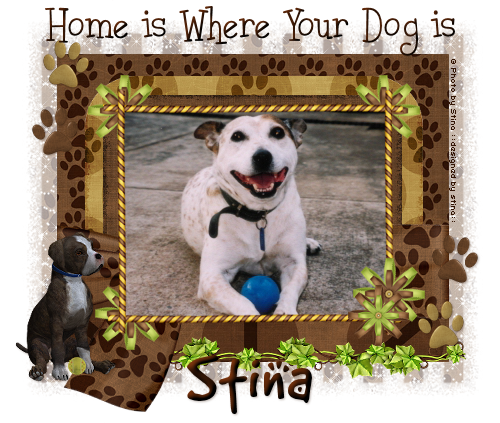
Home is Where Your Dog Is


Supplies

Scrap kit of choice - I am using "Doggy Dayz" by Krissy Scraps 
Photo or Image of choice - I am using one of my own of my gorgeous girl *g*
Template #61 by Missy available here
Fonts of choice - I am using Malihini Tahitian BTN Cond and Good Dog (Cool)
Plugin: Xenofex 2 Constellation


Let's begin....


Open Missy's Template #61

Shift D to duplicate then close original
On your duplicate which will be your working canvas remove the copyright layer and all the Circle layers from Circle1 to Circle11

Image > Canvas Resize 650 x 550 centred
Activate Background layer and flood-fill excess with white

Select the RECTANGLE layer with your Magic Wand
Paste Paper of choice as new layer
Resize by 75%
Selections > Invert
Delete then deselect
Layers > Merge > Merge Down

Select ROUNDED EDGE RECTANGLE 1 with Magic Wand
Paste another Paper as new layer
Resize by 60%
Selections > Invert
Delete then deselect
Layers > Merge > Merge Down

Select ROUNDED EDGE RECTANGLE 2 with Magic Wand
Paste another Paper as new layer
Resize by 55%
Selections > Invert
Delete then deselect
Layers > Merge > Merge Down

Select SHAPE with Magic Wand
Paste another Paper as new layer
Resize by 70%
Selections > Invert
Delete then deselect
Layers > Merge > Merge Down
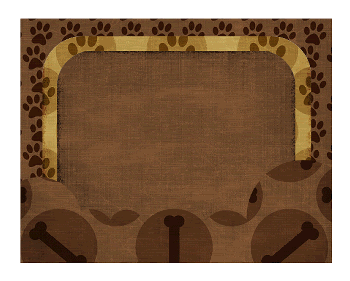

OK, let's create a Frame for our tag

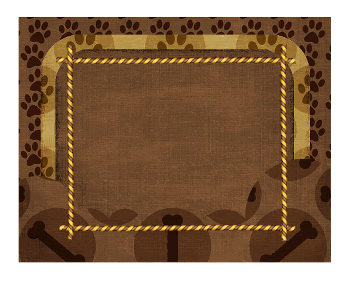
Paste one of the Tassel Ribbons as a new layer
Resize by 60%
Position toward the top of the ROUNDED EDGE RECTANGLE 2 layer

Duplicate
Image > Flip, then Image > Mirror

Duplicate again
Image > Rotate by 90 degrees

Duplicate again
Image > Mirror, then Image > Flip

On the top Tassel Ribbon layer,
Layers > Merge > Merge Down
Repeat until all Tassel Ribbons are merged as one layer

Use your Freehand Tool to draw around the tassels at each end
Delete, then deselect

Image > Rotate by 1.50 to the right
Adjust > Sharpness > Sharpen


Select inside your new Frame with your Magic Wand
Selections > Modify > Expand by 5

Paste an Image or Photo of choice as a new layer
Resize as necessary to your liking
Selections > Invert
Delete to remove any excess around Frame
Deselect

Paste a Wrap of choice as new layer
Resize by 64%
Place behind the Frame and Photo from left to right
Use your Selection Tool to draw around any excess and delete

Paste Pawprint2 as new layer
Image > Rotate by 10 to the left
Resize by 20%
Position to the right
Duplicate, then Image > Mirror
Position slightly toward the upper left

Paste Pawprint1 as new layer
Image > Rotate by 10 to the right
Resize by 20%
Position above first pawprint
Duplicate, then Image > Mirror
Position slightly upwards to the left
Paste Puppy2 as new layer
Image > Rotate by 5 to the right
Resize by 40%
Position to the lower left

Paste Tennis Ball as new layer
Resize by 8%
Position between puppy's paws

Paste Flower of choice as new layer
Resize by 30%
Paste another Flower of choice as new layer
Resize by 20%
Place over centre of first Flower
Layers > Merge > Merge Down
Position in upper left corner of Frame

Duplicate Flower several times and position around Frame to liking

Now paste the two original Flowers we used in reverse for another Flower
For example, in mine I used Brown then Green for the first flower - for the second I used Green then Brown
Repeat the above steps to make the flower
Once merged, resize again by 85%
Position in lower right

Paste an Ivy as new layer
Image > Rotate by 90 to the right
Resize by 50%
Position along lower right of Rectangle
Duplicate, then Image > Mirror
Layers > Merge > Merge Down
Move layer down below Wrap

Paste Paper of choice as new layer
Layers > Arrange > Send to Bottom
Move up from below white background

Layers > New Mask Layer > From Image
Apply WSL_Mask185
OK

DO NOT MERGE YET

Activate Mask layer
Select your Pick Tool (Deformation Tool in some versions) and use nodes to pull Mask up and out
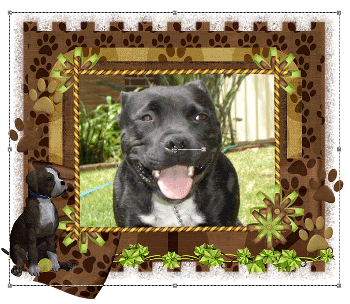

Layers > Merge > Merge Group
Resize layer by 105%
Lower opacity ro 40

Crop and Resize

Activate top layer again

Select your Text Tool and font of choice
I am using Malihini Tahitian BTN Cond
Text Colour to match your tag - I am using #341606

Type out your text of choice
Objects > Align > Horizontal Centre in Canvas
Convert to raster layer
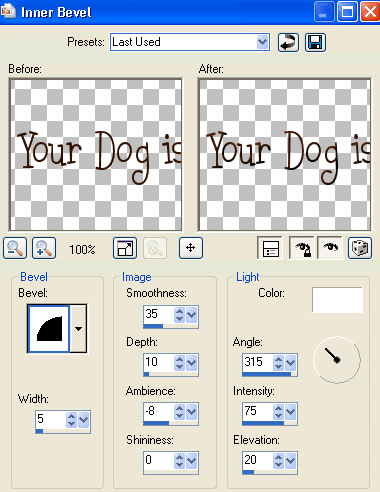
Effects > 3D Effects > Inner Bevel with the following settings:

Select another font of choice
I am using Good Dog (Cool)

Type out your name
Objects > Align > Horizontal Centre in Canvas
Convert to raster layer
Effects > 3D Effects > Inner Bevel with the same settings
Apply a drop shadow of your choice

Finally, add your © copyright, licence and watermark, then save as GIF or JPG and you're done!


** IF YOU WISH TO ANIMATE PLEASE FOLLOW THESE NEXT STEPS **

Activate your Mask layer
Duplicate twice and rename Sparkle1, Sparkle2 and Sparkle3

Activate Sparkle1 and hide Sparkle2 and Sparkle3

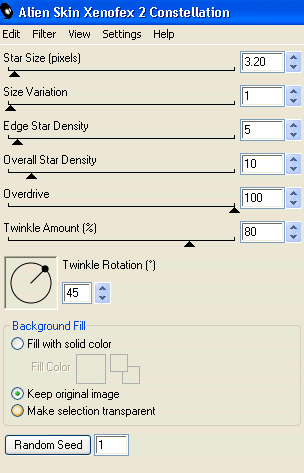
Effects > Plugins > Xenofex 2 > Constellation with the following settings:

Hide Sparkle1 and activate Sparkle2
Repeat Constellation again adjusting the Random Seed

Hide Sparkle2 and activate Sparkle3
Repeat Constellation once again, adjusting the Random Seed

Activate Sparkle1 and hide Sparkle2 and Sparkle3
Edit > Copy Merged

Open Animation Shop
Edit > Paste as New Animation

Back to PSP
Hide Sparkle1 and activate Sparkle2
Edit > Copy Merged

In Animation Shop
Edit > Paste after Current Frame

Back to PSP
Hide Sparkle2 and activate Sparkle3
Edit > Copy Merged

In Animation Shop
Edit > Paste after Current Frame

Now save as a GIF and you're done!

Thanks for trying my tutorial!

::st!na::


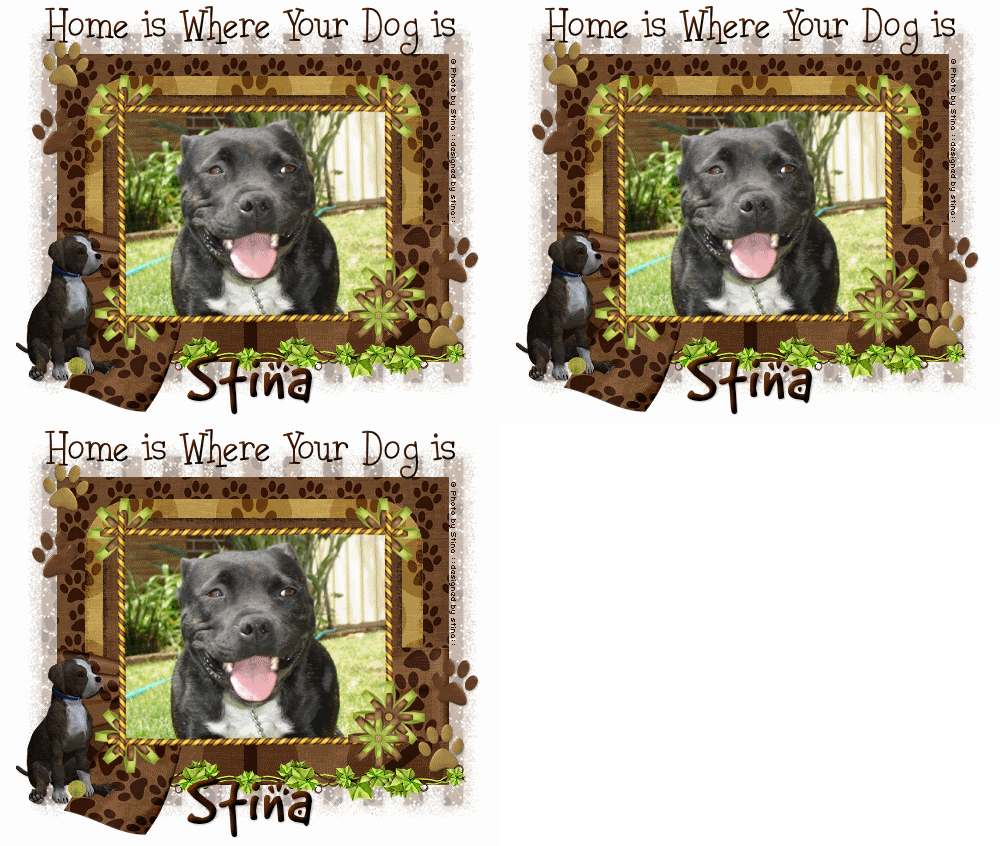
Here is a non-animated version featuring my beloved girl who crossed Rainbow Bridge last September
May she rest in peace - I will always love and miss you, Sheba

© Tutorial written by Stina on 20th June 2009
All rights reserved
Tuesday, June 9, 2009

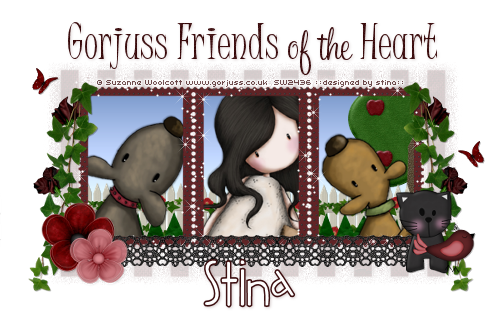
Gorjuss Friends


Supplies

Scrap kit of choice - I am using "Gorjuss II" by Created by Jill available at Twilight Scraps, Scraps with Attitude, Stargazer Scraps, Paradise 4 Scrappers and Exquisite Scraps
Tubes of choice - I am using the adorably "gorjuss" artwork of Suzanne Woolcott available from her store
**PLEASE DO NOT USE HER ARTWORK WITHOUT THE APPROPRIATE LICENCE**
WSL_Mask185 by Chelle available from her blog
Fonts of choice - I am using Juice ITC, SweetheartScript Limited and 2Peas Fat Frog
Plugin: Xenofex 2 Constellation


Ready? Let's begin....


Open a new 600 x 400 blank canvas flood-filled white
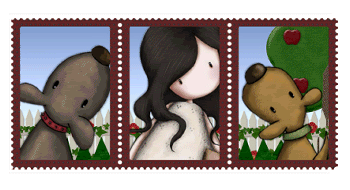
Paste Frame03 as new layer
Resize by 70%

Select the inside of each of the squares of your Frame with your Magic Wand
Selections > Modify > Expand by 8
Add a new raster layer

Select your Flood Fill Tool and open the Foreground on your Materials Palette
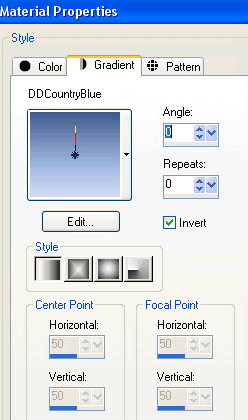
Choose Gradient and find a blue gradient


Flood fill layer with Gradient, then
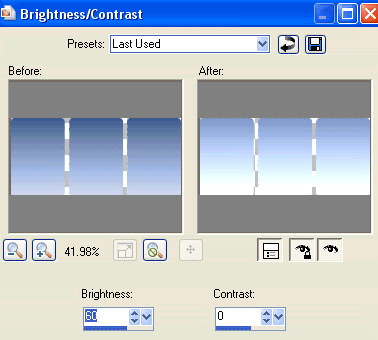
Adjust > Brightness & Contrast > Brightness/Contrast with the following settings:


Layers > Arrange > Move Down

KEEP SELECTED!!

Paste a Tree as new layer
Resize by 40%
Position to the far right (or left) to your liking
Selections > Invert
Delete

STILL SELECTED!!

Paste Fence as new layer
Resize by 40%
Position to the right
Duplicate, then move to the left
Layers > Merge > Merge Down, then
Delete

STILL SELECTED!!

Paste Grass as new layer
Resize by 30%
Position to the bottom and to the right of the Frame
Duplicate and move across
Layers > Merge > Merge Down
Delete

STILL SELECTED....*g*

Paste three tubes of choice as new layers
Resize as necessary and position within each of the Frames to your liking
Delete and deselect!


Paste LaceTrim as new layer
Resize by 60%
Position along bottom of Frame

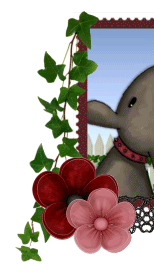
Paste a Flower as new layer
Resize by 25%
Position to the lower left

Paste another Flower as new layer
Resize by 20%
Position alongside first Flower

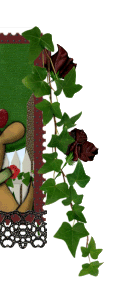
Paste IvyLeaves as new layer
Image > Rotate by 20 to the left
Resize by 40%
Position to the left from top corner
Move below Flower layers


Duplicate, then Image > Mirror

Layers > Merge > Merge Down

Paste Flowers as new layer
Resize by 40%
Position to the right

Layers > Arrange > Send to Bottom

Duplicate, then Image Mirror
Laters > Merge > Merge Down


Delete then deselect

Paste Kitty as new layer
Layers > Arrange > Bring to Top
Resize by 25%
Position to the lower right

Paste Bird as new layer
Resize by 20%
Position alongside the Kitty

Paste Butterfly as new layer
Resize by 10%
Duplicate, then Image > Mirror
Position both to liking

Paste Paper of choice as new layer
Layers > Arrange > Send to Bottom

Layers > New Mask Layer > From Image
Apply WSL_Mask185
OK
Layers > Merge > Merge Group
Lower opacity to 20

Crop and resize

Select your Text Tool and font of choice
I have used Juice ITC and SweetheartScript Limited
Choose a colour from your tag

Type out text and position to your liking
Objects > Align > Horiztonal Centre in Canvas
Convert to raster layer
Apply drop shadow of choice

Select another font of choice
I am using 2Peas Fat Frog
Foreground - (colour of choice)
Background - #FFFFFF
Stroke width - 1.5

Type out your name
Objects > Align > Horizontal Centre in Canvas
Convert to raster layer

Add some noise and a drop shadow of choice

Finally, add your © copyright, licence and watermark, then save as GIF or JPG and you're done!


** IF YOU WISH TO ANIMATE PLEASE FOLLOW THESE NEXT STEPS **

Activate your Frame layer
Duplicate twice and rename Sparkle1, Sparkle2 and Sparkle3

Hide Sparkle2 and Sparkle3 and activate Sparkle1

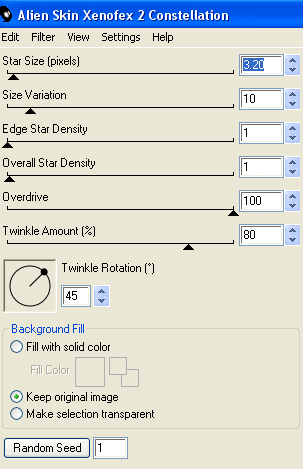
Effects > Plugins > Xenofex 2 > Constellation with the following settings:


Hide Sparkle1 and activate Sparkle2
Apply the Constellation effect again, adjusting the Random Seed

Hide Sparkle2 and activate Sparkle3
Apply the Constellation effect again, adjusting the Random Seed

Now for the animation!

Activate Sparkle1 and hide Sparkle2 and Sparkle3
Edit > Copy Merged

Open Animation Shop
Edit > Paste as New Animation

Back to PSP
Hide Sparkle1 and activate Sparkle2
Edit > Copy Merged

In Animation Shop
Edit > Paste AFTER Current Frame

Back to PSP
Hide Sparkle2 and activate Sparkle3
Edit > Copy Merged

In Animation Shop
Edit > Paste AFTER Current Frame
Save as a GIF and you're done!

Thanks for trying my tutorial!

::st!na::


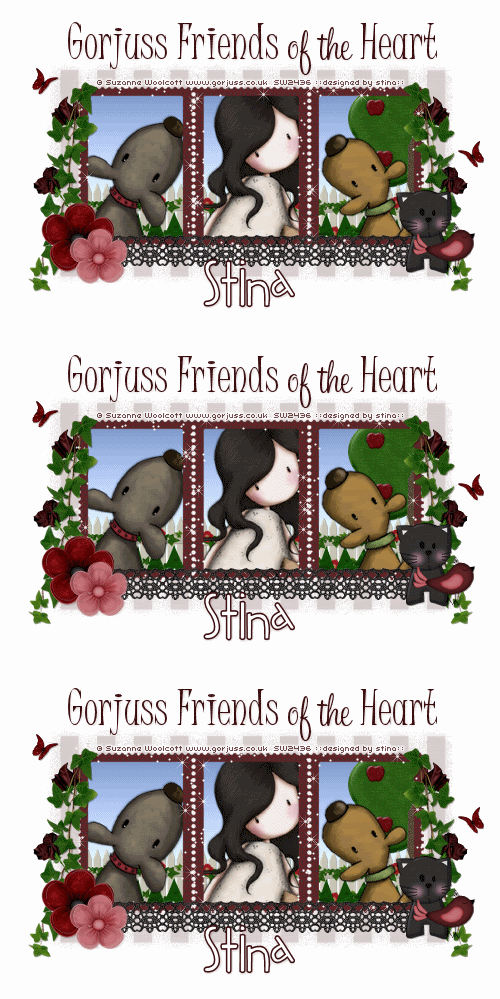
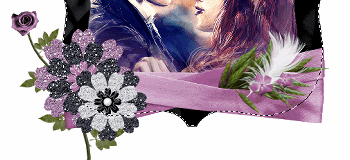
Here is a non-animated version:


© Tutorial written by Stina on 9th June 2009
All rights reserved
Friday, May 29, 2009

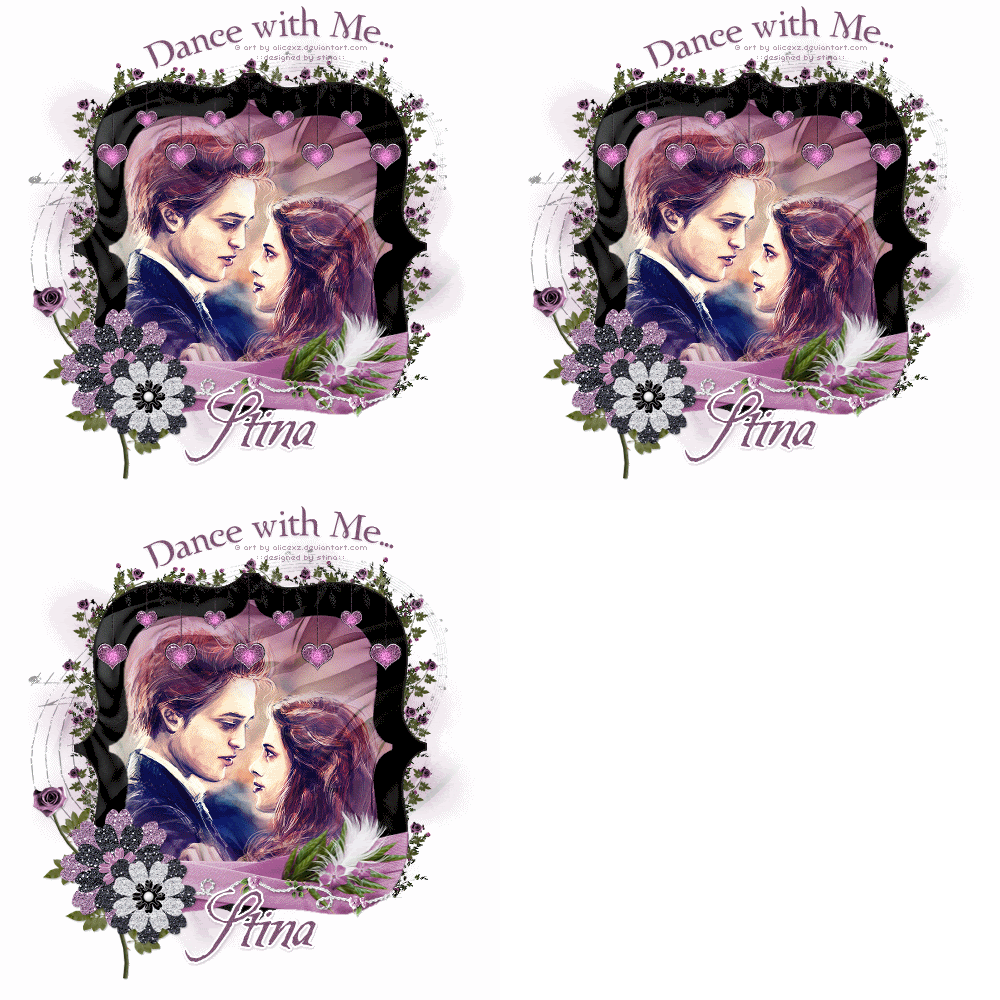
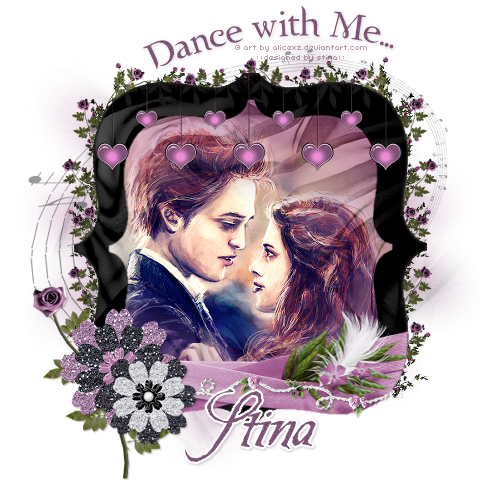
Dance With Me

 
Supplies
 
Scrap kit of choice - I am using the gorgeous "Prom Night" kit by Just a Girl Designs available from Twilight Scraps and Exquisite Scraps
Tube or image of choice - I am using the lovely image by Alicexz of Edward and Bella at the Prom
**I misted this image by using the 20-20 Mask available in your PSP program**
Template #59 by Dezigns by Ali available from her blog
WSL_Mask7 by Chelle available from her blog
Fonts of choice - I am using Twilight and Be Safe
Plugin: Xenofex Constellation
 
 
Ready? Let's begin...
 
 
Open Template #59 by Ali
Resize all layers by 500 wide
Image > Canvas Resize 600 x 600 centred
 
Delete Copyright and Bracket Layers
 
Add new raster layer, then
Layers > Arrange > Send to Bottom
Flood-fill white
Rename BACKGROUND
 
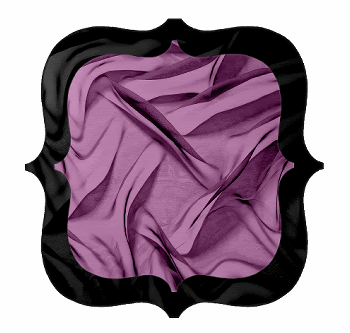
Select SHAPE1 with your Magic Wand
Selections > Modify > Feather by 2
Paste Paper of choice INTO selection
Deselect
 
Select SHAPE2 with Magic Wand
Selections > Modify > Feather by 2
Paste another Paper of choice INTO selection
Deselect
 

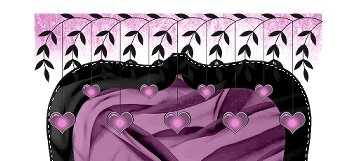
Paste DanglerDeco as new layer
Resize by 50%
Position along the top
 
Select the area outside the bottom SHAPE
Selections > Modify > Expand by 2
Selections > Modify > Feather by 2
 
 
Press delete then deselect
 
Paste your Image, Mist or Tube of choice as new layer
 
Select the area outside SHAPE2
Selections > Modify > Expand by 2
Selections > Modify > Feather by 2
Delete then deselect
 
Layers > Arrange > Move Down
 
Paste a flower as new layer
Resize by 50%
Position to the left
 
Paste another flower of choice as new layer
Resize by 40%
Position alongside first flower
 
Paste a SingleRose as new layer
Resize by 55%
Position to the left and move below the flowers
 
Paste PageWrap as new layer
Resize by 40% and position along bottom
 
Use your Magic Wand to select the area around the SHAPE1, then
Selections > Modify > Feather by 2
Delete then deselect
 

Paste Paper of choice as new layer and move to Background
Layers > New Mask Layer > From Image
Locate WSL_Mask7
OK
Layers > Merge > Merge Group
 
Paste Trellis as new layer
Resize by 75%
Position so it frames SHAPE1
 
For extra flowers and shrubbery paste Roses as new layer
Image > Rotate by 15 to the left
Resize by 70%
Position in upper left
 
 
See the difference in the "thickness" of foliage
Duplicate, then Image > Mirror
Layers > Merge > Merge Down
Duplicate, then move down to the lower part of tag
Duplicate once more, then
Image > Rotate by 90 to the left
Position in the top centre
Erase the excess foliage from the bottom
 
Paste MusicalNotes as new layer
Resize by 42%
Move up slightly to protrude the top
Lower opacity to around 40
 
Apply a drop shadow of choice to your elements then resize tag
 
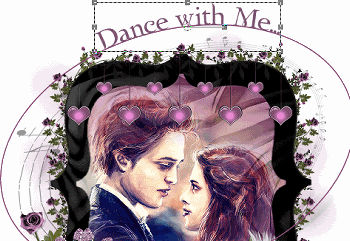
Select your Preset Shape Tool and set to Ellipse
Draw out an oval and shape it like your Musical Notes layer
 
 
Select your Text Tool and font of choice
I am using Twilight
Text Colour is #7e5675
 
On the curve type out your text of choice
Position to your liking then convert to raster layer
Add a drop shadow of choice
 
Select another font of choice
I am using Be Safe with same text colour
 
Type out your name
Objects > Align > Horizontal Centre in Canvas
Convert to raster layer
Apply a Gradient Glow and drop shadow of choice
 
Finally, add your © copyright, licence and watermark, then save as a GIF or JPG and you're done!


** IF YOU WISH TO ANIMATE PLEASE FOLLOW THESE NEXT STEPS **
 
Activate the MusicalNotes Layer
Duplicate twice and rename Sparkle1, Sparkle2 and Sparkle3
 
Hide Sparkle2 and Sparkle3 activating only Sparkle1
 
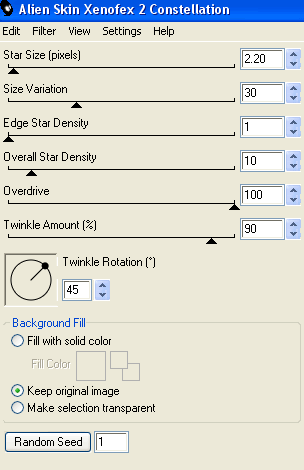
Effects > Plugins > Xenofex 2 > Constellation with the following settings:
 
 
Hide Sparkle1 and activate Sparkle2
Apply the Constellation effect, adjusting the Random Seed
 
Hide Sparkle2 and activate Steam3
Apply the Constellation effect again, adjusting the Random Seed once more
 
I also applied some noise to the Hanging Heartsm adjusting it by 5 with each layer
 
Hide Sparkle2 and Sparkle3 with only Sparkle1 visible
Edit > Copy Merged
 
Open Animation Shop
Edit > Paste as New Animation
 
Back to PSP
Hide Sparkle1 and activate Sparkle2
Edit > Copy Merged
 
In Animation Shop
Edit > Paste AFTER Current Frame
 
Back to PSP
Hide Sparkle2 and activate Sparkle3
Edit > Copy Merged
 
In Animation Shop
Edit > Paste AFTER Current Frame
 
Save as a GIF and you're done!
 
Thanks for trying my tutorial!
 
::st!na::
 
 
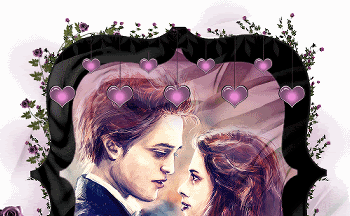
Here is a non-animated version:


© Tutorial written by Stina on 28th May 2009
All rights reserved
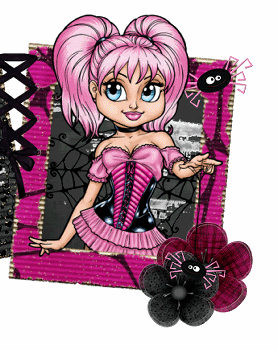
Tuesday, May 26, 2009

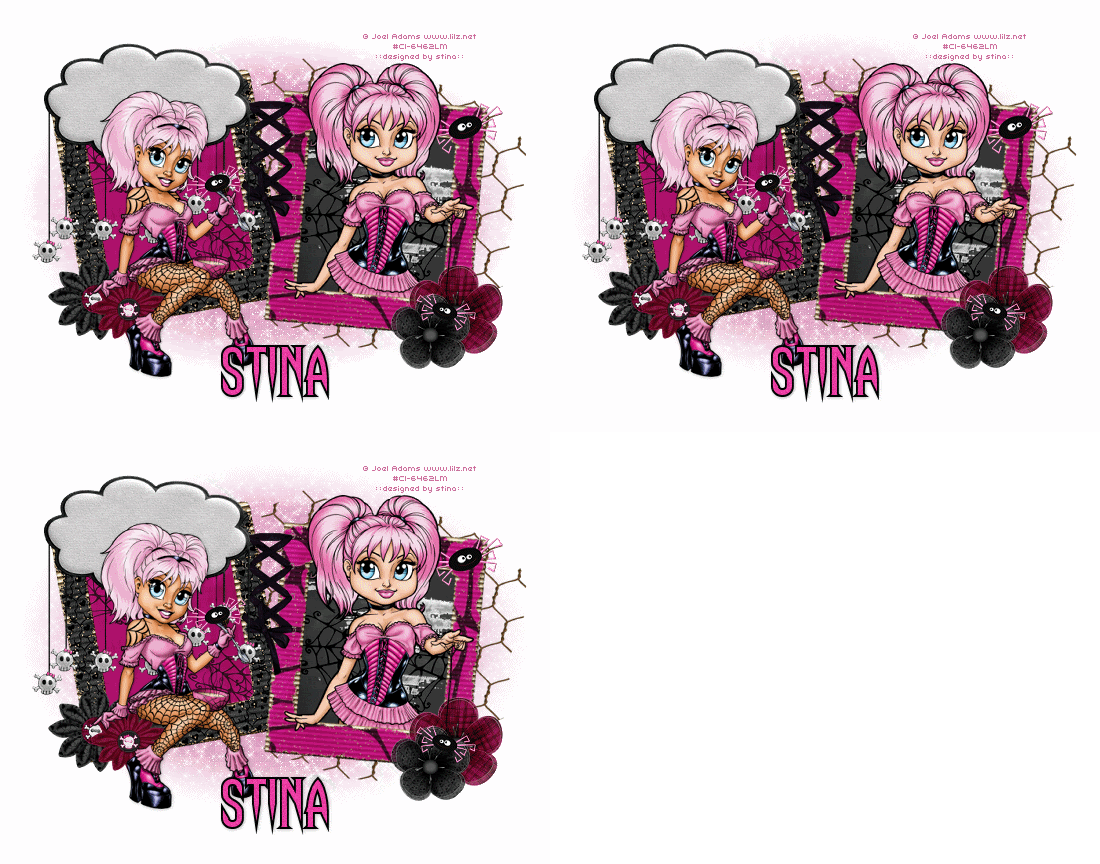
Lil Miss Muffet

 
Supplies
 
Scrap kit of choice - I am using "Tickle Me Emo" by Gina of KiKeKa Designs available from Exquisite Scraps
Tubes of choice - I am using the delightful work of Joel Adams which is available with a licence through CILM
**PLEASE DO NOT USE HIS ARTWORK WITHOUT THE PROPER LICENCE**
Mask of choice - I am using WSL_Mask41 by Chelle
Font of choice - I am using Haunting Attraction
Plugins: Xero Fritillary and Xenofex 2 Constellation
 
 
Ready? Let's begin...
 
 
Open a new 600 x 600 blank canvas flood-filled white
 
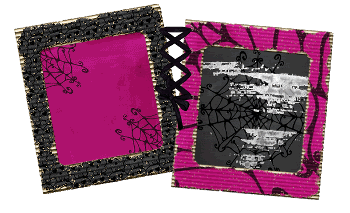
Paste Frame05 as new layer
Image > Rotate by 10 to the left
Resize by 45%
 
Paste Frame04 as new layer
Image > Rotate by 5 to the right
Resize by 45%
Position both Frames alongside one another
 
Paste an Eyelet ribbon or Stitches between the Frames to join them
 
Paste a paper of choice as new layer
Layers > Arrange > Send to Bottom
Image > Rotate 10 to the left
Resize by 33%
Position below the left Frame
 
Paste another paper of choice as new layer
Image > Rotate by 5 to the right
Resize by 33%
Position behind the right Frame
 
 
Paste a Flower of choice as new layer
Resize by 30%
Position in lower right
 
Paste another Flower of choice as new layer
Resize by 25%
Position overlapping first flower
 
Paste another Flower of choice
Resize by 25%
Position in lower left
 
Paste another Flower of choice
Resize by 30%
Position overlapping previous Flower
 
Paste Cloud as new layer
Resize by 35%
Position over one of the Frames
 
Paste Spider as new layer
Image > Rotate by 20 to the left
Resize by 25%
Position in upper right
Duplicate, then Layers > Merge > Merge Down
 
Paste your Tube as new layer
Resize as necessary
Position within right Frame
 
Duplicate and place one layer below Frame
Select the inside of your Frame
Selections > Modify > Expand by 10
Selections Invert
Delete on bottom tube layer
Deselect
 
On top tube layer make a selection around the bottom part of your tube and delete
 
 
Paste second tube as new layer
ResiZe as necessary
Position in left Frame
 
Activate Spider tube we pasted earlier
Duplicate, the Image > Mirror
Resize by 75%
Position a the end of Miss Muffet's web
 
 
Paste Paper of choice as new layer
Layers > Arrange > Send to Bottom
 
Layers > New Mask Layer > From Image
Mask of choice
OK
Layers > Merge > Merge Down
Lower opacity to 50
 
Paste RustedWire as new layer
Image > Rotate by 20 to the right
Resize by 60%
Position behind right Frame
 
Crop to mask layer and resize
 
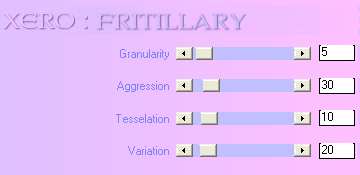
Effects > Plugins > Xero > Fritillary with the following settings:
 
 
Select your Text Tool and font of choice
I am using Haunting Attraction
 
Text colours are:
Foreground - #000000
Background - #eb3da3
 
Stroke width - 2.0
 
Type out your name
Objects > Align > Horizontal Centre in Canvas
Convert to raster layer
Apply drop shadow of choice
 
Finally, add your © copyright, licence and watermark, then save as a GIF or JPG and you're done!
 
 
** IF YOU WISH TO ANIMATE PLEASE FOLLOW THESE NEXT STEPS **
 
Activate the Mask Layer
Duplicate twice and rename Sparkle1, Sparkle2 and Sparkle3
 
Hide Sparkle2 and Sparkle3 activating only Sparkle1
 
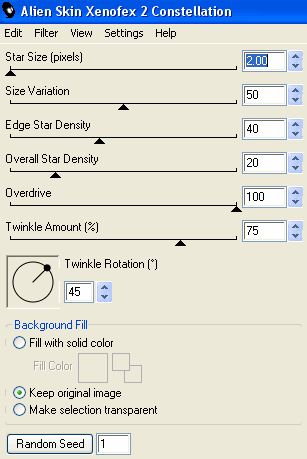
Effects > Plugins > Xenofex 2 > Constellation with the following settings:
 
 
Hide Sparkle1 and activate Sparkle2
Apply the Constellation effect, adjusting the Random Seed
 
Hide Sparkle2 and activate Sparkle3
Apply the Constellation effect again, adjusting the Random Seed once more
 
Hide Sparkle2 and Sparkle3 with only Sparkle1 visible
Edit > Copy Merged
 
Open Animation Shop
Edit > Paste as New Animation
 
Back to PSP
Hide Sparkle1 and activate Sparkle2
Edit > Copy Merged
 
In Animation Shop
Edit > Paste AFTER Current Frame
 
Back to PSP
Hide Sparkle2 and activate Sparkle3
Edit > Copy Merged
 
In Animation Shop
Edit > Paste AFTER Current Frame
 
Save as a GIF and you're done!
 
Thanks for trying my tutorial!
 
::st!na::
 
 
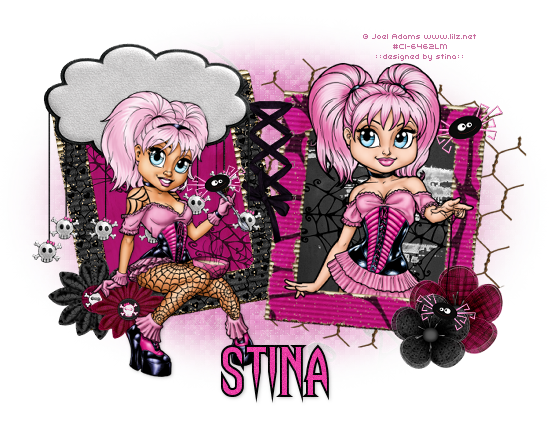
Here is a non-animated version:


© Tutorial written by Stina on 25th May, 2009
All rights reserved
Thursday, May 14, 2009

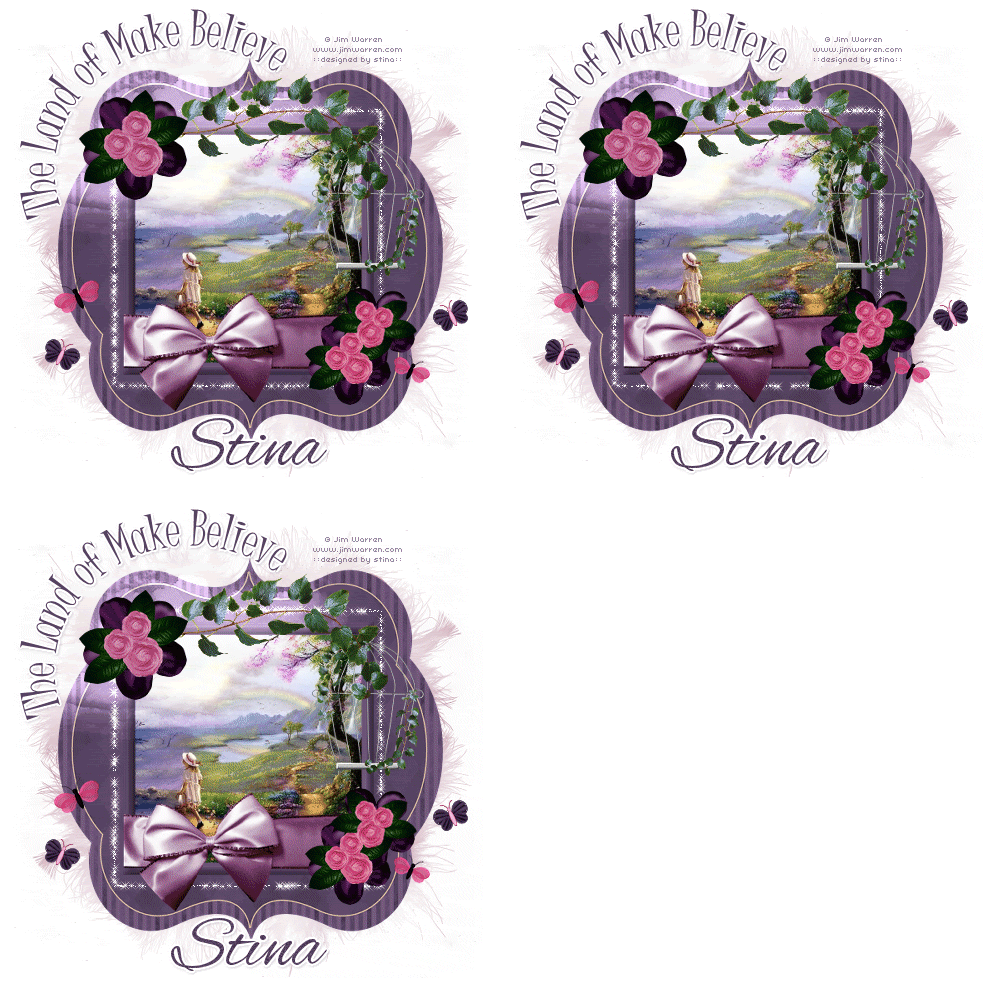
Land of Make Believe


Supplies
 
Scrap kit of choice - I am using "Violaceous" by Oopsie Daisy available from Exquisite Scraps, Stargazer Scraps and Twilight Scraps
Image of choice - I am using the gorgeous artwork of Jim Warren which is free to use with the proper credit and link
Fonts of choice - I am using Juice ITC and Alex Brush
Plugins: Alien Skin Xenofex 2 Constellation and Eye Candy 4000 Glass & Gradient Glow
 
 
Ready? Let's begin....
 
 
Open a new 700 x 700 blank canvas flood-filled white
 
Paste Frame4 as new layer
resize by 40%
 
LEAVE IN POSITION
 
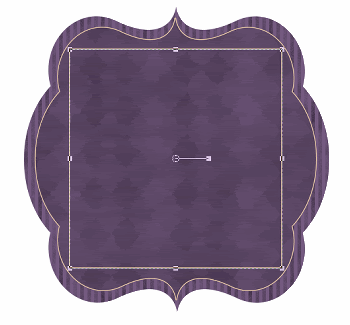
Select your Preset Shape Tool and set to Rectangle
Foreground - colour of your choice
Background - null
 
Stroke width - 2.00
 
Draw out a rectangle symmetrically centred within the Frame
 
 
Convert to raster layer
Rename Sparkle (we'll come back to this layer)
 
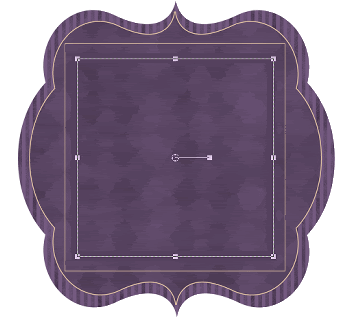
Select your Preset Shape Tool again, still on Rectangle
Change your Foreground colour to another one of your choice
Background - null
 
Stroke width - 15.00
 
Draw out a rectangle inside the first rectangle - keep it centred
 
 
Convert to raster layer
 
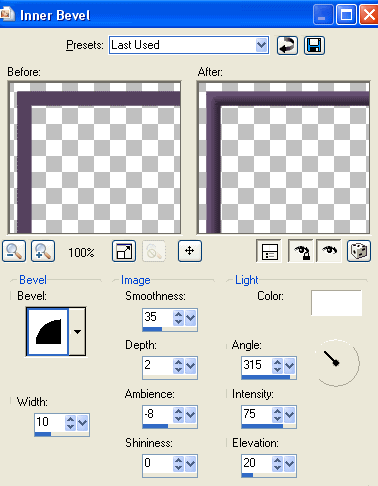
Effects > 3D Effects > Inner Bevel with the following settings:
 
 
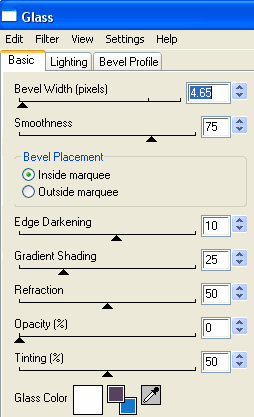
Effects > Plugins > Eye Candy 4000 > Glass with the following settings:
 
 
Paste your image of choice as new layer
Layers > Arrange > Move Down
Resize as necessary and position to your liking
Select the inside of your Frame with your Magic Wand
Selections > Modify > Expand by 10
Selections > Invert
Delete and deselect
 
Paste Bow3 as new layer
Resize by 37% (depending on size of Frame)
Position along bottom of Frame
 
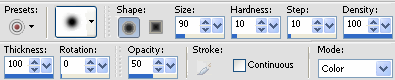
Select your Change to Target Brush with the following settings:
 
 
In your Material Palette set your Foreground to #56425f
 
Then carefully sweep your brush over your bow to colourise it slightly
 
Paste Cloud as new layer
Resize by 50%
Position in upper left
Set blend mode to Overlay
Duplicate then set blend mode to Soft light
 
Paste Birdcage as new layer
Resize by 30%
Position in upper right corner of Frame
 
Paste Ivy as new layer
Resize by 50%
Position along top of Frame
 
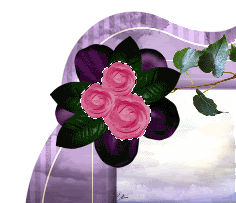
Paste one of the Violets as new layer
resize by 35%
Position in upper left
 
Adjust > Brightness/Contrast > Clarify with the Strength of Effect setting at: 10.00
Repeat once
 
Paste Floral1 as new layer
Resize by 20%
Position over Violet in upper left
 
With your Magic Wand set to a Tolerance of around 55, select the pink part of the rose so that it is all selected
 
 
Selections > Promote Selection to Layer
Select your Change to Target Brush once more with the same settings and colour
Brush over the rose then deselect
Lower the opacity of this layer to 60
 
 
Duplicate your Violet layer twice
Resize by 80%
Position both to the lower right of the Ribbon/Bow
 
Duplicate Floral1 twice
Resize by 80%
Position both over violets in lower right
 
Paste a couple of butterflies as new layers
Image > Rotate 25 to the left or right, depending on position
Resize each as necessary
Position to liking
 
Paste PinkAngelWings as new layer
Resize by 50%
Layers > Arrange > Send to Bottom
 
Duplicate
Image > Mirror, then Image > Flip
 
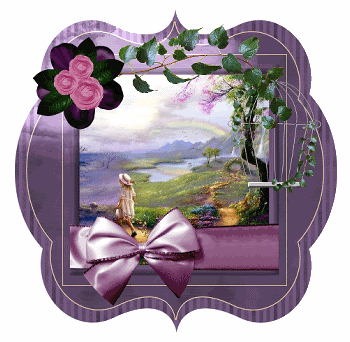
You should have something like this:
 
 
Resize tag to your liking
 
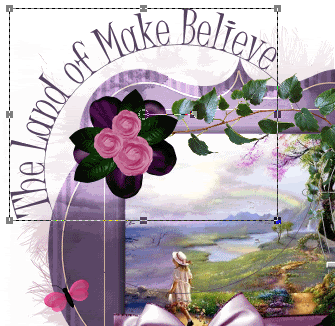
Select your Preset Shape Tool again this time to Ellipse
Draw out a Circle to the upper left of your tag
 
Select your Text Tool and font of choice
I am using Juice ITC
 
Set your Material Palette to:
Foreground - null
Background - colour of choice to match your tag (I am using #56425f)
 
On the curve of your circle type out the text of your choice
Position to your liking
 

Open your Vector Layer in your Layer Palette and turn off the Ellipse
Convert to raster layer
Apply a drop shadow of choice
 
Select your Text Tool again and another font of choice
I am using Alex Brush and the same colour
 
Type out your name
Objects > Align > Horizontal Centre in Canvas
Convert to raster layer
Add some slight noise, a Gradient Glow and drop shadow of choice
 
Finally, add your © copyright, licence and watermark, then save as a GIF or JPG and you're done!


** IF YOU WISH TO ANIMATE PLEASE FOLLOW THESE NEXT STEPS **
 
Activate the rectangle layer we drew and named Sparkle
Duplicate layer twice and rename Sparkle1, Sparkle2 and Sparkle3
 
Hide Sparkle2 and Sparkle3 activating only Bling1
 
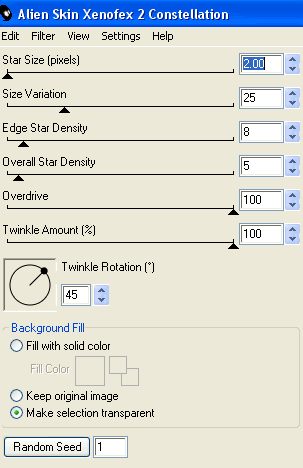
Effects > Plugins > Alien Skin Xenofex 2 > Constellation with the following settings:
 

Hide Sparkle1 and activate Sparkle2
Apply the Constellation effect, adjusting the Random Seed
 
Hide Sparkle2 and activate Sparkle3
Apply same again, adjusting the Random Seed
 
Hide Sparkle2 and Sparkle3 again with only Bling1 visible
Edit > Copy Merged
 
Open Animation Shop
Edit > Paste as New Animation
 
Back to PSP
Hide Sparkle1 and activate Sparkle2
Edit > Copy Merged
 
In Animation Shop
Edit > Paste AFTER Current Frame
 
Back to PSP
Hide Sparkle2 and activate Sparkle3
Edit > Copy Merged
 
In Animation Shop
Edit > Paste after Current Frame
 
Thanks for trying my tutorial!
 
::st!na::
 
 
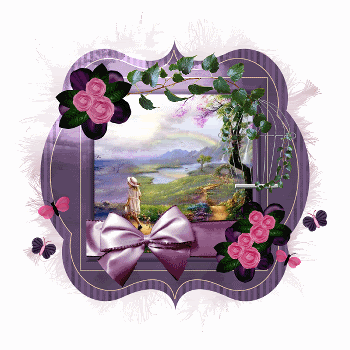
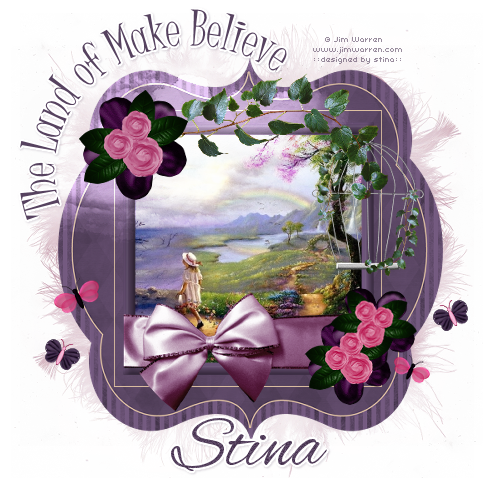
Here is a non-animated version:


© Tutorial written by Stina on 13th May 2009
All rights reserved
Saturday, May 2, 2009

Lil Miss Princess


Supplies
 
Scrap kit of choice - I am using two parts of the "Litte Miss Princess" theme kits from Exquisite Scraps by designers Oopsie Daisy and Bits n' Bobs
The Princess Word Art is from
Creative Intentionz part of the kit
Tube/Image/Photo of choice - I am using one of my own (and rather fitting for this kit I might add...lol)
Fonts of choice - I am using Hairspray
Plugin: Xero Fritillary
Paint Shop Pro and Animation Shop
 
Ready? Let's begin....
 
 
Open a new 600 x 600 blank canvas flood-filled white
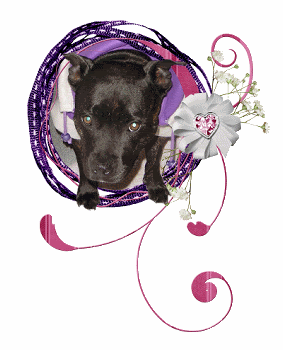
 
Paste odn-lmp09-RibFrame
Resize by 25%
 
Paste your image or photo of choice as new layer
Layers > Arrange > Move Down
(so image is below Frame)
**Duplicate and hide (optional if you wish to have your image protruding from Frame)**
 
Select your Freehand Tool and carefully draw around the inside ribbon of Frame
Selections > Invert
Delete then deselect
 
Activate your duplicated image
Layers > Arrange > Bring to Top
Lower opacity so you can see Frame behind image
 
Use Freehand Tool to draw around the subject in your image, choosing the points to protrude Frame
Selections > Invert
Selections > Modify > Feather by 2
Press delete two or three times
Deselect
 
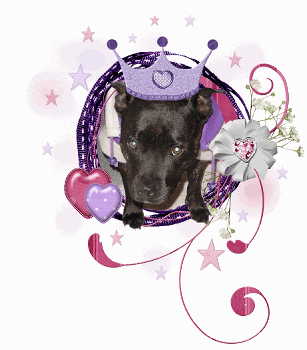
Carefully erase any remaining excess so you should have something like this:
 
 
Paste some stars around your tag, resizing as necessary
(I used BNB-brad-3 and BNB-brad-6)
Hide all layers except stars
Layers > Merge > Merge Visble
Rename Stars Blur
Unhide other layers
Still on Stars Blur layer, go to
Layers > Arrange > Send to Bottom
 
Adjust > Blur > Gaussian Blur with a Radius of 20.00
 
Activate top layer again
 
Paste some more stars around your Frame
Resize each as necessary
Hide all layers except stars
Layers > Merge > Merge Visble
Rename Stars
Lower opacity to 40
Unhide other layers
 
Paste Heart brads as new layers
(I used BNB-brad-1 and BNB-brad-4)
Resize both, the second slightly smaller than the first
Position together on the Frame
 
Paste a Crown as new layer
(I used BNB-princess-crown)
Resize by about 45% (depending on size of crown)
Position on the head of subject in your image/photo
 
 
Paste odn-lmp09-es-starblast as new layer
Rezie by 8%
Layers > Arrange > Send to Bottom
Position slightly to the right to your liking
 
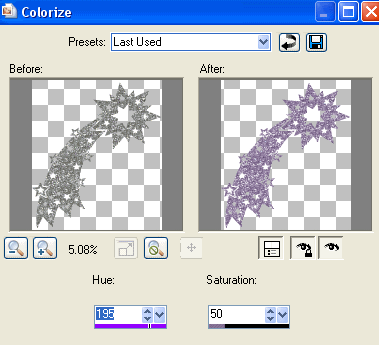
Adjust > Hue & Saturation > Colourise with the following settings:
 
 
Sharpen layer, then lower opacity to 45
 
Paste odn-lmp09-es-pinkstar
Resize by 30%
Layers > Arrange > Move Down
Position directly behind Frame
 
Duplicate then apply the same Colourisation as above
Set Blend Mode to Overlay
Layers > Merge > Merge Down
Lower opacity to 50
 
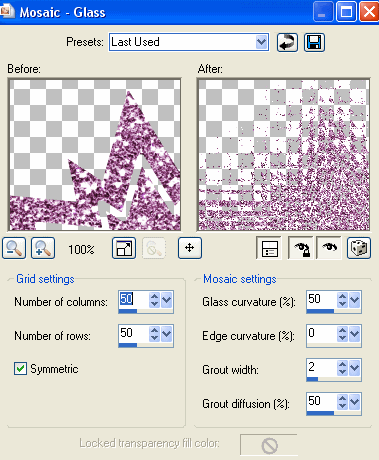
Effects > Texture Effects > Mosaic - Glass with the following settings:
 
 
Adjust > Blur > Gaussian Blur with a Radius of 20.00
 
Duplicate layer twice
Rename StarAni1, StarAni2 and StarAni3
 
Hide StarAni2 and StarAni3
Activate StarAni1
 
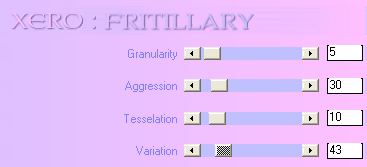
Effects > Plugins > Xero > Fritillary with the following settings:
 
 
Hide StarAni1 and activate StarAni2
Repeat Fritillary adjusting the Variation by 1
 
Hide StarAni2 and activate StarAni3
Repeat Fritillary adjusting the Variation by 1 again
 
Now activate the Princess Crown layer
With your Magic Wand select the areas on the points of the crown
Selections > Promote Selection to Layer
Duplicate twice
Deselect
 
Rename to Crown1, Crown2 and Crown3
 
Add some noise to each layer
Crown1 - 30
Crown2 - 35
Crown3 - 40
 
Add any other elements, drop shadows or Text you wish
 
Add your © copyright, licence and watermark
 
Now as there are so many animated layers let's set up the animation!!
 
First, hide the following layers:
StarAni2, StarAni3, Crown2 and Crown3
 
Edit > Copy Merged
Then Paste as NEW IMAGE
 
Now hide layers StarAni1 and Crown1
Unhide StarAni2 and Crown2
Edit > Copy Merged
 
Activate your NEW IMAGE
Edit > Paste as NEW LAYER
 
Finally, hide layers StarAni2 and Crown2
Unhide StarAni3 and Crown3
Edit > Copy Merged
Activate your NEW IMAGE again
Edit > Paste as NEW LAYER
 
You should now have a new image with THREE LAYERS
 
Select your Text Tool and font of choice
I am using Hairspray
 
Set your Foreground and Background to the same colour (one from your tag)
I chose #503776
Stroke width - 2.00
 
Type out your name
Apply a slight Gradient Glow in white
 
To animate, hide Layers2 and 3
Edit > Copy Merged
 
Open Animation Shop
Edit > Paste as New Animation
 
Back in PSP
Hide Layer1 and unhide Layer2
Edit > Copy Merged
 
In Animation Shop
Edit > Paste after Current Frame
 
Back in PSP
Hide Layer2 and unhide Layer3
Edit > Copy Merged
 
In Animation Shop
Edit > Paste after Current Frame
 
Finally save as a GIF and you're done!!
 
Thanks for trying my tutorial!
 
::st!na::
 

© Tutorial written by Stina on 2nd May 2009
All rights reserved