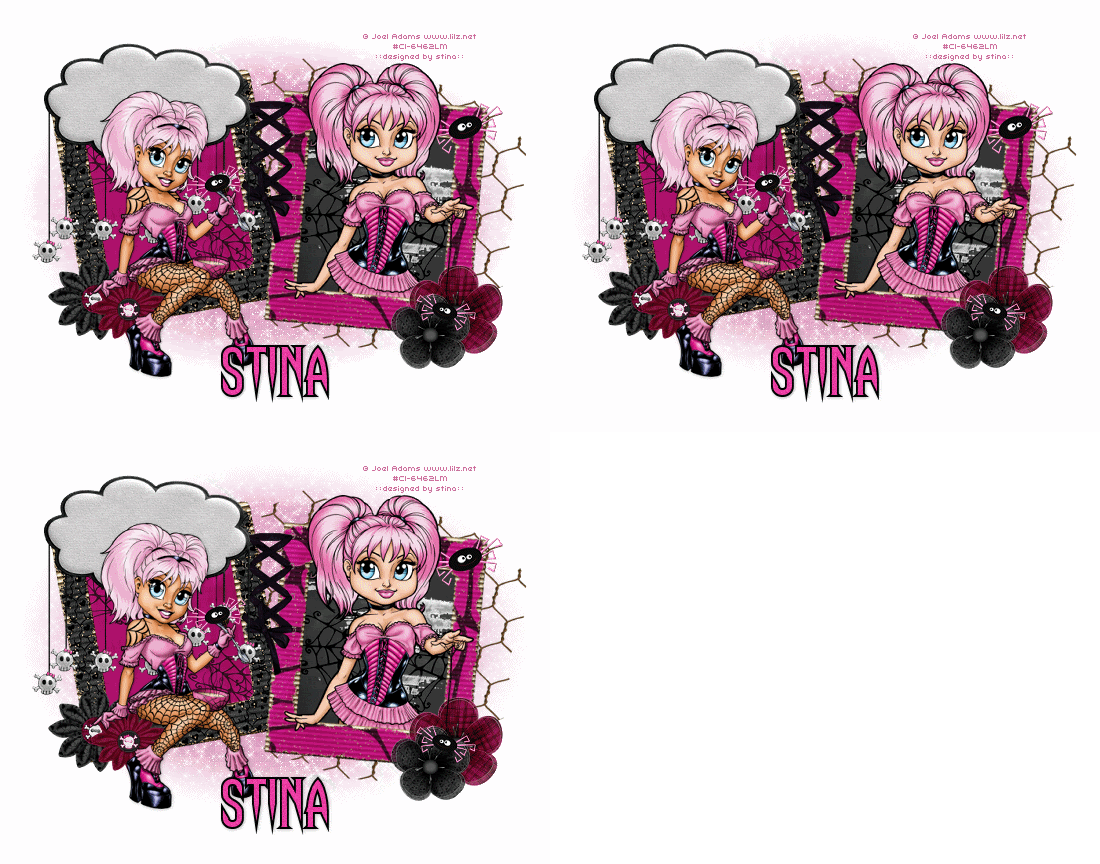
Supplies
Scrap kit of choice - I am using "Tickle Me Emo" by Gina of KiKeKa Designs available from Exquisite Scraps
Tubes of choice - I am using the delightful work of Joel Adams which is available with a licence through CILM
**PLEASE DO NOT USE HIS ARTWORK WITHOUT THE PROPER LICENCE**
Mask of choice - I am using WSL_Mask41 by Chelle
Font of choice - I am using Haunting Attraction
Plugins: Xero Fritillary and Xenofex 2 Constellation
Ready? Let's begin...
Open a new 600 x 600 blank canvas flood-filled white
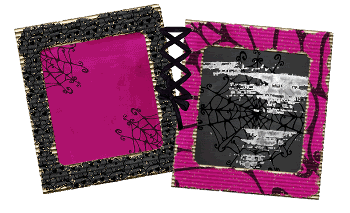
Paste Frame05 as new layer
Image > Rotate by 10 to the left
Resize by 45%
Image > Rotate by 10 to the left
Resize by 45%
Paste Frame04 as new layer
Image > Rotate by 5 to the right
Resize by 45%
Position both Frames alongside one another
Image > Rotate by 5 to the right
Resize by 45%
Position both Frames alongside one another
Paste an Eyelet ribbon or Stitches between the Frames to join them
Paste a paper of choice as new layer
Layers > Arrange > Send to Bottom
Image > Rotate 10 to the left
Resize by 33%
Position below the left Frame
Layers > Arrange > Send to Bottom
Image > Rotate 10 to the left
Resize by 33%
Position below the left Frame
Paste another paper of choice as new layer
Image > Rotate by 5 to the right
Resize by 33%
Position behind the right Frame
Image > Rotate by 5 to the right
Resize by 33%
Position behind the right Frame
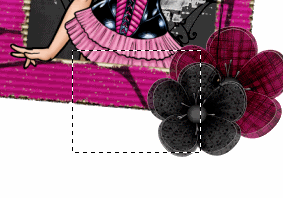
Paste a Flower of choice as new layer
Resize by 30%
Position in lower right
Resize by 30%
Position in lower right
Paste another Flower of choice as new layer
Resize by 25%
Position overlapping first flower
Resize by 25%
Position overlapping first flower
Paste another Flower of choice
Resize by 25%
Position in lower left
Resize by 25%
Position in lower left
Paste another Flower of choice
Resize by 30%
Position overlapping previous Flower
Resize by 30%
Position overlapping previous Flower
Paste Cloud as new layer
Resize by 35%
Position over one of the Frames
Resize by 35%
Position over one of the Frames
Paste Spider as new layer
Image > Rotate by 20 to the left
Resize by 25%
Position in upper right
Duplicate, then Layers > Merge > Merge Down
Image > Rotate by 20 to the left
Resize by 25%
Position in upper right
Duplicate, then Layers > Merge > Merge Down
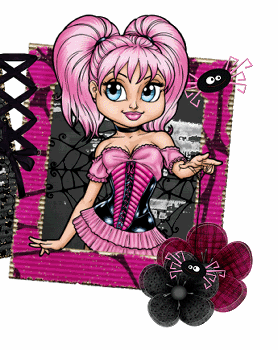
Paste your Tube as new layer
Resize as necessary
Position within right Frame
Resize as necessary
Position within right Frame
Duplicate and place one layer below Frame
Select the inside of your Frame
Selections > Modify > Expand by 10
Selections Invert
Delete on bottom tube layer
Deselect
Select the inside of your Frame
Selections > Modify > Expand by 10
Selections Invert
Delete on bottom tube layer
Deselect
On top tube layer make a selection around the bottom part of your tube and delete
Paste second tube as new layer
ResiZe as necessary
Position in left Frame
ResiZe as necessary
Position in left Frame
Activate Spider tube we pasted earlier
Duplicate, the Image > Mirror
Resize by 75%
Position a the end of Miss Muffet's web
Duplicate, the Image > Mirror
Resize by 75%
Position a the end of Miss Muffet's web
Paste Paper of choice as new layer
Layers > Arrange > Send to Bottom
Layers > Arrange > Send to Bottom
Layers > New Mask Layer > From Image
Mask of choice
OK
Layers > Merge > Merge Down
Lower opacity to 50
Mask of choice
OK
Layers > Merge > Merge Down
Lower opacity to 50
Paste RustedWire as new layer
Image > Rotate by 20 to the right
Resize by 60%
Position behind right Frame
Image > Rotate by 20 to the right
Resize by 60%
Position behind right Frame
Crop to mask layer and resize
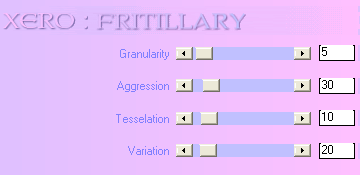
Effects > Plugins > Xero > Fritillary with the following settings:
Select your Text Tool and font of choice
I am using Haunting Attraction
I am using Haunting Attraction
Text colours are:
Foreground - #000000
Background - #eb3da3
Foreground - #000000
Background - #eb3da3
Stroke width - 2.0
Type out your name
Objects > Align > Horizontal Centre in Canvas
Convert to raster layer
Apply drop shadow of choice
Objects > Align > Horizontal Centre in Canvas
Convert to raster layer
Apply drop shadow of choice
Finally, add your © copyright, licence and watermark, then save as a GIF or JPG and you're done!
** IF YOU WISH TO ANIMATE PLEASE FOLLOW THESE NEXT STEPS **
** IF YOU WISH TO ANIMATE PLEASE FOLLOW THESE NEXT STEPS **
Activate the Mask Layer
Duplicate twice and rename Sparkle1, Sparkle2 and Sparkle3
Hide Sparkle2 and Sparkle3 activating only Sparkle1
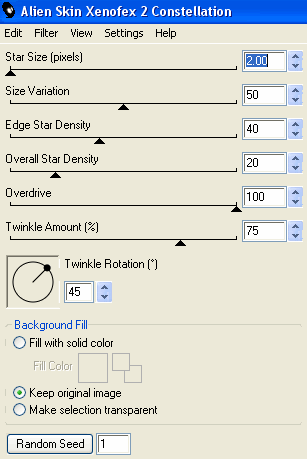
Effects > Plugins > Xenofex 2 > Constellation with the following settings:
Duplicate twice and rename Sparkle1, Sparkle2 and Sparkle3
Hide Sparkle2 and Sparkle3 activating only Sparkle1
Effects > Plugins > Xenofex 2 > Constellation with the following settings:
Hide Sparkle1 and activate Sparkle2
Apply the Constellation effect, adjusting the Random Seed
Hide Sparkle2 and activate Sparkle3
Apply the Constellation effect again, adjusting the Random Seed once more
Hide Sparkle2 and Sparkle3 with only Sparkle1 visible
Edit > Copy Merged
Open Animation Shop
Edit > Paste as New Animation
Back to PSP
Hide Sparkle1 and activate Sparkle2
Edit > Copy Merged
In Animation Shop
Edit > Paste AFTER Current Frame
Back to PSP
Hide Sparkle2 and activate Sparkle3
Edit > Copy Merged
In Animation Shop
Edit > Paste AFTER Current Frame
Save as a GIF and you're done!
Thanks for trying my tutorial!
::st!na::
Here is a non-animated version:

© Tutorial written by Stina on 25th May, 2009
All rights reserved

No comments:
Post a Comment