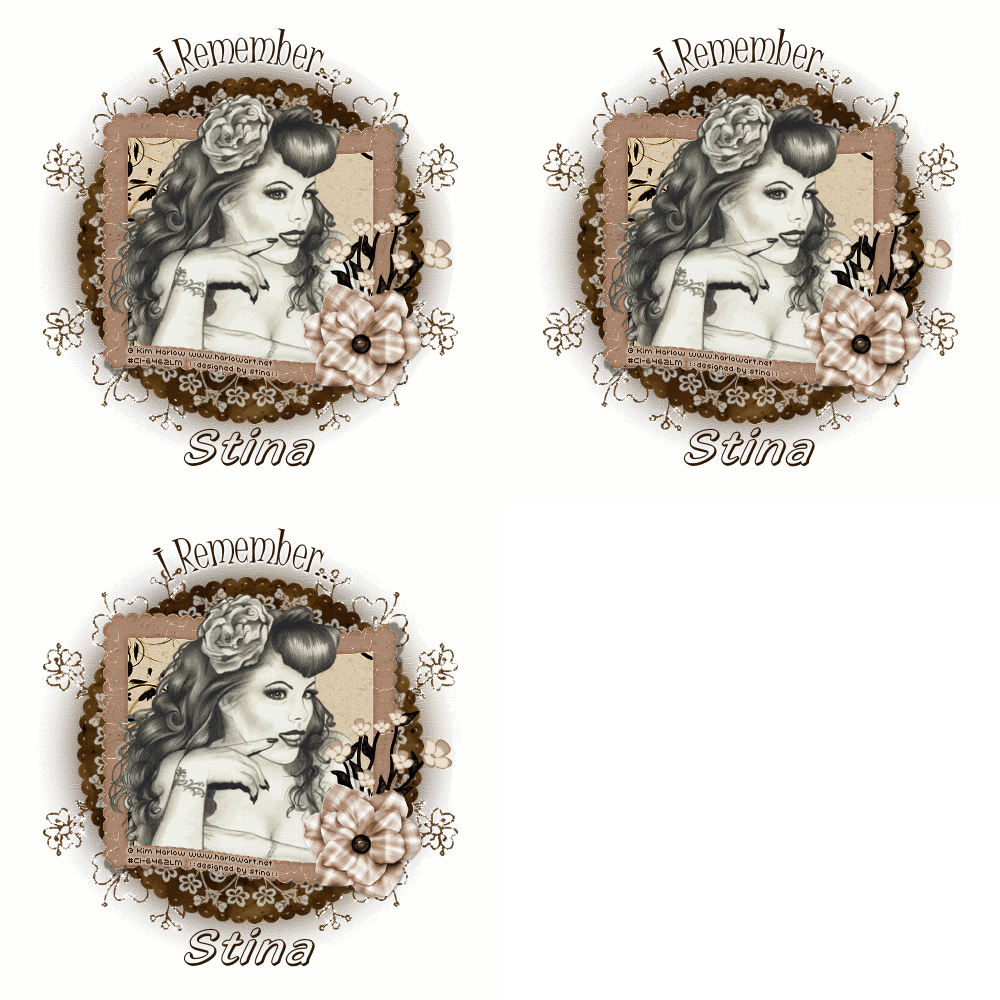
Supplies
Scrap kit of choice - I am using "New and Old" by Designs by Ali which is available for a limited time from Scraps with Attitude, Stargazer Scraps and Paradise 4 Scrappers
Tube if choice - I am using the lovely artwork of Kim Harlow which is available from CILM
Lace tube of choice - the one I used is here
Fonts of choice - I am using Juice ITC and Highlight LET
Plugin: FM Tile Tools Blend Emboss
Plugin: Simple > Top Left Mirror
Plugin: Filters Unlimited > Photo Aging Kit > Cracked Paper and Hair & Dust
Plugin: Alien Skin Xenofex 2 > Constellation
Ready? Let's begin...
Open a new 600 x 600 blank canvas flood-filled white
Paste one of the templates as new layer
Resize by 80%
Resize by 80%
LEAVE IN POSITION
Duplicate and on bottom layer go to
Adjust > Blur > Gaussian Blur with a Radius of 25.00
Adjust > Blur > Gaussian Blur with a Radius of 25.00
Still on same layer
Effects > Texture Effects > Fine Leather with the following settings:
Effects > Texture Effects > Fine Leather with the following settings:
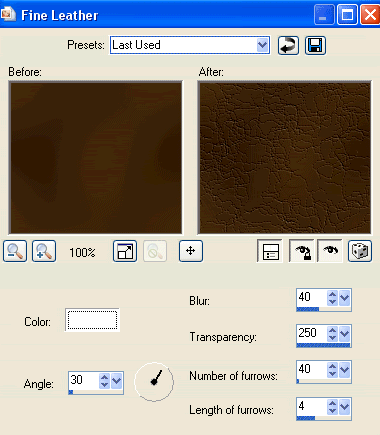
Then Effects > Plugins > FM Tile Tools > Blend Emboss with default settings
Activate top layer
Paste a Frame as new layer
Resize by 60%
Position centrally over template
Paste a Frame as new layer
Resize by 60%
Position centrally over template
Select the inside of Frame with your Magic Wand
Selections > Modify > Expand by 10
Selections > Modify > Expand by 10
Paste DBA Paper5 as new layer
resize by 60%
Selections > Invert
Delete and deselect
resize by 60%
Selections > Invert
Delete and deselect
Layers > Arrange > Move Down
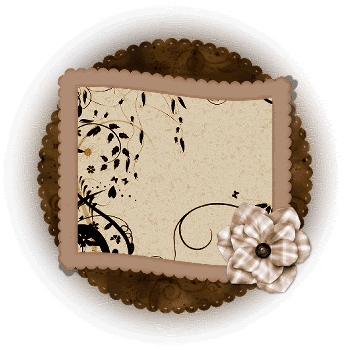
You should now have something a little like this:
Paste one of the Doodles as new layer
Resize by 50%
Place in upper left
Layers > Arrange > Send to Bottom
Position to your liking
Resize by 50%
Place in upper left
Layers > Arrange > Send to Bottom
Position to your liking
Effects > Simple > Top Left Mirror
Resize by 95% Bicubic resample
Resize by 95% Bicubic resample
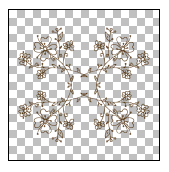
Activate your Template layer (not the blurred one)
Paste your lace of choice as new layer
If using the one I supplied resize by 85%
Lower opacity to around 70%
Paste your lace of choice as new layer
If using the one I supplied resize by 85%
Lower opacity to around 70%
Back to top layer and paste your tube of choice as new layer
Resize as necessary
Duplicate and move copy to layer below Frame
Hide top tube copy
Resize as necessary
Duplicate and move copy to layer below Frame
Hide top tube copy
Select the inside of your Frame with your Magic Wand
Selections > Modify > Expand by 10
Selections > Invert
Activate tube below Frame
Press delete then deselect
Selections > Modify > Expand by 10
Selections > Invert
Activate tube below Frame
Press delete then deselect
Unhide tube above Frame
With your Freehand Tool draw a selection around the bottom part of your Tube
With your Freehand Tool draw a selection around the bottom part of your Tube
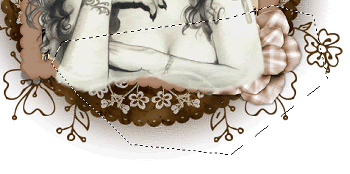
Press delete then deselect
Crop and resize
With your Magic Wand set to the following:
Mode - Add (shift)
Match Mode - RGB Value
Tolerance - 22
Contiguous - checked
Tolerance - 0
Mode - Add (shift)
Match Mode - RGB Value
Tolerance - 22
Contiguous - checked
Tolerance - 0
Select your Frame NOT THE FLOWER!
Effects > Plugins > I.C.Net Software > Filters Unlimited > Photo Aging Kit > Cracked Paper with the following settings:
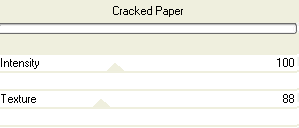
Then Effects > Plugins > I.C.Net Software > Filters Unlimited > Photo Aging Kit > Hair & Dust with the default settings
Deselect
Paste a flower stem bunch as new layer
Resize by 30%
Position to the right over flower on Frame corner
Resize by 30%
Position to the right over flower on Frame corner
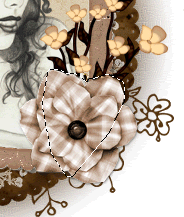
Select your Freehand Tool to draw around the flower on the Frame
Selections > Modify > Feather by 2
Delete then deselect
Selections > Modify > Feather by 2
Delete then deselect
Duplicate
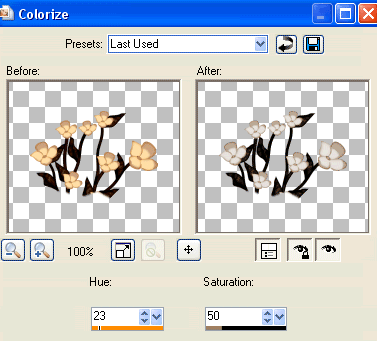
Adjust > Hue & Saturation > Colourise with the following settings:
Adjust > Hue & Saturation > Colourise with the following settings:
Lower opacity to 80
Layers > Merge > Merge Down
Layers > Merge > Merge Down
Select your Preset Shape Tool and set to Ellipse
Set your Foreground to a dark colour and your Background to null
Set your Foreground to a dark colour and your Background to null
Hold your shift key down and draw out a circle (holding Shift will ensure it remains symmetrical)
Objects > Align > Centre in Canvas
Objects > Align > Centre in Canvas
Select your Text Tool and font of choice
I am using Juice ITC
Set your Background to a colour matching your tube - I am using #2f1906
I am using Juice ITC
Set your Background to a colour matching your tube - I am using #2f1906
Hold your mouse over the Ellipse till you see a curved Letter A (or Rockin' A some call it)
Type out your text and position to your liking
Type out your text and position to your liking
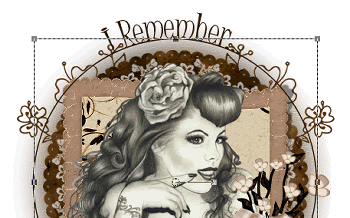
Open the Vector Layer in your Layer Palette and hide the Ellipse
Convert to Raster layer
Apply a Gradient Shadow with the Medium setting and Glow width of 3.00
Select your Text Tool again and another font of choice
I am using Highlight LET
Type out your name
Objects > Align > Horizontal Centre in Canvas
Convert to raster layer
Apply a drop shadow to your liking
I am using Highlight LET
Type out your name
Objects > Align > Horizontal Centre in Canvas
Convert to raster layer
Apply a drop shadow to your liking
Finally, add your © copyright, licence and watermark, then save as a GIF or JPG and you're done!
**IF YOU WISH TO ANIMATE PLEASE READ ON**
Activate your Doodle layer
Duplicate twice and rename Sparkle 1, Sparkle2 and Sparkle3
Duplicate twice and rename Sparkle 1, Sparkle2 and Sparkle3
Hide Sparkle2 and Sparkle3 activating only Sparkle1
Effects > Plugins > Alien Skin Xenofex 2 > Constellation with the following settings:
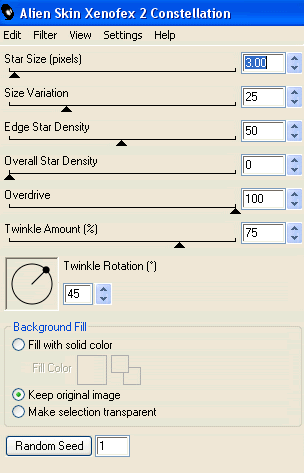
Hide Sparkle1 and activate Sparkle2
Apply the Constellation effect, adjusting the Random Seed
Apply the Constellation effect, adjusting the Random Seed
Hide Sparkle2 and activate Sparkle3
Apply same again, adjusting the Random Seed
Apply same again, adjusting the Random Seed
Hide Sparkle2 and Sparkle3 again with only Sparkle1 visible
Edit > Copy Merged
Edit > Copy Merged
Open Animation Shop
Edit > Paste as New Animation
Edit > Paste as New Animation
Back to PSP
Hide Sparkle1 and activate Sparkle2
Edit > Copy Merged
Hide Sparkle1 and activate Sparkle2
Edit > Copy Merged
In Animation Shop
Edit > Paste AFTER Current Frame
Edit > Paste AFTER Current Frame
Back to PSP
Hide Sparkle2 and activate Sparkle3
Edit > Copy Merged
Hide Sparkle2 and activate Sparkle3
Edit > Copy Merged
In Animation Shop
Edit > Paste after Current Frame
Edit > Paste after Current Frame
Finally, save as a GIF and you're done!!
Thanks for trying my tutorial!
::st!na::
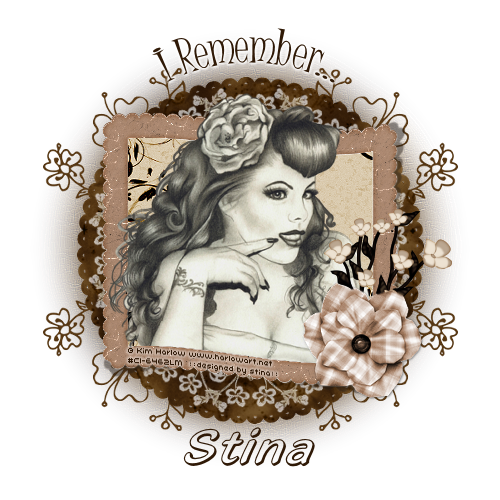
Here is a non-animated version:
© Tutorial written by Stina on 8th May 2009
All rights reserved

No comments:
Post a Comment