Please email me designed.by.stina@gmail.com with your creations. I'd love to see them.

Showing posts with label Cotton Candy Kreations. Show all posts

Friday, June 5, 2009

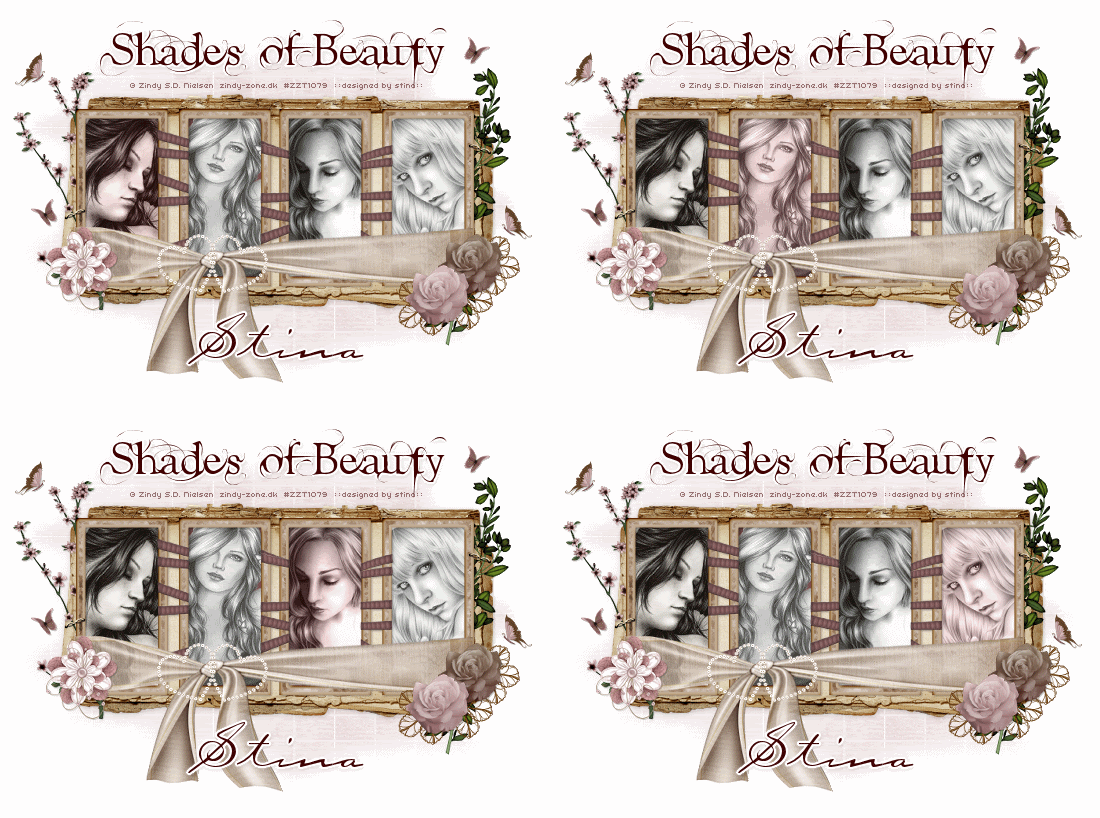
Shades of Beauty

 
Supplies
 
Scrap kit of choice - I am using the gorgeous "A Simple Dream" by Digital Delights available from Cotton Candy Kreations
Tubes of choice - I am using the lovely artwork of Zindy S.D. Nielsen which is available with a licence through her store
**PLEASE DO NOT USE HER ARTWORK WITHOUT THE APPROPRIATE LICENCE**
WSL_Mask84 by Chelle available from her blog
Fonts of choice - I am using AL Fantasy Type and Carptenter Script
 
 
Ready? Let's begin....
 
 
Open a new 700 x 500 blank canvas flood-filled white
 
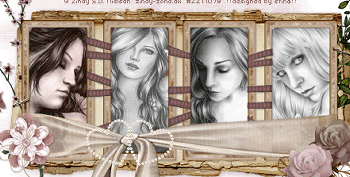
Paste FrameGroup as new layer
Resize by 15%
 
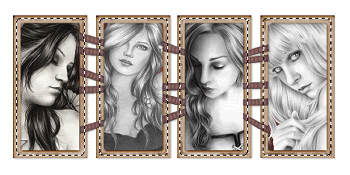
Select the area inside each of the Frames with your Magic Wand
Selections > Modify > Expand by 10
Add new raster layer
Paste Paper of choice INTO selection
Layers > Arrange > Move Down
 
KEEP SELECTED!!
 
Adjust > Blur > Gaussian Blur with a Radius of 20.00
Duplicate then set blend mode to Multiply
Layers > Merge > Merge Down
 
STILL SELECTED!!
 
Paste four Tubes of choice as new layers each
Resize each as necessary to fit inside Frame
Selections > Invert
Delete excess, then deselect
 
 
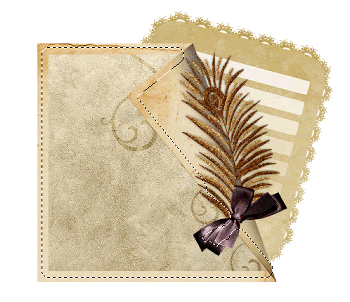
Paste JournalStack as new layer
Resize by 20%
Layers > Arrange > Send to Bottom
 
Position behind Frame to the left
Duplicate then move across to the right
 
Layers > Merge > Merge Down
 
Paste Staple as new layer
Layers > Arrange > Bring to Top
Image > Rotate by20 to the right
Resize by 12%
Position in upper right
Duplicate then Image > Mirror
Position on the left
 
Paste RibbonWrap as new layer
Resize by 14%
Position along bottom of Frame
 
Paste FramedDiamondsHeart as new layer
Resize by 8%
Position over Bow on Wrap
Duplicate, then set blend mode to Overlay
Layers > Merge > Merge Down
 
Paste Flower2 as new layer
Resize by 10%
Position to the left and between Frame and Journal layers
 
Paste Greenery as new layer
Resize by 10%
Position to the right
 
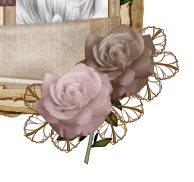
Paste a Rose of choice as new layer
Image > Mirror
Resize by 6%
Position in lower right
 
Paste another Rose of choice as new layer
Image > Mirror, then resize by 6% also
Place alongside first Rose
 
Paste Flower11 (wire flower) as new layer
Resize by 15%
Position in lower right BEHIND Roses
Duplicate, then move across slightly
Duplicate again, and move across
 
 
Paste Flower7 as new layer
Image > Mirror, then
Resize by 8%
Position to the left
 
Paste Butterfly1 as new layer
Resize by 6%
Duplicate, then Image > Mirror
Position both to liking
 
Paste Butterfly2 as new layer
Resize by 4%
Duplicate, then Image > Mirrot
Position both to liking
 
Apply a drop shadow of choice to your layers
 
Crop and resize
 
Paste Paper of choice as new layer
Resize by around 17%
Layers > Arrange > Send to Bottom
 
Layers > New Mask Layer > From Image
Apply WSL_Mask84
 
Select your Pick Tool (Deformation Tool in some versions) and use the nodes to pull the  Mask to your liking
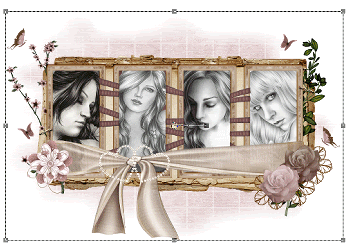
 

Layers > Merge > Merge Group
 
Lower opacity to 65
 
Select your Text Tool and font of choice
I am using AL Fantasy Type
Type out a phrase of choice
Objects > Align > Horizontal Centre in Canvas
Convert to raster layer
Apply a drop shadow of choice
 
Select another font of choice
I am using Carpenter Script
 
Type out your name
Objects > Align > Horizontal Centre in Canvas
Convert to raster layer
Apply some noise and any other effects you wish
Add a drop shadow of choice
 
Finally, add your © copyright, licence and watermark, then save as GIF or JPG and you're done!
 
 
** IF YOU WISH TO ANIMATE PLEASE FOLLOW THESE NEXT STEPS **
 
Activate your Tube Layers
Duplicate each once, then
Merge each of the ORIGINAL layers as one
Set blend mode to Luminance Legacy
Rename MAIN TUBES
 
Rename each of the duplicates to TUBE1, TUBE2, TUBE3 and TUBE4
 
Activate TUBE1 and lower the opacity to 50
Edit > Copy Merged


Open Animation Shop
Edit > Paste as New Animation
 
Back to PSP
Return TUBE1 to full opacity and lower TUBE2 to 50
Edit > Copy Merged
 
In Animation Shop
Edit > Paste AFTER Current Frame
 
Back to PSP
Return TUBE2 to full opacity and lower TUBE3 to 50
Edit > Copy Merged
 
In Animation Shop
Edit > Paste AFTER Current Frame
 
Back to PSP
Return TUBE3 to full opacity and lower TUBE4 to 50
Edit > Copy Merged
 
In Animation Shop
Edit > Paste AFTER Current Frame
 
Go to Frame Properties and change to 50, then save as a GIF and you're done!
 
Thanks for trying my tutorial!
 
::st!na::
 
 
Here is a non-animated version:
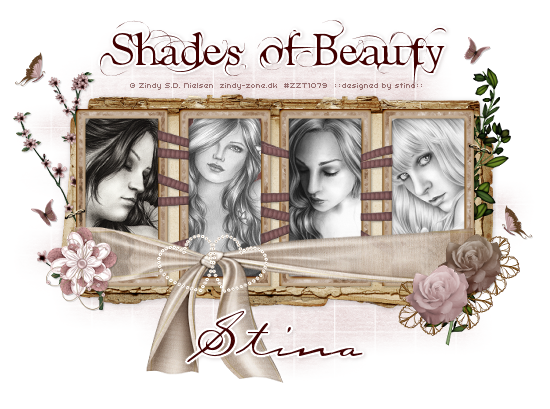


© Tutorial written by Stina on 5th June 2009
All rights reserved

Thursday, June 4, 2009

A Touch of Vintage


Supplies
 
Scrap kit of choice - I am using the gorgeous "Serenity" by Lynne of Babycakes Scraps which is available from Cotton Candy Kreations, Creative Scraps and Scraps with Attitude
Tube of choice - I am using the gorgeous artwork of Jennifer Janesko which is available with a licence from CILM
**PLEASE DO NOT USE HER ARTWORK WITHOUT THE APPROPRIATE LICENCE**
WSL_Mask7 by Chelle available from her blog
Fonts of choice - AL Age Old Love and BakerScript
Plugins: Xero Radiance, Penta.com Color Dot and Xenofex 2 Constellation
 
 
Ready? Let's begin....
 
 
Open a 700 x 500 blank canvas flood-filled white
 
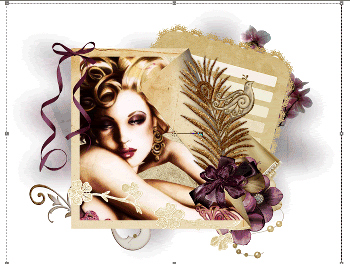
Paste PaperFrame as new layer
Resize by 60%
Move slightly to the left
 
Select the inside of the Frame with your Magic Wand
Selections > Modify > Expand by 10
Add a new raster layer
Paste paper of choice INTO selection
Layers > Arrange > Move Down
 
KEEP SELECTED!!
 
Duplicate, then set blend mode to Screen
Lower opacity to 50
Layers > Merge > Merge Down
 
STILL SELECTED!!
 
 
Paste Tube as new layer
Resize as necessary and position behind Frame
Duplicate
 
Effects > Plugins > Xero > Radiance with default settings, then
Lower opacity to 50
Deselect
 
Paste JournalPaper as new layer
Image > Rotate by 10 to the right
Resize by 70%
Layers > Arrange > Move Down
Move slightly to the right
 
 
Paste Fancy Bow as new layer
Resize by 20%
Position over top of existing bow on Frame
 
Paste SkinnyBow of choice as new layer
Image > Mirror, then
Image > Rotate by 5 to the right
Resize by 30%
Position in upper left of Frame

Paste PearlStrand as new layer
Resize by 25%
Position between Frame and JournalPaper layers
 
Paste Flower of choice as new layer
Resize by 25%
Position in lower right corner (behind FRame)
 
Paste second flower of choice as new layer
Resize by 25%
Position above first flower behind Frame
 
Paste third flower of choice
Resize by 25%
Position between first two flowers then move down two layers tucked behind them
 
Paste Handkerchief as new layer
Resize by 30%
Position behind flowers
 
Paste Necklace as new layer
Layers > Arrange > Bring to Top
Image > Rotate by 40 to the left
Resize by 30%
Position in lower left
 
Paste CreamLace as new layer
Resize by 55%
Position along bottom of Frame
 
Paste Glitter Bird as new layer
Resize by 40%
Position amidst the feather cluster on Frame
 
Paste Blossoms as new layer
Resize by 25%
Layers > Arrange > Send to Bottom
Position behind JournalPaper
 
Paste Swirl Doodle
Resize by 25%
Position in lower left
 
Paste Paper of choice as new layer
Send to bottom
 
Layers > New mask Layer > From Image
Apply WSL_Mask7
 
Select your Pick Tool (Deformation Tool in some versions)
Use the nodes to pull the mask layer up and out to size
 
 
Layers > Merge > Merge Group
 
Crop and resize to liking
 
Still on Mask Layer, go to
 
Effects > Plugins > Penta.com > Color Dot with default settings
 
Select your Text Tool and font of choice
I am using two fonts - AL Age Old Love and BakerScript
Text colour is #411728
Type out your text and position to liking
Add any drop shadow of choice
 
Select another font or one of the same
I am using BakerScript
 
Type out your name
Objects > Align > Horizontal Centre in Canvas
Convert to raster layer
Apply a drop shadow of choice
 
Finally, add your © copyright, licence and watermark, then save as GIF or JPG and you're done!
 

** IF YOU WISH TO ANIMATE PLEASE FOLLOW THESE NEXT STEPS **
 
Activate your Mask Layer
Duplicate twice and rename Sparkle1, Sparkle2 and Sparkle3
 
Hide Sparkle2 and Sparkle3 leaving only Sparkle1 visible
 
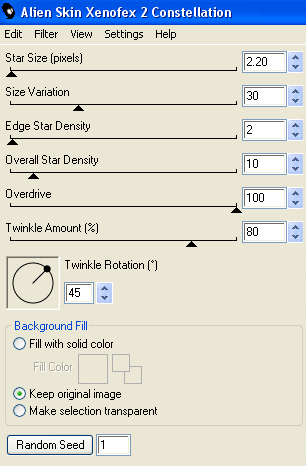
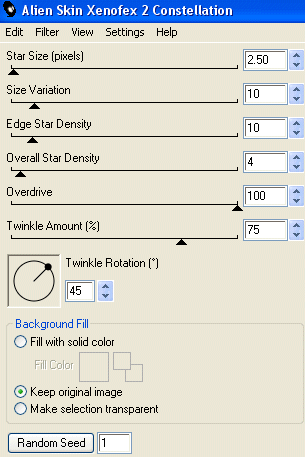
Effects > Plugins > Xenofex 2 > Constellation with the following settings:
 

Hide Sparkle1 and activate Sparkle2
Apply the Constellation effect, adjusting the Random Seed
 
Hide Sparkle2 and activate Sparkle3
Apply the Constellation effect again, adjusting the Random Seed once more
 
Now for the animation part!
 
Hide Sparkle2 and Sparkle with only Sparkle1 visible
Edit > Copy Merged
 
Open Animation Shop
Edit > Paste as New Animation
 
Back to PSP
Hide Sparkle1 and activate Sparkle2
Edit > Copy Merged
 
In Animation Shop
Edit > Paste AFTER Current Frame
 
Back to PSP
Hide Sparkle2 and activate Sparkle3
Edit > Copy Merged
 
In Animation Shop
Edit > Paste AFTER Current Frame
 
Now save as a GIF and you're done!
 
Thanks for trying my tutorial!
 
::st!na::
 
 
Here is a non-animated version:


© Tutorial written by Stina on 4th June 2009
All rights reserved
Sunday, May 24, 2009

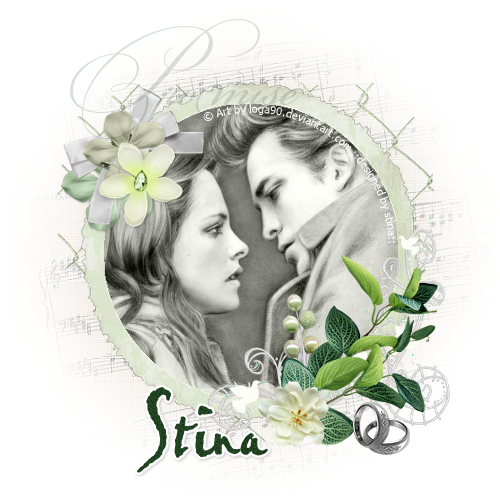
Promise Me


Supplies
 
Scrap kit of choice - I am using the gorgeous "Promise Me" kit by Designs by Helly available from Paradise 4 Scrappers and Cotton Candy Kreations
Tube or image of choice - I am using the artwork of Kat aka Loga90 available here
WSL_Mask62 by Chelle available from her blog
Fonts of choice - I am using BickhamScriptFancy and Pablo LET
Plugin: Eye Candy 4000 Gradient Glow (optional)
 
 
Ready? Let's begin....
 
 
Open a new 600 x 600 blank canvas flood-filled white
 
Set your Selection Tool to Circle
Position pointer in centre of canvas and draw out circle
 
Add a new raster layer
Paste a paper of choice into selection
 
KEEP SELECTED!!
 
Selections > Modify > Contract by 30
 
 
Delete then deselect
 
Selections > Select All, then Float, the Defloat
 
Effects > Plugins > IC Net Software > Filters Unlimited > Edges, Round
Select Round Edge 17
OK
 
 
Select the inside of Frame with Magic Wand
Selections > Modify > Expand by 10
Add new raster layer
Paste paper of choice into selection
Deselect
Layers > Arrange > Move Down
 
Paste Flourish as new layer
Image > Rotate by 5 to the left
Resize by 18%
Position to the lower right
 
Paste Branch as new layer
Image > Mirror, then
Image > Rotate by 15 to the right
Resize by 25%
Position over Flourish in lower right
 
Paste Bow as new layer
Image > Rotate by 25 to the right
Resize by 25%
Position over the Branch to your liking
 
Paste WeddingBandSet as new layer
Resize by 40%
Position in lower right alongside Flourish and Branch
 
 
Paste a Flower as new layer
Resize by 35%
Position in upper left
 
Paste another Flower as new layer
Resize by 30%
Position over first flower
 
Paste PinnedFlower as new layer
Resize by 25%
Position over both flowers
 
Paste Bow as new layer
Image > Rotate by 30 to the left
Resize by 30%
Position within the Flower cluster between the first and second flowers
 

Paste Paper of choice as new layer
Layers > Arrange > Send to Bottom
Resize by 60%
Layers > New Mask Layer > From Image
Locate WSL_Mask62
OK
Layers > Merge > Merge Group
 
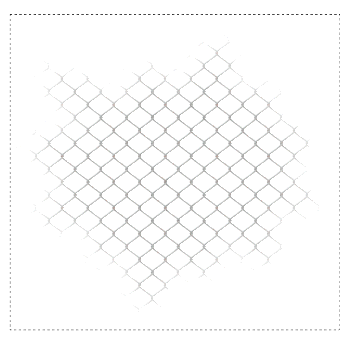
Paste HeartShapeFence as new layer
Resize by 90%
Lower opacity to 45
 
Crop to Mask layer and resize
 
Activate Frame layer
Paste Tube or Image of choice
Layers > Arrange > Move Down
Resize as necessary
 
Select the inside of Frame with your Magic Wand
Selections > Modify > Expand by 10
Selections > Invert
Delete then deselect
 
Activate top layer
 
Select Text Tool and font of choice
I am using BickhamScriptFancy
Type text of choice
Objects > Align > Horiztonal Centre in Canvas
Convert to raster layer
Lower opacity to 30
 
Select another font of choice
I am using Pablo LET (Bella's handwriting)
Text colour is #204221
Type out your name and position
Convert to raster layer
Apply a slight Gradient Glow in white
Add a drop shadow of choice
 
Finally, add your © copyright, licence and watermark, then save as a GIF or JPG and you're done!
 
Thanks for trying my tutorial!
 
::st!na::
 
 
© Tutorial written by Stina on 24th May 2009
All rights reserved
Friday, May 22, 2009

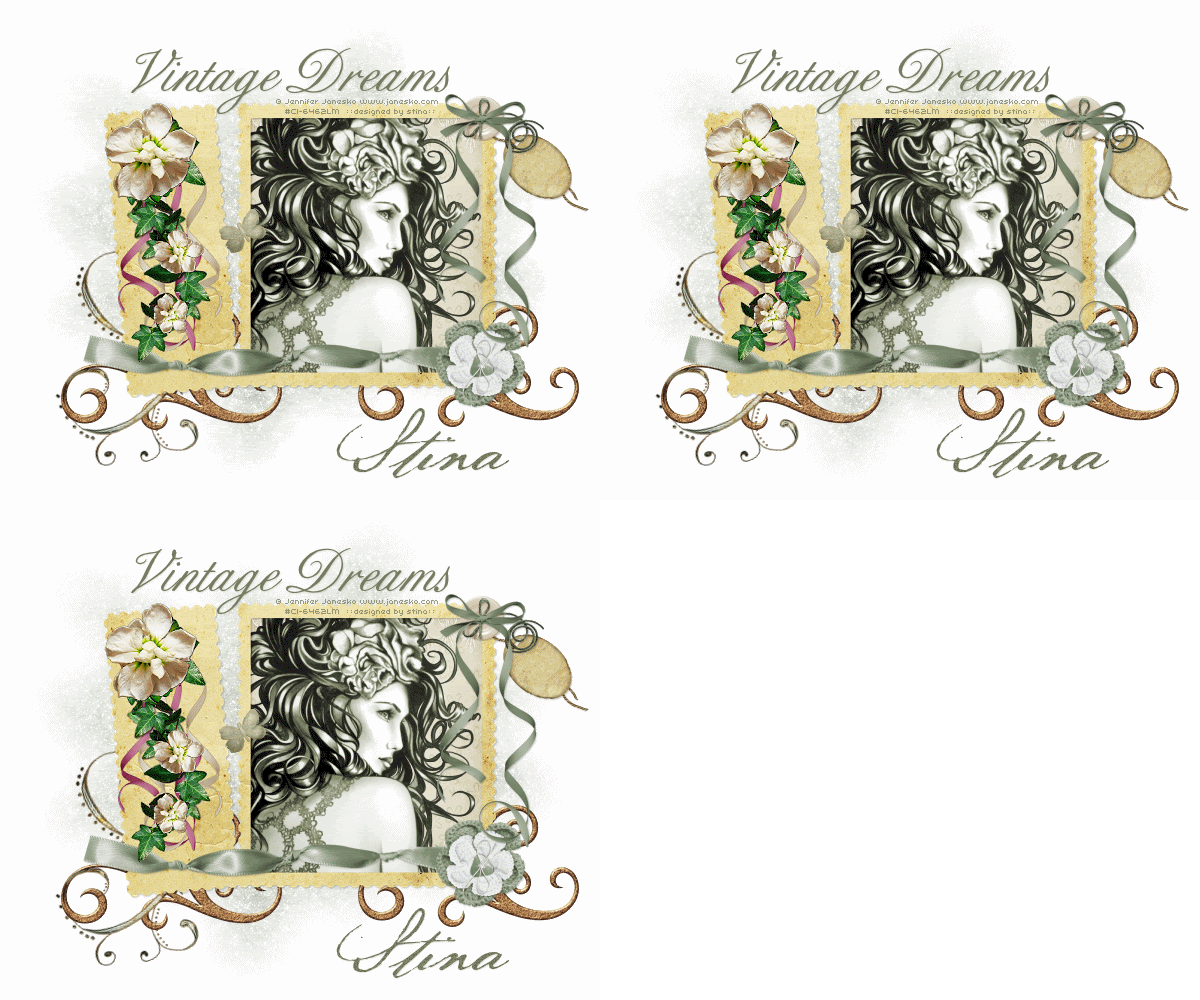
Vintage Dreams

 
Supplies
 
Scrap kit of choice - I am using "Vintage Floral" by Babycakes Scraps available from Creative Scraps, Scraps With Attitude and Cotton Candy Kreations
Tube of choice - I am using the lovely artwork of Jennifer Janesko which is available with a licence from CILM
**PLEASE DO NOT USE HER ARTWORK WITHOUT THE APPROPRIATE LICENCE**
WSL_Mask7 by Chelle available from her blog
Fonts of choice - I am using BixAntiqueScriptHmk and Baker Script
Plugin: Xenofex 2 Constellation
 
 
Ready? Let's begin....
 
 
Open a new 600 x 600 blank canvas flood-filled white
 
Paste StampFrame as new layer
Resize by 70%
 
Select the area inside the Frame with your Magic Wand
Selections > Modify > Expand by 8
Add new raster layer
Paste Paper of choice INTO selection
Deselect
 
Layers > Arrange > Move Down
 
Paste RibbonFlower of choice as new layer
resize by 15%
Position in lower right
 
Paste a Ribbon of choice as new layer
Resize as necessary, depending on size
Position along bottom of Frame
 
With your Freehand Tool draw around the part of the leaf on the Frame that overlaps the Ribbon
Delete then deselect
 
 
Paste TiedButton as new layer
Resize by 25%
Position in upper right
 
Paste Bow & Ribbon as new layer
Resize by around 30%
Position in upper right over the centre of Button
 
Paste a Tag as new layer
Image > Rotate by 50 to the left
Resize by 15%
Position in upper right and below the Tied Button
 
 
Paste SwirlTwo as new layer
Resize by 30%
Position to the lower right
 
Layers > Arrange > Send to Bottom
 
Duplicate, then move across to the left
 
Paste Doodle as new layer
Resize by 40%
Use your Pick Tool to rotate slightly to the left
Position over Swirl in lower left
 
 
Paste Butterfly as new layer
Image > Rotate by 30 to the left
Resize by 10%
Position to your liking
 
Paste your Tube of choice as new layer
Resize as necessary and position
 
Paste Paper of choice as new layer
Layers > Arrange > Send to Bottom
 
Layers > New Mask Layer > From Image
Locate WSL_Mask7
OK
Layers > Merge > Merge Group
Lower opacity to 80
 
Activate top layer
 
Select your Text Tool and font of choice
I am using BixAntiqueScriptHmk
Text colour is #787c62
 
Type out text of choice
Position and convert to raster layer
Apply a drop shadow of choice
 
Select another font of choice
I am using BakerScript
 
Type out your name and position
Convert to raster layer
Apply drop shadow of choice
 
Finally, add your © copyright, licence and watermark, then save as a GIF or JPG and you're done!
 
 
** IF YOU WISH TO ANIMATE PLEASE FOLLOW THESE NEXT STEPS **
 
Activate the Mask Layer
Duplicate twice and rename Sparkle1, Sparkle2 and Sparkle3
 
Hide Sparkle2 and Sparkle3 activating only Sparkle1
 
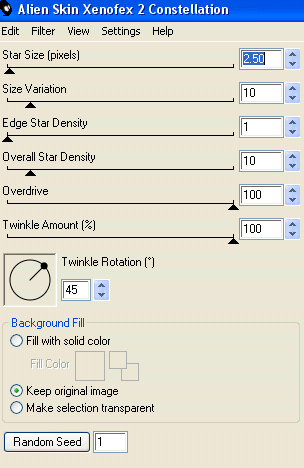
Effects > Plugins > Xenofex 2 > Constellation with the following settings:
 
 
Hide Sparkle1 and activate Sparkle2
Apply the Constellation effect, adjusting the Random Seed
 
Hide Sparkle2 and activate Sparkle3
Apply the Constellation effect again, adjusting the Random Seed once more
 
Hide Sparkle2 and Sparkle3 with only Sparkle1 visible
Edit > Copy Merged
 
Open Animation Shop
Edit > Paste as New Animation
 
Back to PSP
Hide Sparkle1 and activate Sparkle2
Edit > Copy Merged
 
In Animation Shop
Edit > Paste AFTER Current Frame
 
Back to PSP
Hide Sparkle2 and activate Sparkle3
Edit > Copy Merged
 
In Animation Shop
Edit > Paste AFTER Current Frame
 
Save as a GIF and you're done!
 
Thanks for trying my tutorial!
 
::st!na::
 
 
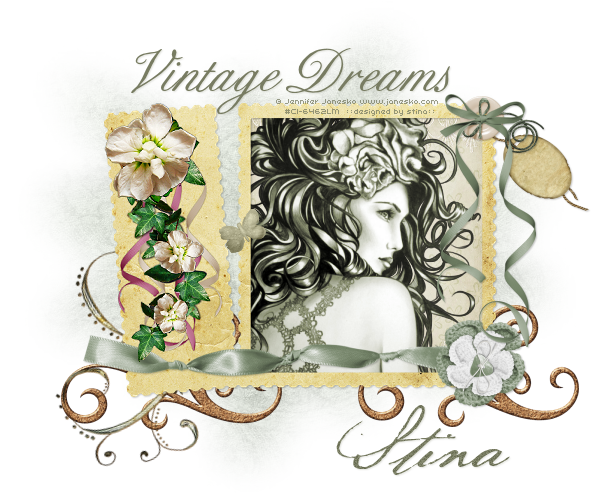
Here is a non-animated version:


© Tutorial written by Stina on 22nd May 2009
All rights reserved
Saturday, May 9, 2009

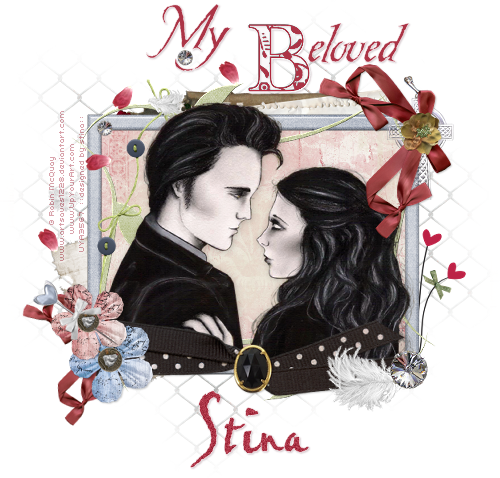
Beloved


Supplies
 
Scrap kit of choice - I am using "At Last" by
Helly available from Cotton Candy Kreations and Scraps With Attitude
Tube of choice - I am using the lovely artwork featuring Bella and Edward by
Robin McQuay available from UpYourArt.com
WSL_Mask7 by Chelle available from her
blog
Plugin: Filters Unlimited Square Edge 04
Plugin: Xenofex 1 Distress
Fonts of choice - I am using Be Safe (Edward's handwriting) and Pablo LET (Bella's handwriting)
 
 
Ready? Let's begin....
 
 
Open a grungy paper of choice - I am using Paper8 from Helly's kit
Shift D to duplicate then close off original
Resize paper to 500 x 500
 
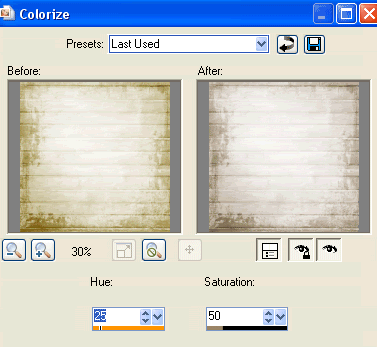
Adjust > Hue & Saturation > Colourise with the following settings:
 
 
Layers > Promote Background to Layer
 
Effects > Plugins > Filters Unlimited > Edges, Square > Square Edge 04
 
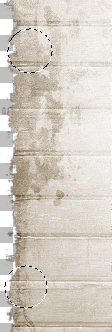
Set your Selection Tool to Circle and draw out two circles along the left hand edge of your paper
 
 
Press delete but KEEP SELECTED!
 
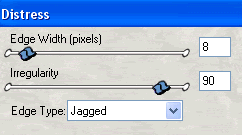
Effects > Plugins > Xenofex 1 > Distress with the following settings:
 
 
Ok, let's minimise that for now - we'll come back to it later
 
Open a new 700 x 9600 blank canvas flood-filled white
 
Add a new raster layer and Select All
Paste Paper4 (or some grungy paper) into Selection and deselect
 
Layers > New Mask Layer > From Image
Locate WSL_Mask7
OK
In Layer Palette click on the mask and resize by 95%
Layers > Merge > Merge Group
 
With your Selection Tool choose from your Tool Options Palette CREATE SELECTION FROM: and select Layer Opaque
This will show Marching Ants around your Mask Layer
 
 
Image > Crop to Selection
 
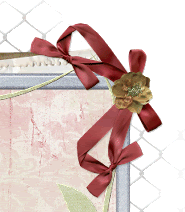
Paste PaperFrame as new layer
Resize by 60%
 
Select all the blank areas within the Frame with your Magic Wand
Selections > Modify > Expand by 10
 
Paste Paper of choice as new layer
Resize by 35%
Selections > Invert
Then press delete
Deselect
 
Layers > Arrange > Move Down
 
Activate the Distressed Paper we made earlier
Paste as new layer
Image > Rotate by 15 to the left
Resize by 40%
Position to the lower left protruding from corner of the Frame
Layers > Arrange > Move Down so that it is below the Frame and Paper
 
Activate top layer again
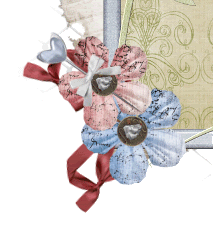
Paste PaperFlower2 as new layer
Resize by 50%
Position in lower left
 
Paste PaperFlower1 as new layer
Resize by 45%
Position alongside first flower in lower left
 
Paste Pin1 as new layer
Image > Rotate by 55 to the left
Resize by 60%
Position over top Flower and erase part of the pin
 
Paste Ribbon as new layer
Image > Rotate by 10 to the left
Resize by 15%
Place in the lower left and Move Down below the Flowers and Pin layers
Position so that it is protruding
 
 
Paste Edge as new layer
Resize by 30%
Move to layer below Paper background
Position it to the top protruding from behind Frame
 
Paste Ribbon as new layer again
Image > Rotate by 10 to the left
Resize by 20%
Position in upper right
 
 
Paste String as new layer
Resize by 25%
Position with one of the bows on the Frame or Stems to your liking
Duplicate then set Blend Mode to Multiply
Lower opacity to 50
Layers > Merge > Merge Down
 
Paste HeartFlower as new layer
Image > Rotate by 15 to the right
Resize by 25
Position to the lower right behind the Frame
 
Paste your tube as new layer
Resize as necessary and position to your liking
 
Use your Selection Tool to make a selection along the bottom of the Frame around the bottom of your Tube
 
 
Selections > Modify > Feather by 2
On your tube layer press delete once or twice
Deselect
 
Paste a Ribbon of choice as new layer (I am using the Bow from Helly's "You Are My Life Now")
Resize as necessary
Position along bottom of Frame
 
Paste Feather as new layer
Image > Mirror
Resize by 75%
Position in lower right
 
Paste Trail as new layer
Resize by 40%
Position to your liking
 
Resize tag to your liking
 
Select a letter from the Alpha and paste as new layer
Resize by 35%
 
Select your Text Tool and font of choice
I am using Be Safe (Edward's handwriting)
Use your Eye Dropper Tool to select the colour from the Alpha to match your text
Complete the word, position and convert to raster layer
 
Layers > Merge > Merge Down
 
Apply a drop shadow:
H & V - 1
Opacity - 20
Blur - 2.00
Colour - a dark colour that blends with your text
 
 
Select your Text Tool again and another font of choice
I am using Pablo LET (Bella's handwriting)
Using the same colour type out your name
Objects > Align > Horizontal Centre in Canvas
Convert to raster layer
 
Add some noise and apply the same drop shadow as above
 
Finally, add your © copyright, licence and watermark, then save as a GIF or JPG and you're done!
 
Thanks for trying my tutorial!
 
::st!na::


© Tutorial written by Stina on 9th May 2009
All rights reserved
Sunday, April 12, 2009

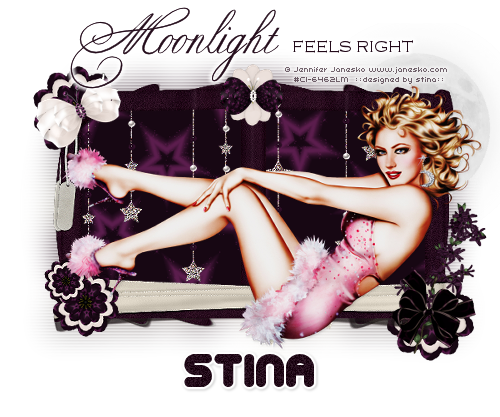
Moonlight

 
Supplies
 
Scrap kit of choice - I am using the gorgeous "Midnight Dreams" by Rachelz Expressionz available from Cotton Candy Kreations and Stargazer Scraps
Tube of choice - I am using the lovely artwork of Jennifer Janesko which can be purchased from CILM
**PLEASE DO NOT USE HER ARTWORK WITHOUT THE APPROPRIATE LICENCE**
Fonts of choice - I am using Copper Alt Caps Expert, Copperplate MedLight and Copulent Caps
Plugin: Eye Candy 4000 Gradient Glow
 
Let's begin!
 
 
Open a new 600 x 600 blank canvas flood-filled white
 
Paste Frame1 as new layer
Resize by 70%
 
Paste Paper5 as new layer
Resize by 65%
Layers > Arrange > Move Down
 
Use your Magic Wand to select the inside areas of the Frame
Selections > Modify > Expand by 10
Selections > Invert
Delete then deselect
 
Paste Stars1 as new layer
Resize by 53%
Position beneath Frame
Use your Eraser Tool to erase any excess
 
Paste Butterfly3 as new layer
Image > Rotate by 25 to the left
Resize by 25%
Position in upper left over the bow
 
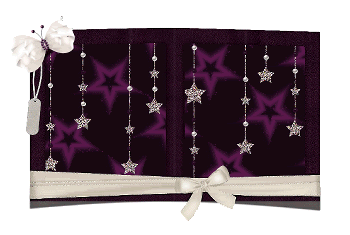
You should have something like this:
 
 
Paste tube as new layer
Resize if necessary
Place in position
Add a drop shadow of choice
 
Paste Forcynthia1 as new layer
Image > Rotate by 25 to the left
Resize by 50%
Position in the lower left
 
Paste PrettyBow5 as new layer
Image > Rotate by 5 to the right
Resize by 30%
Position with Flower
 
Paste Flower5 as new image
Resize by 30%
Paste Flower4 as new layer
Resize by 25%
Paste Flower5 as new layer again
Resize by 20%
Layers > Merge > Merge Visible
 
Paste this new flower as a new layer
Layers > Arrange > Send to Bottom
Duplicate and place in various positions to your liking
Duplicate again
Layers > Arrange > Bring to Top
Resize by 80%
Position to the lower left
Duplicate and resize by 70%
Move slightly to the side
 
Paste Flower4 as new layer
Resize by 20%
Position in centre top
 
Paste Butterfly1 as new layer
Resize by 18%
Position over Flower
 
Resize tag
 
Activate your Frame layer
Duplicate
Layers > Arrange > Send to Bottom
 
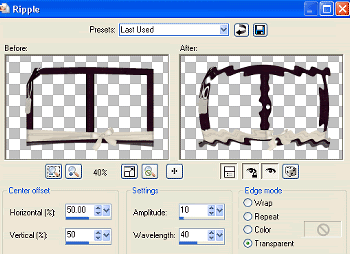
Effects > Distortion Effects > Ripple with the following settings:
 
 
Duplicate again
On lower layer
Adjust > Blur > Gaussian Blur with a radius of 15.00
 
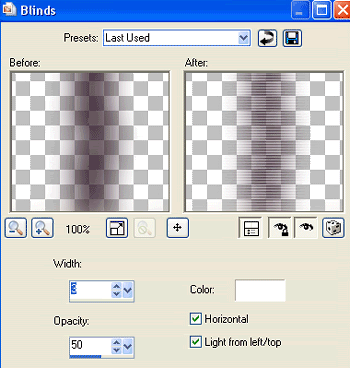
Effects > Texture Effects > Blinds with the following settings:
 
 
Activate top layer
Paste Moon2 as new layer
Resize by 55%
Position in upper corner
Layers > Arrange > Send to Bottom
Layers > Arrange > Move Up
Position to liking
Duplicate
Set blend mode to Soft Light
 
Select your Text Tool and font of choice
I chose Copper Alt Caps Expert
Materials Palette set to:
Foreground - #220a19
Background - #220a19
Stroke width - 0.50
 
Type out the word "Moonlight"
Convert to raster layer
 
Select another font
I chose Copperplate MedLight
Turn off the Foreground
Type the words "feels right"
Convert to raster layer
 
Layers > Merge > Merge Down
Effects > Plugins > Eye Candy 4000 > Gradient Glow
Glow width - 5.00
Soft Corners - 25
Opacity - 100
Setting - Medium
Colour - White
 
Select another font and type out your name
Objects > Align > Horizontal Centre in Canvas
Convert to raster layer
Add any effects you wish
 
Finally, add your © copyright, licence and watermark then save as a GIF and you're done!
 
Thank you for trying my tutorial!
 
::st!na::
 

© Tutorial written by Stina on 11th April 2009
All rights reserved
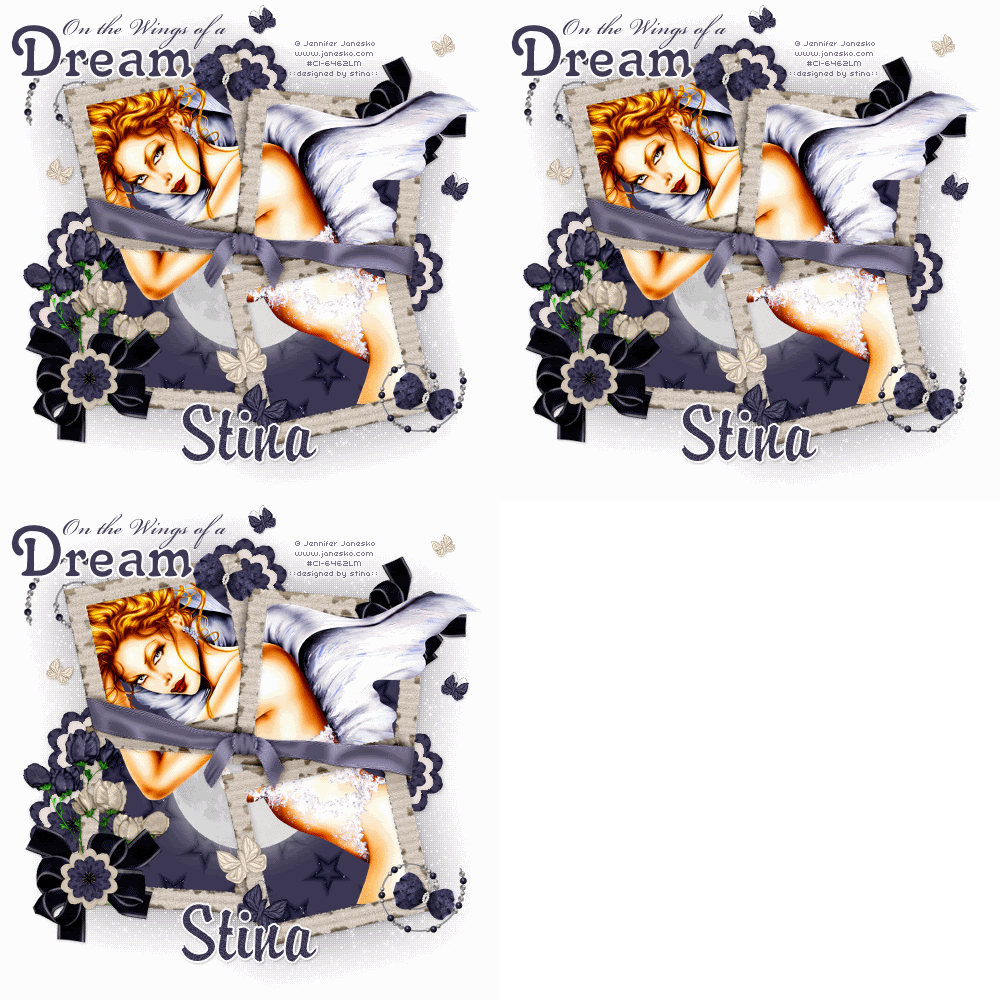
On the Wings of a Dream

 
Supplies
 
Scrap kit of choice - I am using the gorgeous "Midnight Dreams" by Rachelz Expressionz available from Cotton Candy Kreations and Stargazer Scraps
Tube of choice - I am using the lovely artwork of Jennifer Janesko which can be purchased from CILM
**PLEASE DO NOT USE HER ARTWORK WITHOUT THE APPROPRIATE LICENCE**
Fonts of choice - I am using Salina, Beautiful ES and Brody
Plugin: Penta.com > Color Dots
Plugin: Alien Skin Xenofex 2 > Constellation
 
Ok, let's begin!
 
 
Open a new 600 x 600 blank canvas flood-filled white
 
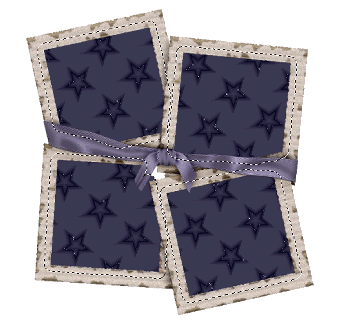
Paste Frame4 as new layer
Resize by 85%
 
With your Magic Wand select the area inside each frame
Selections > Modify > Expand by 10
Add a new raster layer
Paste Paper2 INTO selection
 
KEEP SELECTED
 
 
Layers > Arrange > Move Down
 
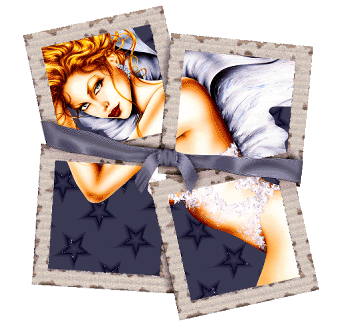
Paste your tube as new layer
Resize as necessary
Position within frames
Duplicate then hide duplicate layer
Selections > Invert
Delete then deselect
 
 
Unhide duplicate
Layers > Arrange > Move up
 
Use your Freehand Tool to draw around the part you wish to extend over the Frame
Then, Selections > Invert
Press delete then deselect
 
 
Paste Moon2 as new layer
Resize by 70%
Move to the layer BELOW your main tube
Move down slightly
 
Paste PrettyFlowers4 as new layer
Resize by 80%
Position in lower left corner
 
Paste Pretty Flowers3 as new layer
Image > Mirror
Resize by 80%
Position with flowers and move down slightly
 
Use your Freehand Tool to draw around the stem protruding below the Frame
Delete then deselect
 
Paste PrettyBow2 as new layer
Image > Rotate by 20 to the left
Resize by 50%
Position over the flower stems
 
Paste Flower3 as new layer
Resize by 20%
Position over centre of Bow
 
Paste Flower2 as new layer
Resize by 15%
Position over Flower3
 
 
Paste Butterfly4 as new layer
Resize by 35%
Position on bottom of Frame
 
Paste Butterfly5 as new layer
Image > Mirror
Resize by 35%
Position above first butterfly
 
Paste PrettyBow2 as new layer
Image > Rotate by 20 to the right
Resize by 40%
Position in the upper right
Move layer down to between Frame and wing extending Frame
 
Open Flower2 as a separate image and resize by 25%
Paste Flower4 as new layer
Resize by 20%
Position over Flower
Paste Flower2 again
Resize by 15%
Position over Flower
Layers > Merge > Merge Visible
Minimise till later
 
Paste Frames2 as new layer
Resize by 85%
Layers > Arrange > Send to Bottom
 
STAY ON LAYER AND LEAVE IN POSITION
 
Resize to your liking
 
Now Adjust > Blur > Gaussian Blur with a radius of 30.00
 
Effects > Plugins > Penta.com > Color Dot with the following settings:
 
 
Return to the flower we just made as a new image
Paste it as a new layer
Position in the centre top of Frame
Layers > Arrange > Send to Bottom
Layers > Arrange > Move Up (this will bring it to the layer above our blurred layer)
Duplicate, then
Position to the left behind flowers
Duplicate again and move down slightly
Duplicate again, then
Image > Mirror and position to the right
 
Paste WireBeads4 as new layer
Image > Rotate by 20 to the left
Resize by 25%
Position in lower left
 
Paste PearlButterfly4 as new layer
Image > Rotate 20 to the right
Resize by 15%
Position over Wirebeads
 
Duplicate then position near top centre of Frame
 
Duplicate WireBeads
Image > Mirror
Image > Flip
Layers > Arrange > Send to Bottom, then
Layers > Arranage > Move Up
 
Activate Butterflies and duplicate each
Resize by 50%
Duplicate and position to your liking
 
Select your Text Tool and font of choice
I am using Salina
Set your Material Properties to:
Foreground - #FFFFFF
Background - #3f3b55
Stroke width - 2.00
 
Type out the word "Dream"
 
Select a script font of choice
I am using Beautiful ES
Turn off your Foreground then type out the words:
"On the Wings of a"
 
Select another font for your name
I am using Brody
Foreground - #FFFFFF
Background - #3f3b55
Stroke width - 2.00
 
Type out your name
Objects > Align > Horizontal Centre in Canvas
Convert to raster layer
Add Noise (optional) and apply a drop shadow
H & V - 1
Opacity - 20
Blur - 3.00
Colour - #000000
 
Add your © copyright, licence and watermark
 

**THIS NEXT STEP IS FOR ANIMATION**
 
First duplicate your blurred layer three times so that you should have four layers
Rename them from bottom up as:
Blur Background
Sparkle1
Sparkle2
Sparkle3
 
Lower the opacity of Blur Background to around 20
Hide Sparkle2 and Sparkle3 and activate Sparkle1
 
Effects > Plugins > Alien Skin Xenofex 2.0 > Constellation with the following settings:
 
 
Then hide Sparkle1 and activate Sparkle2
Repeat the Constellation effect, altering the Random Seed
 
Hide Sparkle2 and activate Sparkle3
Repeat, altering Random Seed again
 
Now, hide Sparkle2 and Sparkle3 again
Activate Sparkle1
Edit > Copy Merged
 
Open Animation Shop
Edit > Paste as new animation
 
Back to PSP
Hide Sparkle1 and unhide Sparkle2
Edit > Copy Merged
 
In Animation Shop
Edit > Paste > After Current Frame
 
Back to PSP
Hide Sparkle2 and unhide Sparkle3
Edit > Copy Merged
 
In Animation Shop
Edit > Paste > After Current Frame
 
Edit > Select All
Animation > Frame Properties
Change Properties to 20
 
Then save as a GIF and you're done!
 
Thank you for trying my tutorial!
 
::st!na::
 

© Tutorial written by Stina on 11th April 2009
All rights reserved
 

Thursday, April 9, 2009

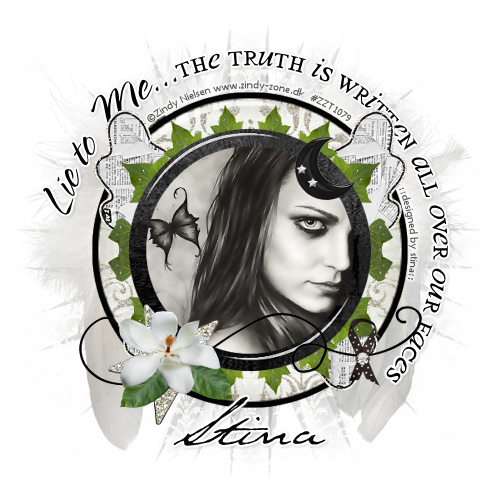
Lie to Me

 
Supplies
 
Scrap kit of choice - I am using the gorgeous "Lie to Me" by Designs by Helly available from Cotton Candy Kreations
Tube of choice - I am using the lovely artwork of Zindy Nielsen which can be purchased from her store
**PLEASE DO NOT USE HER ARTWORK WITHOUT THE APPROPRIATE LICENCE**
WSL_Mask 26 by Chelle available from her blog
Fonts of choice - I am using Spring Light, Will & Grace and Texas Hero
Plugin: Alien Skin Eye Candy 5 Impact Glass
Plugin: Simple Top Left Mirror
Plugin: Xero Improver (optional)
Plugin: Eye Candy 4000 Gradient Glow
 
 
Let's begin!
 
Open a new 600 x 600 blank canvas flood-filled white
 
Set your Preset Shape Tool to Ellipse
Foreground - null
Background - #000000
 
Hold your Shift key and draw out a circle
Objects > Align > Centre in Canvas
Convert to raster layer
 
Selections > Select All
Selections > Float
Selections > Defloat
Selections > Modify > Contract by 12
 
Paste Paper2 into Selection
 
 
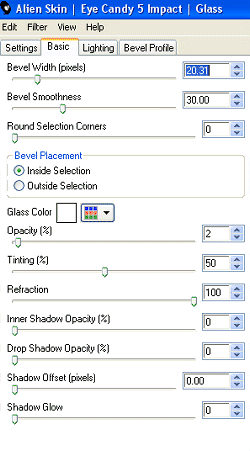
Effects > Plugins > Alien Skin Eye Candy 5 Impact > Glass with the following settings:
 
 
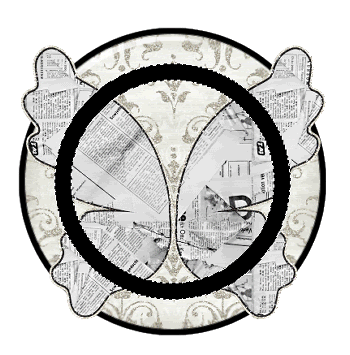
Paste Wings as new layer
Resize by 15%
LEAVE IN POSITION
Duplicate and set blend mode to Screen
Lower opacity to 85
Layers > Merge > Merge Down
 
Select your Preset Shape Tool again - same settings
Draw out a smaller circle
Objects > Align > Centre in Canvas
Convert to raster layer
 
Selections > Select All
Selections > Float
Selections > Defloat
Selections > Modify > Contract by 20
Press delete and deselect
 
With your Magic Wand select the black Frame
 
 
Selections > Modify > Feather by 2
Paste Paper3 INTO selection
Deselect
 
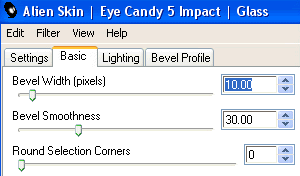
Effects > Plugins > Alien Skin Eye Candy 5 Impact > Glass with the same settings BUT CHANGE THE BEVEL WIDTH TO 10.00
 
 
Select the area inside the Frame with your magic Wand
Selections > Modify > Expand by 10
Add a new raster layer
 
Paste Paper4 INTO selection
Deselect
Layers > Arrange > Move Down
 
Activate your Frame layer
Paste Star as new layer
Resize by 22%
Position along the bottom of Frame
 
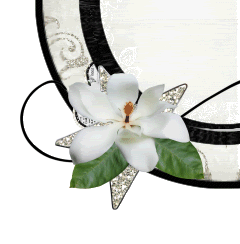
Paste Magnolia as new layer
Resize by 10%
Position over the star (see below)
 
 
Paste Branch as new layer
Resize by 10%
Position below the Frame and Paper layers
 
 
Effects > Plugins > Simple > Top Left Mirror
 
Paste Moon as new layer
Resize by 8 - 10%
Image > Mirror
Paste in upper right or to your liking
 
Paste Ribbon as new layer
Resize by 10%
Position on string at edge of Frame
 
Select the area inside your Frame once again
Selections > Modify > Expand by 10
 
Paste your tube as a new layer
Resize as necessary to fit
Selections > Invert
Delete (excess) and deselect
 
Paste Heart as new layer
Resize by 18%
Layers > Arrange > Send to Bottom
 
Add a new raster layer
Selections > Select All
Paste Paper6 INTO selection
Deselect
Layers > Arrange > Send to Bottom
 
Layers > New Mask Layer > From Image
Locate WSL_Mask26
OK
Layers > Merge > Merge Group
 
Select your Preset Shape Tool again to Ellipse
Toggle the colour palette to the reverse of before:
Foreground - #000000
Background - null
 
Hold your Shift key again and draw out a circle around your tag back
Objects > Align > Centre in Canvas
 
Select your Text Tool and font of choice
I am using Spring Light and Will & Grace
Colour is Black (#000000)
 
On the curve type out your text and position
 

In your Layer Palette open the Vector Layer and close off the Ellipse
Convert to raster layer
Layers > Arrange > Move Up
(should now be above the feathery wings layer)
Apply a Gradient Glow
 
Add a slight drop shadow:
H & V - 1
Opacity - 15
Blur - 3.00
Colour - #000000
 
Select another Script font of choice
I am using Texas Hero
Type out your name
Objects > Align > Horizontal Centre in Canvas
Convert to raster layer
Apply a Gradient Glow and the same drop shadow
 
Finally, add your © copyright, licence and watermark then save as a GIF or JPG and you're done!
 
Thank you for trying my tutorial!
 
::st!na::
 

© Tutorial written by Stina on 9th April 2009
All rights reserved