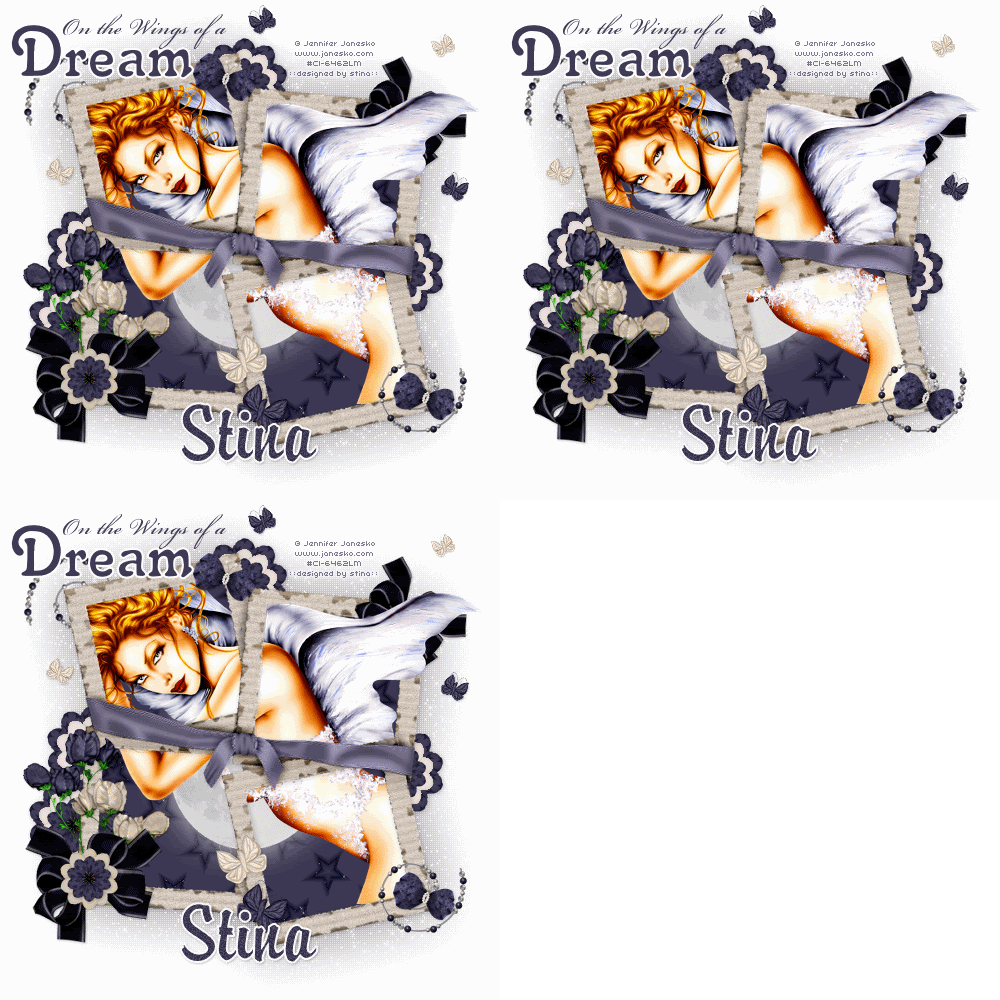
Supplies
Scrap kit of choice - I am using the gorgeous "Midnight Dreams" by Rachelz Expressionz available from Cotton Candy Kreations and Stargazer Scraps
Tube of choice - I am using the lovely artwork of Jennifer Janesko which can be purchased from CILM
**PLEASE DO NOT USE HER ARTWORK WITHOUT THE APPROPRIATE LICENCE**
Fonts of choice - I am using Salina, Beautiful ES and Brody
Plugin: Penta.com > Color Dots
Plugin: Alien Skin Xenofex 2 > Constellation
Ok, let's begin!
Open a new 600 x 600 blank canvas flood-filled white
Paste Frame4 as new layer
Resize by 85%
Resize by 85%
With your Magic Wand select the area inside each frame
Selections > Modify > Expand by 10
Add a new raster layer
Paste Paper2 INTO selection
Selections > Modify > Expand by 10
Add a new raster layer
Paste Paper2 INTO selection
KEEP SELECTED
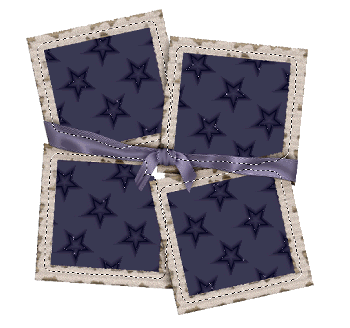
Layers > Arrange > Move Down
Paste your tube as new layer
Resize as necessary
Position within frames
Duplicate then hide duplicate layer
Selections > Invert
Delete then deselect
Resize as necessary
Position within frames
Duplicate then hide duplicate layer
Selections > Invert
Delete then deselect
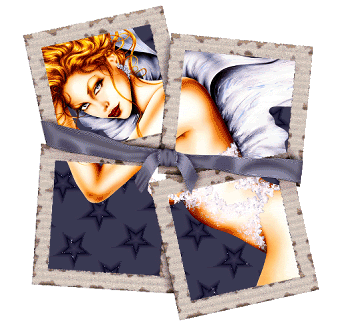
Unhide duplicate
Layers > Arrange > Move up
Layers > Arrange > Move up
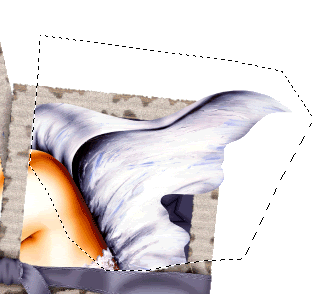
Use your Freehand Tool to draw around the part you wish to extend over the Frame
Then, Selections > Invert
Press delete then deselect
Then, Selections > Invert
Press delete then deselect
Paste Moon2 as new layer
Resize by 70%
Move to the layer BELOW your main tube
Move down slightly
Resize by 70%
Move to the layer BELOW your main tube
Move down slightly
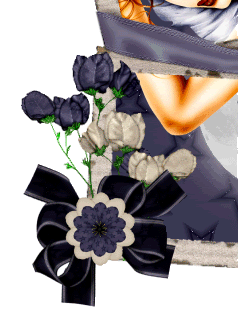
Paste PrettyFlowers4 as new layer
Resize by 80%
Position in lower left corner
Resize by 80%
Position in lower left corner
Paste Pretty Flowers3 as new layer
Image > Mirror
Resize by 80%
Position with flowers and move down slightly
Image > Mirror
Resize by 80%
Position with flowers and move down slightly
Use your Freehand Tool to draw around the stem protruding below the Frame
Delete then deselect
Delete then deselect
Paste PrettyBow2 as new layer
Image > Rotate by 20 to the left
Resize by 50%
Position over the flower stems
Image > Rotate by 20 to the left
Resize by 50%
Position over the flower stems
Paste Flower3 as new layer
Resize by 20%
Position over centre of Bow
Resize by 20%
Position over centre of Bow
Paste Flower2 as new layer
Resize by 15%
Position over Flower3
Resize by 15%
Position over Flower3
Paste Butterfly4 as new layer
Resize by 35%
Position on bottom of Frame
Resize by 35%
Position on bottom of Frame
Paste Butterfly5 as new layer
Image > Mirror
Resize by 35%
Position above first butterfly
Image > Mirror
Resize by 35%
Position above first butterfly
Paste PrettyBow2 as new layer
Image > Rotate by 20 to the right
Resize by 40%
Position in the upper right
Move layer down to between Frame and wing extending Frame
Image > Rotate by 20 to the right
Resize by 40%
Position in the upper right
Move layer down to between Frame and wing extending Frame
Open Flower2 as a separate image and resize by 25%
Paste Flower4 as new layer
Resize by 20%
Position over Flower
Paste Flower2 again
Resize by 15%
Position over Flower
Layers > Merge > Merge Visible
Minimise till later
Paste Flower4 as new layer
Resize by 20%
Position over Flower
Paste Flower2 again
Resize by 15%
Position over Flower
Layers > Merge > Merge Visible
Minimise till later
Paste Frames2 as new layer
Resize by 85%
Layers > Arrange > Send to Bottom
Resize by 85%
Layers > Arrange > Send to Bottom
STAY ON LAYER AND LEAVE IN POSITION
Resize to your liking
Now Adjust > Blur > Gaussian Blur with a radius of 30.00
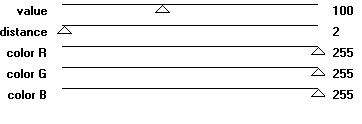
Effects > Plugins > Penta.com > Color Dot with the following settings:
Return to the flower we just made as a new image
Paste it as a new layer
Position in the centre top of Frame
Layers > Arrange > Send to Bottom
Layers > Arrange > Move Up (this will bring it to the layer above our blurred layer)
Duplicate, then
Position to the left behind flowers
Duplicate again and move down slightly
Duplicate again, then
Image > Mirror and position to the right
Paste WireBeads4 as new layer
Image > Rotate by 20 to the left
Resize by 25%
Position in lower left
Image > Rotate by 20 to the left
Resize by 25%
Position in lower left
Paste PearlButterfly4 as new layer
Image > Rotate 20 to the right
Resize by 15%
Position over Wirebeads
Image > Rotate 20 to the right
Resize by 15%
Position over Wirebeads
Duplicate then position near top centre of Frame
Duplicate WireBeads
Image > Mirror
Image > Flip
Layers > Arrange > Send to Bottom, then
Layers > Arranage > Move Up
Image > Mirror
Image > Flip
Layers > Arrange > Send to Bottom, then
Layers > Arranage > Move Up
Activate Butterflies and duplicate each
Resize by 50%
Duplicate and position to your liking
Resize by 50%
Duplicate and position to your liking
Select your Text Tool and font of choice
I am using Salina
Set your Material Properties to:
Foreground - #FFFFFF
Background - #3f3b55
Stroke width - 2.00
I am using Salina
Set your Material Properties to:
Foreground - #FFFFFF
Background - #3f3b55
Stroke width - 2.00
Type out the word "Dream"
Select a script font of choice
I am using Beautiful ES
Turn off your Foreground then type out the words:
"On the Wings of a"
I am using Beautiful ES
Turn off your Foreground then type out the words:
"On the Wings of a"
Select another font for your name
I am using Brody
Foreground - #FFFFFF
Background - #3f3b55
Stroke width - 2.00
I am using Brody
Foreground - #FFFFFF
Background - #3f3b55
Stroke width - 2.00
Type out your name
Objects > Align > Horizontal Centre in Canvas
Convert to raster layer
Add Noise (optional) and apply a drop shadow
H & V - 1
Opacity - 20
Blur - 3.00
Colour - #000000
Objects > Align > Horizontal Centre in Canvas
Convert to raster layer
Add Noise (optional) and apply a drop shadow
H & V - 1
Opacity - 20
Blur - 3.00
Colour - #000000
Add your © copyright, licence and watermark
**THIS NEXT STEP IS FOR ANIMATION**
First duplicate your blurred layer three times so that you should have four layers
Rename them from bottom up as:
Blur Background
Sparkle1
Sparkle2
Sparkle3
Rename them from bottom up as:
Blur Background
Sparkle1
Sparkle2
Sparkle3
Lower the opacity of Blur Background to around 20
Hide Sparkle2 and Sparkle3 and activate Sparkle1
Hide Sparkle2 and Sparkle3 and activate Sparkle1
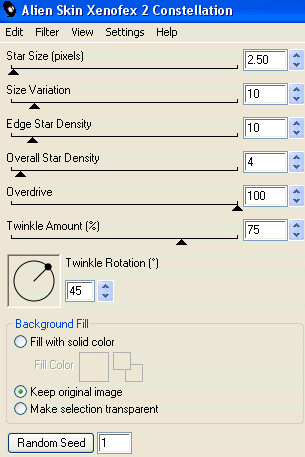
Effects > Plugins > Alien Skin Xenofex 2.0 > Constellation with the following settings:
Then hide Sparkle1 and activate Sparkle2
Repeat the Constellation effect, altering the Random Seed
Repeat the Constellation effect, altering the Random Seed
Hide Sparkle2 and activate Sparkle3
Repeat, altering Random Seed again
Repeat, altering Random Seed again
Now, hide Sparkle2 and Sparkle3 again
Activate Sparkle1
Edit > Copy Merged
Activate Sparkle1
Edit > Copy Merged
Open Animation Shop
Edit > Paste as new animation
Edit > Paste as new animation
Back to PSP
Hide Sparkle1 and unhide Sparkle2
Edit > Copy Merged
Hide Sparkle1 and unhide Sparkle2
Edit > Copy Merged
In Animation Shop
Edit > Paste > After Current Frame
Edit > Paste > After Current Frame
Back to PSP
Hide Sparkle2 and unhide Sparkle3
Edit > Copy Merged
Hide Sparkle2 and unhide Sparkle3
Edit > Copy Merged
In Animation Shop
Edit > Paste > After Current Frame
Edit > Paste > After Current Frame
Edit > Select All
Animation > Frame Properties
Change Properties to 20
Animation > Frame Properties
Change Properties to 20
Then save as a GIF and you're done!
Thank you for trying my tutorial!
::st!na::
© Tutorial written by Stina on 11th April 2009
All rights reserved

No comments:
Post a Comment