
Supplies
Scrap kit of choice - I am using "Let's Get Hitched" by KristiW Designs
Images/Photos of choice - I am using Krissy's wedding photos of Krissy's Scraps (who was married today *g*)
20-20 Mask
215 Mask
Plugins: Xero Improver and Xero Radiance
Plugin: Filters Unlimited > Photo AGing Kit > Cracked Paper
Fonts of choice - I am using Cheri and Carpenter Script
Ready? Let's begin.....
Open a new 700 x 600 blank canvas flood-filled white
Paste Frame2 as new layer
Resize by 20%
Duplicate twice
Rename layers FRAME1, FRAME2 and FRAME3
Hide top two layers (FRAMES 2 & 3) and we'll work on the bottom one (FRAME1)
Resize by 20%
Duplicate twice
Rename layers FRAME1, FRAME2 and FRAME3
Hide top two layers (FRAMES 2 & 3) and we'll work on the bottom one (FRAME1)
Paste Image or photo of choice as new layer
Resize as necessary to fit in Frame
USe your Magic Wand to select the inner area of Frame
Selections > Modify > Expand by 10
Selections > Invert
Then delete any remaining excess
Deselect
Resize as necessary to fit in Frame
USe your Magic Wand to select the inner area of Frame
Selections > Modify > Expand by 10
Selections > Invert
Then delete any remaining excess
Deselect
On Image/Photo go to:
Effects > Plugins > Xero > Improver with the following settings:
Effects > Plugins > Xero > Improver with the following settings:
Then, Effects > Plugins > I.C.Net Software > Filters Unlimited > Photo Aging Kit > Cracked Paper with the following settings:
Activate Frame Layer
Layers > Merge > Merge Down
Rename to FRAME1 again
Layers > Merge > Merge Down
Rename to FRAME1 again
Image > Rotate by 15 to the left
Resize by 70%
Resize by 70%
Layers > Arrange > Move Down
Position to the left for the moment
Position to the left for the moment
Activate FRAME2
Paste another image of choice as new layer
Resize as necessary to fit into Frame
USe your Magic Wand to select the inner area of Frame
Selections > Modify > Expand by 10
Selections > Invert
Then delete any remaining excess
Deselect
Resize as necessary to fit into Frame
USe your Magic Wand to select the inner area of Frame
Selections > Modify > Expand by 10
Selections > Invert
Then delete any remaining excess
Deselect
On Image/Photo go to:
Effects > Plugins > Xero > Improver with the same settings as above
Effects > Plugins > Xero > Improver with the same settings as above
Effects > Plugins > Xero > Radiance with the following settings:
Then, Effects > Plugins > I.C.Net Software > Filters Unlimited > Photo Aging Kit > Cracked Paper with the same settings as above
Activate Frame Layer
Layers > Merge > Merge Down
Rename to FRAME2 again
Layers > Merge > Merge Down
Rename to FRAME2 again
Image > Rotate by 15 to the right
Resize by 65%
Resize by 65%
Layers > Arrange > Move Down
Also position to the left for the moment
Also position to the left for the moment
Activate FRAME3 (your main Frame)
With your magic wand select the inner area of Frame
Selections > Modify > Expand by 10
Paste Paper12 as new layer
Resize by 50%
Layers > Arrange > Move Down
With your magic wand select the inner area of Frame
Selections > Modify > Expand by 10
Paste Paper12 as new layer
Resize by 50%
Layers > Arrange > Move Down
KEEP SELECTED
Open Image or photo of choice
Effects > Plugins > Xero > Improver with the same settings as above
Layers > Load/Save Mask > Load Mask from Disk
Locate 20/20 Mask
Ok
Layers > Merge > Merge Group
Edit > Copy
Locate 20/20 Mask
Ok
Layers > Merge > Merge Group
Edit > Copy
Back to your working canvas, and
Edit > Paste as new layer
Deselect
Layers > Arrange > Move Down
Edit > Paste as new layer
Deselect
Layers > Arrange > Move Down
Now position FRAME1 and FRAME2 to the left of your main Frame, protruding slightly
You should now have something like this:
Paste Glasses as new layer
Resize by 10%
Position in lower right
Paste Car as new layer
Image > Rotate by 15 to the left
Resize by 5%
Position in lower left of Frame
Image > Rotate by 15 to the left
Resize by 5%
Position in lower left of Frame
Paste Bird as new layer
Resize by 8%
Position in upper corner of main Frame
Resize by 8%
Position in upper corner of main Frame
Paste WireHeart as new layer
Resize by 8%
Position to your liking
Duplicate
Set Blend Mode to Screen
Layers > Merge > Merge Down
Resize by 8%
Position to your liking
Duplicate
Set Blend Mode to Screen
Layers > Merge > Merge Down
Paste Swirl1 as new layer
Resize by 10%
Position to the left beneath Dove/Bird
Resize by 10%
Position to the left beneath Dove/Bird
Adjust > Hue & Saturation > Colourise with the following settings:

Paste Hearts1 as new layer
Resize by 10%
Position in upper right
Resize by 10%
Position in upper right
Paste Ribbon4 as new layer
Resize by 10%
Position in upper right over Hearts
Resize by 10%
Position in upper right over Hearts
Apply the same Hue & Saturation Colourising as above
Paste StringHearts as new layer
Resize by 6%
Position as if attached to Wire Heart
Resize by 6%
Position as if attached to Wire Heart
Use your Freehand Tool to draw a selection around the excess
Press delete then deselect
Apply a slight drop shadow to your elements:
H & V - 1
Opacity - 20
Blur - 5.00
Colour - #000000
H & V - 1
Opacity - 20
Blur - 5.00
Colour - #000000
Paste ButterflyDoodle as new layer
Resize by 15%
Position towards top of Frames
Layers > Arrange > Send to Bottom
Resize by 15%
Position towards top of Frames
Layers > Arrange > Send to Bottom
Again apply the same Hue & Saturation Colourising as above
Paste Glitter2 as new layer
Resize by 50%
Layers > Load/Save Mask > Load Mask from Disk
Locate 215 Mask
OK
Layers > Merge > Merge Group
Resize by 90%
Image > Mirror
Resize by 50%
Layers > Load/Save Mask > Load Mask from Disk
Locate 215 Mask
OK
Layers > Merge > Merge Group
Resize by 90%
Image > Mirror
Layers > Arrange > Send to Bottom
Lower opacity to 60
Lower opacity to 60
Crop and resize
Activate top layer
Select your Text Tool and font of choice
I chose Cheri
I chose Cheri
Set your Material Palette with the following:
Foreground - #FFFFF
Background - Paper or colour of choice
Foreground - #FFFFF
Background - Paper or colour of choice
Stroke width - 2.00
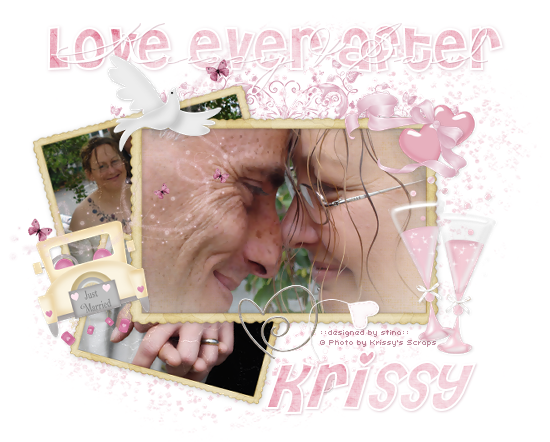
Type out your text - I wrote "Love Ever After"
Objects > Align > Horizontal Centre in Canvas
COnvert to raster layer
Add a drop shadow:
H & V - 1
Opacity - 20
Blur - 5.00
Colour - #7c1f3f
Objects > Align > Horizontal Centre in Canvas
COnvert to raster layer
Add a drop shadow:
H & V - 1
Opacity - 20
Blur - 5.00
Colour - #7c1f3f
If you wish to add a type-over text as I have, select a script font of choice
Text colour (background) #FFFFFF
Text colour (background) #FFFFFF
Type text
Objects > Align > Horizontal Centre in Canvas
COnvert to raster layer
Apply a slight drop shadow of choice
Objects > Align > Horizontal Centre in Canvas
COnvert to raster layer
Apply a slight drop shadow of choice
Select another font of choice for your name
Apply any effects or drop shadows of your choice
Position your name to your liking
Apply any effects or drop shadows of your choice
Position your name to your liking
Finally, add your © copyright, licence and watermark, then save as a GIF or JPG and you're done!
Thanks for trying my tutorial!
::st!na::
© Tutorial written by Stina on 28th April 2009
All rights reserved
No comments:
Post a Comment