
Supplies
"Summer Party" by Farrah's Creations from her part of the Blog Train
Butterflies by Babycakes Scraps from her part of the Summer Party Blog Train
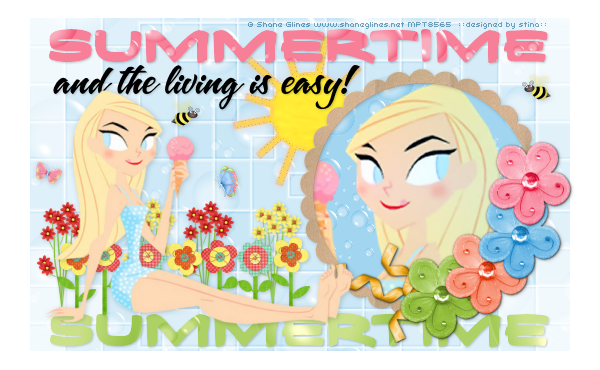
Tube of choice - I am using the artwork of Shane Glines which can be purchased from CILM
**PLEASE DO NOT USE HIS ARTWORK WITHOUT THE APPROPRIATE LICENCE**
Flowers and Bee by Micki from her "Frueling" Scrap
Mask by Caro
Summer WordArt by Yvette
Font of choice - I used Carpenter Script
Plugin: Xero Improver and Soft Mood
Plugin: Color Rave Atmospherizer
My Supplies here
~ Step 1 ~
Open a new blank canvas 600 x 370 flood-filled white
We will begin with Farrah's kit
Paste Paper4 as new layer
Resize by 18%
Paste Paper4 as new layer
Resize by 18%
Layers / New Mask Layer / From Image
Locate Caro10
Source Luminance
OK
Locate Caro10
Source Luminance
OK
Layers / Merge / Merge Group
Resize layer by 90%
Rename this layer to Mask Background
Paste Frame as new layer
Resize by 13%
Position to the right
Resize by 13%
Position to the right
Add a new raster layer
Layers / Arrange / Move Down
Layers / Arrange / Move Down
Click inside the Frame with your Magic Wand
Selections / Modify / Expand by 5
Activate your Paper4 layer again
Edit / Copy
Edit / Paste into Selection
Deselect
Selections / Modify / Expand by 5
Activate your Paper4 layer again
Edit / Copy
Edit / Paste into Selection
Deselect
~ Step 2 ~
Open Yvette_EOC_SummerWordArt4
Activate the layer that reads Summertime
Edit / Copy
Paste onto your working canvas and position at the top
Duplicate and place this layer at the bottom
Activate the layer that reads Summertime
Edit / Copy
Paste onto your working canvas and position at the top
Duplicate and place this layer at the bottom
Layers / Arrange / Move Down
Repeat twice
Rename layers Summertime1 and Summertime2
Repeat twice
Rename layers Summertime1 and Summertime2
Back on the WordArt activate the top text layer
Edit / Copy
Paste onto canvas as a new layer
Resize by 90 – 95% if necessary
Position below Summertime1
Edit / Copy
Paste onto canvas as a new layer
Resize by 90 – 95% if necessary
Position below Summertime1

Open Papers1 and 5
On your canvas activate Summertime1 (top layer)
Selections / Float
Selections / Defloat
Paste Paper5 as new layer
Resize by 70%
Selections / Invert
Delete twice
Deselect
Activate Summertime2
Selections / Float
Selections / Defloat
Paste Paper1 as new layer
Resize by 70%
Selections / Invert
Delete twice
Deselect
Selections / Float
Selections / Defloat
Paste Paper1 as new layer
Resize by 70%
Selections / Invert
Delete twice
Deselect
Delete the two Summertime template layers
Rename the two you just made with the papers Summertime1 and Summertime2
Rename the two you just made with the papers Summertime1 and Summertime2
Add a drop shadow to the Word Art layers
H & V – 1
Opacity – 20
Blur – 5.00
Colour - #000000
H & V – 1
Opacity – 20
Blur – 5.00
Colour - #000000
~ Step 3 ~
Paste your tube as a new layer
Resize as necessary
Position to the left on the tag above the Summertime2 wordart
(a sitting tube works best)
Resize as necessary
Position to the left on the tag above the Summertime2 wordart
(a sitting tube works best)
Add a drop shadow:
H & V – 1
Opacity – 20
Blur – 8.00
Colour - #000000
H & V – 1
Opacity – 20
Blur – 8.00
Colour - #000000
Paste your tube again
Image / Mirror
Resize slightly larger if necessary
Position inside the frame to your liking beneath the Frame
Image / Mirror
Resize slightly larger if necessary
Position inside the frame to your liking beneath the Frame
Using your Magic Wand click inside the Frame
Selections / Modify / Expand by 5
Selections / Invert
Activate your tube layer
Then delete
Deselect
Selections / Modify / Expand by 5
Selections / Invert
Activate your tube layer
Then delete
Deselect
Duplicate then hide layer
On original go to:
Effects / Plugins / Xero / Improver with default settings
Then,
Effects / Plugins / ColorRave / Atmospherizer with the following settings:
Effects / Plugins / Xero / Improver with default settings
Then,
Effects / Plugins / ColorRave / Atmospherizer with the following settings:
Turn the visibility of the duplicate layer back on
Set the blend mode to Multiply
Lower opacity to 40
Add a drop shadow to your Frame:
H & V – 1
Opacity – 20
Blur – 5.00
Colour - #000000
H & V – 1
Opacity – 20
Blur – 5.00
Colour - #000000
~ Step 4 ~
Paste SummerParty_Sun as new layer
Resize by 10%
Position toward the centre but tucked behind the Frame and beneath the Word Arts
Resize by 10%
Position toward the centre but tucked behind the Frame and beneath the Word Arts

Effects / Plugins / Xero / Improver with default settings
Effects / Plugins / Xero / Soft Mood with default settings
Effects / Plugins / Xero / Soft Mood with default settings
Adjust / Brightness & Contrast / Brightness/Contrast with the following settings:
Add a drop shadow:
H & V – 1
Opacity – 20
Blur – 5.00
Colour - #000000
H & V – 1
Opacity – 20
Blur – 5.00
Colour - #000000
Activate Background Mask layer
Paste HD_Country_Flower3 as new layer
Resize by 20%
Position to the left of the frame
Resize by 20%
Position to the left of the frame
Paste HD_Country_Flower2 as new layer
Resize by 20%
Position beside first flower
Resize by 20%
Position beside first flower
Paste HD_Country_Flower1 as new layer
Resize by 20%
Position again
Resize by 20%
Position again
Duplicate each flower and place them alternately across your tag
Paste Wildflowers2 as new layer
Resize by 30%
Place behind flowers
Resize by 30%
Place behind flowers
Paste Wildflowers1 as new layer
Resize by 30%
Place behind flowers alongside first set
Resize by 30%
Place behind flowers alongside first set
Duplicate each of these layer and place to your liking
Merge Down each layer till the flowers are one layer
Then add a drop shadow:
H & V – 1
Opacity – 20
Blur – 5.00
Colour - #000000
Paste BCS_Summer bfly as new layer
Image / Rotate by 20 to the right
Resize by 6%
Position to the left of your tube
Image / Rotate by 20 to the right
Resize by 6%
Position to the left of your tube
Paste BCS_Summer Bfly2 as new layer
Resize by 8%
Position to the right
Resize by 8%
Position to the right
Paste Bee1 as new layer
Resize by 10%
Place in position
Duplicate
Image / Mirror
Position duplicate bee to the right
Resize by 10%
Place in position
Duplicate
Image / Mirror
Position duplicate bee to the right
Add the same drop shadow as above to the Butterflies and Bees layers
Now is the time to crop and resize your tag if you wish to do so
Add your © copyright, licence and watermark as a new layer
Don't forget to add your name too!
~ Step 5 ~
**This step is only if you wish to animate**
Activate Background Mask layer
Duplicate twice, giving you a total of THREE duplicate layers
Turn off the visibility of the top two
Duplicate twice, giving you a total of THREE duplicate layers
Turn off the visibility of the top two
On the first layer go to:
Adjust / Add/Remove Noise / Add Noise with a radius of15
Turn off layer and turn on Layer2
Repeat Noise changing the Noise to 20
Turn off layer and turn of Layer3
Repeat Noise changing Noise to 25
Adjust / Add/Remove Noise / Add Noise with a radius of15
Turn off layer and turn on Layer2
Repeat Noise changing the Noise to 20
Turn off layer and turn of Layer3
Repeat Noise changing Noise to 25
Once again hide the top two layers
Edit / Copy Merged
Edit / Copy Merged
Then in Animation Shop
Edit / Paste as new Image
Edit / Paste as new Image
Back to PSP
Turn off layer and turn on Layer2
Edit / Copy
Turn off layer and turn on Layer2
Edit / Copy
In Animation Shop
Edit / Paste after Current Frame
Edit / Paste after Current Frame
Back to PSP
Turn off layer and turn on Layer3
Turn off layer and turn on Layer3
In Animation Shop
Edit / Paste after Current Frame
Edit / Paste after Current Frame
That's it!
Save your work as a GIF and you're done!
Thank you for trying my tutorial
::st!na:
Here is a non-animated version:
© Tutorial written by Stina on 9th March 2009
All rights reserved
All rights reserved
No comments:
Post a Comment