Please email me designed.by.stina@gmail.com with your creations. I'd love to see them.

Sunday, August 30, 2009

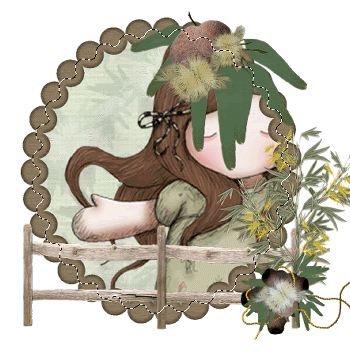
Gumnut Girl


Supplies

Tubes of choice - I am using the lovely artwork of Suzanne Woolcott which is available with a licence from her store
**PLEASE DO NOT USE HER ARTWORK WITHOUT THE APPROPRIATE LICENCE**
WSL_Mask35 by Chelle available from her blog
Fonts of choice - I am using AKApprique Black and 2Peas Sunshine
Plugins: dsb Flux > Linear Transmission
Eye Candy 4000 > HSB Noise


Let's begin...


Open a new 600 x 600 blank canvas flood-filled white

Paste a Frame of choice as new layer
Resize by 50%
(you can either choose a plain one to decorate yourself or a predecorated one)

Select inside Frame with Magic Wand
Selections > Modify > Expand by 10
Add new raster layer
Paste Paper of choice as new layer
Layers > Arrange > Move Down

KEEP SELECTED!!

Activate Background
Layers > Promote Selection to Layer
Reduce opacity of Paper to around 50
Layers > Merge > Merge Down
Deselect

Activate top layer

Paste some Gumnuts as new layer
Image > ROtate by 10 to the right
Resize by 35%
Position to the upper right of Frame

Paste Fence1 as new layer
Resize by 75%
Position along bottomg of Frame

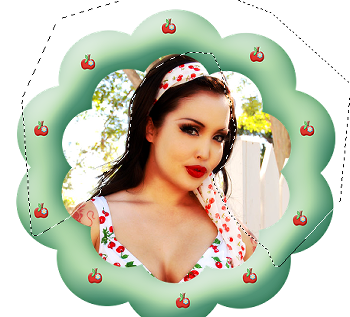
Use your Freehand Tool to make a selection around the excess
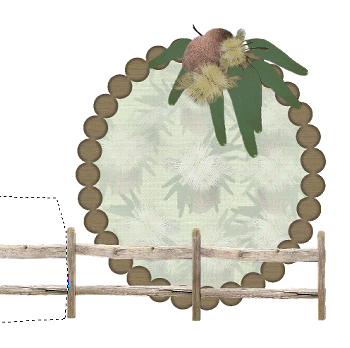

Then delete and deselect

Paste Wattle as new layer
Resize by 40%
Position to the lower right

Paste some more Gumnuts of choice as new layer
Resize by around 25%
Position to the lower right below the wattle

Paste tube of choice as new layer and move below Frame layer
Resize UP if needed
Select the inside of Frame again
Selections > Modify > Expand by 10
Position Tube slightly off centre
Selections > Invert
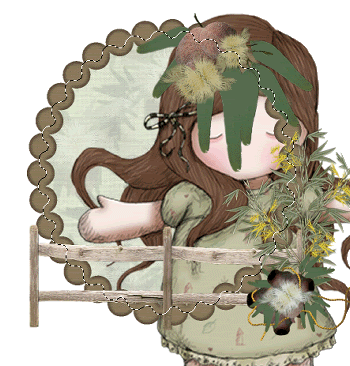


Delete then deselect
Lower opacity to liking

Paste Gumnut Chain as new layer
Resize by 20%
Position to the lower right along bottom railing of Fence
Duplicate then Image > Mirror
Position to liking, then erase excess from end of Fence
Layers > Merge > Merge Down

Paste a Gumnut as new layer
Resize by 25%
Position and the foot of the Fence
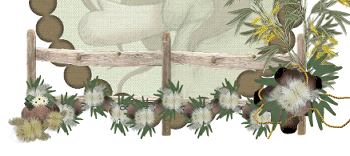

Paste a Heart as new layer
Image > Rotate by 15 to the left
Resize by 20%
Duplicate and Mirror a few times
Position behind gumnuts along fence

Paste your Tube as new layer
Resize as necessary and position slightly off centre

Paste a Paper of choice as new layer
Layers > Arrange > Send to Bottom

Layers > New Mask Layer > From Image
Apply WSL_Mask35
OK
Layers > Merge > Merge Group
Resize layer by 85%

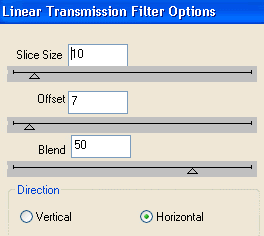
Effects > Plugins > dsb Flux > Linear Transmission with the following settings:

Crop and resize tag

Select your Text Tool and font of choice
I am using AKApprique Black
Foreground - #576e50
Background - #FFFFFF
Stroke width - 0.8

Type out text of choice
Objects > Align > Horiztonal Centre in Canvas
Convert to raster layer

Select another font of choice
I am using 2Peas Sunshine
Text colour is #576e50

Type out your name
Objects > Align > Horiztonal Centre in Canvas
Convert to raster layer
Apply any effects and drop shadow of choice

Finally, add your © copyright, licence and watermark, then save as a GIF or JPG and you're done!


** IF YOU WISH TO ANIMATE PLEASE FOLLOW THESE NEXT STEPS **

Activate your Mask layer
Duplicate twice and rename Noise1, Noise2 and Noise3

Activate Noise1
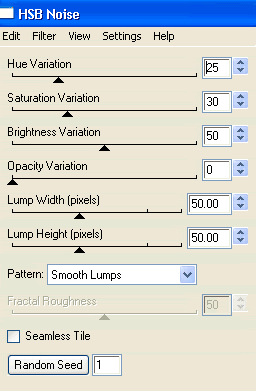
Effects > Plugins > Eye Candy 4000 > HSB Noise with the following settings:

Hide Noise1 and activate Noise2
Repeat Noise, adjusting the Random Seed

Hide Noise2 and activate Noise3
Repeat Noise once again, adjusting the Random Seed

Now to animate!

Activate Noise1 and hide Noise2 and Noise3
Edit > Copy Merged

Open Animation Shop
Edit > Paste as New Animation

Back to PSP
Hide Noise1 and activate Noise2
Edit > Copy Merged

In Animation Shop
Edit > Paste After Current Frame

Back to PSP
Hide Noise2 and activate Noise3
Edit > Copy Merged

In Animation Shop
Edit > Paste After Current Frame

Select all and change Frame Properties to 20
Now save as a GIF and you're done!

Thanks for trying my tutorial!

::st!na::


Here is a non-animated version:
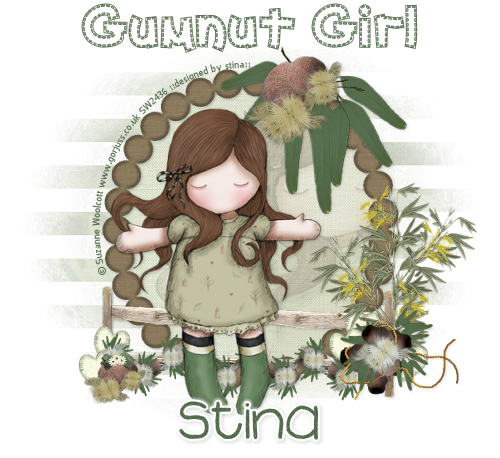

© Tutorial written by Stina on 29th August 2009
All rights reserved

Saturday, August 29, 2009

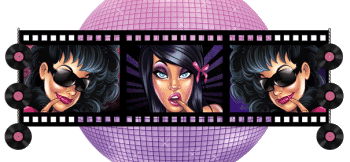
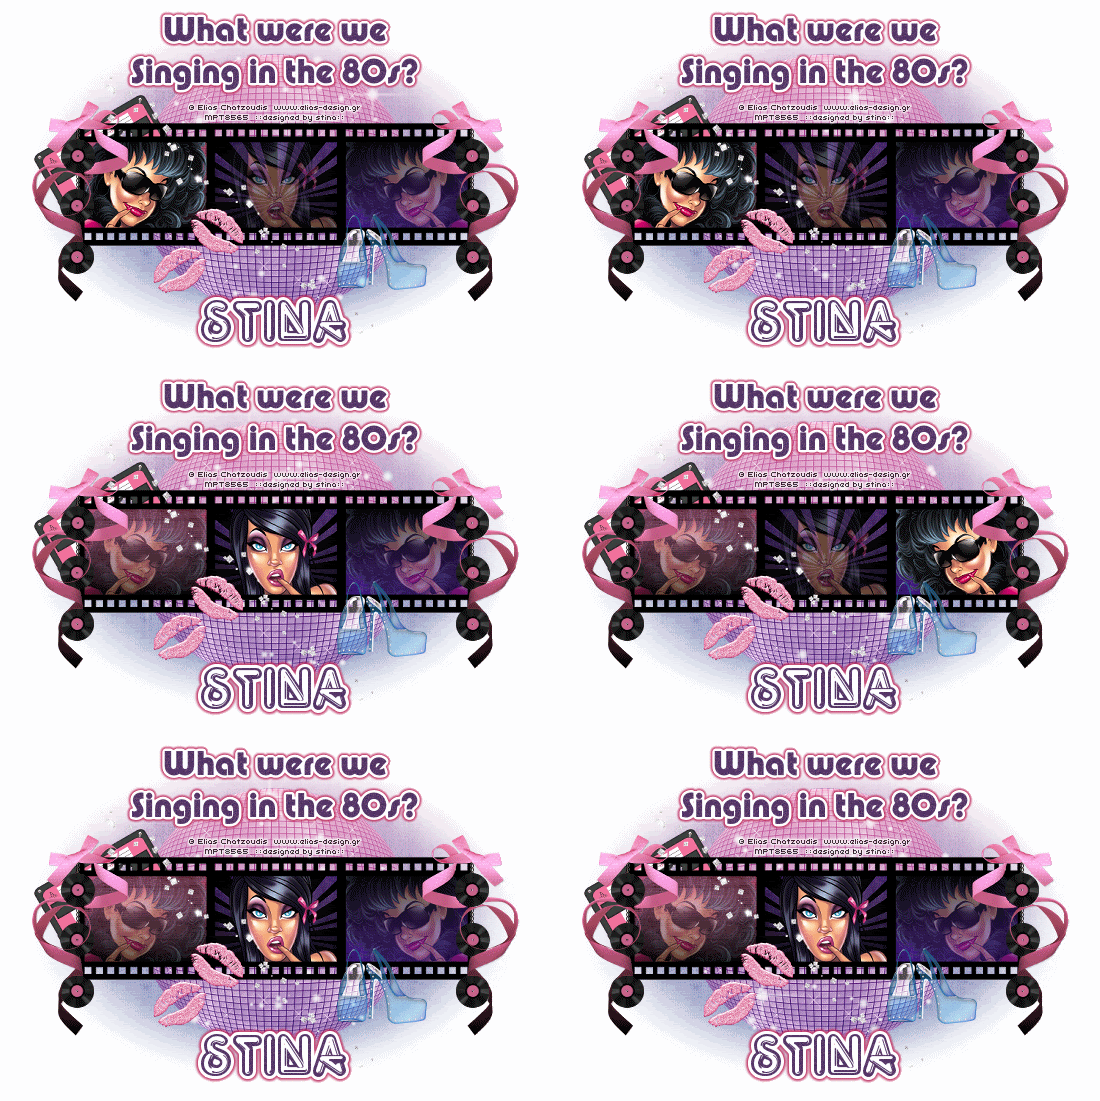
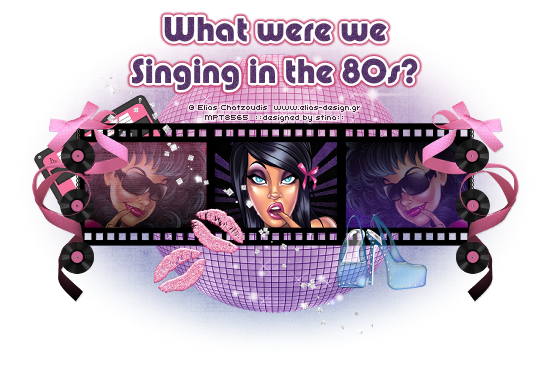
Singing in the 80s


Supplies

Scrap kit of choice - I am using "80's Glam Rock" by Kristi Westling available from The Scrapping Divaz Designz and Sunshine Studio Scraps
Tubes of choice - I am using the lovely artwork of Elias Chatzoudis available with a licence from My PSP Tubes
**PLEASE DO NOT USE HIS ARTWORK WITHOUT THE APPROPRIATE LICENCE**
WSL_Mask41 by Chelle available from her blog
Chain made my Tootypup available here (supplied with permission)
Fonts of choice - I am using Pump Demi Bold LET and Quark Neon
Plugins: Eye Candy 4000 > Gradient Glow
Xenofex 2 > Constellation


Let's begin...


Open a new 750 x 500 blank canvas flood-filled white

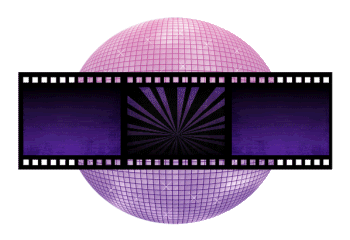
Paste Disco Ball as new layer
Resize by 60%

LEAVE IN POSITION!!

Paste FilmStrip Frame as new layer
Resize by 80%
Select inside first Frame
Selections > Modify > Expand by 5
Add new raster layer
Paste paper of choice INTO selection
Layers > Arrange > Move Down
Deselect

Select middle Frame
Selections > Modify > Expand by 5
Activate layer you pasted your paper on
Paste another paper of choice into selection
Deselect

Select third Frame
Repeat above step with another paper of choice


Select first Frame again
Selections > Modify > Expand by 5
Paste Tube of choice as new layer
Resize to liking
Selections > Invert
Delete then deselect
Duplicate then Image > Mirror

Select middle Frame again
Selections > Modify > Expand by 5
Paste another Tube of choice as new layer
Resize to liking
Selections > Invert
Delete then deselect

Paste Chain as new layer
Image > Rotate by 90
Resize by 25%
Duplicate and position to make one long chain
Layers > Merge > Merge Down
Positon to the right of Frame so the chain protrudes slightly
Duplicate, then Image > Mirror

Paste Record as new layer
Resize by 8%
Position on the end of the chain
Duplicate twice and space them evenly along chain
Layers > Merge > Merge Down twice
Duplicate, then Image > Mirror

Paste Ribbon2 as new layer
Image > Flip
Resize by 25%
Position to the right
Duplicate, then Image Mirror


On the Records layer select around them with your Magic Wand
Selections > Invert
Selections > Modify > Inside/Outside Feather
Inside by 5.00
Erase the ribbon from the inside of the top and bottom records
Deselect

Paste Lips as new layer
Image > Rotate by 30 to the right
Resize by 15%
Position to the left of the center on Film Strip
Duplicate and Image > Mirror
Position slightly down from the first

Paste Shoes as new layer
Resize by 25%
Position to liking
Duplicate and lower opacity to 50
Layers > Merge > Merge Down

Paste Sparkles as new layer
Resize by 30%
Position to liking

Paste Cassette as new layer
Image > Rotate by 30 to the left
Resize by 15%
Position behind FilmStrip to the upper left

Paste Paper of choice as new layer
Layers > Arrange > Send to Bottom

Layers > New Mask Layer > From Image
Apply WSL_Mask41
OK
Layers > Merge > Merg Group

Crop and resize tag

Select your Text Tool and font of choice
I am using Pump Demi Bold LET
Colour is #58386a or to match your tag

Type out text of choice
Objects > Align > Horiztonal Centre in Canvas
Convert to raster layer

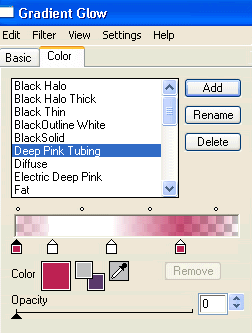
Effects > Plugins > Eye Candy > Gradient Glow with Deep Pink Tubing


Select another font of choice
I am using Quark Neon
Same text colour

Type out your name
Objects > Align > Horiztonal Centre in Canvas
Convert to raster layer
Apply any same Gradient Glow as above but increasing the Glow Width slightly

Finally, add your © copyright, licence and watermark, then save as a GIF or JPG and you're done!


** IF YOU WISH TO ANIMATE PLEASE FOLLOW THESE NEXT STEPS **

Firstly, lower the opacity of each of your Tube layers to 40
Rename them Left, Middle and Right

Activate your Disco Ball layer
Duplicate five times and rename Sparkle1 through to Sparkle6

Activate Sparkle1 and hide the rest
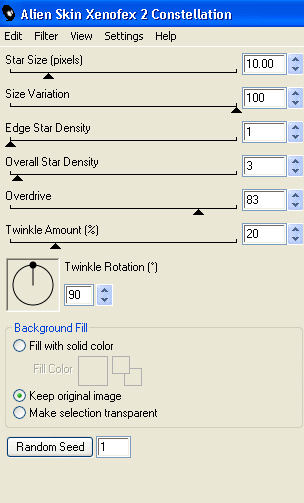
Effects > Plugins > Xenofex 2 > Constellation with the following settings:


Hide Sparkle1 and activate Sparkle2
Repeat Constellation again adjusting the Random Seed

Hide Sparkle2 and activate Sparkle3
Repeat Constellation again, adjusting the Random Seed

Repeat steps through to Sparkle6

Now to animate!

Activate Sparkle1
Activate Left Tube and raise opacity to 100
Edit > Copy Merged

Open Animation Shop
Edit > Paste as New Animation

Back to PSP
Hide Sparkle1 and activate Sparkle2
DO NOt ADJUST TUBE YET!
Edit > Copy Merged

In Animation Shop
Edit > Paste after Current Frame

Back to PSP
Hide Sparkle2 and activate Sparkle3
Edit > Copy Merged

In Animation Shop
Edit > Paste after Current Frame

Back to PSP
Activate Sparkle4
Reduce Left Tube back to 40 and raise the opacity of the Middle Tube to 100
Edit > Copy Merged

In Animation Shop
Edit > Paste after Current Frame

Back to PSP
Hide Sparkle4 and activate Sparkle5
Edit > Copy Merged

In Animation Shop
Edit > Paste after Current Frame

Back to PSP
Hide Sparkle5 and activate Sparkle6
Edit > Copy Merged

In Animation Shop
Edit > Paste after Current Frame

Back to PSP and Sparkle1
Reduce Middle Tube Tube back to 40 and raise the opacity of the Right Tube to 100
Edit > Copy Merged

In Animation Shop
Edit > Paste after Current Frame

Back to PSP
Hide Sparkle1 and activate Sparkle2
Edit > Copy Merged

In Animation Shop
Edit > Paste after Current Frame

Back to PSP
Hide Sparkle2 and activate Sparkle3
Edit > Copy Merged

Back to PSP
Activate Sparkle4
Reduce Left Tube back to 40 and raise the opacity of the Middle Tube to 100
Edit > Copy Merged

In Animation Shop
Edit > Paste after Current Frame

Back to PSP
Hide Sparkle4 and activate Sparkle5
Edit > Copy Merged

In Animation Shop
Edit > Paste after Current Frame

Back to PSP
Hide Sparkle5 and activate Sparkle6
Edit > Copy Merged

In Animation Shop
Edit > Paste after Current Frame

You should now have 12 Frames
Select All and change Frame Properties t0 15
Now save as a GIF and you're done!

Thanks for trying my tutorial!

::st!na::


Here is a non-animated version:


© Tutorial written by Stina on 29th August 2009
All rights reserved
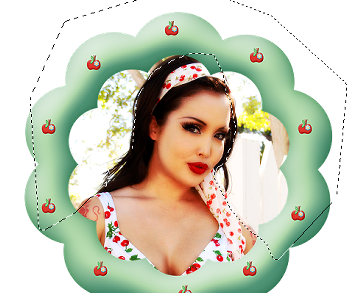
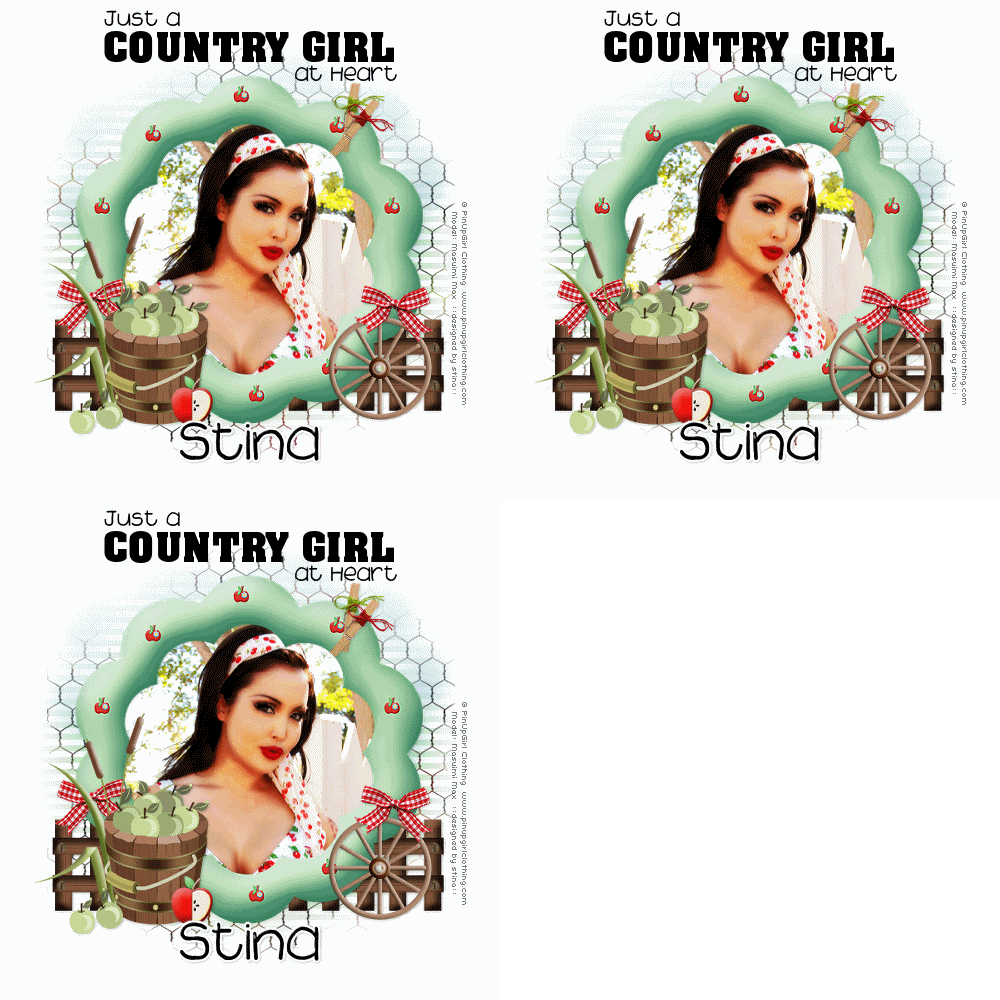
Country Girl


Supplies

Scrap kit of choice - I am using "EIEIO" by Kristi Westling available from The Scrapping Divaz Designz and Sunshine Studio Scraps
Tube or Image of choice - I am using an image of Masuimi Max for PinUpGirl Clothing which is FTU with proper credit
WSL_Mask41 and WSL_Mask220 by Chelle available from her blog
Fonts of choice - I am using Acme Font and 2Peas Sunshine
Plugins: Xero > Radiance
dsb Flux > Linear Transmission
Eye Candy 4000 > HSB Noise


Let's begin....


Open a new 600 x 600 blank canvas flood-filled white

Paste Frame2 as new layer
Resize by 80%

Select inside of Frame with Magic Wand
Selections > Modify > Expand by 10
Paste Image of choice as new layer
Selections > Invert
Delete then deselect
Layers > Arrange > Move Down
Duplicate layer

Effects > Plugins > Xero > Radiance with default settings
Your image may look a little stark so lower opacity to 65

Then with your Freehand Tool draw around the subject in your image
Selections > Modify > Feather by 5


Then erase area within your Selection


Activate top layer

Paste MiniBow as new layer
Position to the right just below halfway down
Duplicate then Image > Mirror

Paste Cattail as new layer
Resize by 60%
Position to the lower left

Paste Bucket as new layer
Resize by 25%
Position to the lower left over Cattail

Paste Apple2 as new layer
Resize by 10%
Position beside Bucket

Paste Clothespin2 as new layer
Image > Rotate by 10 to the right
Resize by 50%
Position in upper right

Paste Clothespin3 as new layer
Image > Rotate by 40 to the right
Resize by 50%
Position with first clothespin

Paste Paper of choice as new layer
Layers > Arrange > Send to Bottom

Layers > New Mask Layer > From Image
Apply WSL_Mask41
OK
Layers > Merge > Merge Group
Resize by 85%

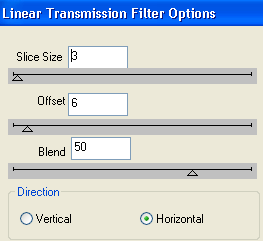
Effects > Plugins > dxb Flux > Linear Transmission with the following settings:


Lower opacity to 75

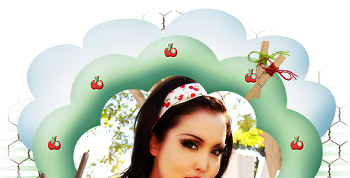
Paste Chicken Wire as new layer
Resize by 40%
Layers > New Mask Layer > From Image
Apply WSL_Mask220
OK
Layers > Merge > Merge Group

Paste Cloud as new layer
Position to the top

Duplicate, then set blend mode to Multiply
Layers > Merge > Merge Down

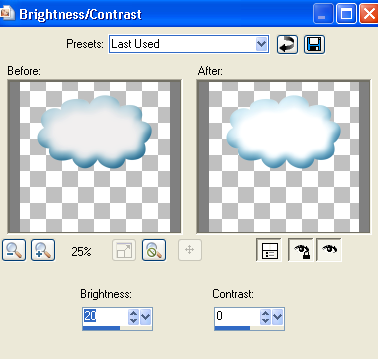
Adjust > Brightness & Contrast > Brightness/Contrast with the following settings:


Adjust > Blur > Gaussian Blur with a Radius of 15.00
Lower opacity to 50

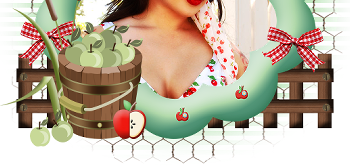
Paste Fence as new layer
Resize by 20%
Position to the lower right
Duplicate, then Image > Mirror
Layers > Merge > Merge Down


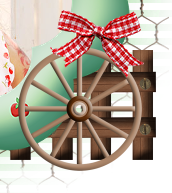
Back to top layer and let's add the Wagon Wheel
Paste as new layer
Resize by 25%
Position to the lower right as if leaning against fence

Activate MiniBow and move to top layer so it is now above Wagon Wheel


Select your Text Tool and fonts of choice
I am using Acme Font and 2 Peas Sunshine
Colour is Black

Using Acme Font in CAPS type out COUNTRY GIRL or text of choice
Objects > Align > Horiztonal Centre in Canvas
Convert to raster layer

Using 2Peas Sunshine type out "Just a" and position
Convert to raster layer
Then type out "at Heart" and position
Convert to raster layer

Layers > Merge > Merge Down
Merge Down again so your Text is one layer

Select another font of choice
I am using 2Peas Sunshine again
Same text colour

Type out your name
Objects > Align > Horiztonal Centre in Canvas
Convert to raster layer
Apply any effects and drop shadow of choice

Finally, add your © copyright, licence and watermark, then save as a GIF or JPG and you're done!


** IF YOU WISH TO ANIMATE PLEASE FOLLOW THESE NEXT STEPS **

Activate your ChickenWire layer
Duplicate twice and rename Noise1, Noise2 and Noise3

Activate Noise1 and hide Noise2 and Noise3
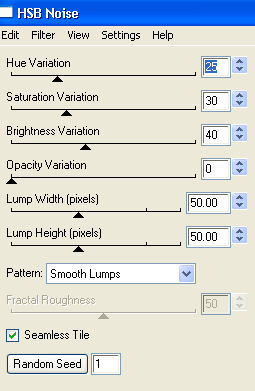
Effects > Plugins > Eye Candy 4000 > HSB Noise with the following settings:


Repeat with same settings on same layer

Hide Noise1 and activate Noise2
Repeat HSB Noise again adjusting the Random Seed
Repeat with same settings on same layer

Hide Noise2 and activate Noise3
Repeat HSB Noise once again, adjusting the Random Seed
Repeat with same settings on same layer

Now to animate!

Activate Noise1 and hide Noise2 and Noise3
Edit > Copy Merged

Open Animation Shop
Edit > Paste as New Animation

Back to PSP
Hide Noise1 and activate Noise2
Edit > Copy Merged

In Animation Shop
Edit > Paste after Current Frame

Back to PSP
Hide Noise2 and activate Noise3
Edit > Copy Merged

In Animation Shop
Edit > Paste after Current Frame

Select All and change the Frame Properties to 20
Now save as a GIF and you're done!

Thanks for trying my tutorial!

::st!na::


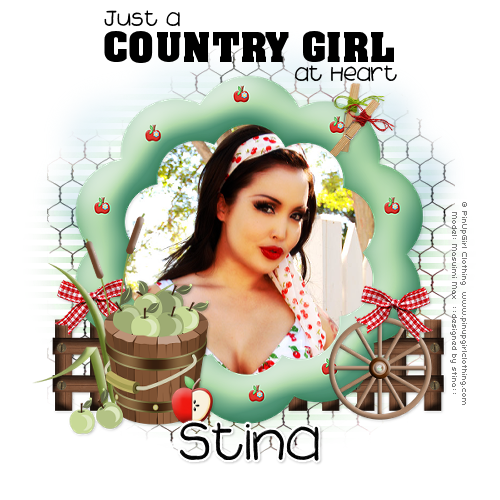
Here is a non-animated version:


© Tutorial written by Stina on 29th August 2009
All rights reserved
Friday, August 28, 2009

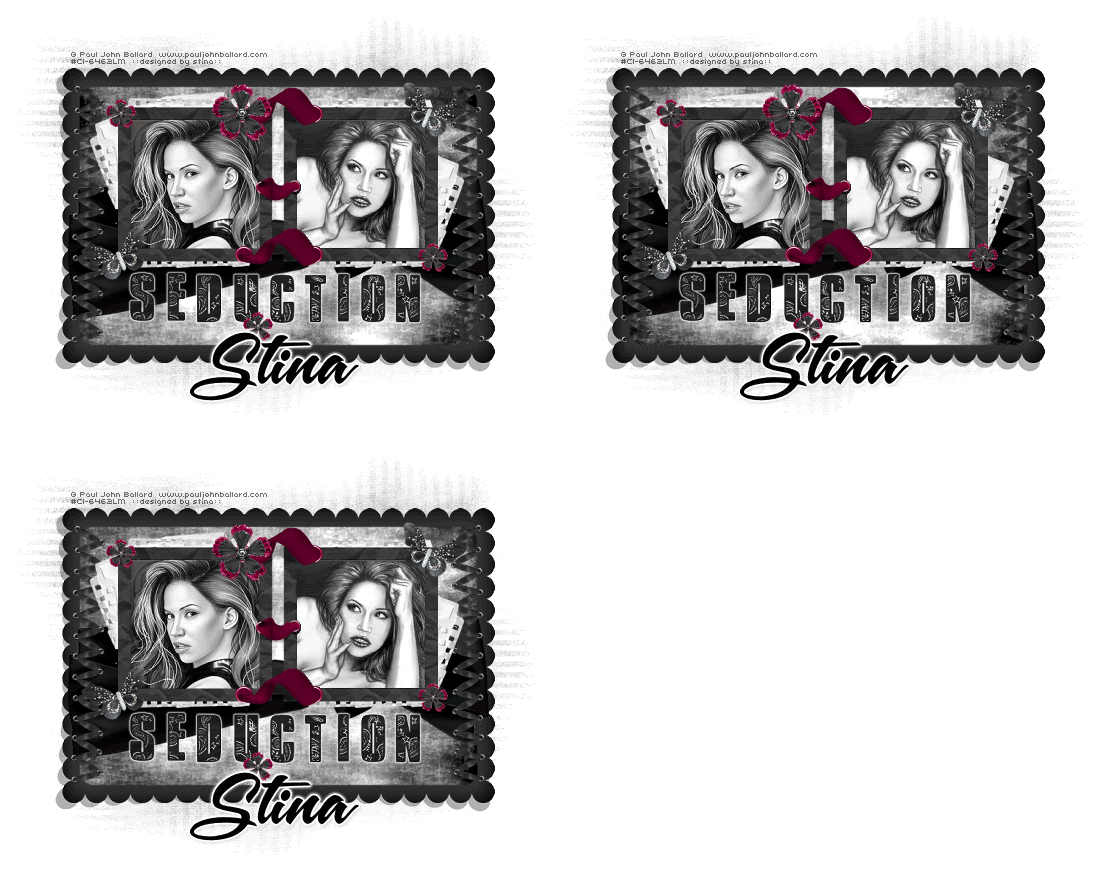
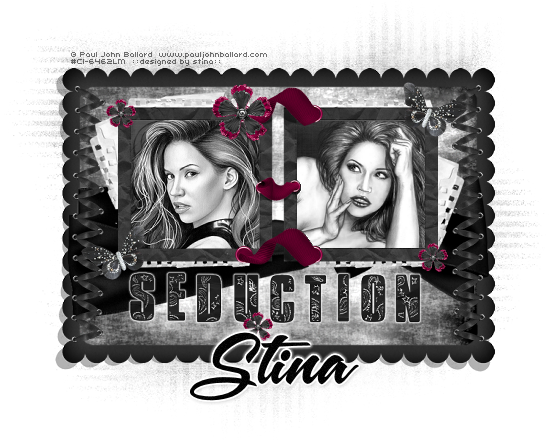
Seduction


Supplies

Scrap kit of choice - I am using "Rock It" by Cora's Creations (formerly Pimp'd Dezigns) available from Totally Sweet Designs and Paradise 4 Scrappers
Tubes of choice - I am using the lovely artwork of Paul John Ballard avialable with a licence through CILM
**PLEASE DO NOT USE HIS ARTWORK WITHOUT THE APPROPROATE LICENCE**
WSL_Mask81 by Chelle available from her blog
Font of choice - I am using A&S Snapper Script
Plugins: Eye Candy 4000 > Gradient Glow and HSB Noise


Let's begin....


Open a new 750 x 500 blank canvas flood-filled white

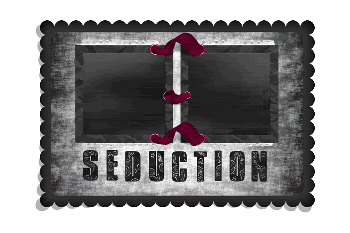
Paste Frame06 as new layer
Select inside the Frame with your Magic Wand
Selections > Modify > Expand by 20
Selections > Modify > Feather by 2
Delete twice

KEEP SELECTED!!

Selections > Modify > Expand by 10
Paste paper of choice as new layer
Layers > Arrange > Move Down
Selections > Invert
Delete then deselect

Paste Frame08 as new layer
Resize by 60%
Position inside first Frame and move upwards
Selections > Modify > Expand by 10
Add new raster layer
Paste paper of choice INTO selection
Layers > Arrange > Move Down
Selections > Invert
Deselect

Paste some text from the alpha as new layers
Resize each by around 45 - 55% depending on your text of choice
Position each beneath the Inner Frame


Select inside the left Frame and paste a Tube of choice as new layer
Resize as necessary and position
Selections > Invert
Delete then deselect
Set blend mode to Luminance Legacy

Repeat with the right Frame

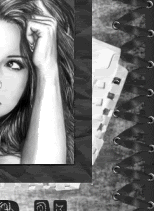
Paste Eyelet02 as new layer
Resize by 45%
Position to the left edge of outer frame
Duplicate then Image > Mirror
Layers > Merge > Merge Down
Duplicate again
Set blend mode to Overlay
Lower opacity to 50
Layers > Merge > Merge Down

Paste NotebookSheet as new layer
Image > Rotate by 20 to the right
Resize by 60%
Position to the right BEHIND inner Frame


Duplicate, then Image > Mirror
Position in upper left

Activate top layer

Paste Butterfly as new layer
Image > Rotate by 10 to the left
Resize by 30%
Position to the lower left of inner frame
Duplicate then Image > Mirror
Position in the upper right of inner frame

Paste Flower02 as new layer
Resize by 25%

LEAVE IN POSITION!!

Paste Flower04 as new layer
Resize by 20%
Layers > Merge > Merge Down
Position to your liking

Duplicate again
Resize by another 50%
Duplicate and position around canvas

Paste any other elements and position to your liking

Select your text and apply a slight Gradient Glow

Paste Paper of choice as new layer
Layers > Arrange > Send to Bottom

Layers > New Mask Layer
Apply WSL_Mask81
OK
Layers > Merge > Merge Group

Crop and resize tag

Select Text Tool and font of choice
I am using A&S Snapper Script
Text colour Black

Type out your name
Objects > Align > Horizontal Centre in Canvas
Convert to raster layer
Apply a Gradient Glow and drop shadow of choice

Finally, add your © copyright, licence and watermark, then save as a GIF or JPG and you're done!


** IF YOU WISH TO ANIMATE PLEASE FOLLOW THESE NEXT STEPS **

Activate your Frame1 Paper Background layer
Duplicate twice and rename Light1, Light2 and Light3

Activate Light1
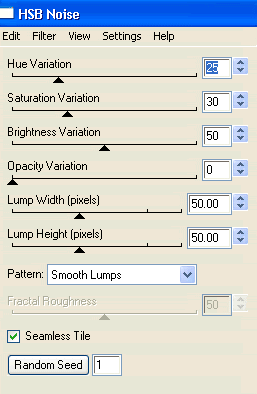
Effects > Plugins > Eye Candy 4000 > HSB Noise with the following settings:


Hide Light1 and activate Light2
Repeat Noise, adjusting the Random Seed

Hide Light2 and activate Light3
Repeat Noise once again, adjusting the Random Seed

Now to animate!

Activate Light1 and hide Light2 and Light3
Edit > Copy Merged

Open Animation Shop
Edit > Paste as New Animation

Back to PSP
Hide Light1 and activate Light2
Edit > Copy Merged

In Animation Shop
Edit > Paste After Current Frame

Back to PSP
Hide Light2 and activate Light3
Edit > Copy Merged

In Animation Shop
Edit > Paste After Current Frame

Select all and change Frame Properties to 20
Now save as a GIF and you're done!

Thanks for trying my tutorial!

::st!na::


Here is a non-animated version:


© Tutorial written by Stina on 27th August 2009
All rights reserved
Thursday, August 27, 2009

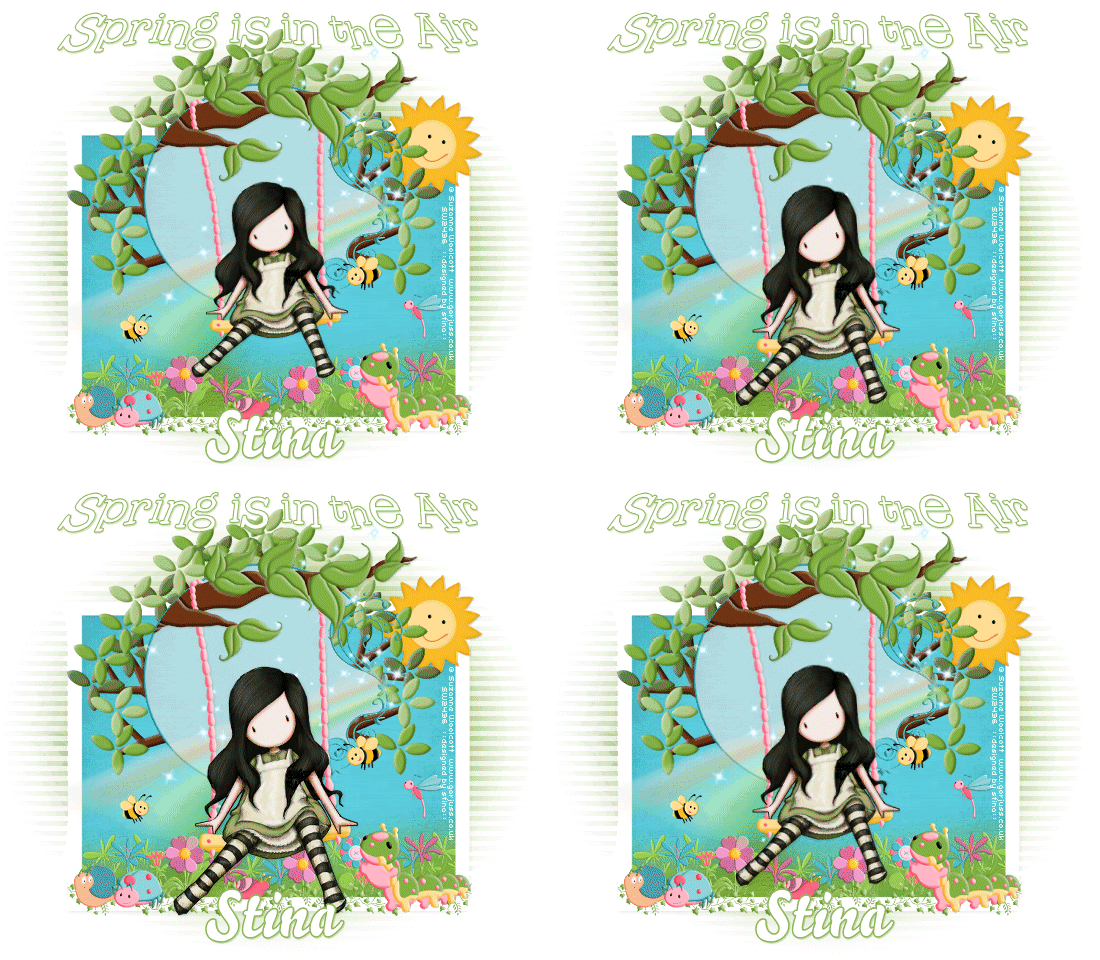
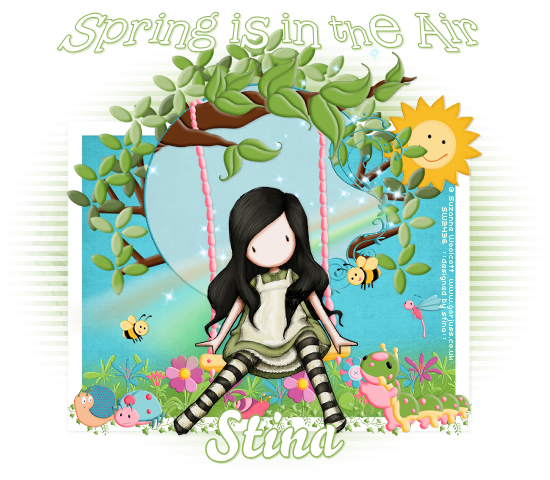
Spring is in the Air


Supplies

Scrap kit of choice - I am using "In the Between" by Lynn Earwicker available from The Scrapping Divaz Designz
Tube of choice - I am using lovely artwork of Suzanne Woolcott available with a licence from her store
**PLEASE DO NOT USE HER ARTWORK WITHOUT THE APPROPRIATE LICENCE**
WSL_Mask41 by Chelle available from her blog
Fonts of choice - I am using 2Peas Fragile and BelloScript
Plugin: dxb Flux > Linear Transmission


Let's begin...


Open a new 750 x 600 blank canvas flood-filled white

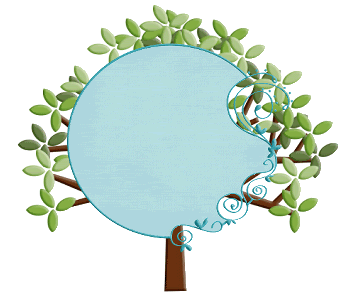
Paste Tree2 as new layer
Image > Mirror
Resize by 85%

LEAVE IN POSITION!!

Paste DoodleFrame as new layer
Resize by 60%
Position to centre of Tree
Select inside of Frame with Magic Wand
Selections > Modify > Expand by 2
Add new raster layer
Paste Paper of choice INTO selection
Layers > Arrange > Move Down

KEEP SELECTED!!

Activate Background layer
Layers > Promote Selection to Layer
Layers > Arrange > Move Up
(should be below paper background)
Deselect

Lower opacity of Paper Background to around 40
Layers > Merge > Merge Down


Paste Rainbow as new layer
Lower opacity to 55
Position to the lower left across bottom of Frame
Erase some overhanging the the upper right

Paste Sparkles as new layer
Resize by 80%
Position to liking

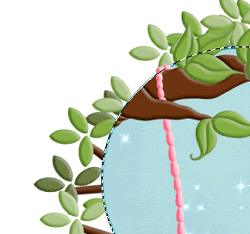
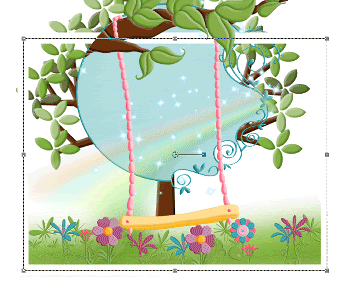
Paste Swing as new layer
Resize by 60%
Position slightly upwards on Frame

Select outside Frame with your Magic Wand
Selections > Modify > Feather by 4
Use your Eraser Tool to erase excess branch to the left


Paste Wrap2 as new layer
Position along the bottom beneath Swing
Adjust > Blur > Gaussian Blur with a Radius of 10.00
Duplicate and Merge Down again
Apply Gaussian Blur again
Layers > Merge > Merge Down

Duplicate again, then
Adjust > Blur > Gaussian Blur with a Radius of 20.00
Move slightly upwards
Then Layers > Merge > Merge Down

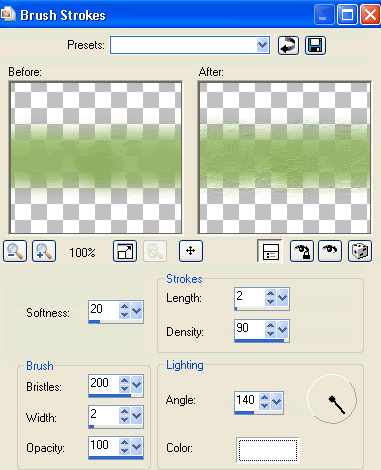
Effects > Art Media Effects > Brush Strokes with the following settings:


Then Effects > Edge Effects > Enhance
Adjust > Brightness & Contrast > Brightness/Contrast with the settings at:
Brightness - 20
Contrast - 0

Paste Flowers as new layers
Resize to various sizes of around 12 - 15%
Position along Grass, soft erasing bottom of each flower
Merge all Flowers together and apply the same Brightness as above

Merge Flowers with Grass then Send layer to Bottom

Select your Preset Shape Tool and set to Rectangle
Foreground - #FFFFFF
Background - null
Width - 20.00

Draw out a Rectangle:


Convert to raster layer and apply a drop shadow of choice

Select inside Rectangle with your Magic Wand
Selections > Modify > Expand by 10
Add new raster layer
Paste Paper of choice INTO selection
Layers > Arrange > Move Down
Deselect

Adjust > Brightness & Contrast > Brightness/Contrast with the settings at:
Brightness - 30
Contrast - 0

Activate top layer again

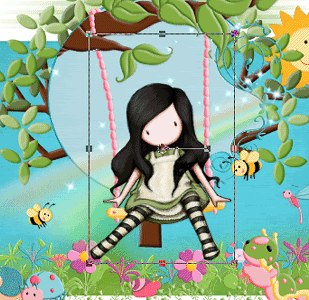
Paste Tube of choice as new layer
Best choice is a "sitting" kind of tube
Resize as necessary and position seated on swing

Paste some ladybugs, snails and caterpillars and any others
Resize by around 10%
Position to liking

Paste Leaf (border) as new layer
Position along bottom of Rectangle beneath bugs
Erase ends overhanging frame

Paste Sun as new layer
Resize by 25%
Position in the upper right of Rectangle behind Tree layer

Paste Paper of choice as new layer
Layers > Arrange > Send to Bottom

Layers > New Mask Layer > From Image
Apply WSL_Mask41
OK
Layers > Merge > Merge Group

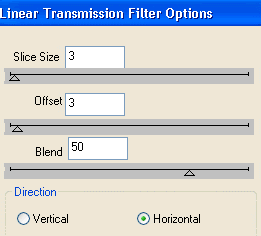
Effects > Plugins > dsb Flux > Linear Transmission with the following settings:


Crop and resize tag

Select Text Tool and font of choice
I am using 2Peas Fragile
Foreground - #90b658
Background - #FFFFFF
Stroke width - 1.00

Type out text of choice
Objects > Align > Horizontal Centre in Canvas

DO NOT CONVERT YET!!

Hold your Control Key and pull the bottom left node DOWN and TO THE LEFT slightly


Convert to raster layer
Apply drop shadow of choice

Select another font of choice
I am using BelloScript
Same colours as above

Type out your name
Objects > Align > Horizontal Centre in Canvas
Convert to raster layer
Apply a drop shadow of choice

Finally, add your © copyright, licence and watermark, then save as a GIF or JPG and you're done!


** IF YOU WISH TO ANIMATE PLEASE FOLLOW THESE NEXT STEPS **

Activate your Swing layer
With your Freehand Tool carefully draw around the swing
Layers > Promote Selection to Layer
Duplicate twice so you have three swings

On the original Swing layer press delete to remove selection

Duplicate Tube layer three times and merge each one with each Swing layer
Rename Swing1, Swing2 and Swing3

Hide Swing1 and Swing3

On Swing2 select your Pick Tool (Deformation Tool in earlier versions)
Hold your Control Key and push left node toward right node SLIGHTLY
Then push left node upwards and repeat with right node


Repeat with Swing1 slightly moreso

Now to animate!

Keep Swing1 activated and Swing2 hidden
Edit > Copy Merged

Open Animation Shop
Edit > Paste as New Animation

Back to PSP
Hide Swing1 and activate Swing2
Edit > Copy Merged

In Animation Shop
Edit > Paste After Current Frame

Back to PSP
Hide Swing2 and activate Swing3
Edit > Copy Merged

In Animation Shop
Edit > Paste After Current Frame

Back to PSP
Hide Swing3 and activate Swing2 again
Edit > Copy Merged

In Animation Shop
Edit > Paste After Current Frame

You should now have FOUR frames
Select all then change Frame Properties to 25
Now save as a GIF and you're done!

Thanks for trying my tutorial!

::st!na::


Here is a non-animated version:


© Tutorial written by Stina on 27th August 2009
All rights reserved
Wednesday, August 26, 2009

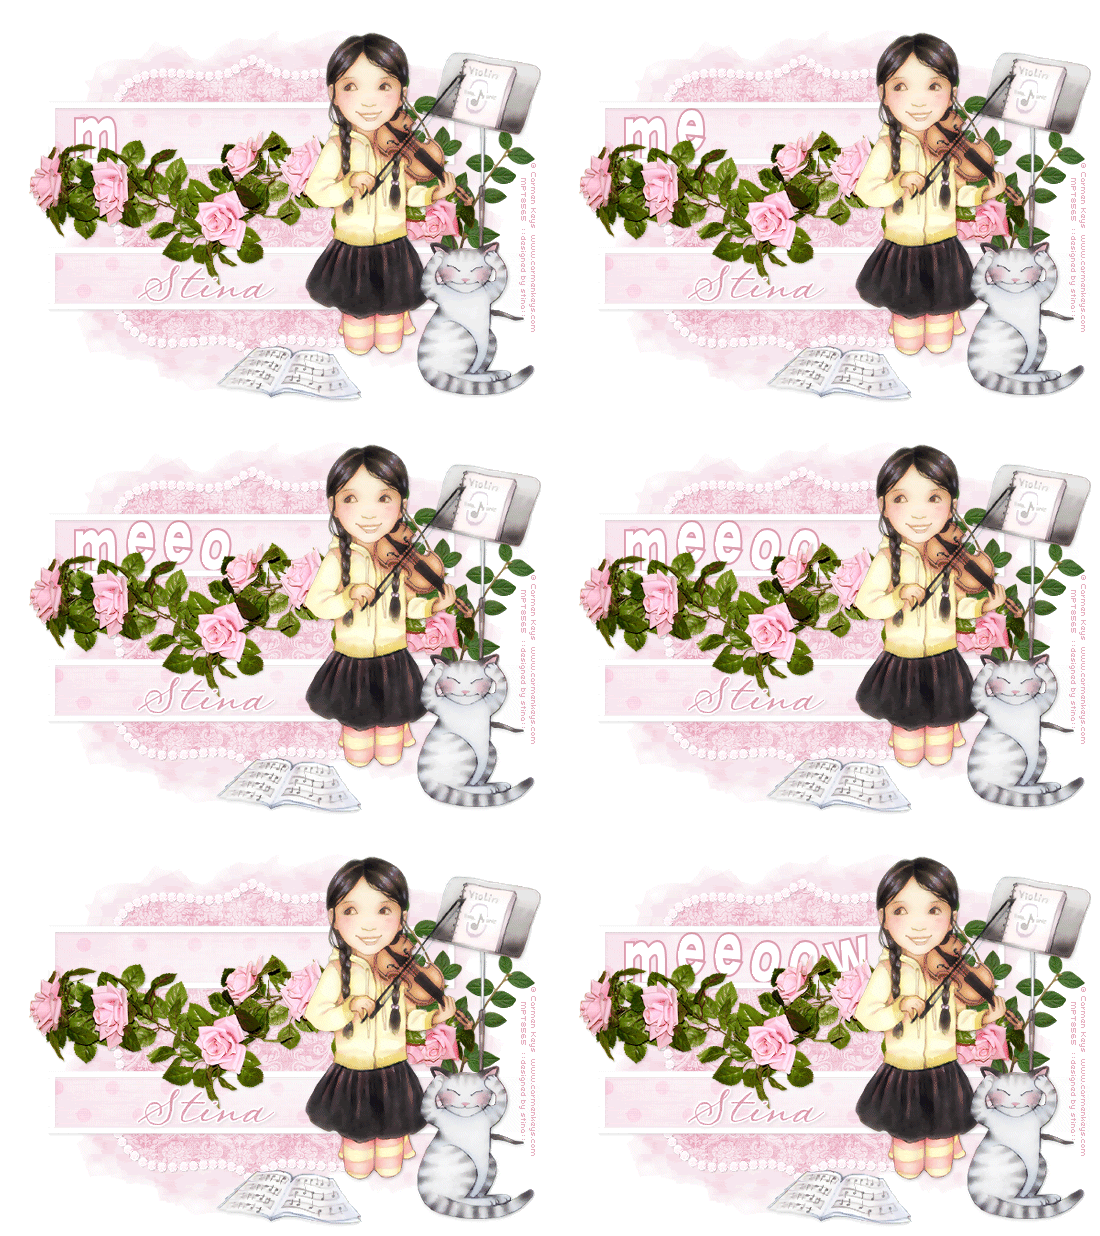
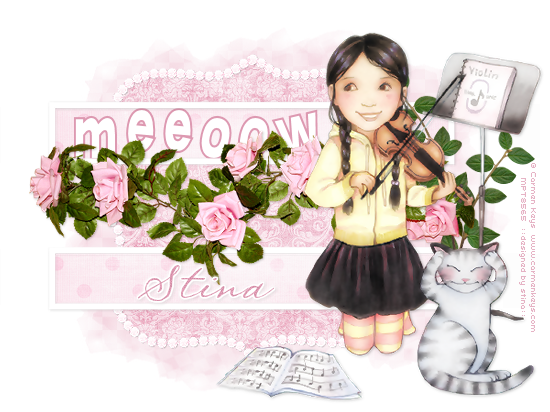
On the Cat's Tail


Supplies

Scrap kit of choice - I am using "Paris Chic" by Kristi Westling which is available from The Scrapping Divaz Designz and Sunshine Studio Scraps
Tube of choice - I am using the lovely artwork of Carmen Keys which is available with a licence from My PSP Tubes
**PLEASE DO NOT USE HER ARTWORK WITHOUT THE APPROPRIATE LICENCE**
WSL_Mask218 by Chelle available from her blog
Fonts of choice - TangledUp and PegsannaHMK
Plugins: Xero > Improver
Xero > Radiance
Eye Candy 4000 > Gradient Glow (optional)


Let's begin....


Open a new 750 x 600 blank canvas flood-filled white

Paste Frame3 as new layer
Resize by 50%

With your Freehand Tool draw just along the inside of the Frame
Add new raster layer
Paste Paper of choice INTO selection
Deselect


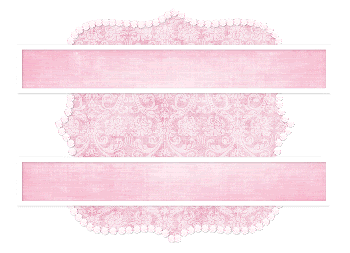
Select your Preset Shape Tool and set to Rectangle
Foreground - #FFFFFF
Background - null
Width - 10.00

Hide your Background layer so we can see what we're doing

Draw a thin rectangle toward the top of Frame
Objects > Align > Horizontal Centre in Canvas
Convert to raster layer
Duplicate, then Image > Flip
Layers > Merge > Merge Down

Select inside each rectangle with your Magic Wand
Selections > Modify > Expand by 5
Add new raster layer
Paste another Paper of choice INTO selection
Deselect
Apply a drop shadow of choice to the Rectangles and Frame


Paste Ribbon2 as new layer
Resize by 85%
Position beneath top Rectangle frame over paper
Duplicate, then Image > Flip
Layers > Merge > Merge Down

Activate paper layer and select the outside with your Magic Wand
On your Ribbon layer press delete
Deselect
Set blend mode to Soft Light then duplicate again

Paste Roses as new layer
Resize by 55%
No need to position - they should do so when you resize

Resize canvas down to 500 wide

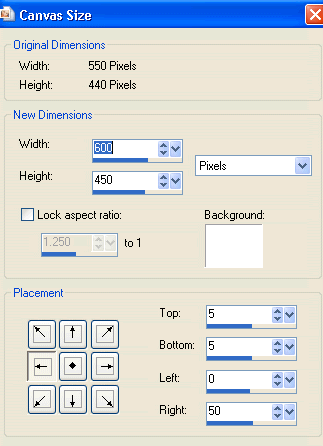
Image > Canvas Resize to 600 x 450 with the following settings:


Hide Roses and activate layer below
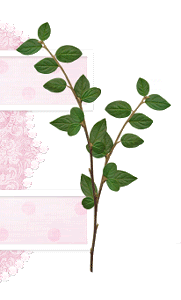
Paste Leaves as new layer
Resize by 35%
Place to the far right of canvas
Duplicate then Image > Mirror
Position slightly upwards adjoining the first set of Leaves


Layers > Merge > Merge Down

Unhide Roses again

Paste Tube of choice as new layer
Resize as necessary and position to the right

Effects > Plugins > Xero > Improver with default settings

Duplicate tube

Effects > Plugins > Xero > Radiance with default settings

Lower opacity to around 65
Apply a drop shadow of choice

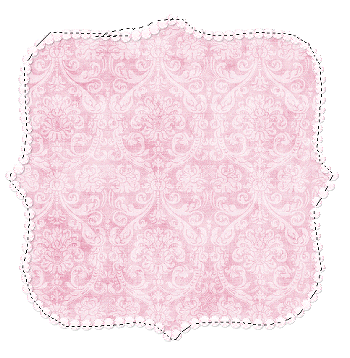
Paste a paper of choice as new layer
Layers > Arrange > Send to Bottom
Adjust > Blur > Gaussian Blur with a Radius of 5.00
Layers > New Mask Layer > From Image
Apply WSL_Mask218
OK
Layers > Merge > Merge Group
Lower opacity to 70

Crop and resize to liking

Select your Text Tool and font of choice
I am using TangledUP
Text Colour to match tag - I am using:
Foreground - #dd99b1
Background - #FFFFFF
Stroke width - 2.00
Kerning - 125

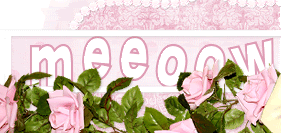
Type out MEEOOW each letter separately
Position in top rectangle BENEATH frame
Apply a drop shadow of choice

Select another font of choice
I am using PegsannaHMK
Background - #f4c2c4

Type out your name
Position in bottom rectangle
Convert to raster layer
Apply drop shadow of choice

Finally, add your © copyright, licence and watermark, then save as a GIF or JPG and you're done!


** IF YOU WISH TO ANIMATE PLEASE FOLLOW THESE NEXT STEPS **

Activate your MEEOOW letters layer
Rename M, E1, E2, O1, 02 AND W

Activate M and hide the other letters
Edit > Copy Merged


Open Animation Shop
Edit > Paste as New Animation

Back to PSP
NOw zctivate E1
Edit > Copy Merged

In Animation Shop
Edit > Paste after Current Frame

Back to PSP
Activate E2
Edit > Copy Merged

In Animation Shop
Edit > Paste after Current Frame

Back to PSP
Activate O1
Edit > Copy Merged

In Animation Shop
Edit > Paste after Current Frame

Back to PSP
Activate O2
Edit > Copy Merged

In Animation Shop
Edit > Paste after Current Frame

Back to PSP
Activate W
Edit > Copy Merged

In Animation Shop
Edit > Paste after Current Frame

Back to PSP
Hide all letters
Edit > Copy Merged

In Animation Shop
Edit > Paste after Current Frame

Back to PSP
Unhide and activate ALL letters once more
Edit > Copy Merged

In Animation Shop
Edit > Paste after Current Frame

You should now have 8 Frames

Select All, and change Frame Properties to 50
Then change Frame Properties of LAST Frame to 100
Now save as a GIF and you're done!

Thanks for trying my tutorial!

::st!na::


Here is a non-animated version:


© Tutorial written by Stina on 26th August 2009
All rights reserved
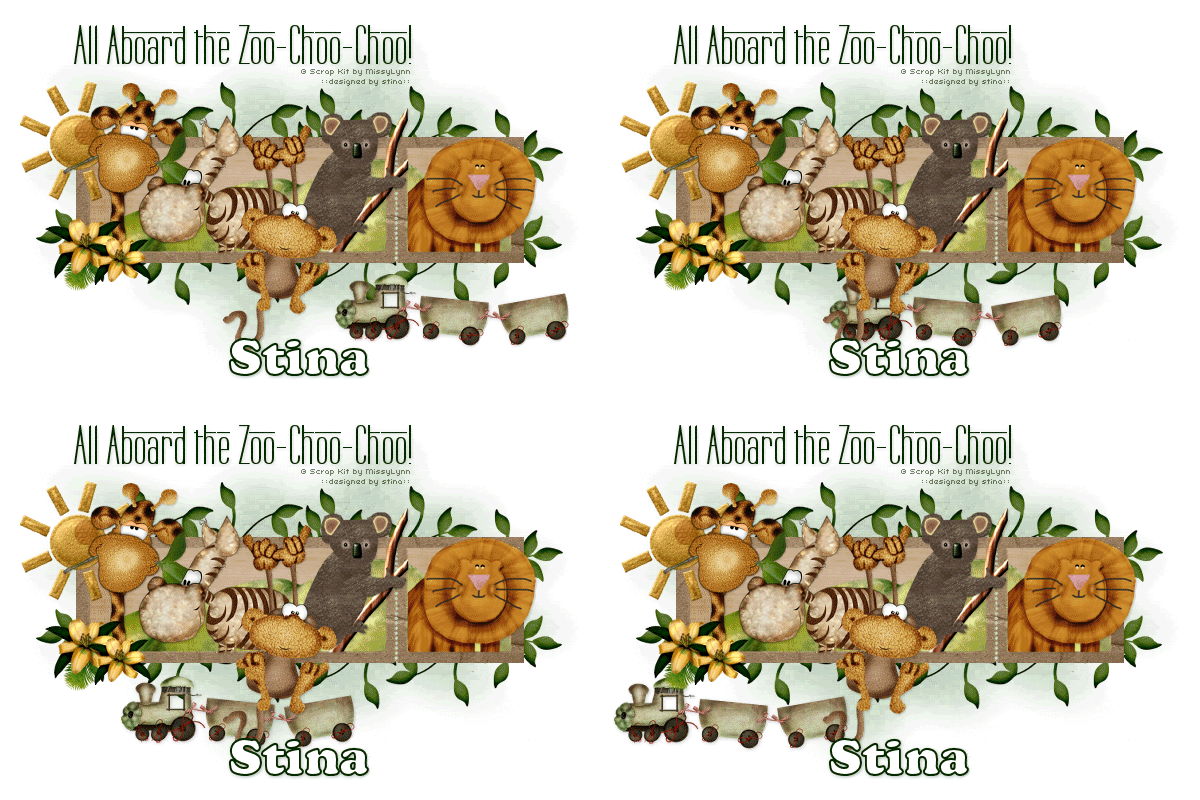
Zoo Choo Choo


Supplies

Scrap kit of choice - I am using "Zoo Pals" by MissyLynn Scraps available from Stargazer Scraps, Scraps with Attitude, Totally Sweet Designs, Paradise 4 Scrappers and Katelynns Designs
Tubes of choice - I used those supplied in the kit
WSL_Mask7 by Chelle available from her blog
Fonts of choice - I am using Labtop Overscore and Cooper Blk BT
Plugin: Xero > Fritillary
Animation Shop


Let's begin....


Open a new 750 x 600 blank canvas flood-filled white

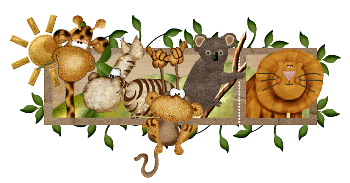
Paste Frame7 as new layer
Resize by 80%

Select inside the Frame with Magic Wand
Selections > Modify > Expand by 8
Add new raster layer
Paste Paper of choice INTO Selection
Layers > Arrange > Move Down
Deselect

Paste Grass as new layer
Resize by 80%
Position inside Frame
Erase the excess between left and right Frame


Paste Sun as new layer
resize by 35%
Position in upper left

Paste Giraffe as new layer
Resize by 40%

Paste Zebra as new layer
Resize by 40%

Paste Koala as new layer
Resize by 25%
Position to the right Frame

Paste Monkey as new layer
Resize by 40%

Paste Lion as new layer
Resize by 35%

Select inside your Frames again
Selections > Invert
Selections > Modify > Contract by 2
Selections > Modify > Feather by 2
Erase any excess you wish to remove overhanging the bottom of your Frame

Activate Frame layer again

Paste ChooChoo as new layer
Resize by 40%
Position to the lower right
Hide layer for now

Paste Leaf2 as new layer
Resize by 60%
Image > Flip
Position along top of Frame
Layers > Arrange > Send to Bottom


Duplicate and position along top
Duplicate again
Image > Flip, then Image > Mirror
Position to the right and erase any excess at the end

Hide all layers except the Leafs
Layers > Merge > Merge Visible
Unhide layers again

Add any other elements of your choice to your liking

Paste Paper of choice as new layer
Layers > Arrange > Send to Bottom

Layers > New Mask Layer > From Image
Apply WSL_Mask7
OK
Layers > Merge > Merge Group
Lower opacity to 50

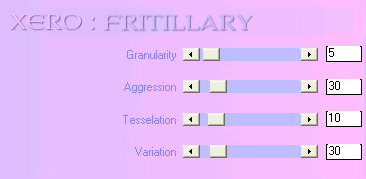
Effects > Plugins > Xero > Fritillary with the following settings:


Crop and resize to liking

Select your Text Tool and font of choice
I am using Labtop Overscore
Text Colour to match tag - I am using #012901

Type out Text of choice and position
Apply a drop shadow of choice

Select another font of choice
I am using Cooper Blk BT
Foreground - #012901
Background - #FFFFFF
Stroke width - 2.00

Type out your name
Objects > Align > Horizontal Centre in Canvas
Convert to raster layer
Duplicate and set blend mode to Multiply
Apply drop shadow of choice

Finally, add your © copyright, licence and watermark, then save as a GIF or JPG and you're done!


** IF YOU WISH TO ANIMATE PLEASE FOLLOW THESE NEXT STEPS **

Activate your ChooChoo layer
Duplicate three times and rename Train1, Train2, Train3 and Train4

Leave Train1 in position
Carefully move Train2, Train3 and Train 4 across the bottom of your Frame in EXACT line of Train1


Then activate Train1 and hide other layers
Edit > Copy Merged

Open Animation Shop
Edit > Paste as New Animation

Back to PSP
Hide Train1 and activate Train2
Edit > Copy Merged

In Animation Shop
Edit > Paste after Current Frame

Back to PSP
Hide Train2 and activate Train3
Edit > Copy Merged

In Animation Shop
Edit > Paste after Current Frame

Back to PSP
Hide Train3 and activate Train4
Edit > Copy Merged

In Animation Shop
Edit > Paste after Current Frame

Back to PSP
Set Cat4 back to Soft Light and opacity to 100
Edit > Copy Merged

In Animation Shop
Edit > Paste after Current Frame

Select All, and change Frame Properties to 50
Now save as a GIF and you're done!

Thanks for trying my tutorial!

::st!na::
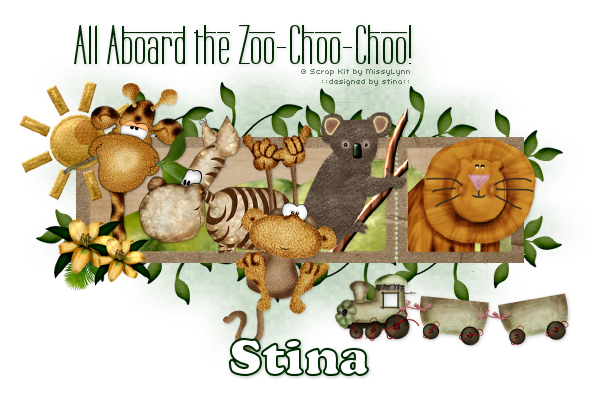
Here is a non-animated version:


© Tutorial written by Stina on 25th August 2009
All rights reserved