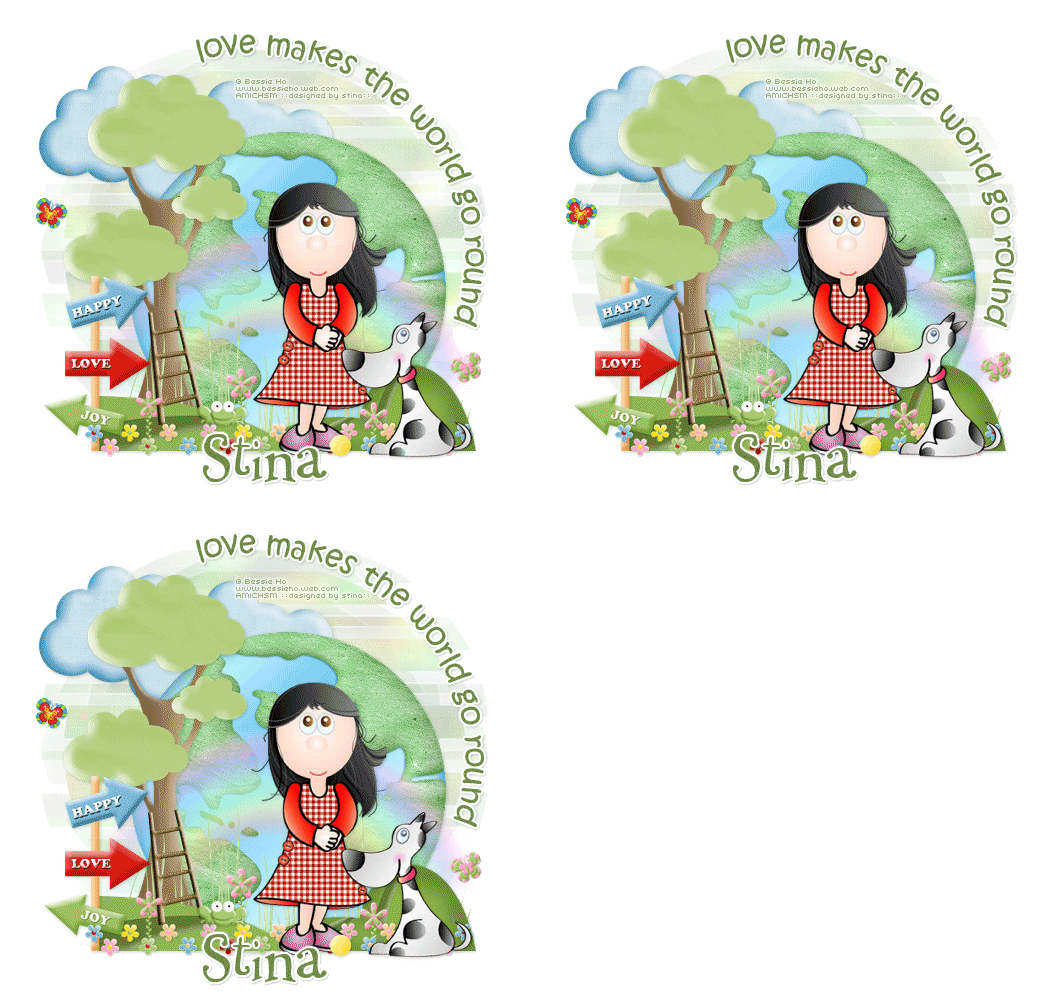
Supplies
Scrap kit of choice - I am using "Happy Town" by Kristi Westling available from The Scrapping Divaz Designz and Sunshine Studio Scraps
Tube of choice - I am using the cute artwork of Bessie Ho available with a licence from Artistic Minds Inc
**PLEASE DO NOT USE HER ARTWORK WITHOUT THE PROPER LICENCE**
WSL_Mask182 by Chelle available from her blog
Fonts of choice - I am using Kristen ITC and 2Peas Flea Market
Plugins: Eye Candy 4000 Gradient Glow and HSB Noise
Let's begin...
Open a new 600 x 600 blank canvas flood-filled white
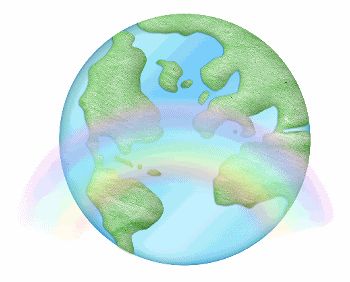
Paste Earth as new layer
Resize by 50%
Move down slightly
Resize by 50%
Move down slightly
Paste Rainbow as new layer
Image > Rotate by 15 to the right
Resize by 45%
Position to across centre to liking
Image > Rotate by 15 to the right
Resize by 45%
Position to across centre to liking
Paste Tree as new layer
Image > Mirror
Resize by 40%
Position to the left
Image > Mirror
Resize by 40%
Position to the left
Paste Grass as new layer
Resize by 20%
Position to the lower left at the base of Tree
Duplicate, then Image > Mirror
Duplicate again and move across to centre
Layers > Merge > Merge Down
Repeat
Resize by 20%
Position to the lower left at the base of Tree
Duplicate, then Image > Mirror
Duplicate again and move across to centre
Layers > Merge > Merge Down
Repeat
Paste Grass1 as new layer
Resize by 55%
Position over first Grass layers
Resize by 55%
Position over first Grass layers
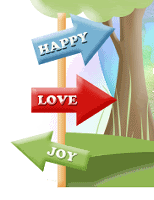
Paste Arrow as new layer
Resize by 35%
Position at the edge of Grass
Resize by 35%
Position at the edge of Grass
Paste Ladder as new layer
Resize by 35%
Position on Grass leaning against Tree
Resize by 35%
Position on Grass leaning against Tree
Paste FlowerBorder as new layer
Resize by 32%
Position along bottom of Grass
Resize by 32%
Position along bottom of Grass
Duplicate, then Image > Mirror
Position so the end flower directly overlaps the other
Layers > Merge > Merge > Down
Position so the end flower directly overlaps the other
Layers > Merge > Merge > Down
Paste some flowers along the ground
Paste Butterfly1 as new layer
Image > Rotate by 20 to the right
Resize by 12%
Position to the left
Image > Rotate by 20 to the right
Resize by 12%
Position to the left
Paste Butterfly3 as new layer
Image > Rotate by 20 to the left
Resize by 12%
Position to the right
Image > Rotate by 20 to the left
Resize by 12%
Position to the right
Paste Tube as new layer
Resize as necessary and position
Apply a drop shadow of choice
Resize as necessary and position
Apply a drop shadow of choice
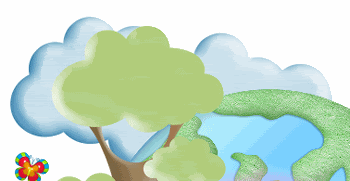
Paste Cloud as new layer
Resize by 40%
Layers > Arrange > Send to Bottom
Position behind Earth and Tree to the left
Resize by 40%
Layers > Arrange > Send to Bottom
Position behind Earth and Tree to the left
Paste Paper of choice as new layer
Layers > Arrange > Move Down
Layers > Arrange > Move Down
Layers > New Mask Layer > From Image
Apply WSL_Mask182
OK
Apply WSL_Mask182
OK
DO NOT MERGE!!
On Mask layer resize by 110%
Layers > Merge > Merge Group
Lower opacity to 30
Layers > Merge > Merge Group
Lower opacity to 30
Crop and resize to your liking
Select your Preset Shape Tool and set to ellipse
Set your foreground to a dark colour
Hold your shift key and draw out a circle
Position around the Earth
Set your foreground to a dark colour
Hold your shift key and draw out a circle
Position around the Earth
Select your Text Tool and font of choice
I am using Kristen ITC
Text colour of choice to match your tag
I am using #6f8a4c
I am using Kristen ITC
Text colour of choice to match your tag
I am using #6f8a4c
On the curve type out your text of choice
Position to your liking
Position to your liking
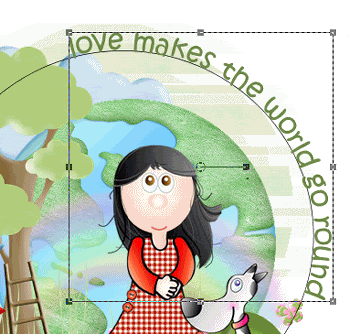
Open Layer Palette and Vector Layer
Turn off Ellipse, then
Convert to raster layer
Apply a Gradient Glow and drop shadow of choice
Turn off Ellipse, then
Convert to raster layer
Apply a Gradient Glow and drop shadow of choice
Select another font of choice
I am using 2Peas Flea Market
I am using 2Peas Flea Market
Type out your name
Objects > Align > Horizontal Centre in Canvas
Convert to raster layer
Apply a Gradient Glow and drop shadow of choice
Objects > Align > Horizontal Centre in Canvas
Convert to raster layer
Apply a Gradient Glow and drop shadow of choice
Finally, add your © copyright, licence and watermark, then save as a GIF or JPG and you're done!
** IF YOU WISH TO ANIMATE PLEASE FOLLOW THESE NEXT STEPS **
Activate your Mask layer
Duplicate twice and rename Mask1, Mask2 and Mask3
Duplicate twice and rename Mask1, Mask2 and Mask3
Activate Mask1
Effects > Plugins > Eye Candy 4000 > HSB Noise with the following settings:
Effects > Plugins > Eye Candy 4000 > HSB Noise with the following settings:
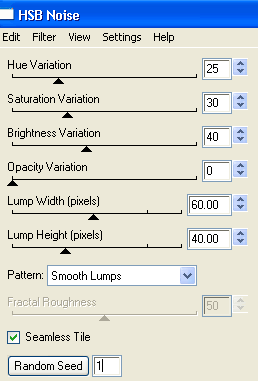
Hide Mask1 and activate Mask2
Repeat HSB Noise adjusting the Random Seed
Repeat HSB Noise adjusting the Random Seed
Hide Mask2 and activate Mask3
Repeat HSB Noise again adjusting the Random Seed once more
Repeat HSB Noise again adjusting the Random Seed once more
Now to animate!
Activate Mask1 and hide Mask2 and Mask3
Edit > Copy Merged
Edit > Copy Merged
Open Animation Shop
Edit > Paste as New Animation
Edit > Paste as New Animation
Back to PSP
Hide Mask1 and activate Mask2
Edit > Copy Merged
Hide Mask1 and activate Mask2
Edit > Copy Merged
In Animation Shop
Edit > Paste After Current Frame
Edit > Paste After Current Frame
Back to PSP
Hide Mask2 and activate Mask3
Edit > Copy Merged
Hide Mask2 and activate Mask3
Edit > Copy Merged
In Animation Shop
Edit > Paste After Current Frame
Edit > Paste After Current Frame
Now save as a GIF and you're done!
Thanks for trying my turorial!
::st!na::
Here is a non-animated version:
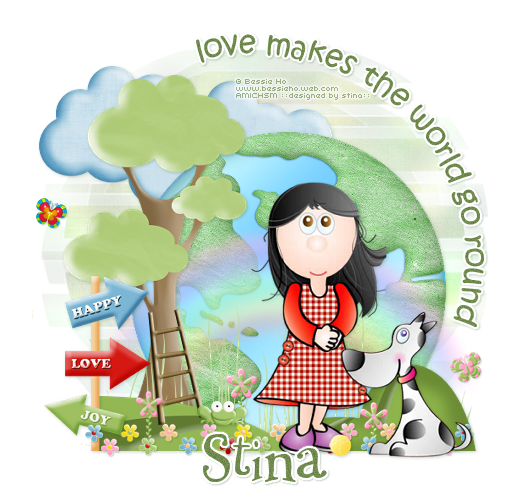
© Tutorial written by Stina on 8th August, 2009
All rights reserved

No comments:
Post a Comment