
Supplies
Scrap kit of choice - I am using "This n That Part 2" by Created by Jill available from Twilight Scraps and Aussie Scraps
Tubes of choice - I am using the wonderful FTU artwork of Lianne Issa
ETMask-re05 and dmsk0001
Fonts of choice - I am using BeautifulES and BickhamScriptFancy
Plugins: Xero > Radiance
Eye Candy 4000 > Gradient Glow (optional)
Xenofex 2 > Constellation
Let's begin....
Open a new 700 x 600 blank canvas flood-filled white
Paste Frame2 as new layer
Resize by 85%
Resize by 85%
Select inside Frame with your Magic Wand
Selections > Modify > Expand by 10
Add a new raster layer
Layers > Arrange > Move Down
Paste Paper of choice INTO selection
Selections > Modify > Expand by 10
Add a new raster layer
Layers > Arrange > Move Down
Paste Paper of choice INTO selection
KEEP SELECTED!!
Paste Tube of choice as new layer
Resize as necessary
Position within Frame
Selections > Invert
Delete then deselect
Resize as necessary
Position within Frame
Selections > Invert
Delete then deselect
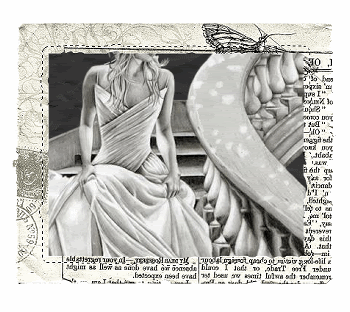
I pasted a "stand alone" copy of the same tube OVER the bottom tube and brought that to top layer (above the Frame)
Select with Magic Wand again
Selections > Invert
Selections > Modify > Contract by 2
Selections > Feather by 2
Erase the excess with your Eraser Tool
Duplicate layer, then
Effects > Plugins > Xero > Radiance with default settings
Lower opacity to 60
Layers > Merge > Merge Down
Lower opacity to 60
Layers > Merge > Merge Down
Paste FrameWrap4 as new layer
Resize by 83%
Position along lower portion of Frame
Resize by 83%
Position along lower portion of Frame
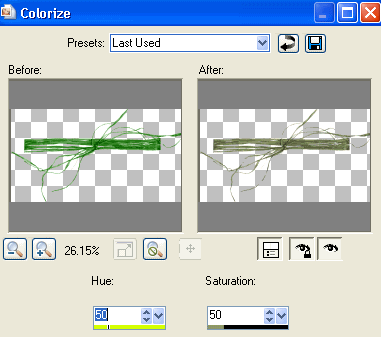
Adjust > Hue & Saturation > Colourise with the following settings:
Duplicate, then set blend mode to Soft Light
Layers > Merge > Merge Down
Layers > Merge > Merge Down
Paste Flower13 as new layer
Resize by 35%
Position in lower right
Duplicate and resize by 80%
Resize by 35%
Position in lower right
Duplicate and resize by 80%
Position below first flower
Paste Bow2 (Red ribbon flower) as new layer
Resize by 20%
Position in the centre of white daisy flower
Resize by 20%
Position in the centre of white daisy flower
Adjust > Hue & Saturation > Colourise with the same settings as above
Duplicate, then resize by 80% also
Move below the flowers and position with the smaller daisy
Lower the opacity to 60
Layers > Merge > Merge Down
Move below the flowers and position with the smaller daisy
Lower the opacity to 60
Layers > Merge > Merge Down
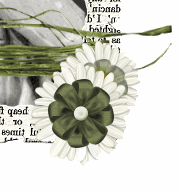
Paste HeartElement as new layer
Resize by 70%
Position in lower left BEHIND FLOWERS
Duplicate, then Image > Mirror
Position the copy from the lower left to lower right, resizing by 90%
Resize by 70%
Position in lower left BEHIND FLOWERS
Duplicate, then Image > Mirror
Position the copy from the lower left to lower right, resizing by 90%
Paste Bubbles as new layer
Resize by 40%
Position to your liking
Resize by 40%
Position to your liking
Paste Cloud as new layer
Resize by 85%
Position behind tube above Frame (or to liking)
Resize by 85%
Position behind tube above Frame (or to liking)
Paste Grass2 as new layer
Resize by 70%
Position in lower right
Resize by 70%
Position in lower right
Layers > Arrange > Send to Bottom
Duplicate, then Image > Mirror
Duplicate, then Image > Mirror
Paste Paper as new layer and move to bottom
Layers > New Mask Layer > From Image
Apply ET Mask-re05
OK
Layers > Merge > Merge Group
Layers > New Mask Layer > From Image
Apply ET Mask-re05
OK
Layers > Merge > Merge Group
On same layer:
Layers > New Mask Layer > From Image
Apply dmsk0001
OK
Layers > Merge > Merge Group
Layers > New Mask Layer > From Image
Apply dmsk0001
OK
Layers > Merge > Merge Group
Crop and resize to liking
Select Text Tool and font of choice
I am using Beautiful ES
Text colour to match tag - I am using #000000
I am using Beautiful ES
Text colour to match tag - I am using #000000
Type out text of choice
Objects > Align > Horizontal Centre in Canvas
Convert to raster layer
Lower opacity to 70
Objects > Align > Horizontal Centre in Canvas
Convert to raster layer
Lower opacity to 70
Select another font of choice
I am using BickhamScriptFancy
Same text colour
I am using BickhamScriptFancy
Same text colour
Type out your name
Objects > Align > Horizontal Centre in Canvas
Convert to raster layer
Apply a Gradient Glow and drop shadow of choice
Objects > Align > Horizontal Centre in Canvas
Convert to raster layer
Apply a Gradient Glow and drop shadow of choice
Finally, add your © copyright, licence and watermark, then save as a GIF or JPG and you're done!
** IF YOU WISH TO ANIMATE PLEASE FOLLOW THESE NEXT STEPS **
Activate the Background layer of your Frame
Duplicate twice and rename Sparkle1, Sparkle2 and Sparkle3
Duplicate twice and rename Sparkle1, Sparkle2 and Sparkle3
Activate Sparkle1
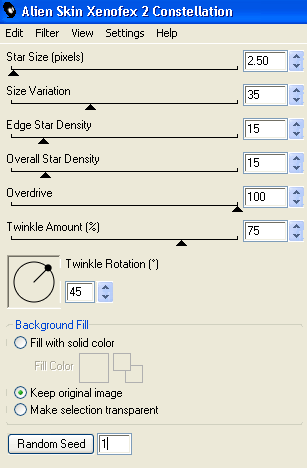
Effects > Plugins > Xenofex 2 > Constellation with the following settings:
Effects > Plugins > Xenofex 2 > Constellation with the following settings:
Hide Sparkle1 and activate Sparkle2
Repeat Constellation, adjusting the Random Seed
Repeat Constellation, adjusting the Random Seed
Hide Sparkle2 and activate Sparkle3
Repeat Constellation once again, adjusting the Random Seed
Repeat Constellation once again, adjusting the Random Seed
Now to animate!
Activate Sparkle1 and hide Sparkle2 and Sparkle3
Edit > Copy Merged
Edit > Copy Merged
Open Animation Shop
Edit > Paste as New Animation
Edit > Paste as New Animation
Back to PSP
Hide Sparkle1 and activate Sparkle2
Edit > Copy Merged
Hide Sparkle1 and activate Sparkle2
Edit > Copy Merged
In Animation Shop
Edit > Paste After Current Frame
Edit > Paste After Current Frame
Back to PSP
Hide Sparkle2 and activate Sparkle3
Edit > Copy Merged
Hide Sparkle2 and activate Sparkle3
Edit > Copy Merged
In Animation Shop
Edit > Paste After Current Frame
Edit > Paste After Current Frame
Now save as a GIF and you're done!
Thanks for trying my tutorial!
::st!na::
Here is a non-animated version:
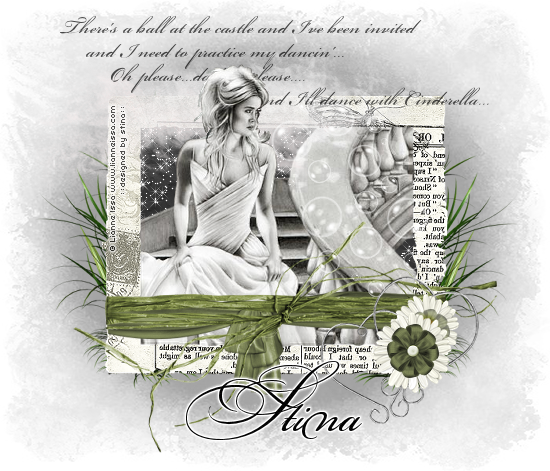
© Tutorial written by Stina on 21st August 2009
All rights reserved

No comments:
Post a Comment