Please email me designed.by.stina@gmail.com with your creations. I'd love to see them.

Showing posts with label Twilight Scraps. Show all posts

Thursday, September 10, 2009

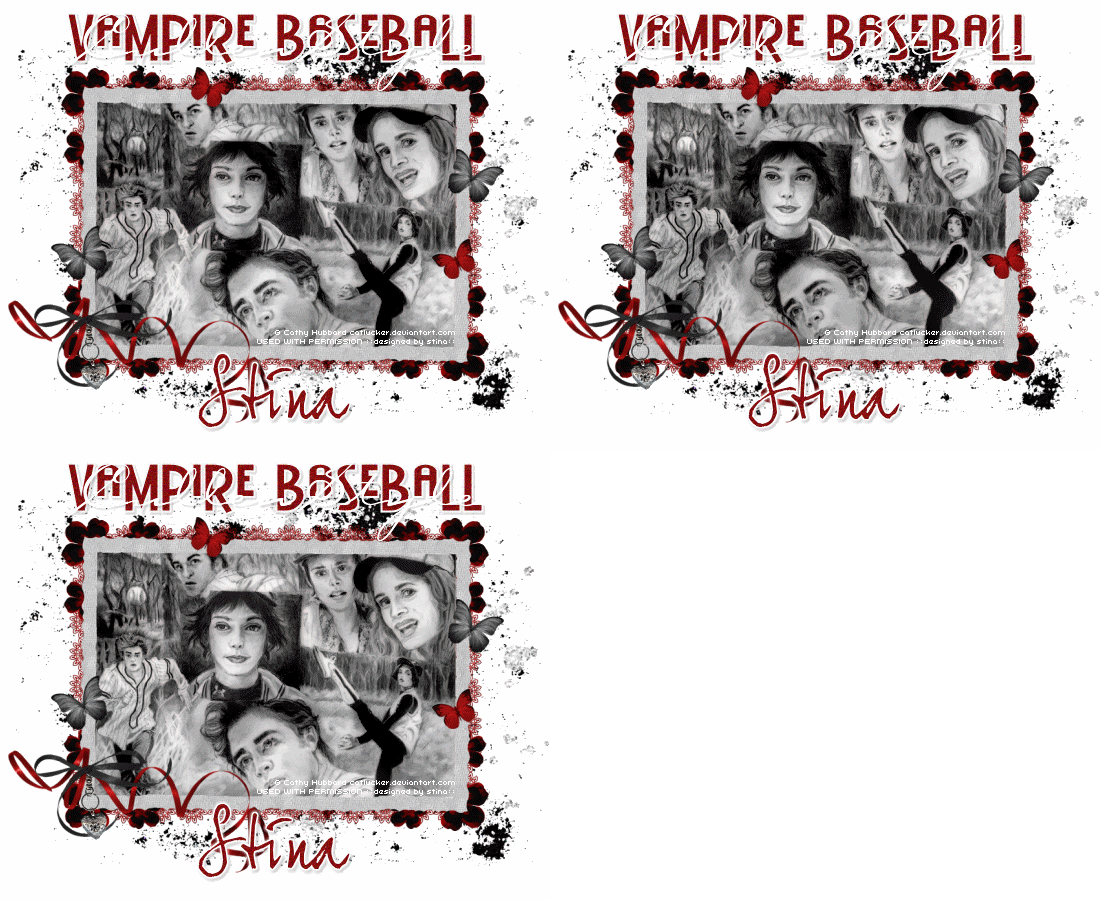
Vampire Baseball


Supplies

Scrap kit of choice - I am using "Adoration" by Gemini CreationZ available from Gemini Creationz, Twilight Scraps, Scrappin Bratz and Paradise 4 Scrappers
Tube of choice - I am using the lovely artwork of Cathy Hubbard with permission
**PLEASE DO NOT USE HER ARTWORK WITHOUT THE APPROPRIATE PERMISSION**
Fonts of choice - I am using BattleLines, Carpenter Script and JoeHand2
Plugins: Xero > Porcelain
Simple > Top Left Mirror
Eye Candy 4000 > Gradient Glow (optional) and HSB Noise


Let's begin...


Open a new 850 x 650 blank canvas flood-filled white

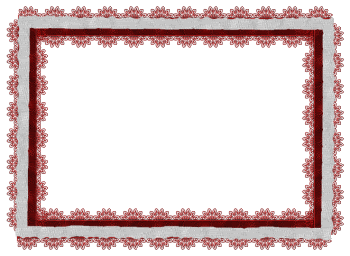
Paste Frame2 as new layer
Resize by 70%

Now activate Background layer

Paste EmbRibbon as new layer
Resize by 70%
Position along bottom of Frame
With your Selection Tool make a small selection around the excess and press delete

Duplicate, then Image > Flip

Duplicate again, then Image > Rotate by 90
Position to the left
Make another selection and delete

Duplicate once more, then Image > Mirror

Hide Background and Frame
Layers > Merge > Merge Visible
Activate layers again


Paste Flower3 as new layer
Resize by 15%
Duplicate and set blend mode to Multiply
Layers > Merge > Merge Down

LEAVE IN POSITION!!

Paste Flower1 as new layer
Resize by 12%

LEAVE IN POSITION!!

Duplicate Flower3 again
Layers > Arrange > Move Up
Resize by 50%

LEAVE IN POSITION!!

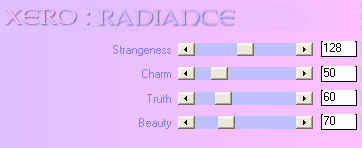
Effects > Plugins > Xero > Radiance with default settings
Repeat on EACH flower layer

On top flower layer, Merge Down
Repeat
Flowers should now be ONE layer

Position in upper left corner
Duplicate and resize by 70%, then duplicate again
Position smaller flowers on either side of larger one
Activate top flower
Layers > Merge > Merge Down
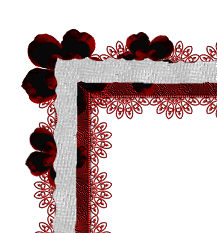


Effects > Plugins > Simple > Top Left Mirror

Paste BlkSplatter as new layer
Layers > Arrange > Send to Bottom

Paste WhtSplatter as new layer
Resize by 70% and position to liking

Select inside Frame with Magic Wand
Selections > Modify > Expand by 10

Add a new raster layer
Paste Paper of choice INTO selection
Layers > Arrange > Move Down

OR

Paste Image of choice as new layer
Resize as necessary and position
Layers > Arrange > Move Down (behind Frame)
Selections > Invert
Delete then deselect

Duplicate, then on the original layer:

Effects > Plugins > Xero > Porcelain with the following settings:
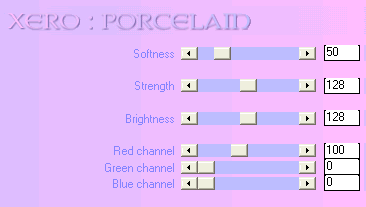


Lower opacity of duplicate to 40
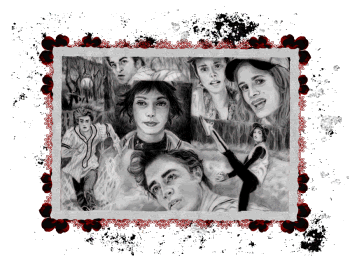


Activate top layer

Paste RedRibbon as as new layer
Resize by 50%
Position to the lower left

Paste Black Ribbon Bow as new layer
Resize by 55%
Position over the Red Ribbon

Paste HeartClip as new layer
Resize by 35%
Adjust > Sharpness > Sharpen
Position BENEATH the Red and Black Ribbons
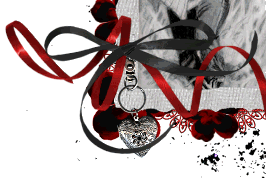


Paste Butterfly as new layer
Image > Rotate by 25 to the right
Resize by 15%
Position to the right
Duplicate, then Image > Mirror
Position to the left

Paste another butterfly and repeat but resize by 12%
Position to your liking

Crop and resize

Select your Text Tool and font of choice
I am using BattleLines
Foreground - #FFFFFF
Background - #860c0e
Stroke width - 2.0

Type out text of choice
Objects > Align > Horizontal Centre in Canvas
Convert to raster layer
Apply a drop shadow of choice

I then chose a script font - Carpenter Script
Then typed out some more text of choice and positioned over it
Duplicate, then applied a drop shadow

Select another font of choice
I am using JoeHand2
Same Text colour
Type out your name
Objects > Align > Horizontal Centre in Canvas
Convert to raster layer
Apply a Gradient Glow and drop shadow of choice

Finally, add your © copyright, licence and watermark, then save as GIF or JPG and you're done!


** IF YOU WISH TO ANIMATE PLEASE FOLLOW THESE NEXT STEPS **

Activate your (bottom) Image layer (not the one we lowered the opacity to)
Duplicate twice and rename Noise1, Noise2 and Noise3

Activate Noise1

Effects > Plugins > Eye Candy 4000 > HSB Noise with the following settings:
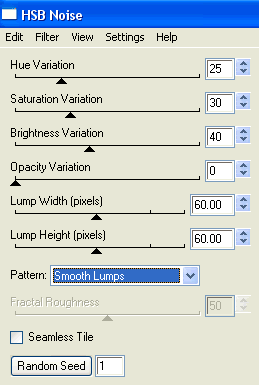


Hide Noise1 and activate Noise2
Repeat Noise adjusting the Random Seed

Hide Noise2 and activate Noise3
Repeat Noise effect once more adjusting the Random Seed again

Now to animate!

Activate Noise1 and hide the other two
Edit > Copy Merged

In Animation Shop
Edit > Paste as New Animation

Hide Noise1 and activate Noise2
Edit > Copy Merged

In Animation Shop
Edit > Paste after Current Frame

Hide Noise2 and activate Noise3
Edit > Copy Merged

In Animation Shop
Edit > Paste after Current Frame

Select All, and change Frame Properties to 30
Save as a GIF and you're done!

Thanks for trying my tutorial!

::st!na::


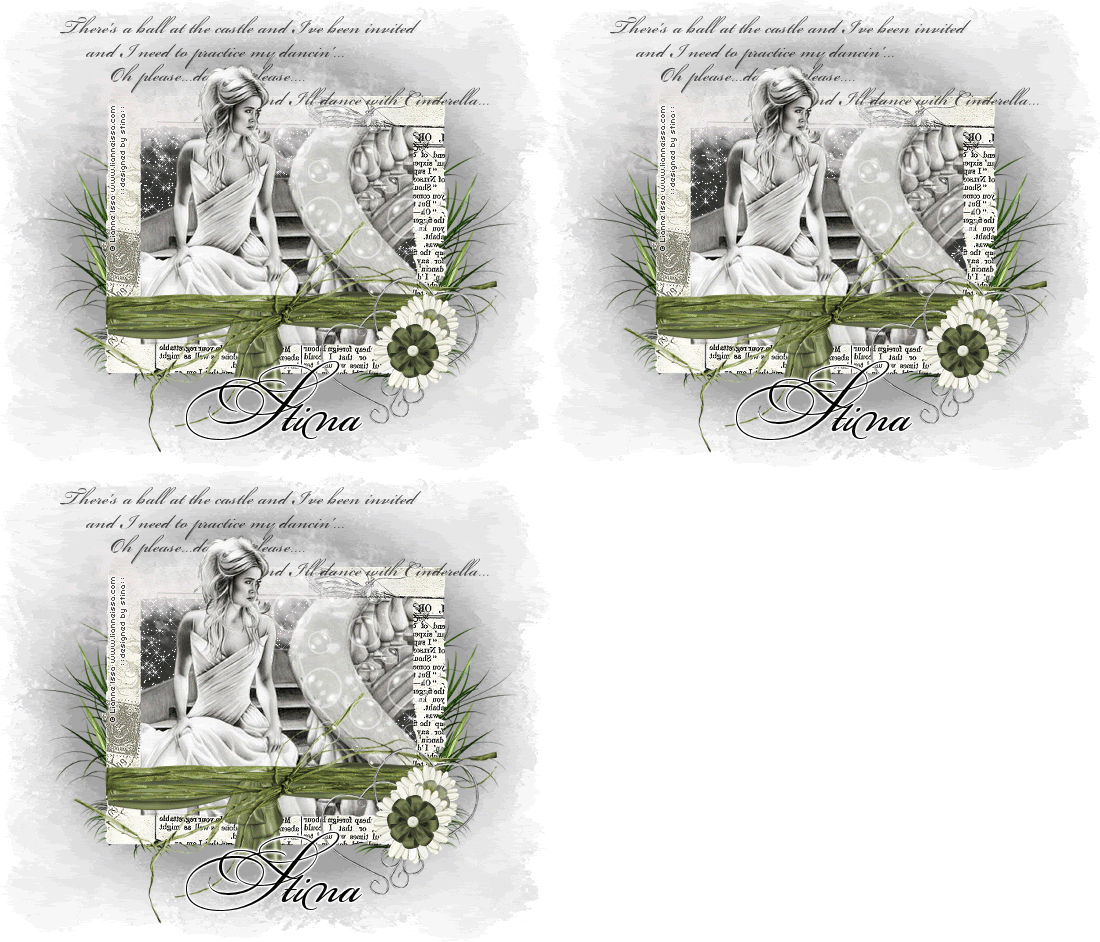
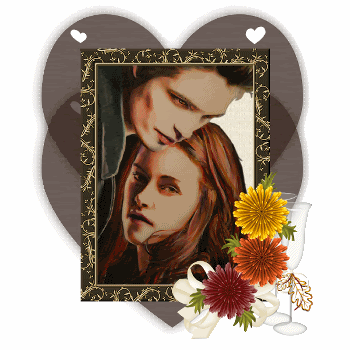
Here is a non-animated version:
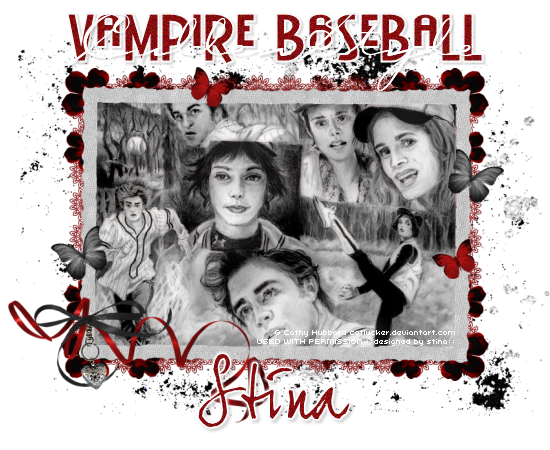


© Tutorial written by Stina on 10th September 2009
All rights reserved

Friday, August 21, 2009

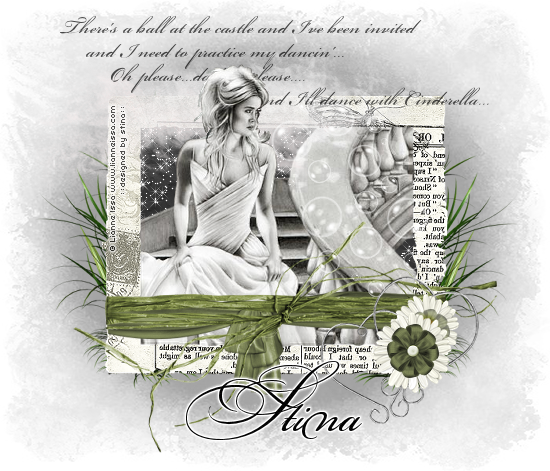
Dance With Cinderella


Supplies

Scrap kit of choice - I am using "This n That Part 2" by Created by Jill available from Twilight Scraps and Aussie Scraps
Tubes of choice - I am using the wonderful FTU artwork of Lianne Issa
Fonts of choice - I am using BeautifulES and BickhamScriptFancy
Plugins: Xero > Radiance
Eye Candy 4000 > Gradient Glow (optional)
Xenofex 2 > Constellation


Let's begin....


Open a new 700 x 600 blank canvas flood-filled white

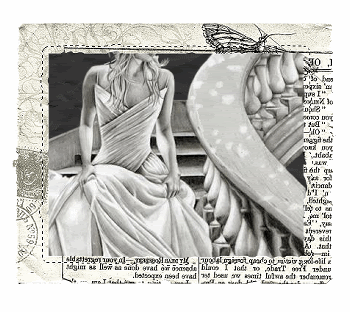
Paste Frame2 as new layer
Resize by 85%

Select inside Frame with your Magic Wand
Selections > Modify > Expand by 10
Add a new raster layer
Layers > Arrange > Move Down
Paste Paper of choice INTO selection

KEEP SELECTED!!

Paste Tube of choice as new layer
Resize as necessary
Position within Frame
Selections > Invert
Delete then deselect


I pasted a "stand alone" copy of the same tube OVER the bottom tube and brought that to top layer (above the Frame)

Select with Magic Wand again
Selections > Invert
Selections > Modify > Contract by 2
Selections > Feather by 2
Erase the excess with your Eraser Tool

Duplicate layer, then
Effects > Plugins > Xero > Radiance with default settings
Lower opacity to 60
Layers > Merge > Merge Down

Paste FrameWrap4 as new layer
Resize by 83%
Position along lower portion of Frame

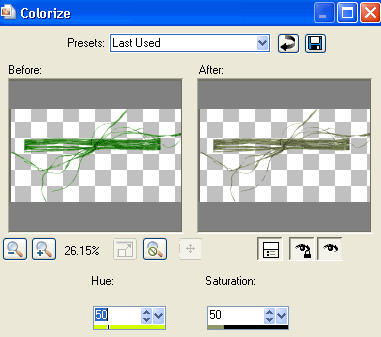
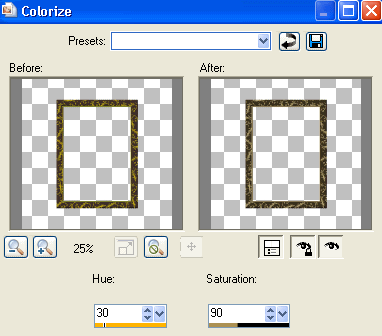
Adjust > Hue & Saturation > Colourise with the following settings:


Duplicate, then set blend mode to Soft Light
Layers > Merge > Merge Down

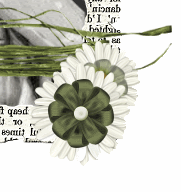
Paste Flower13 as new layer
Resize by 35%
Position in lower right
Duplicate and resize by 80%
Position below first flower

Paste Bow2 (Red ribbon flower) as new layer
Resize by 20%
Position in the centre of white daisy flower

Adjust > Hue & Saturation > Colourise with the same settings as above
Duplicate, then resize by 80% also
Move below the flowers and position with the smaller daisy
Lower the opacity to 60
Layers > Merge > Merge Down


Paste HeartElement as new layer
Resize by 70%
Position in lower left BEHIND FLOWERS
Duplicate, then Image > Mirror
Position the copy from the lower left to lower right, resizing by 90%

Paste Bubbles as new layer
Resize by 40%
Position to your liking

Paste Cloud as new layer
Resize by 85%
Position behind tube above Frame (or to liking)

Paste Grass2 as new layer
Resize by 70%
Position in lower right
Layers > Arrange > Send to Bottom
Duplicate, then Image > Mirror

Paste Paper as new layer and move to bottom
Layers > New Mask Layer > From Image
Apply ET Mask-re05
OK
Layers > Merge > Merge Group

On same layer:
Layers > New Mask Layer > From Image
Apply dmsk0001
OK
Layers > Merge > Merge Group

Crop and resize to liking

Select Text Tool and font of choice
I am using Beautiful ES
Text colour to match tag - I am using #000000

Type out text of choice
Objects > Align > Horizontal Centre in Canvas
Convert to raster layer
Lower opacity to 70

Select another font of choice
I am using BickhamScriptFancy
Same text colour

Type out your name
Objects > Align > Horizontal Centre in Canvas
Convert to raster layer
Apply a Gradient Glow and drop shadow of choice

Finally, add your © copyright, licence and watermark, then save as a GIF or JPG and you're done!


** IF YOU WISH TO ANIMATE PLEASE FOLLOW THESE NEXT STEPS **

Activate the Background layer of your Frame
Duplicate twice and rename Sparkle1, Sparkle2 and Sparkle3

Activate Sparkle1
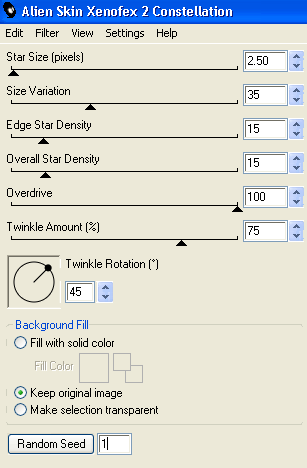
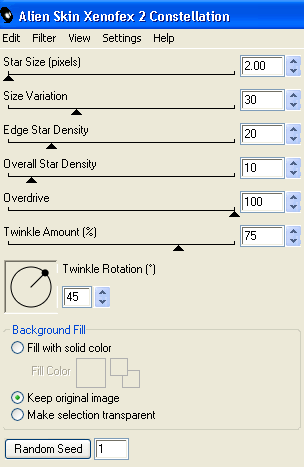
Effects > Plugins > Xenofex 2 > Constellation with the following settings:


Hide Sparkle1 and activate Sparkle2
Repeat Constellation, adjusting the Random Seed

Hide Sparkle2 and activate Sparkle3
Repeat Constellation once again, adjusting the Random Seed

Now to animate!

Activate Sparkle1 and hide Sparkle2 and Sparkle3
Edit > Copy Merged

Open Animation Shop
Edit > Paste as New Animation

Back to PSP
Hide Sparkle1 and activate Sparkle2
Edit > Copy Merged

In Animation Shop
Edit > Paste After Current Frame

Back to PSP
Hide Sparkle2 and activate Sparkle3
Edit > Copy Merged

In Animation Shop
Edit > Paste After Current Frame

Now save as a GIF and you're done!

Thanks for trying my tutorial!

::st!na::


Here is a non-animated version:


© Tutorial written by Stina on 21st August 2009
All rights reserved
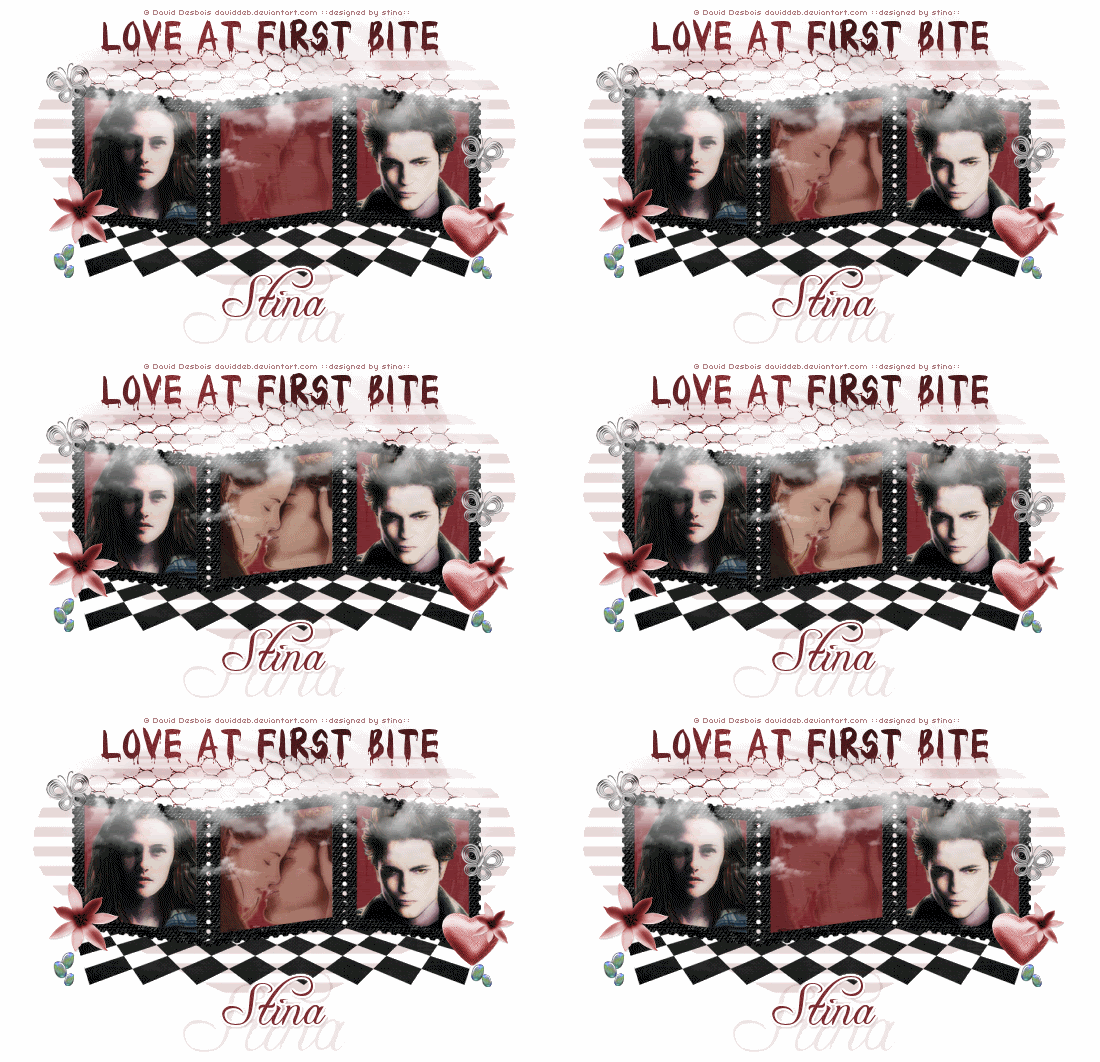
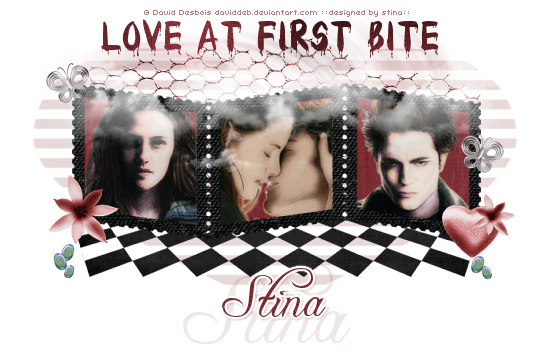
Love at First Bite


Supplies

Scrap kit of choice - I am using "This n That Part 1" by Created by Jill available from Twilight Scraps and Aussie Scraps
Tubes of choice - I am using the wonderful artwork of David Desbois who is FTU with written permission
WSL_Mask191 by Chelle available from her blog
Fonts of choice - I am using Wet Paint and Freebooter Script
Plugins: Xero > Radiance
Greg's Factory Output II > Pool Shadow
Eye Candy 4000 > Gradient Glow (optional)


Let's begin....


Open a new 700 x 550 blank canvas flood-filled white

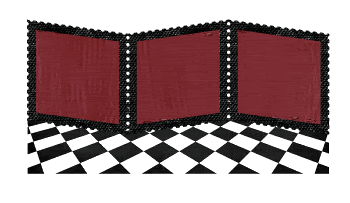
Paste Frame1 as new layer
Resize by 80%
Move upwards slightly

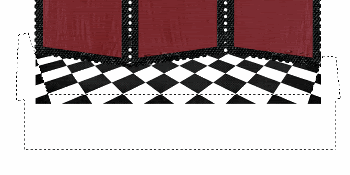
Paste Perspective Flooring as new layer
Resize by 74%
Layers > Arrange > Move Down

Position from beneath Frame
Select inside each Frame with your Magic Wand
Selections > Modify > Expand by 10
Add new raster layer
Paste Paper of choice INTO selection
Deselect


Activate Perspective Flooring again
With your Selection Tool draw out a rectangle along the bottom squares
Then with your Freehand Tool draw around the ends


Selections > Modify > Feather by 2
Delete a few times, then deselect

Paste three Tubes of choice as new layers
Resize as necessary
Position each within the three Frames
Select inside the first Frame with your Magic Wand
Selections > Modify > Expand by 10
Selections > Invert
Delete then deselect
Repeat for the remaining two Frames

Duplicate each of the tubes and apply the following:
Effects > Plugins > Xero > Radiance with default settings
Set blend mode to Multiply, then
Lower opacity to around 70
Layers > Merge > Merge Down

Paste Cloud as new layer
Resize by 75%
Position in upper left
Duplicate, then Image > Mirror
Layers > Merge > Merge Down

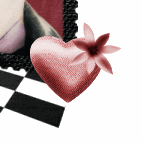
Paste Heart3 as new layer
Resize by 50%
Position to your liking

Adjust > Hue & Saturation > Colourise with the following settings:
Hue - 0
Saturation - 100

Effects > Plugins > Xero > Radiance with default settings

Paste Flower6 as new layer
Resize by 15%
Position to the lower left
Repeat the Hue & Saturation as above
Duplicate and set blend mode to Multiply
Layers > Merge > Merge Down

Effects > Plugins > Xero > Radiance with default settings again
Duplicate then resize by 60%
Position upon the Heart


Paste Butterfly2 as new layer
Image > Rotate by 15 to the right
Resize by 20%
Position to the right
Duplicate, then Image > Mirror
Postion to the upper right

Paste WireBits2 as new layer
Image > Mirror
Resize by 98%
Layers > Arrange > Send to Bottom
Position toward the top of Frame
Repeat the same Hue and Saturation once again

Paste Paper of choice as new layer
Layers > Arrange > Send to Bottom

Layers > New Mask Layer > From Image
Apply WSL_Mask191
OK

DO NOT MERGE!!

Activate Mask layer and resize by 110%
Layers > Merge > Merge Group

Repeat Xero Radiance effect twice
Lower opacity to 15

Crop and resize to liking

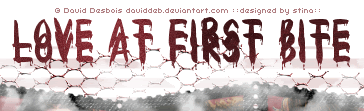
Select Text Tool and font of choice
I am using Wet Paint
Text colour to match tag - I am using #7c2c32

Type out text of choice
Objects > Align > Horizontal Centre in Canvas
Convert to raster layer

Effects > Plugins > Gregs Factory Output II > Pool Shadow with default settings
Duplicate text and move partially down


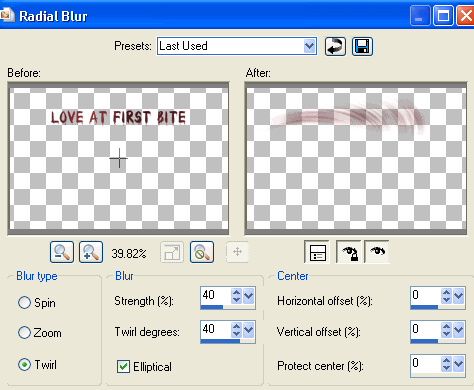
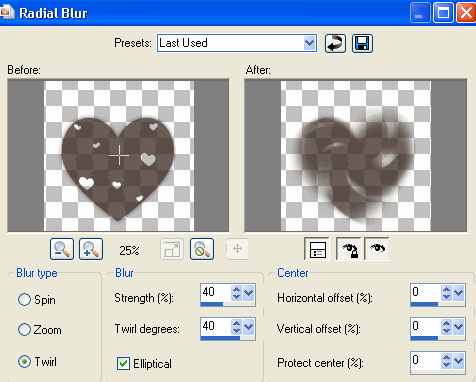
On copy below use the following Radial Blur settings:


Lower opacity to 40

Select another font of choice
I am using Freebooter Script
Same text colour

Type out your name
Objects > Align > Horizontal Centre in Canvas
Convert to raster layer
(I also typed my name in a larger size then lowered the opacity to around 10 and positioned beneath the top layer)
Apply a Gradient Glow and drop shadow of choice

Finally, add your © copyright, licence and watermark, then save as a GIF or JPG and you're done!


** IF YOU WISH TO ANIMATE PLEASE FOLLOW THESE NEXT STEPS **

Activate your Tube in the middle Frame
Lower the opacity to 20
Edit > Copy Merged

Open Animation Shop
Edit > Paste as New Animation

Back to PSP
Change the opacity to 40
Edit > Copy Merged

In Animation Shop
Edit > Paste After Current Frame

Back to PSP
Change to opacity to 60
Edit > Copy Merged

In Animation Shop
Edit > Paste After Current Frame

Back to PSP
Change to opacity to 80
Edit > Copy Merged

In Animation Shop
Edit > Paste After Current Frame

Back to PSP
Change to opacity to 100
Edit > Copy Merged

In Animation Shop
Edit > Paste After Current Frame

Now Select All, Copy then Paste as (another) new animation
Animation > Reverse Frames
Select All and Copy

Go back to your first animation and activate the last frame, then
Paste After Current Frame
Select All, then change Frame Properties to 20
Now save as a GIF and you're done!

Thanks for trying my tutorial!

::st!na::


Here is a non-animated version:


© Tutorial written by Stina on 20th August 2009
All rights reserved
Thursday, August 20, 2009

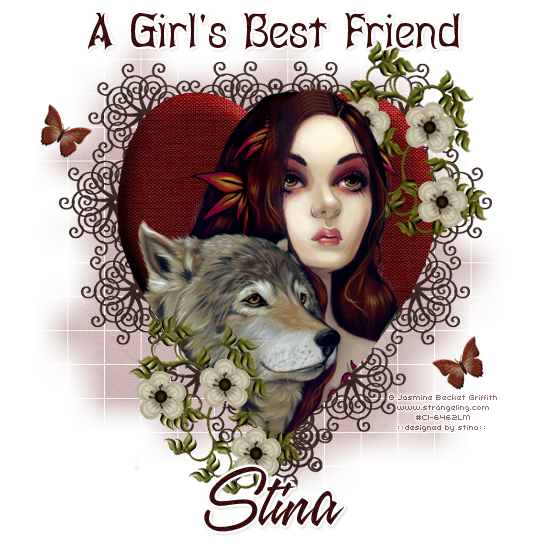
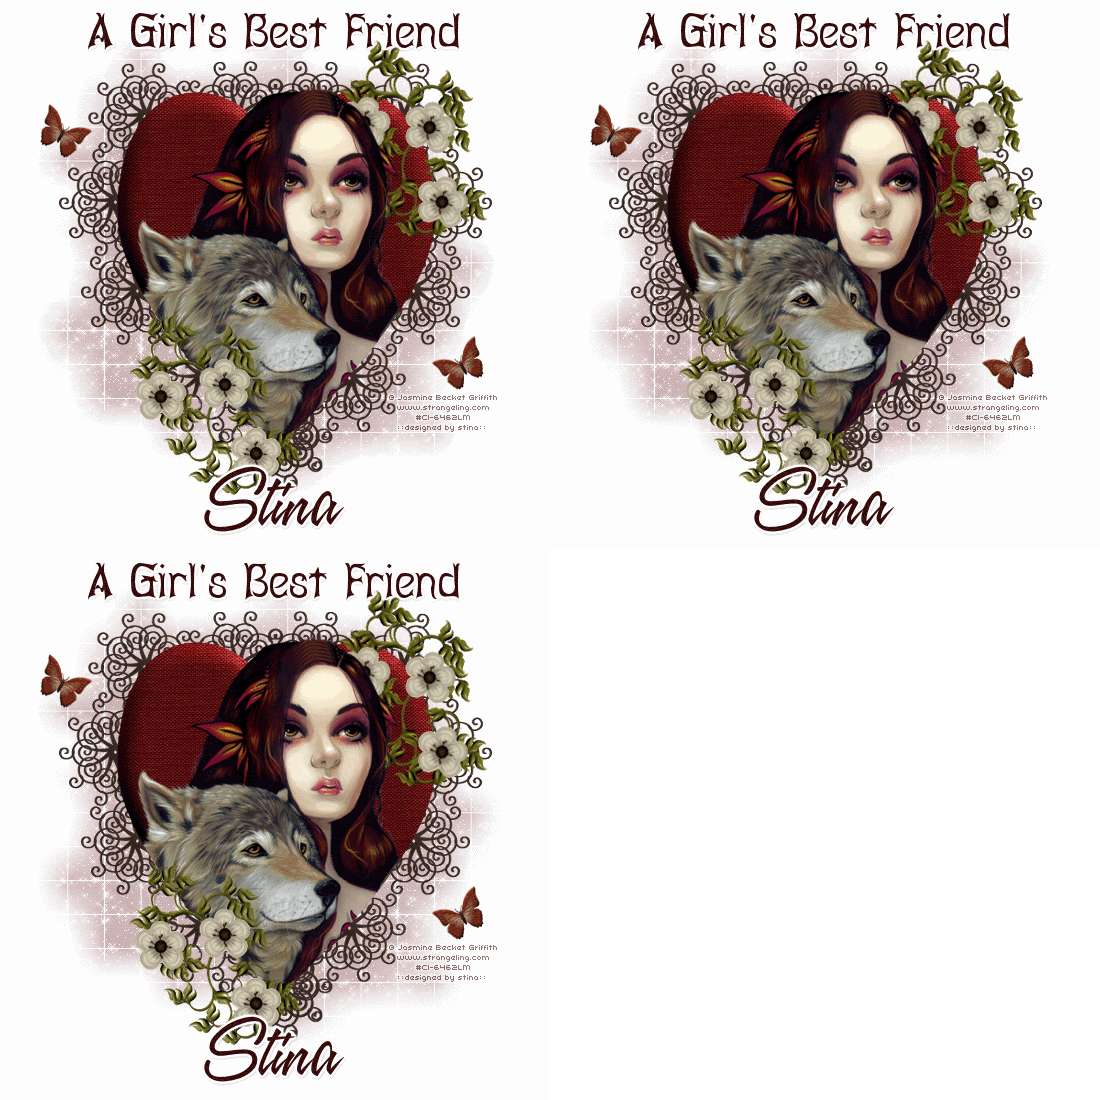
A Girl's Best Friend


Supplies

Scrap kit of choice - I am using Tootypup Scraps' part of "An Autumn Romance" collab available from Twilight Scraps
Tubes of choice - I am using the artwork of Jasmine Becket Griffith which is avialable with a licence from CILM
**PLEASE DO NOT USE HER ARTWORK WITHOUT THE APPROPRIATE LICENCE**
WSL_Mask84 by Chelle available from her blog
Fonts of choice - I am using Abagail and A&S Speedway
Plugins: Xenofex 2 > Constellation
Eye Candy 4000 > Gradient Glow (optional)


Let's begin....


Open a 600 x 600 blank canvas flood-filled white

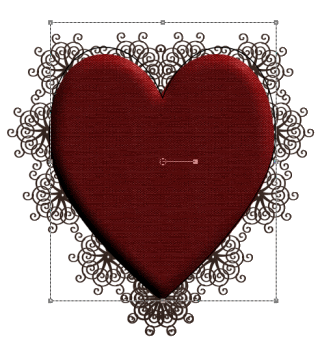
Paste Heart5b as new layer
Resize if necessary (I kept it the same size)

Paste your Tube of choice as new layer
Resize as necessary and position

Select your Preset Shape Tool to Heart
Foreground - #000000
Background - null

Draw out a heart to the same size as the one we pasted
(You might want to hide your Tube layer for this step so you can see the edge of the heart)


Once happy with your sizing,
Convert to raster layer

Select outside the Heart you just drew with your Magic Wand
Selections > Modify > Feather by 3

Activate and unhide Tube layer
Erase the any excess you wish to your liking
You can delete your heart shape now

Paste Doodle4 as new layer
Image > Rotate by 20 to the right
Resize by 30%
Position to the lower left

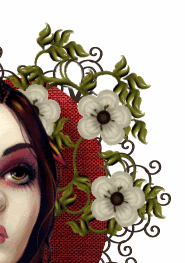
Paste a Flower of choice as new layer
Resize by around 15%
Duplicate twice and place each flower on the greenery
Layers > Merge > Merge Down
Repeat so each flower is one layer
Duplicate then set blend mode to Multiply
Lower opacity to 75, then
Layers > Merge > Merge Down

Layers > Merge > Merge Down
(Flowers and Doodle as one layer)

Duplicate then move to the upper right corner
Image > Rotate by 15 to the right
Place this layer BEHIND your Tube layer

Activate Background Heart layer
Use your Eraser Tool to erase some of the "wrought iron" so that the Doodle greenery blends with it


Paste a Butterfly as new layer
Resize by 20%
Position in upper left
Duplicate, then Image > Mirror
Position in lower right

Crop and resize

Paste Paper of choice as new layer
Layers > Arrange > Send to Bottom

Layers > New Mask Layer > From Image
Apply WSL_Mask84
OK
Layers > Merge > Merge Group
Lower opacity to 35

Select Text Tool and font of choice
I am using Abagail
Text colour to match tag - I am using #380b0c

Type out text of choice
Objects > Align > Horizontal Centre in Canvas
Convert to raster layer
Add any effects you wish and drop shadow of choice

Select another font of choice
I am using A&S Speedway
Same text colour

Type out your name
Objects > Align > Horizontal Centre in Canvas
Convert to raster layer
Add any effects you wish and drop shadow of choice

Finally, add your © copyright, licence and watermark, then save as GIF or JPG and you're done!


** IF YOU WISH TO ANIMATE PLEASE FOLLOW THESE NEXT STEPS **

Activate the Mask Layer
Duplicate twice and rename Sparkle1, Sparkle2 and Sparkle3

Hide Sparkle2 and Sparkle3 activating only Sparkle1

Effects > Plugins > Xenofex 2 > Constellation with the following settings:


Hide Sparkle1 and activate Sparkle2
Apply the Constellation effect, adjusting the Random Seed

Hide Sparkle2 and activate Sparkle3
Apply the Constellation effect again, adjusting the Random Seed once more

Hide Sparkle2 and Sparkle3 with only Sparkle1 visible
Edit > Copy Merged

Open Animation Shop
Edit > Paste as New Animation

Back to PSP
Hide Sparkle1 and activate Sparkle2
Edit > Copy Merged

In Animation Shop
Edit > Paste AFTER Current Frame

Back to PSP
Hide Sparkle2 and activate Sparkle3
Edit > Copy Merged

In Animation Shop
Edit > Paste AFTER Current Frame
Save as a GIF and you're done!

Thanks for trying my tutorial!

::st!na::


Here is a non-animated version:


© Tutorial written by Stina on 19th August 2009
All rights reserved
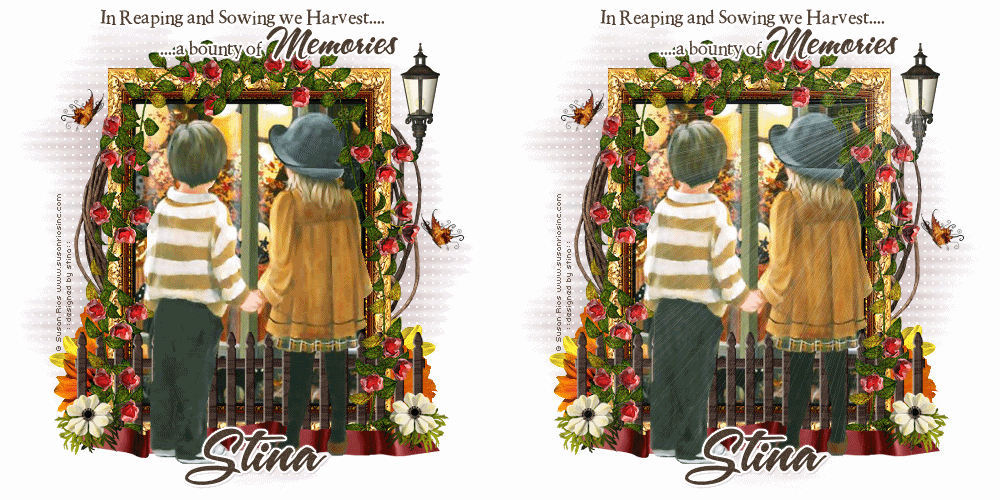
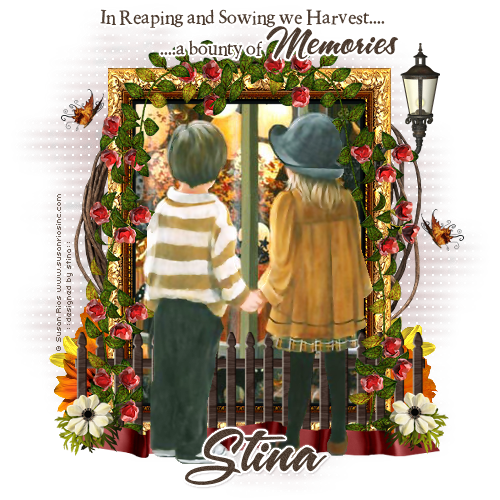
A Bounty of Memories


Supplies

Scrap kit of choice - I am using Schnegge's part of "An Autumn Romance" collab available from Twilight Scraps
Tubes of choice - I am using the artwork of Susan Rios
WSL_Mask84 by Chelle available from her blog
Fonts of choice - I am using 2Peas Rennaissance and A&S Snapper Script
Plugins: dsb Flux > Linear Transmission
Eye Candy 4000 > Gradient Glow


Let's begin....


Open a new 600 x 600 blank canvas flood-filled white

Paste Frame02 as new layer
Resize by 85%
Leave in position

Paste FloralVine02 as new layer
Resize by 80%
Position over Frame to your liking

Activate Frame and select inside with Magic wand
Selections > Modify > Expand by 10
Add a new raster layer
Layers > Arrange > Move Down
Paste Paper of choice INTO selection

KEEP SELECTED!!

Paste Image or Tube of choice as new layer
Resize as necessary and position
Delete and deselect


Paste Fence as new layer
Resize by 60%
Position to the lower centre of Frame

Paste Ribbon01 as new layer
Resize by 65%
Position along bottom of Fence

Paste Lamp02 as new layer
Resize by 50%
Position in the upper right of Frame


Paste Butterfly01 as new layer
Resize by 25%
Position in the upper left
Duplicate, then Image > Mirror
Position to the right to your liking

Add any other elements, like flowers, of your choice

Crop and resize to your liking

Paste Paper of choice as new layer
Layers > Arrange > Send to Bottom

Layers > New Mask Layer > From Image
Apply WSL_Mask84
OK
Layers > Merge > Merge Group
Lower opacity to 50

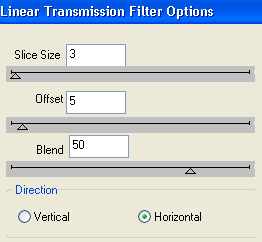
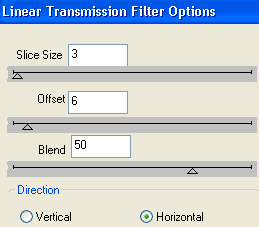
Effects > Plugins > dsb Fluxx > Linear Transmission with the following settings:


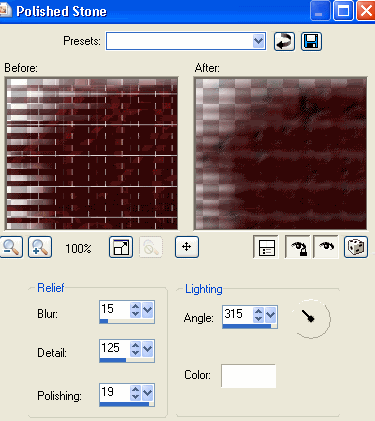
Effects > Texture Effects > Polished Stone with the following settings:


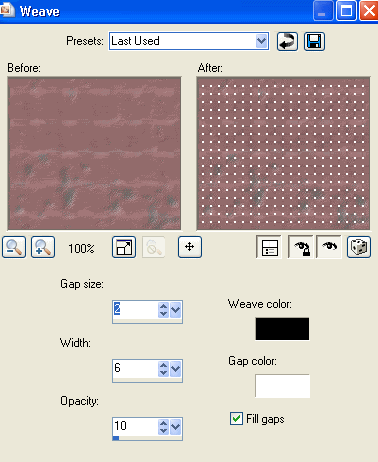
Effects > Texture Effects > Weave with the following settings:


Now on same layer paste Frame03 as new layer
Resize by 80%
Duplicate, then set blend mode to Multiply
Layers > Merge > Merge Down

It should now resemble something like a twiggy-type vine protruding from behind Frame

Activate top layer

Select Text Tool and font of choice
I am using 2PEas Rennaissance and A&S Snapper Script
Text colour to match tag - I am using #4e3d31

Type out Text of choice
Objects > Align > Horizontal Centre in Canvas
Convert to raster layer
Apply Gradient Glow and drop shadow of choice

Select another font of choice
I am using A&S Snapper Script
Same text colour

Type out your name
Objects > Align > Horizontal Centre in Canvas
Convert to raster layer
Apply Gradient Glow and drop shadow of choice

Finally, add your © copyright, licence and watermark, then save as GIF or JPG and you're done!


** IF YOU WISH TO ANIMATE PLEASE FOLLOW THESE NEXT STEPS **

Layers > Merge > Merge Visible or All
Duplicate merged layer
Rename Light1 and Light2

Hide Light1 and activate Light2
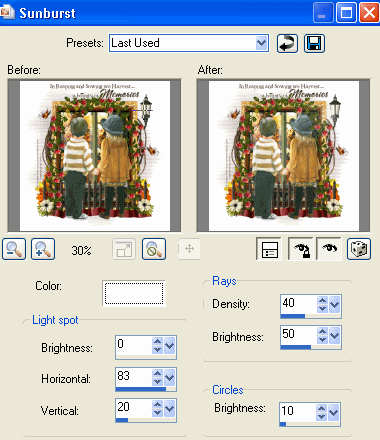
Effects > Illumination Effects > Sunburst with the following settings:


Now to animate!

Activate Light1 and hide Light2
Edit > Copy Merged

Open Animation Shop
Edit > Paste as New Animation

Back to PSP
Hide Light1 and activate Light2
Edit > Copy Merged

In Animation Shop
Edit > Paste after Current Frame

Select All and change the Frame Properties to 100
Now save as a GIF and you're done!

Thanks for trying my tutorial!

::st!na::


Here is a non-animated version:


© Tutorial written by Stina on 19th August 2009
All rights reserved
Wednesday, August 19, 2009

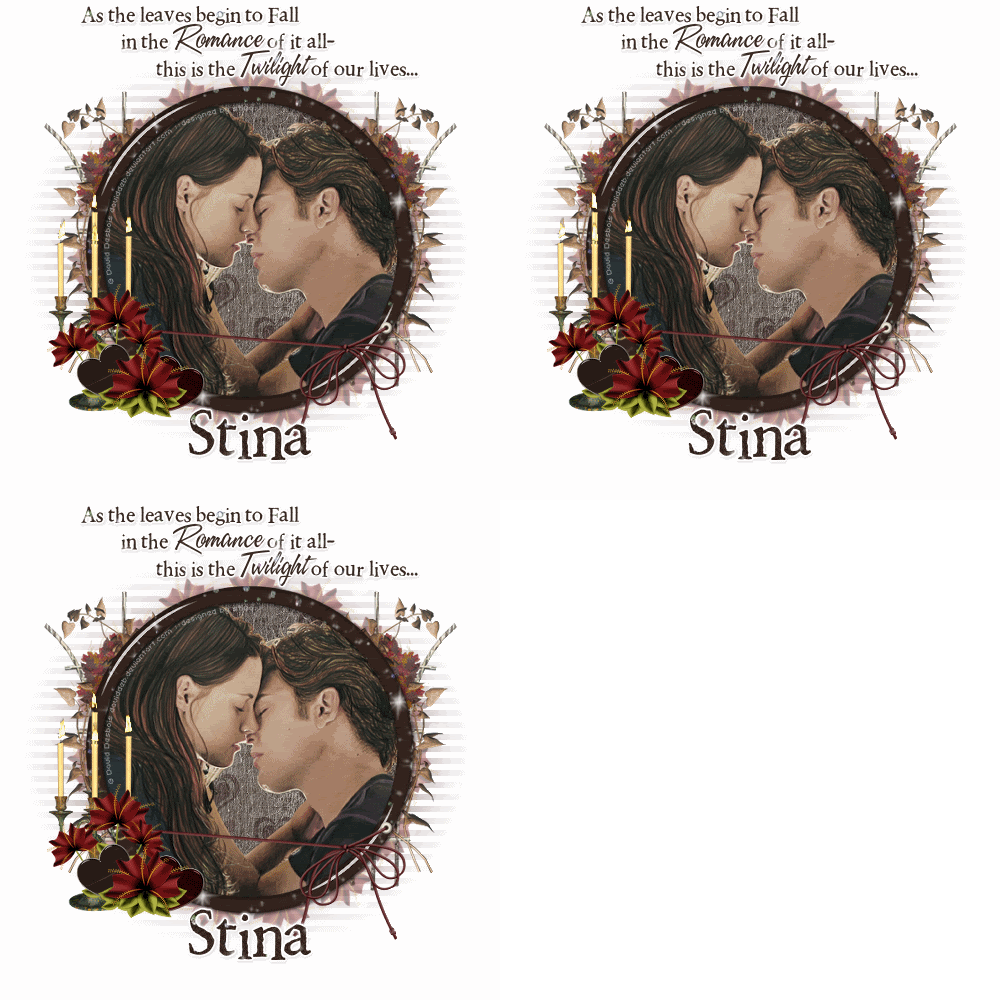
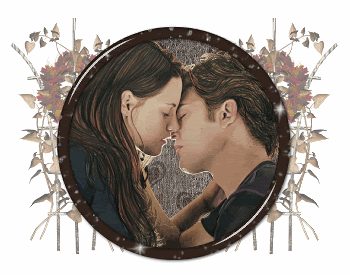
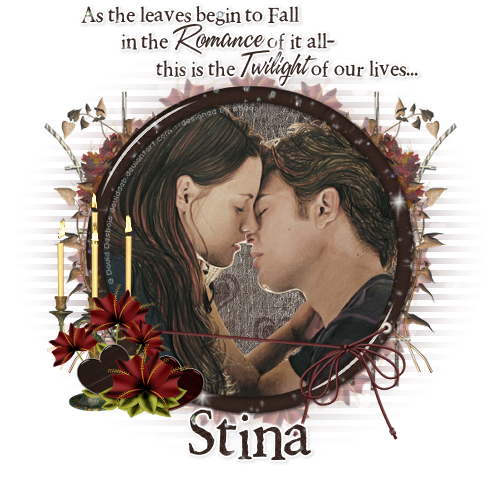
A Twilight Romance


Supplies

Scrap kit of choice - I am using Stitchy Angel's Creationz' part of "An Autumn Romance" collab available from Twilight Scraps
Tubes of choice - I am using the artwork of David Desbois which is FTU with written permission
WSL_Mask51 by Chelle available from her blog
Fonts of choice - I am using 2Peas Rennaissance and A&S Speedway
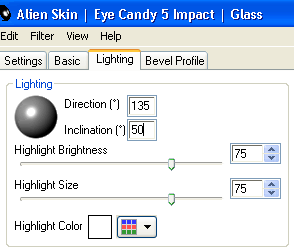
Plugins: Alien Skin Eye Candy 5: Impact > Glass
Mura Meister > Copies
dsb Flux > Linear Transmission
Eye Candy 4000 > Gradient Glow
Alien Skin Eye Candy 5: Nature > Fire


Let's begin...


Open a new 600 x 600 blank canvas flood-filled white

Open a paper of choice and minimise
Select your Preset Shape Tool and set to Ellipse
Set your width to 20.00
Foreground - Paper of choice, with the scale set to 80
Background - null

Hold your shift key and draw out a circle
Objects > Align > Centre in Canvas
Convert to raster layer

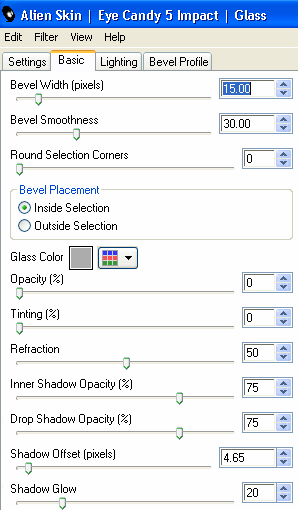
Effects > Plugins > Alien Skin Eye Candy 5: Impact > Glass with the following settings:


KEEP SELECTED!!

Paste Tube of choice as new layer
Resize as necessary to fit into Frame
Selections > Invert
Delete

KEEP SELECTED!!

Selections > Invert
Duplicate layer

On top copy:
Adjust > Hue & Saturation > Colourise with both Hue and Saturation set to 0
Lower opacity to around 60

Paste Element25 as new layer
Layers > Arrange > Send to Bottom
Resize by 45%
Position to the left to your liking

Duplicate, then Image > Mirror
Layers > Merge > Merge Down
Then lower opacity to 60
Resize again to liking, if you wish


Activate top layer

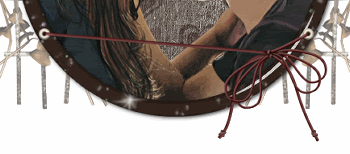
Paste one of the TiedString Elements as a new layer
Resize by around 40% (depending on the size of your Frame)
Position along lower half of Frame from left to right


Paste Element36 (Candle) as new layer
Resize by 80%
Position to the lower left

Paste Element9 as new layer
Resize by 30%
Position in beside candle

Paste Element12 as new layer
And repeat as above

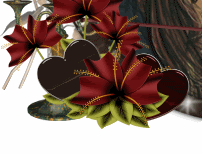
Paste a Heart element as new layer
Image > Rotate by 30 to the left
Resize by 15%
Layers > Arrange > Move Down
Position between the two flower layers

Paste another heart element as new layer
Image > Rotate by 30 to the right
Resize by 15%
Position on the otherside of flower
Duplicate and set blend mode to Multiply
Lower opacity slightly, then
Layers > Merge > Merge Down


Add any other elements you wish to your liking
Paste Element12 as new layer
Resize by 25%

LEAVE IN POSITION!!

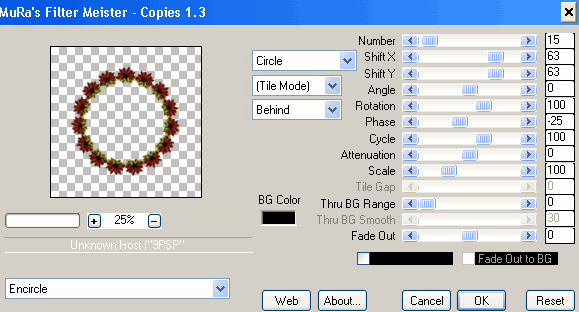
Effects > Plugins > Mura Meister > Copies with the following settings:


Layers > Arrange > Send to Bottom
Add a new raster layer and send to bottom
Select All
Paste a Paper of choice INTO selection
Deselect

Layers > New Mask Layer > From Image
Apply WSL_Mask41
OK
Layers > Merge > Merge Group
Resize layer by 95%

Crop and resize tag

Effects > Plugins > dsb Flux > Linear Transmission with the following settings:


Activate top layer

Select your Text Tool and fonts of choice
I am using 2Peas Rennaissance and A&S Speedway
Text colour of choice - I am using one of the papers from the kit

Type out your text of choice, using the script font for your key words
Objects > Align > Horizontal Centre in Canvas
Convert to raster layer
Apply a Gradient Glow and drop shadow of choice

Select another font of choice
I am using 2Peas Rennaissance
Same Text Colour

Type out your name
Objects > Align > Horizontal Centre in Canvas
Convert to raster layer
Apply a Gradient Glow and drop shadow of choice

Finally, add your © copyright, licence and watermark, then save as a GIF or JPG and you're done!


** IF YOU WISH TO ANIMATE PLEASE FOLLOW THESE NEXT STEPS **

Activate your Candles layer
Add three new raster layers and name them Candles1, Candles2 and Candles3

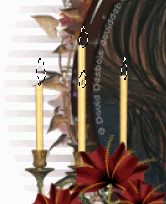
With your Freehand Tool draw out the shape of flames on each candle


Activate Candles1

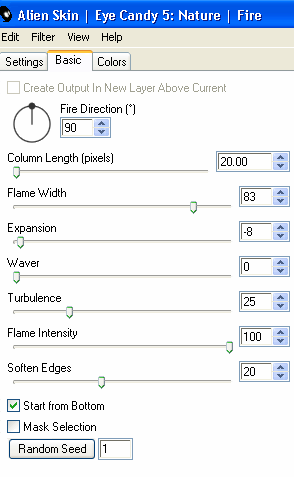
Effects > Plugins > Alien Skin Eye Candy 5: Nature > Fire with the following settings:


Hide Candles1 and activate Candles2
Repeat Fire effect, adjusting Random Seed

Hide Candles2 and activate Candles3
Repeat Fire effect, adjusting Random Seed once more

Now to animate!

Activate Candles and hide the other two Candle layers
Edit > Copy Merged

Open Animation Shop
Edit > Paste as New Animation

Back to PSP
Hide Candles1 and activate Candles2
Edit > Copy Merged

In Animation Shop
Edit > Paste After Current Frame

Back to PSP
Hide Candles2 and activate Candles3
Edit > Copy Merged

In Animation Shop
Edit > Paste After Current Frame

Now save as a GIF and you're done!

Thanks for trying my turorial!

::st!na::


Here is a non-animated version:


© Tutorial written by Stina on 19th August, 2009
All rights reserved
Saturday, August 15, 2009

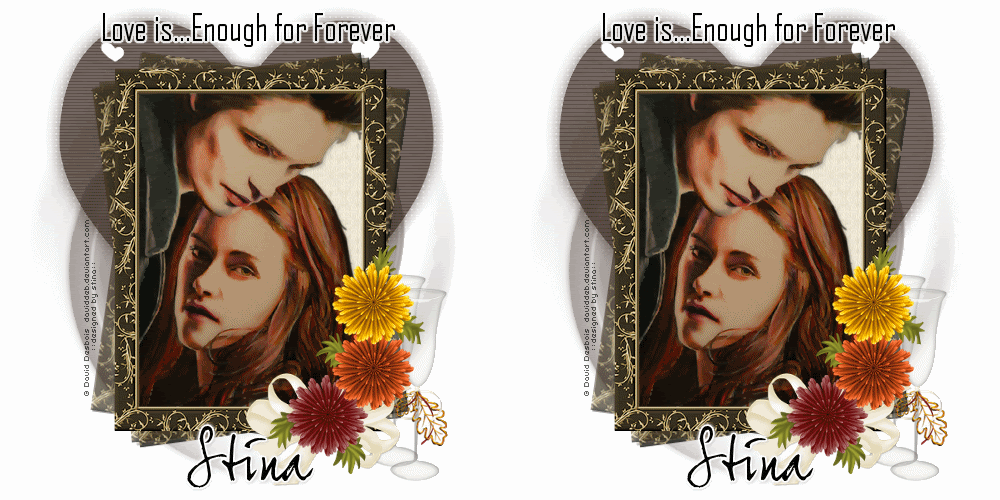
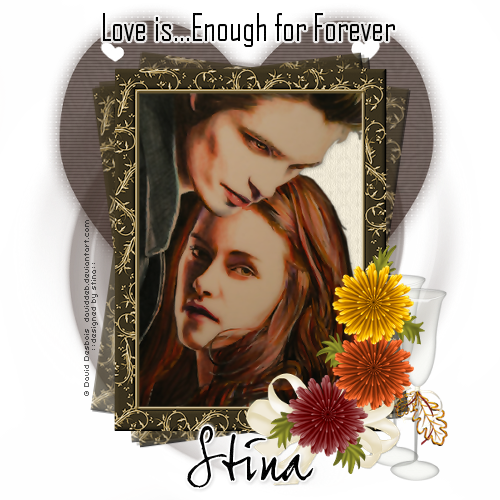
Enough for Forever


Supplies

Scrap kit of choice - I am using Digiscrapation's part of "An Autumn Romance" collab available from Twilight Scraps
Tubes of choice - I am using the artwork of David Desbois which is FTU with written permission
WSL_Mask51 by Chelle available from her blog
Fonts of choice - I am using AgencyFB and JoeHand2
Plugins: Xero > Radiance
Mura Meister > Copies
PhotoEffex > Scanlines


Let's begin....


Open a new 600 x 600 blank canvas flood-filled white
Paste Frame as new layer
Resize by 80%

Adjust > Hue & Saturation > Colourise with the following settings:


Select the inside of the Frame with your Magic Wand
Selections > Modify > Expand by 10
Add a new raster layer
Layers > Arrange > Move Down
Paste paper of choice INTO selection

KEEP SELECTED!!

Paste Tube or image of choice as new layer
Resize as necessary to fit into Frame
Selections > Invert
Delete then deselect

Effects > Plugins > Xero > Improver
with default settings

Effects > Plugins > Xero > Radiance with the following settings:


Activate Frame again and duplicate
Layers > Arrange > Send to Bottom
Effects > Plugins > Mura Meister > Copies
In the Preset Menu select AFTERIMAGE (ROTATE RANDOM)

Paste MumSpray as new layer
Resize by 50%
Position in lower right

Paste Bow1 as new layer
Image > Mirror
Resize by 45%
Position to the lower right BEHIND the bottom flower


Paste WineGlass as new layer
Image > Mirror and place to the lower right
Duplicate and hide duplicate for a moment
Erase part of the leaf on the Glass of the visible copy
Position BEHIND flowers in the lower right
Unhide second Glass and place beside the first

Paste Paper of choice as new layer
Layers > Arrange > Send to Bottom

Layers > New Mask Layer > From Image
Apply WSL_Mask51
OK
Layers > Merge > Merge Group
Move Mask layer Up to Top of tag
Duplcate and position just below centre


Then Adjust > Blur > Radial Blur with the following settings:


Effects > Distortion Effects > Twirl at 420 Degrees
Repeat Twirl
Lower opacity to around 60

Crop and resize to liking

Select your Text Tool and font of choice
I am using AgencyFB
Text colour to match tag - I am using #000000

Type our your text of choice
Objects > Align > Horizontal Centre in Canvas
convert to raster layer

Select another font of choice
I am using JoeHand2
Same text colour

Type out your name
Objects > Align > Horizontal Centre in Canvas
Convert to raster layer
Apply any effects and drop shadow of choice

Finally, add your © copyright, licence and watermark, then save as a GIF or JPG and you're done!


** IF YOU WISH TO ANIMATE PLEASE FOLLOW THESE NEXT STEPS **

Activate your Mask Layer layer
Duplicate once and rename Scanlines1 and Scanlines 2

Activate Scanlines1
Effects > Plugins > PhotoEffex > Scanlines with the default settings

Hide Scanlines1 and activate Scanlines2
Repeat Scanlines effect, adjusting the Spacing to 3

Now to animate!

Activate Scanlines1 and hide Scanlines2
Edit > Copy Merged

Open Animation Shop
Edit > Paste as New Animation

Back to PSP
Hide Scanlines1 and activate Scanlines2
Edit > Copy Merged

In Animation Shop
Edit > Paste after Current Frame

Select All and change Frame Properties to 15
Now save as a GIF and you're done!

Thanks for trying my tutorial!

::st!na::


Here is a non-animated version:


© Tutorial written by Stina on 14th August 2009
All rights reserved